Technique Tuesday – Welcome Home Decor Frame!!!

Posted on

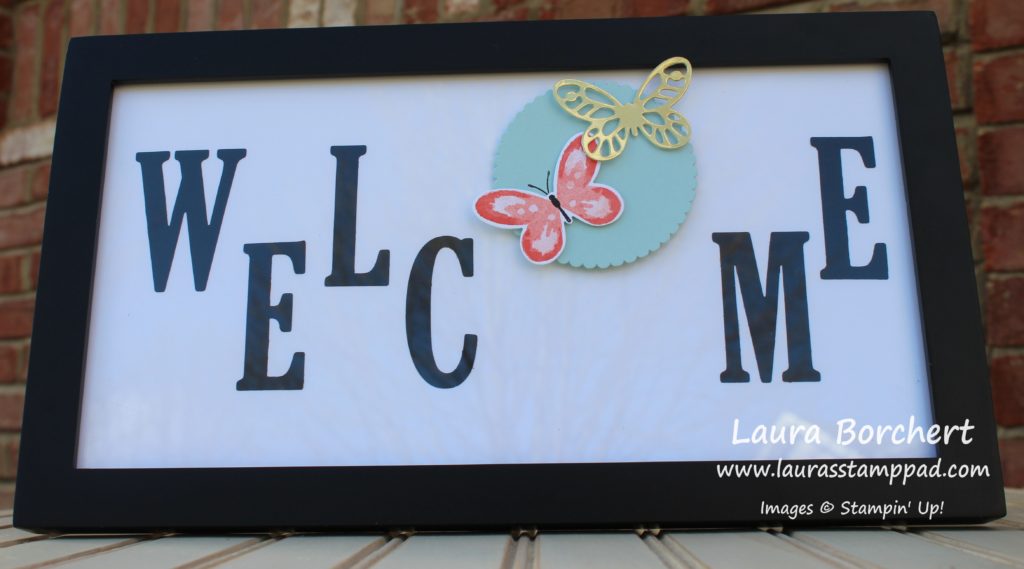
Happy Tuesday!!! You all know what that means! I have a fabulous technique to share with you today and it’s this Welcome home decor frame! It is super fun and the interchangeable decoration keep it fresh every season/occasion!

Welcome Home Decor Frame, www.LaurasStampPad.com

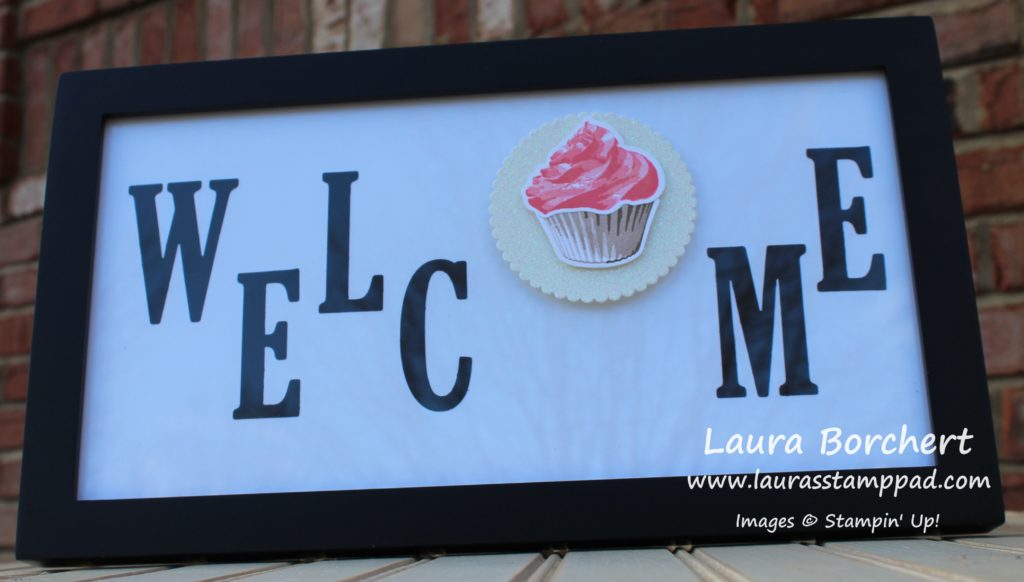
I started with a frame measuring 12.5″ x 7.25″ which I got off of Amazon. It was actually a sports frame for an individual photo on the left and a team photo on the right. It was the perfect long shape for what I needed though! 🙂 I cut a piece of 12″ x 12″ Whisper White cardstock down to fit. Using the Large Letters Framelits, I die cut out the letter in Basic Black and glued them on with Fine Tip Glue Pen. When I did this in class some did it straight across, some diagonal left to right, and some up and down like mine. TIPS: Make sure you allow enough space for the decoration since it’s bigger than a letter. Also, be sure to stay away from edge enough for the frame to fit in since there is a bit of a lip.

Butterflies, www.LaurasStampPad.com

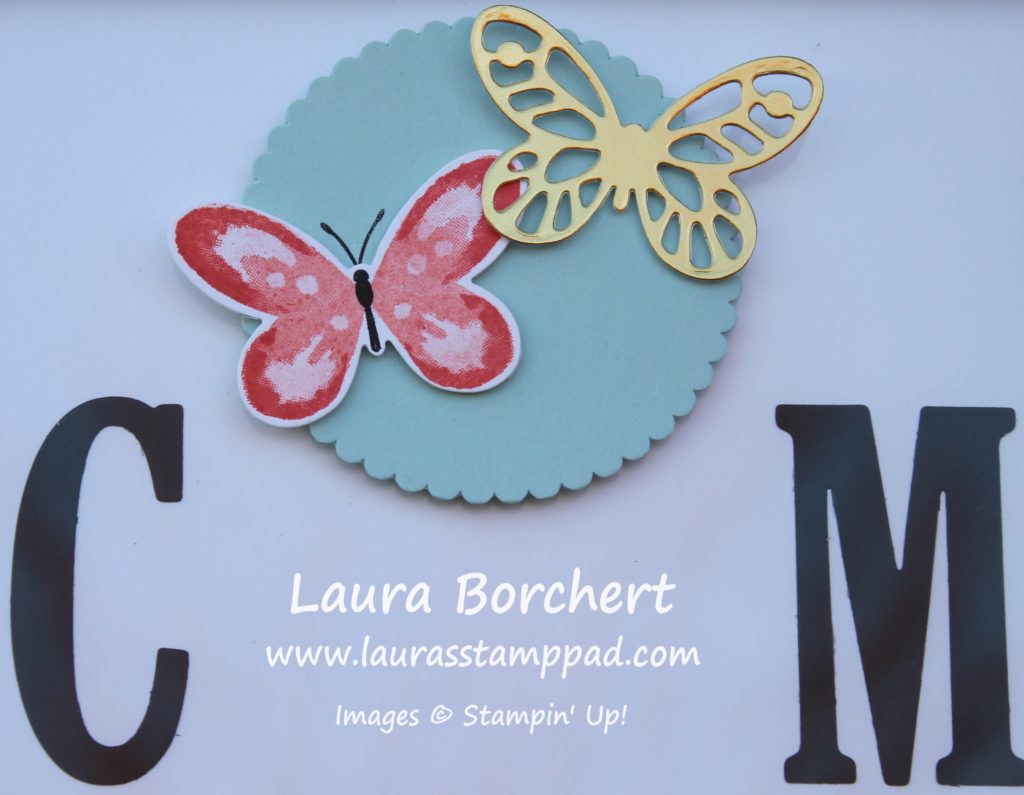
For Spring, I did these beautiful butterflies using the Watercolor Wings Stamp Set. I started with a Pool Party scallop circle die cut from the Layering Circles Framelits. Then I stamped the butterfly in Calypso Coral (full strength, stamped off once, stamped off twice)! Using the Bold Butterfly Framelits and Butterfly Thinlits (both retiring), I die cut out the butterflies. I added them to the scallop with Stampin’ Dimensionals and put a magnet on the back!

Strawberry Cupcake, www.LaurasStampPad.com

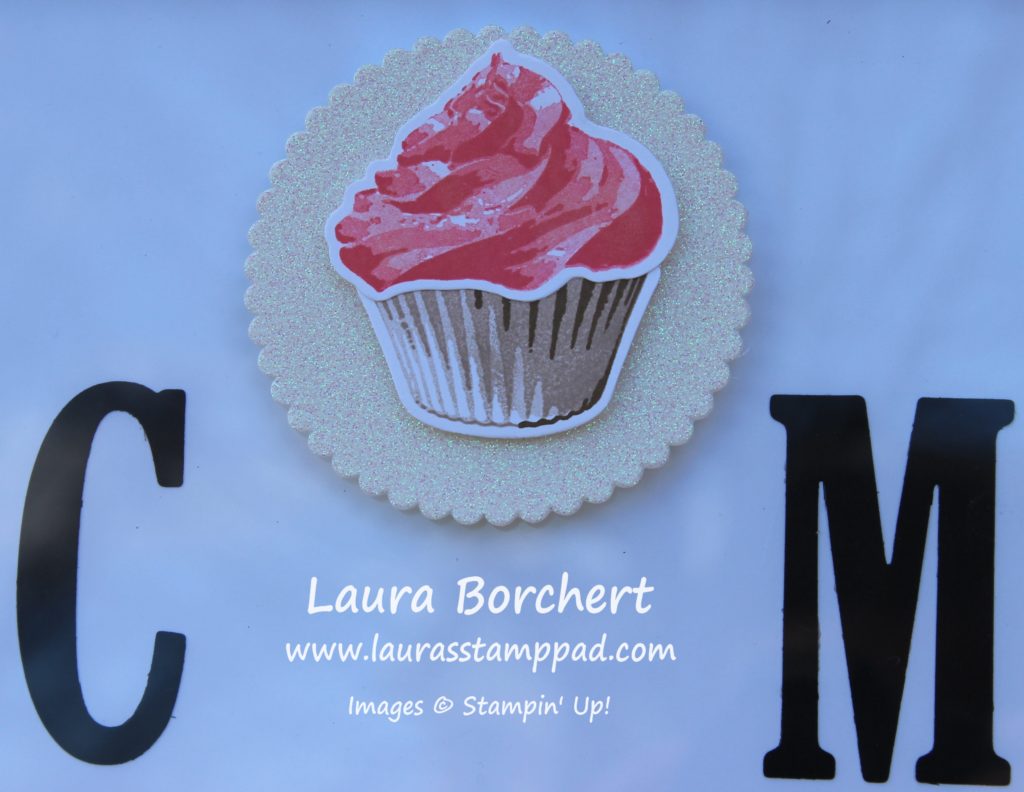
I made Birthday decorations to display the month, week, or day of someone’s birthday. Here is the strawberry cupcake which I stamped in Flirty Flamingo Ink (full strength, stamped off once, stamped off twice). I used the Sweet Cupcake Stamp Set and coordinating Cupcake Cutouts Framelits (both retiring). For the liner, I used Soft Suede Ink, Crumb Cake Ink (full strength) and Crumb Cake Ink (stamped off once).

Sweet Cupcake, www.LaurasStampPad.com

I added the cupcake with Stampin’ Dimensionals to a scallop circle die cut from the Myths & Magic Glimmer Paper. YUM! Can’t wait to display this in August for my birthday!!! Also, don’t forget to add the magnet to the back!

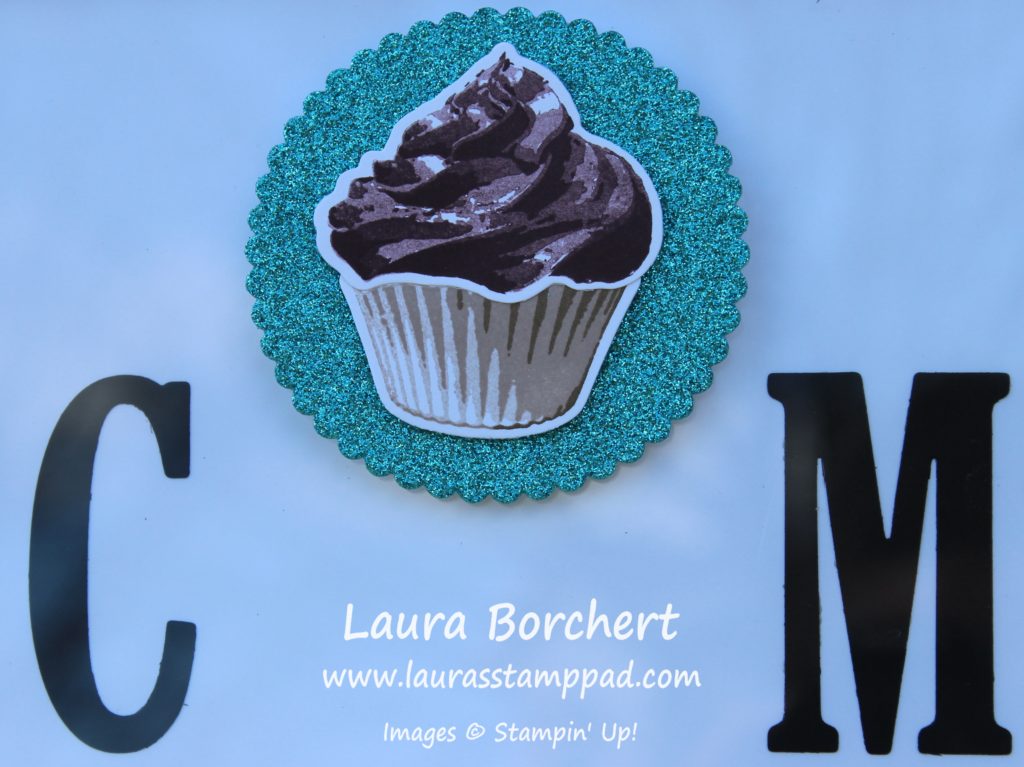
Chocolate Cupcake for Birthdays, www.LaurasStampPad.com

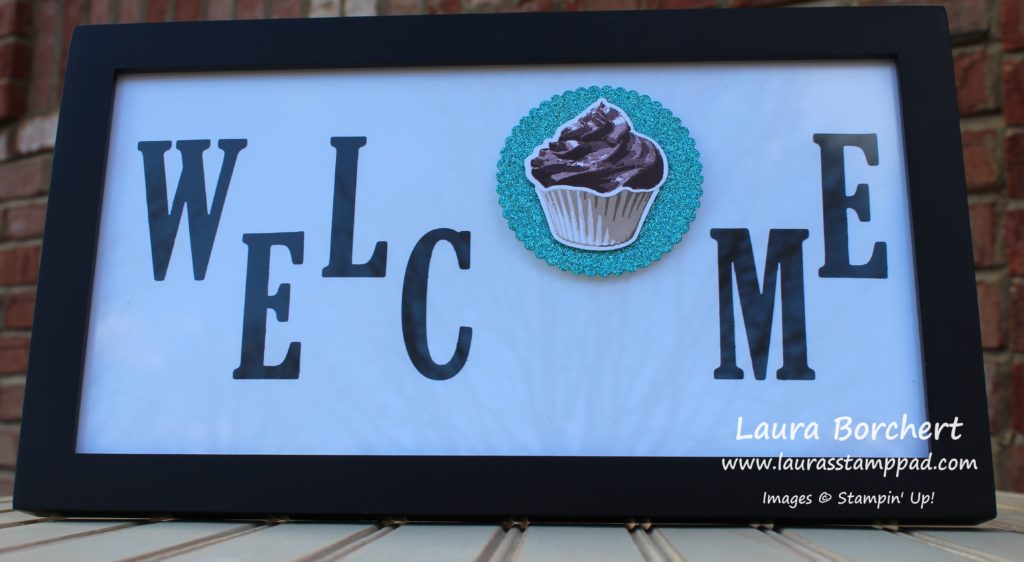
Here is a chocolate cupcake too! I’m more of a white cake girl over chocolate any day but thought I would do one of each. I used more Myth’s & Magic Glimmer Paper for the base. The cupcake was stamped with Chocolate Chip Ink (full strength, stamped off once, stamped off twice) and the same liner as the Strawberry one! Don’t forget to add the magnet to the back!

Chocolate Cupcake, www.LaurasStampPad.com

This one will go up in December at our house because Brad loves chocolate and his birthday is then! 🙂

Stayed tuned for tomorrow where I will show the adorable little box to store all of these in and I’ll be making more decorations as the year goes on. Feel free to give suggestions in the comments below of some good ones for holidays or seasons. I would love to hear what you think.

If you would like to see this all in action, check out the Video Tutorial below or click here! Be sure to give the video a thumbs up if you liked it and don’t forget to subscribe if you are new. If you would like a notification when I post a new video, be sure to click the bell right next to the subscribe!!!

Happy Stampin’

~Laura

Product List

My Succulent Garden Home Decor Piece!!!

Posted on

Succulents are so in right now as home decor, greeting cards, and so much more! So when I thought of how to decorate my Cake Dome for Spring, I instantly thought of a little Succulent Garden Home Decor piece!!! I love how it turned out!!!

Succulent Garden Home Decor, www.LaurasStampPad.com

My cake dome just makes me so happy as it is! Now it’s even more fabulous with these flowers as it sits on the counter in my kitchen! I just love it!!!! Let’s get started on how I created it because it was rather easy!

For the Succulent Garden Home Decor piece, I die cut the 6 layers of flowers from the Succulent Framelits! The colors I used were Garden Green, Pool Party, Calypso Coral, Elegant Eggplant and Old Olive. The large flowers are all 6 layers and I brushed the edges of the flowers with my Sponge Dauber! To get the petals to curl, I just ran it over my Bone Folder like curling ribbon. Here are the color combinations I used:

~Pool Party Cardstock with Elegant Eggplant brushed on the edges

~Garden Green & Old Olive Cardstock with Elegant Eggplant brushed on the edges

~Old Olive Cardstock with Whisper White brushed on the edges

Big Succulents, www.LaurasStampPad.com

I made the large flowers and  realized I needed filler or moss! I reached out on Facebook and everyone suggested moss from the dollar store. So off I went to the store and got some moss and some green covered “rocks”. Perfect. I kept the rock sponge that I had from the beach and placed it in the middle with moss under it. Then I placed all of the “green rocks” all around. Next I tucked in the big succulents and die cut a few of the smaller 3 flowers in Elegant Eggplant and Calypso Coral. I added a Pearl to the center and attached them to the display with a Mini Glue Dot!

Succulent Garden, www.LaurasStampPad.com

If  you would like to see this all in action and up close, check out my Video Tutorial below or click here! Be sure to give it a thumbs up if you like it and don’t forget to subscribe if you are new! I post a new video every Tuesday and Thursday!

Purchase the Oh So Succulent Bundle and some Pearls (or other item for $1.50), save 10% with the bundle and you get to pick a Sale-A-Bration item!!! Tomorrow is the last day of Sale-A-Bration so stock up now. Use the Hostess Code: FCCVREYF and your name will be entered into a drawing for an entire Color Family of Ink Pads!!! Click here to start shopping!

Happy Stampin’

~Laura


Vertical Garden Project Kit!!!

Posted on

Succulents, www.LaurasStampPad.com

Succulents are so in right now! Little potted plants and fairy gardens are in all the stores and are just so darn cute! I love them! My Mom has them all over the house and they are precious! We got to pick out a few for her to pot up for us for Christmas! Can’t wait to pick it up!!! Eeeee Love them!!! (now let’s just hope I can keep them alive) If you are like me and love them but can’t keep plants alive, this is perfect for you!!!! The Vertical Garden Project Kit comes with all of the supplies to make this succulent garden! No watering necessary! 🙂

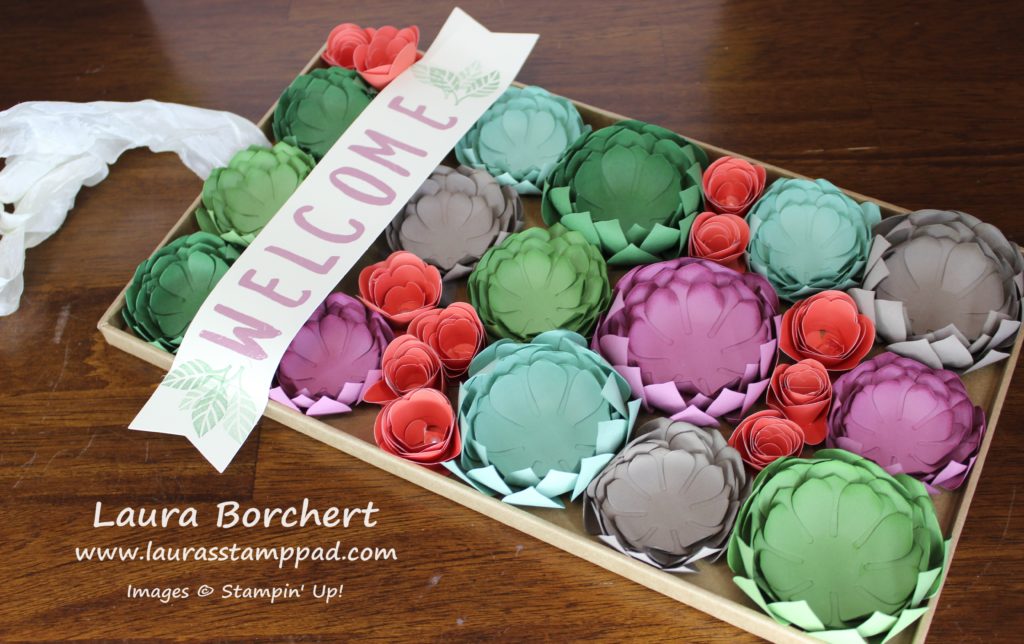
Vertical Garden Project Kit, www.LaurasStampPad.com

The kit comes with all of the flower die cut out for you. All you have to do is curl the petals with your Bone Folder for that nice rounded look and glue them together! I actually brushed my petals with a sponge dauber in the same color as the cardstock just for a little texture and color variation. I used the Fine Tip Glue Pen to adhere the layers together. The Kit Instructions say to use the Multipurpose Glue but I tend to use too much of that stuff! I love that I didn’t need to get out the hot glue gun for this entire kit. Me and the hot glue gun don’t get along very well and it takes like a million hours to complete because of the pick up, set it down routine.

Succulent Garden, www.LaurasStampPad.com

I did use a Hot Glue Gun for the little roses. You will want to curl it around a pencil or your fingertip to get a base curl and then add the glue and press and hold. You actually want to put the glue on that “second to last” petal and then wrap the last petal up with the rest. Hopefully this photo helps!

Mini Rose Buds Tutorial, www.LaurasStampPad.com

Once you have all of your flowers done, you can hot glue them into the box. The box is super sturdy and not flimsy at all. I expected it to be a bit more flimsy but it doesn’t bend or curve at all. Be sure your spacing for your flowers fills box rather than placing them all in there and having leftover space (like me) or not having enough space for all of them! I just placed the greeting over the space that I had leftover. The ribbon that is included in the kit is super fun and frilly. It is easy to make a big floppy bow.

Welcome Garden, www.LaurasStampPad.com

The kit comes with 2 banners which is fabulous for making mistakes or changing up the greeting!! The coordinating stamp set for this kit is Vertical Garden which has the words Welcome and Hello! I decided not to purchase the stamp set and thought I could add a greeting that I already had. I used the Layered Letters Alphabet Stamp Set for the letters and the leaves from Flourishing Phrases Stamp Set. I added a score line about an inch from the edges and added hot glue on the back side of the score line. I adhered that score line to the edge of the box! I super love how this turned out and I can’t wait to hang it on my front door closer to Spring! I wish that was tomorrow but unfortunately here in the midwest we have an ice storm coming so we must wait longer.

If you would like to see the contents of this kit in action, check out the unboxing video below or click here! Don’t forget to give it a thumbs up if you liked it and be sure to subscribe you are new!!

Happy Stampin’

~Laura


June 2016 Paper Pumpkin Kit – Banner Surprise!!!

Posted on

June 2016 Paper Pumpkin, www.LaurasStampPad.com

I am loving the bling and those shades of pink in the sequins!!! The Banner Surprise June 2016 Paper Pumpkin Kit arrived and I was a little perplexed by it at first glance. Once I started playing with it, I had lots of fun! You can see the reveal of the kit here.

I created 8 total cards with only 2 of them using my own cardstock (Mint Macaron) and then I created a banner that says SUMMER!

Golden Washi Tape, www.LaurasStampPad.com

I looked at Pinterest for some ideas with this kit since I thought I might branch out a bit. I saw a similar card to the one on the left side and just had to recreate it. I added the Washi Tape on each of the white lines and stamped the greeting on the crumb cake lines. My stamped images weren’t very straight but after I added the gold hearts and the To You I realized you couldn’t see they were crooked…..at least not as much. 🙂

Baby Cards, www.LaurasStampPad.com

I really tried to use lots of the gold alphabet letters so I got creative in the words I used!!!

Anniversary Cards, www.LaurasStampPad.com

Another tip on these cards. I actually placed a Mini Glue Dot on the back of the circle in the cellophane banner bag. I wanted the heart to stay upright and I didn’t want them moving all around. The little dot helps to keep them in place.

June Paper Pumpkin Alternative, www.LaurasStampPad.com

I had lots of leftover pieces so I created these 2 cards with a Mint Macaron card base. Love it!!!

Summer Banner, www.LaurasStampPad.com

Then I made this amazing SUMMER banner! I have a banner hanging in the doorway from my living room to the kitchen. I have a Spring/Summer one that has been up since about March and I thought this would be super fun and different! I love it!

Summer, www.LaurasStampPad.com

I added the gold letter to the center of each circle and stamped the dots around the edge in Tip Top Taupe. I added a Mini Glue Dot to the backs of each circle to hold them in place in the banner cellophane bag! I used a spoon to add in the sequins to each of the banners and then sealed it with the Washi Tape.

Hanging Summer Banner, www.LaurasStampPad.com

I love it and the light catches all of the glittery pieces and shines so beautifully!!! Getting 8 cards and a banner out of one kit is super fabulous and I still have some supplies left over. These kits are so amazing and well worth the $19.95 (plus tax)! This kit also came with 2 ink pads – Mint Macaron & Tip Top Taupe.

I can’t wait to see what the July Kit is going to be!!! You can get your July Kit by clicking here! Of course, all of my Paper Pumpkin subscribers get a little gift from me each month as well! 🙂 Just a little bonus! Also, if you are a Paper Pumpkin Subscriber, you can always purchase refill kits from past kits. Click here to check those out!

Happy Stampin’

~Laura


April Paper Pumpkin – Lovely Little Wreath!!!

Posted on

April Paper Pumpkin 2016, www.LaurasStampPad.com

Here are all of the goodies from the April 2016 Paper Pumpkin Kit!!! Check out that Bonus Stamp Set!!! There are 18 images in that set and it’s greetings and flowers! SCREAM!!!! I love love love it! I was also super pumped about this wreath because I was in desperate need of a new wreath for the front door….it’s a little small but it works for me! 🙂

Mini Wreath, www.LaurasStampPad.com

So my first worry with this kit was not having enough of the strips of leaves. I tend to get started wrapping them around and then getting about 3/4 done and running out. Let me tell you, there is no fear here! The leaves have adhesive on them already so it was super simple and I ended up having 10 or so strips left over when I was done! WOOT WOOT! I added the pretty flowers by folding them in half twice and adhering them on with the glue dots! Then I added the little chalkboard greeting and the ribbon. I realized (thanks to my downline) that I did the greeting wrong. The cord goes across the front and then you use the ends to knot it. Instead I looped the end into my ribbon loops and it was really long so I had to tie the ends together in the back to raise it up some. Ehh still works! 🙂 I love it!

Home Decor Wreath, www.LaurasStampPad.com

After I tied the bow, I added a little loop of the ribbon on the back to hang it on my door hook! Isn’t it adorable???

Lovely Little Wreath, www.LaurasStampPad.com

Here is a photo on my door and here is another standing back father.

Too Small?, www.laurasStamppad.com

Is it too small? Be honest! Let me know in the comments below! I normally have a Stampin’ Up sign on the door as well so that my customers can easily find me for classes and all so that helps a little too!

After playing with this wreath, you could also buy a few refill kits and a larger foam wreath to create a bigger sized wreath. You could also use this wreath for in home decor like adding a pillar candle to the middle, hanging on the back of a chair at the dinner table, hanging on a door handle or along a staircase. Endless ideas with this adorable little wreath! I love it!!!

Be sure to get signed up for the May Paper Pumpkin Kit before May 10th. You can do so by clicking here! I can’t wait to see what this one will have…..any guesses? Graduation was last month. This month there was a Mother’s Day stamp so I’m going with Father’s Day/Man Cards! Leave your guesses in the comments below and I might give out a prize to all of the correct winner! 😉

Happy Stampin’

~Laura

Ribbon Retire

Be sure to check out the Retiring Items before they are gone at the end of May!


Season to Season Wreath!!!

Posted on

4 Season Wreath, www.LaurasStampPad.com

This wreath is fabulous! I love the look and I love that I have my wreath all set from now until 2016!!!! Not having to worry about my wreath decoration during some of the busiest months of the year….sound amazing to me!!! The Season to Season Wreath Kit comes with all of the supplies to make this wreath including the foam circle!!! The kit comes with TONS of the leaves to fill the wreath too! I am usually the one that goes too close in the beginning and then runs out so I was very careful and what happened….I had tons left over. I used lots of the extras to fill in open holes but still had tons left over so that was awesome!!! Now here are some up close looks at each one!!!

Hello Fall Wreath, www.LaurasStampPad.com

I took a photo of each wreath on the inside and outside door as well as a close-up! This wreath I will hang up this month for Fall….maybe in a few weeks, I’m holding tight to Summer! 🙂 The kit includes the burlap ribbon and all the goodies for the banner. You will want to purchase the Cheer All Year Stamp Set to stamp on all of the die cut included in the kit. The little pom pom looking things are adorable too!!!

Halloween Wreath, www.LaurasStampPad.com

This wreath will go up in October for Halloween! I love the black and white striped ribbon!!! The bats, spider, and Boo are super cute too….well minus the spider. I really don’t like spiders even stamped ones!

Thanksgiving Wreath, www.LaurasStampPad.com

This wreath will go up in November for Fall/Thanksgiving! I love the leaves, especially the wooden element leaves in the kit. I used the burlap ribbon again for this one!

Christmas Wreath, www.LaurasStampPad.com

This one is my favorite! That Cherry Cobbler satin striped ribbon is AMAZING!!!! It is just beautiful! I did a two loop bow for this one. I really like the red sequins on the trees as well! Love it!!!

Ribbon Attachment, www.LaurasStampPad.com

Here is how I attached my ribbons and banners – with straight pins!!! It is really simple to do and to change out! It holds really well as long as you angle the pins in different directions!! You could also leave a spot open on the wreath with no leaves and have the ribbon loop around the foam. This would work if you ran out of leaves and still had foam showing.

Holiday Banners, www.LaurasStampPad.com

Here are all of the banners. The kit comes with the twine and four T pins to use to attach to your wreath. I tied a knot in the twine and then pushed the pin through the knot. Some of the banners I pinned in across and some diagonal. It was really easy to do!!! This entire kit was pretty easy and didn’t really take that long. The longest part was the leaves on the wreath…..but I seriously think it is because I am not good with a hot glue gun! 🙂 Picking it up and setting it down and up and down is so not cool and time consuming. Tips anyone?

If you would like to see the Unboxing and Reveal of this Season to Season Wreath Kit, you can check that out below or by clicking here!!! If you are local and want to create this kit, I’m having a class on September 29th!!! Come over for stamping, chatting and gluing! Go home with a beautiful wreath!!!

Happy Stampin’

~Laura


New Summer Wreath!!!

Posted on

Rainbow Flower Wreath, www.LaurasStampPad.com

My Spring Wreath was really looking worn so I needed something new! I couldn’t think of a good idea and I have been pretty busy lately so it kept getting pushed aside. I typed in Summer Wreath into Pinterest and saw lots of rainbow wreaths. That is when it hit me to punch some flowers and make my own rainbow wreath! I love it! I completed it in about 10 minutes. I used the Flower Medallion Punch and pulled out my scrap boxes for the cardstock!

Flower Medallion Punch, www.LaurasStampPad.com

I curled the edges of the flowers with my Bone Folder and then hot glued them to my wreath!!!

Wreath Assemble, www.LaurasStampPad.com

To finish it off, I added a little bit of Multi-Purpose Glue (green lid glue) to the center of the flowers and then dusted a little Dazzling Diamond Stampin’ Glitter over the glue! It really added a little shine to the flowers! I love how it turned out and it’s so bright and colorful!!!

Summer Wreath, www.LaurasStampPad.com

Here is another photo of the wreath on the inside of my door….sometimes it looks better on white than dark gray! Love it!!!

Any ideas for a Fall Wreath??? Let me know in the comments below!!! It will be here before we know it!

Happy Stampin’

~Laura


Cards & Home Decor with Project Life!!!

Posted on

On Monday, I shared with you a few of the pages that I have created with Project Life!!! You can check that out here! Today, I’m going to share with you a few other ways to use your Project Life Card Collections!!!

Project Life Greeting Cards, www.LaurasStampPad.com

How adorable and simple are these cards?? These were all made with the Moments Like These Card Collection! I added some greetings from the Remembering Your Birthday, Lovely Amazing You Stamp Set, Blessed By God Stamp Set, and Friendly Wishes Stamp Set. I added some Rhinestones, Linen Thread, and punched flowers and I was all set!

Project Life Greeting Cards, www.LaurasStampPad.com

Here are a few others using cards from a few other Card Collections. The Hi card was simply made by adding the Card Collection to a card base with Stampin’ Dimensionals! It can’t get much simpler than that!!!

Moments Like These Project Life, www.LaurasStampPad.com

Here are a few more cards that were created at the Project Life Class that I had. I love how creative everyone got! So simple and yet so fabulous!!!

Project Life Cards, www.LaurasStampPad.com

Here is another set of cards that were created with the Moments Like These Card Collection and the Love Story Card Collection! The card on the right was created by one of the stampers in my class as a wedding card and then this is the gift!

Home Decor Project Life, www.LaurasStampPad.com

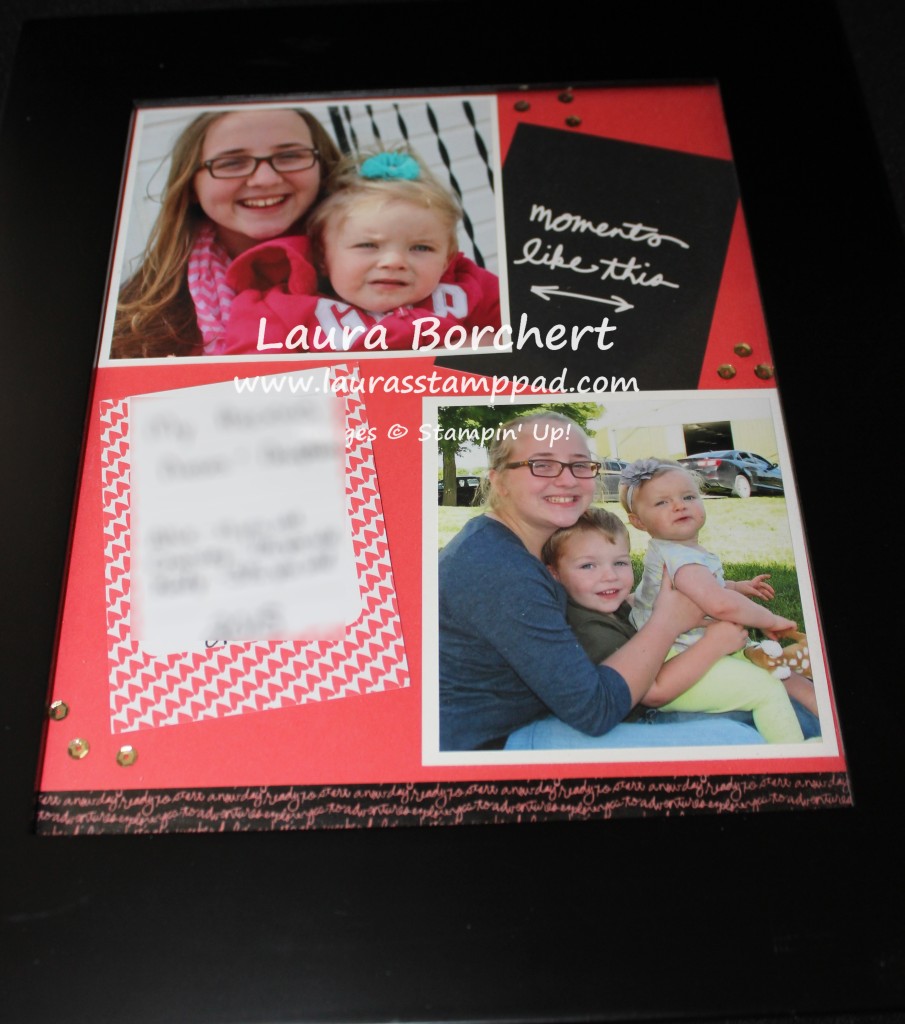
This is an 8″ x 10″ piece that will go in a frame with pictures in the black squares! How fabulous is that?? I love it!!!

Framed Art, www.LaurasStampPad.com

Here is an 8″ x 10″ framed piece that I created! I used the Moments Life These Card Collection and then added the Washi Tape and Sequins from the Accessory Pack! Love it! I did the writing with the Project Life Journal Pens! Love those things!

There are so many wonderful things you can create with the Project Life Card Collections!!! Have you tried Project Life yet? Let me know what you think in the comments below!

Happy Stampin’

~Laura


Spring Wreath!!!

Posted on

Butterfly Wreath Home Decor, www.LaurasStampPad.com

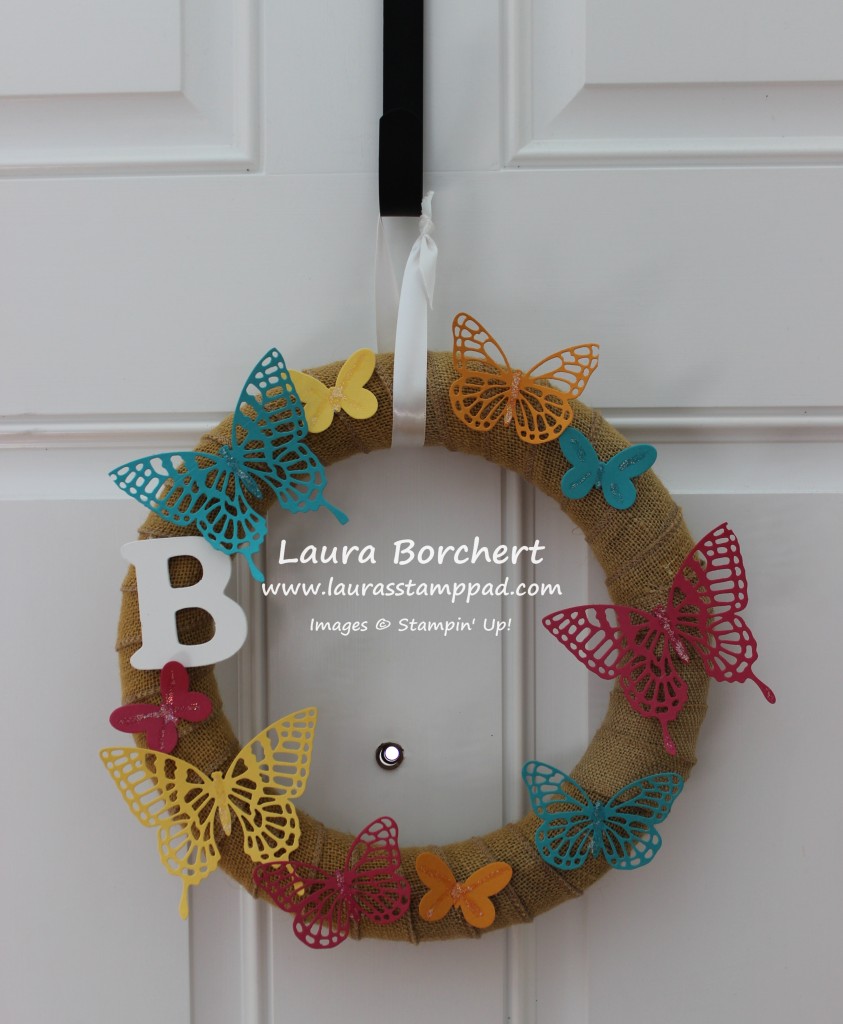
Spring is here and that means I needed a new wreath for my front door!!! You can see some of my past wreaths here and here! I am loving butterflies and they are the epitome of Spring to me! I am still using the 1-1/4″ Burlap Ribbon as a base around my foam wreath. I used the Butterfly Thinlets from the Occasions Mini Catalog to create all of the butterflies in Daffodil Delight, Pumpkin Pie, Melon Mambo, and Tempting Turquoise! I hot glued the butterflies to the burlap and added a little bit of Dazzling Details to a few of them! I love it! It is so fresh and bright!!!!

What is on your wreath? Do you like decorating a wreath for every season?

Happy Decoratin’

~Laura


Build A Bouquet!!!!

Posted on

Build A Bouquet, www.LaurasStampPad.com

Is this not the most gorgeous bouquet of flower you don’t have to water or worry about keeping alive??? While making this I didn’t know if it was really going to be worth it but now a month later, it was totally worth it! It has been sitting on our dining room table for over a month now and it sure brightens up the room. It helped me get through those gloomy winter days and even some of the gloomy spring days! I love it and the best part is it will never die!!!

You can make yours beautiful bouquet too!!! All you need is the Build-A-Bouquet Kit from the Occasions Mini Catalog, a hot glue gun and some pliers (totally recommend these). So now a little honesty from me….you all know I like to keep it real! This kit is not easy and takes lots of time but don’t let that scare you! I would highly recommend doing it with a friend or husband in my case because it will go much faster. I am not a hot glue gun pro at all and it seemed like all I did for hours on end was pick up the gun, dab it, set it down, attach flower, and then repeat 5 million times. Finally towards the end I enlisted my fabulous husband who was oh so excited (not) to help! He ran the glue gun while I attached and worked the flowers. This went soooo much better and I wish I would have done it sooner!

Paper Flower Bouquet, www.LaurasStampPad.com

You will also noticed in the catalog that there is a coordinating stamp set – Build A Bouquet Stamp Set! I’m not going to lie I got out the kit and read the instruction and was like Ops I didn’t get that stamp set…..so I improvised!!! For the big line image, I used my Hardwood Stamp Set and for the veins in the leaves I used my stem from the Lotus Blossom Sale-A-Bration Stamp Set. I also used the dots image from Gorgeous Grunge for the blue flowers. The other ones, I just omitted and think it turned out fabulous still!

Use the pliers for the wire bending, it is sooooo much easier! I was too lazy to go down to the basement and search for some so I just used my fingers. 1. It Hurts! 2. It doesn’t turn out the same! I took a few of the flowers to my parents house to work on while I was visiting since I really wanted to get this bouquet done by the next evening. I asked my mom if she knew where some pliers were and she immediately handed me some. I finished the flowers and was like “Oh wow, why did I not go get some a long time ago.” Ehh Lesson learned!

Build A Bouquet, www.LaurasStampPad.com

I didn’t care for how some of my flowers came out and I didn’t think it look all that great….maybe it was because I was tired and we always judge our own stuff so much more. After I put it all together I was in awe at how amazing it looked. I loved it and now a month later I still love it! I’m so glad I stuck with it and completed the kit! It was totally worth the the time and $25 I spent on it.

Have you purchased this kit? Have you completed it? What are your tips and tricks? How have you displayed your flowers? Leave me a comment down below!

Also, did you know that there is a Big Shot Die that makes all of these flowers? It is the Bouquet Bigz L Die! You can create as many flowers as you wish and in any color imaginable!!!!

Happy Stampin’

~Laura