Technique Tuesday – Flip Fold Mother’s Day Card!!!

Posted on

Happy Tuesday!!! I have a fabulous flip fold Mother’s Day Card to share with you today!!! Just in time to make for Mother’s  Day which is on May 14th!!! You could also change up the designer paper and greetings to make this card for any occasion!

Flip Fold Mother's Day Card, www.LaurasStampPad.com

So of course you can’t see the flip fold part until you watch the video tutorial below. So stay tuned!!! I got this amazing idea from fellow stamper, Julie Davison! She is amazing! Let’s get started!

Mother's Day Card, www.LaurasStampPad.com

First, I cut 2 card fronts (4-1/4″ x 5-1/2″) and one card base (3-3/4″ x 11″). I did my card fronts in Watermelon Wonder and Mint Macaron and the card base in Whisper White. Next, I scored the card base at 1″ & 6″. I added adhesive to the bottom rectangle (3-3/4″ x 5″) and placed it in the center of the Mint Macaron card base. Then I folded the rectangle above that down and the little 1″ flap fold back/up. I added adhesive to this flap and placed the Watermelon Wonder card base over the top, lining up both card bases. You want to make sure you line up the card bases rather that place the on the Watermelon Wonder with a border so that it lays flat. Now your card base is complete and it’s time to decorate!

For the front of the card, I added a piece of Affectionately Yours Designer Series Paper (3″ x 4/1/4″) to the bottom. I tied some Mint Macaron Sheer Linen Ribbon around the card to cover up the seam of the 2 types of paper! For the greeting, I die cut an oval using the Stitched Shapes Framelits. I just love how fabulous these are! The greeting was stamped in Night of Navy Ink and the flowers in Watermelon Wonder Ink. I used the Love & Affection Stamp Set. The greeting was added to the card front with Stampin’ Dimensionals.

Flip Fold Card, www.LaurasStampPad.com

Now for the inside panel, I added another piece of the Affectionately Yours Designer Series Paper (3-1/4″ x 4-3/4″). The copper accents really give a fabulous look to the card. I die cut another Stitched Shapes Oval and stamped the greeting from the Teeny Tiny Wishes Stamp Set. You could also use another greeting from the Love & Affection Stamp Set as well. Using that stamp set, I stamped a few flowers on the bottom panel and left the rest open to write in. Another option would be to stamp the middle and bottom panel and leave a lot of space for writing! It’s the perfect Mother’s Day card!

Technique Tuesday, www.LaurasStampPad.com

If you would like to see this all in action, check out my Video Tutorial below or click here! Don’t forget to give it a thumbs up if you liked it and be sure to subscribe if you are new. I post a new video every Tuesday and Thursday!

Happy Stampin’

~Laura


Three Little Trees!!!

Posted on

three-little-trees, www.LaurasStampPad.com

The Totally Trees Stamp Set from the Holiday Mini Catalog has so many perfect little trees for every holiday and season! You can check out a few others here, here and here! And now I’m going to show you all about this Christmas style tree!!!

I started with a Whisper White card base. Then I took a piece of Whisper White (2″ x 4-1/4)) and stamped the tree from the Totally Trees Stamp Set in Garden Green three times across the paper! I added the little stars on top of the trees with Crushed Curry Ink. I layered this piece onto Real Red cardstock measuring 2-1/2″ x 4-1/4″. Then I added this to the card base and stamped the Merry Christmas from the Teeny Tiny Wishes Stamp Set. That is my favorite stamp set for greetings for all occasions!!! You could use any greeting of your choice for this one! I finished the card off with a little Cherry Cobbler Baker’s Twine from the Baker’s Twine Trio Pack tied into a bow!! I love it!!!

Don’t forget that the Buy 3, Get 1 Free Designer Series Paper Sale ends next Monday!!! Click here to start shopping!

sharable6_b3g1dsp_naspuk

Happy Stampin’

~Laura


Halloween One Sheet Wonder!!!

Posted on

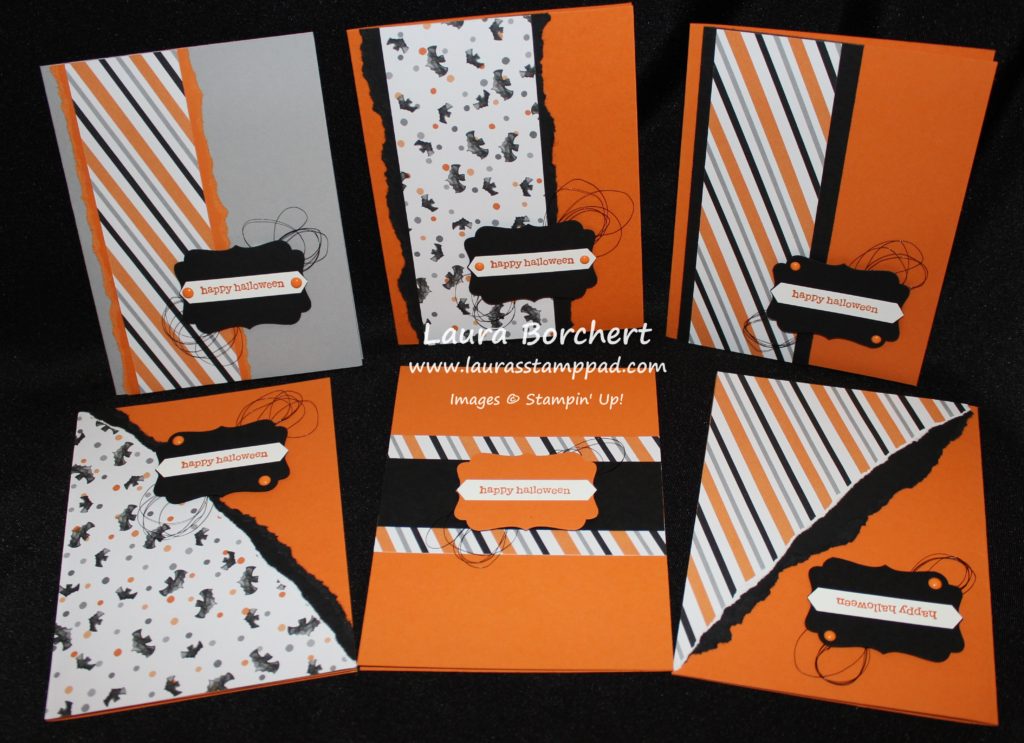
Halloween One Sheet Wonder, www.LaurasStampPad.com

Halloween is right around the corner and I know how much you all love One Sheet Wonders!!! By request from one of my YouTube Subscribers, I have created a Halloween One Sheet Wonder that includes cards and treats!!! I love this set and it is perfect for having a few cards on hand to send to loved ones and a few treats for trick-or-treats or nieces and nephews in my case!!! Let’s get started!

One Sheet Wonder Template, www.LaurasStampPad.com

Here is the template I used for this Halloween Set. You might remember that the bottom row is the same as the other template. You can check out samples of that here, here, here, and here! I used the bottom row for all of the 6 cards.

6 Cards One Sheet Wonder, www.LaurasStampPad.com

The paper I used is from the Holiday Mini Catalog and it is called Halloween Night. Since I am not a huge Halloween fan, I purchased this paper and used a all occasion greeting set I have on hand and made these beauties. I used Pumpkin Pie and Smoky Slate for the card bases and pulled out some Basic Black scraps for layering. TIP: The black just lines the edge of the Designer Paper, not the entire portion. This is how you can use up those little pieces of scraps. The bottom middle card was created using the 1-3/4″ x 5-1/2″ and I cut it to 4-1/4 to go sideways on the card. Since it wasn’t that wide, I cut it in half and added a piece up high and down low and put a strip of Basic Black in the middle! 😉 See there are so many ways you can create fun cards with the One Sheet Wonder Technique! The greetings were all stamped with the Teeny Tiny Wishes Stamp Set and punched out with the Classic Label Punch. I wanted a larger greeting to pop more on the card so I layered that onto the Decorative Label Punch and added loop of Metallic Black Thread behind it. I added some Enamel Shapes to a few of them! I love those things!

6 Treat Boxes in One Sheet Wonder, www.LaurasStampPad.com

The top row is for these adorable treat boxes using the Clear Tiny Treat Boxes. I took each of those 2″ x 6″ pieces and scored them just a hair below the 2″ mark and 4″ mark so they would fold into the box. Since the box is 2″, you want to go a smidge less so it fits inside. Pop the Designer Paper into the box and add candy! For the outside decoration, I used Burlap Ribbon and Thick White Baker’s Twine. I stamped the For You from the Perfectly Wrapped Stamp Set and punched it out with the Classic Label Punch. I thought it looked too long for the tiny box so I cut one end off, punched a hole with the 1/8″ Handheld Punch and tied it to the treats with Black Metallic Thread. Love it! They do hold a decent amount of candy but they are so adorable!!!

So 6 cards and 6 treat boxes from 1 sheet of 12″ x 12″ Designer Paper is super fabulous and if you want to see the Video Tutorial of all of this, check out the one below or click here! Don’t forget to give it a thumbs up if you liked it and be sure to subscribe if you are new!

Happy Stampin’

~Laura

Don’t forget about the Paper Pumpkin BOGO Sale for new subscribers!!! Click here to get started and be sure to enter the Promo Code: BOGO  Offer ends on October 10th!

PP_BOGO_Facebook_US, www.LaurasStampPad.com


Hearts and Flowers???

Posted on

Anniversary Hearts, www.LaurasStampPad.com

I’m not really a hearts and flowers type of girl…..BUT I am a show the love, give a hug type of girl. I think hand shakes are awkward but I will give a hug to anyone I meet. That’s just me. 🙂 I cry at weddings because the amount of love in the room is amazing. I cry at graduations because they have accomplished so much and are moving on to the next step in their life. That’s me!!

Now let’s chat about this amazing this card and not crazy me! I love those interlocking hearts and think they are just fabulous! So simple and yet so sweet! I started with a Bermuda Bay card base and added just a little scrap piece of Have a Cuppa Designer Series Paper (1″ x 5-1/2″). I layered the DSP with a little Melon Mambo scrap peaking out on the right hand side. For the greeting, I die cut one of the Lots of Labels images and cut off the right side bumps to be a flat edge. You can see another sample and how I did that here! I stamped the greeting in Melon Mambo Ink from the Teeny Tiny Wishes Stamp Set! Then I die cut the hearts from the Cups and Kettle Framelit Set (sold out). I interlocked them and adhered them on with the Fine Tip Glue Pen. I added the greeting to the lower right hand side of my card and then I thought it needed a little bling! I added some Candy Dots and Rhinestones for a little POP!

Are you Hearts and Flowers? Chocolate? Just a good card? Let me know in the comments below! Don’t leave me hanging, I know there are others out there like me! 🙂

Happy Stampin’

~Laura

Going Going Gone, www.LaurasStampPad.com

Be sure to check out the Retiring Items before they are gone at the end of May!


Fabulous Friday

Posted on

Happy Friday!!!! I know that Valentine’s Day was last weekend but I thought I would share with you the card I created for my Sweetheart! We have this little toy that we have named Bluepy and he hide him around my Stamp Room. Once I find him, I hide him and then my husbands finds him and hides him. It goes on and on. I thought that would be fun to make for his Valentine’s Day Card! So here it is!!!

Valentine's Card, www.LaurasStampPad.com

I think it turned out really good! I used Pacific Point Cardstock. The eyes were created with a 3/4″ Circle Punch and 1/2″ Circle Punch. The face was created with a 2-1/2″ Circle Punch and then 1″ Circle Punch and 1-1/4″ Circle Punch. I used the Tree Punch for the ears. I used the Corner Rounder Punch for the body and the legs! The hearts are from the Itty Bitty Punch Pack!

Valentine's Sentiment, www.LaurasStampPad.com

I have told you how much I love the greetings from the Rose Wonder Stamp Set and I thought they went very well for this card as well! The Happy Valentine’s Day greeting is from Teeny Tiny Wishes!

Now I have a fabulous TIP that I would like to share with you!!! I have shown you how I love the Photopolymer Stamps the best because they stick to the clear blocks perfectly and you can see through them! I don’t like that they stain though! I was given a fabulous tip from a fellow stamper and it works amazingly! When you receive you stamps, ink them up really well in a light color like Pink Pirouette. Ink and Stamp and Ink and Stamp. Get that ink all over the stamp. By doing this, you are pre-staining it in a light color so that when you use Real Red or Melon Mambo, it won’t stain in that color. It totally works and I had to share with all of you!!! Enjoy!

Weekly Deals 2.16

Of course it isn’t a Friday without the Weekly Deals!!!

I hope you all have a wonderful weekend and I’ll see you back here on Monday!!!

Happy Stampin’

~Laura

Built for Free Using: My Stampin Blog


Valentine’s Day Love!

Posted on

Valentine's Day, www.LaurasStampPad.com

Valentine’s Day is right around the corner so now is the time to start working on those sweet cards and goodie bags! I love Valentine’s Day because it is a day that I can share my love for everyone. I like to do it all year long but this day is even more special! This card is quick and simple and fairly gender neutral.

I started with a Whisper White card base and added a strip of Love Blossoms Designer Series Paper! The Love Blossoms Designer Series Paper Stack is perfect for Valentine’s Day but it also has lots of great prints for all occasion cards too! I added some Silver Baker’s Twine along the top and tied in a bow! For the greeting, I used the Teeny Tiny Wishes Stamp Set in Rose Red. I punched out the greeting with the Word Window Punch and layered it onto a Washi Label Punch from Blushing Bride cardstock. I added the greeting to the card with Stampin’ Dimensionals! Simple and fabulous! I love it!

Do you send out Valentine’s Day Cards? Let me know in the comments below!!!

Happy Stampin’

~Laura


Fabulous Friday!!!

Posted on

Happy Friday everyone!!! This has been a busy, rainy, dreary, warm, cold week! Welcome to Illinois! 🙂 I have officially started on my Christmas Cards!!! All of the envelopes are stamped and addressed! I have created a few of the cards from leftover packets of some of the classes I have held! I will be using my samples and any other leftover class cards as I finish up the last of the Holiday Card Classes!!! I am feeling behind this year for some reason…..maybe because I’ve got all of these empty envelopes and I’m afraid I won’t have enough cards. Have no fear though, I’ll just make more!!! 🙂

Breese Craft Fair, www.LaurasStampPad.com

I participated in a Craft Fair last weekend that was lots of fun!!! This weekend I will doing the Holiday Card Class at the Library which is one of my favorite events of the season. It is always so much! There are 22 people and we make 10 Holiday Cards. The class always takes less than 20 hours! It boggles my mind how quickly everyone creates their cards since I have held classes of 3 people making 5 cards and it takes 3 hours. Maybe I am talking less at this event since I’m pretty busy! 🙂

Weekly Deals 11.17

Of course it isn’t a Friday without the Weekly Deals!!! I have been having lots of fun with the Snow Friends Framelits. You can check out samples here and here! You can check out my wreath here!

If that isn’t exciting enough……..drum roll……..Stampin’ Up! Online Extravaganza Sale begins on November 23rd and runs through the 30th!!! Woot Woot! Sneak Peak here – Online Extravaganza Sale (Buy 3, Get 1 Free DSP….Eeeee) and I’ll be posting more on Monday when it begins!!! Be sure to subscribe along the right hand side of my page so you don’t miss out on these amazing deals! Have someone crafty on your Gift List? Get supplies when they are on sale! Don’t forget to get a little something for yourself as well! What about all of those are aren’t crafty or don’t have a lot of time for crafting??? Paper Pumpkin is perfect for them because it comes with everything you need, instructions for the project and only takes 30-45 minutes! It is a great project to share with those you love and enjoy some quality time together! I will be offering DOUBLE Laura’s Loyal Stampers Points during the Extravaganza as well!!!! Woot Woot!!!

Turkey Treats, www.LaurasStampPad.com

Here is an adorable little Turkey Treat Bag that I just had to share before Thanksgiving! You can check out the Video Tutorial here for how to make the turkey and just add him to a tag for an adorable treat!!!

See you back here on Monday! Have an amazing weekend!

Happy Stampin’

~Laura

Sponging Over an Embossed Image!

Posted on

Birdie in a Tree, www.LaurasStampPad.com

Welcome back for more on the Woodland Embossing Folder!!! Today I’m going to share samples that showcase sponging over your embossed image! You can check out yesterday’s post on adding color to your embossing folder here!

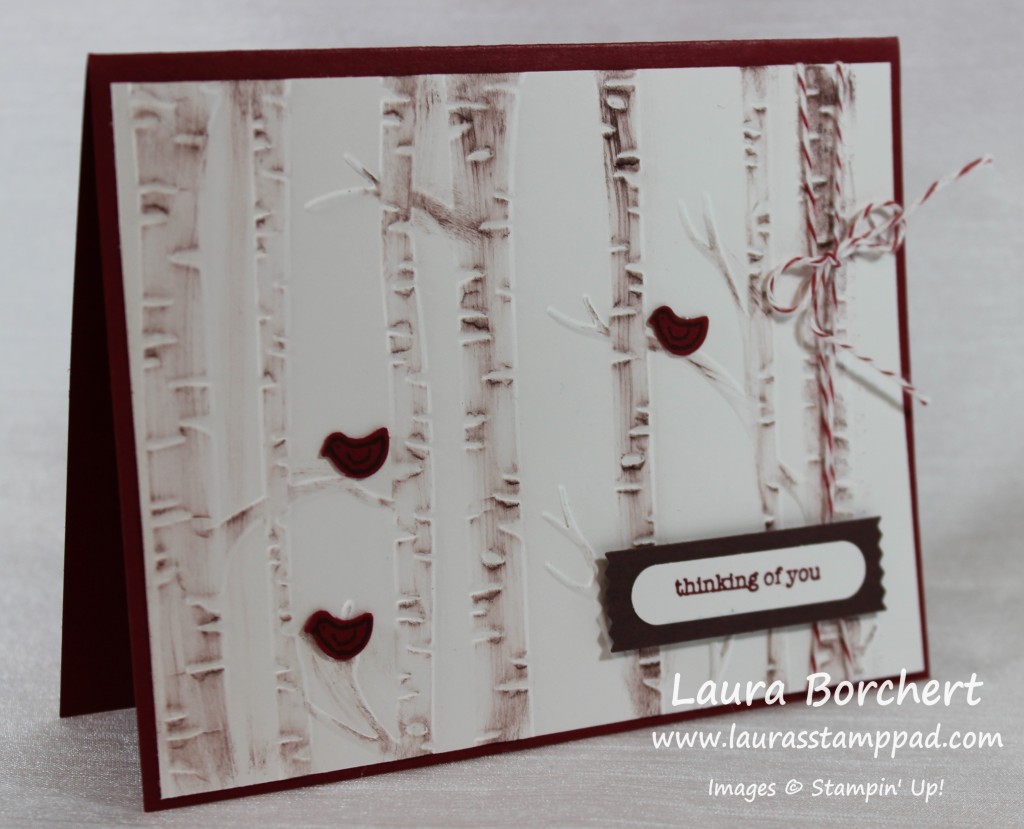
Today I’m going to show you samples using the Woodland Embossing Folder and adding color to the image with a Sponge Dauber!!! In the sample above, I used Chocolate Chip ink to lightly brush over the embossed trees. This gave a little color and texture to the trees. This isn’t going to come out perfect or bold which was hard for me. You just want to lightly brush over the image and be okay with some ink being on the background too. Stamped with love, not perfection! 🙂 I wrapped some Cherry Cobbler Baker’s Twine and tied a bow and then layered it onto a Cherry Cobbler card base. I added a few little birdies with the Sprinkles of Life Stamp Set and coordinating Tree Builder Punch. For the greeting, I used the Teeny Tiny Wishes Stamp Set. I punched it out with the Word Window Punch and layered it onto a Cherry Cobbler Washi Label Punch! Of course, I added the greeting to the card with Stampin’ Dimensionals!

Haunting Trees, www.LaurasStampPad.com

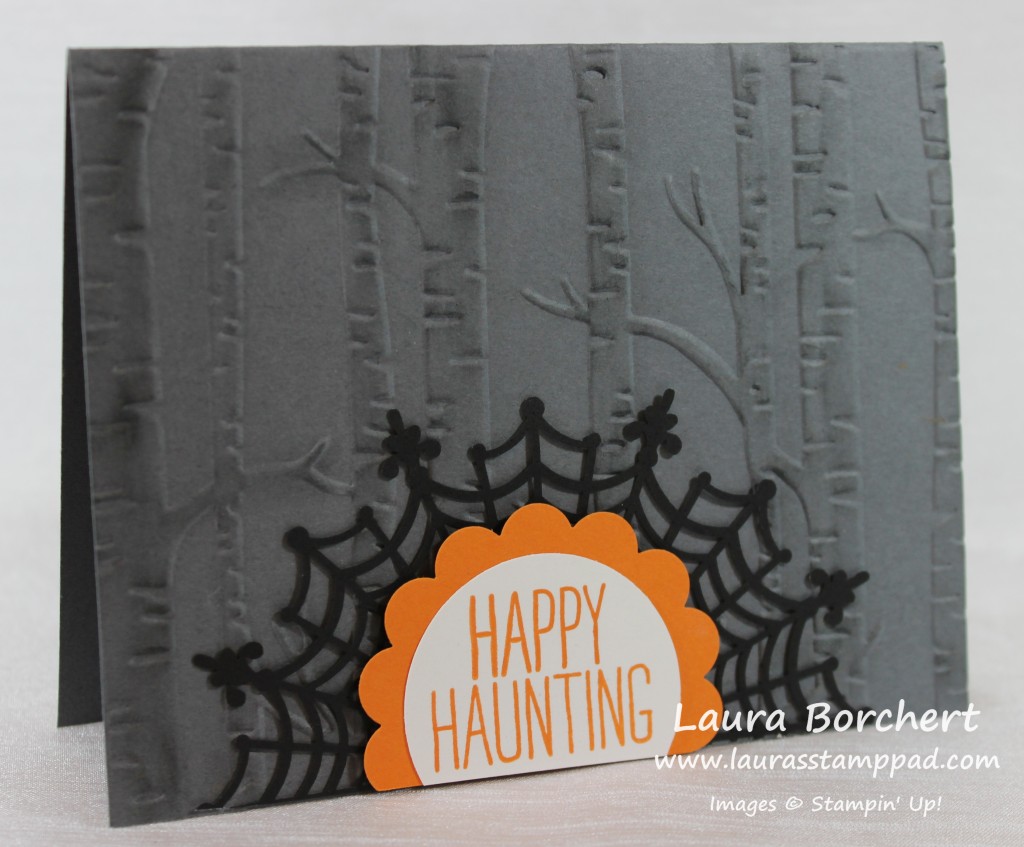
Here is another sample that I created with this technique! I embossed Basic Gray cardstock and added some Basic Black Ink with a Sponge Dauber for that texture and spooky look! I cut a Spider Web Doily in half and added it to the bottom of the card. For the greeting, I used the Cheer All Year Stamp Set. I punched it out with the 2″ Circle Punch and layered it onto a Pumpkin Pie 2-3/8 Scallop Circle Punch. Simple Halloween card that you can create in no time at all!

You can check out a video tutorial on this technique here! Be sure to check back tomorrow to see more way to color with your embossing folder!!!

Happy Stampin’

~Laura

Technique Tuesday – Ways to Use the Woodland Folder!

Posted on

Happy Tuesday!!! That means I have a fabulous technique to share with you! Even better…..it will continue til Thursday!!! That’s right; I will be showing you ways to use your Woodland Embossing Folder for 3 days!! Woot Woot!!!

Woodland Embossing Folder, www.LaurasStampPad.com

I love the rustic Man look of this card; perfect for lots of the men in my life who are hunters and farmers! This woodsy card is perfect for them or even a Holiday card!! I used the Woodland Embossing Folder from the Holiday Mini Catalog. I’m sure you are wondering how I got my tree trunks brown so let’s get started!

SUPPLIES NEEDED: Woodland Embossing Folder, Big Shot, Brayer

I started with a Mossy Meadow card base and then I cut a piece of Whisper White cardstock measuring 4″ x 5-1/4″. Using the Woodland Embossing Folder, I added Chocolate Chip ink to the trees (the side that doesn’t say Sizzix). You can add the ink with a Sponge Dauber (light), a direct to folder with the ink pad (not always clean), or a Brayer! I found that the Brayer worked the best for a bold image and I didn’t fall into the spots between the trees at all like I did with the ink pad (see left corner on the sample above). Once it is all inked up, place your white cardstock in and close it. Run it through the Big Shot like you normally would and when you are done, you will get these fabulous brown trees. Now since you are doing the trees and those are the images that pop forward, you will notice that your trees are de-bossed (meaning they are pressed in rather than popping out). That is how it is suppose to come out! 🙂 Now you can add it to your card front and decorate. I added some Mossy Meadow leaves using the Sprinkles of Life Stamp Set. For the greeting, I stamped Happy Birthday from the Teeny Tiny Wishes Stamp Set in Mossy Meadow and punched it out with the Word Window Punch. I layered that onto a Mossy Meadow Washi Label Punched piece. I layered this with Stampin’ Dimensionals onto a piece of frayed Burlap Ribbon. First I cut the ribbon in half length ways and then just pull out some of the stitching to get that frayed look. Very masculine and rustic looking!

If you would like to see a Video Tutorial on how to create this look, check out the video below or click here! Don’t forget to give it a thumbs up if you liked it and be sure to subscribe so you don’t miss the Part 2 tutorial!

Happy Stampin’ and see you back here tomorrow!!!

~Laura


Technique Tuesday – Halloween Punch Art!!!

Posted on

Happy Tuesday!!! You know what that means….I have a fabulous Technique to share with you today! Punch Art is so much fun, uses up your scraps and really makes punches super versatile!!! I love that!

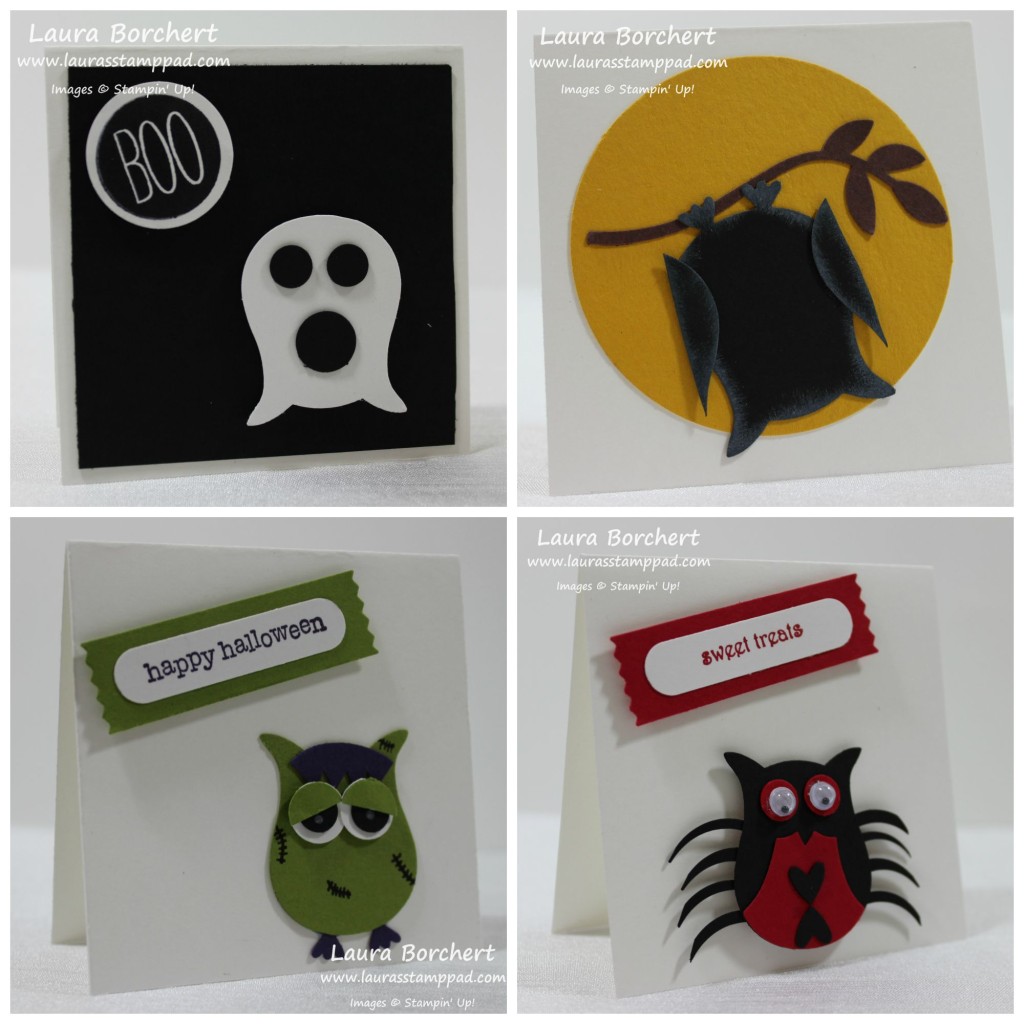
Halloween Punch Art, www.LaurasStampPad.com

How cute are all of these?? Since I’m not a huge Halloween fan, I like to find Halloween options with some of the supplies I already have. I used the Owl Builder Punch for all of these!!! Love it!!!! These little 3″ x 3″ cards are perfect to attach to a gift or treat bag. Let’s get started with each one and don’t worry, I did do a Video Tutorial for each of these!!! 🙂

Bat Punch Art, www.LaurasStampPad.com

This card is a Whisper White card base measuring 6″ x 3″ and folded in half. I used a 2-1/2″ Circle Punch in Crushed Curry for the moon!!! The branch was punched in Chocolate Chip with the Bird Builder Punch! I punched a full Owl body from the Owl Punch and then two sides of the owl. I cut the sides straight to get those wings. Using a Sponge Dauber and Whisper White ink, I added a little color around the edges for some texture. I attached the wings with a Mini Glue Dot and added him to the card with Stampin’ Dimensionals! Here is the video tutorial!

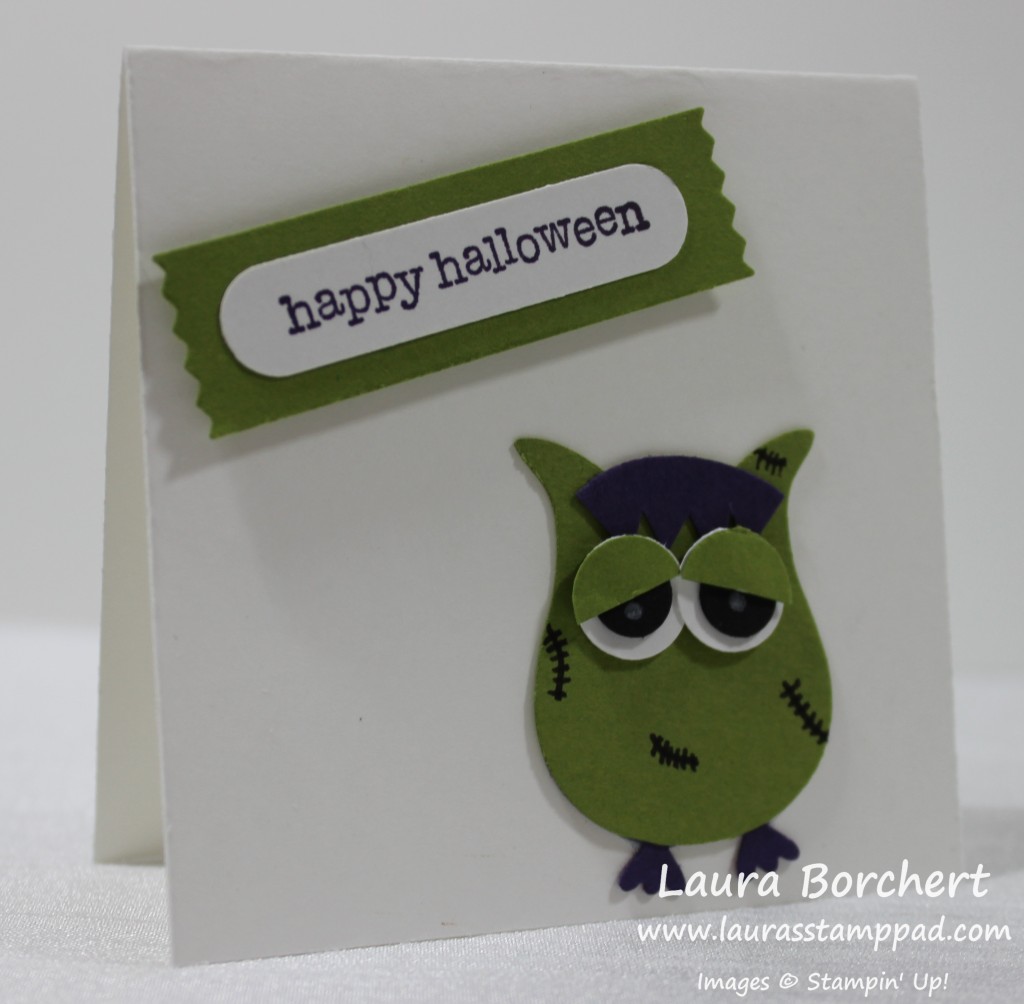
Frankenstein, www.LaurasStampPad.com

Little Frankie is my favorite!!!! I used the Owl Builder Punch for each of the pieces. I punched out a bottom half of the Owl body and the front body piece in Elegant Eggplant. I punched out a full Owl body and 1 large circle in Old Olive. I punched 2 large circles in Whisper White and 2 small circles in Basic Black. You will snip off the olive feet and place the eggplant feet to the back side of the owl. Then with your Paper Snips, you will cut the other eggplant piece into spikes for his hair and attach it to his forehead! For the eyes, you will assemble them with Mini Glue Dots – black circles onto the white ones and then cut the olive one in half and place those on top. I used a White Chalk Marker for the dots in the eyes and a Black Marker for the stitches all over!! For the greeting, I used the Happy Halloween from the Teeny Tiny Wishes Stamp Set. I stamped it in Elegant Eggplant and punched it out with the Word Window Punch. I layered this onto an Old Olive punched Washi Label Punch! Here is the Video Tutorial!

Ghost Punch Art, www.LaurasStampPad.com

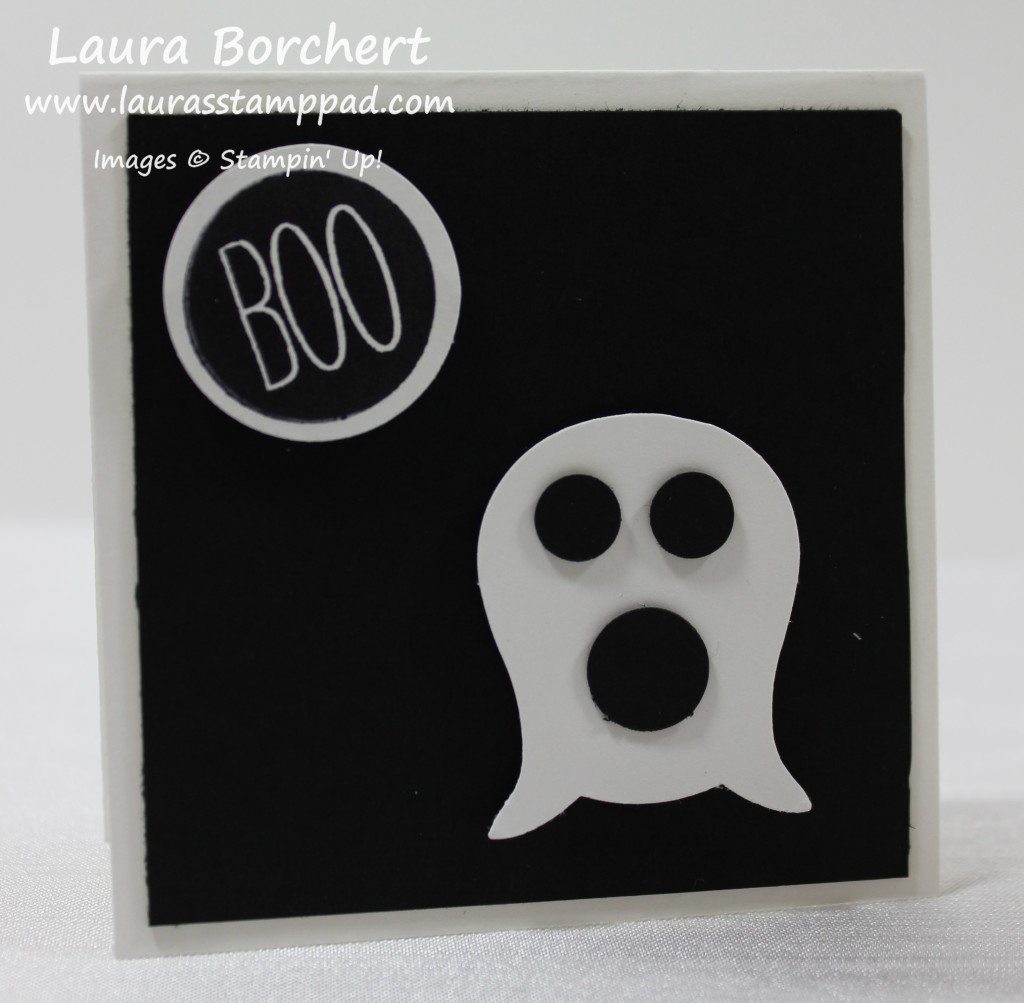
I used a Whisper White card base and then layered on a piece of Basic Black measuring 2-3/4″ x 2-3/4″. I punched out an owl in Whisper White and cut off the little feet and turned it over. There is your little ghost. Then I punched out 2 small circles and 1 big circle and adhered them on with Mini Glue Dots. The greeting is from the Cheer All Year Stamp Set and I punched it out with the 1″ Circle Punch! Here is the Video Tutorial!

Spider Punch Art, ww.LaurasStampPad.com

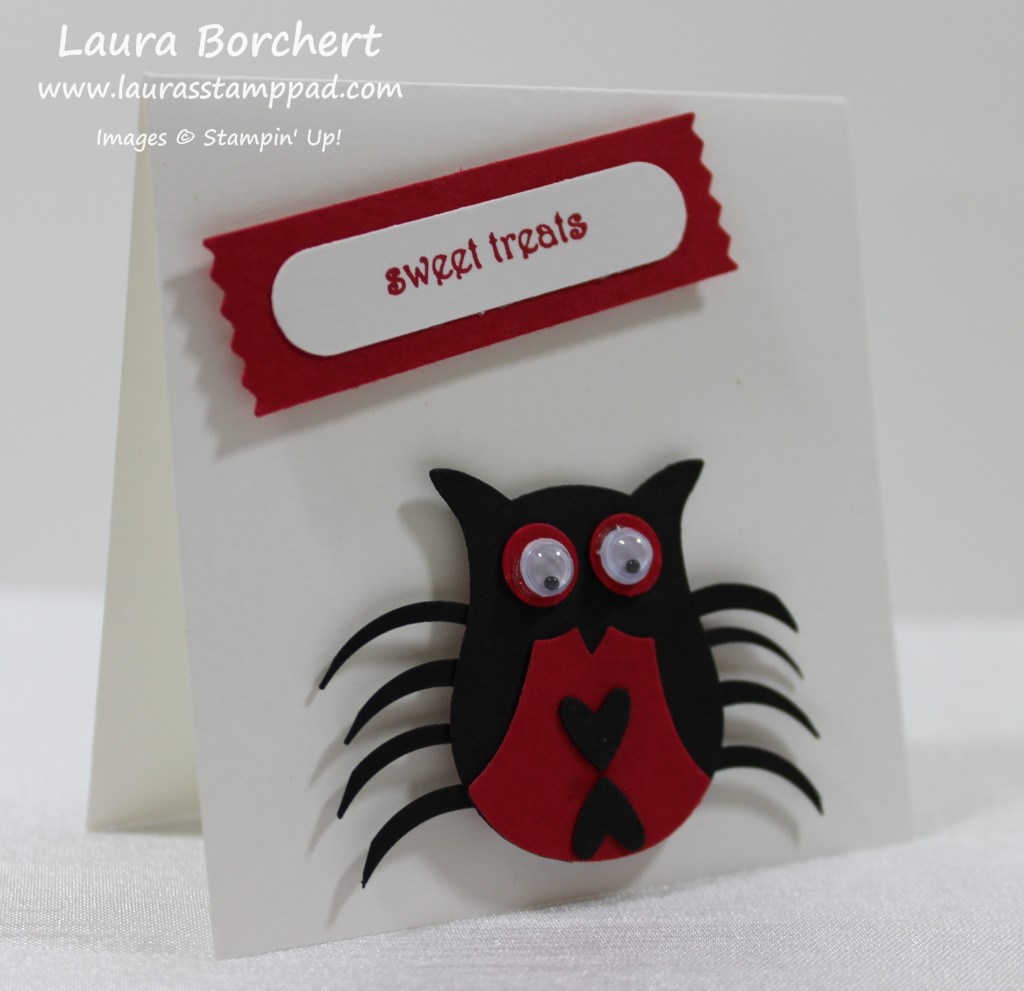
For the little spider, I punched out a Black Owl and snipped off his feet. Then I punched 8 slivers from the piece of paper that I punched his body out of and that is how I created the legs. Check out the Video Tutorial here (it is at the exact spot for you) to see how I did that. You will also need 2 black hearts, 2 small red circles and a red body front piece. What is that front piece called? Owl belly? It looks like a vest to me! 🙂 I glued the owl belly on at the bottom of the owl body and added the hearts with 2-Way Glue Pen but you could also use the NEW Fine Tip Glue Pen! For the legs, I put Snail Adhesive all over the back of the spider and then attached all of the legs. Once I was done I added another layer of cardstock over top to really hold them in place!! I added googly eyes to the red circles and added them to the body with Mini Glue Dots. The eyes really bring him to life! If you don’t have googly eyes, you could always do black centers and a white dot like Frankie up above!!! For the greeting, I used the Teeny Tiny Wishes Stamp Set and stamped Sweet Treats in Real Red. I punched it out with the Word Window Punch. I layered this onto a Real Red punched Washi Label Punch! Here is the Video Tutorial!

Aren’t they all adorable and the best part is you can use up your scraps!!!! Love it!!! Here is the complete Video Tutorial!! Be sure to give it a thumbs up if you liked it!!!

Let me know which one is your favorite in the comments below!

Happy Punchin’

~Laura