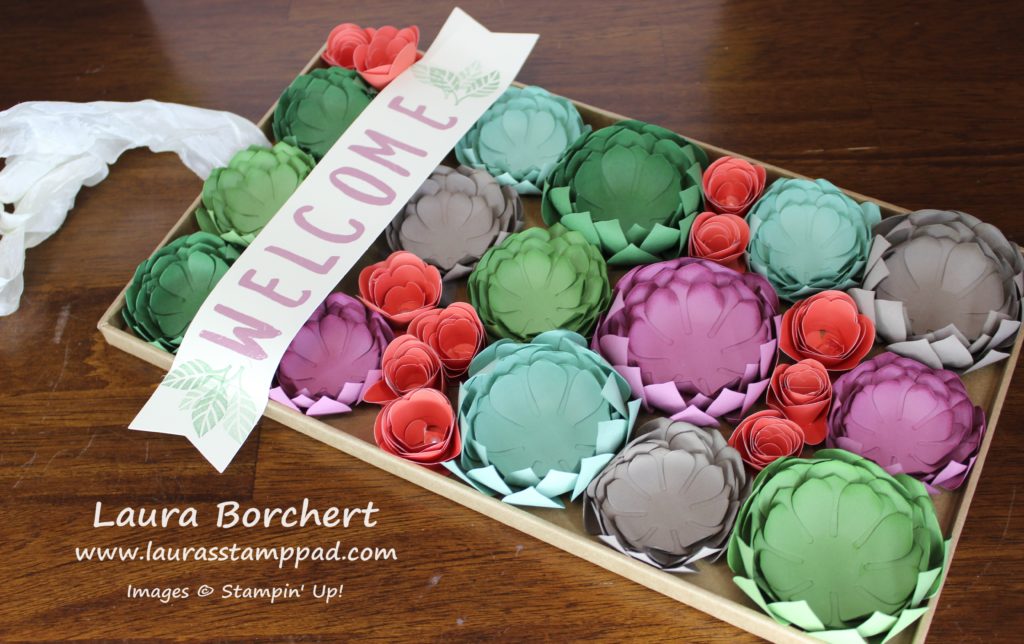
Succulents are so in right now! Little potted plants and fairy gardens are in all the stores and are just so darn cute! I love them! My Mom has them all over the house and they are precious! We got to pick out a few for her to pot up for us for Christmas! Can’t wait to pick it up!!! Eeeee Love them!!! (now let’s just hope I can keep them alive) If you are like me and love them but can’t keep plants alive, this is perfect for you!!!! The Vertical Garden Project Kit comes with all of the supplies to make this succulent garden! No watering necessary! 🙂
The kit comes with all of the flower die cut out for you. All you have to do is curl the petals with your Bone Folder for that nice rounded look and glue them together! I actually brushed my petals with a sponge dauber in the same color as the cardstock just for a little texture and color variation. I used the Fine Tip Glue Pen to adhere the layers together. The Kit Instructions say to use the Multipurpose Glue but I tend to use too much of that stuff! I love that I didn’t need to get out the hot glue gun for this entire kit. Me and the hot glue gun don’t get along very well and it takes like a million hours to complete because of the pick up, set it down routine.
I did use a Hot Glue Gun for the little roses. You will want to curl it around a pencil or your fingertip to get a base curl and then add the glue and press and hold. You actually want to put the glue on that “second to last” petal and then wrap the last petal up with the rest. Hopefully this photo helps!
Once you have all of your flowers done, you can hot glue them into the box. The box is super sturdy and not flimsy at all. I expected it to be a bit more flimsy but it doesn’t bend or curve at all. Be sure your spacing for your flowers fills box rather than placing them all in there and having leftover space (like me) or not having enough space for all of them! I just placed the greeting over the space that I had leftover. The ribbon that is included in the kit is super fun and frilly. It is easy to make a big floppy bow.
The kit comes with 2 banners which is fabulous for making mistakes or changing up the greeting!! The coordinating stamp set for this kit is Vertical Garden which has the words Welcome and Hello! I decided not to purchase the stamp set and thought I could add a greeting that I already had. I used the Layered Letters Alphabet Stamp Set for the letters and the leaves from Flourishing Phrases Stamp Set. I added a score line about an inch from the edges and added hot glue on the back side of the score line. I adhered that score line to the edge of the box! I super love how this turned out and I can’t wait to hang it on my front door closer to Spring! I wish that was tomorrow but unfortunately here in the midwest we have an ice storm coming so we must wait longer.
If you would like to see the contents of this kit in action, check out the unboxing video below or click here! Don’t forget to give it a thumbs up if you liked it and be sure to subscribe you are new!!
Happy Stampin’
~Laura


