Easy Shaker Card!!!

Posted on

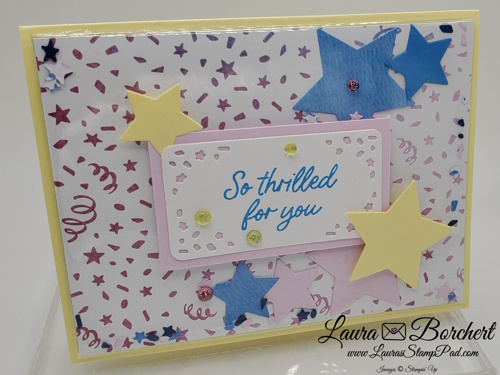
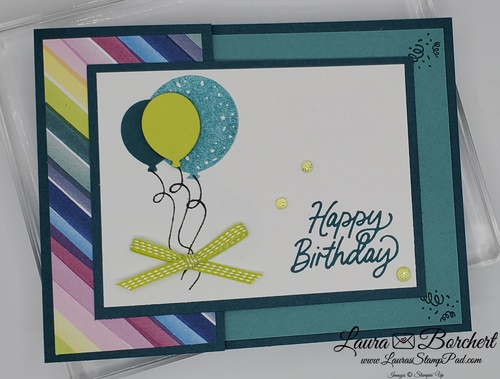
I will be honest and say that shaker cards scare me when it comes to making them……until I saw this new and fun Easy Shaker Card idea! No worries about leaking confetti or anything! It’s so simple to just fill the clear envelope and seal it up! Check out this fun tutorial!

Easy Shaker Card, www.LaurasStampPad.com

SUPPLIES & MEASUREMENTS:
Lemon Lolly Cardstock – 8 ½” x 5 ½”
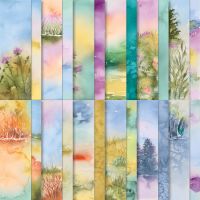
Bright & Beautiful Designer Paper – 4” x 5 ¼” and scrap for die cutting
Basic White Cardstock – 4” x 5 ¼” and scrap for die cutting
Bubble Bath Cardstock – 1 ¾” x 3” and scrap for die cutting
Lemon Lolly and Azure Afternoon scrap for die cutting
Clear Medium Envelope

CARD INSTRUCTIONS:

  1. Slide Designer Paper (4” x 5 ¼”) into the Clear Envelope. Die cut scrap Designer Paper with the confetti Die and add confetti to the envelope. Then, die cut stars in Lemon Lolly, Azure Afternoon, and Bubble Bath scrap paper to add to the envelope as well. Fill it as much or as little as you wish! Fold the envelope over to be 4” x 5 ¼” and secure with Tear And Tape. Adhere to the card front with Tear And Tape. This is your shaker card part! How easy was that?!?!
  2. Die cut out the label and decorate the front of the shaker card as you wish!

I hope you enjoyed this easy shaker card card tutorial! You can check out more cards using the Beautiful Balloons Bundle here or watch this video tutorial!

Happy Stampin’

~Laura

Product List
Balloon Celebration!!!

Posted on

Now is a great time to work on birthday cards. After all the weather has us inside more and everyone has a birthday so let’s have a balloon celebration. Balloons are great for birthday cards and graduation cards and baby cards! Really just any occasion, am I right?!?!

Balloon Celebration, www.LaurasStampPad.com

SUPPLIES & MEASUREMENTS:

  • Pretty Peacock Cardstock – 4 ¼” x 11”, cut at 3 ¼” along 11” and then score at 2 ¼”
  • Lost Lagoon Cardstock – 4” x 5 ¼”
  • Bright & Beautiful Designer Paper – 2” x 4”
  • Basic White Cardstock – 4” x 3”
  • Lemon Lime Twist scrap for die cutting
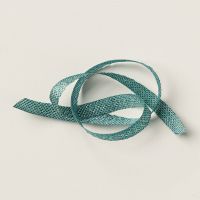
  • Lemon Lime Twist Ribbon – 8”

CARD INSTRUCTIONS:

Starting with a piece of Pretty Peacock Cardstock measuring 4 ¼” x 11”, cut at 3-1/4” along the 11” side. This piece (3 ¼” x 4 ¼”) will be your focal point layer. With the leftover piece (4 ¼” x 7 ¾”), score at 2 ¼” and fold! This is now your card base.

Adhere strip of Bright & Beautiful Designer Paper to the left hand flap (card front). Stamp Lost Lagoon Cardstock with greeting/decoration of your choice in Pretty Peacock Ink. Adhere to the inside of the card. Stamp balloons in Pretty Peacock Ink on the left side of the Basic White Cardstock. Next, stamp balloon strings in Memento Ink or feel free to draw them. Then stamp greeting in the lower right corner. Then adhere this layer to the Pretty Peacock Cardstock (3 ¼” x 4 ¼”). Add this to the card front by adhering only the left hand side to the designer paper. It should be centered.

Die cut scrap Lemon Lime Twist cardstock with the balloon die and add it with the others popped up with Stampin’ Dimensionals. Be sure there is a string for this one too! Tie ribbon into a bow and adhere to the card front over the balloon tails. Mini Glue Dots work well for adhering the bow!

I hope you enjoyed this Balloon Celebration card tutorial! You can check out more cards using the Beautiful Balloons Bundle here or watch this video tutorial!

Happy Stampin’

~Laura

Product List
Countryside Inn!!!

Posted on

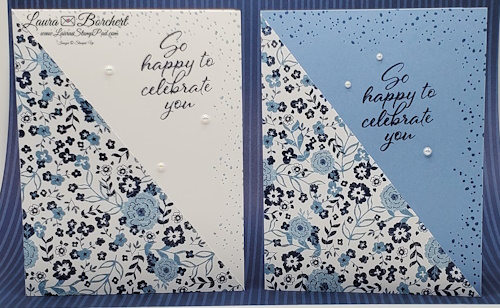
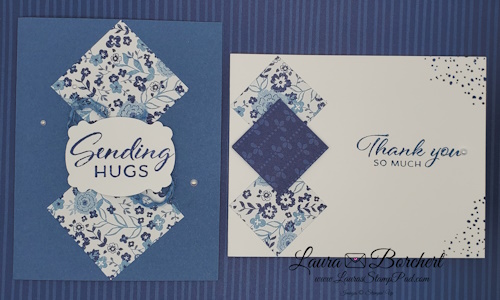
Give me all the shades of blue with the Countryside Inn Designer Series Paper!!! Balmy Blue, Night of Navy, Boho Blue and Misty Moonlight are all the colors in this paper pack! You can really have fun with this for quick and simple cards!!!

Countryside Inn Designer Paper, www.LaurasStampPad.com

To create these 2 cards, I used a 4-1/4″ x 5-1/2″ piece of the Designer Paper! If you wish to create lots of these cards, you can get 4 of these rectangles from a 12″ x 12″ sheet of Designer Paper with leftovers. The leftover pieces can be used on the inside of the cards or for additional cards!

SUPPLIES & MEASUREMENTS:

  • Thick Basic White Cardstock – 8 ½” x 5 ½”
  • Boho Blue Cardstock – 8 ½” x 5 ½”
  • Countryside Inn Designer Series Paper – 4 ¼” x 5 ½” cut diagonally in half

CARD INSTRUCTIONS:

Stamp greeting and decoration as you wish in the upper right-hand corner. I used Night of Navy Ink for all. For the card on the left side, I stamped off once for a lighter look for the dots. Adhere triangle of designer paper in the lower left corner. Depending on the pattern on your designer paper, this could be flipped or rotated around to create a landscape card or even your stamped greeting in a different corner. Embellish as desired. 

You can also check out more details about this card and others using the Countryside Inn Designer Paper in this video tutorial!

Want to recreate this card? Check out the supplies listed below! Click Add All To Cart for easy shopping too!

Happy Stampin’

~Laura

Product List
Simple Card Design!!!

Posted on

I am all for a simple card design that can be used with many different colors, patterns, stamp sets, etc. This one is just that!!! Pick your favorite colors and designer paper! Grab a stamp set and your favorite punch/die and let’s get started!

Simple Card Design Circle Sayings Stampin' Up, www.LaurasStampPad.com

I started with a Boho Blue card base. Next, I took a 1-1/2″ x 5-1/2″ strip of the 2023-2025 In Color Designer Paper and layered it onto Pebbled Path cardstock (1-3/4″ x 5-1/2″). This strip can be added in the middle of the card front or towards the bottom like mine above! Then I took the Circle Saying Stamp Set and the coordinating Circle Punch for the greeting! Add this to the card front with Stampin’ Dimensionals for some texture! To finish it off, I added some ribbon and dots!

Floral Card Insert, www.LaurasStampPad.com

For the inside of the card, I added a piece of Basic White measuring 4″ x 5-1/4″. On opposing corners, I stamped the floral image in Boho Blue! I love how the flowers frame this piece and add a little bit of decoration! Don’t forget to stamp your envelopes as well!

Check out the supplies listed below so you can recreate this card. I challenge you to at least try out this simple card design with your stamping supplies! It’s simple and fabulous!!!

Happy Stampin’

~Laura

Product List
Sunrise or Sunset?!?

Posted on

Which do you prefer – Sunrise or Sunset?!?!? Honestly I am a bit torn but if I had to pick just 1, it would be sunrise. I love that early morning crispness, the birds chirping, and that feeling of newness. It’s a brand new day to be amazing! I love that! Although I will say right now, I’m not happy to see sunrises because that means the kids woke me super early. LOL

Sunrise or Sunset with Circle Saying Stamp Set, www.LaurasStampPad.com

This beautiful card uses the Circle Sayings Stamp Set and coordinating Circle Punch! I am loving this bundle WAY more than I ever thought I would! It’s just super versatile and I love that birthday greeting! It is small and scrolly and fabulous!

I used Azure Afternoon for the card base as well as that color from the Brights Designer Series Paper Pack! Next, I layered this with a piece of Night of Navy cardstock! I thought about coloring all of the waves and everything but then I stopped at just the sun and I love it! What do you think?!?! For this card, I used Daffodil Delight Light Stampin’ Blends. If you want a bit brighter or more yellow/orange, go for the Daffodil Delight Dark Stampin’ Blends! Another option is to use both and really highlight the sun! 🙂

Check out the supply list below if you wish to recreate this card! It can be a sunrise or sunset….it’s all up to you!

Happy Stampin’

~Laura

Product List

Moody Mauve Monochromatic!

Posted on

Do you like to create with all the colors or stick with just 1?!? What do you think of my Moody Mauve monochromatic card?!? I’m a little bit of both! I love all the colors but sometimes I enjoy creating with just 1.

Moody Mauve Monochromatic Card, www.LaurasStampPad.com

Here I started with a Basic White card base! Then I took a piece of Moody Mauve cardstock (4″ x 5-1/4″) and added a layer of In Color Designer Paper to the lower half (3-3/4″ x 3″). There are so many fun prints in this designer paper pack that you can use for this card or even mix and match to add more color to your card! Next, I added a strip of Moody Mauve Textured Ribbon across the card where the designer paper ends. This sort of smooths out the line from designer paper to cardstock! Simply adhere the ends of the ribbon behind the cardstock and then add this layer to the card base.

For the focal point, I used the Circle Sayings Stamp Set and coordinating Circle Punch! Bundle & Save 10% when you purchase these together! Normally I stamp first and then punch it out but in this case I do the opposite. I punched out the Basic White cardstock first and then stamped the floral image near the bottom edge. Next, I stamped the greeting above that. I was afraid that if I stamped the 2 images and then punched it out they would be too far apart and not fit in the punch. Finally I added this to the card front with Stamping Dimensionals and finished it off with a Moody Mauve Dot! This completes my Moody Mauve monochromatic card!

What color would you use to create this card? Let me know in the comments below!

Happy Stampin’

~Laura

Product List

This Little Piggy!

Posted on

It’s always sad to see stamp sets retire and this little piggy set is one of them! It’s also on SUPER sale too!!! This Birthday Piggy Stamp Set is under $10 and the coordinating dies are under $15. WOOT WOOT for an amazing bundle! Click here to shop them!

This Little Piggy Stampin Up, www.LaurasStampPad.com

I used a lot of retiring products in this card actually so snatch them up before they are gone at the end of the month! The black and white polka dot paper is from the Perfectly Penciled Designer Series Paper Pack (sold out already). The Balmy Blue Textured Shimmer Paper (not retiring) is super fun to add to a card or any project. It has just a hint of shimmer to it so nothing majorly bling-y. It’s the texture that is super fun though. I love it!

For the focal point, I used the Scallop Contour Dies and stamped the piggy in Basic Gray Ink! I went for gray because it’s a bit softer than Memento Black. I really struggled with color options for my piggy. After coloring it I thought oh no, that’s awful but after it sat for a bit and the colors blended, I loved the look! For the piggy above, I used Petal Pink and Flirty Flamingo for the accents! For the piggy below, I used just Flirty Flamingo and while he’s PINK its super cute! So my advice for you is to just color and have fun and give it a bit to really blend and dry and then decide whether you like it or not.

Happy Birthday Piggy, www.LaurasStampPad.com

Here I created the same card but in landscape to fit this adorable piggy on a scooter! These adorable cards would be fun for any age really! I know I would giggle if I got this little piggy birthday card! What about you?!?

Be sure to snatch these retiring items before they are gone! Click here to shop all retiring products!

Happy Stampin’

~Laura

Product List

All The Layers!

Posted on

You all know I love bright colors and flowers! Here I created a card that is just that and I just want to make a million of them! It’s actually really easy and a fun way to use Designer Paper! Check it out with all the layers!

All the Layers Hues of Happiness, www.LaurasStampPad.com

Isn’t it just stunning?!?! Are you ready for all the measurements to layer together?!?!

Daffodil Delight – 4-1/4″ x 5-1/2″, Melon Mambo – 4″ x 5-1/4″, Daffodil Delight – 10″ x 3-3/4″, scored at 3″ and 8″. All of these pieces are layered onto each other! Then the Hues of Happiness Designer Series Paper measures 1-3/4″ x 3-1/2″ for the top piece and 2-3/4″ x 3-1/2″ for the bottom piece! You could use the same pattern for these 2 pieces or use coordinating pieces.

For the greeting, I used the amazing Something Fancy Stamp Set and coordinating dies. I love how the dies have layering labels! There is nothing better than a good label set and even better when they layer for a fabulous look like this!

Fun Fold Hues of Happiness, www.LaurasStampPad.com

This inside greeting is like the best ever. I love it so much because it’s so perfect to send to someone to brighten there day! This greeting could be stamped inside every card in my opinion!

I hope you enjoyed this card with all the layers! It’s so beautiful and easy to create! Try it out!

Happy Stampin’

~Laura


Gold Foil One Sheet Wonder!

Posted on

There is something about Gold and Navy that just looks stunning!!! Check out this fun Gold Foil One Sheet Wonder card that I created! It uses the NEW Naturally Gilded Specialty Designer Paper that came out this month!!!

Gold Foil One Sheet Wonder, www.LaurasStampPad.com

The Naturally Gilded Paper has sheets of Gold, Copper, and Silver! These prints are basic nature images which is perfect for any occasion! I paired it with the Something Fancy Stamp Set and Dies for a quick and simple card!

One Sheet Wonder

Now for the amazing One Sheet Wonder part where you can create 6 cards! Let me share the measurements so you can use every inch of the 12″ x 12″ Designer Paper. After all this paper is gorgeous and you don’t want to waste any. First, cut at 5-1/4″ creating a 5-1/4″ x 12″ strip. Then cut another strip at 5-1/4″. Now you should have 2 strips measuring 5-1/4″ x 12″ and 1 strip measuring 1-1/2″ x 12″. With both 5-1/4″ x 12″ strips, cut across every 4″ creating 6 pieces measuring 5-1/4″ x 4″. These will be used on the card fronts of 6 cards! Now with the 1-1/2″ x 12″, simply cut that in half at 3/4″ creating 2 strips of 3/4″ x 12″. Then cut across every 4″ creating 6 pieces measuring 3/4″ x 4″ which will be used inside the card!

One Sheet Wonder Something Fancy, www.LaurasStampPad.com

For the inside of this card, I brushed some Night of Navy Ink on the bottom of the Very Vanilla just to make the Designer Paper POP some more! I really love how it turned out!!! Of course, then I stamped the greeting crooked but it’s all good! 🙂 Check out all of the supplies below so you can recreate these gold foil one sheet wonder cards!

Happy Stampin’

~Laura

Product List

Thanks A Bunch!

Posted on

I DO NOT HAVE A GREEN THUMB! I am the youngest of 3 kids. My Mom is a major gardener in both flowers and vegetables and my oldest sister is the same! My brother does have a vegetable and then there is me with nothing. Thanks a bunch, apparently it all ran out by the time I came along! I can barely keep a house plant alive. I either over water it or forget about it. What I do enjoy doing is stamping with flowers and vegetables though if that counts?! 🙂

Thanks A Bunch Stampin' Up Sale-A-Bration Stamp Set - Laura's Stamp Pad

The Thanks A Bunch Sale-A-Bration Stamp Set has these adorable carrots and some super fun SPRING greetings! You all know how much I love Spring so I’m overjoyed. If you are new here, Welcome! My name is Laura and I LOVE SPRING!

For this card, I used Pumpkin Pie and Pear Pizzazz Ink! When stamping the carrots, I stamped off once with the full solid carrot piece in Pumpkin Pie Ink and then stamped it on the scalloped rectangle. Then I stamped full strength Pumpkin Pie for that detailed right side image. NOTE: I always find it easier to stamp the lighter image second because it is easier to line up an image through a lighter ink (stamped off ink). That would mean stamping the right side detailed image first in this case. The problem here is that spacing would be difficult! It is doable if you start with the center one and work your way out.

I have another tip for the carrot tops too! The solid leaf was stamped in Pear Pizzazz and stamped off. As for the other greenery piece, that one is stamped in full strength. I also felt that the stem was super long so I simply curved it around the clear block to shorten the image!

Check out the supplies listed below to recreate this fabulous card using the the Thanks A Bunch Stamp Set that you can get for FREE through Sale-A-Bration!

Happy Stampin’

~Laura

Product List