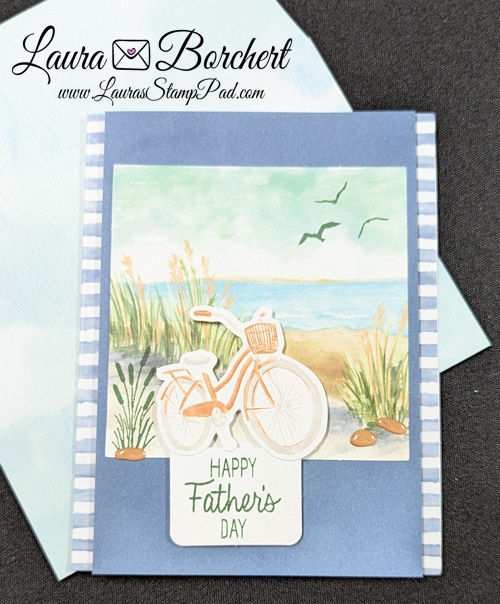
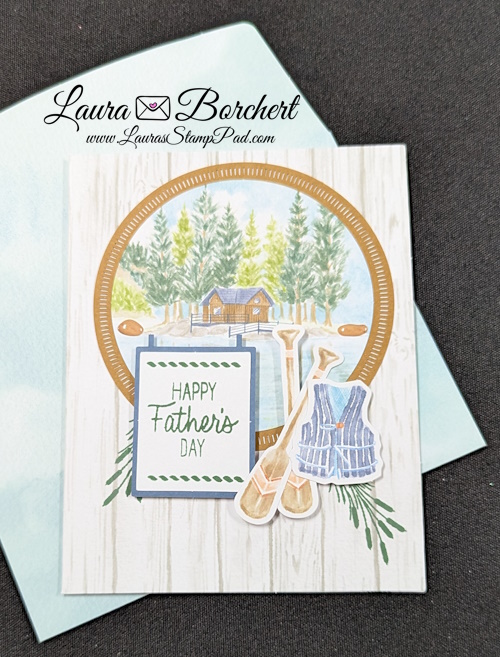
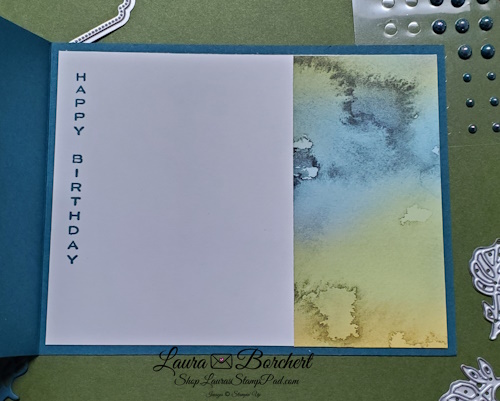
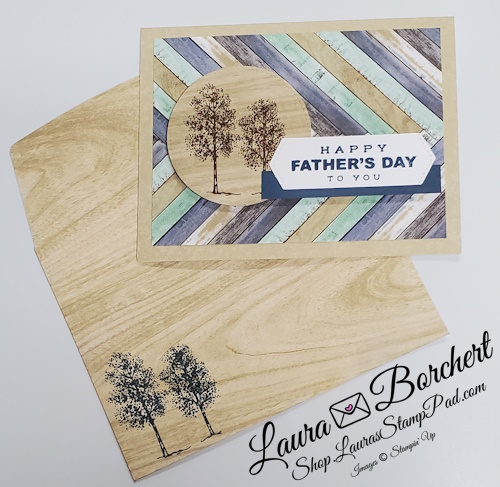
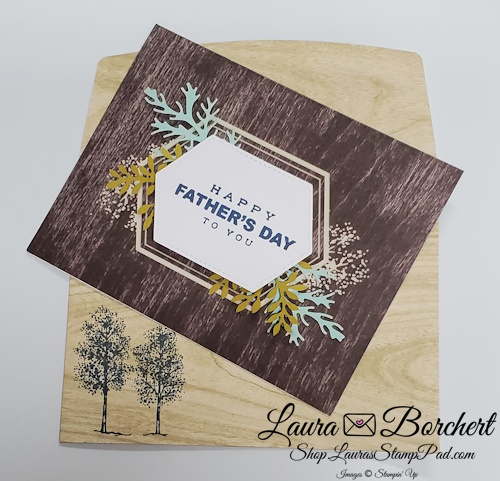
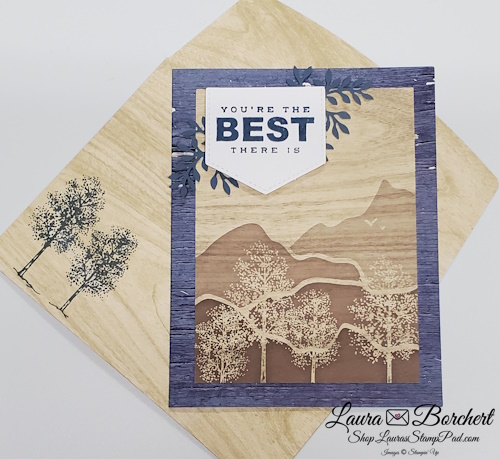
The April 2026 Paper Pumpkin – Lakeside Retreat was the perfect masculine card kit to get me ready for Father’s Day! I actually did all of my cards with that greeting! What about you?! Have you created your April Kit yet?!
What is Paper Pumpkin you ask?! It is a monthly subscription kit with a craft project and everything needed to create it all in a fabulous box. These kits are typically cards but sometimes include treat boxes, home decor, etc.
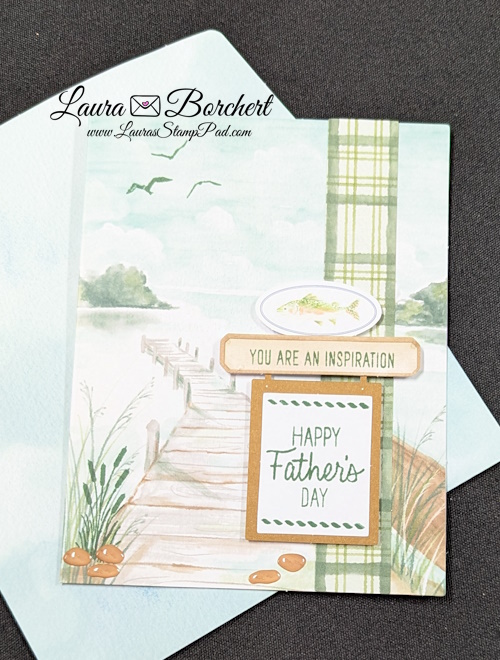
I felt like this kit had a lot of stamping and A LOT of Dimensional use! You all know how much I love Stampin’ Dimensionals but even I thought it was a bit much. LOL I actually mixed it up a bit and didn’t use them in spots the instructions said to use them and used them in other areas! For the card above, the instructions had dimensionals used for the plaid strip and I decided not to do that. Instead, I adhered that piece flat and used dimensionals on all of the other pieces! You can always do whatever you want with these kits – follow the instructions, modify as you wish, or even use the pieces with other cardstock and products to create something totally different! It’s all up to you and that’s the fabulous part about this!
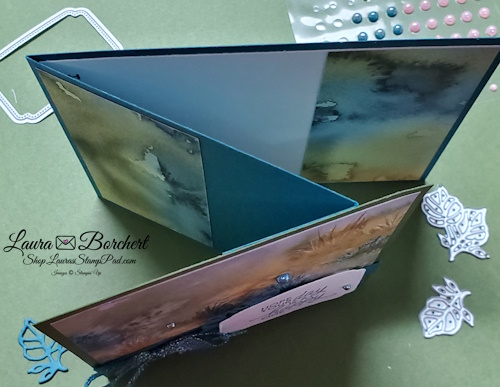
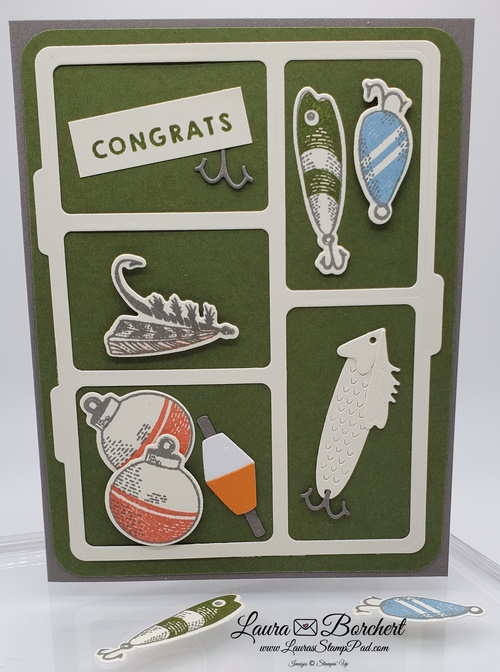
This last card was a bit tricky but trust the process. Stamping the cattails upside down and just on the card front was a bit scary. I did have to adjust the layers on top to make sure I didn’t cover up anything but it worked and turned out fabulous!!! I’m sooooo excited to have 6 cards for Father’s Day now! There are 9 total cards in the kit but my daughter who is 7 does the kit with me and she gets to create and keep 1 of each! I love it and hope we continue to do these kits together!
Did you enjoy this Lakeside Retreat Paper Pumpkin Kit?!? Don’t forget that you can purchase refills to make even more or have fun creating alternatives! Can’t wait for the May kit!!!!
Happy Stampin’
~Laura
Product List![Paper Pumpkin 12 Month Subscription [ 166818 ]](https://assets1.tamsnetwork.com/images/EC042017NF/166818s.jpg "Paper Pumpkin 12 Month Subscription [ 166818 ]")
![Paper Pumpkin 6 Month Subscription [ 166817 ]](https://assets1.tamsnetwork.com/images/EC042017NF/166817s.jpg "Paper Pumpkin 6 Month Subscription [ 166817 ]")
![Paper Pumpkin 3 Month Subscription [ 166816 ]](https://assets1.tamsnetwork.com/images/EC042017NF/166816s.jpg "Paper Pumpkin 3 Month Subscription [ 166816 ]")
![Paper Pumpkin Subscription [ 166815 ]](https://assets1.tamsnetwork.com/images/EC042017NF/166815s.jpg "Paper Pumpkin Subscription [ 166815 ]")
![Lakeside Retreat Paper Pumpkin Refill (English) [ 171464 ]](https://assets1.tamsnetwork.com/images/EC042017NF/171464s.jpg "Lakeside Retreat Paper Pumpkin Refill (English) [ 171464 ]")
![Fluttering Garden Paper Pumpkin Refill (English) [ 168629 ]](https://assets1.tamsnetwork.com/images/EC042017NF/168629s.jpg "Fluttering Garden Paper Pumpkin Refill (English) [ 168629 ]")
![Wonderful Scenes Dies (English) [ 168665 ]](https://assets1.tamsnetwork.com/images/EC042017NF/168665s.jpg "Wonderful Scenes Dies (English) [ 168665 ]")

![Loveliest Tree Cling Stamp Set (English) [ 163714 ]](https://assets1.tamsnetwork.com/images/EC042017NF/163714s.jpg "Loveliest Tree Cling Stamp Set (English) [ 163714 ]")
![Peaceful View Cling Stamp Set [ 165310 ]](https://assets1.tamsnetwork.com/images/EC042017NF/165310s.jpg "Peaceful View Cling Stamp Set [ 165310 ]")
![Forever Plaid 3 D Embossing Folder [ 164049 ]](https://assets1.tamsnetwork.com/images/EC042017NF/164049s.jpg "Forever Plaid 3 D Embossing Folder [ 164049 ]")
![1 7/8" (4.8 Cm) Circle Punch [ 165259 ]](https://assets1.tamsnetwork.com/images/EC042017NF/165259s.jpg "1 7/8\" (4.8 Cm) Circle Punch [ 165259 ]")
![Basic White 8 1/2" X 11" Cardstock [ 166780 ]](https://assets1.tamsnetwork.com/images/EC042017NF/166780s.jpg "Basic White 8 1/2\" X 11\" Cardstock [ 166780 ]")
![Cloud Cover 8 1/2" X 11" Cardstock [ 165621 ]](https://assets1.tamsnetwork.com/images/EC042017NF/165621s.jpg "Cloud Cover 8 1/2\" X 11\" Cardstock [ 165621 ]")
![Mossy Meadow 8-1/2" X 11" Cardstock [ 133676 ]](https://assets1.tamsnetwork.com/images/EC042017NF/133676s.jpg "Mossy Meadow 8-1/2\" X 11\" Cardstock [ 133676 ]")
![Pecan Pie 8 1/2" X 11" Cardstock [ 161717 ]](https://assets1.tamsnetwork.com/images/EC042017NF/161717s.jpg "Pecan Pie 8 1/2\" X 11\" Cardstock [ 161717 ]")
![Old Olive Classic Stampin' Pad [ 147090 ]](https://assets1.tamsnetwork.com/images/EC042017NF/147090s.jpg "Old Olive Classic Stampin' Pad [ 147090 ]")
![Pecan Pie Classic Stampin' Pad [ 161665 ]](https://assets1.tamsnetwork.com/images/EC042017NF/161665s.jpg "Pecan Pie Classic Stampin' Pad [ 161665 ]")
![2025–2027 In Color™ Flat Pearls [ 165192 ]](https://assets1.tamsnetwork.com/images/EC042017NF/165192s.jpg "2025–2027 In Color™ Flat Pearls [ 165192 ]")
![Stampin' Dimensionals [ 104430 ]](https://assets1.tamsnetwork.com/images/EC042017NF/104430s.jpg "Stampin' Dimensionals [ 104430 ]")


")

 Specialty Designer Series Paper")


")
 Designer Series Paper")

 Metallic Ribbon")


")


")


")


")
 Designer Series Paper")


