Technique Tuesday – Baby Wipe Technique!!!

Posted on

Happy Tuesday!!! You know what that means….I have a fabulous technique to share with you today! This is an oldy but a goody! It is so much fun and super simple too! The look comes out different each time but it is really fabulous!

Baby Wipe Flowers, www.LaurasStampPad.com

Amazing shades of pink and I’m in heaven!!!! Love love love it!!!! Now let’s get started!!!

SUPPLIES NEEDED: Baby Wipe, Re-Inkers, Cardstock

This is a really simple technique. You just take your baby wipe and fold it up. For this I folded it into quarters but if you are using a larger stamp, then you can fold it in half. Be sure it is at least 2 layers thick. If you are using a large stamp, just layer 2 wipes. Place them on a plate, plastic container, or clear block stamp case like I did!!! Then using your Re-Inkers you will squeeze dots all around in Melon Mambo and Pink Pirouette! I went with the lightest and darkest pinks for a strong contrast but you could use any colors you use! Now the baby wipe is your ink pad. It is as simple as that! Then I took the flower from the Crazy About You Stamp Set and used my new baby wipe ink pad to stamp flowers all over scrap Whisper White cardstock. Then I punched them out with the coordinating Flower Medallion Punch so that I could use them on my card. For my card, I have a Whisper White base (5-1/2″ x 5-1/2″) with Melon Mambo (5-1/4″ x 4″) on top! With another Whisper White piece measuring 3-3/4″ x 5″, I stamped the leaves from the Crazy About You Stamp Set in Wild Wasabi and added my greeting in Melon Mambo from the Lovely Amazing You Stamp Set! Now it is time to add your flowers! I placed one in the corner with Snail adhesive and trimmed off the excess. For the other 2 flowers, I added those with Stampin’ Dimensionals!!!! You know how I love those things!!! Beautiful!!! I just love it! I really think that purple would be fabulous too – really any color would be amazing!

Baby Wipe Gorgeous Grunge, www.LaurasStampPad.com

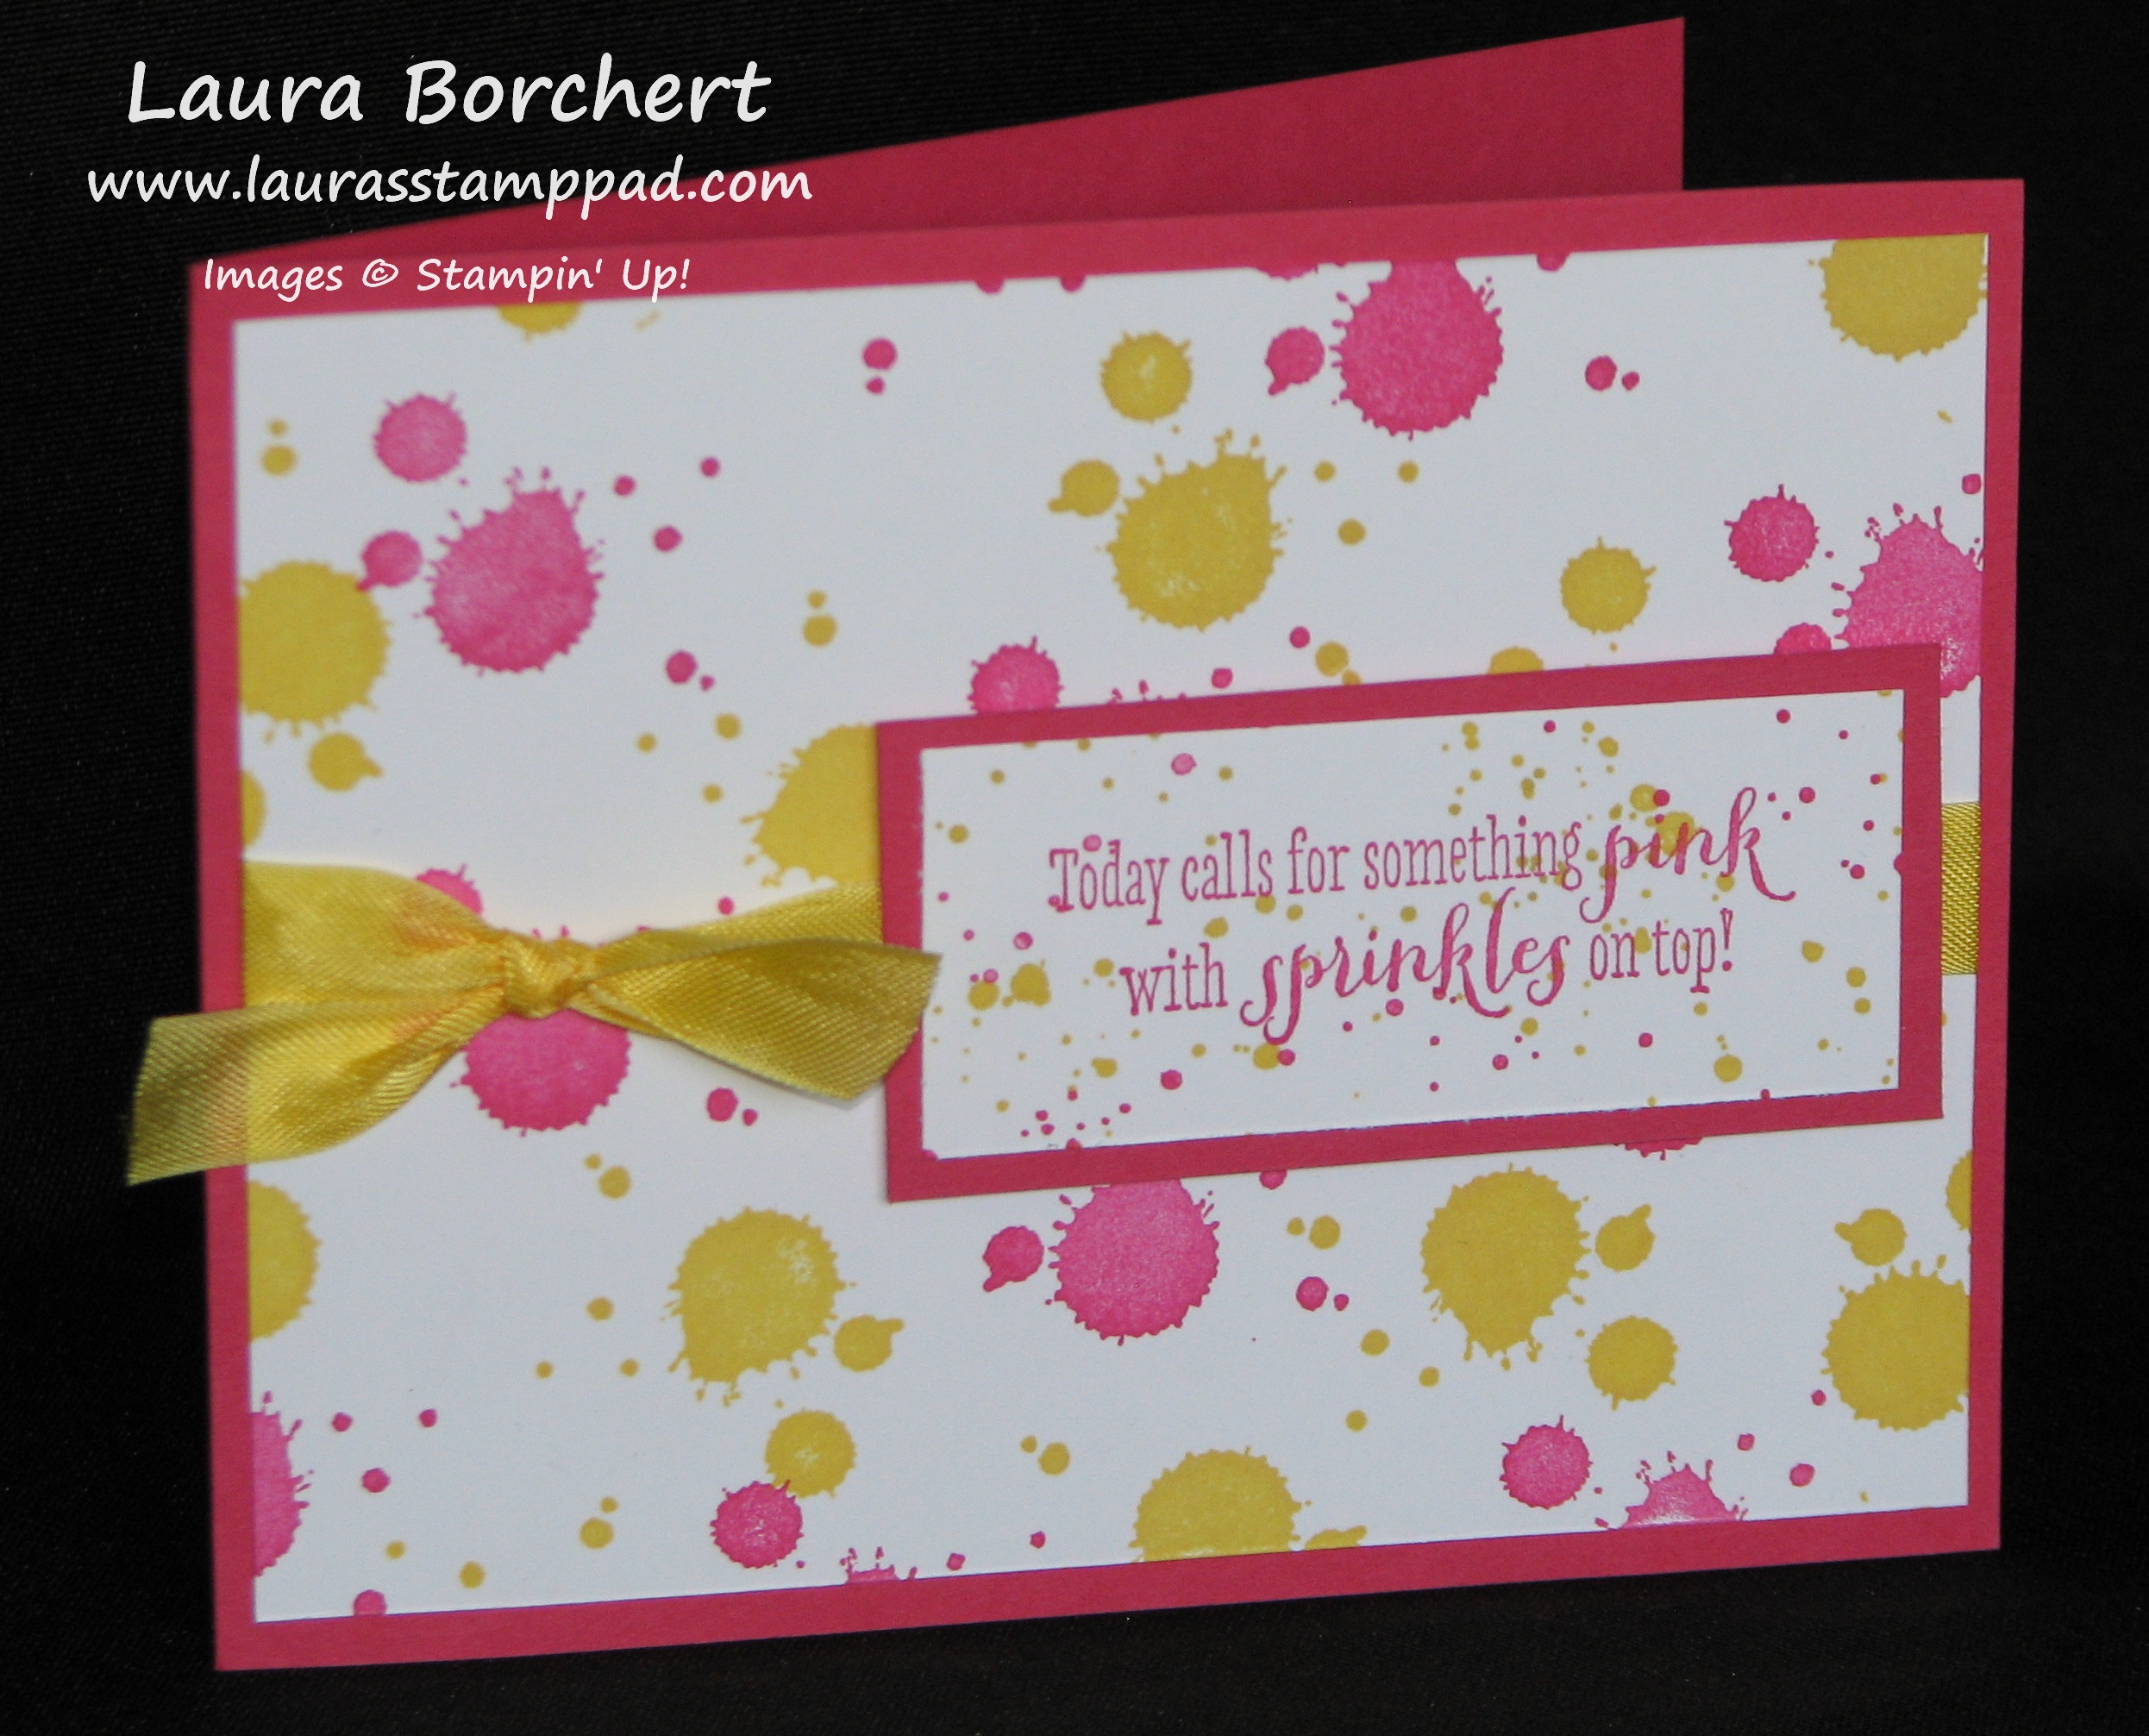
Here is another one that I created! For this card, I used Tempting Turquoise, Elegant Eggplant, and Daffodil Delight Re-Inkers on the Baby Wipe. I just placed drops all over the place. They bleed together and created that beauiful green! This is just a really fun technique! For this card, I used the Gorgeous Grunge Stamp Set and just stamped all over a piece of Whisper White cardstock (3″ x 5″). I layered that onto a piece of Tempting Turquoise (3-1/4″ x 5-1/4″) and added it to my card base of Daffodil Delight! I added some Daffodil Delight Seam Binding around the card and stamped the greeting at the bottom. This greeting is from the Remembering Your Birthday Stamp Set so the coordinating greeting is stamped on the inside! 🙂 I think this card scream Teens or Tweens. It’s like rockstar, punk rock looking…..or something? Am I alone here? Let me know in the comments below!!!

Also, I created a Video Tutorial for you on this cool technique and a few tips and tricks! Don’t forget to give it a thumbs up if you liked it!!!

Happy Stampin’

~Laura


Build A Bouquet!!!!

Posted on

Build A Bouquet, www.LaurasStampPad.com

Is this not the most gorgeous bouquet of flower you don’t have to water or worry about keeping alive??? While making this I didn’t know if it was really going to be worth it but now a month later, it was totally worth it! It has been sitting on our dining room table for over a month now and it sure brightens up the room. It helped me get through those gloomy winter days and even some of the gloomy spring days! I love it and the best part is it will never die!!!

You can make yours beautiful bouquet too!!! All you need is the Build-A-Bouquet Kit from the Occasions Mini Catalog, a hot glue gun and some pliers (totally recommend these). So now a little honesty from me….you all know I like to keep it real! This kit is not easy and takes lots of time but don’t let that scare you! I would highly recommend doing it with a friend or husband in my case because it will go much faster. I am not a hot glue gun pro at all and it seemed like all I did for hours on end was pick up the gun, dab it, set it down, attach flower, and then repeat 5 million times. Finally towards the end I enlisted my fabulous husband who was oh so excited (not) to help! He ran the glue gun while I attached and worked the flowers. This went soooo much better and I wish I would have done it sooner!

Paper Flower Bouquet, www.LaurasStampPad.com

You will also noticed in the catalog that there is a coordinating stamp set – Build A Bouquet Stamp Set! I’m not going to lie I got out the kit and read the instruction and was like Ops I didn’t get that stamp set…..so I improvised!!! For the big line image, I used my Hardwood Stamp Set and for the veins in the leaves I used my stem from the Lotus Blossom Sale-A-Bration Stamp Set. I also used the dots image from Gorgeous Grunge for the blue flowers. The other ones, I just omitted and think it turned out fabulous still!

Use the pliers for the wire bending, it is sooooo much easier! I was too lazy to go down to the basement and search for some so I just used my fingers. 1. It Hurts! 2. It doesn’t turn out the same! I took a few of the flowers to my parents house to work on while I was visiting since I really wanted to get this bouquet done by the next evening. I asked my mom if she knew where some pliers were and she immediately handed me some. I finished the flowers and was like “Oh wow, why did I not go get some a long time ago.” Ehh Lesson learned!

Build A Bouquet, www.LaurasStampPad.com

I didn’t care for how some of my flowers came out and I didn’t think it look all that great….maybe it was because I was tired and we always judge our own stuff so much more. After I put it all together I was in awe at how amazing it looked. I loved it and now a month later I still love it! I’m so glad I stuck with it and completed the kit! It was totally worth the the time and $25 I spent on it.

Have you purchased this kit? Have you completed it? What are your tips and tricks? How have you displayed your flowers? Leave me a comment down below!

Also, did you know that there is a Big Shot Die that makes all of these flowers? It is the Bouquet Bigz L Die! You can create as many flowers as you wish and in any color imaginable!!!!

Happy Stampin’

~Laura


Pink & Sprinkles!!!!

Posted on

Pink & Sprinkles, www.LaurasStampPad.com

This card is just fabulous because it uses the color PINK (Melon Mambo) and it mentions SPRINKLES (I love them)!  This was one of the cards that we made at my Birthday Celebration Class last week! I used my Gorgeous Grunge Stamp Set for the background with Melon Mambo & Daffodil Delight Ink. Then for the greeting I used my Remembering Your Birthday Stamp Set and another stamp from Gorgeous Grunge for those little dots in the background! Gorgeous Grunge makes some amazing backgrounds! You could even do this in boy colors like blues and greens, blue and gray, 2 shades of blue or green. I see some inspiration happening. 🙂 Okay, back to the card, I added some Daffodil Delight Seam Binding to give the card some POP and texture! This is a fairly simple simple card and the little greeting piece uses up scraps! Bonus!

For more samples using the Gorgeous Grunge Stamp Set, click here and here!

Happy Stampin’

~Laura


Make Your Own Background!!!

Posted on

We all love Designer Series Paper (especially when it is on sale Buy 3, Get 1 Free) but did you know that you can create your own Designer Series Paper? Using any stamp set really, you can create that perfect matching piece. If you want a Melon Mambo flower paper, take one of your favorite flower stamp sets and stamp all over Whisper White or even Melon Mambo cardstock. If you want random splotches, take your Gorgeous Grunge Stamp Set or a spritzer bottle if you like living on the edge! I am loving the Gorgeous Grunge Stamp Set because it has those splotch images that come out perfect every time. When I use my spritzers, it is not the same…..spray once – goes in the eye, spray twice – got the left corner, spray a third time – covered the whole piece in a wet mess. Am I the only person with this problem? My other problem is when it looks perfect, I think maybe a little more in that right corner and I go for it and then it becomes not so perfect. Ehh It’s handmade with love, not perfection! 🙂

Birthday Gorgeous Grunge, www.LaurasStampPad.com

Check out this amazing card. I used the itty bitty dotted stamp in Basic Gray on the background and then filled in with the larger splotch in Tempting Turquoise. My husband said I should have used another color (on the splotches or cardstock) rather than using just Tempting Turquoise. What do you think? Leave me a comment down below! Greeting was stamped from the Big New Stamp Set!

Birthday Gorgeous Grunge, www.LaurasStampPad.com

This card was created with the lines image from the Gorgeous Grunge Stamp Set (the one that looks like a car left black marks). The greeting was stamped from Age Awareness! With the lines, you can create an entire background or stamp vertical and horizontal and you will have a cool crisscross pattern! So many options for creating cool backgrounds! Which is your favorite?

Happy Stampin’!

~Laura


Thinking Outside the Box!

Posted on

I love taking a stamp set, tool, or embellishment and, thinking outside box, come up with a new way to use it! I looked at the Gorgeous Grunge Stamp Set and see some great background splotches and patterns but what else could I use this set for?

Candles Gorgeous Grunge, www.LaurasStampPad.com

I thought this card was super adorable and a great use for this stamp set! I used the long diagonal lines for the candles. Then taking one of the splotch stamps, I colored in a splotch with my markers for the fire. I used Crushed Curry for the center and then took my Pumpkin Pie Marker and went around the edge to get that dual color!

Grunge - candle

The 2 stamps that are boxed in red are the images that I used! TIP: Apply some take or some form of a mask to the rest of the splotches so that when you stamp down you don’t get marks from the images not used. No matter how much you try to clean it, there is still a chance it will stamp and mess up your creation! I’m coming from experience here. 🙂 Also, take your Black Marker and draw a little wick line for your candle as well. I did this step last so I knew how much to draw! This card could be modified for a boy or girl and I think it works great for those young and young at heart! For your little ones (probably 5 and under), you could stamp the amount of candles they will be turning! Super cute!!! Let me know of ways that you like to use this Gorgeous Grunge Stamp Set in the comments below- backgrounds, pops of color, etc? Also, be sure to check out this post and this post for other ideas on how to use this stamp set!

Happy Stampin’

~Laura


Black & White….with a POP of Color!!!!

Posted on

I love the simplicity of Black and White! It is just so bold and beautiful but then you add a POP of color and it is AMAZING!!!

Hexagon Gorgeous Grunge, www.LaurasStampPad.com

I started with a Black card base and added a layer of Bermuda Bay and then Whisper White! The splotches from Gorgeous Grunge Stamp Set made the perfect subtle background! Then I punched out a few hexagons in the Back to Black Designer Series Paper (don’t forget Buy 3, Get 1 Free Special)! As soon as I saw the Back to Black DSP, I knew I needed it…like NOW! Of course, I popped a few of the hexagons up with dimensionals to add some…well dimension…and texture! 😉 The greeting came from the Itty Bitty Banners Stamp Set and then I used my Banner Framelits to cut it out! Get them both with the Bundle and Save – Clear Bundle or Wood Bundle! I popped the greeting up with Dimensionals and then added a little Baker’s Twine bow! How fabulous is this card?

What color do you like to use with Black & White??? Leave me a comment down below!

Happy Stampin’

~Laura


Rainbow Paint!!!

Posted on

Rainbow Gorgeous Grunge, www.LaurasStampPad.com

Doesn’t this fabulous card look like paint splatters or a painter’s palette? Either way I love it because it is so bright and colorful! I created this card with the Gorgeous Grunge Stamp Set. I used the same image to each color – Real Red, Pumpkin Pie, Daffodil Delight, Old Olive, Pacific Point and Rich Razzleberry! I wish I had a good tip for you on the spacing but I don’t. Sorry! 🙂 Just be sure to fall off on the corners and do some overlapping! If all else fails, stop at Old Olive…or whichever color takes you to the edge of the paper. I stamped my greeting from the Remembering Your Birthday Stamp Set in Basic Black! Quick, Simple and perfect for any age of Birthday!

Be on the lookout for more cards using the Gorgeous Grunge Stamp Set!!! Hit Subscribe in the top right corner so you don’t miss out!

Happy Stampin’

~Laura


Going Grunge!!!!

Posted on

The Stamp Set – Gorgeous Grunge may not seem like a top pick for stamp sets….after all there aren’t any flowers in the set. BUT it is a fabulous stamp set for masculine cards (don’t we all need help there) and for amazing backgrounds. How many times do you wish you had a little splatter or random dots but when you get our your spritzers it spits all over or the splatters are too much? You get out a marker but that doesn’t look random enough. Well I have the solution for you and it comes out PERFECT every time!

Grunge Masculine Card, www.LaurasStampPad.com

See, look how fabulous those little dots/splatters are in the bottom corner. I just took the stamp and used Smoky Slate ink (same color as the cardstock) and stamped it down. Perfect! You can add it to the entire background or just in the spots you wish to have it! I love that and some of the dots are bigger and some smaller so you still get that splatter look…..it is just more controlled. 🙂 I used some of the NEW Moonlight Designer Series Paper Stack which features the new In-Colors Lost Lagoon and Hello Honey! The greeting I used came from the Remembering Your Birthday Stamp Set!

Grunge Masculine Card, www.LaurasStampPad.com

Now this card is my favorite! Something about the blue and grays together….or just the messiness of it….or something! I used Night of Navy and Smoky Slate but I think it would look great in any color….even pink and orange or yellow and red….oh the possibilities! Of course, pink and orange will take it out of the masculine category! 🙂 I used every single stamp in the Gorgeous Grunge Set for this card…the splatters, the lines, the dots, everything!

Gorgeous Grunge Stamp Set, www.LaurasStampPad.com

Some of the images I did in full strength ink and sometimes I stamped off once to get a lighter look! What do you think? Would you change anything or add anything? Leave me a comment down below! I would love to hear from you!

Happy Stampin’

~Laura