Happy Tuesday everyone!!! That means I have a fabulous technique to share with you today and that is a fabulous winter wreath!!! After my Halloween wreath, I realized I needed to come up with something for the Holidays. After some thought and time going by, I realized that a winter wreath would be better and last longer than a Christmas one. Now I can keep this one up until the end of February or so.
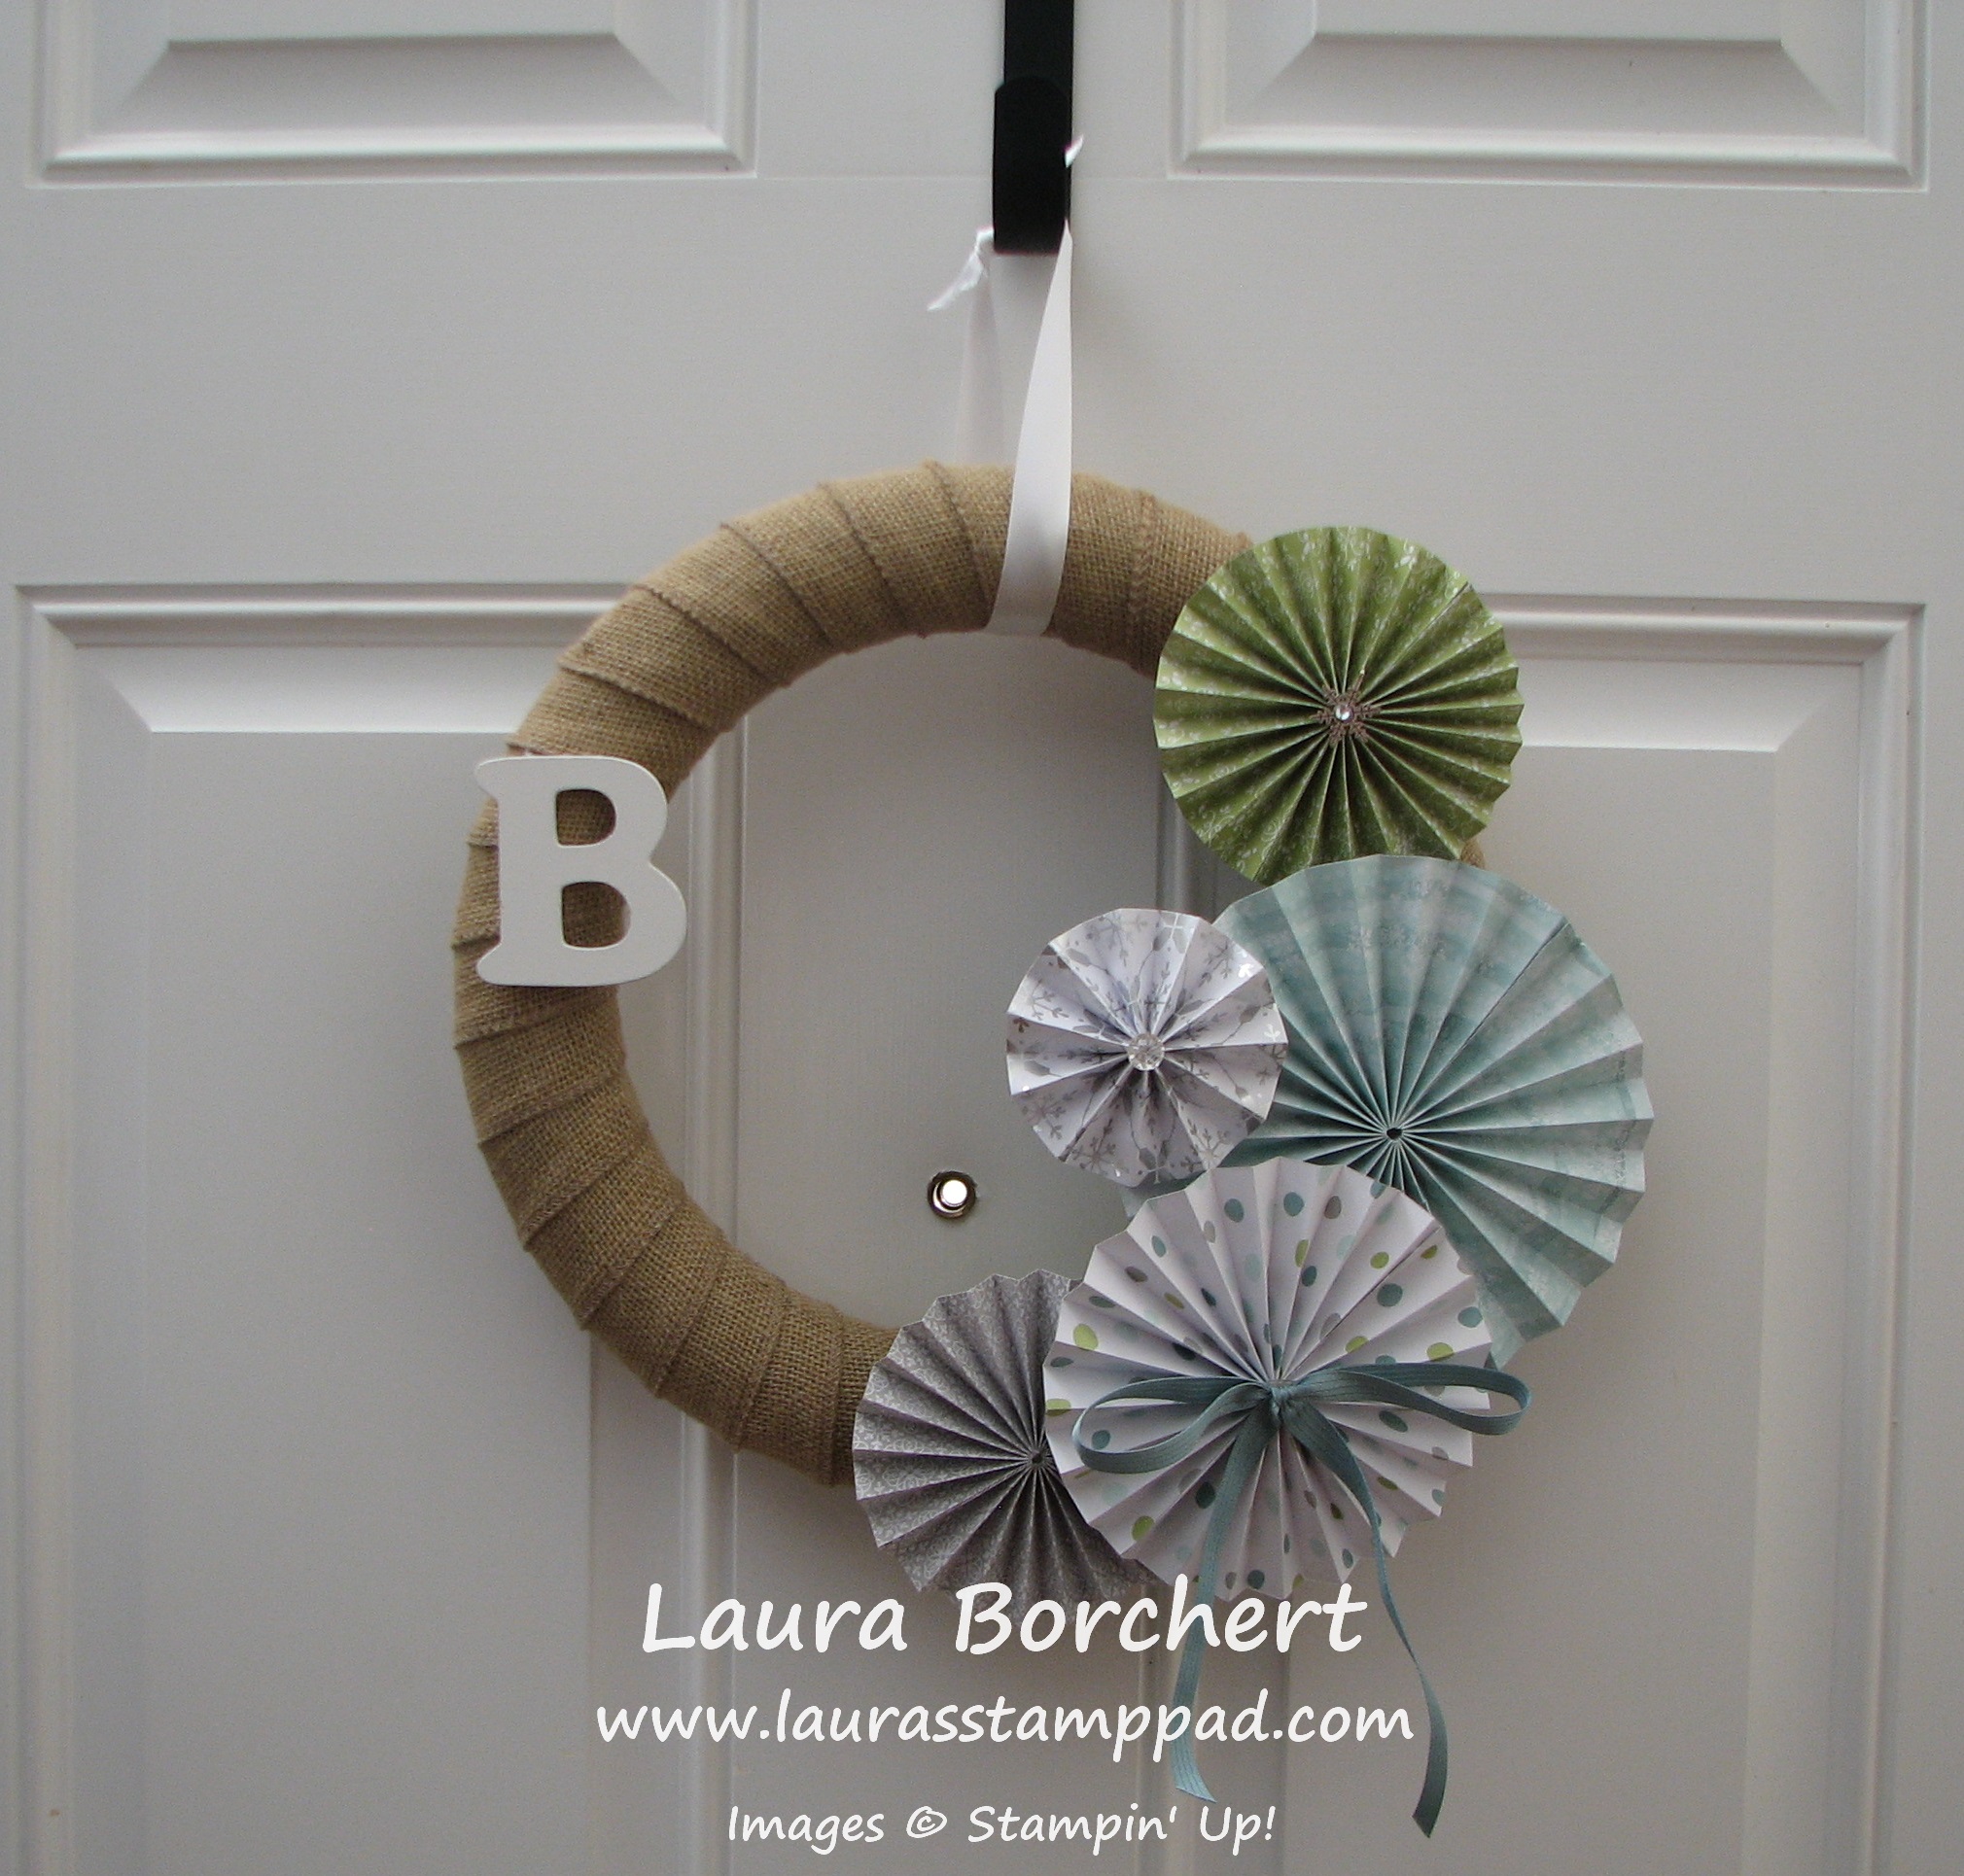
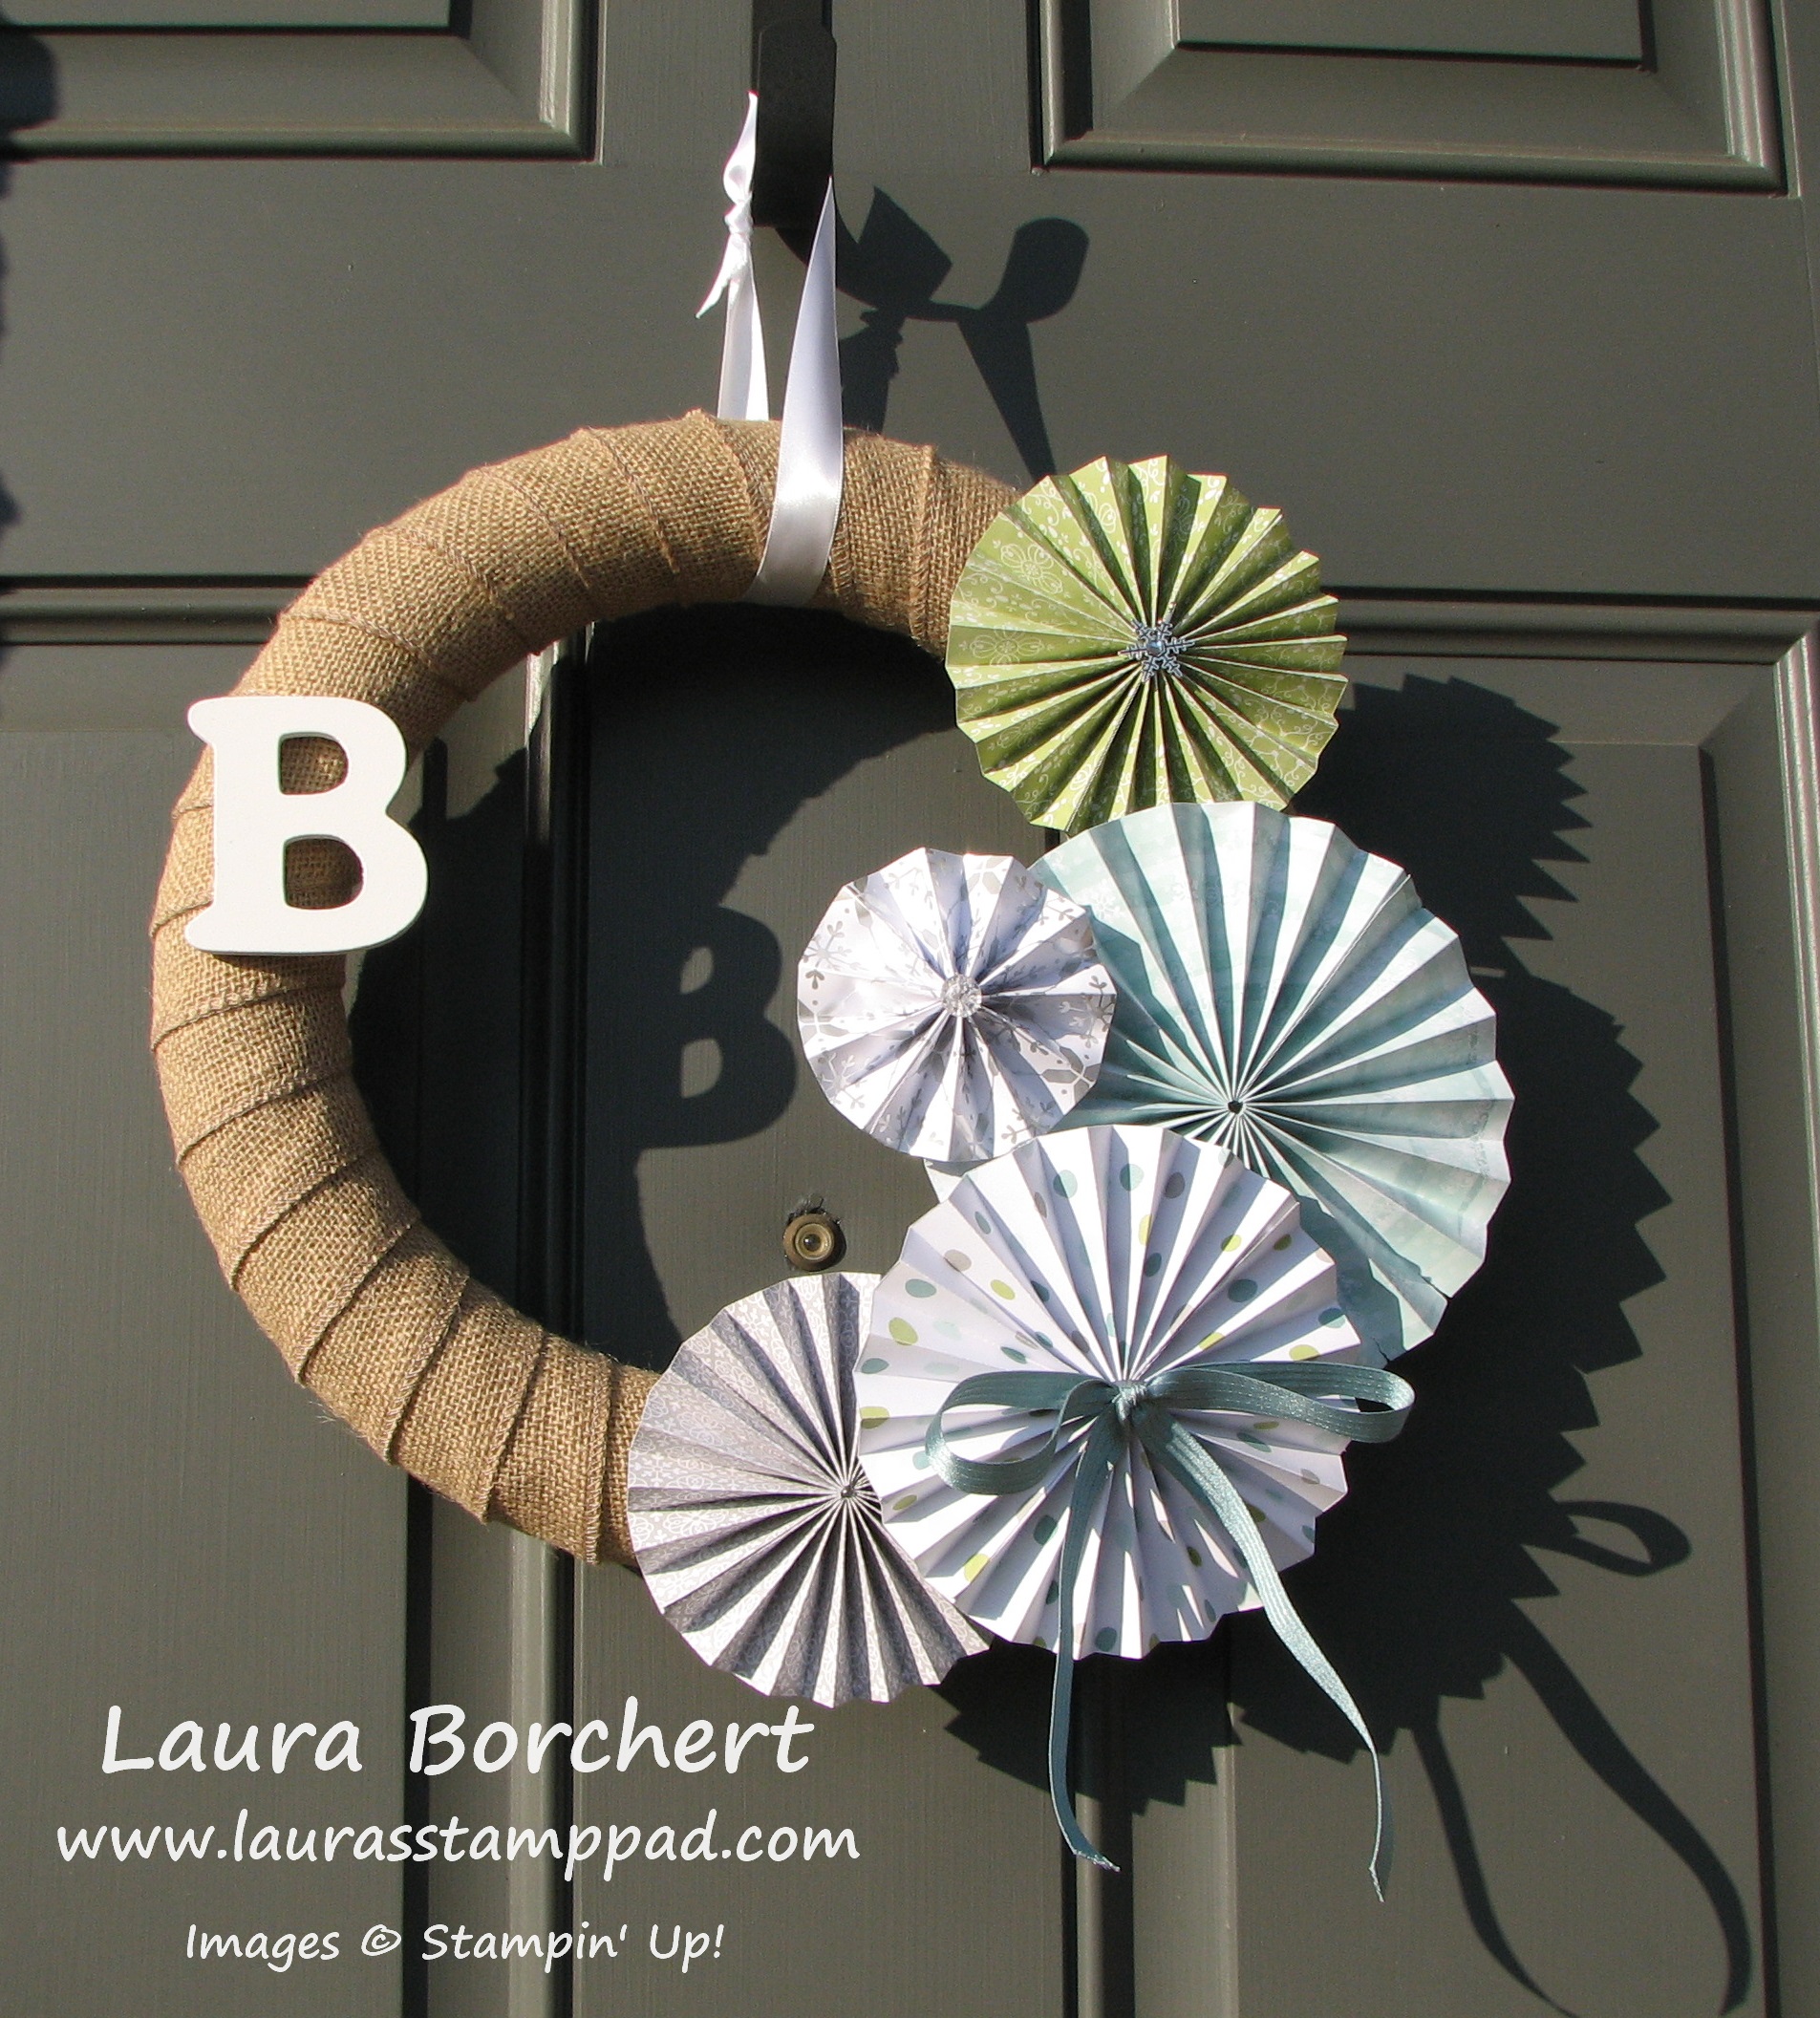
This is what I came up with!!!! What do you think?
SUPPLIES NEEDED: Foam Wreath, Burlap Ribbon, All is Calm Designer Series Paper, Rosette Designer Bigz XL Die, Big Shot, Hot Glue Gun, Embellishments (Ribbon, Buttons, All is Calm Snowflake Embellishments, Vintage Faceted Buttons)
I started by wrapping my foam wreath with the Burlap Ribbon! You can secure the ends with hot glue or straight pins. Be sure to go at an angle and make it just barely overlap or you won’t have enough to cover the wreath. Mine didn’t go all the way around but I covered up the missing portion with my rosettes. I did a class and some were able to cover all of it. You can always add more from another roll as well. Now it is time to make your Rosettes.
Smallest Rosette – One strip of Designer Series Paper: 1-1/2″ x 12″
2 Medium Rosettes – 2 strips of DSP for each Rosette: 2″ x 12″
Medium/Large Rosette – 2 strips of DSP: 2-1/2″ x 12″
Large Rosette – 2 strips of DSP: 3″ x 12″
Run each of the strips through your Big Shot with the Rosette Designer Die to get the folds for creating your Rosettes. Fold on the creases in a mountain/valley fold style. You can use your hot glue gun or some Sticky Strip to adhere the strips together and into a circle. To get your Rosette to stay down and not pop up, you will want to get our your Silicone Mat and put a glob of hot glue in the middle. Press your Rosette down onto the glob of glue right in the middle and hold while it cools. Once it is cool, it will pull right off and you are set. I did add a little scrap punched oval of cardstock to the back to cover up that glue spot and in case some of them still needed a little more stability. Once you are done with all of your rosettes, it is time to assemble them to your wreath. You can arrange them in the bottom right corner like I did or do 3 down there and 2 in the top left corner. You could even make lots of these rosettes and cover the entire wreath. Note: when assembling them to your wreath, place the glue on the wreath and place the rosette on top rather than putting the glue on the rosette. There were many times I would put it on the rosette and then realize that spot wasn’t even touching the wreath. 🙂 I added some Lost Lagoon Satin Stitched Ribbon, Vintage Faceted Buttons, and Snowflake Embellishments. You can always hang the wreath as is or you can add a ribbon loop. My ribbon loop was created with Whisper White Satin Ribbon. Love it!!!! Here it is on my front door!!!
Let me know if you want this wreath! I would love to see your creation! Also, do you create a wreath for Valentine’s Day or just skip to Spring? Leave me a comment down below!
Happy Stampin’
~Laura
This is lovely. Thank you for sharing at the Thursday Favorite Things blog hop. xo
Thank you!!! I’m glad you enjoyed it! ~Laura
Hi there! Stopping by from the Thursday Favorite Things Blog Hop at Katherine’s Corner. Love this wreath! We like to create wreaths for every season, too. Last winter I made one similar to your except that it was all in white, silver, and blue with paper snowflakes that I sprayed with glitter paint. I would love to share your wreath on our blog at Ruby for Women as our readers are always interested in fun new ways to celebrate each season. May I share one photo and a link back here to your blog? Thanks in advance! Nina @ Vintage Mama’s Cottage and Ruby for Women
http://www.rubyforwomen.com
Thank you for your kind words! I’m glad you enjoyed it! Of course, you may share my wreath! Have a fabulous day! ~Laura
Pingback: Spring Wreath!!! | Laura's Stamp Pad