Sparkling Snowflakes!!!

Posted on

Winter is here and that…..MIGHT…..mean snow! Who here loves snow?!?!? I’m not the biggest fan but you probably already knew that if you have been following me for even a hot minute! I do love stamping snow though with this Sparkling Snowflakes Set!!!
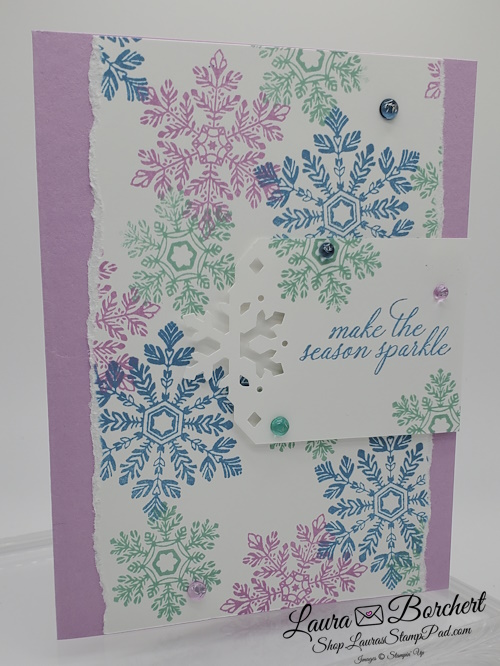
Sparking Snowflakes, www.LaurasStampPad.com

This card is so fabulous because it can be used as a Christmas Card or even an all occasion card throughout the winter season! Who wouldn’t love to get this on a cold January day to cheer them up?! I know I would and I don’t even like snow! The soft pastel colors brighten it up but you could also use your favorite color combination!

Card Tutorial

First, I started with a card base. Next, I took a piece of Basic White cardstock (5-1/2″ x 4″) and stamped snowflakes (from the Sparkling Snowflakes Stamp Set) in 3 sizes all over. Be sure to start with the biggest snowflake and work your way down, this way you have plenty of room for each size! The colors I used were Fresh Freesia, Boho Blue, and Pool Party! How crazy is it that Pool Party looks so green when stamped with the other colors!?!?! After stamping the snowflakes, I ripped both sides for some fun texture and then added this piece to the card front!

For the greeting, I punched a 2″ strip of Basic White cardstock with the coordinating Sparkling Snowflakes Tag Topper Punch! This gives such a fun and detailed look! Add the greeting and some more snowflakes and you are all set. I added this to the card front with Stampin’ Dimensionals! The final touch was adding some Tinsel Gems!
Winter Snowflake Card, www.LaurasStampPad.com

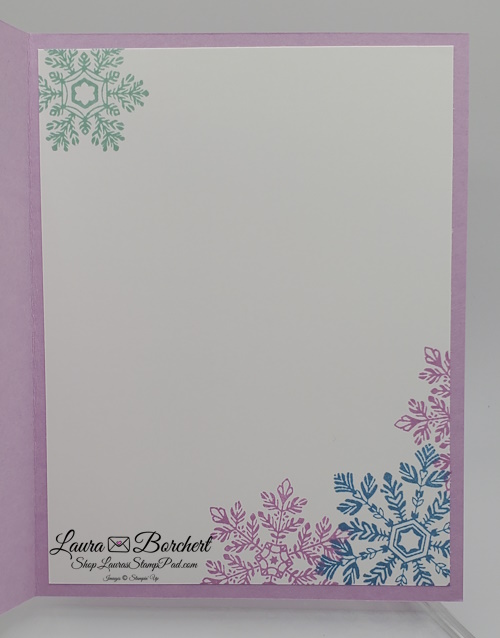
Of course, don’t forget to stamp some snowflakes on a piece of Basic White for the inside of the card. Decorating the envelope is also a fun added touch too! Getting happy mail in the mailbox with a fun stamped image is always exciting!

If you would like to make this Sparkling Snowflakes card, check out the supply list below!

Happy Stampin’

~Laura

Product List

Sunrise or Sunset?!?

Posted on

Which do you prefer – Sunrise or Sunset?!?!? Honestly I am a bit torn but if I had to pick just 1, it would be sunrise. I love that early morning crispness, the birds chirping, and that feeling of newness. It’s a brand new day to be amazing! I love that! Although I will say right now, I’m not happy to see sunrises because that means the kids woke me super early. LOL

Sunrise or Sunset with Circle Saying Stamp Set, www.LaurasStampPad.com

This beautiful card uses the Circle Sayings Stamp Set and coordinating Circle Punch! I am loving this bundle WAY more than I ever thought I would! It’s just super versatile and I love that birthday greeting! It is small and scrolly and fabulous!

I used Azure Afternoon for the card base as well as that color from the Brights Designer Series Paper Pack! Next, I layered this with a piece of Night of Navy cardstock! I thought about coloring all of the waves and everything but then I stopped at just the sun and I love it! What do you think?!?! For this card, I used Daffodil Delight Light Stampin’ Blends. If you want a bit brighter or more yellow/orange, go for the Daffodil Delight Dark Stampin’ Blends! Another option is to use both and really highlight the sun! ๐Ÿ™‚

Check out the supply list below if you wish to recreate this card! It can be a sunrise or sunset….it’s all up to you!

Happy Stampin’

~Laura

Product List

Little Monkey!!!

Posted on

Hi! I’m Laura and I LOVE monkeys. I like REALLY love them! When I was a kid, I said that was what I wanted to be when I grow up! The kids have lots of monkey toys because I’m trying to push it on them as well! LOL When I saw the Little Monkey Stamp Set and coordinating Punch, I knew I had to have it!!!

Little Monkey Stampin' Up Stamp Set, www.LaurasStampPad.com

Here is a quick and simple note card that I created! The hardest part of this card is the coloring and that’s not even hard! I would call it more like time consuming than hard. In the photo above, I stamped directly onto the Note Card. After coloring this one, I did see a bit of bleeding from the markers to the inside of the card. So for my event, I had everyone stamp onto a layer of Basic White and then add that to the Note Card either flat or with Stampin’ Dimensionals! The colors I used were Memento Black Ink, Early Espresso Ink, and Granny Apple Green Ink and Blends! Super cute and fun!

Stepped Up Little Monkey Card!

Monkey Builder Punch, www.LaurasStampPad.com

Here is another card I created! This one is stepped up a bit! I used Tahitian Tide as my card base and stamped the leaves all over in Granny Apple Green! Then I stamped the branch onto Granny Apple Green and ripped the top and bottom for a little bit of texture! Next, I stamped the greeting in Night of Navy and layered it onto Night of Navy cardstock for a little more POP! The monkey was stamped in Early Espresso onto Pecan Pie and then punched out!

Which card to you like more – the simple note card or the stepped up version?!? Let me know in the comments below!

If you love monkeys too, check out the supplies listed below!

Happy Stampin’

~Laura

Product List

Moody Mauve Monochromatic!

Posted on

Do you like to create with all the colors or stick with just 1?!? What do you think of my Moody Mauve monochromatic card?!? I’m a little bit of both! I love all the colors but sometimes I enjoy creating with just 1.

Moody Mauve Monochromatic Card, www.LaurasStampPad.com

Here I started with a Basic White card base! Then I took a piece of Moody Mauve cardstock (4″ x 5-1/4″) and added a layer of In Color Designer Paper to the lower half (3-3/4″ x 3″). There are so many fun prints in this designer paper pack that you can use for this card or even mix and match to add more color to your card! Next, I added a strip of Moody Mauve Textured Ribbon across the card where the designer paper ends. This sort of smooths out the line from designer paper to cardstock! Simply adhere the ends of the ribbon behind the cardstock and then add this layer to the card base.

For the focal point, I used the Circle Sayings Stamp Set and coordinating Circle Punch! Bundle & Save 10% when you purchase these together! Normally I stamp first and then punch it out but in this case I do the opposite. I punched out the Basic White cardstock first and then stamped the floral image near the bottom edge. Next, I stamped the greeting above that. I was afraid that if I stamped the 2 images and then punched it out they would be too far apart and not fit in the punch. Finally I added this to the card front with Stamping Dimensionals and finished it off with a Moody Mauve Dot! This completes my Moody Mauve monochromatic card!

What color would you use to create this card? Let me know in the comments below!

Happy Stampin’

~Laura

Product List

Simple, Moderate, or Stepped Up!

Posted on

There are so many different ways to create a card at any level! Whether you are new to stamping or have stamped for many years….whether you have tons of supplies or just a handful of items, you can create a beautiful card made with love. Which one are you – Simple, Moderate, or Stepped Up?!?! I’m all 3 but probably moderate the majority of the time!

Simple, Moderate, or Stepped Up Note Card & Envelopes, www.LaurasStampPad.com

I used Note Cards and Envelopes for these cards which are fun and easy because they come pre-scored and ready to go! They are also a notecard size (5″ x 3-1/2″) so it isn’t as big and daunting if you are just starting out! Note Cards & Envelopes come in a pack of 20 and there is a white or vanilla option!

Simple Homemade Note Card, www.LaurasStampPad.com

For this simple card, I took a piece of Basic White (4-3/4″ x 3-1/4″) to do all of the stamping on. This made it less intimating for making mistakes. If I made a mistake on the card front, that’s the entire card. This way it’s a fun layer to add texture to the card while also making it “safer”. LOL I just randomly stamped the grass in Parakeet Party Ink and then added the flowers on top. Some of the flowers are stamped with the big flower in the upper left and some in the lower center. This gives the field of flowers a random look where each flower isn’t the same! The flowers were stamped in Sweet Sorbet Ink and Orchid Oasis! Then I added a greeting and it was all set!

Step It Up!

Homemade Thank You Note Card, www.LaurasStampPad.com

To step up the card a bit, I simply added a layer of Sweet Sorbet cardstock to make it POP more! The Sweet Sorbet cardstock measures 3-1/4″ x 4-3/4″ and then the Basic White measures 3″ x 4-1/2″. To mix it up even more I created this card in landscape rather than portrait. There are so many fun ways to create this card! To step it up even more, you can punch out the greeting with your favorite label punch (or die cut) and add a little ribbon behind it or jewels! So many ways to decorate this card!

Which card style do you prefer – simple, moderate, or stepped up?!? It’s okay to be all 3 too!!! If you would like to recreate these cards, check out the supplies listed below! Don’t forget that it is Sale-A-Bration time right now so you can earn FREE goodies when you order $50!!! Woot Woot!

Happy Stampin’

~Laura

Product List

Artfully Layered!!!

Posted on

This card uses the Artfully Layered Stamp Set but I also feel like it is artfully layered in technique as well! So it is a double duty title!!!

Artfully Layered Stampin Up Stamp Set - www.LaurasStampPad.com

This card actually uses Just Jade which is one of the retired colors. I didn’t get a chance to share it before the color officially retired. I still wanted to share the sample because I think it is fabulous and I think it would look amazing in Calypso Coral, Night of Navy or even Bermuda Bay! What color do you think it would look amazing in?!?!

Card Instructions Using Artfully Layered Stamp Set:

I used a monochoromatic look so it uses minimal products! The card base measures 8-1/2″ x 5-1/2″ and then I cut 2 pieces of Basic White measuring 3-3/4″ x 5″. One of the pieces is for the front and one for the inside. Next, I took a 3-1/2″ x 4″ piece of Just Jade (same as the card base) and stamped the greenery piece from Artfully Layered all over it. Be sure to fall off the piece of cardstock so the pattern looks continuous. Then along the 4″ side, cut it into 1″ x 3-1/2″ strips! You will have 4 pieces now! I layered those onto the Basic White and added it to the card front! Now it’s time for a simple greeting also stamped in Just Jade Ink. Before adding the greeting to the card front, I die cut out a greenery piece in Basic White and attached it to the back of the greeting. This way I don’t have to add adhesive to the delicate die cut! Simple and fabulous for an everyday #happymail card!

I hope you try out this Artfully Layered card and let me know which color you use!!! Check out all of the supplies listed below for quick and easy shopping!

Also, be sure to join me at 10:00 a.m. CT on Facebook for my Stamp Garage Sale TODAY!!!

Happy Stampin’

~Laura

Product List

Heartfelt!!!

Posted on

You all know how much I love to do the heart hands on my videos! I am not really sure when or how that started but I love doing it. Somehow Claire has picked up on it and wants to do heart hands with me now and that just warms my heart. So sweet! When I saw that image in the Here Together Stamp Set, I had to have it just for that image and this heartfelt card!

Heartfelt Here Together Stamp Set, www.LaurasStampPad.com

I started with a Blushing Bride card base. Next I layered on a piece of the Sweet Talk Designer Series Paper. I love how the back side of this paper isn’t Valentine’s Day specific and can be used all year long for amazing cards like this one! Then I added a strip of Blushing Bride and Basic White. On the white, I stamped the greeting Heartfelt in Real Red Ink. This image is from the Lovely You Stamp Set. It’s so simple and fabulous and makes this card perfect for so many different occasions!

Here Together Stampin' Up Stamp Set, www.LaurasStampPad.com

For the focal point, I stamped the heart hands in Memento Black Ink onto scrap Basic White and punched it out with the smooth heart punch. Then I layered it onto a Real Red scallop heart punched piece. This I added to the card front with Stampin’ Dimensionals. I finished off the card with some Polished Dots. There are pale pink and clear ones and honestly either one would work for this card!

On the inside of the card, I added a piece of Basic White and a leftover strip of the Sweet Talk Designer Paper along the left side. I can’t wait to send this card out for some fun #Happymail. Would you use the Heartfelt greeting or a different one for this card? Let me know in the comments below!

If you wish to make this card, check out the supplies for easy shopping!

Happy Stampin’

~Laura

Product List

Gingerbread Cookies!!!

Posted on

Have you ever made Gingerbread Cookies!?!?! I actually have not….I’m not even sure I have eaten one! I do love the smell of those gingerbread/cinnamon ornaments that you make for the tree though!

Gingerbread Cookies Stampin' Up, www.LaurasStampPad.com

I have had so much fun with the Frosted Gingerbread Suite this year! It’s super cute and there is so much versatility with it! Check out other projects I made by clicking here!

For the card above, I used an Old Olive card base and then added lots of the Gingerbread and Peppermint Designer Series Paper. There is a strip of it, a square of it layered on Basic White, and the star and bell are die cut from it as well! See how amazing this paper is!?!?! For the greeting, I punched out some Basic White with the Everyday Label Punch! The greeting is stamped in Real Red Ink using the Frosted Gingerbread Stamp Set! The star and the greeting are popped up on Stampin’ Dimensionals for some texture! Then I added some Gingerbread & Peppermint Acrylic Shapes.

For the inside of the card, I stamped some of the lace trim for the same stamp set in Old Olive ink on the bottom. Then I added the greeting in Real Red ink.

Here is another quick and simple card I created using more paper from the Gingerbread & Peppermint Designer Series Paper! I used the dies to cut out the circles from the designer paper and used the Everyday Label Punch again for the greeting!

These cards are super fun and could use any print from the designer paper pack which makes it even more fun and versatile! I love it! If you would like to make these cards, check out the supplies listed below! Don’t forget these items are retiring soon!

Happy Stampin’

~Laura

Product List

A Grateful Heart!!

Posted on

Thanksgiving is a day to be thankful but I have a grateful heart every day! There are so many blessings in my life that I can’t even count them all. I find that on hard days it is best to think of as many as I can! One of them is Stampin’ Up and all of YOU!!! You mean so much to me and have allowed me to enjoy my job so much and stay home with my 2 little blessings too!

Grateful Heart Card, www.LaurasStampPad.com

On this crazy busy holiday week, I thought I would share a quick and simple card that you could whip up in 3 minutes or less!!! Time it!

I used a Blackberry Bliss card base. Next, I cut a piece of the Blackberry Beauty Designer Series Paper into a 4″ x 5-1/4″ piece and added it to the card front. Then for the greeting, I used the Double Oval Punch! I love that it’s a 2 in 1 punch for the perfect layered greeting! The scallop was punched in Gold Foil Paper. The smooth oval is Gray Granite! I stamped the greeting in Blackberry Bliss Ink. The greeting as well as the image on the inside of the card is from the Banner Year Stamp Set! The greeting was added to the card front with Stampin’ Dimensionals…of course!! ๐Ÿ™‚

Banner Year Stampin' Up Stamp Set, www.LaurasStampPad.com

Then for the inside of the card, I used Gray Granite cardstock (4″ x 5-1/4″) and stamped the corners! Just a little decoration to pull it all together! DONE!

How long did that take?!? You could even make it simpler by stamping the greeting on the front directly to the designer paper! Quick, simple, and made with love is perfect for this time of year! After all, it is the message and the thought that means the most!

Wishing you all a wonderful week! If you are feeling overwhelmed with the holidays and to-do lists, stop and think of your many blessings for just a minute with a grateful heart! Smile and power through! You got this! Remember that you mean so much to me and I appreciate you! HUGS!

Happy Stampin’

~Laura


Treat Yourself!!!

Posted on

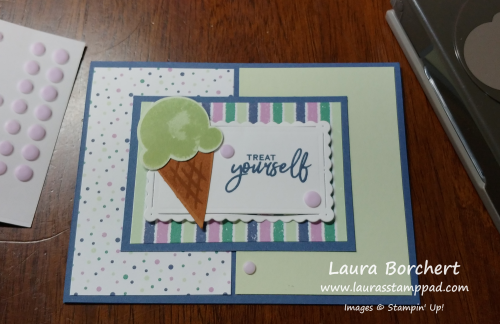
How often do you treat yourself to something wonderful?!?! It might be ice cream or a massage or a nap or maybe a new purse or outfit!!! No matter what it is be sure to do it as often as you can because you deserve it! ๐Ÿ™‚

Treat Yourself Stampin' Up!, www.LaurasStampPad.com

I wanted to create a card with the Sale-A-Bration Penguin Playmates Designer Series Paper that wasn’t winter or penguins! Here is what I came up with and I love it!!! This shows you that this paper can be used all year long for any occasion. I think this makes a fabulous birthday card but it would work for a baby card too!

I started with a Misty Moonlight card base and then added on some Penguin Playmates Designer Paper (2-1/2″ x 4″) and Soft Sea Foam cardstock (2-3/4″ x 4″)! If you would like an even split you could always do that but I sort of like the uneven look where the cardstock is bigger than the designer paper. Next, I layered together more Penguin Playmates Designer Paper (2-1/2″ x 3-1/2″) onto Misty Moonlight cardstock (2-3/4″ x 3-3/4″). This layer is added to the card front flat as well because I popped up the focal point with Stampin’ Dimensionals!

Using the Scalloped Contour Dies, I die cut a rectangle in Basic White and stamped the greeting in Misty Moonlight Ink. Then I stamped the ice cream from the Sweet Ice Cream Stamp Set in Soft Sea Foam onto Soft Sea Foam cardstock and punched it out with the coordinating punch! For the cone, I stamped off once with Cinnamon Cider and then onto the cardstock with the triangle. For the waffle cone lines, I went with full strength Cinnamon Cider! I added this to the left of the greeting on the card front and finished it off with some Playing with Patterns Resin Dots!

On the inside of the card, I took a piece of Basic White (4″ x 5-1/4″) and stamped Happy Birthday in Misty Moonlight Ink. Then I took some of the dots and stamped them in Soft Sea Foam. All of the images are from the Sweet Ice Cream Stamp Set! I love it!!! If you would like to recreate this card and don’t have all of the supplies, check them out below. Go on, treat yourself and have fun!!! Don’t forget it’s Sale-A-Bration still too so Stampin’ Up will treat you too!

Happy Stampin’

~Laura

Product List