Technique Tuesday – Window Sheet Wonder!!

Posted on

Happy Tuesday!!! That means I have a fabulous technique to share with you today!!! Please note that Blendabilities are no longer available with Stampin’ Up! because there was a product issue BUT I know many of you have them so I want to share these cool ideas with you!!!

Stripes on Window Sheet with Blendabilities, www.LaurasStampPad.com

How fabulous is this card? AND it is a man card!!! Love it!!!!!

For this card, I used a Whisper White card base of 4-1/4″ x 11″ and then I cut a piece of Window Sheet measuring 4″ x 5-1/4″. I took the Window Sheet and placed it over some of the diagonal design from the Birthday Bash Designer Series Paper. You could use any type of Designer Series Paper that is stripes, or polka dots or any other design! I used this as my template to dry the lines with the Night of Navy and Old Olive Blendabilities (alcohol markers)!!!! They aren’t straight and they aren’t perfect and some are thick and some are thin but it is okay! Made with love and not perfection! 🙂 I love it all messy though which is super different because I normally like clean, simple, and straight. I used Sticky Strip to adhere the Window Sheet along the top of the card and then covered it up with the Pear Pizzazz Cotton Ribbon. LOVE IT!!! The greeting is from the Remembering Your Birthday Stamp Set!!!

Window Sheet Dots with Blendabilities, www.LaurasStampPad.com

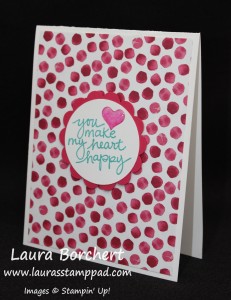
Here is another card that I created by coloring on a Window Sheet. For this one, I embossed the Window Sheet with the Polka Dot Embossing Folder! Then I colored some of the dots with the Coastal Cabana Blendabilities. I will say this only really works with certain images. I tried it with the flowers in the Lovely Lace Embossing Folder and it failed. The markers make streaks and swirls so the images need to be small and not detailed. I used the Crazy About You Stamp Set and coordinating Hello You Framelits (Bundle & Save) for the greeting. I added some Silver Glimmer Paper for a little bling on the bottom! Love it!!!

If you want to see this in action as well as other things you can color, check out my Video Tutorial here!

To see the cards with the Epoxy Stickers, click here! I hope you enjoyed these ways to use your Blendabilities and I hope Stampin’ Up comes out with a new alcohol marker because they are lots of fun!

Happy Stampin’

~Laura


Lovely, Amazing and Simple!!!

Posted on

Painted Blooms, Lovely Amazing You, Epoxy, www.LaurasStampPad.com

I love love love this card and the other sample posted below! They are simple cards and just stunning! You all know I love flowers and pinks and purples!!!! The Lovely Amazing You Stamp Set has THE best greetings ever!!!! This card was super simple to create. I started with a Whisper White card base (4-1/4″ x 11″) and added some Painted Blooms Designer Series Paper from the Occasions Mini Catalog (4″ x 5-1/4″). For the greeting, I used the 2-3/8″ Scallop Circle Punch to punch out some Crushed Curry. Then after stamping my greeting from the Lovely Amazing You Stamp Set in Blackberry Bliss, I punched it out with my 2″ Circle Punch! I adhered the circle to the scallop and then attached it to my card with Stampin’ Dimensionals. For the final touch, I got out my Itty Bitty Accents Epoxy Stickers and colored the little circle with my Rich Razzleberry Blendabilities (these are no longer available). You can also color them with a Sharpie Marker!!! Here is another sample!

Painted Blooms, Lovely Amazing You, Epoxy, www.LaurasStampPad.com

I added a little Bermuda Bay to this card with my greeting! I love that color so much right now as well! Simple and fabulous cards that you can create in no time at all!!! Which one is your favorite? Leave me a comment below!

Want to see this in action? Check out my video here!

Happy Stampin’

~Laura


Love is Kindness!!!

Posted on

Love is Kindness, www.LaurasStampPad.com

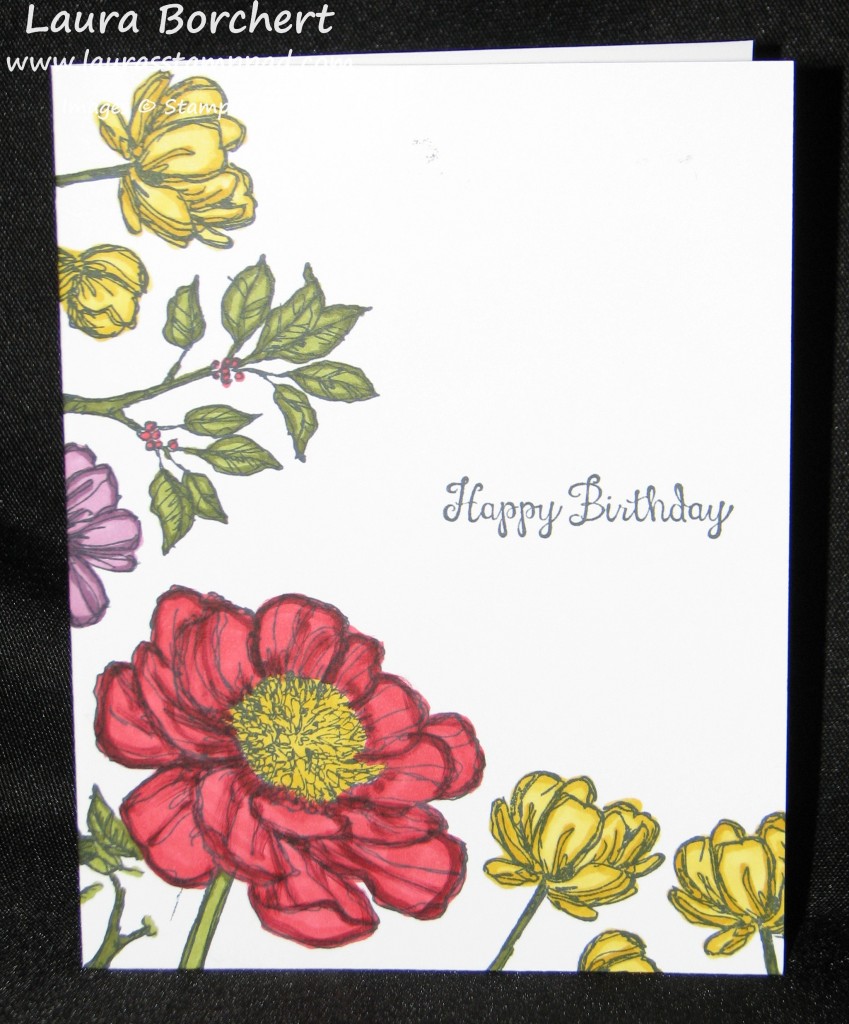
 I have been having sooooo much fun with the Love is Kindness Stamp Set! At first I thought the tulips were pretty but I didn’t think I needed the stamp, then I started to see more and more samples and I just had to have it. Come on you know that happens to you too, right? So I got the Love is Kindness Stamp Set which is a single stamp and so fabulous! I have played with it A LOT! I used my Blendabilities to color it. You can no longer purchase Blendabilities through Stampin’ Up due to a product issue they were having and they want to give the best product ever. I do know that many of you do have Blendabilities and these samples are fabulous so I just had to share with you!!! You could use your markers to color these fabulous tulips as well!

I colored my tulips in a few different ways to get a different look. Some of them I colored with the darkest marker on the outside edge of the tulip and some of them I colored with the darkest color in the middle. Then for the third option, I colored bottom up with the darkest on the bottom. Each one comes out different but each look amazing!!!! The card above uses the Calypso Coral and Old Olive Blendabilities as well as the Skin Tone Set.

Tulip Collage, www.LaurasStampPad.com

See how much fun I have had!!!! I used the Rich Razzleberry, Pink Pirouette, Daffodil Delight and Cherry Cobbler for all of the tulips above. You can see the far left was done with the dark in the middle and lighter on the outside. The purple and pink tulips were done with the darkest on the bottom. You can really see this in action in my Video Tutorial! Be sure to give it a thumbs up if you liked it!!!

Happy Stampin’

~Laura


My Two Favorites…

Posted on

…Flowers and the Work of Art Stamp Set!!! You can actually add in bright colors to all of that as well!!!! Love love love it!!!!

Flower Shop Work of Art, www.LaurasStampPad.com

This card just has so many fabulous parts to it! I started with a card base of Pear Pizzazz. Then I took a piece of Whisper White cardstock measuring 4″ x 5-1/4″ and stamped the zig zag image from the Work of Art Stamp Set on the bottom using my markers to color it in (Bermuda Bay, Crushed Curry, and Calypso Coral)! Then for the flowers, I stamped them from the Flower Shop Stamp Set in Memento Black Ink on some scrap Whisper White cardstock and colored them with my Blendabilities. I used the lightest color to come in the entire flower and then took either the Medium or Dark marker to color the lines in the flowers! You can use which ever you prefer based on how dark you want it. I like dark bold colors!!! 🙂 Then I punched the flowers out with the coordinating Pansy Punch! I added some leaves which were punched in Pear Pizzazz with the Bird Builder Punch. The blue flower is flat on the card and the other two are adhered with Stampin’ Dimensionals! I finished it off with the greeting stamped from the Work of Art Stamp Set and some pearls on the flowers! I love it because of the amazing colors, springy feel, flowers, pearls and some of my favorite stamp sets!

If you would like to see more samples using the Work of Art Stamp Set, click here! To see some samples using the Flower Shop Stamp Set and Blendabilities, click here and here!

Happy Stampin’

~Laura


Blooming with Hope!!!

Posted on

Blooming with Hope, www.LaurasStampPad.com

Simple and Beautiful! Notice I did not say quick…hehe! It could be quick if you are fast at coloring! This card is very simple though as I just took a half sheet of Whisper White cardstock, folded it in half and stamped various flowers from the Blooming with Hope Hostess Stamp Set with my Memento Ink Pad! Then I got started coloring with my Blendabilities! I will say it now….I am NOT an Artist. That was my Grandfather who could paint with any tool and he was amazing!!! This is the latest painting that I have gotten and plan on having it framed! 🙂

Grandpa

I don’t think I have the patience for being an artist like this but I do enjoy stamping and coloring with my Blendabilities. I really love using stamp sets that make shading on the image super easy. Take a look at the flowers in the card above and you will see those extra lines….I use those lines as my guide. I usually color in the flower with the lightest Blendabilities Marker and then go back with either the Medium or Dark Marker and color around the edges and in those extra lines on the image. Works for me! If you want to see more on how to use your Blendabilities, you can check out this video that Stampin’ Up created! If you want to see some more samples using Blendabilities, check out this one and this one!

Do you enjoy coloring? Do you prefer to color with stamped images like this one or do your own shading? Leave me a comment down below. Also, if you have any tips or tricks, I would love to hear them!!!

Happy Stampin’

~Laura


You Light Up My Life!!!

Posted on

one tag fits all, www.LaurasStampPad.com

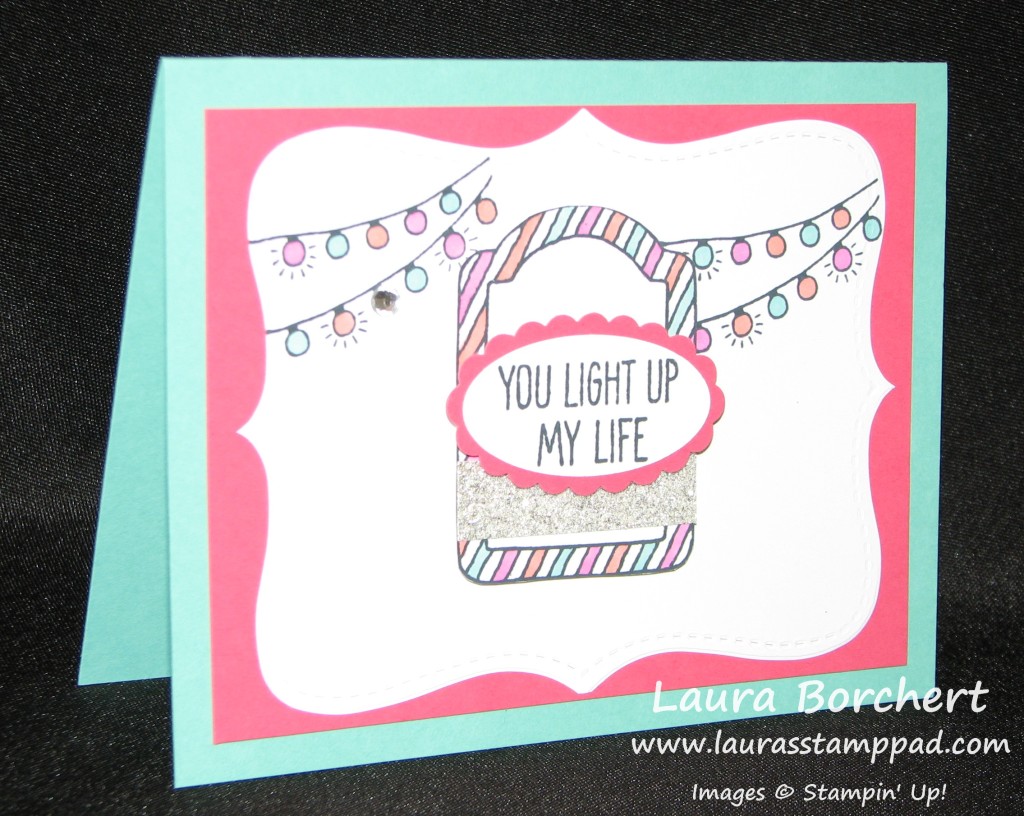
This card LIGHTS UP MY LIFE! I love the bright colors! I love the bling with Glimmer Paper and Rhinestones! I love the greeting! This is sure to brighten anyone’s day! I started with a card base of Coastal Cabana and layered a piece of Strawberry Slush measuring 3-3/4″ x 5″! I used my Top Note Die and Big Shot to cut out the Whisper White piece. Using the lights from the One Tag Fits All Stamp Set, I inked JUST the lights in Memento Ink and stamped them in the corners. The easiest way to do this is to turn over your stamp and ink it up with the ink pad. You can see where you are inking better. TIP: Then to be safe, place a post-it note or scrap piece of paper over the words before stamping. I do this just in case it is still a little dirty because I don’t want that light image coming through on my project and if some ink got on there while inking up the lights! Come on, I’m not the only one that has made this mistake, am I? Well it won’t happen to all of you because of the tip I gave you! 🙂 I colored in the lights with my Blendabilities – Coastal Cabana, Calypso Coral, and Melon Mambo! I added a Rhinestone to one of the lights! Now for the tag and greeting! I stamped the greeting in Memento onto a scrap piece of Whisper White and punched it out with the Large Oval Punch! I layered this onto a piece of Strawberry Slush punched out with the Scallop Oval Punch! I stamped the Tag image from the One Tag Fits All Stamp Set onto a piece of Whisper White cardstock and colored it with my Blendabilities – Coastal Cabana, Calypso Coral, and Melon Mambo! I fussy cut the tag because I wanted the full image and if you use the Note Tag Punch, it is slightly smaller! I attached the tag to my card with Stampin’ Dimensionals. I added a small strip of Silver Glimmer Paper…use up those scraps! 🙂 Then I used Stampin’ Dimensionals to add the oval greeting as well! LOVE IT!!! You can see this card and others using this stamp set in my Video Tutorial here!

What color combination brightens your day? Let me know in the comments below!

Happy Stampin’

~Laura


Birthday Bash!!!!

Posted on

I am loving the Birthday Bash Designer Series Paper in the Occasions Mini Catalog! Remember my love for the Birthday Basics Designer Series Paper and how sad I was when it retired…..well Stampin’ Up has brought back it’s cousin!!!! WOOT WOOT!

Birthday Bash, Big Day, www.LaurasStampPad.com

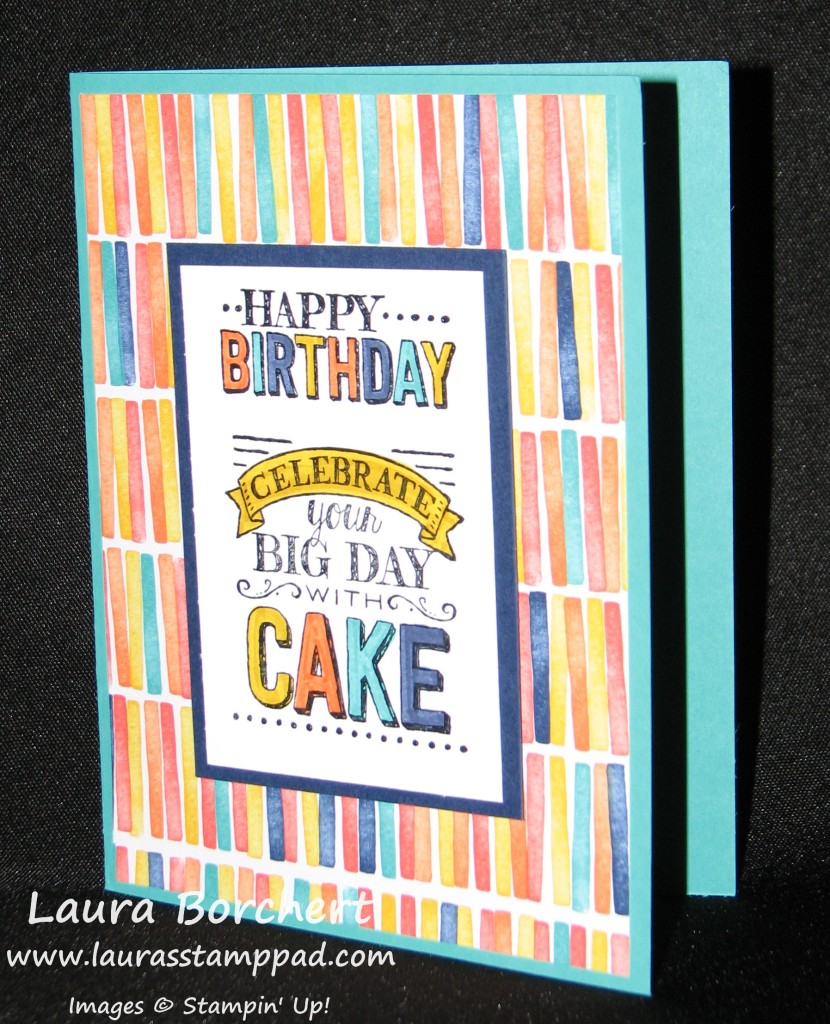
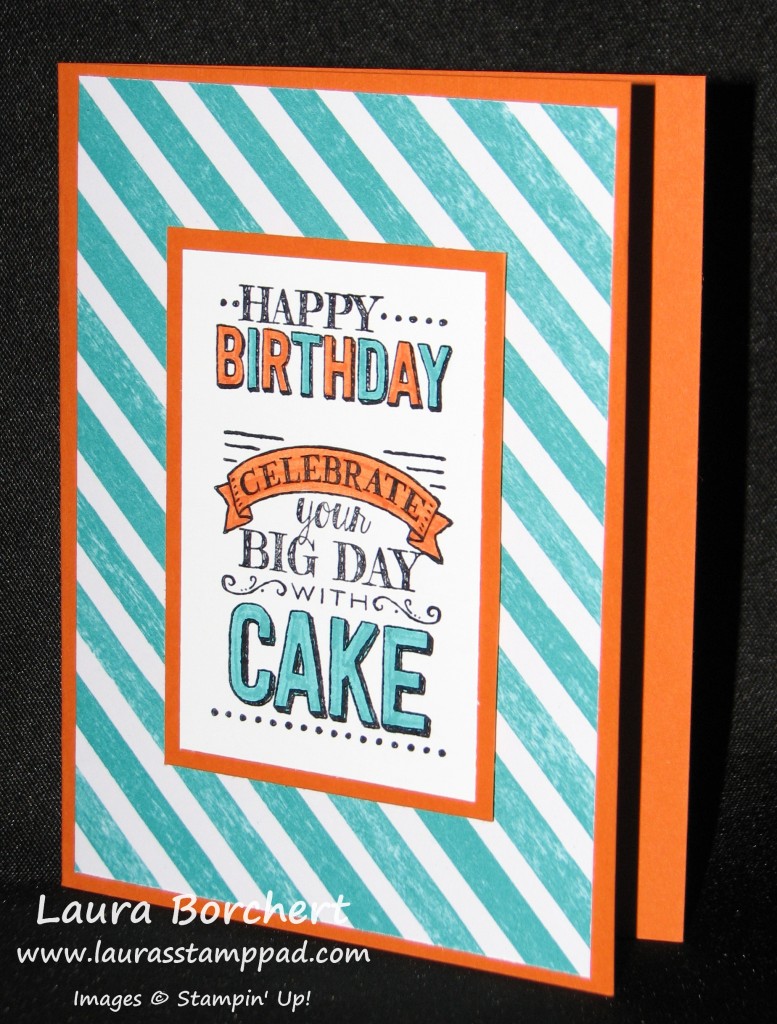
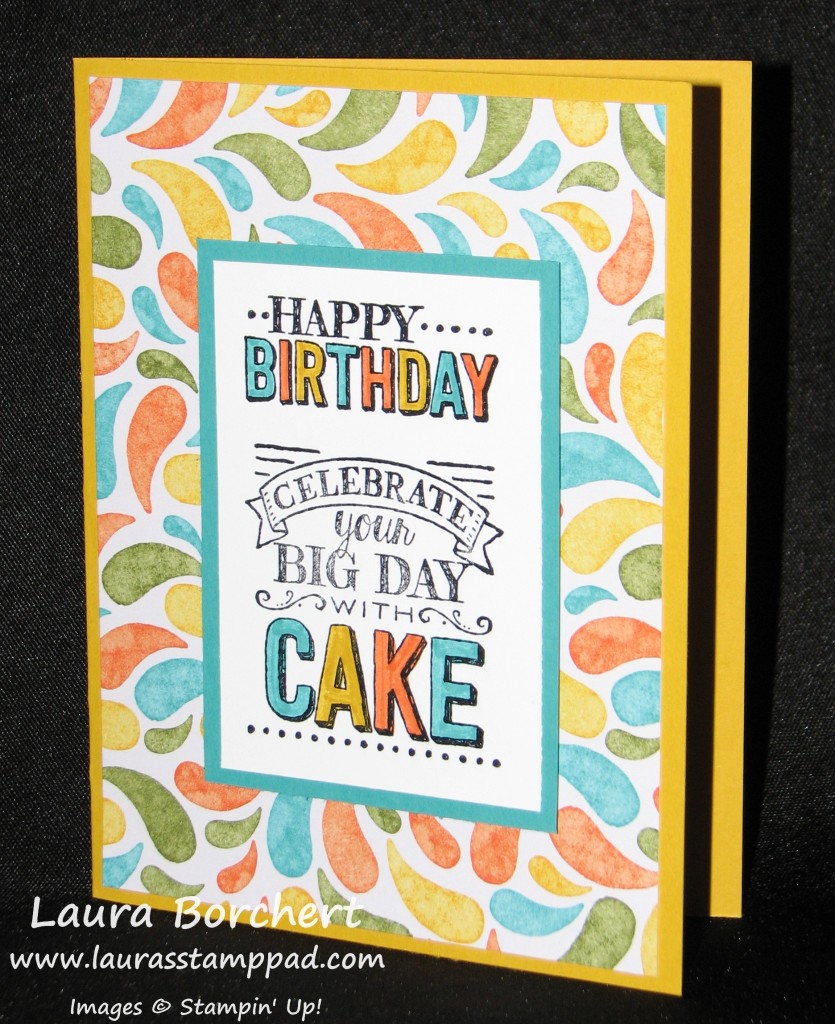
How fabulous is this quick and simple card? I used Bermuda Bay as the card base and added a piece of the Birthday Bash Designer Series Paper (DSP) measuring 4″ x 5-1/4″! For the greeting, I used two images from the Big Day Sale-A-Bration Stamp Set! I colored in the letters with my Blendabilities!!!! A stamper friend of mine said this paper looks like books and it would be fabulous to write book titles on the books! Isn’t that a great idea?!?!?!

Birthday Bash, Big Day, www.LaurasStampPad.com

I “think” this one is my favorite but it is so hard to pick! I just love the stripes and color combination. I used Tangelo Twist for the card base here! LOVE IT!

Birthday Bash, Big Day, www.LaurasStampPad.com

This one is fabulous too! It was the favorite at my Girls Night Out Stamp Event! I think more people picked this one than any other design! This one uses a Crushed Curry card base! So many fabulous options and each one looking amazing as ever!!!!

You can make these cards with the following items:

Bermuda Bay Cut & Ready Card Bases….$4.95

Crushed Curry Cut & Ready Card Bases….$4.95

Tangelo Twist Cardstock…$6.95

Birthday Bash Designer Series Paper….$12.95

Memento Ink Pad….$5.95

Bermuda Bay Blendabilities….$11.95

Daffodil Delight Blendabilities….$11.95

When you order all of these items you get the Big Day Stamp Set for FREE with Sale-A-Bration!!!!! You can make 40 cards and have lots of supplies leftover to use on other projects!!!! Get your’s today!!!

Happy Stampin’

~Laura


Cake or Cupcakes???

Posted on

Cake One Tag Fits All, www.LaurasStampPad.com

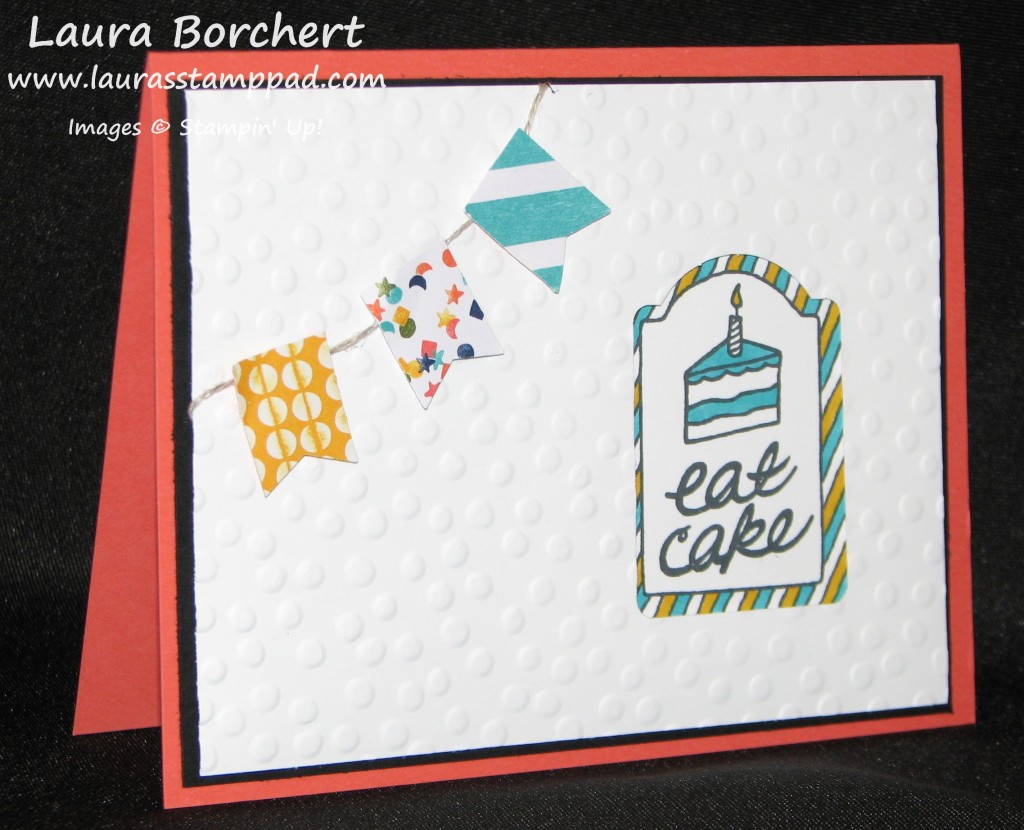
Which do you prefer – cake or cupcakes? Cupcakes all the way right here!!!! I love them!!! Either way this card is super cute and festive! I started off with a Tangelo Twist card base and added a piece of Basic Black (4″ x 5-1/4″)! Then I took a piece of Whisper White (3-3/4″ x 5″) and ran it through the Big Shot with my Decorative Dots Embossing Folder. I punched out a few Banner Punches with the Birthday Bash Designer Series Paper. I took some Linen Thread and went from the left side to the top middle, adhering it to the back with Stampin’ Dimensionals. I then attached the banner with Stampin Dimensionals as well, making sure to have the dimensional go over Linen Thread to hold it in place! Now you will need to stamp the tag border and the eat cake greeting with a Memento Pad on a scrap piece of Whisper White (use your Stazon Ink if you are using Markers to color in). Then color in as much or as little as you wish with your Blendabilities (Bermuda Bay & Daffodil Delight)! You won’t be punching this piece out but instead using the Note Tag Punch to punch out the image from your embossed Whisper White. I lined it up so that the bottom of the paper was all the way in the punch and you will want to be on the right side of your paper. Now you can add Stampin’ Dimensionals to the rest of the back of the embossed Whisper White. Before you go to lay it down you will want to add adhesive to your colored greeting and line it up in the punched hole and place that down first, just right before you place the embossed piece. Now you have that window effect where the greeting is set in! Super cute and fun! Here is another photo of this sample straight on!

Cake One Tag Fits All, www.LaurasStampPad.com

You can check out this Video Tutorial that I created using this stamp set for this card and a few others! Be sure to subscribe to my blog in the upper right corner so you don’t miss out on the rest of these samples which will be posted next week! Don’t forget to leave me a comment below on whether you prefer cake or cupcake!!!!

Happy Stampin’

~Laura


Technique Tuesday – One Tag Fits All!!!

Posted on

Happy Tuesday!!! That means I have a fabulous technique to share with you today and I do!!!! I received the One Tag Fits All Stamp Set for free from Stampin’ Up when I attended the New Catalog Premiere! It was super fabulous and a great perk of being a demonstrator is getting to see the new catalog items before everyone else….and free stamps! If you would like to join me for these events, you can sign up to be a demonstrator now and earn a FREE kit from the Occasions Mini Catalog! Woot Woot!!!

One Tag Fits All Baby, www.LaurasStampPad.com

Okay so lets get started on this fabulous technique I have to share with you today! Actually there are a few techniques….multiple uses of 1 stamp set and some cool ways to use your punches!!!! Isn’t this baby card just precious? It is very simple to make and since it is light blue and yellow, it isn’t gender specific so you can make a few of these up to have on hand. Love it!!!

SUPPLIES NEEDED: Embossing Folder, Decorative Label Punch, One Tag Fits All Stamp Set, Memento or Stazon Ink, Blendabilities or Markers, and Ribbon

I started with a piece of Soft Sky cardstock measuring 4-1/4″ x 11″. I folded the card in half and then stuck the front of the card in my Polka Dot Embossing Folder and ran it through the Big Shot! Then I stamped the New Baby image, from the One Tag Fits All Stamp Set which is in the new Occasions Mini Catalog, with the Memento Ink onto a scrap piece of Whisper White Cardstock. If you are coloring the duck in with Markers, you will want to use Stazon Ink. If you are coloring the duck in with Blendabilities, you will want to use Memento Ink. This is so the ink won’t bleed when you are coloring. After stamping it down, I colored it in with my Pumpkin Pie Blendabilities and Daffodil Delight Blendabilities! Then I lined up this image in my Decorative Label Punch and punched it out. I then took my Decorative Label Punch and put my card front in the punch towards the right side and all the way into the punch so that I knew it was straight/even. I punched! Then I added Stampin’ Dimensionals to my stamped, colored, and punched piece and placed it in the punched hole on my card front. The best way to line it up is to have the card folded shut and just lay it in that punched hole. This is adhering the piece to the inside of the card which makes a fabulous front and inside to the card! Precious! Then I added some Daffodil Delight Cotton Ribbon around the side of the card and through that punched hole! Quick and simple and fabulous!!!!

One Tag Fits All Baby, www.LaurasStampPad.com

Here is another photo showing the image on the inside! If you want to see this in action, check out my Video Tutorial on this card and others that you can create with this amazing One Tag Fits All Stamp Set! Don’t forget to subscribe here so you don’t miss out on those cards that will be posted later this week and next week. At the top right of my page – www.LaurasStampPad.com you can enter your email address and then you will get an email every time I post something new!

Get your One Tag Fit All Stamp Set today!!!

Happy Stampin’

~Laura


Irresistible Polka Dots!!!

Posted on

Decorative Mask Emboss Resist, www.LaurasStampPad.com

How adorable is this card and it has polka dots!?!?!?!?! Loving it!!! I created this card with the fabulous Irresistibly Yours Designer Series Paper in the Sale-A-Bration Brochure which means you can get it for FREE with a $50 (US) purchase! Last week I showed you how to use this paper with your Sponge Daubers here and your Spritzers here! Today I’m going to show you how to create this card with your Sponge Daubers and Decorative Masks!

I started off with a Hello Honey card base and then cut my star piece from the Irresistibly Yours DSP (4″ x 5-1/4″). Using my Sponge Daubers and Stripes and Dots Decorative Mask (or Simply Created Build A Banner Template), you will add ink (Bermuda Bay) in the dots over your paper! It is so fun because it reveals these adorable little stars! I love it. NOTE: You will want to take a paper towel and wipe each little dot to get the excess ink off the embossed stars before removing the template. If you remove the template and start rubbing all over to get the excess off, you will get streaks in between your dots!!! That’s what I’m here for….to make the mistakes for you and let you know the tips and trick! hehe! Once that is complete, you can adhere that to your card and start on your greeting. I stamped the greeting from the Big News Stamp Set in Memento Ink so I could color in the words with my darkest marker in the Coastal Cabana Blendibilities Set! Precious! I added a little knot of Hello Honey Satin Stitched Ribbon on the left to finish it off! Of course the greeting is popped up on Stampin’ Dimensionals as well! What is a card without those?

Of course you can check out the Video Tutorial on this as well and don’t forget to give it a thumbs up if you liked it!!!

What is your favorite way to add color to the Irresistibly Yours Designer Series Paper – Mask, Sponge Daubers, Spritzing, Stamping, or something else? Leave me a comment down below!

Happy Stampin’

~Laura