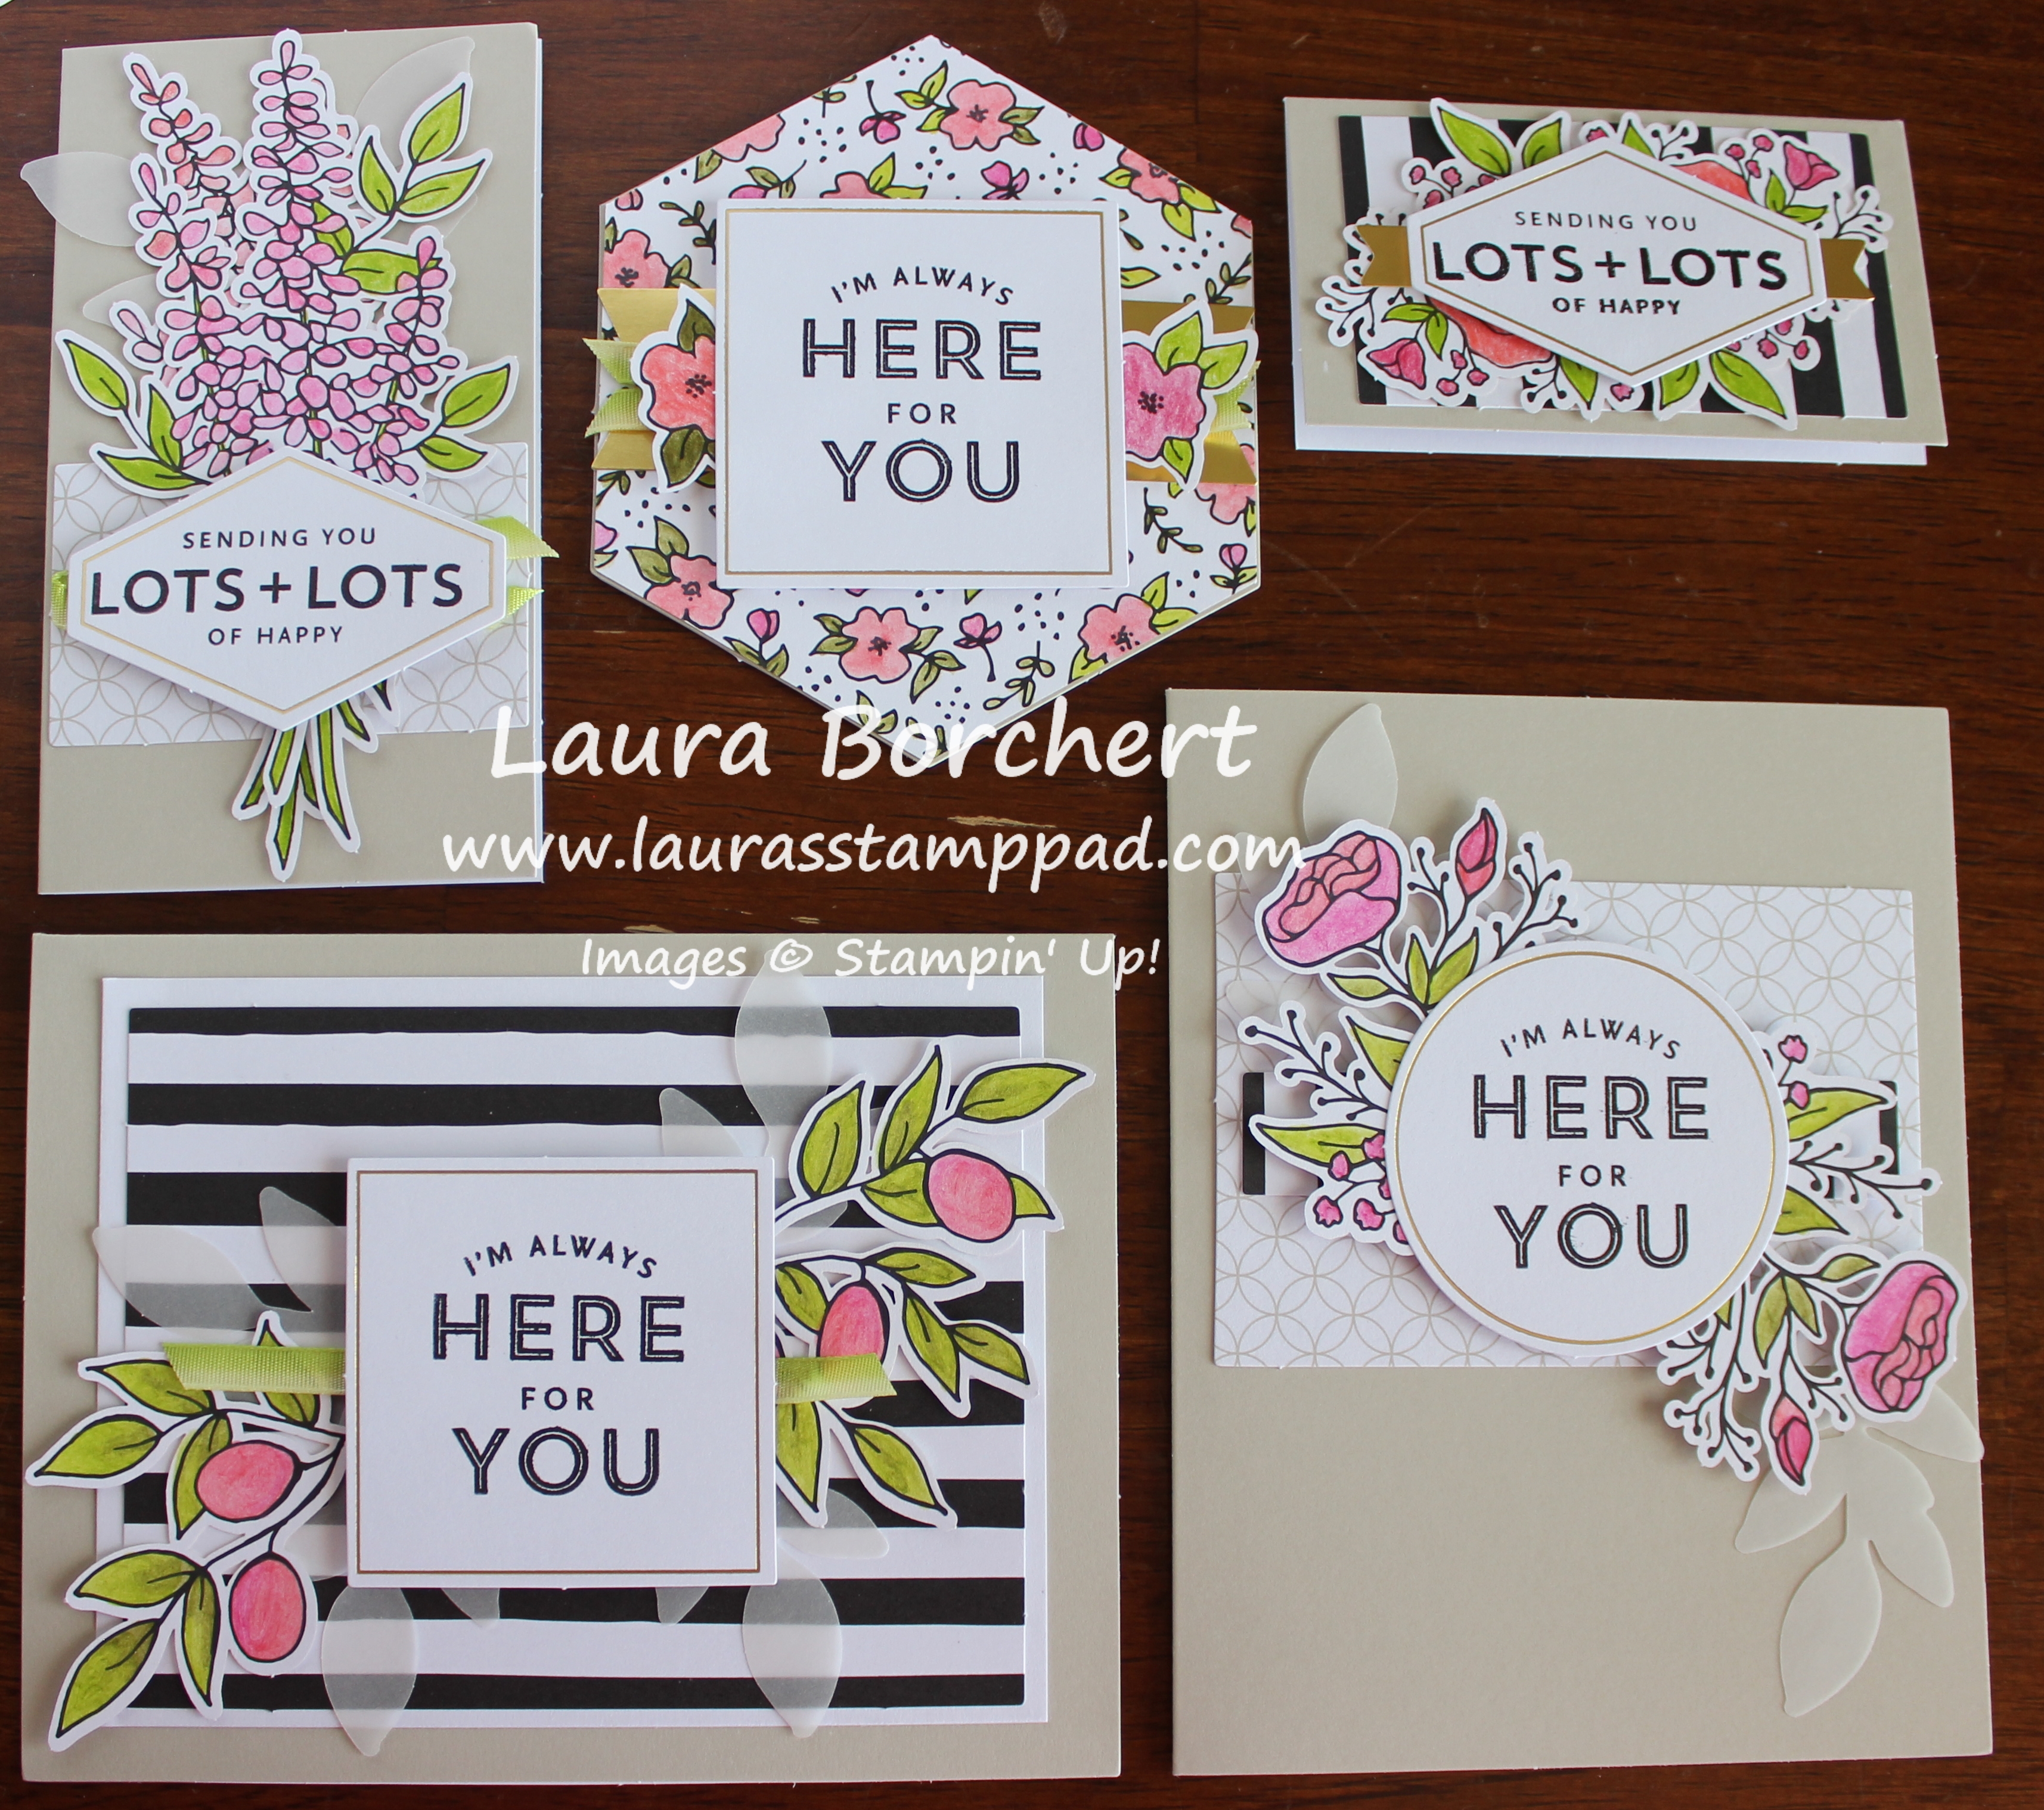
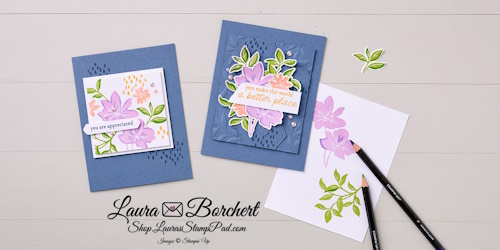
My Grandpa was a true artist who painted, used charcoals, pencils, and so much more! I may have gotten a bit of his talent but I need stamps to get me started! Coloring with watercolor pencils intimidates me but also intrigues me! Let’s try out this fun technique together!!!
MEASUREMENTS:
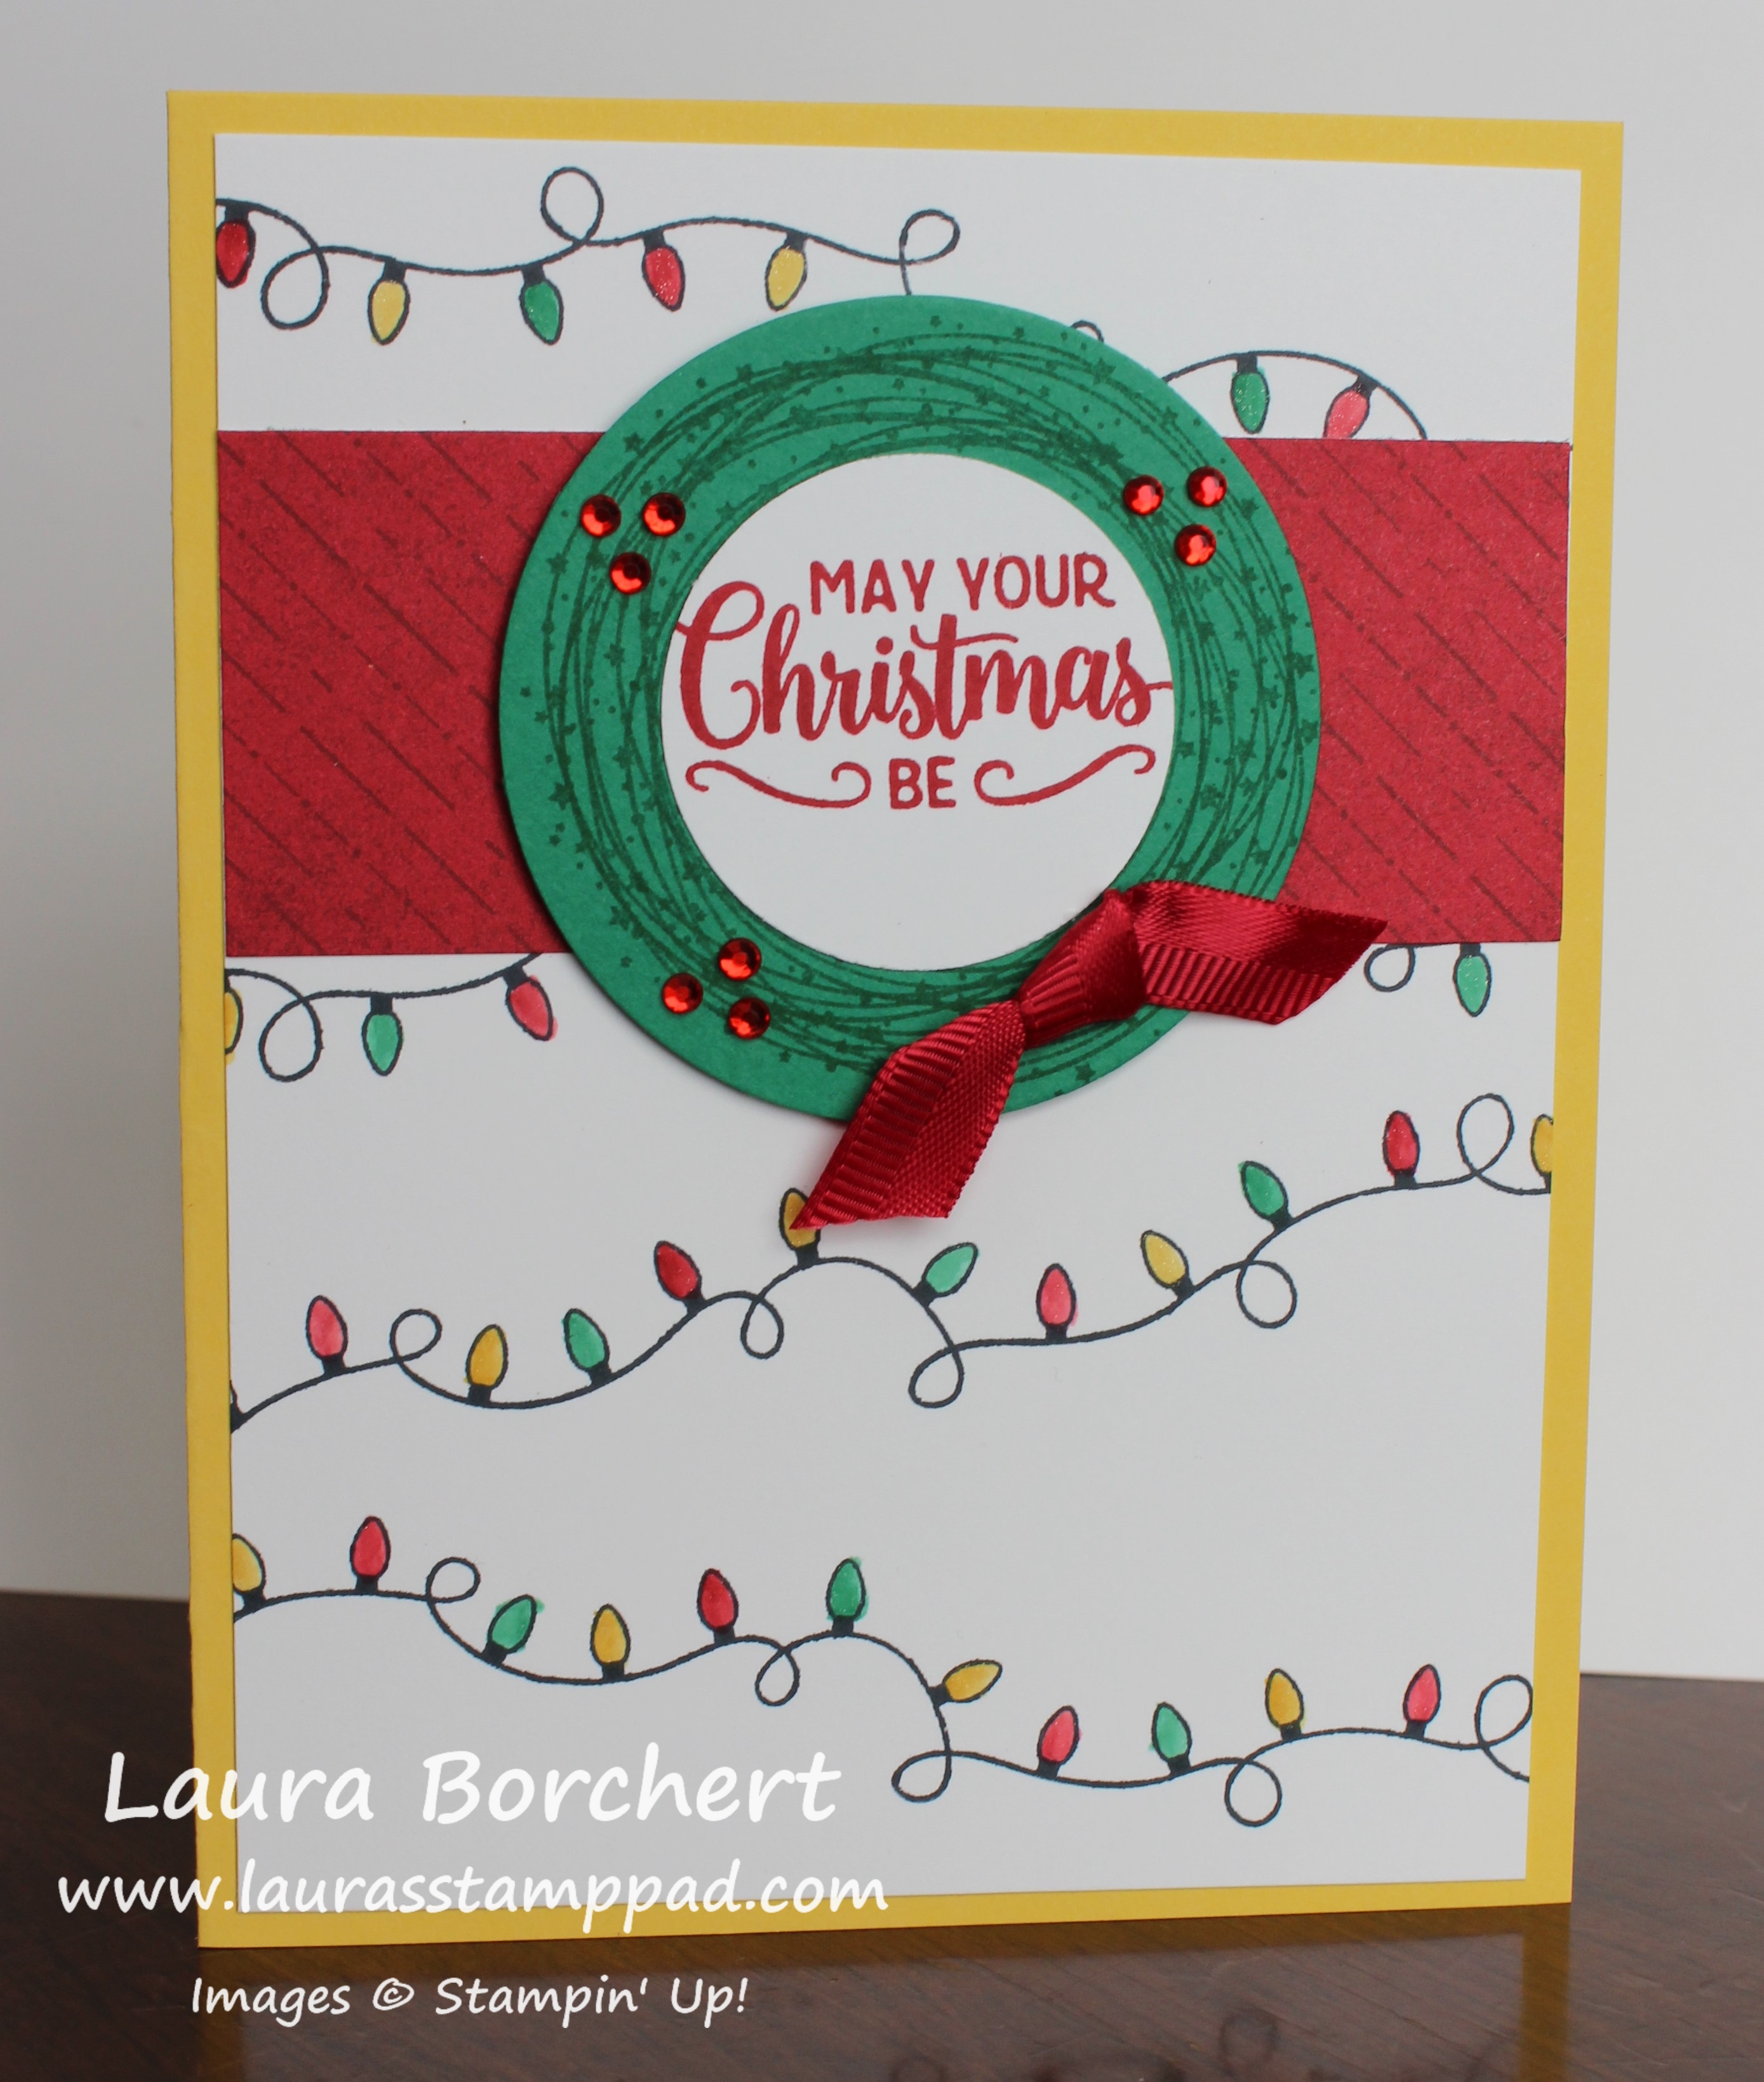
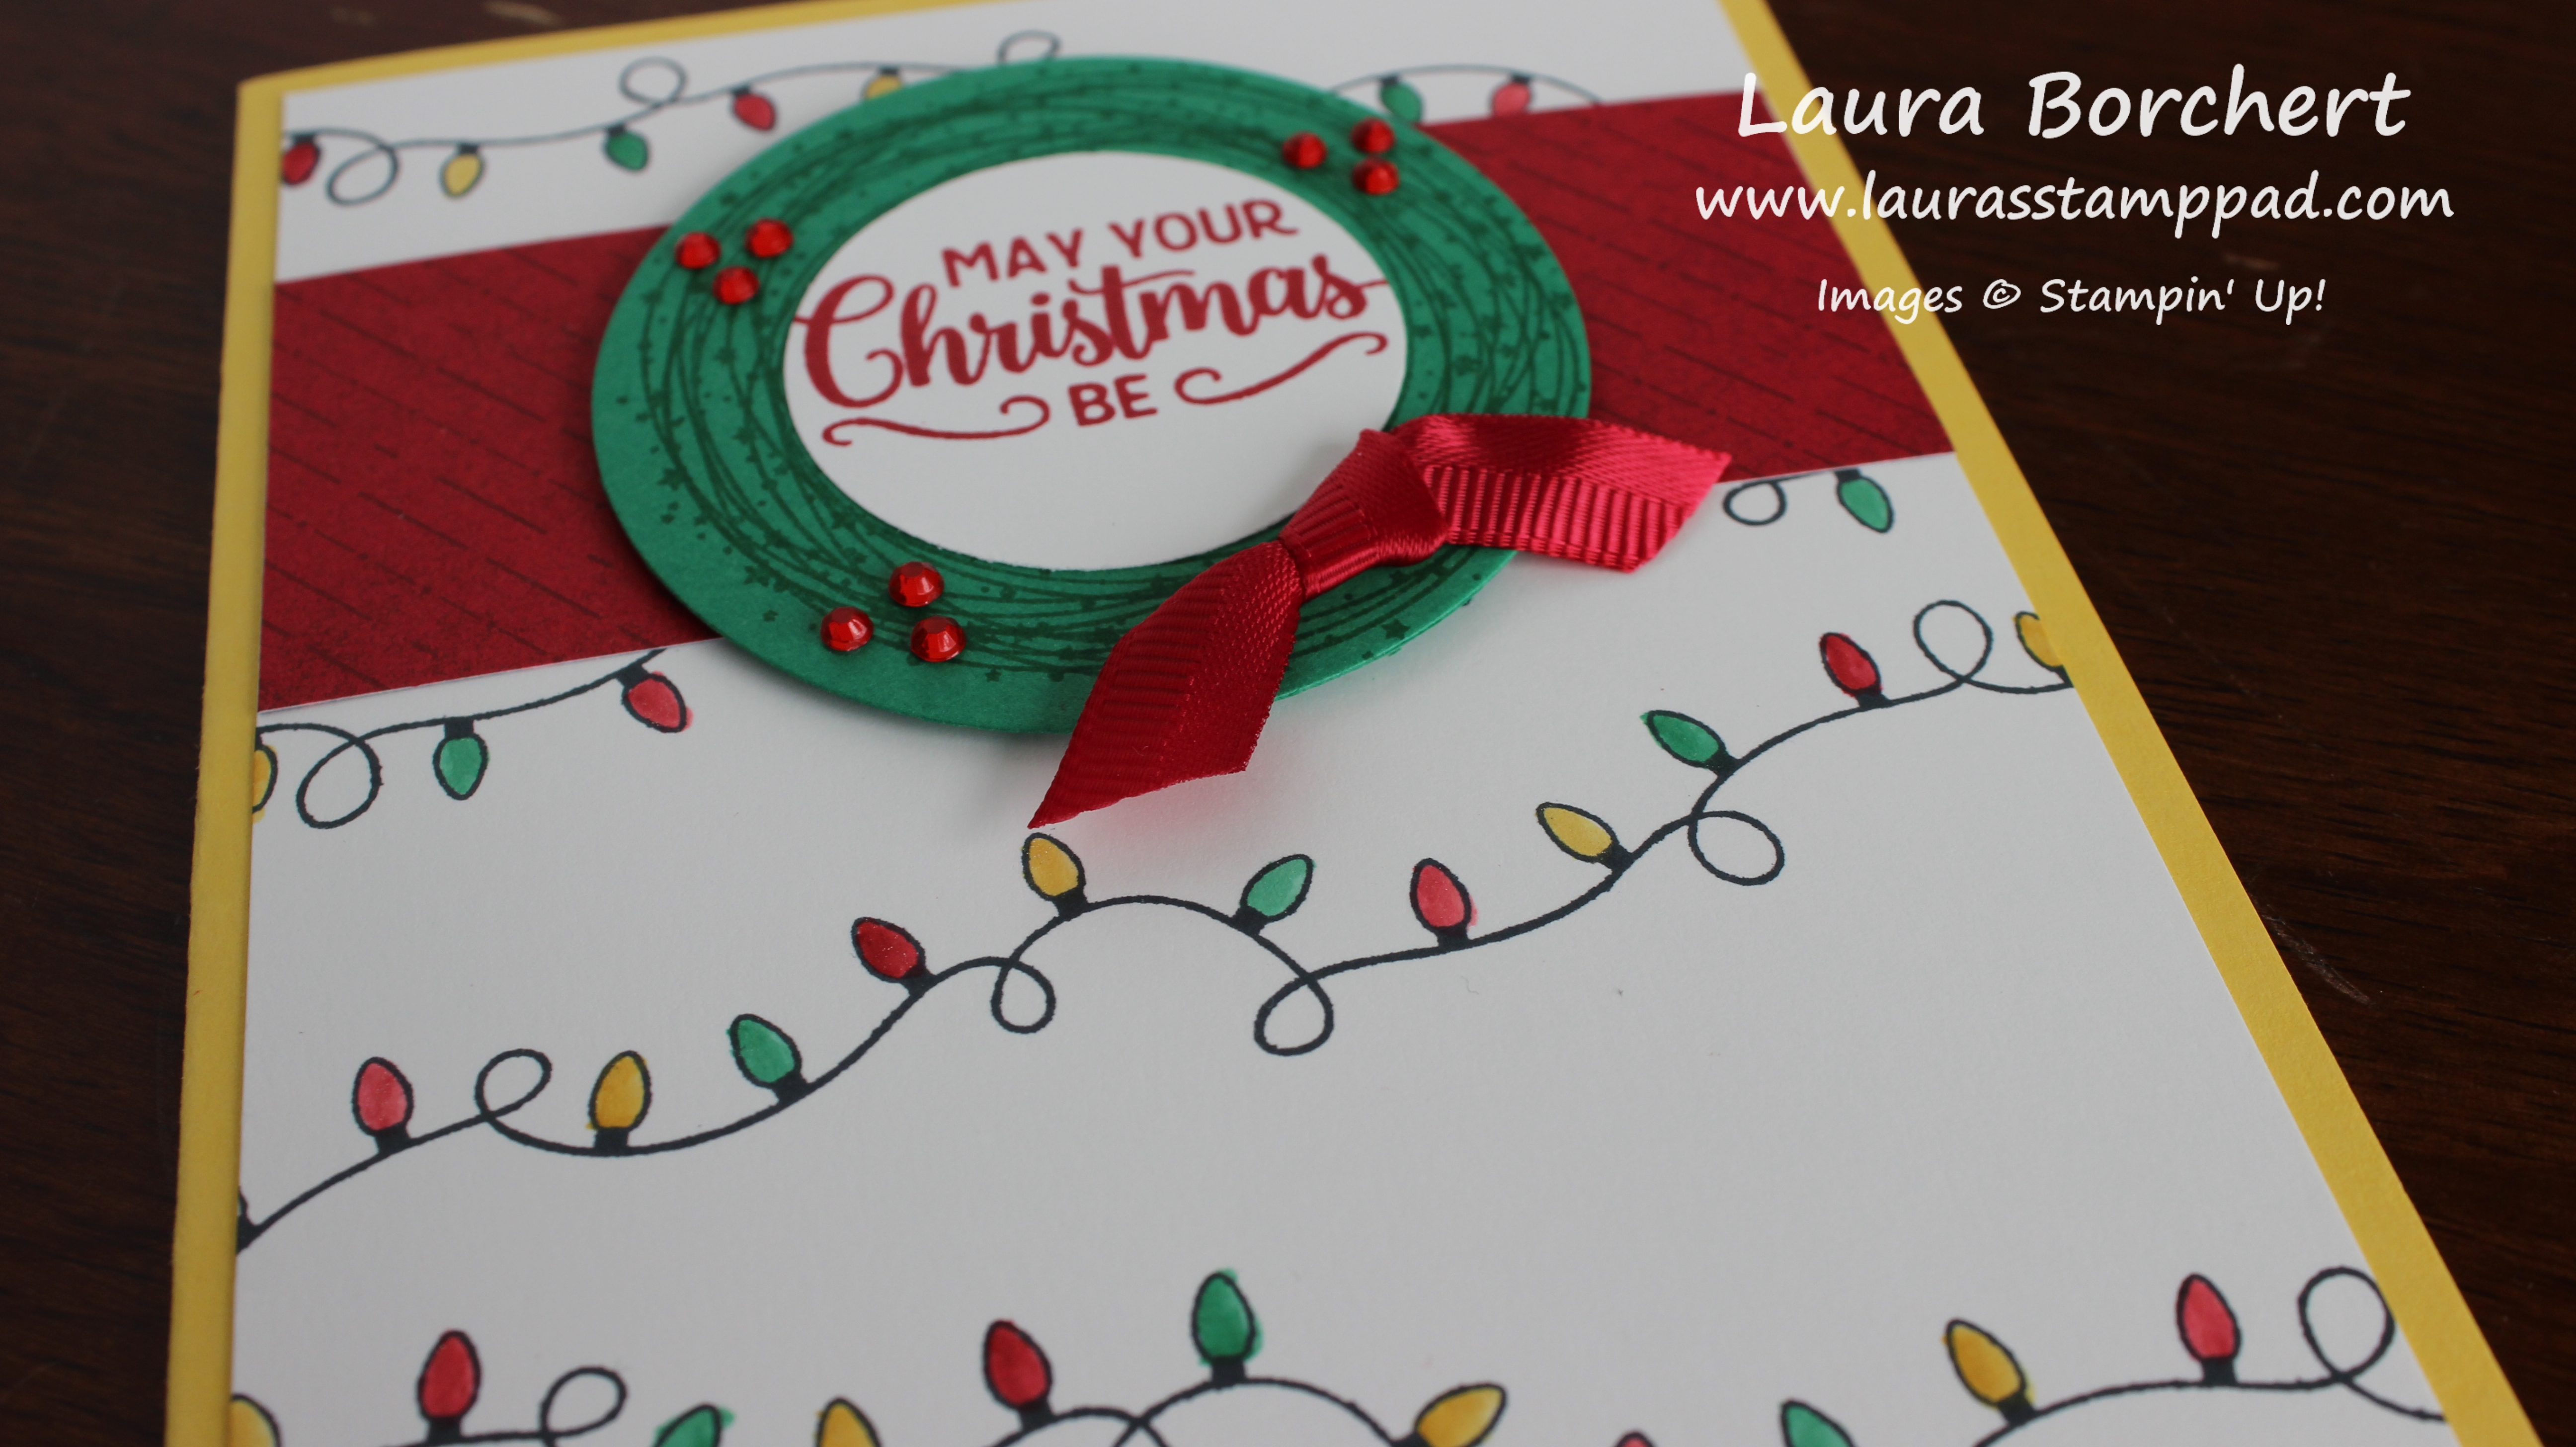
Misty Moonlight Cardstock (card base): 8-1/2″ x 5-1/2″
Misty Moonlight Cardstock (layer): 3-1/2″ x 4-1/4″
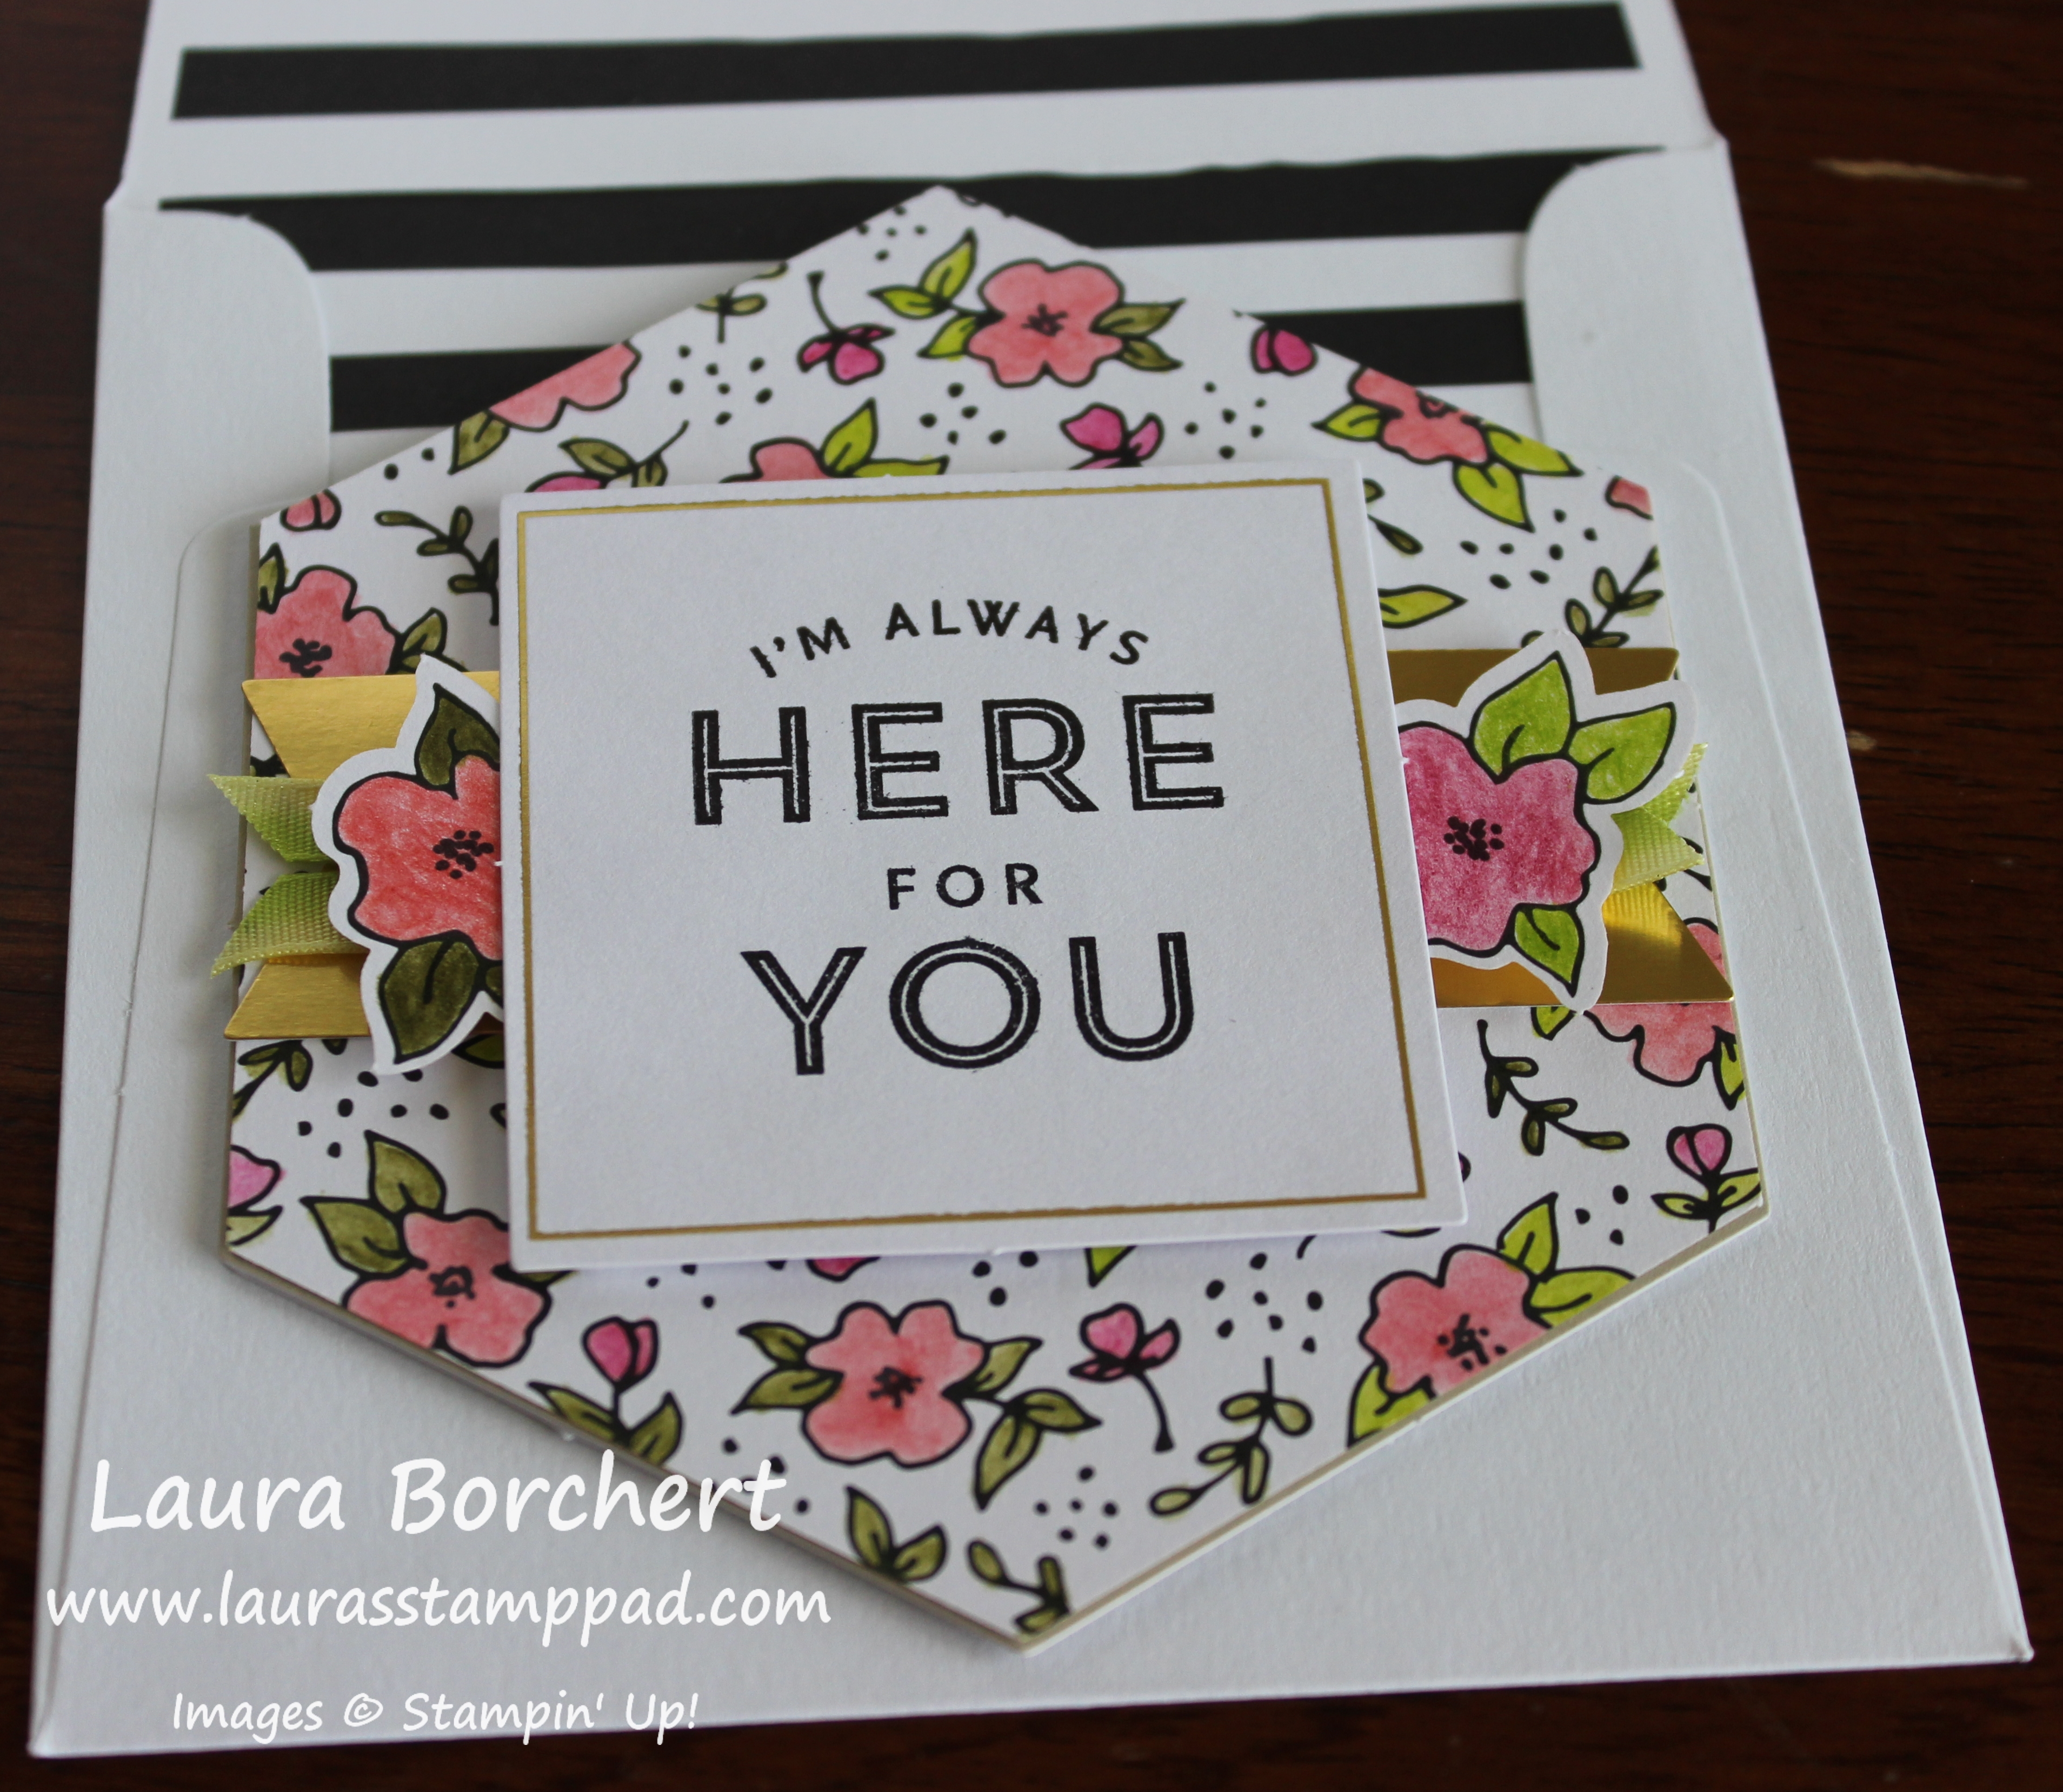
Misty Moonlight Cardstock (hexagons): 3-1/2″ x 3-1/2″
Basic White Cardstock (florals): 5″ x 5″
Basic White Cardstock (sentiment): 1″ x 4″
INSTRUCTIONS:
- Score the 8-1/2″ x 5-1/2″ Misty Moonlight Cardstock at 4-1/4″ and fold it in half to create the card base!
- Run the 3-1/2″ x 4-1/4″ piece of Misty Moonlight Cardstock through the Stampin’ Cut & Emboss Machine using the Paradise Garden Hybrid Embossing Folder or folder of your choice.
- Die cut three hexagons from the 3-1/2″ x 3-1/2″ Misty Moonlight Cardstock; stamp the dots image on them in Misty Moonlight ink! Adhere the hexagons to the embossed cardstock layer. Adhere the layer to the card!
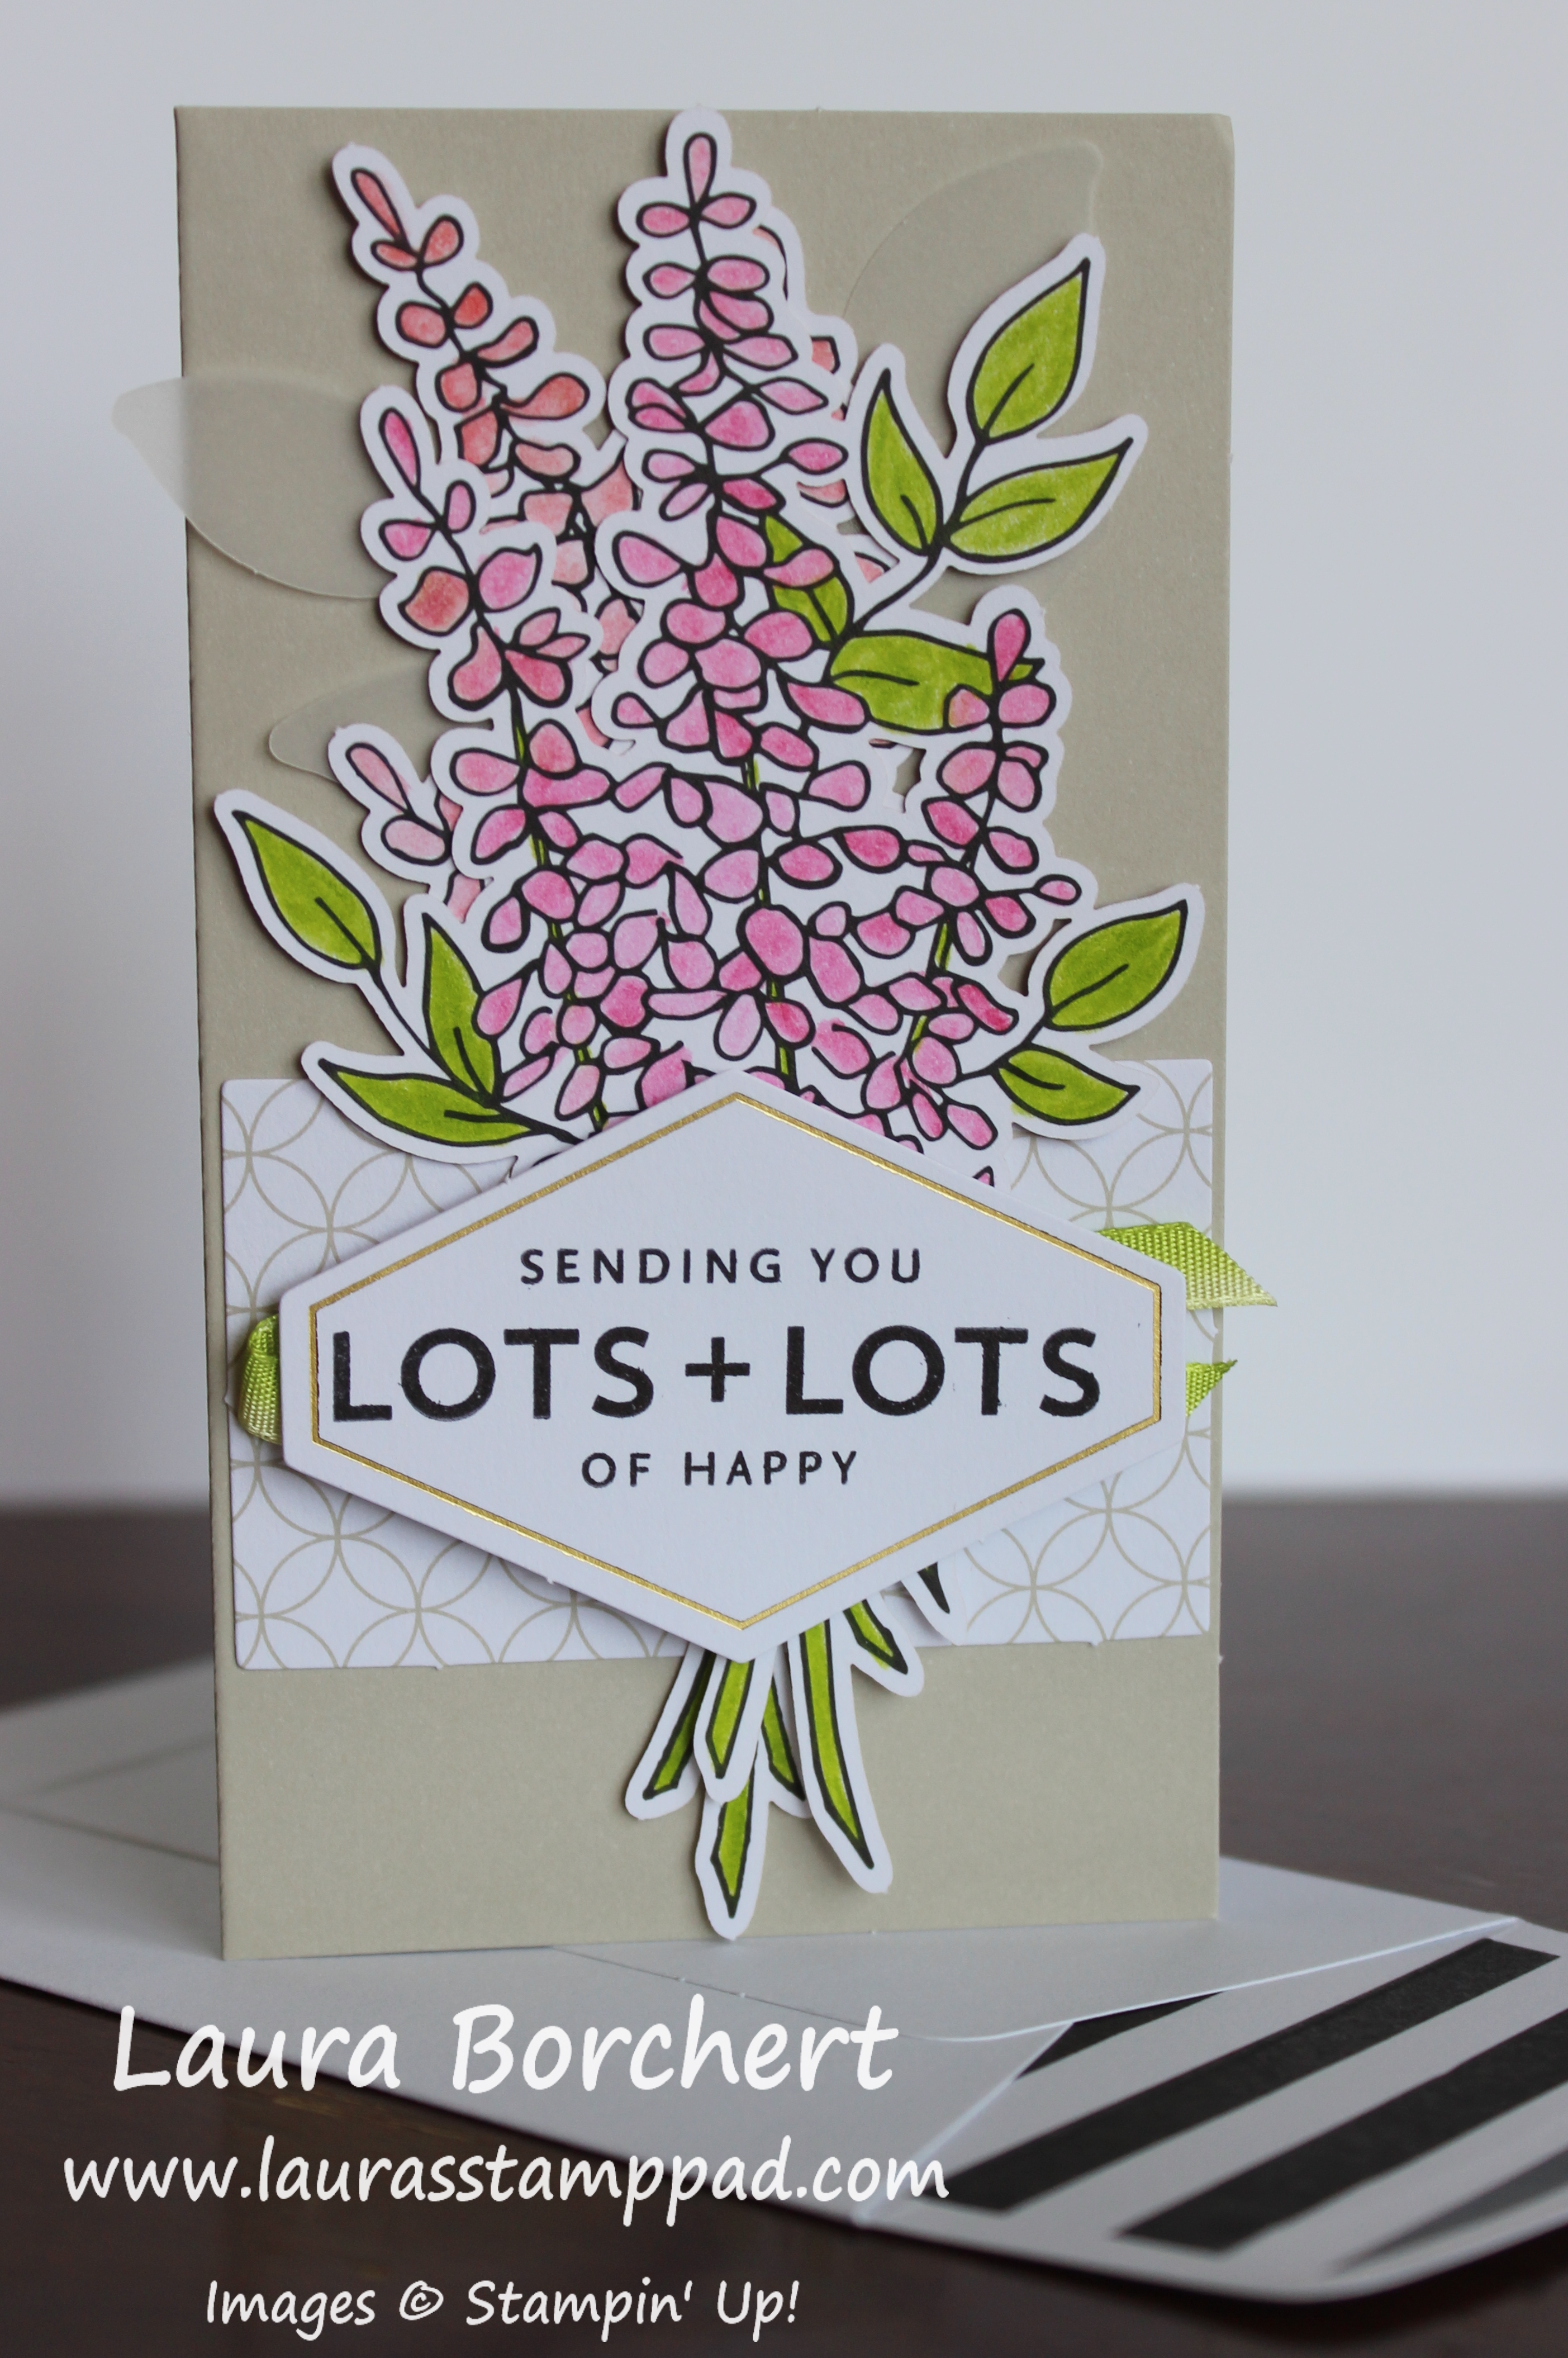
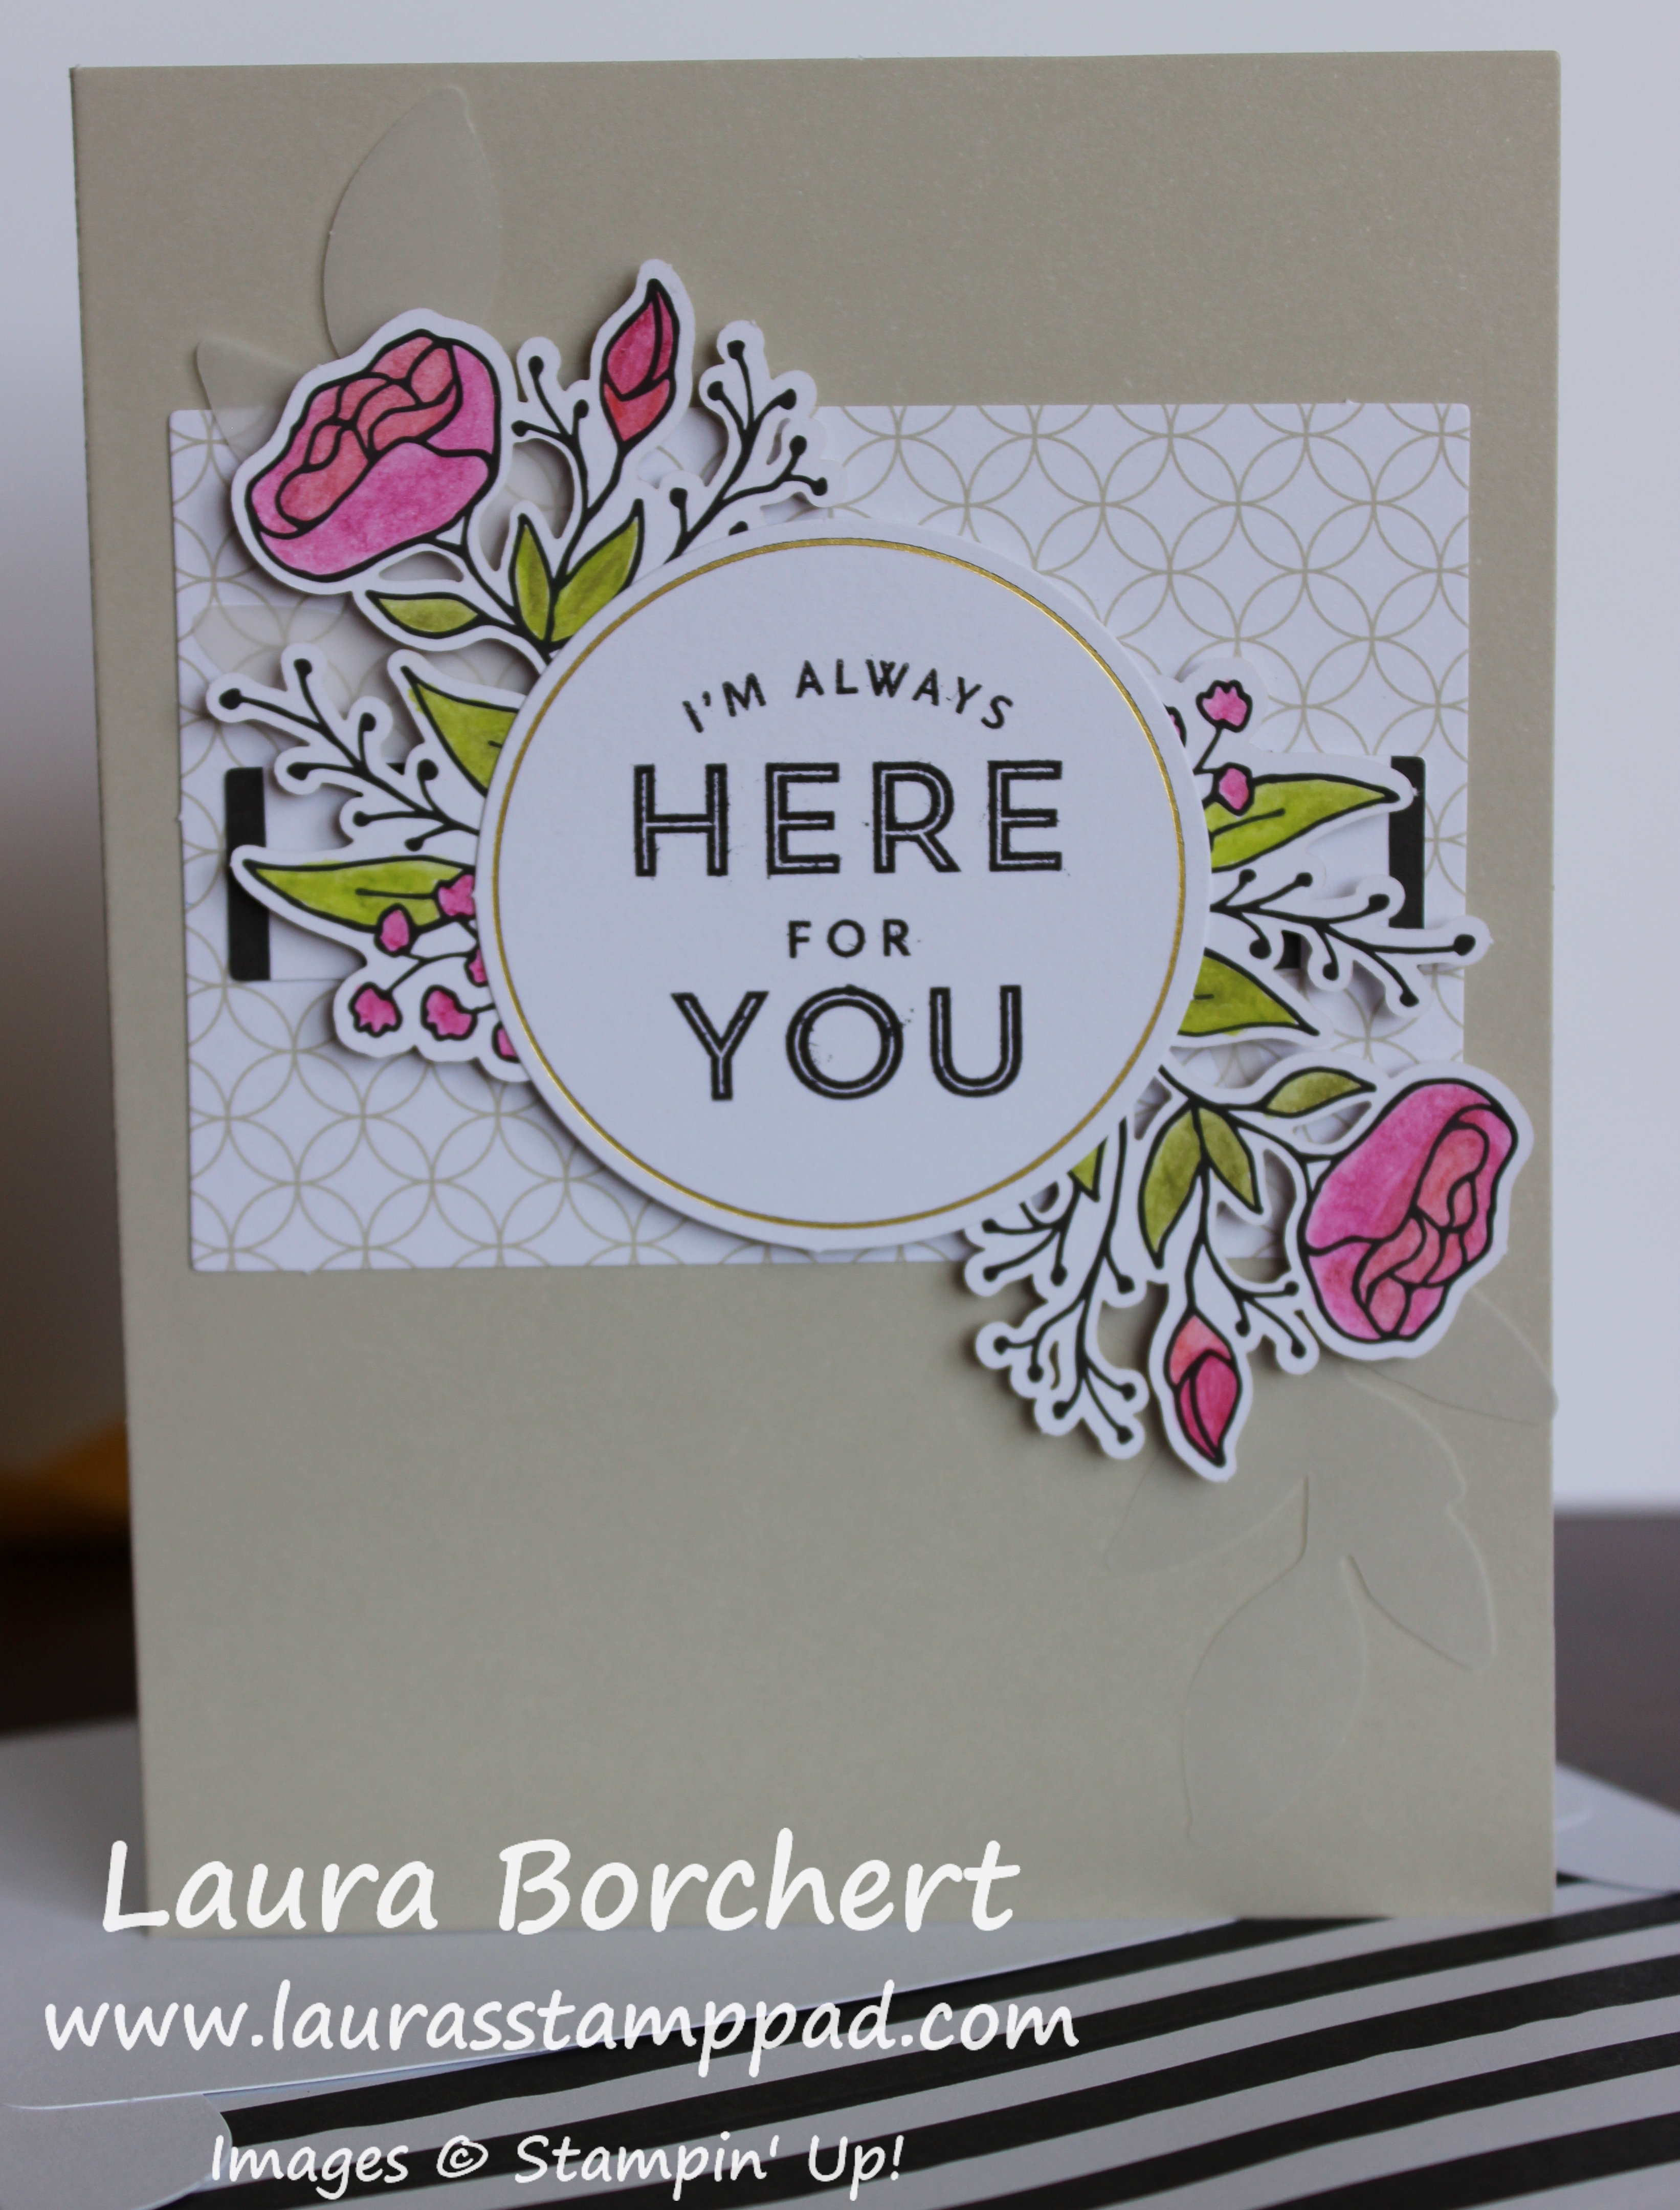
- Stamp the florals and leaves images in Fresh Freesia, Granny Apple Green,
and Petal Pink ink on the 5″ x 5″ Basic White Cardstock. Add highlights around the edges using the Watercolor Pencils. Die cut and adhere the flowers and leaves to the card using Stampin’ Dimensionals. - Stamp the sentiment in Crushed Curry ink on the 1″ x 4″ Basic White Cardstock. Cut it into a slanted banner and adhere it to the card using Stampin’ Dimensionals!!
- Add embellishments as desired!
What do you think? Will you be coloring with watercolor pencils on your next craft project?! Check out all of the supplies below to make sure you have everything!
All orders of $40 or more will earn Fabulous Friends Club Perks and orders of $75 or more will earn Fabulous Friends Club Perks as well as the Free Gift of the Month!!! Woot Woot! Click here to shop!
Happy Stampin’
~Laura
Product List![Paradise Garden Bundle (English) [ 167121 ]](https://assets1.tamsnetwork.com/images/EC042017NF/167121s.jpg "Paradise Garden Bundle (English) [ 167121 ]")
![Basic White 8 1/2" X 11" Cardstock [ 166780 ]](https://assets1.tamsnetwork.com/images/EC042017NF/166780s.jpg "Basic White 8 1/2\" X 11\" Cardstock [ 166780 ]")
![Misty Moonlight 8-1/2" X 11" Cardstock [ 153081 ]](https://assets1.tamsnetwork.com/images/EC042017NF/153081s.jpg "Misty Moonlight 8-1/2\" X 11\" Cardstock [ 153081 ]")
![Crushed Curry Classic Stampin' Pad [ 147087 ]](https://assets1.tamsnetwork.com/images/EC042017NF/147087s.jpg "Crushed Curry Classic Stampin' Pad [ 147087 ]")
![Fresh Freesia Classic Stampin' Pad [ 155611 ]](https://assets1.tamsnetwork.com/images/EC042017NF/155611s.jpg "Fresh Freesia Classic Stampin' Pad [ 155611 ]")
![Granny Apple Green Stampin' Pad [ 147095 ]](https://assets1.tamsnetwork.com/images/EC042017NF/147095s.jpg "Granny Apple Green Stampin' Pad [ 147095 ]")
![Misty Moonlight Classic Stampin' Pad [ 153118 ]](https://assets1.tamsnetwork.com/images/EC042017NF/153118s.jpg "Misty Moonlight Classic Stampin' Pad [ 153118 ]")
![Petal Pink Classic Stampin' Pad [ 147108 ]](https://assets1.tamsnetwork.com/images/EC042017NF/147108s.jpg "Petal Pink Classic Stampin' Pad [ 147108 ]")
![Watercolor Pencils Assortment 2 [ 149014 ]](https://assets1.tamsnetwork.com/images/EC042017NF/149014s.jpg "Watercolor Pencils Assortment 2 [ 149014 ]")
![Pearlized Faceted Circles [ 166978 ]](https://assets1.tamsnetwork.com/images/EC042017NF/166978s.jpg "Pearlized Faceted Circles [ 166978 ]")
![Stampin' Dimensionals [ 104430 ]](https://assets1.tamsnetwork.com/images/EC042017NF/104430s.jpg "Stampin' Dimensionals [ 104430 ]")


")


 Circle Punch")


 Mixed Satin Ribbon")