Technique Tuesday – Hand Sanitizers!!!

Posted on

Happy Tuesday!!! That means I have a fabulous technique to share with you and this one is perfect for this time of year – gift giving!!! These little hand sanitizers are perfect for stocking stuffers, Secret Santa, and hostess gifts…..but they are perfect for all year long as well!

Hand Sanitizer, www.LaurasStampPad.com

Aren’t they fabulous??? I got the idea from Meg Loven who shared this at one of our Team Meetings!! They are perfect for sitting on your desk, coffee table, or even in your purse!!! Let’s get started!

SUPPLIES NEEDED: Cardstock, Designer Series Paper, Favorite Greeting, Punches or Framelits, Embellishments

Starting with a piece of cardstock measuring 1-7/8″ x 11″, you will score at 2″, 3″, 6-1/4″, 7-1/4″, 9-1/2″, & 10-1/2″. You can get lots of these out of one sheet of 8-1/2″ x 11″ which is awesome. TIP: If you are using all of the 8-1/2″ x 11″ sheet of cardstock, be sure to score the entire sheet and then cut it into strips, this will save time and less scoring. 🙂 Fold on all of the score lines. On the end with the 1/2″ tab, you will need to punch out a hole for the top of the hand sanitizer to fit though. I used the 3/4″ Circle Punch and slide in it, centered it, and made sure I was just over that first score line and into the 2nd “box”. Now that you have your hole in there, add some Fast Fuse Adhesive to that 1/2″ flap, place your hand sanitizer in there and adhere it to the back panel. I like to use Fast Fuse or Tear & Tape for this because it has a nice strong hold. If you would like, add some Washi Tape around the neck of the bottle to coordinate with your decoration and designer paper! Now you can decorate with Designer Paper of your Choice. You will need 3 pieces measuring 1-5/8″ x 3″ (back panel), 1-5/8″ x 2″ (bottom front), and 1-5/8″ x 1-3/4″ (top flap). You can always add these pieces before putting the hand sanitizer in but just be sure you have them right side up if the pattern requires that. I used Pop of Pink Designer Paper, Presents & Pinecones Designer Paper, Affectionately Yours Designer Paper, and Candy Cane Lane Designer Paper in all of the samples pictured.

reindeer sanitizer, www.LaurasStampPad.com

For the decoration, you can use your favorite greeting or image. For the one above and the gingerbread man, I used the Cookie Cutter Christmas Stamp Set and coordinating Cookie Cutter Builder Punch (Bundle & Save 10%). The Be Joyful is from the Merriest Wishes Stamp Set. I really just had so much fun playing with different greetings, designer paper, and ribbons! For the decoration, I added it to the bottom half of the hand sanititzer and added it with Stampin’ Dimensional on the lower portion only. This is so the top flap can slide under the greeting/reindeer/image and hold closed. You could also use a little piece of velcro too!

fill-me-with-happiness, www.LaurasStampPad.com

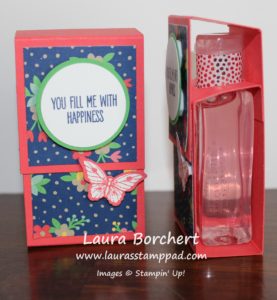
This one uses the Papillon Potpourri Stamp Set and Bitty Butterfly Punch! Let me know which one your favorite is in the comments below. I’m thinking my favorite is the butterfly and reindeer ones!!

If you would like to see this all in action, check out the Video Tutorial below or click here! Be sure to give it a thumbs up if you liked it and don’t forget to subscribe if you are new! I post videos every Tuesday and Thursday!

Happy Stampin’

~Laura

Only 2 more days left to get a chance at winning a Big Shot!!! Check out all the details here!!!

Big Shot Code:HSQJBEPD, www.LaurasStampPad.com


Masking with the Elegant Butterfly!!!

Posted on

butterfly-masking, www.LaurasStampPad.com

You all know I love bright colors and this card just makes me so happy!!! I love it!!! It is sure to spend a smile to anyone that receives it!! Also, did you notice the butterflies look so distinct and not like a muddy mess from stamping over each one? I used a mask to avoid that look. This way each butterfly looks like it’s own and that it is either up front or behind the other one! This is a super simple technique with masking! To see other masking techniques, check out these samples here, here, and here! Let’s get started!

I started with a piece of Whisper White cardstock measuring 3-3/4″ x 5″ and I stamped the butterfly from the Papillon Potpourri Stamp Set in Real Red at the top! Then I took the Elegant Butterfly Punch and punched out the top of a Post-It Note (the part with the sticky). Place this over your red butterfly to cover him up. Now you will stamp another butterfly in Pumpkin Pie, overlapping the bottom portion a bit. Pull off your mask and cover up the orange butterfly and stamp in Daffodil Delight. You will keep repeating this step until you have all of your desired colors (or run out of paper). I continued with Cucumber Crush, Pacific Point, Bermuda Bay, and Elegant Eggplant. I turned my butterflies towards the left and right because I didn’t want them straight since that wouldn’t happen anyway. 🙂 It also allowed the butterflies to take up less space. I just love those bright colors and how they look so clean and perfect! I layered this piece onto Pacific Point cardstock (4″ x 5-1/4″) and then onto a Daffodil Delight card base! For the greeting, I stamped it from the Love & Affection Stamp Set in Real Red. I punched it out with the Decorative Label Punch as well as a Real Red one. I cut the red one in half and placed the top portion on the top of the greeting piece and the other portion on the bottom. You can check out a video tutorial on that here. I added some loops of the Silver Metallic Thread to the back and secured it with Stampin’ Dimensionals and then added it to the card!

This card is perfect for a random card to a family or friend just to let them know you are thinking of them or that they mean the world to you! Do you send out random cards like that? Let me know in the comments below! I sometimes do and need to do it a lot more often! Everyone loves Happy Mail!!!

Happy Stampin’

~Laura

Seasonal Offer, www.LaurasStampPad.com

Check out this fabulous offer for the Holiday Season!!!


My Amazing Mother!!!

Posted on

My Amazing Mother, www.LaurasStampPad.com

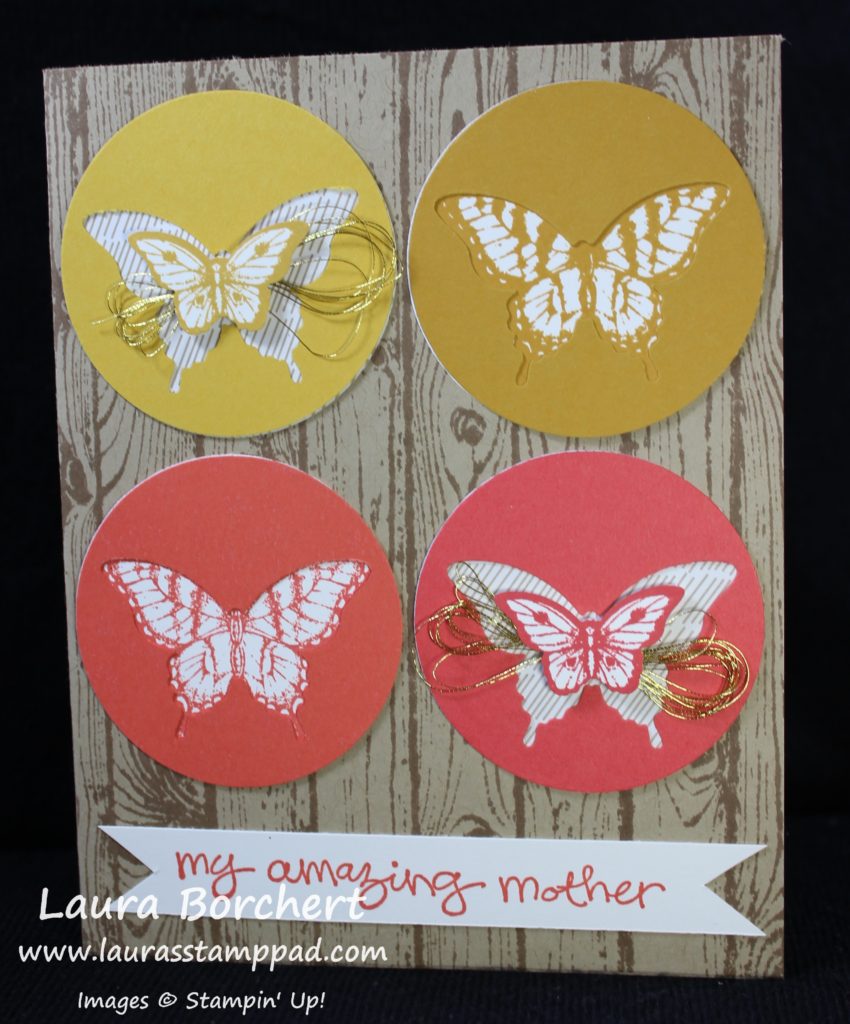
I love love love this card for so many reasons – the beautiful colors, the bright butterflies, the rustic wooden background, a little gold bling, and the greeting reminding me of My Amazing Mother!!!! You could always change up the greeting for any occasion! Let’s get started on this beauty!

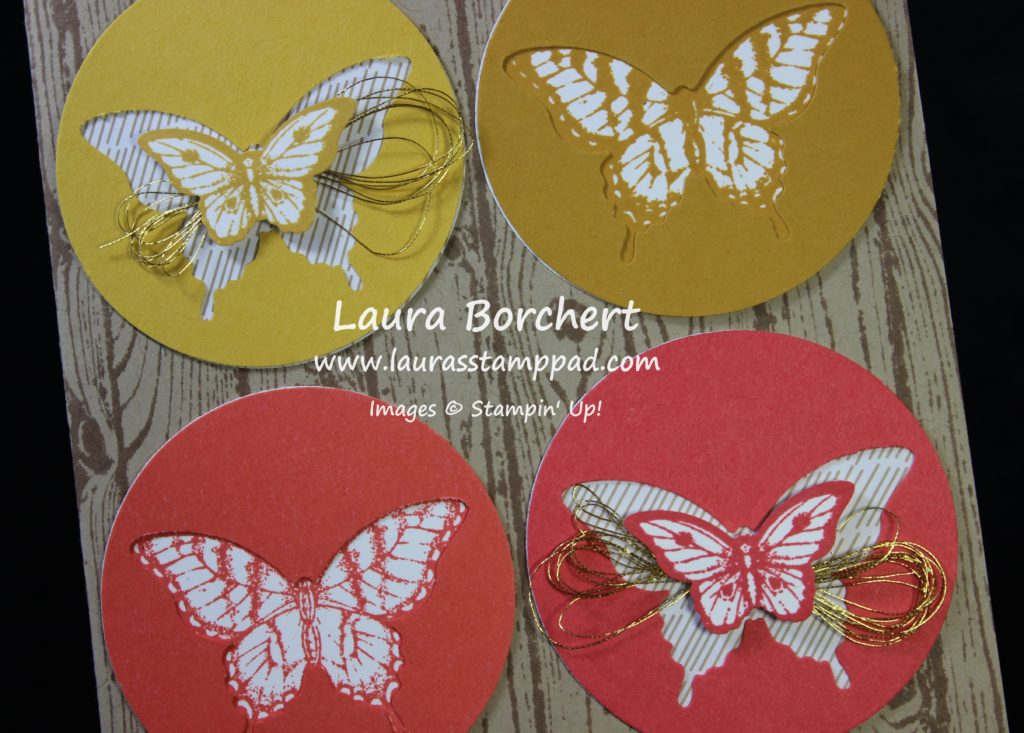
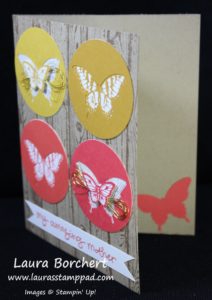
I started with a Crumb Cake card base and I stamped the Hardwood Stamp on the background in Crumb Cake ink! Then I took scrap cardstock of Hello Honey, Delightful Dijon, Watermelon Wonder and Calypso Coral and punched out the butterfly with the Elegant Butterfly Punch. Be sure to punch away from the edges so you can then punch out the circle. Once the butterfly is punched, take the 2″ Circle Punch and center the butterfly (hole) in the middle of the punch! This will create all of those rings shown above. I have you punch out the butterfly first because it would be hard to center the already punched circle into the butterfly punch! Next up, you will need 2 Whisper White 2″ Circles and 2 Designer Series Paper 2″ Circle. I used some neutral striped paper from the Love Blossoms Designer Series Paper Stack in the Occasions Mini Catalog. I stamped the large butterfly from the Papillon Potpourri Stamp Set in the middle of the white circles in Delightful Dijon and Calypso Coral. If you stamp the butterfly in the middle as best you can, it should line up that the butterfly is in the punched portion of the coordinating color. If it doesn’t line up, you can always line it up and trim the access. So now your Delightful Dijon and Calypso Coral butterflies are all done.

Beautiful Butterflies, www.LaurasStampPad.com

For the other two, I stamped the smaller butterfly from the Papillon Potpourri Stamp Set onto scrap white paper in Hello Honey and Watermelon Wonder. Then I punched them out with the Bitty Butterfly Punch. Then I took some Gold Thread and wrapped it around three of my fingers 10-15 times. When I pulled the loops off of my fingers, I twisted them in the center and placed the center on the back of the Bitty Butterflies and stuck a 1/2 of a Stampin’ Dimensional (or some of the border piece) over the top of the thread. This will hold the thread in place and stick the butterfly to the project. Once your butterflies are ready, you will adhere the Designer Series Paper to the back of the butterfly frames and then place the bitty butterfly in the middle of the punched butterfly. I hope all of this hasn’t completely confused you and if it has, check out the Video Tutorial below! 🙂 Now you have all of your butterfly decoration complete and you can add them to your card front. From Left Top to Right Bottom – Hello Honey, Delightful Dijon, Calypso Coral, and Watermelon Wonder! For the greeting on the bottom, I stamped the image from Greatest Greetings onto scrap white cardstock in Watermelon Wonder. I cut the little banner ends and added it to the card with Stampin’ Dimensionals! If you are wondering what to do with the 4 Elegant Butterflies that you punched out, you can always decorate the inside of the card!

Mother's Day, www.LaurasStampPad.com

And if you are super lost on the directions above or if you just like to see it all in action, check out the Video Tutorial below or click here! Don’t forget to give it a Thumbs Up if you liked it and be sure to Subscribe if you are new! The New Catalog Product Reveal Video is coming soon but I’m not sure when…..make sure you subscribe so you don’t miss it! 🙂

What occasion would you use this card for? Birthday, Wedding, Just Because, Mother’s Day, Sympathy? Let me know in the comments below! I can’t wait to give this card to my mom. I super love it and I love her so I’m excited! 🙂

Happy Stampin’ and Happy Mother’s to all of the women out there who have given birth to a child, wish to give birth to a child, have a fur baby or are motherly to those they meet! You are all amazing and should celebrate this special day! Hugs!

~Laura


Technique Tuesday – Room Divider Card!!!

Posted on

Happy Tuesday!!! You know what that means!!!! I have a fabulous technique to share with you today and it uses my favorite punch – the Decorative Label Punch!!! Check this out!!!

Room Divider, www.LaurasStampPad.com

Isn’t this adorable?!?! You could create it for any occasion by switching up the images – baby, wedding, moving, just because, get well, and more! I always think cute standing cards like these would be great for a get well or thinking of you because they can be displayed oh so nicely.

SUPPLIES NEEDED: Cardstock and Decorative Label Punch

There are not very many supplies which is fabulous and it still fits into a regular Medium Envelope! You will need a piece of cardstock (your base) measuring 4-1/4″ x 11″ and you will fold it in half like a a regular card. Then you will fold the end up to the that center fold for both sides, so folding the front up and the back one back. I hope that makes sense. Use a Bone Folder for those nice strong creases! This creates the folds so your card stands up. Now with 2 of the layers of cardstock folded, slide the Decorative Label Punch up half way and punch! Do this so that there is a punch out of all 4 pieces. This created those decorative feet on the bottom of your room divider. Now it is time to decorate. The Basic Black cardstock measures 3″ x 2-1/4″ and the Very Vanilla measures 2-3/4″ x 2″. I decorated the Very Vanilla with the Flowering Flourishes Stamp Set in Mint Macaron and then added some butterflies from the Papillon Potpourri Stamp Set. I stamped the butterflies in Elegant Eggplant and Wisteria Wonder and punched them out with the Elegant Butterfly Punch! I added the butterflies with some Stampin’ Dimensionals! Love it!!!!

Laying Down, www.LaurasStampPad.com

You can see this in action in the Video Tutorial below of by clicking here!!! Don’t forget to give it a thumbs up if you liked it!!! Come back tomorrow to see the Easel Card!

Happy Stampin’
~Laura


Technique Tuesday – 70+ Cards from 1 Stack!!!

Posted on

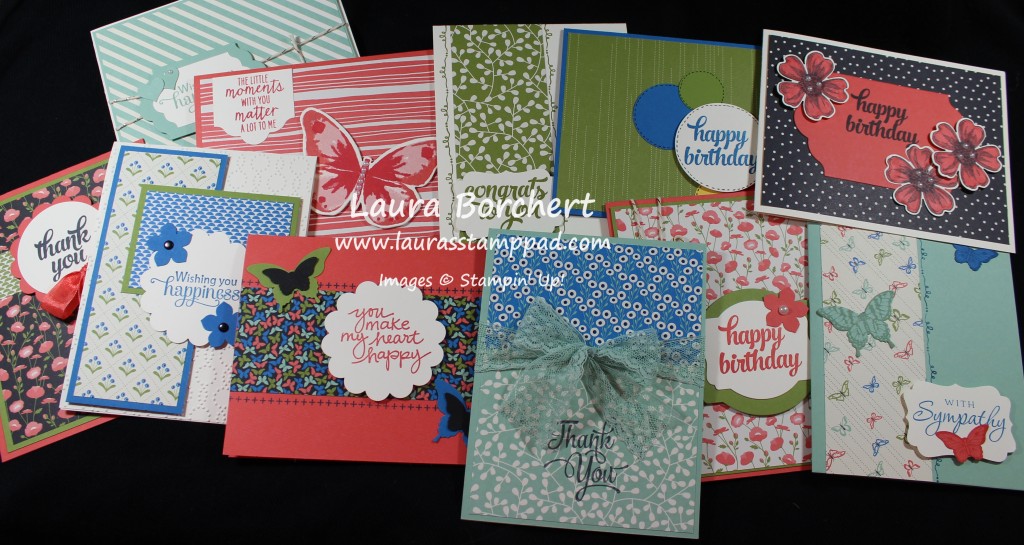
Happy Tuesday!!! You know what that means!!! I have a fabulous technique to share with you today. I will show you how to create over 70 Cards from a Designer Series Paper Stack! I used the Pretty Petals Stack and created cards for every occasion – man, women, sympathy, birthday, anniversary, wedding and more!!! I love it!
Pretty Petals Card Set, www.LaurasStampPad.com

Here are the cards that I created with each sheet in the Pretty Petals Designer Series Paper Stack! You can get multiples of each of these cards and then use the leftover scrap pieces to create quilt cards like these samples! I will be posting a few of these today and the rest tomorrow!!! 🙂 Let’s get started!

Butterfly Lovely Amazing You, www.LaurasStampPad.com

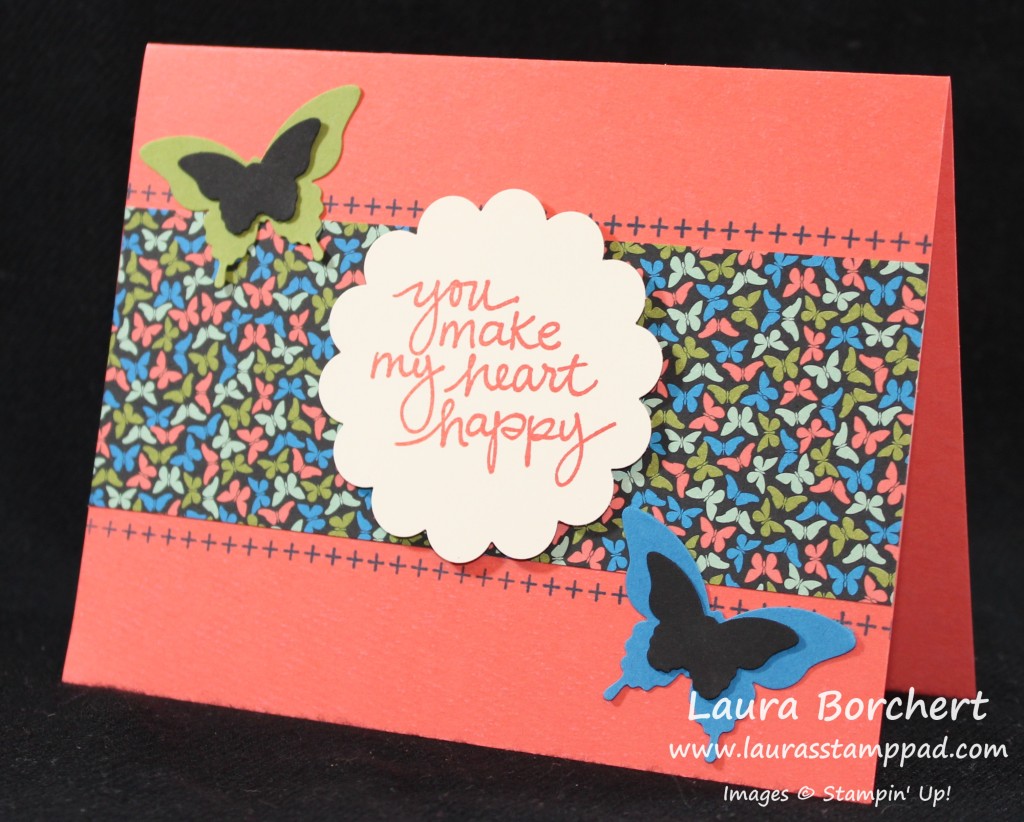
This card uses a Calypso Coral card base. The Pretty Petals Designer Series Paper measures 5-1/2″ x 2″. You can get 3 of these from one sheet and since there are 4 sheets of this pattern, that is 12 cards like this! The border on the top and bottom is from the Tin of Cards Stamp Set. I stamped the greeting from the Lovely Amazing You Stamp Set and punched it out with the 2-3/8″ Scallop Circle Punch! The butterflies were punched out from the Elegant Butterfly Punch and Bitty Butterfly Punch!

Sympathy Card, www.LaurasStampPad.com

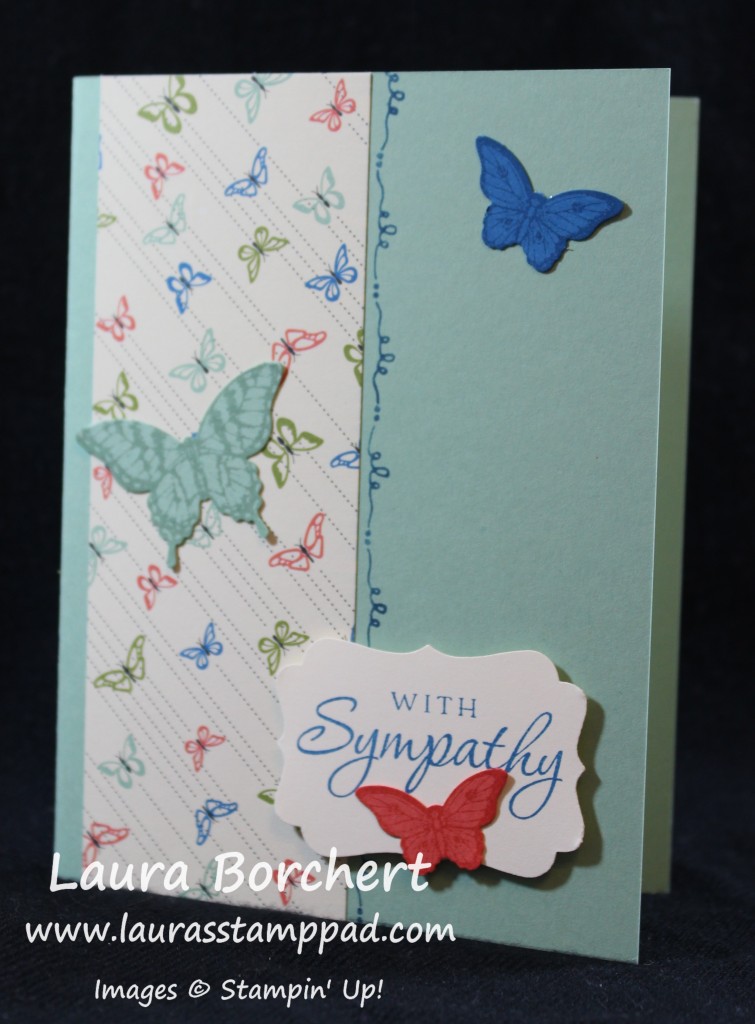
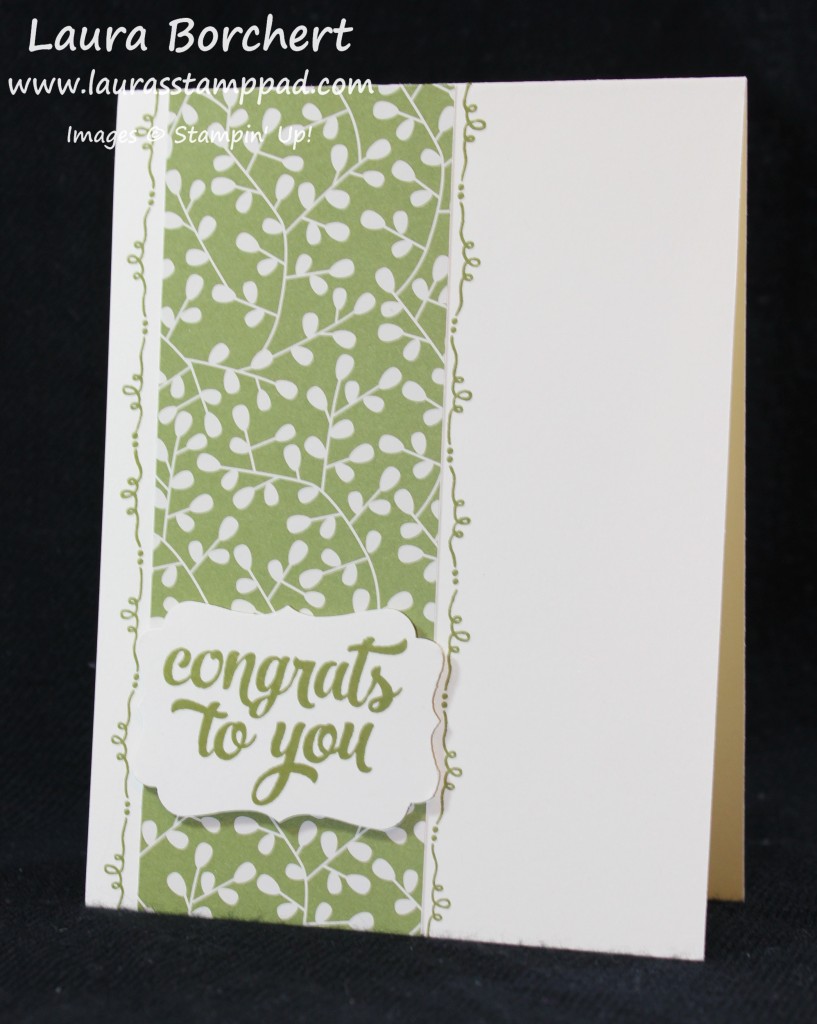
This card uses a Mint Macaron card base. The Pretty Petals Designer Series Paper measures 2″ x 5-1/2″. You can get 3 of these from one sheet and since there are 4 sheets of this pattern, that is 12 cards like this! The border along the side is from the Tin of Cards Stamp Set. I stamped the greeting from the August Paper Pumpkin Kit and punched it out with the Decorative Label Punch! The butterflies were stamped from the Papillion Potpourri Stamp Set and then punched out from the Elegant Butterfly Punch and Bitty Butterfly Punch!

Coral Flowers, www.LaurasStampPad.com

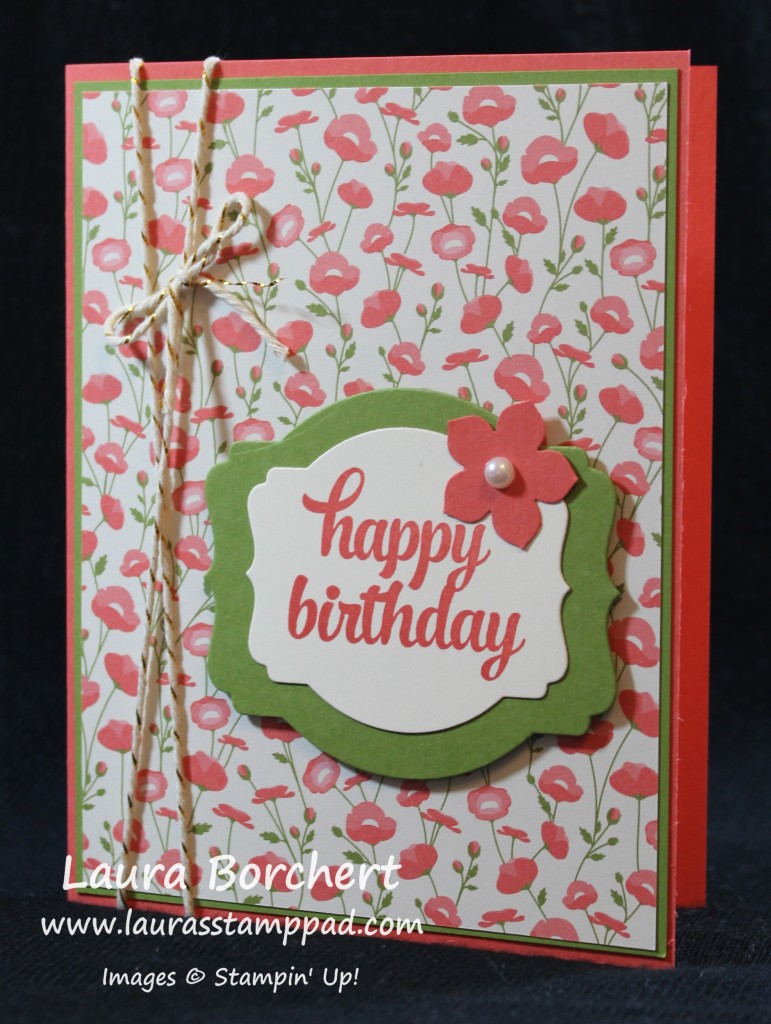
This card uses a Calypso Coral card base. The Pretty Petals Designer Series Paper measures 4″ x 5-1/4″. You can get 1 of these from one sheet and since there are 4 sheets of this pattern, that is 4 cards like this! The Designer Series Paper is layered onto Old Olive measuring 4-1/8″ x 5-3/8″. I wrapped some Gold Baker’s Twine around the left edge and tied it into a bow! The greeting is from the Tin of Cards Stamp Set. I die cut the greeting out with the Deco Label Framelits and added a layer of Old Olive with the next frame size up! I added a flower that was punched out with the Petite Petals Punch and I placed a Pearl in the center!

Quick Simple Card, www.LaurasStampPad.com

This card uses a Very Vanilla card base. The Pretty Petals Designer Series Paper measures 2″ x 5-1/2″. You can get 3 of these from one sheet and since there are 4 sheets of this pattern, that is 12 cards like this! The border on the left and right of the DSP is from the Tin of Cards Stamp Set. I stamped the greeting from the same set and punched it out with the Decorative Label Punch!

Birthday Circles, www.LaurasStampPad.com

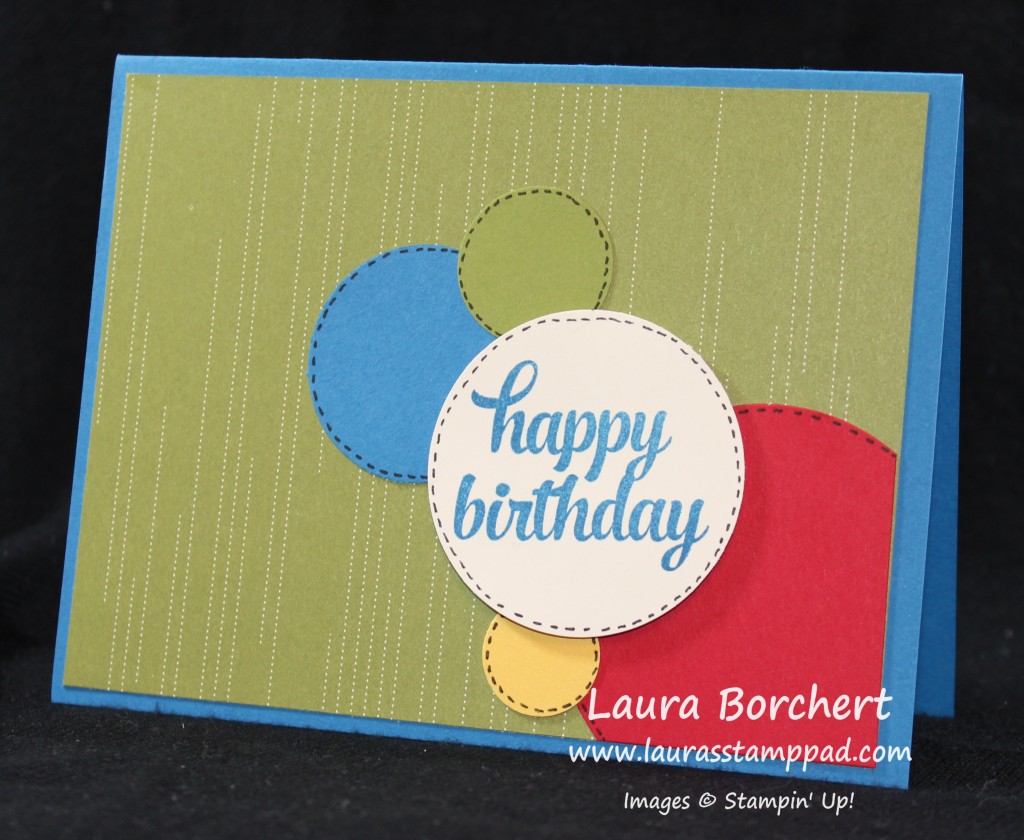
This card uses a Pacific Point card base. The Pretty Petals Designer Series Paper measures 5-1/4″ x 4″. You can get 1 of these from one sheet and since there are 4 sheets of this pattern, that is 4 cards like this! I used some of my scraps of cardstock in Real Red, Daffodil Delight, Old Olive and Pacific Point. I used various sizes of circle punches. The greeting is from the Tin of Cards Stamp Set. I thought the circles looked a little plain at first so I added the little stitches around the edges and I think it really makes them pop! Love it!! This would make a fabulous kid’s card!

I will be posting the rest of the cards in the set tomorrow! If you would like to see all of this in action, check out the Video Tutorial below or by clicking here! If you liked the video, be sure to give it a thumbs up! Don’t forget to subscribe to my blog so you don’t miss tomorrow’s post! 🙂

See you tomorrow! Which one of these is your favorite so far? Let me know in the comments below!

Happy Stampin’

~Laura


Crazy About Butterflies!!!

Posted on

Crazy About You, www.LaurasStampPad.com

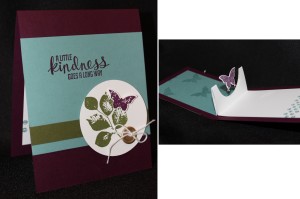
I thought the title for today was perfect since it is a mash up for the Crazy About You Stamp Set and Papillion Potpourri Stamp Set! Also, you know how much I love butterflies!!! This card was inspired by one of the Make and Takes at Spring Into Stamping which I attended a few weeks ago (Check that out here!)! The fabulous Julie Davison is the creator of our Make and Takes and she really wowed us this year! I love how simple and fabulous the front is but then you open it up and…..WOW!

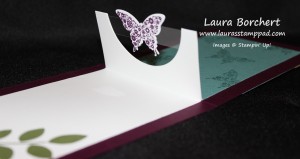
Butterfly Pop Out Card, www.LaurasStampPad.com

How fabulous is that??? I love when the inside is decorated too! It just pulls it all together to make a beautiful card and has such a WOW factor!!!! Love it!!!!

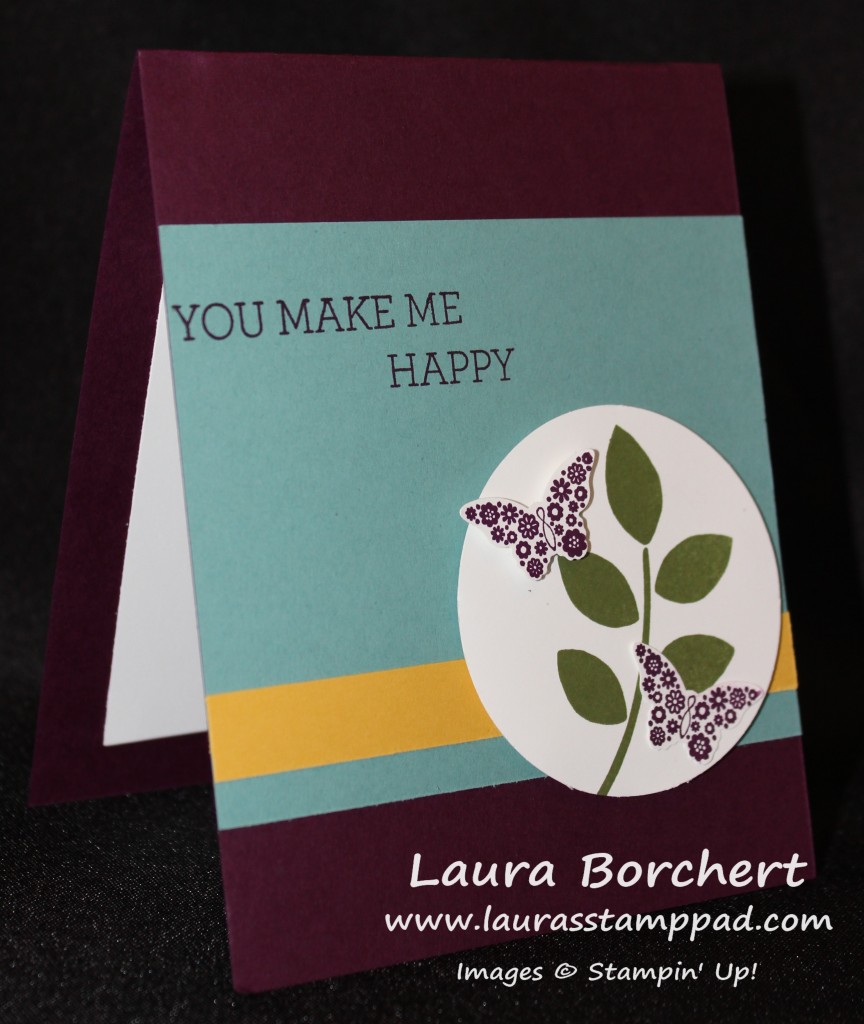
To get started, I have a card base of Blackberry Bliss measuring 4-1/4″ x 11″. The front was decorated with the Crazy About You leaves and then the Papillion Potpourri butterflies! I punched out the butterflies with the Bitty Butterfly Punch and the circle is the 2-1/2″ Circle Punch! The greeting is from the Crazy About You Stamp Set as well. I love how there are so many different greetings in that stamp set that you can mix and match with!!! Now for the inside, you will need a piece of Whisper White cardstock measuring 3-3/8″ x 9-1/2″ and score along the 9-1/2″ side at 1″, 2-3/4″, and 4-1/2″. This is what gives you that center pop-up piece! Fold on all of the score lines so you have a mountain at the top and then slide in your 2-1/2″ Circle Punch halfway and punch on that fold line. Using a Mini Glue Dot or Fast Fuse, adhere your Window Sheet (1/2″ x 3-1/4″) to the sides of your circle. Now you can attach this to the inside of your card. Make sure that the fold is on the fold of your card base! I noticed it seems to close better if you don’t have it tight in that fold and instead space the lower portion of the white down a little bit (small smidge) from that center card fold and the top portion up a small smidge from the center card fold. I hope that makes sense! 🙂 Once that is placed inside your card, you can adhere your butterflies. I used the bigger butterfly for the inside and punched it out with the Elegant Butterfly Punch! I just used regular Snail adhesive to adhere the butterflies to the front and back of the Window Sheet! I stamped the leaves from the Crazy About You Stamp Set in the lower corner of my Whisper White. For the Lost Lagoon piece (3-3/8″ x 5″) at the top, I stamped butterflies randomly all over in Lost Lagoon and then adhered it on, covering that top Whisper White lip.

SIS Sample

Here is the original card that was created at Spring Into Stamping. It used the Kinda Eclectic Stamp Set! I love the original but didn’t have that stamp set so I had to modify! 🙂 Do you like to modify samples that you see or copy exactly what it looks like? Let me know in the comments below!

Happy Stampin’

~Laura


Beautiful Butterflies!!!

Posted on

I was asked by the local Library to create a craft at a Volunteer Luncheon that they were having as a Thank You to these lovely ladies! The theme was butterflies and here is what I came up with!!!

Butterfly Curvy Keepsake Box, www.LaurasStampPad.com

These little Curvy Keepsake Boxes were a hit!!! They were able to pick from 4 different colors. We stamped butterflies all over with the Papillion Potpourri Stamp Set! The boxes were assembled using Fast Fuse adhesive and then we added on the Butterflies on the outside! The top butterfly was cut out in Vellum! They are so cute!

Butterfly Bookmarks, www.LaurasStampPad.com

The other project that everyone got to make was 1 of these bookmarks! I started with a piece of Whisper White cardstock measuring 5-1/2″ x 2″. The tops were punched out using the Scallop Tag Topper Punch and Ornate Tap Topper Punch!

The Butterfly Bookmark used the Papillion Potpourri Stamp Set and coordinating Bitty Butterfly Punch and Elegant Butterfly Punch! We used Tangelo Twist and Hello Honey. The greeting is from the Lovely Amazing You Stamp Set and I just had to brush the edges with my Sponge Daubers! I couldn’t resist! I used some of the Tangelo Twist and Hello Honey Satin Stitched Ribbon for the top!

The Flower Bookmark uses the Crazy About You Stamp Set for the flowers and leaves! The colors used were Crisp Cantaloupe, Calypso Coral and Wild Wasabi! We punched out the flowers with the coordinating 1-3/4″ Scallop Circle Punch! We used Calypso Coral Seam Binding for the top!

Both of these projects were lots of fun to create and simple enough for those who have never crafted before. It was a wonderful time celebrating all the amazing things these women do at the Library and they really enjoyed the afternoon! I had so much fun!

Happy Stampin’

~Laura


Technique Tuesday – Card In A Box!!!

Posted on

Happy Tuesday!!! I have a fabulous technique to share with you today!!! It is super fabulous and has a major WOW factor! This card is for sure one to put on the mantel or desk to display!!!

Card In A Box, www.LaurasStampPad.com

How amazing is this card? It is like a flower bouquet but in 3D. If you want a flat flower bouquet, click here! Now you can see why I said this card is one to display for sure!!! LOVE IT!! You can create in with flowers, butterflies, balloons, stars and so much more!!! Now lets get started on how to create it!!!

SUPPLIES NEEDED: Cardstock, Scoring Tool (either your Stampin’ Trimmer or Simply Scored), Sticky Strip, Designer Series Paper, Stamps, and Embellishments

You will start with a piece of cardstock measuring 5-1/2” x 9”. I used Bermuda Bay in the sample above. Now using your scoring tool on the Paper Trimmer or the Simply Scored Tool, you will score along the 9” end at 2 1/8”, 4 ¼”, 6 3/8” and 8 ½”. Rotate the cardstock 90 degrees and score at 2 ¾”.  Now using scissors, cut down to that 2-3/4″ along each score line to create flaps on the top half. Trim off the tiny strip left over at the end (this leaves a tab on the bottom half). Fold on the creases and use sticky strip to adhere the box together with that little flap. The best way to do this is to fold the card flat and stick the tab to the other side. By laying it flat you know it will adhere flat rather than trying to do it in the air and having it not lay flat. (I hope that didn’t super confuse you.) Now to create the tabs for inside the box which your decorations will be adhered to, you will need 2 pieces of cardstock measuring 1” x 3-1/8” and you will score at both ends at ½”. Fold the tabs to form a “z” and adhere sticky strip to the ends (opposite ends) and set aside. Now to decorate!!!!

For the back of the box, add cardstock for writing your message – this piece is 5 1/4” x 1-7/8”. Be sure to stamp before adhering it to the back of the card since it isn’t smooth. For decorating the flaps, you can use Designer Series Paper or cardstock for the top four panels. In my sample, I used Blackberry Bliss measuring 2″ x 2-5/8″ and then the Painted Blooms Designer Series Paper measuring 1-7/8″ x 2-1/2″. To add your two “Z” strips to the inside of the box, you will adhere them with one tab towards the back and then close the box and let the other tab attach to the other side of the box. For the other one, you will put it towards the front of the box and then close it to attach the other tab. See the video tutorial for more on this because I’m sure if I try to explain any more, I will only confuse you more! 🙂 Now you can embellish as desired. I used the Flower Shop Stamp Set and Pansy Punch. I also stamped a few butterflies from the Papillon Potpourri and Bitty Butterfly Punch! For the leaves, I used the Bird Builder Punch! I used little strips of Mossy Meadow to stand my flowers taller and for the butterflies, I used little strip of Window Sheet!

Card In A Box, www.LaurasStampPad.com

The other awesome thing about this card in a box is that it folds flat and fit into a regular envelope!!! Woot Woot! For the back, I used the Sale-A-Bration Stamp Set – Simply Wonderful! LOVE IT!!!!

Okay so what you have been waiting for….the Video Tutorial! I know this can be a bit confusing which is why I just had to film it. If you liked it, be sure to give it a thumbs up!!!

You can see another sample I created before by clicking here and here! I hope you enjoyed this and try it out! I would LOVE to see what you come up with so please share with me!!!

Happy Stampin’

~Laura


Beautiful Butterfly!!!

Posted on

Bitty Butterfly Embossed, www.LaurasStamppad.com

I really went through a Butterfly phase last Spring and I think as we get closer to this Spring, I’m reaching for those butterflies again! I love the colors, simplicity, and cuteness of this card! It also uses up scraps! Bonus!!!!! I started with a Whisper White card base and then took stripes of cardstock that are 1″ wide in Coastal Cabana, Pistachio Pudding, Crisp Cantaloupe, and Strawberry Slush. I took each color and ran each through the Big Shot with a different embossing folder! I used my Chevron Folder, Perfect Polka Dot Folder, Fancy Fan Folder, and Arglye Folder! You can use any folders you have! Then I took my Bitty Butterfly Punch and punched the bottom of each strip making sure to keep the angle the same each time. I did it by lining up the edge of the paper with the corner of the punch!!!

Punch Tutorial, www.LaurasStampPad.com

Then you will want to stamp one of the small butterflies from the Papillon Potpourri Stamp Set in the coordinating colors and punch them out with the Bitty Butterfly Punch. Without using adhesive, I set the first butterfly down towards the bottom on the left side of my card base to make sure my spacing was good. I started with my longest piece (some of my scraps were smaller so I used those for the little ones.) I added Snail Adhesive to the strip and placed it real close to the edge of the white, right above the butterfly. Then I added adhesive to the next one and spaced it real close and up a bit from the first one. Remember that each strip is 1″ wide and your card front is 4-1/4″ wide so you only have 1/4″ to have in between!!! Keep moving until you have all 4 strips placed down. I didn’t make specific measurements on the length because I just used scraps and after placing them down I trimmed off the extra cardstock along the top. Then I added a piece of Stampin Dimensional to each of the little butterflies and added those to the bottom of the strips! My greeting was stamped from the Petite Pairs Stamp Set in Strawberry Slush. Also, I added a little Itty Bitty Punch Pack flower in Coastal Cabana with a Rhinestone in the middle! Lots of scraps used up with this adorable card! Colorful and perfect for Spring!!!

How do you like to use up your scraps? Let me know in the comments below!

Happy Stampin’

~Laura


Tags and Bags!!!!

Posted on

There are so many times that you need a fabulous treat bag – school treats, teacher gifts, neighbor gifts, goodies for the Holidays, party favors, and gatherings!!! It is a must that it looks super cute, right? YES! And that it is super simple? YES! I’m here to save the day for all of your upcoming occasions or treat bag needs!!!

Watercolor Wonder Washi Tape Bag & Tag, www.LaurasStampPad.com

Boom…Problem Solved!!! How amazing is this treat bag!?!?!

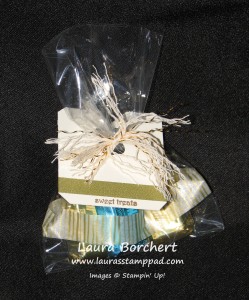
All you need are some 4″ x 6″ Cellophane Bags, Washi Tape (I used Watercolor Wonder Washi Tape) and a tag! The Washi Tape on the bag is super simple because it tears so you don’t even need scissors and I just overlap mine on the back side! For the tag, I used my Chalk Talk Framelits, a strip of Washi Tape, and stamped Sweet Treats from the Teeny Tiny Wishes Stamp Set! I love how the Chalk Talk Tag is notched so you don’t need to attach it with ribbon but just notch it around the top of the bag!!! To close the bag, I used my Gold Baker’s Twine and then took a needle to the ends to fray it and make it look fuller!

Tag Topper Treat Bag, www.LaurasStampPad.com

Here is another fabulous treat bag! This one is decorated with an adorable tag using the Scallop Tag Topper Punch! I then decorated the tag with my Papillion Potpourri Stamp Set and greeting from my Perfect Pennants Stamp Set! I closed this bag with some Whisper White Baker’s Twine in a double knot. Then I added the tag with the ends of the Baker’s Twine in a loop! These fabulous treat bags were made for a Mother/Daughter Banquet! See….cute treat bags are needed everywhere!!!

Here is a video showing how to make these fabulous treat bags! Be sure to “Like” and “Subscribe” to the video because that would be fabulous!!! Also, leave a comment down below and let me know what you would like to see next!!!

Happy Stampin’

~Laura