While Christmas may be over, some get started on their card early or you can always PIN this on Pinterest for next year. A more likely idea would be to use this technique with a different embossing folder or greeting for a card you can use within the next month or so! Check out this Embossing Folder ink transfer technique!

The technique just needs an embossing folder + brayer + ink! Change up the folder and ink for a completely different look! So many different possibilities! Give it a try!
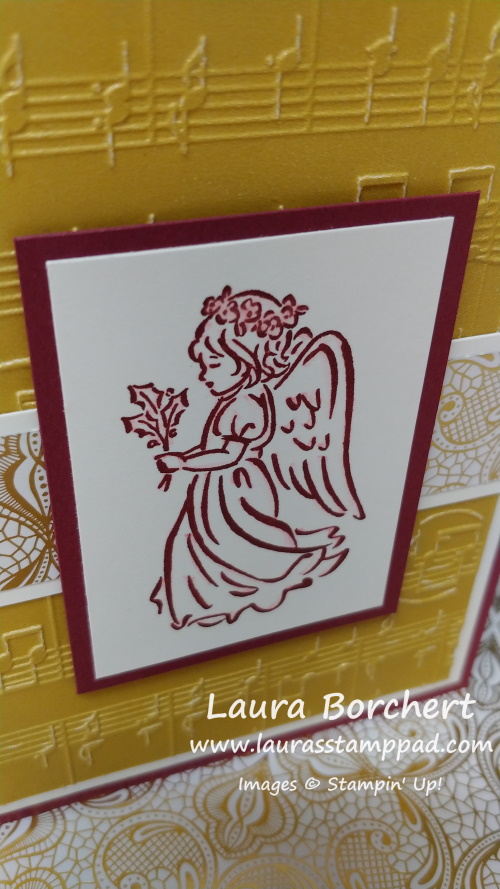
Step 1: Open your embossing folder (Traditional Wreath 3D Embossing Folder) and apply Old Olive ink to the back panel (the side without raised details) by simply pressing the ink pad directly on the folder. Place your Basic White Cardstock inside.
Step 2: Using a Stampin’ Brayer, apply firm pressure to the embossing folder to transfer ink to the cardstock. Tip: Use your fingers to press smaller spaces to transfer more ink to the cardstock.
Step 3: Remove the inked cardstock, then place red sequins (Traditional Sparkle Gems) over the single berries.
For a full list of the supplies used on this Merry Card using the Embossing Folder Ink Transfer Technique, check out the full list below!! I hope you will give this a try for your cards next year or for a card to use in the next month or two!
Happy Stampin’
~Laura
Product List![Words For The Season Dies (English) [ 165797 ]](https://assets1.tamsnetwork.com/images/EC042017NF/165797s.jpg "Words For The Season Dies (English) [ 165797 ]")
![Old Olive Classic Stampin' Pad [ 147090 ]](https://assets1.tamsnetwork.com/images/EC042017NF/147090s.jpg "Old Olive Classic Stampin' Pad [ 147090 ]")
![Traditions Of Christmas 12" X 12" (30.5 X 30.5 Cm) Specialty Designer Series Paper [ 165853 ]](https://assets1.tamsnetwork.com/images/EC042017NF/165853s.jpg "Traditions Of Christmas 12\" X 12\" (30.5 X 30.5 Cm) Specialty Designer Series Paper [ 165853 ]")
![Real Red 8-1/2" X 11" Cardstock [ 102482 ]](https://assets1.tamsnetwork.com/images/EC042017NF/102482s.jpg "Real Red 8-1/2\" X 11\" Cardstock [ 102482 ]")
![Basic White 8 1/2" X 11" Cardstock [ 166780 ]](https://assets1.tamsnetwork.com/images/EC042017NF/166780s.jpg "Basic White 8 1/2\" X 11\" Cardstock [ 166780 ]")
![Strawberry Slush 8 1/2" X 11" Cardstock [ 165625 ]](https://assets1.tamsnetwork.com/images/EC042017NF/165625s.jpg "Strawberry Slush 8 1/2\" X 11\" Cardstock [ 165625 ]")
![Traditional Wreath 3 D Embossing Folder [ 165874 ]](https://assets1.tamsnetwork.com/images/EC042017NF/165874s.jpg "Traditional Wreath 3 D Embossing Folder [ 165874 ]")
![Stampin' Brayer [ 162936 ]](https://assets1.tamsnetwork.com/images/EC042017NF/162936s.jpg "Stampin' Brayer [ 162936 ]")
![Traditional Sparkling Sequins [ 165875 ]](https://assets1.tamsnetwork.com/images/EC042017NF/165875s.jpg "Traditional Sparkling Sequins [ 165875 ]")
![Baker's Twine Essentials Pack [ 155475 ]](https://assets1.tamsnetwork.com/images/EC042017NF/155475s.jpg "Baker's Twine Essentials Pack [ 155475 ]")
![Love & Courage Cling Stamp Set (English) [ 165935 ]](https://assets1.tamsnetwork.com/images/EC042017NF/165935s.jpg "Love & Courage Cling Stamp Set (English) [ 165935 ]")
![Stampin' Cut & Emboss Machine [ 149653 ]](https://assets1.tamsnetwork.com/images/EC042017NF/149653s.jpg "Stampin' Cut & Emboss Machine [ 149653 ]")
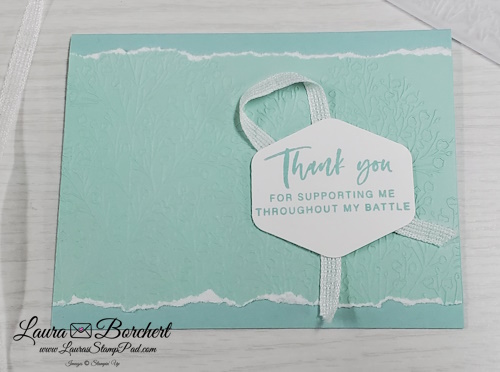
![Pressed Flowers Embossing Folder [ 165614 ]](https://assets1.tamsnetwork.com/images/EC042017NF/165614s.jpg "Pressed Flowers Embossing Folder [ 165614 ]")
![Pool Party 12" X 12" (30.5 X 30.5 Cm) Two Tone Cardstock [ 166691 ]](https://assets1.tamsnetwork.com/images/EC042017NF/166691s.jpg "Pool Party 12\" X 12\" (30.5 X 30.5 Cm) Two Tone Cardstock [ 166691 ]")
![Pool Party 8-1/2" X 11" Cardstock [ 122924 ]](https://assets1.tamsnetwork.com/images/EC042017NF/122924s.jpg "Pool Party 8-1/2\" X 11\" Cardstock [ 122924 ]")
![Heartfelt Hexagon Punch [ 162888 ]](https://assets1.tamsnetwork.com/images/EC042017NF/162888s.jpg "Heartfelt Hexagon Punch [ 162888 ]")
![Pool Party Classic Stampin' Pad [ 147107 ]](https://assets1.tamsnetwork.com/images/EC042017NF/147107s.jpg "Pool Party Classic Stampin' Pad [ 147107 ]")
![White 1/4" (6.4 Mm) Ribbon [ 165562 ]](https://assets1.tamsnetwork.com/images/EC042017NF/165562s.jpg "White 1/4\" (6.4 Mm) Ribbon [ 165562 ]")


")


")
 Designer Series Paper")


")
 Designer Series Paper")

 Crinkled Seam Binding Ribbon")


")
 Specialty Designer Series Paper")
 Shimmer Vellum")


")


")
 Designer Series Paper")


 Polka Dot Tulle Ribbon")

