Tempting Techniques – T-Shirt Builder Bundle!!!

Posted on

Happy Tuesday!!! That means I have a fabulous technique to share with you using the T-Shirt Builder Bundle from the Occasions Mini Catalog! I love how this set is perfect for all ages and both men and women!!!

T-Shirt Builder Bundle, www.LaurasStampPad.com

This card is perfect for Father’s Day or change up the greeting and make it a Birthday Card!!! Either way, it’s the perfect Man Card and I really struggle with those! Let’s get started!

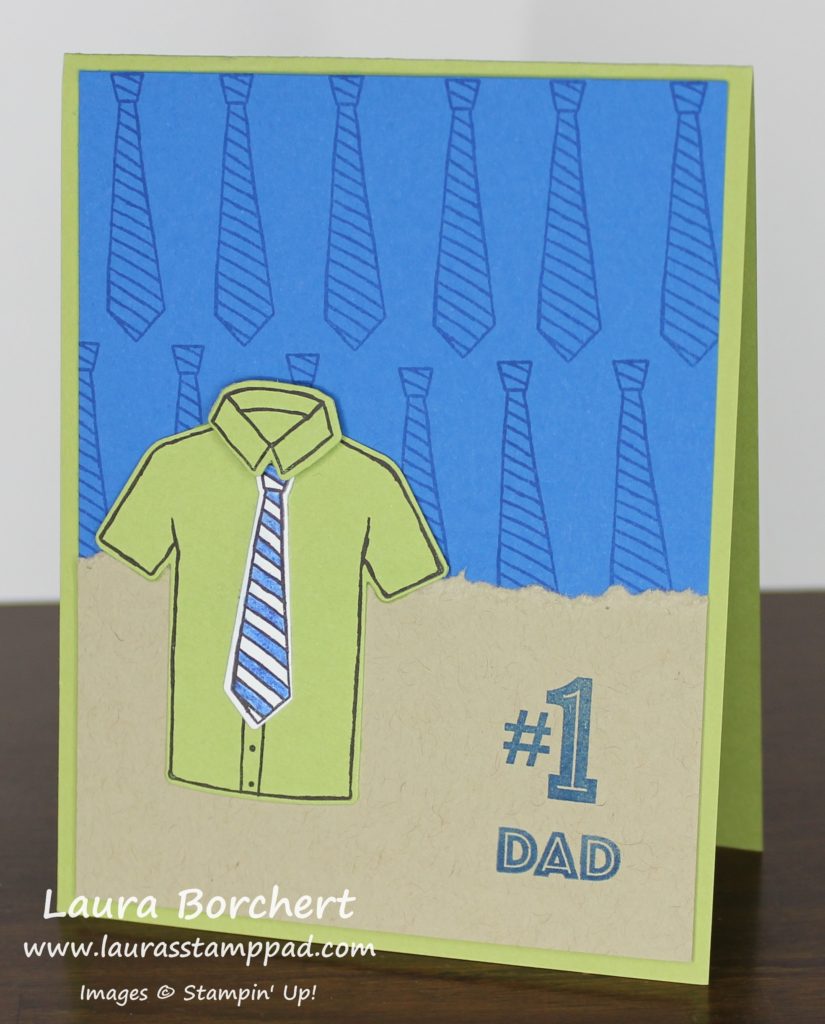
I used the T-Shirt Builder Bundle for this entire card! Starting with the shirt, I stamped the men’s shirt, buttons down the front, and the collar. All of them are stamped in Basic Black onto Pear Pizzazz. I stamped the tie in Basic Black onto Whisper White. Using the T-Shirt Builder Framelits, I die cut the shirt, collar, and tie. I thought the tie needed a pop of color so I colored in every other stripe with the Pacific Point Marker.

For the card, I started with a Pear Pizzazz card base. Next, I took a piece of Pacific Point cardstock (4″ x 5-1/4″) and stamped the tie on the background in Pacific Point Ink. This gives the background a some pattern. After stamping the background, I adhered it to the card base. Then I took a piece of Crumb Cake (4″ x 2″) and ripped around the top edge for a little texture. I stamped the greeting from Custom Tee Stamp Set. The set actually says RAD DAD but I omitted the Rad part but just inking Dad. I stamped it below the #1! Then I adhered it to the bottom of the Pacific Point on the card . Then I added the shirt. The actual shirt was added flat to the card but I added the collar with a Stampin’ Dimensional to make the shirt look more real!

If you would like to see this all in action, check out my Video Tutorial below or click here! Don’t forget to give it a thumbs up if you liked it and be sure to subscribe if you are new. I post a new video every Tuesday and Thursday! Check back tomorrow as I will be posting another sample using the T-Shirt Builder Bundle!

Happy Stampin’

~Laura

Technique Tuesday – Creating a Marbled Background!!!

Posted on

Happy Tuesday!!! You all know what that means!!! I have a super fun technique to share with you – creating a marbled background!!! Check this out!!

Best.Guy.Ever., www.LaurasStampPad.com

Isn’t the background super cool?? It is super easy as well. All you need are ink pads and baby wipes!!! I got this technique from fellow demonstrator, Sandy Jacobson! I love sharing ideas!!!

SUPPLIES NEEDED: Ink Pads, Baby Wipes

For creating the marbled background, I started with a piece of Shimmery White cardstock measuring 4″ x 5-1/4″. You can use regular Whisper White or Very Vanilla cardstock if you wish! It works the same with all but I liked the little hint of shimmer! Next, I took a wet baby wipe and balled it up and very lightly tapped it into an ink pad and then pounced all over the cardstock. I used Bermuda Bay Ink, Cucumber Crush Ink, and Pumpkin Pie Ink. You can pounce with each color as little or as much as you wish. It’s as simple as that! Super fun and comes out different each time. You can mix and match any color combination!

To finished the above card off, I placed it onto a Bermuda Bay card base. I stamped the birthday greeting in the lower right corner from the Balloon Adventures Stamp Set. The die cuts came from the Stitched Shapes Framelits in Cucumber Crush and a t-shirt from the T-Shirt Builder Framelits in Bermuda Bay. I stamped the front of the shirt with the Suite Sentiments Stamp Set. Next, I added the t-shirt to the square with Stampin’ Dimensionals to make it look a little more 3D. I added loops of Whisper White Baker’s Twine to the back of the square, securing it with Stampin’ Dimensionals and then adding it to the card front! Perfect Man Card!

Razzleberry Dress, www.LaurasStampPad.com

I used Wisteria Wonder Ink and Rich Razzleberry Ink for this one. For the decoration, I stamped the lady from the Beautiful You Stamp Set in Basic Black and her dress in Rich Razzleberry. The greeting was done in Wisteria Wonder. I went over her dress with a Wink of Stella Pen which added a little shine and blended it together a bit. I used the leftover bit of ink on the tip to color in her hat. Then, I layered this piece onto Silver Foil Paper and added it to the card front. To finish it off, I added a few White Perfect Accents. Love it!

If you would like to see this all in action, check out the Video Tutorial below or click here! Don’t forget to give it a thumbs up if you liked it and be sure to subscribe if you are new! I post every Tuesday and Thursday!

Have fun trying this out yourself! What color combination will you use? Let me know in the comments below!

Happy Stampin’

~Laura


Coloring With a Chalk Marker!!!

Posted on

Rustic Birthday Chalk Marker, www.LaurasStampPad.com

Happy Friday!!! Today we are going to be coloring with the White Chalk Marker! These markers are fun to use on black cardstock for that chalkboard look but you can use them for other projects like this one too!!! I love getting out tools and using them for more projects than the typical use! So get out that Chalk Marker and let’s play!!!

For this card, I used a Crumb Cake card base! Then I took a piece of Cucumber Crush (5-1/4″ x 4″) and ripped the top and bottom. You just want to do little tears all along, rather than one long rip!  Then I took another piece of Crumb Cake (5″ x 2-1/2″) and ripped the top and bottom of this piece as well. I stamped the Happy greeting from the Happy Celebrations Stampin’ Up Stamp Set in Crumb Cake Ink. After stamping the greeting, I used the White Chalk Marker and drew lines down each of the letters. I’m not the best at drawing and free-hand stuff so a simple line was enough for me but you could always decorate with dots, squiggles, or another design! I adhered this piece to the Cucumber Crush piece and then stamped the “Birthday to You” in Cucumber Crush Ink in the lower right corner! Then I added this piece to the card front! To finish it off, I wrapped some Linen Thread around the top and tied it into a knot. Linen Thread is the perfect embellishment for a man card!!! Simple and fabulous!!!

You could always mix up the colors to match the recipients favorite color or based on the gender! If you would like to check out other samples using the Happy Celebrations Stamp Set by clicking here and here! If you would like to see more ways to color with the Chalk Marker, click here and here!

Don’t forget that Sale-A-Bration is still going on till the end of March! You can pick out a FREE item for every $50.00 that you order! You will also be earning Laura’s Loyal Stampers Stickers and after 10 stickers you will get a $40 Gift Certificate! Now is the perfect time to stock up on all the stamping goodies!!!

I hope you all have a wonderful weekend and I’ll see you back here on Monday!

Happy Stampin’

~Laura


Birthday Balloons!!!

Posted on

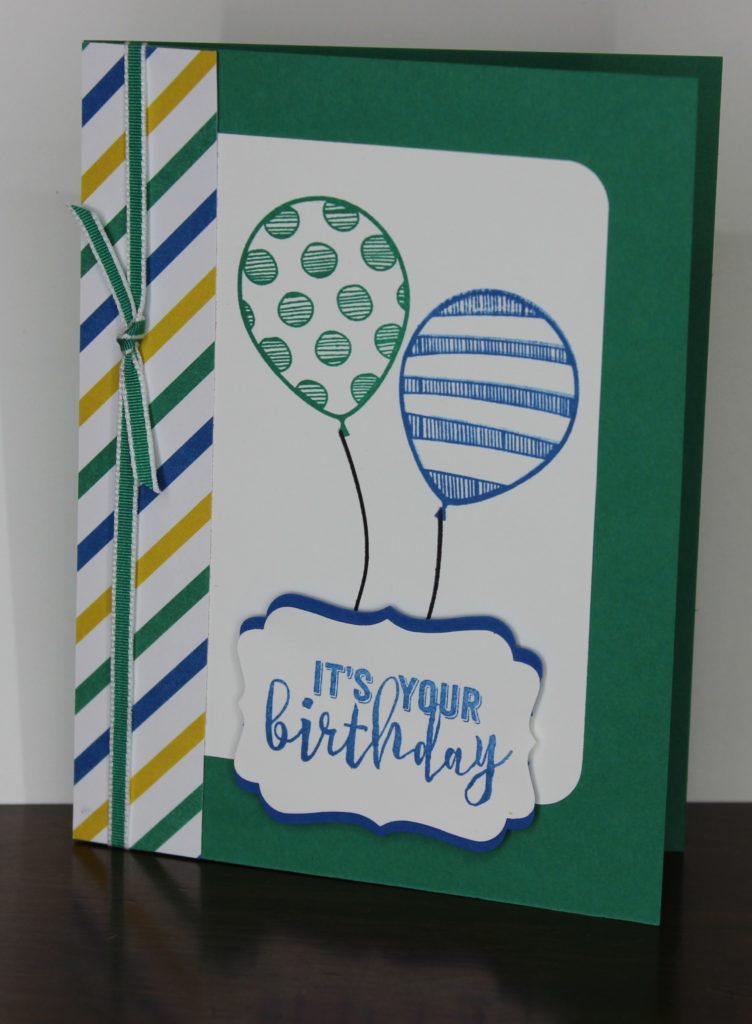
Blue.Green Balloons, www.LaurasStampPad.com

A new year has begun and that means Birthdays will happen!!! I love sending Birthday Cards because it is the one event that we all partake in!!! I tend to struggle with man card since I love PINK and flowers and bling but this one is perfect!!!

I started with an Emerald Envy card base! Then I took a piece of Whisper White measuring 4″ x 3″ and punched the right side corners with the Corner Rounder Punch. I stamped the balloons from the Balloon Adventures Stamp Set in Pacific Point Ink and Emerald Envy Ink. I stamped the strings of the balloons in Basic Black Ink. I made this card first but since I have made a few more and I like the squiggle string better for this card. It makes the strings not look so straight and blah. I added this piece to a Emerald Envy card base in the middle of card. Then I added a piece of Party Animal Designer Series Paper measuring 1″ x 5-1/2″ along the left hand side of the card. This covers the gap between the edge of the card and the balloon piece! Then I added some Emerald Envy Taffeta Ribbon around the card and tied into a knot. The ribbon goes to the inside of the card! For the greeting, I stamped it in Pacific Point Ink onto Whisper White. I punched it out with the Decorative Label Punch. Then I punched out another one in Pacific Point and cut it in half. I put half behind the upper part of the greeting and the other hand on the lower portion of the greeting. Check out the video on how to do it here! I added the greeting to the card front with Stampin’ Dimensionals. Love it!!!

If you would like to get a Birthday Card this year, send me you name and address here! I would love to send out tons and tons of cards this year! #imbringingbirthdaysback

Happy Stampin’

~Laura


Fall is in the Air!!!

Posted on

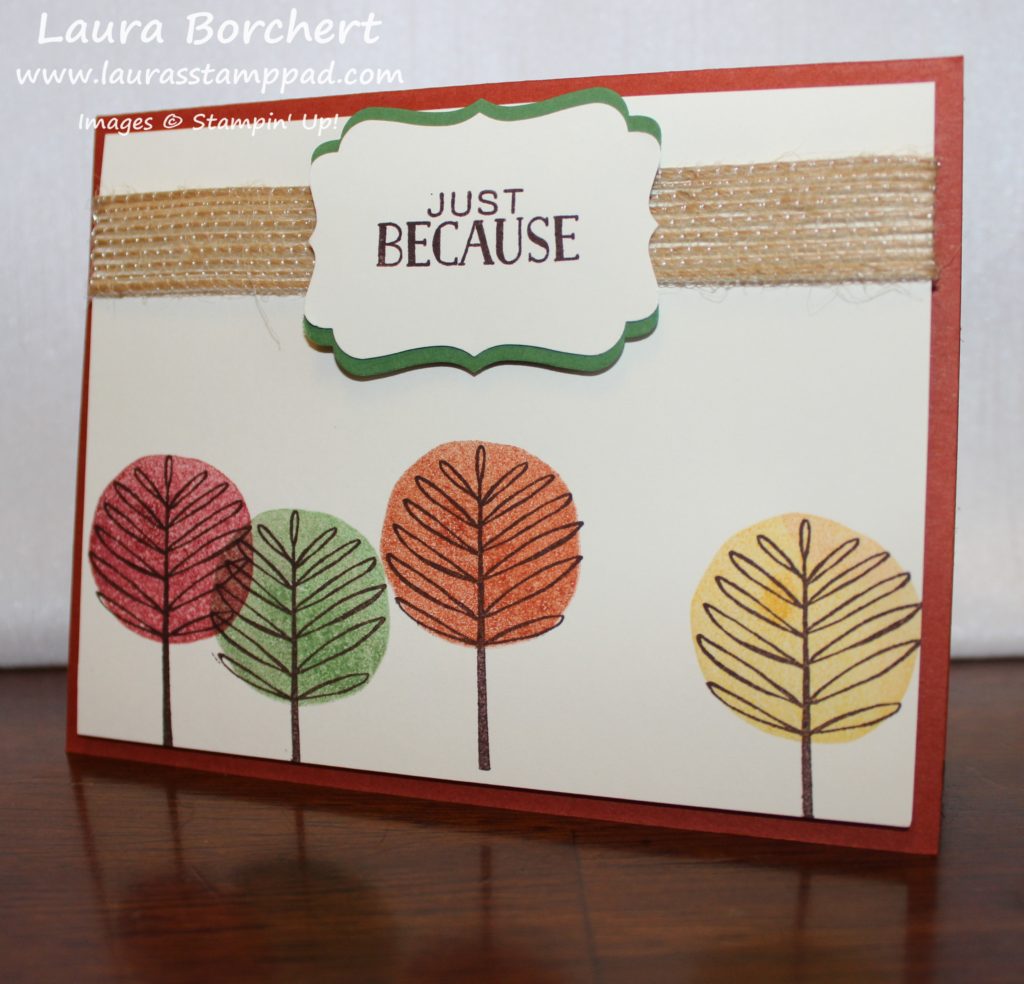
fall-trees, www.LaurasStampPad.com

Fall is here and there is no denying it! Let’s just hope it stays Fall and doesn’t become the next season…..oh how I don’t like winter at all. In the mean time, I’m trying to enjoy the sun, warm fall days, crisp morning, and the beautiful colors of trees!!! This card is made with the Totally Trees Stamp Set from the Holiday Mini Catalog which has every type of try for every location and occasion! It is super fun and perfect for a man card too! If you would like to see more samples, check them out here and here!

I started with a Cajun Craze card base. This color is one that I only really use during the Fall. It’s the perfect fall color. Then I took a piece of Very Vanilla (4″ x 5-1/4″) and stamped the trees along the bottom from the Totally Trees Stamp Set. I did the base in Chocolate Chip and then the circles in Garden Green, Cajun Craze, Cherry Cobbler, and Crushed Curry. I wanted a more subtle look so I stamped off once with each of them before stamping onto my cardstock. This gives a lighter look so it isn’t so bold. I added a piece of Burlap Ribbon along the top. I added a bit of adhesive in the middle to hold it down since I knew the greeting would cover any sticky that might come through. I placed some Stampin’ Dimensionals on the back side to hold the ends down. I really like using dimensionals when I have ribbon on the back side of my cardstock because the dimensionals give it a smooth look rather than a bumpy one when using Fast Fuse or Snail. Since the ribbon is wide, I just used the dimensional border and placed a long piece over the top. I added more dimensionals along the back and adhered it to the card base. For the greeting, I stamped it from the Tin of Cards Stamp Set in Chocolate Chip Ink onto Very Vanilla cardstock. I punched it out with the Decorative Label Punch. Then I punched another one out in Garden Green and layered it behind by cutting it in half and placing one piece above and one below for a nice layer. You can check out this video on how to do that here. I added the greeting to the card with Stampin’ Dimensionals as well….again for that smooth look and because dimensionals sink into the ribbon and around it rather than just sitting on top! Now you have the perfect fall card!

I hope you all have a wonderful weekend enjoying the Fall weather and don’t some of your favorite things! See you back here on Monday!!!

Happy Stampin’

~Laura

Seasonal Offer, www.LaurasStampPad.com

Check out my Cut For Christmas Offer this season! The perfect holiday helper during this busy time of the year!!!


Sail Away On A Sailboat!!!

Posted on

Sailboats, www.LaurasStampPad.com

The Swirly Bird Stamp Set is so versatile and fun with all of the crazy images! I created these little sailboats with that stamp set to make the perfect Man Card! This could be for birthdays, Father’s Day, or just any occasion. You could always change up the colors for a more feminine look. I mean technically these colors would be perfect for either gender as well but you know how I love my pinks!!! 🙂

This card is fairly simple but can get a little confusing with colors. You will need 4 Whisper White squares measuring 1-3/4″ x 1-3/4″. One each of the squares, you will stamp the boat bottom from the Swirly Bird Stamp Set in Crumb Cake Ink. You will want to stamp fairly close to the bottom of the square for a good fit. There is also a little bitty flag for the top of the sail that you can add on as well. If you use the little flag, stamp REAL close to the bottom so you have plenty of room. Now for the sails, there is the large sail on the right side in solid and stripes and then there is the small sail on the left side. Here is where it can get confusing with colors. I did 1 solid and 1 strip of Emerald Envy and Dapper Denim. I did the opposite color for the small sail on the left. Once you have all of your boats complete, you will need 4 squares measuring 2″ x 2″. I did 2 in Dapper Denim and 2 in Emerald Envy. Adhere those together and then place on a Crumb Cake card base. You can do all 4 towards the bottom with the greeting up top, all 4 at the top with the greeting at the bottom or split like I did. It is all up to you!

Swirly Sailboats, www.LaurasStampPad.com

Once you have your sailboats in place, wrap some Linen Thread around your card a few times and tie a knot. For the greeting, I used the Thoughtful Banners Stamp Set and coordinating Duet Banner Punch (Bundle & Save 10%). I stamped the banner in Dapper Denim and the greeting in Emerald Envy and punched it out. I added it to the card with Stampin’ Dimensionals.

I have had so much fun with the Swirly Bird Stamp Set and coordinating Swirly Scribbles Thinlits (Bundle & Save 10%), you can check out more samples here, here and here! AND when I was teaching this class, I found ANOTHER fabulous image from the framelits…..a Pumpkin! I can’t wait to use it in the Fall for that!

Happy Stampin’

~Laura


Technique Tuesday – Irresistibly Floral Fun!!!

Posted on

Happy Tuesday!!! You know what that means! I have a fabulous technique to share with you today! The many different ways to emboss resist (the easy way)! The Irresistibly Floral Designer Series Paper is 12″ x 12″ white paper that is embossed in clear with a design – flowers, stripes, dots, and more! It is stunning paper and you can add color to use and really make the images POP!!!

Blue.Green Stripes, www.LaurasStampPad.com

How fabulous is this card??? It would have been perfect for Father’s Day! It’s just screams Man Card!!! Love it!!!

SUPPLIES NEEDED: Irresistibly Floral Designer Paper, Sponge Daubers, Ink of Choice

I cut a piece of the stripes Irresistibly Floral Designer Series Paper into a 4″ x 5-1/4″ piece. For this one, I used Sponge Daubers to color the stripes. I felt like I had more control and the sponge dauber is about the width I wanted in color! I started in the middle and worked my way to the sides. I just went up and down with the dauber adding as much color as I wanted. Once I was done with each color, I wiped off the excess ink with a paper towel! You can do a rainbow of colors or pick any amount of colors you wish! I used Emerald Envy and Dapper Denim. Then I added this piece to a Emerald Envy card base and wrapped some of the Whisper White Thick Baker’s Twine around the card. It really gives this card a nautical look, doesn’t it? For the greeting, I die cut a label from the Lots of Labels Framelits with the Big Shot. I stamped the greeting from the Tin of Cards Stamp Set and added a few of the Stars from the In-Color Enamel Shapes Pack. I added the greeting piece to the card with Stampin’ Dimensionals. It is a big bumpy over the ribbon so you will for sure want to use Dimensionals or you can always place the greeting below the ribbon!

You can always change up the colors or even add color in other ways like with Markers, Stamping, Spritzers, and Sponge Brayers. There are endless possibilities.

If you would like to see all of the paper in the Irresistibly Floral pack and the different ways to color it, check out the video tutorial below or click here. Don’t forget to give it a thumbs up if you liked it and be sure to subscribe if you are new. I post every Tuesday and Thursday!

Happy Stampin’

~Laura


May 2016 Paper Pumpkin – Many Manly Occasions!

Posted on

May Paper Pumpkin, www.LaurasStampPad.com

Look at these amazing Man Cards??? You all know I struggle with Man Cards because I love Pink and Flowers and Bling. The May 2016 Paper Pumpkin Kit – Many Manly Occasions is perfect! The stamp set had lots of greetings for upcoming occasions like Father’s Day and Birthday. It also had lots of name stamps like Dad, Grandpa, Son, Brother, etc. Of course the timing was perfect with Father’s Day around the corner. I made enough of those for everyone and then I made the rest into Birthday cards!

Manly Birthday, www.LaurasStampPad.com

All you had to do for these cards is add the Happy greeting which came in a scroll font and a block font and stamp the rest of the greeting (Father’s Day, Birthday, Name, decoration). I used the stars because they looked fun and manly. There was also a candle, arrow, cake, and hearts. These little images are perfect for the card or decorating the envelope. Once it is all stamped you can add the Pumpkin Pie corrugated background to the inside of the card. It was really easy to go and created a fun and textured look.

Happy Father's Day, www.LaurasStampPad.com

This is the block letter font for the Happy! You will also notice that there was 2 styles of the card base. One is like the above – rectangles with a straight greeting bar and the other is a diagonal greeting bar with triangles cut out!

Happy Birthday, www.LaurasStampPad.com

The kit also came with Pool Party Epoxy Stars but I didn’t use them on these cards! I just liked them as is and so I thought I would save them for a different project!

Grandpa Father's Day, www.LaurasStampPad.com

Between my husband and I, we only have one Grandpa left. I always make sure to send cards for every occasion! 🙂

Extra Paper Pumpkin, www.LaurasStampPad.com

As always, these Paper Pumpkin Kits come with plenty of goodies. I was able to create these 2 cards with the leftovers. I added the Epoxy Stars to these. I even had to add some to the inside of the one card because I got an ink smudge in there. Opps! 🙂 Cute, simple and fabulous!

If you are a Paper Pumpkin Subscriber, you can purchase Refills of this kit to have lots of Man Cards! Click here to get some refills! If you would like to get the June Paper Pumpkin Kit, click here! You need to be signed up before June 10th!

Happy Stampin’

~Laura


Technique Tuesday – Decorative Corner Card!!!

Posted on

Happy Tuesday!!! That means I have a fabulous technique to share with you today! This one is super fun because it’s a Box and a Card and it still fits into a regular Medium Envelope! I think this one is super simple and fun! You can check out another box card here!

Birthday Box Card, www.LaurasStampPad.com

Look how fabulous it is? It is so hard to show 3D in a photo so I have a few and of course a Video Tutorial!!! 🙂 I got this idea from a fellow demonstrator – Linda Yearsley at one of our Team Meetings. Linda got the idea from Debbie! A big Thank You to both ladies for the fabulous idea! Now let’s get started!

SUPPLIES NEEDED: Stampin’ Trimmer, 1″ Circle Punch, Designer Paper of your Choice

There aren’t a lots of tools needed for this fun card! You will start with a normal card base measuring 5-1/2″ 8-1/2″ and you will want to score it along the 8-1/2″ side at the following measurements – 2-1/8″, 4-1/4″, 6-3/8″. This will create 4 panels of the exact same size. You will fold on all of the score lines and be sure to use a Bone Folder for a nice strong crease! Now you will need your layers to decorate your panels. You will need four solid cardstock panels measuring 5-1/4″ x 1-7/8″. I used Marina Mist in this sample! Then I used some of the It’s My Party Designer Series Paper for the next layer on the panels. You only need three panels of Designer Series Paper and one Whisper White all measuring 5″ x 1-5/8″. The white panel will be on the back side for you to write on. This is like the “inside of the card.” Once all of these pieces are on your card base, it is time to seal it into a box! You will need a piece of cardstock in the same color as the card base measuring 1″ x 5-1/2″ and you will score it or fold it in half at the 1/2″ mark. Add adhesive to both panels (same side) of this small piece. You can use Tear & Tape or Fast Fuse. I used both on mine and they held together really well so it is all up to you! Now you will add one side of the strip to one end of the card base. Then lay your card flat and press the other end of the card base to the other side of the strip. I always like to lay it down and press it because then I know it will lay flat when I go to mail it.

Back of Box Card, www.LaurasStampPad.com

Now that you have your box, it’s time for the decoration. To get it to POP out on the corner, you will need two circles using the 1″ Circle Punch in the same color as your card base! Fold the circles in half. Add a Stampin’ Dimensional to one of the halves of the circle and then use Fast Fuse on the half. With the Fast Fuse side, place it with the crease (fold) right next to the corner fold of the card. You will do both circles like this on either sides from each other and on either side of the crease on the box card.

Pop Out Box Card, www.LaurasStampPad.com

Then you will peel off the backs of the Stampin’ Dimensionals and place your greeting on top! For the greeting, I punched out a Basic Black 2-3/8″ Scallop Circle and a Marina Mist 2″ Circle! I stamped the greeting from the Tin of Cards Stamp Set in Mint Macaron and punched it out with the 1-3/4″ Circle Punch! I also used the star from the Tin of Cards Set to stamp the back panel as well. You could use all kinds of Punches or Framelits for your greeting piece! I love it!!

If you would like to see this all in action because I have you totally confused, check out the Video Tutorial below or click here! I hope you aren’t confused after this! If so, remember you can always ask me for tips or suggestions if you need help! I am happy to help! Don’t forget to give this video a thumbs up if you liked it and be sure to subscribe!

Happy Stampin’

~Laura

Ribbon Retire

Be sure to check out the Retiring Items before they are gone at the end of May!


Background Blues!!!

Posted on

Birthday Boy Card, www.LaurasStampPad.com

You all know how I struggle with a good man card because I just love flowers, ribbons and bling! Well check out this one!!!! I love it and I think it’s a perfect Man Card!!! I will be making multiples of this one to have on hand!!!

I started with a Soft Sky card base. Then I cut a piece of Night of Navy measuring 4″ x 5-1/4″ and White White measuring 3-3/4″ x 5″. On the Whisper White, I stamped the tea cup stain image from the Timeless Textures Stamp Set all over in Soft Sky and Night of Navy. Just randomly stamp and be sure to fall off the sides to make it look like the pattern continues. I adhered this piece to the Night of Navy and then wrapped some Linen Thread around the 2 pieces a few times and tied a knot (no bow since it’s a Man Card)! 😉 I added this piece to the card base with Stampin’ Dimensionals. You all know I love those things and I like to use them when there is ribbon (or something wrapped around) because it allows for it to still look smooth! For the greeting, I stamped the Happy Birthday in Night of Navy and die cut with the Deco Label Framelits. I brushed the edges with a Sponge Dauber and Soft Sky Ink and attached it with Stampin’ Dimensionals as well! Just perfect!!!!

What do you like to use for your Man Cards? Let me know in the comments below! I always need help with Man Cards! Also, if you would like to see more samples using the Timeless Texture Stamp Set, click here and here!

Happy Stampin’

~Laura

Project Life Retire

Be sure to check out the Retiring Items before they are gone at the end of May!