Sometimes we get stuck in a rut with our crafting! Here is a fun technique that you should try to pull you out of that rut! This technique can be used with lots of different stamp sets!! Step out and try this bee kind card!
Step 1: Die cut a heart shape or image of your choice from Basic White Cardstock. Then, stamp the bee image with Memento ink onto the Silicone Craft Sheet.
Step 2: Place the die-cut heart on the stamped image and rub it with your finger to transfer the image to the cardstock. Be careful not to wiggle or move the cardstock because then you will get a smeared image.
Step 3: Now that you have the reversed image bee, stamp the image again on the heart so that the bees are facing one another. So sweet!!!
This is a fabulous technique to use with lots of different stamp images! What image would you love to try this out with?!?! Let me know in the comments below!
Check out the supplies used in this card below! You can click each image or select Add All To Cart! Don’t forget about all of the amazing perks when you shop with me – Fabulous Friends Club Perks and Free Gift of the Month!
Have you been thinking about joining Stampin’ Up!? Do you want a discount on your favorite products?! This month’s Starter Kit promotion is INCREDIBLE and an amazing deal!!! 💛
When you join this month, you’ll receive:
✨ $125 worth of ANY products you choose ✨ FREE shipping ✨ ALL for just $99
AND there’s MORE!! 🎉
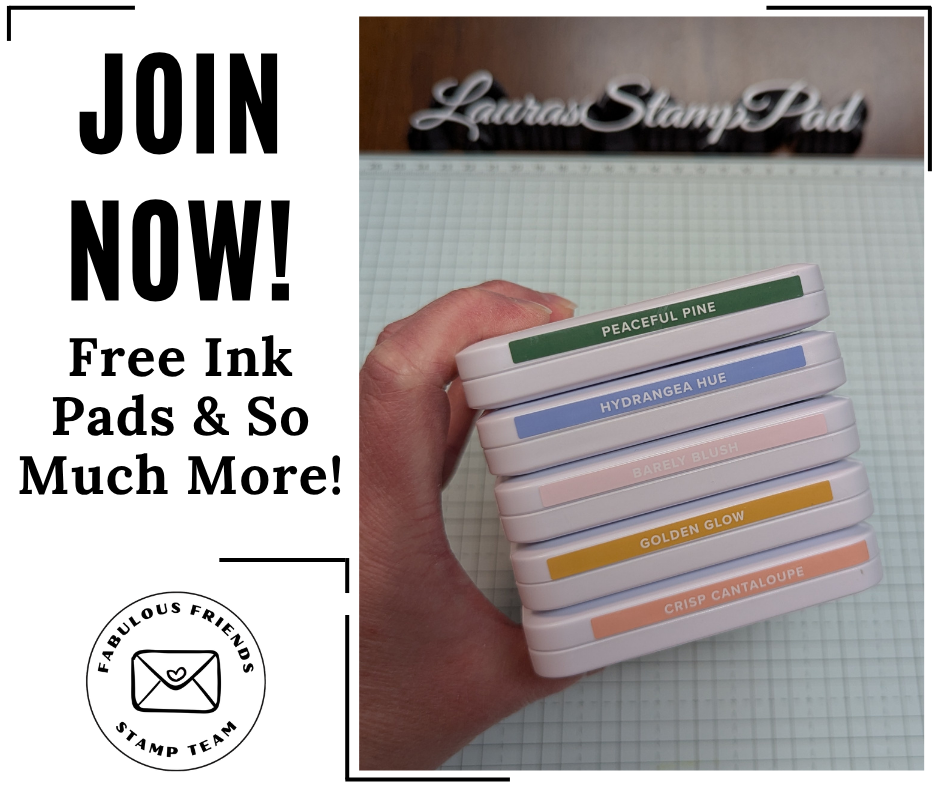
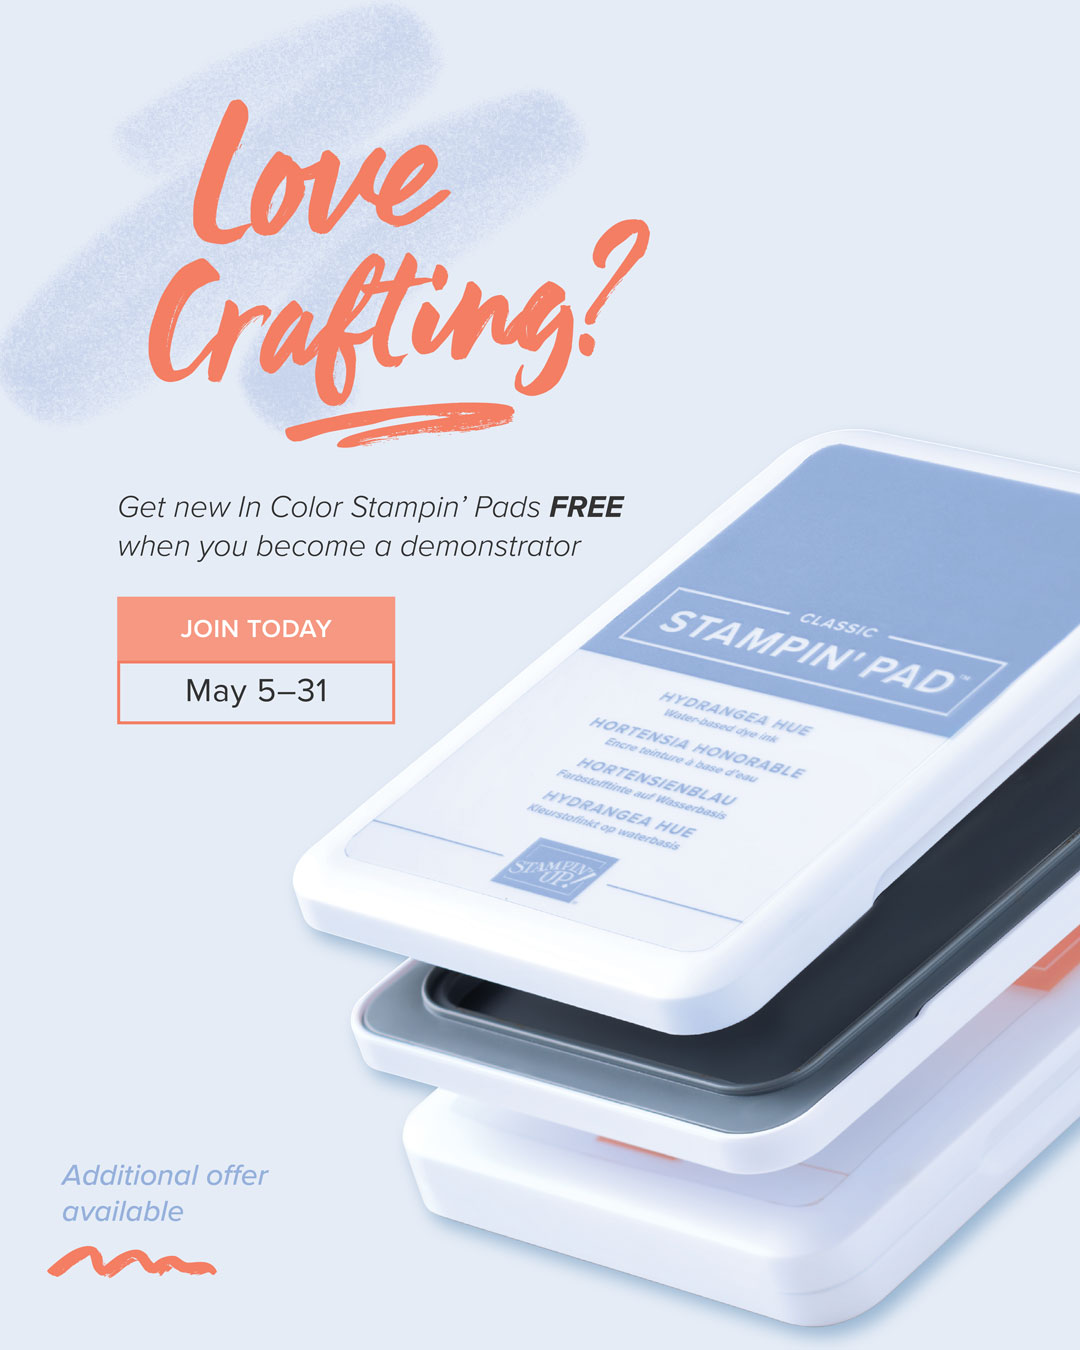
🌈 FREE 2026–2028 In Color Stampin’ Pads!
When you sign up during this special promotion, you can choose to receive the brand new 2026–2028 In Color Stampin’ Pads FREE with your Starter Kit! These ink pads are a NEW style too! Easy to open with magnets!!!
That’s right — all 5 gorgeous new In Color ink pads included at no extra cost 😍
OR…
If ink pads aren’t your thing, you can choose another option:
✨ Add an EXTRA $35 worth of products to your Starter Kit instead!
That means even MORE crafting goodies for the same $99 price.
💛 Why Join?
So many people think joining Stampin’ Up! means you have to sell products—but that’s absolutely not true!
Most people join simply because they: ✔ Love the discount (that’s how I started out…..22 years ago!) ✔ Want early access to products (I’m so impatient and love this perk!) ✔ Enjoy being part of a creative community (my stampers are like family to me) ✔ Want more value for their crafting budget (don’t we all?!?)
There’s no pressure, no obligation, and no penalty if you decide it’s not for you later.
You can simply enjoy the perks and craft your heart out ✂️✨
🌸 What Comes with the Starter Kit?
For just $99, you’ll get: 🎨 $125 in products YOU choose 🚚 FREE shipping 🌈 FREE 2026–2028 In Color Stampin’ Pads OR 🛍️ An extra $35 in products instead
It’s truly the ultimate crafting bundle!
✨ I’d Love to Welcome You!
I’ve loved being part of the Stampin’ Up! community and my Fabulous Friends Stamp Team for years (22 to be exact) and would be so excited to welcome you to my crafting group!!! 💛
Whether you want discounts, inspiration, friendships, or happy mail at your door, this is such a fun time to join.
If you have questions, I’m always happy to chat and help you decide if it’s right for you! Email me here!
The new hybrid ink will be a coloring go-to. Now you no longer have to guess which ink to use for which technique (watercoloring, alcohol markers, etc)!! This simplifies your crafting experience because you only need to reach for one ink pad!
HELPFUL HYBRID POINTERS Here are a few pro tips to keep in mind as you begin using your new Basic Black Hybrid Ink:
Like StāzOn, the Basic Black Hybrid Stampin’ Pad is airtight to prevent evaporation. If you experience suction opening the pad, put your fingernails under the lip of the lid and pull it open at an angle.
Use Stampin’ Mist (153648) and the Simply Shammy (147042) to clean your stamps. It’s worth noting that the hybrid ink will stain your stamps, but the stained color left on clean stamps won’t transfer to other ink pads.
For best results, allow stamped hybrid ink to dry before applying any additional color like coloring with Stampin’ Blends, Sponges, Blending Brushes, Spritzing, or Watercoloring.
Hybrid ink will not stamp on Window Sheets or other non-porous surfaces.
Are you excited about the Hybrid Ink Pad? Order yours today here! Have additional questions about this, feel free to ask me any time!
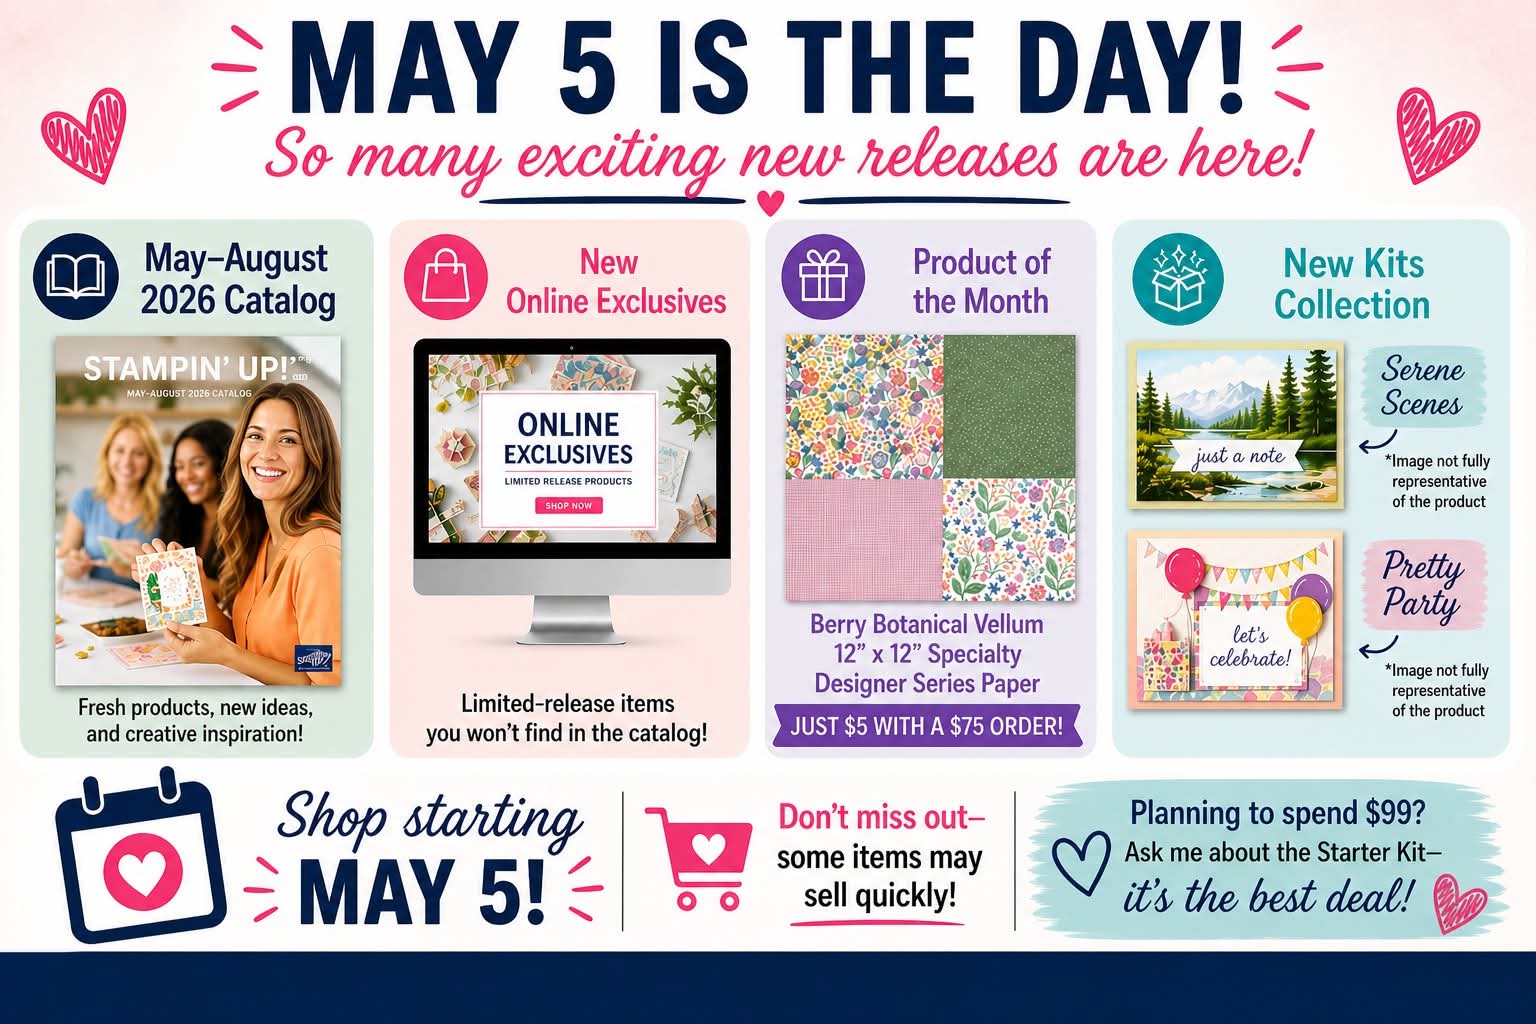
Some call it Maycember because the May madness is just insane! Graduations, Mother’s Day, school getting out, Teacher & Nurse Appreciation and so much more! Stampin’ Up! is joining the fun and chaos with the launch of so many AMAZING products!!!
The New Catalog launched as well as NEW Online Exclusives!!! You can check those out here!!! The New 2026-2028 In Colors are out – Barely Blush, Crisp Cantaloupe, Golden Glow, Hydrangea Hue, Peaceful Pine! My favorites are Crisp Cantaloupe (peachy/orange color) and Hydrangea Hue (periwinkle/blue color) so far!!! Let me know in the comments which one your favorite is!
There are 2 New Kit Collections as well! Pretty Party is perfect for anyone because it is all birthday and balloons which are just fabulous!! Serene Scenes Kit makes for great masculine cards and I love that. You all know I struggle with man cards because I just love flowers and bling! LOL
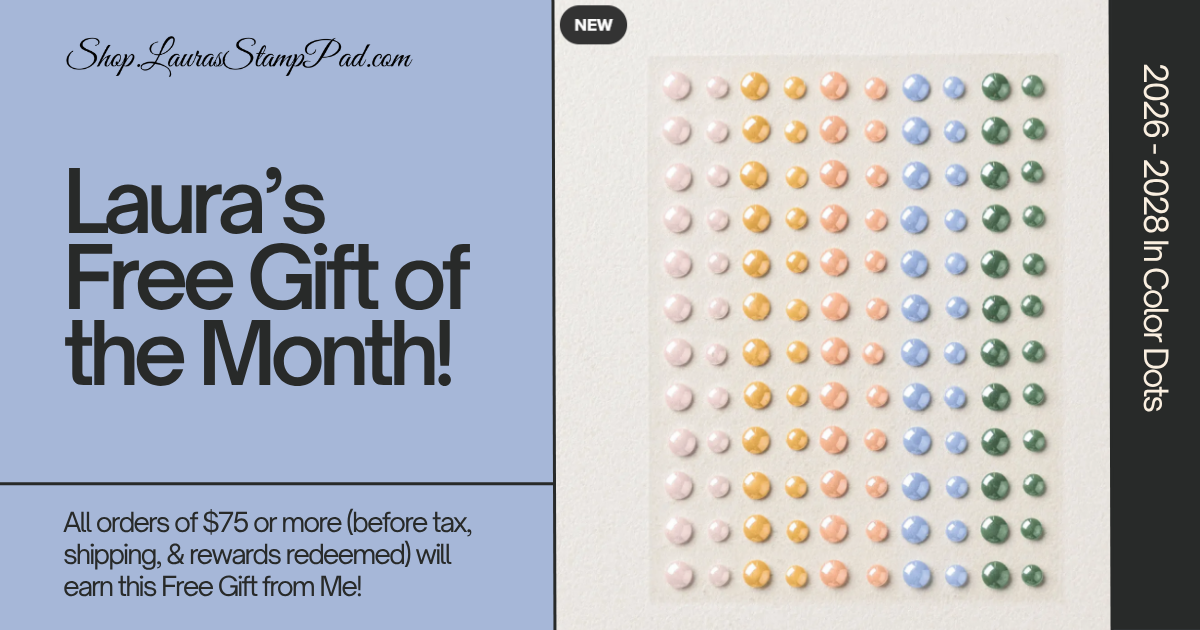
Then of course we have all the amazing things you can earn with your order! Starting at just $20, you start to earn Stampin’ Rewards which is dollars to spend on your next order! Stampin’ Up! keeps that in your online account! Then at $40 (before tax, shipping, and rewards redeemed), you will also earn Fabulous Friends Club Perks! At $75 or more (before tax, shipping, and rewards redeemed), you will earn Stampin’ Rewards, Fabulous Friends Club Perks, AND Laura’s Free Gift of the Month! This month it is the amazing In Color Dots!!! WOOT WOOT!!!! At $75, Stampin’ Up! also give you the option to add on the Product of the Month for just $5! This month it is the Berry Botanicals Vellum!!!
Do you love the In-Colors and want to get all the Ink Pads for FREE?!?! Check out the Stampin’ Up! Starter Kit this month where you can do just that! Pick out $125 in any product you would like for your Starter Kit and get the 5 Ink Pads for FREE! If you aren’t interested in the Ink Pads, you can add $35 more in product to your Starter Kit! Woot Woot! This is a fabulous time to get this amazing deal and be a part of my Fabulous Friends Stamp Family! Feel free to reach out if you have any questions or click here to get started!
It’s going to be a great month and we got this!!! Take each day at a time and celebrate as it comes! Mother’s Day is this weekend and I want to wish everyone an amazing day! You are an amazing Mom and deserve all the love and appreciation for your hard work! Hugs!!!
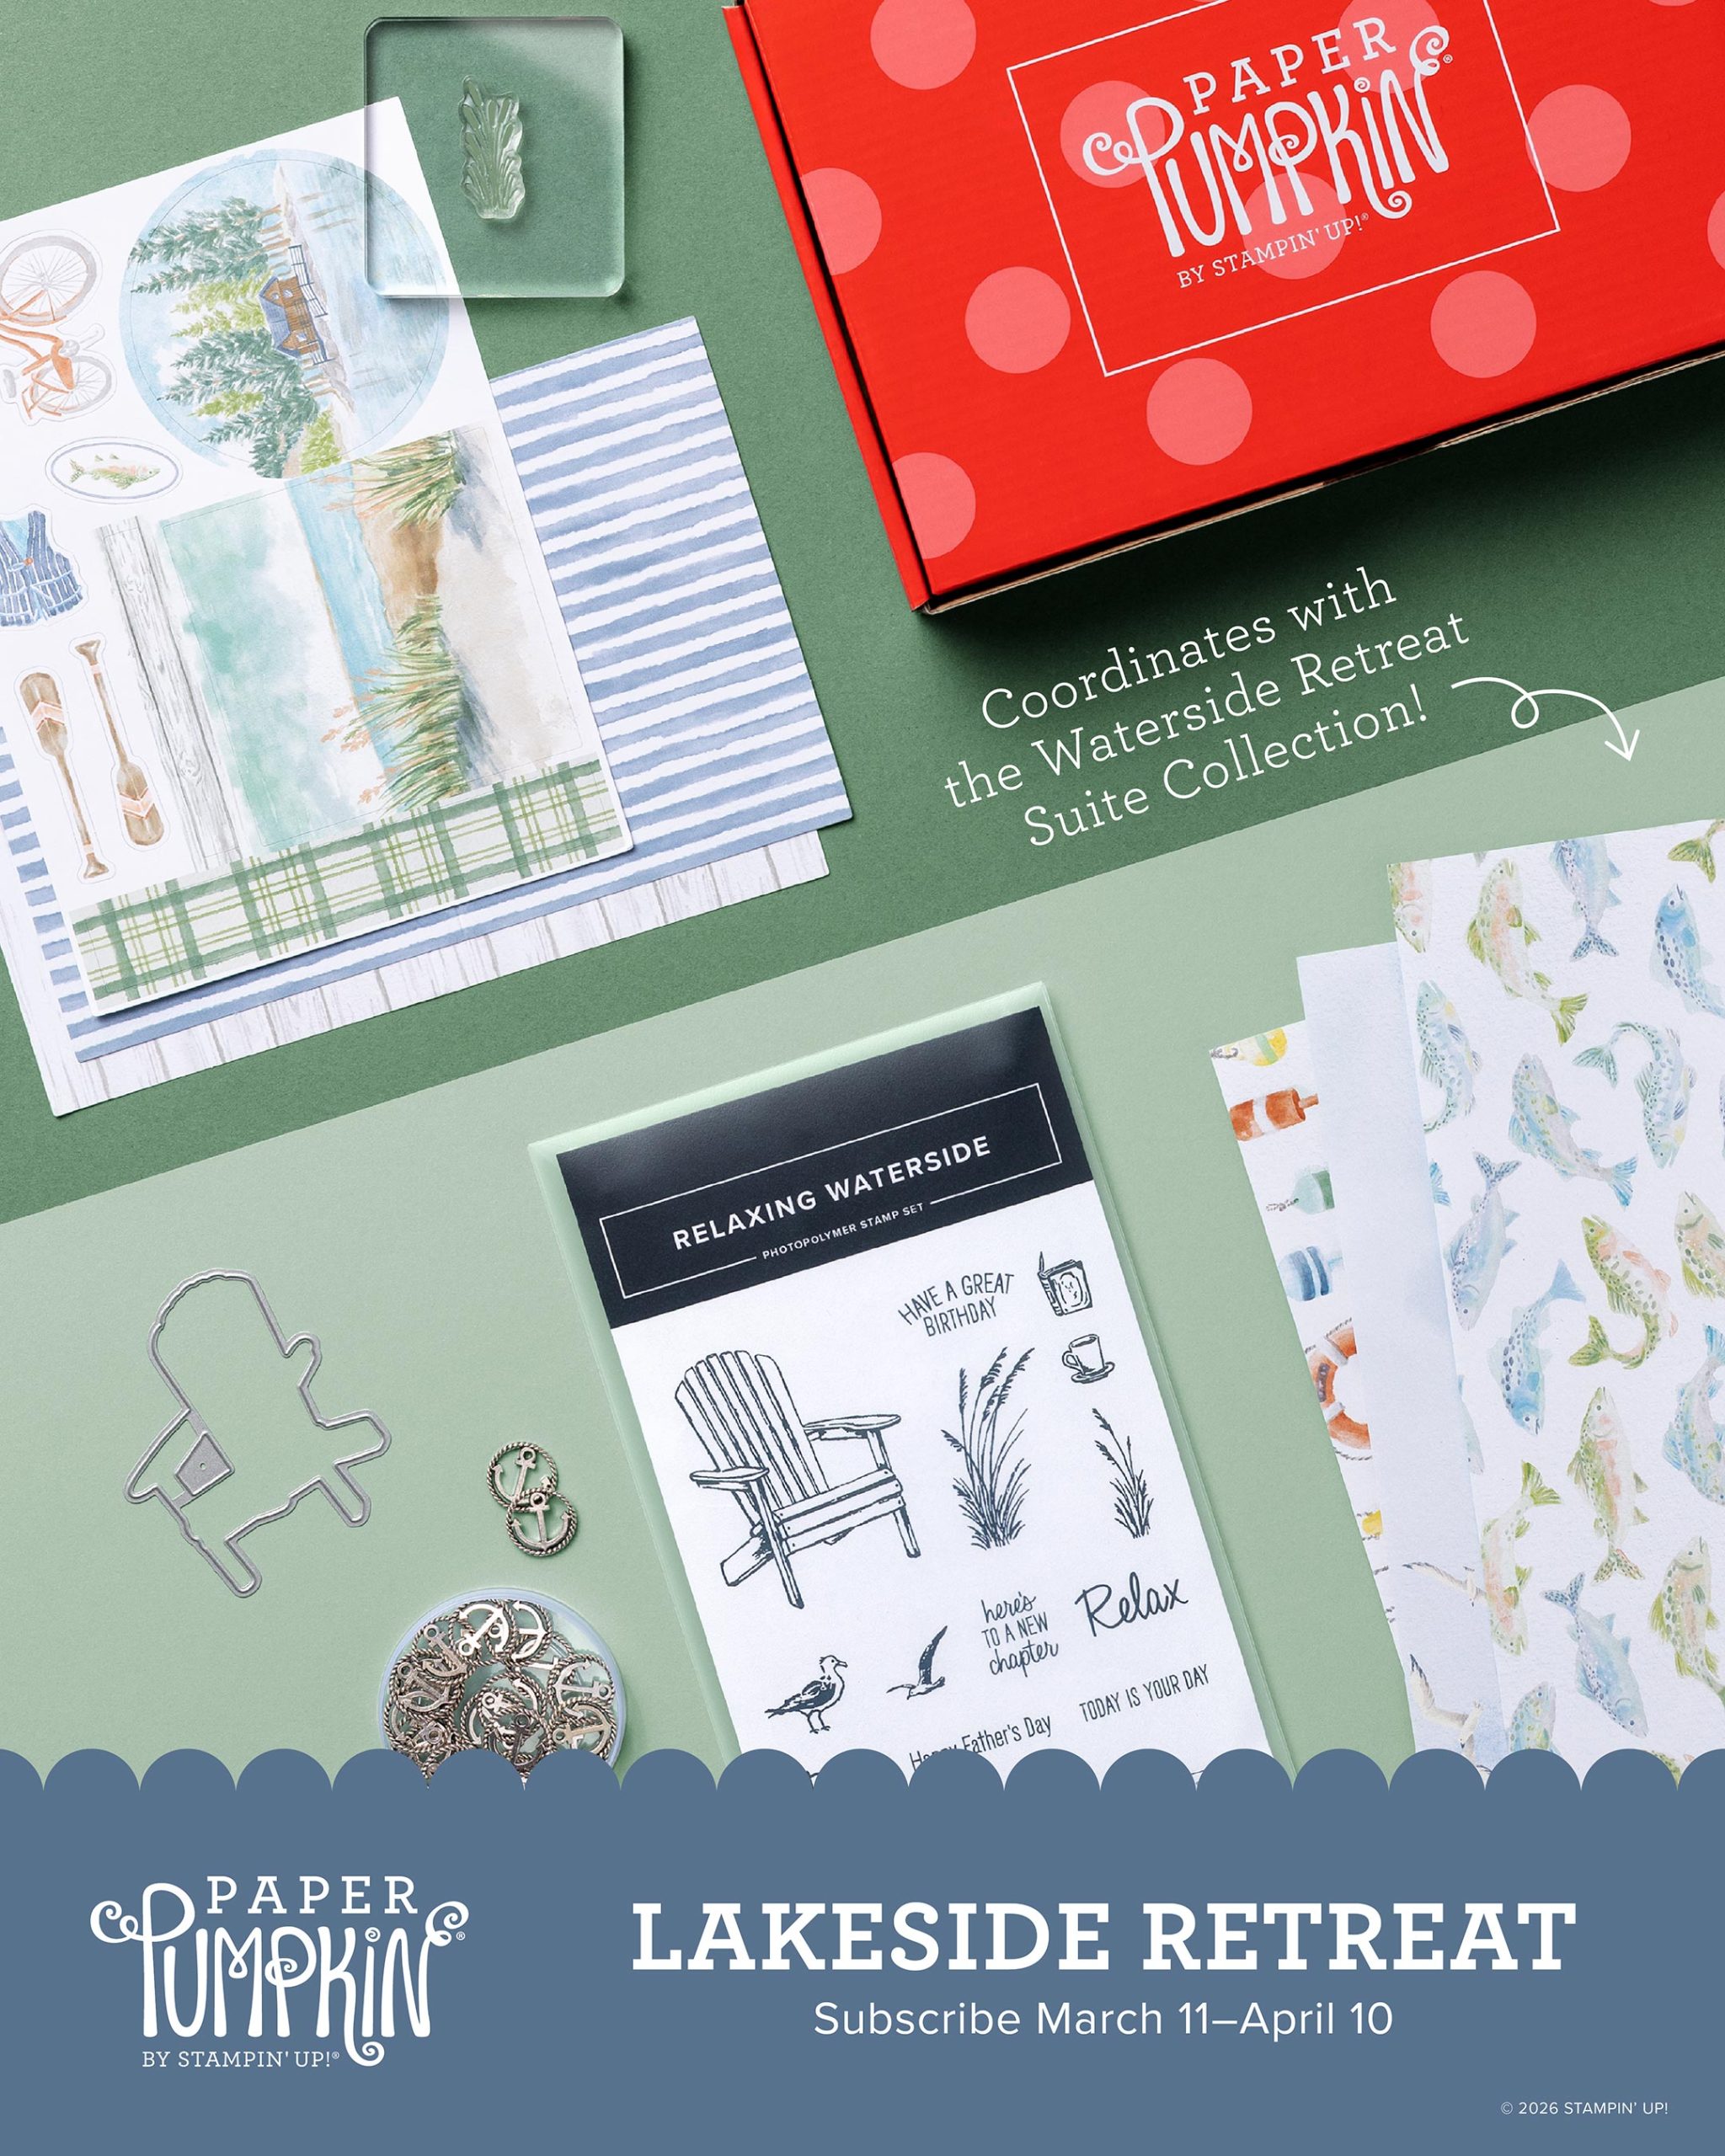
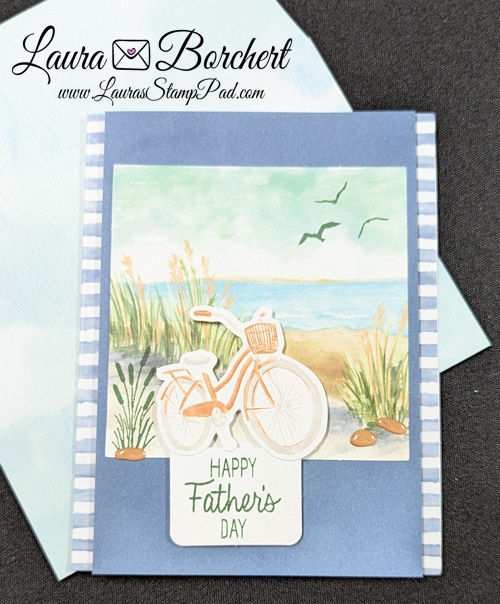
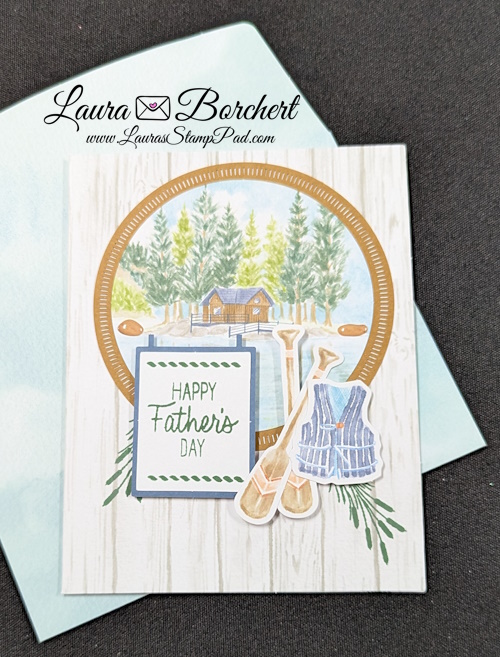
The April 2026 Paper Pumpkin – Lakeside Retreat was the perfect masculine card kit to get me ready for Father’s Day! I actually did all of my cards with that greeting! What about you?! Have you created your April Kit yet?!
What is Paper Pumpkin you ask?! It is a monthly subscription kit with a craft project and everything needed to create it all in a fabulous box. These kits are typically cards but sometimes include treat boxes, home decor, etc.
I felt like this kit had a lot of stamping and A LOT of Dimensional use! You all know how much I love Stampin’ Dimensionals but even I thought it was a bit much. LOL I actually mixed it up a bit and didn’t use them in spots the instructions said to use them and used them in other areas! For the card above, the instructions had dimensionals used for the plaid strip and I decided not to do that. Instead, I adhered that piece flat and used dimensionals on all of the other pieces! You can always do whatever you want with these kits – follow the instructions, modify as you wish, or even use the pieces with other cardstock and products to create something totally different! It’s all up to you and that’s the fabulous part about this!
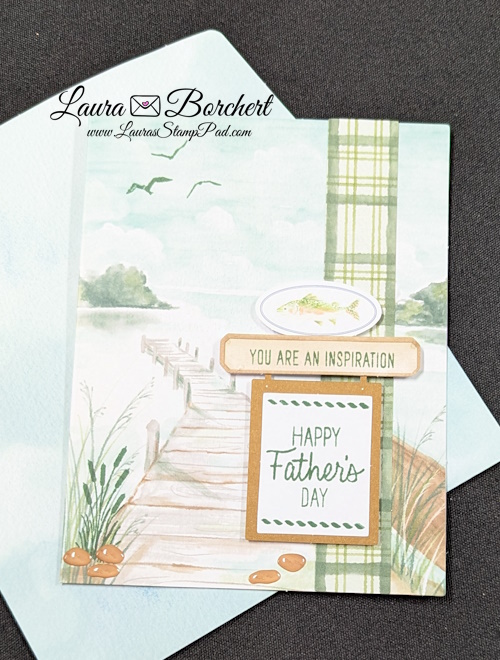
This last card was a bit tricky but trust the process. Stamping the cattails upside down and just on the card front was a bit scary. I did have to adjust the layers on top to make sure I didn’t cover up anything but it worked and turned out fabulous!!! I’m sooooo excited to have 6 cards for Father’s Day now! There are 9 total cards in the kit but my daughter who is 7 does the kit with me and she gets to create and keep 1 of each! I love it and hope we continue to do these kits together!
Did you enjoy this Lakeside Retreat Paper Pumpkin Kit?!? Don’t forget that you can purchase refills to make even more or have fun creating alternatives! Can’t wait for the May kit!!!!
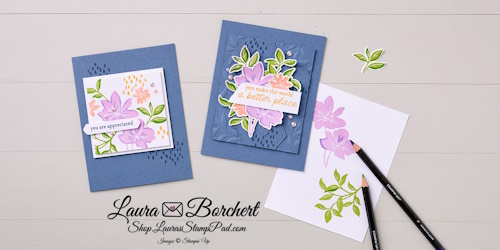
My Grandpa was a true artist who painted, used charcoals, pencils, and so much more! I may have gotten a bit of his talent but I need stamps to get me started! Coloring with watercolor pencils intimidates me but also intrigues me! Let’s try out this fun technique together!!!
MEASUREMENTS:
Misty Moonlight Cardstock (card base): 8-1/2″ x 5-1/2″ Misty Moonlight Cardstock (layer): 3-1/2″ x 4-1/4″ Misty Moonlight Cardstock (hexagons): 3-1/2″ x 3-1/2″ Basic White Cardstock (florals): 5″ x 5″ Basic White Cardstock (sentiment): 1″ x 4″
INSTRUCTIONS:
Score the 8-1/2″ x 5-1/2″ Misty Moonlight Cardstock at 4-1/4″ and fold it in half to create the card base!
Run the 3-1/2″ x 4-1/4″ piece of Misty Moonlight Cardstock through the Stampin’ Cut & Emboss Machine using the Paradise Garden Hybrid Embossing Folder or folder of your choice.
Die cut three hexagons from the 3-1/2″ x 3-1/2″ Misty Moonlight Cardstock; stamp the dots image on them in Misty Moonlight ink! Adhere the hexagons to the embossed cardstock layer. Adhere the layer to the card!
Stamp the florals and leaves images in Fresh Freesia, Granny Apple Green, and Petal Pink ink on the 5″ x 5″ Basic White Cardstock. Add highlights around the edges using the Watercolor Pencils. Die cut and adhere the flowers and leaves to the card using Stampin’ Dimensionals.
Stamp the sentiment in Crushed Curry ink on the 1″ x 4″ Basic White Cardstock. Cut it into a slanted banner and adhere it to the card using Stampin’ Dimensionals!!
Add embellishments as desired!
What do you think? Will you be coloring with watercolor pencils on your next craft project?! Check out all of the supplies below to make sure you have everything!
All orders of $40 or more will earn Fabulous Friends Club Perks and orders of $75 or more will earn Fabulous Friends Club Perks as well as the Free Gift of the Month!!! Woot Woot! Click here to shop!
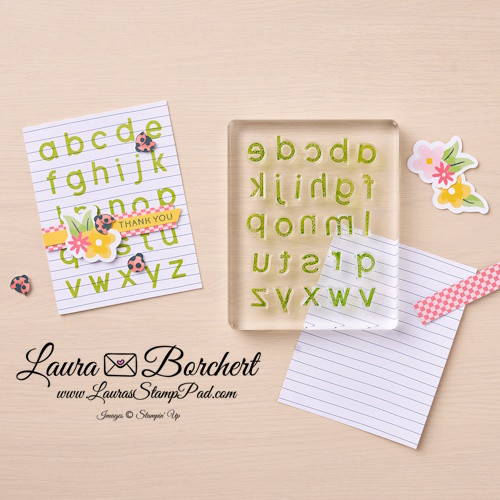
Teacher Appreciation Week is at the beginning of May!!! I love to spoil my kid’s teachers because after all they are teaching and dealing with my kid all week (or just 2 days for Alex)! We love and appreciate all they do and want them to know that!!!
This card is so cute and would make a fabulous Teacher Appreciation Card!
Stamps
Filled With Sweetness Stamp Set
Simple Alphabet Stamp Set
Ink
Granny Apple Green Classic Stampin’ Pad
Misty Moonlight Classic Stampin’ Pad
Paper
Basic White Cardstock
Daffodil Delight Two-Tone Cardstock
Homemade Sweetness Designer Series Paper & Sticker Sheet
Adhesive
Mini Stampin’ Dimensionals
Check out the supplies below to purchase! You can select 1 item or click Add All To Cart and then modify what you need from there! Don’t forget that when your order is $40 or more, you will earn Fabulous Friends Club Perks! When your order is $75 or more, you will earn Fabulous Friends Club Perks and Laura’s Free Gift of the Month! Woot Woot!
I am SO excited to share a sneak peek of the April Paper Pumpkin Kit – Lakeside Retreat!
If you’re anything like me, you know that masculine cards can be a struggle… but this kit makes it EASY (and honestly, really fun!). I enjoy doing my kit with my daughter Claire! It’s easy to just grab it for a quick evening project after school!
This month’s kit features calm, lakeside-inspired designs that are perfect for creating thoughtful cards for the men in your life—without overthinking it.
Here’s what’s included: • Printed card bases with peaceful, masculine designs • Coordinating envelopes • Precut paper pieces (hello, easy crafting 🙌) • Enamel pebble embellishments • A 2026–2028 In Color Ink Spot • Coordinates beautifully with the Waterside Retreat Suite Collection
Whether you’re crafting for Father’s Day, birthdays, or just because—this kit has you covered!
🚨 Important Reminder: You must subscribe by April 10th to get this kit—after that, it’s gone! Click here!
Trust me… if masculine cards have ever stumped you, you’re going to LOVE this one as much as I do 💙
Spring is in the air—and that means it’s time to make room for something NEW! 🌸 The upcoming catalog is just around the corner, and April is your chance to grab your favorites before they disappear for good.
🌼 April Specials Are Here!
This month is packed with exciting deals, surprises, and opportunities to stock up on products you love (or have been eyeing 👀).
🚨 Last Chance Products – Don’t Miss Out!
The Last Chance List is officially live, and items are selling fast! These retiring products will not be restocked, so once they’re gone… they’re gone.
Even better? Many of these items are marked down with major discounts, making it the perfect time to:
Grab wishlist items at a steal
Stock up on crafting essentials
Try something new without breaking the bank
If it’s been on your list, now is the time to click “add to cart!” Want lots of goodies, grab the Stampin’ Up! Starter Kit and get even more bang for your buck as well as early access to the NEW Catalog! Click here for more details!
🌸 Stampin’ Up! Product of the Month – Just $5!
✨ Eyelet Blooms Dies – ONLY $5! ✨
These dies are perfect for adding delicate, detailed floral elements to your cards and scrapbook pages. Soft, pretty, and versatile—they’re a must-have for spring crafting!
👉 Available at this price only with a qualifying order of $75 or more —so don’t wait!
🎁 New Kits Just Added!
If you love quick, all-in-one crafting projects, you’re going to love this!
Two brand-new kits have been added to the Kit Collection—perfect for:
Busy crafters
Beginners
Easy, no-stress creativity
Everything you need comes in one box—just open and start creating! Check out these new ones as well as all of the Kit Collection here!
💖 Earn Fabulous Friends Club Perks!
Shopping this month comes with extra rewards (because you deserve it 😉):
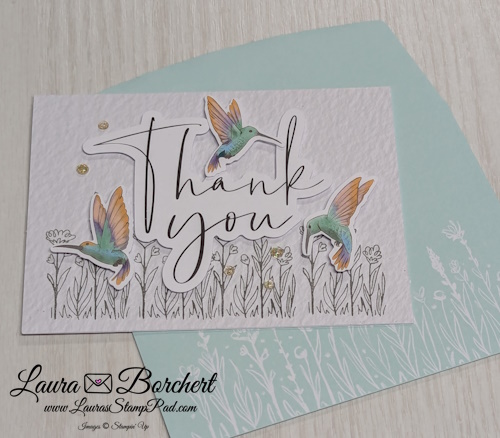
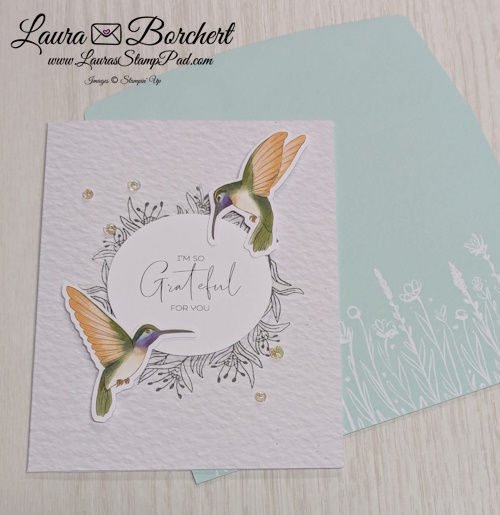
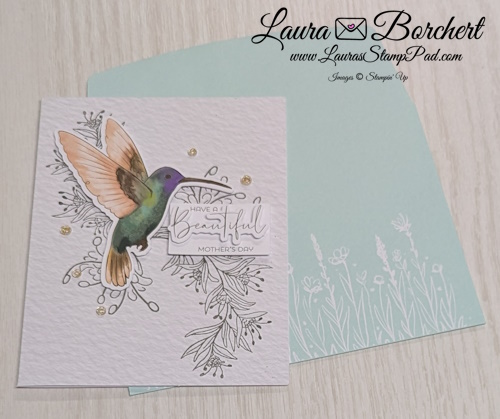
I feel like I say this a lot but I love the March 2026 Paper Pumpkin Kit – Fluttering Garden! The hummingbirds are just stunning (and I didn’t have to color them)! It’s fabulous! What is Paper Pumpkin you ask?! It is a monthly subscription kit with a craft project and everything needed to create it all in a fabulous box. These kits are typically cards but sometimes include treat boxes, home decor, etc.
This card is probably my favorite mostly because here are 3 hummingbirds on it and they are just so beautiful! I love the gray stamped background and then hint of shine with the embellishments! TIP: For this card, you will stamp the grassy flower image along the bottom. You can stamp left to right but I find stamping in the middle and working my way out to work better with spacing!
For this card, I’m so grateful to Stampin’ Up! for creating a light gray circle on the card front. This is where you stamp the floral image twice. Without that circle as a guide of where/how to stamp, I would have totally been all over the place! Simple and fabulous! Claire even did this kit with me and she nailed it! I love our time together each month creating Paper Pumpkin!
The best thing about Paper Pumpkin for me is that I can sit and craft without having to come up with the project or pull a million things out! The second best thing is that Paper Pumpkin sets me up for future holidays! This kit had 3 of these cards in it so I’ve already got a good start on my Mother’s Day cards! If you are thinking but I only have 1 mom and don’t need 3 cards, send a card to anyone who is a mother to celebrate her and tell her she is doing a good job. Every mom wants to hear that!!!
Have you created your March 2026 Fluttering Garden Paper Pumpkin Kit?!?! Which card is your favorite? Let me know in the comments below!
Be sure to sign up for April Kit before the 10th of April!
![Sweet Bugs Photopolymer Stamp Set (English) [ 166995 ]](https://assets1.tamsnetwork.com/images/EC042017NF/166995s.jpg "Sweet Bugs Photopolymer Stamp Set (English) [ 166995 ]")
![Endless Love Dies [ 167061 ]](https://assets1.tamsnetwork.com/images/EC042017NF/167061s.jpg "Endless Love Dies [ 167061 ]")
![Cute As A Bug 12" X 12" (30.5 X 30.5 Cm) Designer Series Paper [ 166994 ]](https://assets1.tamsnetwork.com/images/EC042017NF/166994s.jpg "Cute As A Bug 12\" X 12\" (30.5 X 30.5 Cm) Designer Series Paper [ 166994 ]")
![Basic White 8 1/2" X 11" Cardstock [ 166780 ]](https://assets1.tamsnetwork.com/images/EC042017NF/166780s.jpg "Basic White 8 1/2\" X 11\" Cardstock [ 166780 ]")
![Old Olive 8-1/2" X 11" Cardstock [ 100702 ]](https://assets1.tamsnetwork.com/images/EC042017NF/100702s.jpg "Old Olive 8-1/2\" X 11\" Cardstock [ 100702 ]")
![Petal Pink 8-1/2" X 11" Cardstock [ 146985 ]](https://assets1.tamsnetwork.com/images/EC042017NF/146985s.jpg "Petal Pink 8-1/2\" X 11\" Cardstock [ 146985 ]")
![Basic Black Hybrid Stampin' Pad [ 166648 ]](https://assets1.tamsnetwork.com/images/EC042017NF/166648s.jpg "Basic Black Hybrid Stampin' Pad [ 166648 ]")
![Versamark Pad [ 102283 ]](https://assets1.tamsnetwork.com/images/EC042017NF/102283s.jpg "Versamark Pad [ 102283 ]")
![Cloud Cover Stampin’ Blends Combo Pack [ 165287 ]](https://assets1.tamsnetwork.com/images/EC042017NF/165287s.jpg "Cloud Cover Stampin’ Blends Combo Pack [ 165287 ]")
![Lemon Lolly Stampin’ Blends Combo Pack [ 161673 ]](https://assets1.tamsnetwork.com/images/EC042017NF/161673s.jpg "Lemon Lolly Stampin’ Blends Combo Pack [ 161673 ]")
![Petal Pink Stampin' Blends Combo Pack [ 154893 ]](https://assets1.tamsnetwork.com/images/EC042017NF/154893s.jpg "Petal Pink Stampin' Blends Combo Pack [ 154893 ]")
![Pool Party Stampin' Blends Combo Pack [ 154894 ]](https://assets1.tamsnetwork.com/images/EC042017NF/154894s.jpg "Pool Party Stampin' Blends Combo Pack [ 154894 ]")
![Basics Wow! Embossing Powder [ 165679 ]](https://assets1.tamsnetwork.com/images/EC042017NF/165679s.jpg "Basics Wow! Embossing Powder [ 165679 ]")
![Silicone Craft Sheet [ 127853 ]](https://assets1.tamsnetwork.com/images/EC042017NF/127853s.jpg "Silicone Craft Sheet [ 127853 ]")
![Simply Shammy [ 147042 ]](https://assets1.tamsnetwork.com/images/EC042017NF/147042s.jpg "Simply Shammy [ 147042 ]")
![Stampin' Mist [ 153648 ]](https://assets1.tamsnetwork.com/images/EC042017NF/153648s.jpg "Stampin' Mist [ 153648 ]")
![Pretty Party Kit (English) [ 167998 ]](https://assets1.tamsnetwork.com/images/EC042017NF/167998s.jpg "Pretty Party Kit (English) [ 167998 ]")
![Serene Scenes Kit (English) [ 167995 ]](https://assets1.tamsnetwork.com/images/EC042017NF/167995s.jpg "Serene Scenes Kit (English) [ 167995 ]")
![Silly Old Bear 12" X 12" (30.5 X 30.5 Cm) Designer Series Paper [ 167616 ]](https://assets1.tamsnetwork.com/images/EC042017NF/167616s.jpg "Silly Old Bear 12\" X 12\" (30.5 X 30.5 Cm) Designer Series Paper [ 167616 ]")
![Silly Old Bear Suite Collection [ 167634 ]](https://assets1.tamsnetwork.com/images/EC042017NF/167634s.jpg "Silly Old Bear Suite Collection [ 167634 ]")
![Scalloped Blooms Bundle (English) [ 167647 ]](https://assets1.tamsnetwork.com/images/EC042017NF/167647s.jpg "Scalloped Blooms Bundle (English) [ 167647 ]")
![Splash & Relax Bundle [ 167903 ]](https://assets1.tamsnetwork.com/images/EC042017NF/167903s.jpg "Splash & Relax Bundle [ 167903 ]")
![2026–2028 In Color™ 8 1/2" X 11" Cardstock [ 167683 ]](https://assets1.tamsnetwork.com/images/EC042017NF/167683s.jpg "2026–2028 In Color™ 8 1/2\" X 11\" Cardstock [ 167683 ]")
![2026–2028 In Color™ Butterflies [ 167656 ]](https://assets1.tamsnetwork.com/images/EC042017NF/167656s.jpg "2026–2028 In Color™ Butterflies [ 167656 ]")
![Paper Pumpkin 12 Month Subscription [ 166818 ]](https://assets1.tamsnetwork.com/images/EC042017NF/166818s.jpg "Paper Pumpkin 12 Month Subscription [ 166818 ]")
![Paper Pumpkin 6 Month Subscription [ 166817 ]](https://assets1.tamsnetwork.com/images/EC042017NF/166817s.jpg "Paper Pumpkin 6 Month Subscription [ 166817 ]")
![Paper Pumpkin 3 Month Subscription [ 166816 ]](https://assets1.tamsnetwork.com/images/EC042017NF/166816s.jpg "Paper Pumpkin 3 Month Subscription [ 166816 ]")
![Paper Pumpkin Subscription [ 166815 ]](https://assets1.tamsnetwork.com/images/EC042017NF/166815s.jpg "Paper Pumpkin Subscription [ 166815 ]")
![Lakeside Retreat Paper Pumpkin Refill (English) [ 171464 ]](https://assets1.tamsnetwork.com/images/EC042017NF/171464s.jpg "Lakeside Retreat Paper Pumpkin Refill (English) [ 171464 ]")
![Fluttering Garden Paper Pumpkin Refill (English) [ 168629 ]](https://assets1.tamsnetwork.com/images/EC042017NF/168629s.jpg "Fluttering Garden Paper Pumpkin Refill (English) [ 168629 ]")
![Wonderful Scenes Dies (English) [ 168665 ]](https://assets1.tamsnetwork.com/images/EC042017NF/168665s.jpg "Wonderful Scenes Dies (English) [ 168665 ]")
![Paradise Garden Bundle (English) [ 167121 ]](https://assets1.tamsnetwork.com/images/EC042017NF/167121s.jpg "Paradise Garden Bundle (English) [ 167121 ]")
![Misty Moonlight 8-1/2" X 11" Cardstock [ 153081 ]](https://assets1.tamsnetwork.com/images/EC042017NF/153081s.jpg "Misty Moonlight 8-1/2\" X 11\" Cardstock [ 153081 ]")
![Crushed Curry Classic Stampin' Pad [ 147087 ]](https://assets1.tamsnetwork.com/images/EC042017NF/147087s.jpg "Crushed Curry Classic Stampin' Pad [ 147087 ]")
![Fresh Freesia Classic Stampin' Pad [ 155611 ]](https://assets1.tamsnetwork.com/images/EC042017NF/155611s.jpg "Fresh Freesia Classic Stampin' Pad [ 155611 ]")
![Granny Apple Green Stampin' Pad [ 147095 ]](https://assets1.tamsnetwork.com/images/EC042017NF/147095s.jpg "Granny Apple Green Stampin' Pad [ 147095 ]")
![Misty Moonlight Classic Stampin' Pad [ 153118 ]](https://assets1.tamsnetwork.com/images/EC042017NF/153118s.jpg "Misty Moonlight Classic Stampin' Pad [ 153118 ]")
![Petal Pink Classic Stampin' Pad [ 147108 ]](https://assets1.tamsnetwork.com/images/EC042017NF/147108s.jpg "Petal Pink Classic Stampin' Pad [ 147108 ]")
![Watercolor Pencils Assortment 2 [ 149014 ]](https://assets1.tamsnetwork.com/images/EC042017NF/149014s.jpg "Watercolor Pencils Assortment 2 [ 149014 ]")
![Pearlized Faceted Circles [ 166978 ]](https://assets1.tamsnetwork.com/images/EC042017NF/166978s.jpg "Pearlized Faceted Circles [ 166978 ]")
![Stampin' Dimensionals [ 104430 ]](https://assets1.tamsnetwork.com/images/EC042017NF/104430s.jpg "Stampin' Dimensionals [ 104430 ]")
![Filled With Sweetness Photopolymer Stamp Set (English) [ 167469 ]](https://assets1.tamsnetwork.com/images/EC042017NF/167469s.jpg "Filled With Sweetness Photopolymer Stamp Set (English) [ 167469 ]")
![Simple Alphabet Photopolymer Stamp Set [ 167541 ]](https://assets1.tamsnetwork.com/images/EC042017NF/167541s.jpg "Simple Alphabet Photopolymer Stamp Set [ 167541 ]")
![Homemade Sweetness Designer Series Paper & Sticker Sheet (English) [ 167496 ]](https://assets1.tamsnetwork.com/images/EC042017NF/167496s.jpg "Homemade Sweetness Designer Series Paper & Sticker Sheet (English) [ 167496 ]")
![Daffodil Delight 12" X 12" (30.5 X 30.5 Cm) Two Tone Cardstock [ 166669 ]](https://assets1.tamsnetwork.com/images/EC042017NF/166669s.jpg "Daffodil Delight 12\" X 12\" (30.5 X 30.5 Cm) Two Tone Cardstock [ 166669 ]")