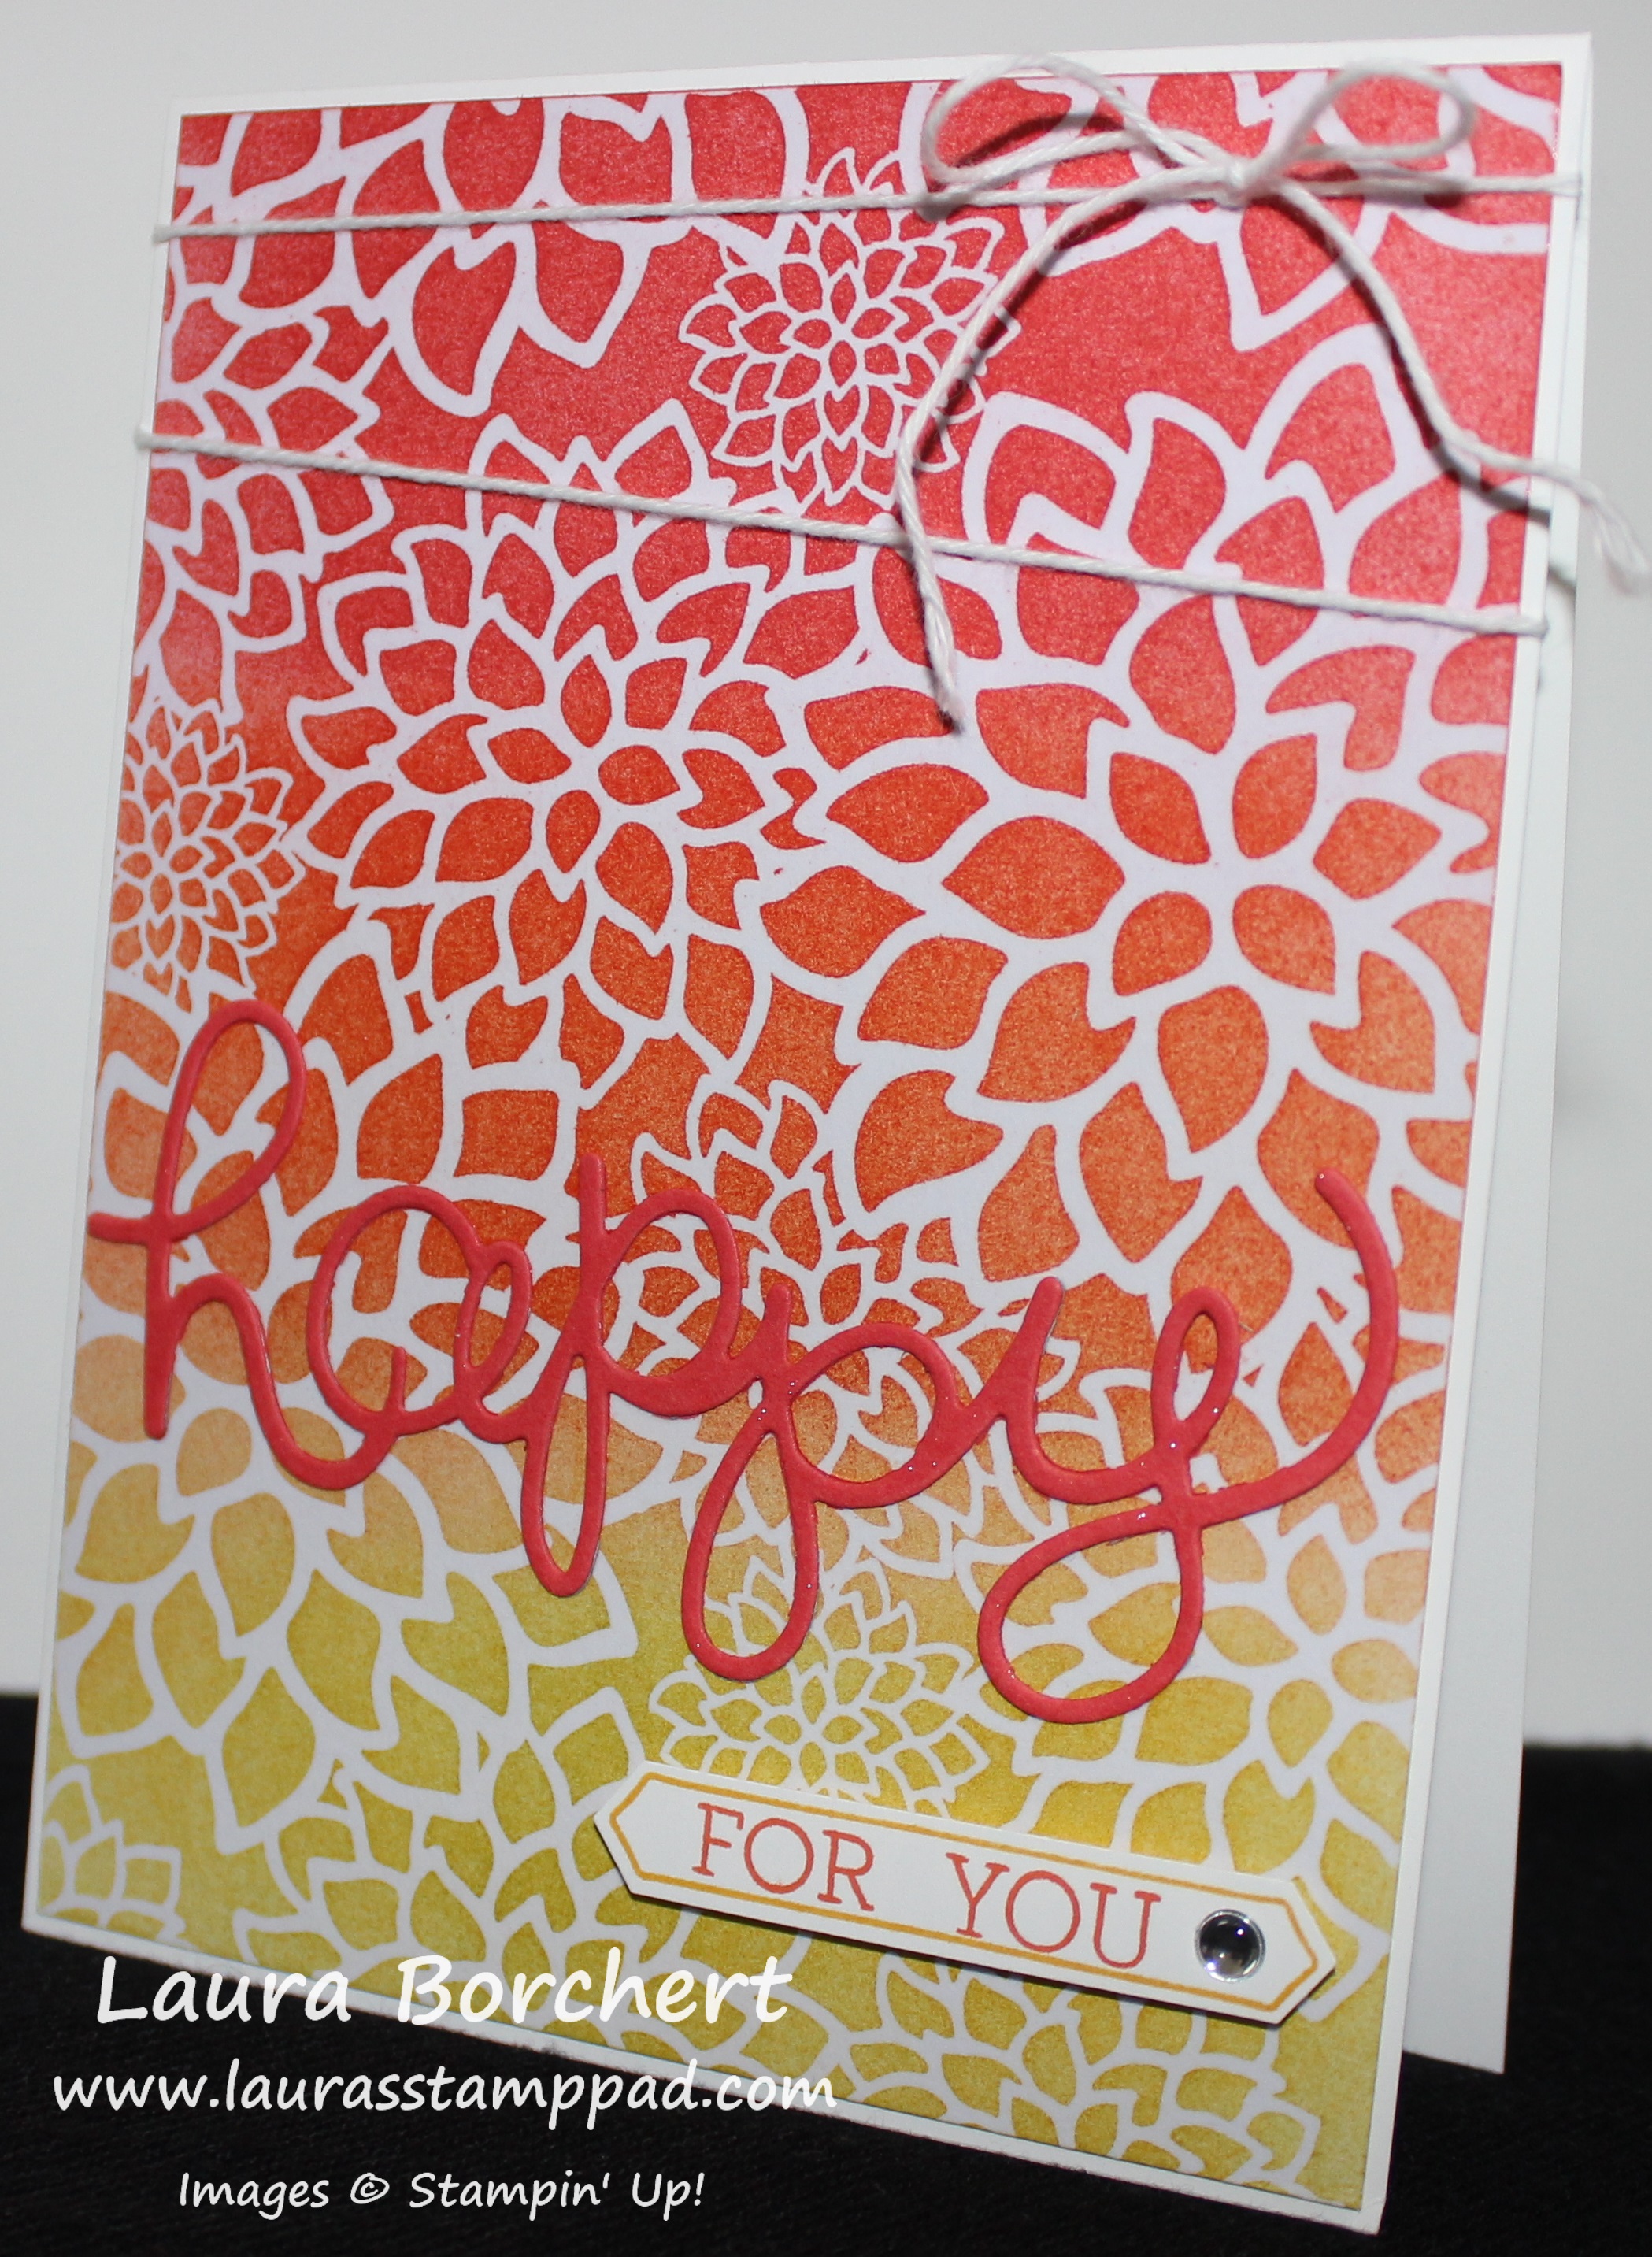
The Fall colors this year are just stunning. Those shades of yellow and green into oranges and then the POP of red! I love it all!!! Here I did a little Fall coloring with Blending Brushes!
First, start with the lightest color and blend the Crushed Curry on the bottom and up about 1/2 way. Next, take Pumpkin Pie and blend in the middle. Work you way down into the Crushed Curry and up about 3/4 of the way! Finally, using Cajun Craze blend from the edge into the Pumpkin Pie. TIP: Always start your blending brush off of your project and then slide onto it. Work in a circular motion
Once you have the background complete, simply stamp an image over the top in Memento Black Ink! I used a few leaves and a greeting on the bottom! You could always add in some acorns and different types of leaves. You could also do this same design with other colors and stamp flowers, animals, party hats, etc. This card design is perfect for all year long and any occasion!
If you would like to see this Fall Colors Blending Technique in action, check out my video tutorial below!
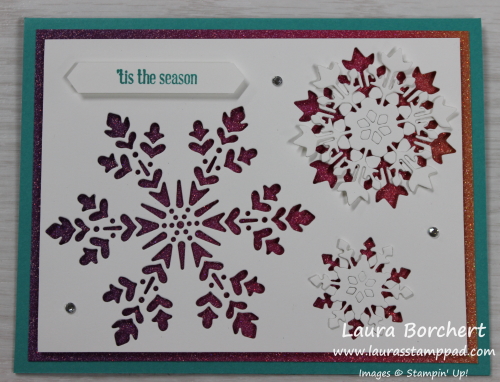
Disclaimer: Still not a fan of winter! LOL I sure have been stamping a lot lately with snowflakes and wintery themes as I’m working on my Christmas Cards. One of them is this gorgeous Rainbow Snowflakes Card!!! What do you think?
I just love the bright colors….surprise, surprise. 🙂 Also, this card is fairly simple to create with few layers and minimal stamping! The die cutting and poking out can make a person go crazy though! LOL
I started with a Bermuda Bay card base and then layered on a piece of that AMAZING Rainbow Glimmer Paper. This stuff is so beautiful and brings happiness to my life for sure! Each sheet is ombre of purple, blue, green, pink, orange, and yellow. Since this piece is only 4″ x 5-1/4″, you can pick which colors you use for your card! You can see 2 different color combinations with the samples here!
Next, I took a piece of Whisper White cardstock (3-3/4″ x 5″) and die cut 3 snowflakes using the So Many Snowflakes Dies. Try to leave a small little spot to put a greeting. I went super small since I used a greeting from the Itty Bitty Christmas Greetings Stamp Set! After die cutting the snowflakes, I delicately popped out the two smaller ones.
Check out the photo above and below these words. In the sample above, all of the pieces popped out from the snowflake center so I added Fine Tip Glue Pen to the edges and glues them off set to the coordinating one. The center is just hanging there. In the sample below, the snowflake centers stayed in and I added a Stampin’ Dimensional to the center to hold them in place and popped the snowflake in the middle. There was no intention on these 2 options, it just happened and I went with it!
I added the Whisper White cardstock to the card front with Stampin’ Dimensionals. This gives that 3D look and makes it pop more! The greeting was stamped in Bermuda Bay from the Itty Bitty Christmas Stamp Set. I did it on a piece of scrap Whisper White as to not mess us my super cute snowflake piece after all of that work. You can always use your favorite punch or just snip the ends diagonal. Then I finished off the card with some Rhinestones for additional bling!
This card would be perfect for any occasion throughout the Winter season so leave off the greeting till you need a card and then add it on!
For the inside of the card, I simply stamped some snowflakes and a greeting from the Snowflake Wishes Stamp Set in Bermuda Bay! Click here for one click shopping for the items used in this Rainbow Snowflakes cards!!!
REMINDER: Christmas is right around the corner. Let your friends and family know what you want with a Stampin’ Up List! Fill this out and pass it out to anyone who asks! All of my contact information is on there for them to reach out and place an order for you or order online! I have already had fun being an elf this year and helping some with early shopping!
Have you ever created a card and thought oh my goodness this is AMAZING?? I sure hope you have because all card are amazing and made with love. I will admit I don’t have that OMG feeling with all cards though. This feeling comes about once a year or sometimes longer. My last most amazing card was this one in November 2016! I still have that card and admire it randomly. Well today I’m sharing another one of my amazing cards! This one just screams beauty at me and I LOVE IT!
I hope you love it as much as I do but if not that’s okay too! The colors, the pattern and that little hint of bling do it for me!!!
I started with a Highland Heather card base and layered on a piece of Coastal Cabana measuring 4″ x 5-1/4″. Next, I took a piece of Whisper White (3-7/8″ x 5-1/8) and placed it in the Stamparatus. Using the Florentine Filigree Stamp Set and a Spectrum Pad, I created that amazing background! The colors for the Spectrum Pad are Gorgeous Grape, Highland Heather, Pool Party, Coastal Cabana, and Bermuda Bay. It is super easy to create because the Stamparatus does all of the work with spacing and stamping. Simply notch down the plate after each row.
TIP: The hardest part is probably making sure the ink pad is always stamping the correct color on the same end. Place the ink pad above the Stamparatus Plate after inking each time with the flat side of the ink pad on the left side.
Now for the focal point of those layered circles!!! Using the same Florentine Filigree Stamp Set, I stamped the circle image in Bermuda Bay and in Gorgeous Grape. I used the Layering Circles Framelits for the Bermuda Bay Circle and the 2″ Circle Punch for the Gorgeous Grape one. Next, I stamped the greeting in Bermuda Bay and slide the long skinny piece of Whisper White into the 1-1/4″ Circle Punch. That is how I got those slightly rounded ends. Then I added some of the Pool Party and Silver Baker’s Twine to the back securing with Stampin’ Dimensionals for texture. I finished off the card with a few Gingham Gala Adhesive Backed Sequins for some bling!
Isn’t it just fabulous??? What color combination would you use for your Spectrum Pad?? Let me know in the comments below because I have 2 left to ink up and I just can’t decide on the colors.
If you would like to see this all in action, check out the video below or click here! Be sure to give the video a thumbs up if you liked it and don’t forget to subscribe if you are new. If you would like a notification when I post a new video, be sure to click the bell right next to the subscribe!!!
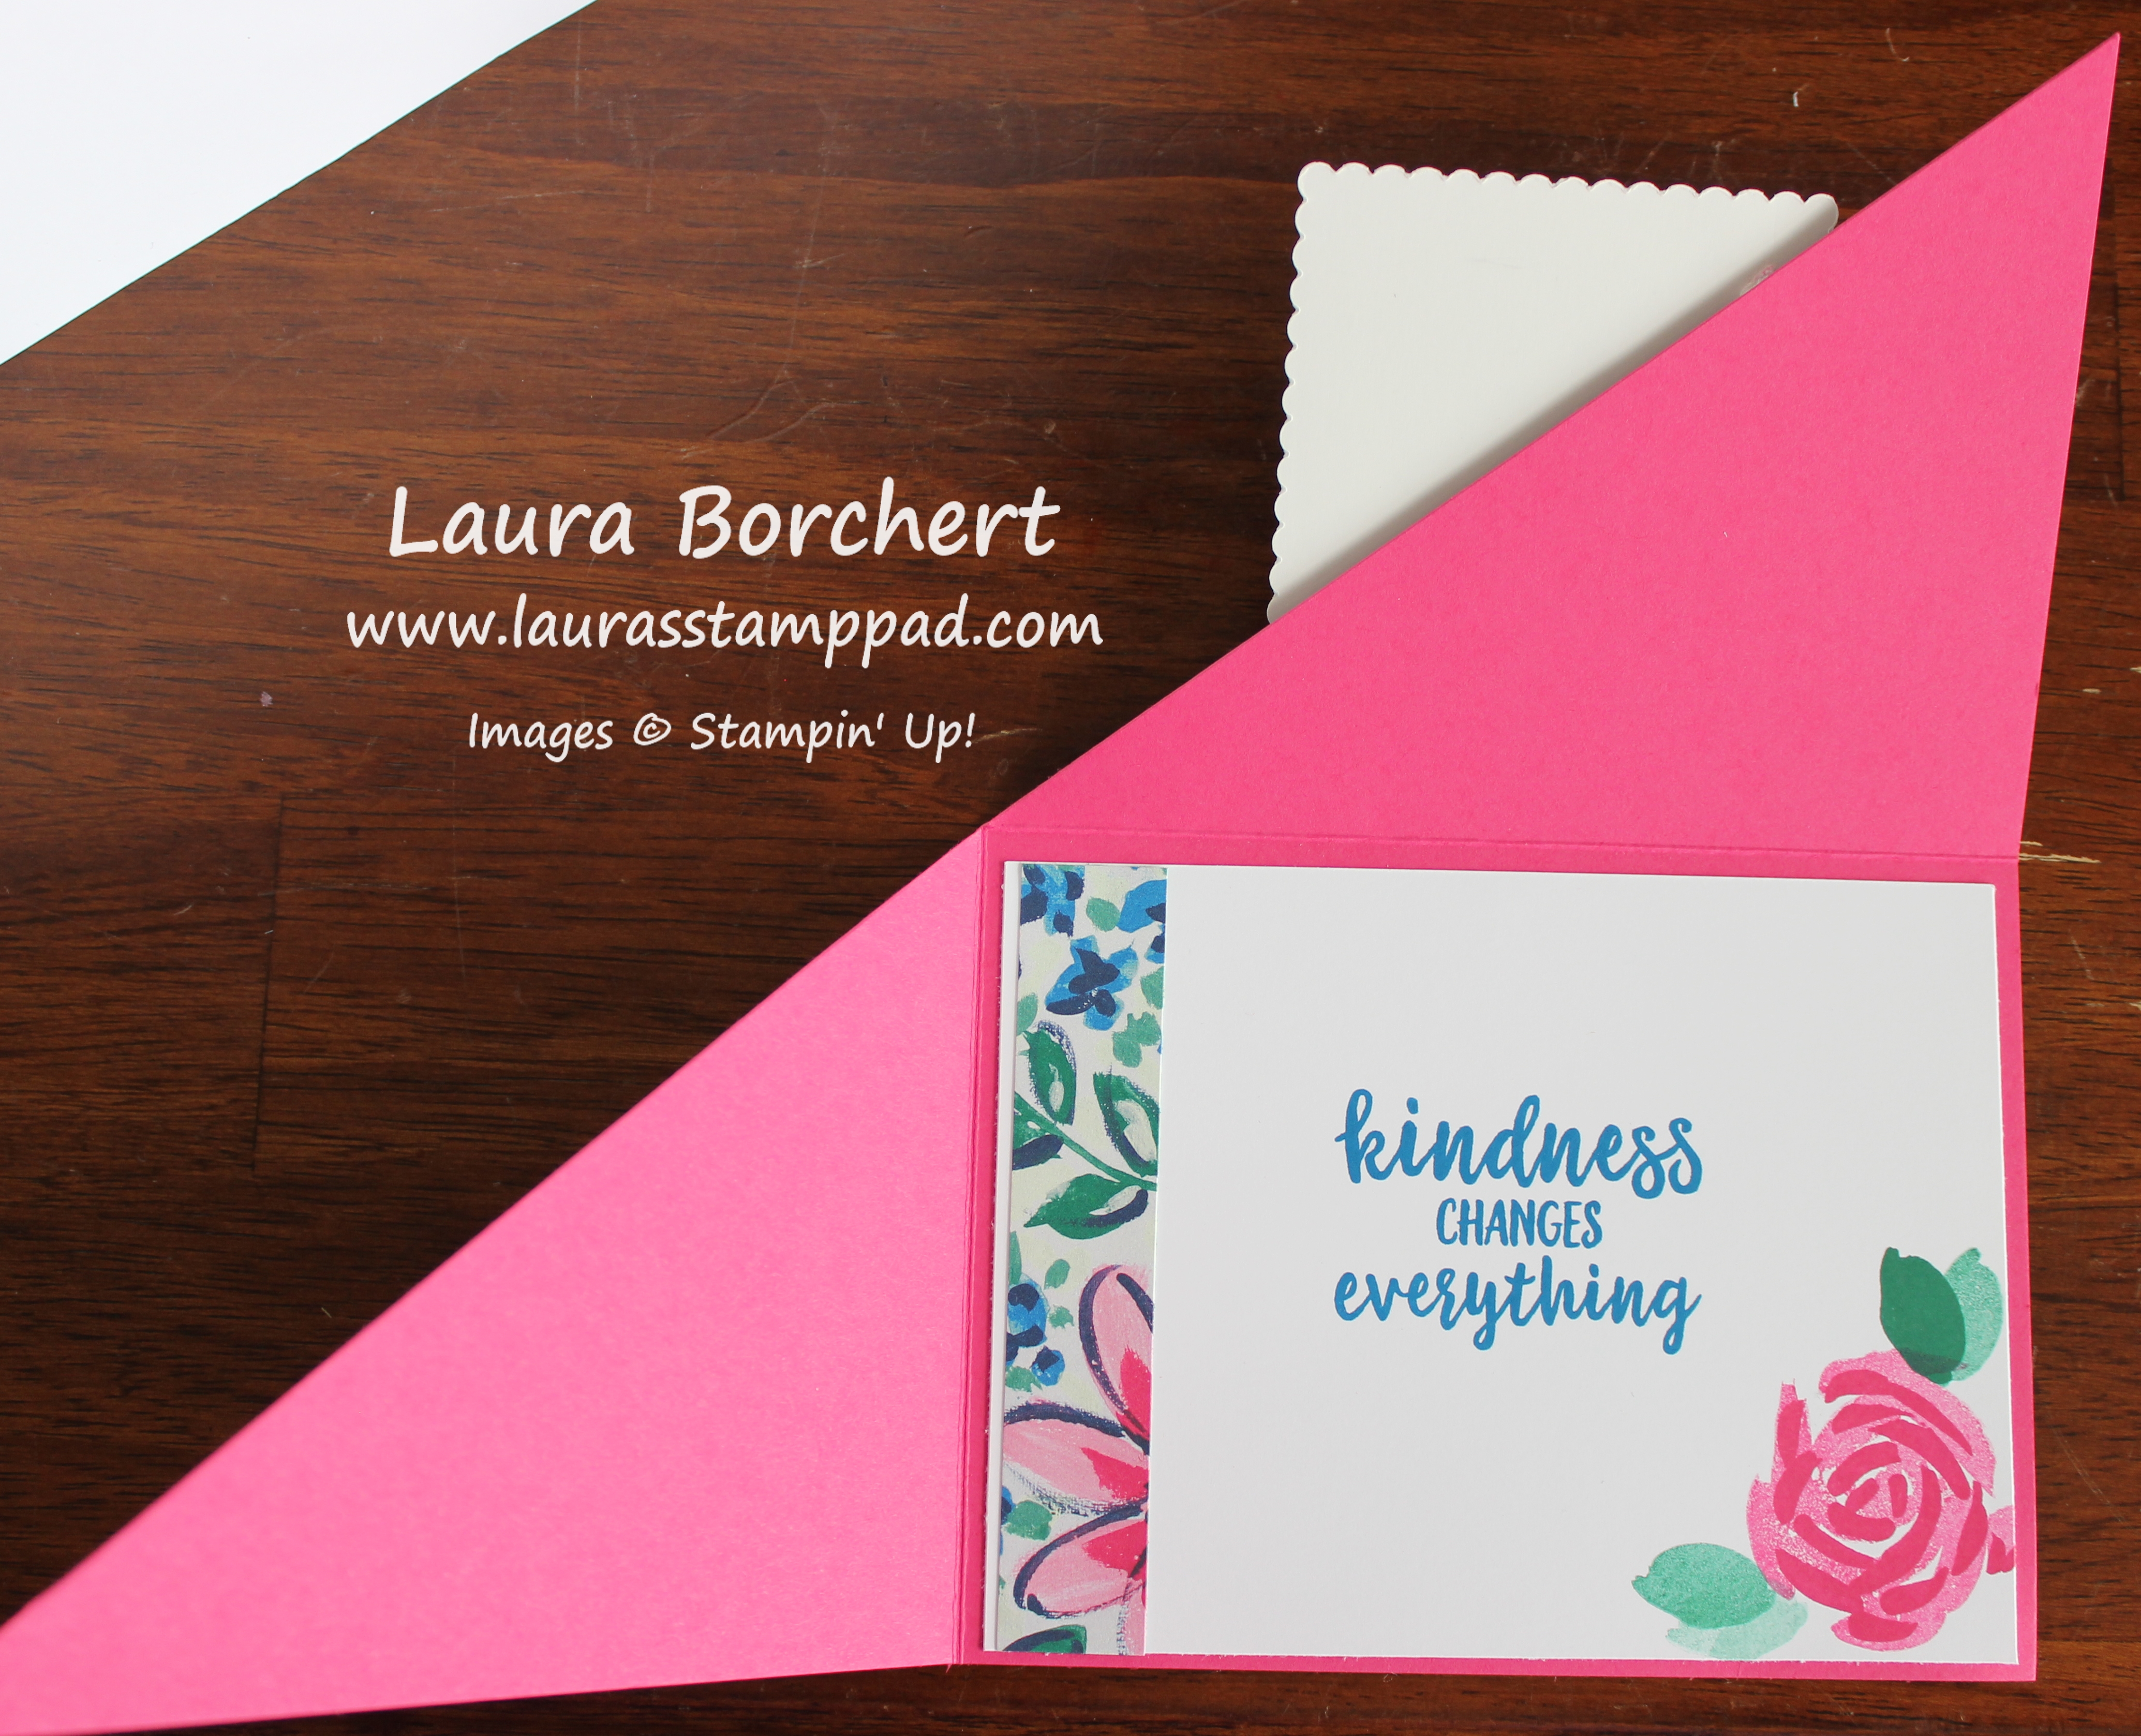
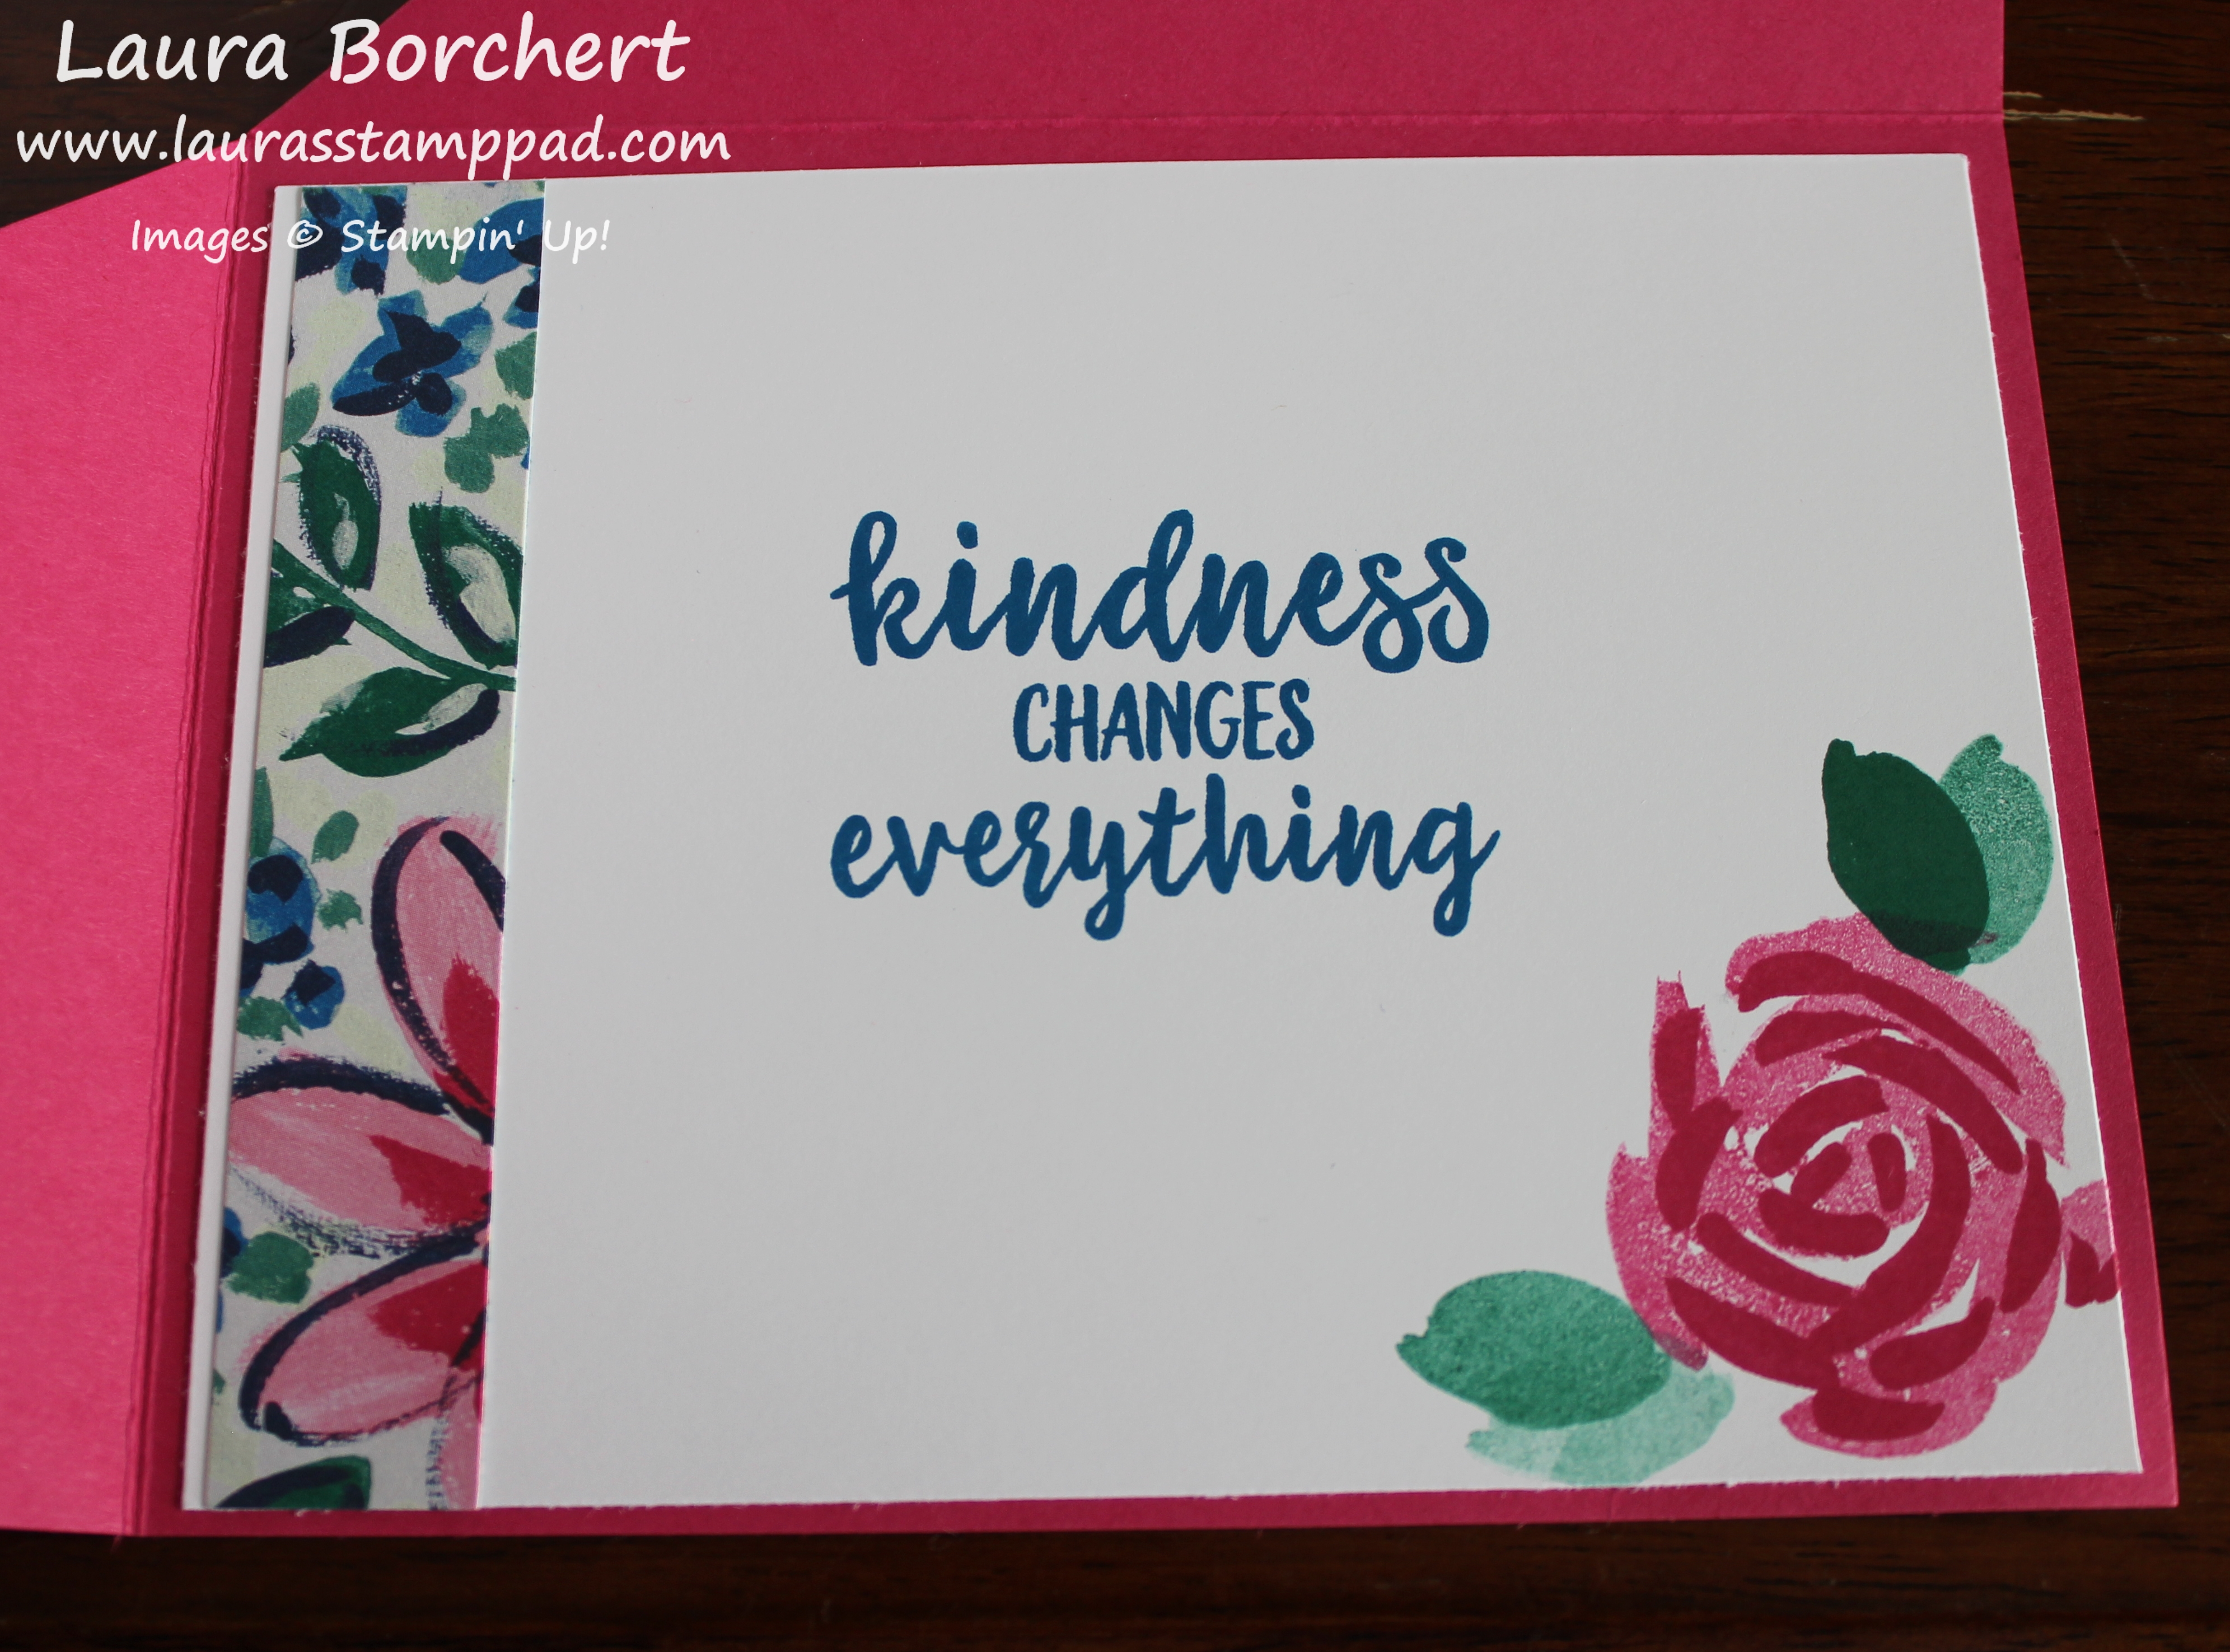
Happy Tuesday!!! You all know that means I have a fabulous technique to share. This one might not look cool at first but then when you open it you see the real magic. This diagonal opening card is super fun and the concept can be used for any occasion! Thank you to Margo Richardson for the amazing idea!
At first, I started with an 8-1/2″ x 11″ piece of Melon Mambo cardstock. I cut it diagonally from corner to corner using the Stampin’ Trimmer. Be sure to take out the scoring blade and then the cutting blade will be able to cut all the way to the ends. Also, I recommend starting in the middle and pushing out so you don’t crinkle the corner tips. Now that you have a giant triangle, it’s time to score. Score from the corner over to 5-1/2 and up at 4-1/4″. This will create a 4-1/4″ x 5-1/2″ rectangle in the corner and two triangle flaps to fold over as the front of the card!
Now that we have the card base complete, it’s time to decorate. For the inside, I added a piece of Whisper White measuring 4″ x 5-1/4″. I stamped the greeting and flower from the Abstract Impressions Stamp Set. The greeting was done in Pacific Point Ink and the flower was Melon Mambo and Emerald Envy Ink. On the left hand side, I added a little piece of the leftover designer paper after cutting for the front of the card!
For the front of the card, I cut a piece of Pacific Point cardstock into a 4″ x 5-1/4″ rectangle and then I cut it diagonally from corner to corner. Making sure I had the piece positioned correctly for the card, I placed it into the Garden Trellis Embossing Folder. There is only one way the paper can go on the card. These weird sized triangles make that part a little tricky. Using a piece of the Garden Impressions Designer Series Paper, I cut it into a 4″ x 5-1/4″ piece and cut it diagonally as well. The greeting was stamped in Pacific Point Ink from the Abstract Impressions Stamp Set. I inked it up and then stamped three times without going back to the ink for that ombre look. This piece was layered on to a scallop square of Silver Foil Paper. I used the Layering Squares Framelits to die cut it out. When placing the greeting on the front of the card, be sure to only add adhesive to the one corner/triangle so that it doesn’t seal the card closed! 🙂
If you would like to see this all in action, check out the video below or click here! Be sure to give the video a thumbs up if you liked it and don’t forget to subscribe if you are new. If you would like a notification when I post a new video, be sure to click the bell right next to the subscribe!!!
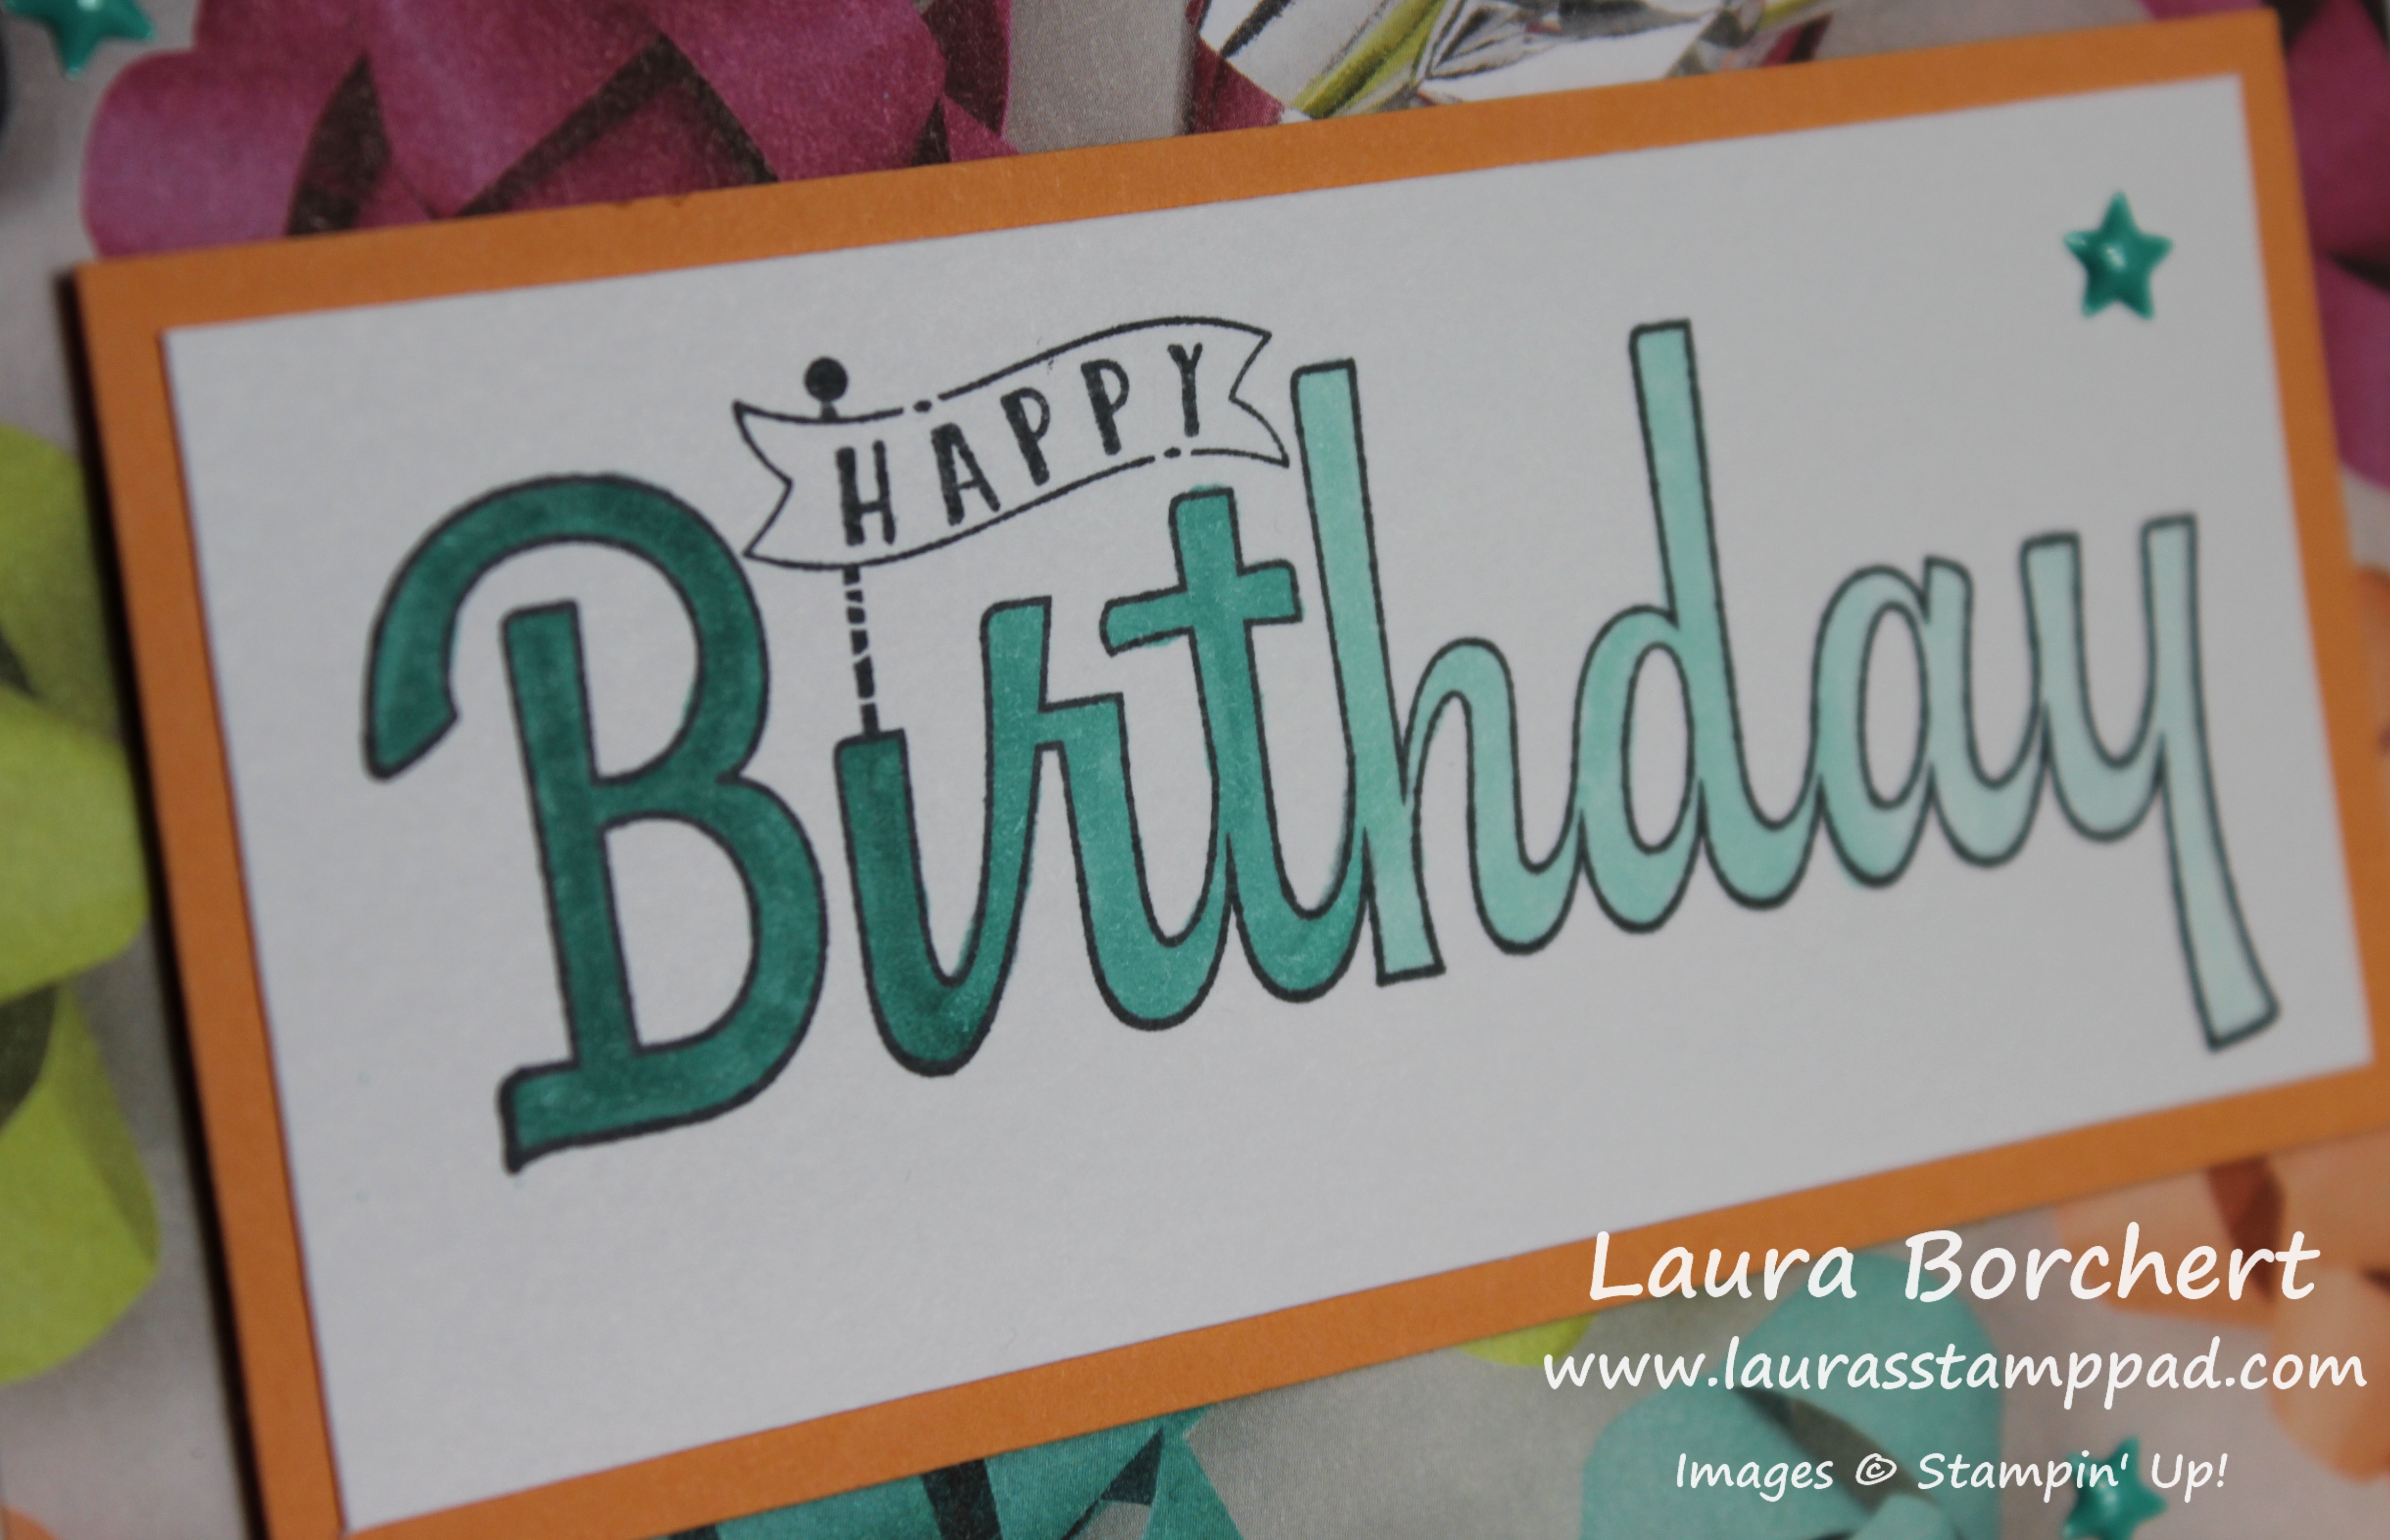
Happy Monday!!! I hope you all had a wonderful weekend! Today, I’m sharing this simple and yet fabulous ombre birthday card!!! I just love Ombre…..check out more samples here! The Stampin’ Blend make creating an ombre look super easy too!
I started with a Whisper White card base and layered on a piece of the Picture Perfect Party Designer Series Paper (4″ x 5-1/4″). This paper has so many perfect patterns for this style of card – bows, cookies, donuts, confetti, and more! I love it! Now for that fabulous ombre birthday greeting!
I stamped the greeting from the Birthday Wishes For You Stamp Set in Memento Black Ink onto Whisper White! Then using the Bermuda Bay and Pool Party Stampin’ Blends, I colored the greeting. Starting with the “bi” using the dark Bermuda Bay marker and doing 2 letters with each color. I went from dark Bermuda Bay, light Bermuda Bay, Dark Pool Party to light Pool Party! These colors were perfect for creating that ombre look! Next, I layered this onto a piece of Peekaboo Peach and added it to the card front with Stampin’ Dimensionals. To finish off the card, I added a few Bermuda Bay Enamel Shapes! This card is super simple and easy to change up the colors to the designer paper you have on hand or colors you prefer!
I did this ombre look using just the dark and light Bermuda Bay and creating the ombre from top to bottom. The only problem I had with this was that the middle where I had to color more to get the blending (rather than a distinct line) bled out. When going over a spot over and over, it will bleed wider on the paper and so that is how this happened. I think maybe if I did a little bit of blending on each one and allowed it to dry more in between, I might not have had this problem!
I have really fallen in love with the Stampin’ Blends and have been having lots of fun with them! Have you tried them? What are your favorite colors? Let me know in the comments below!
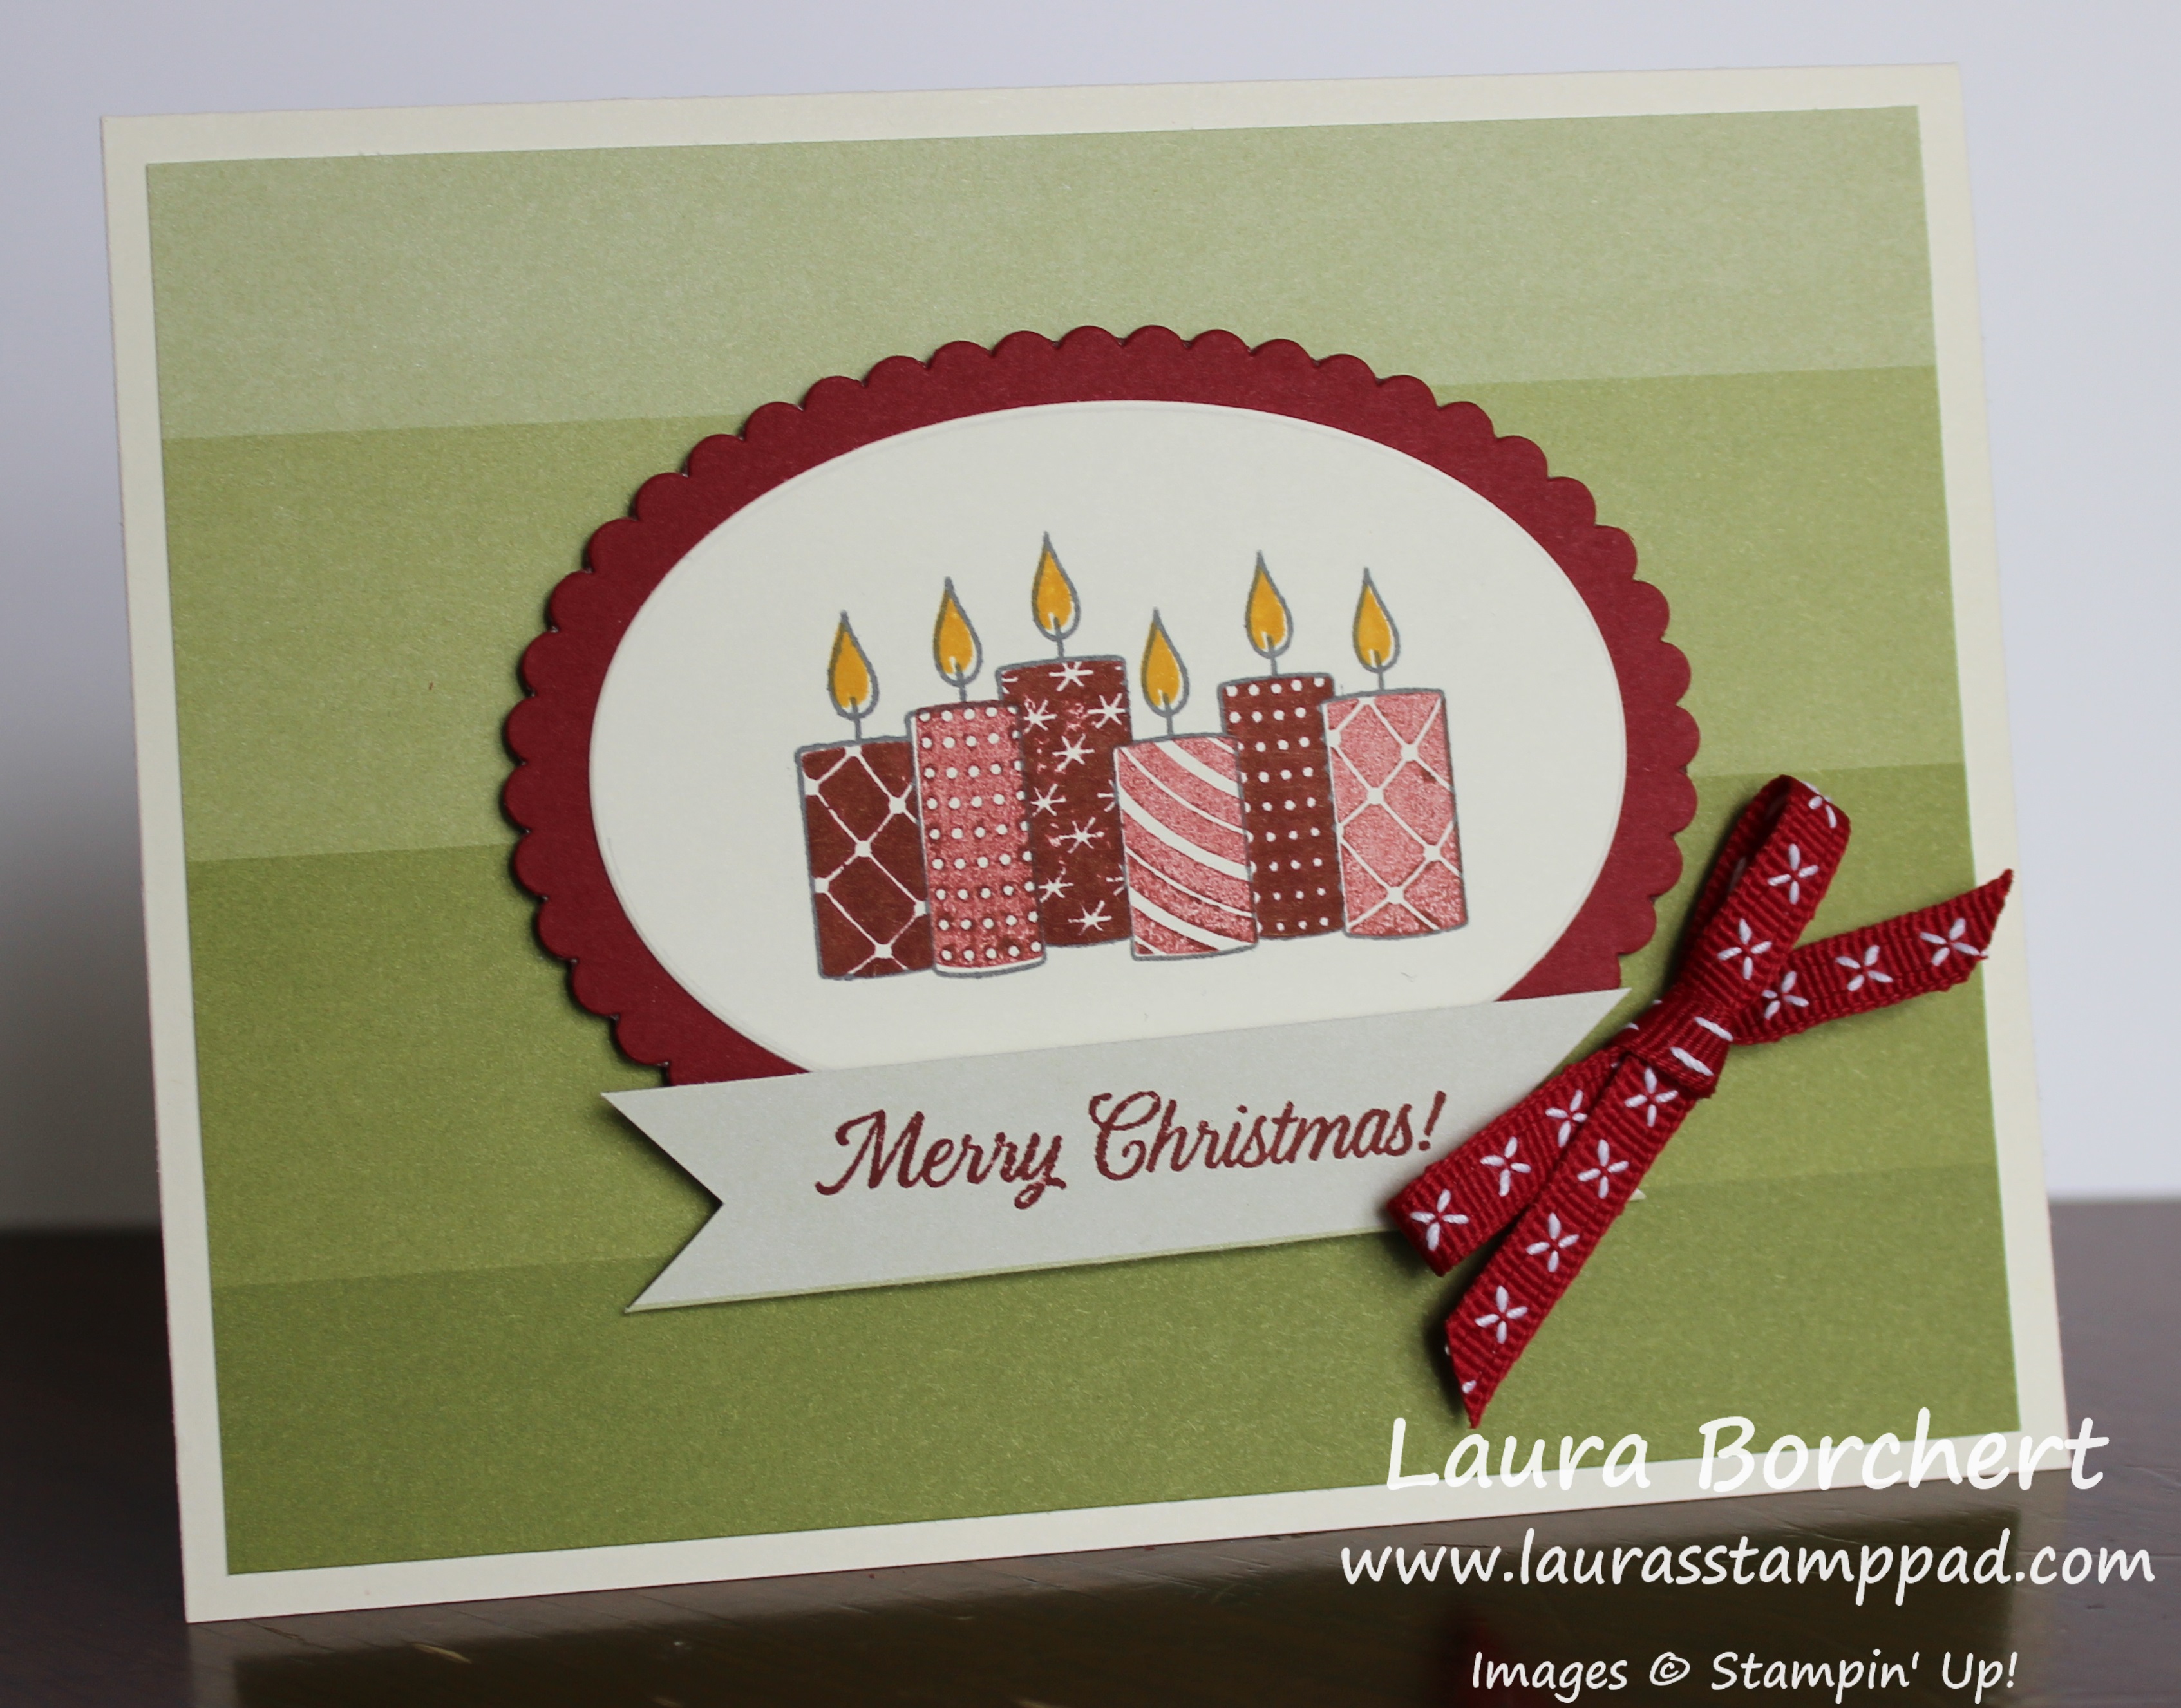
Happy Friday!!! I love how the Merry Patterns Stamp Set has these Christmas Candles but they can be used all year long as birthday candles and more!!! Perfect!
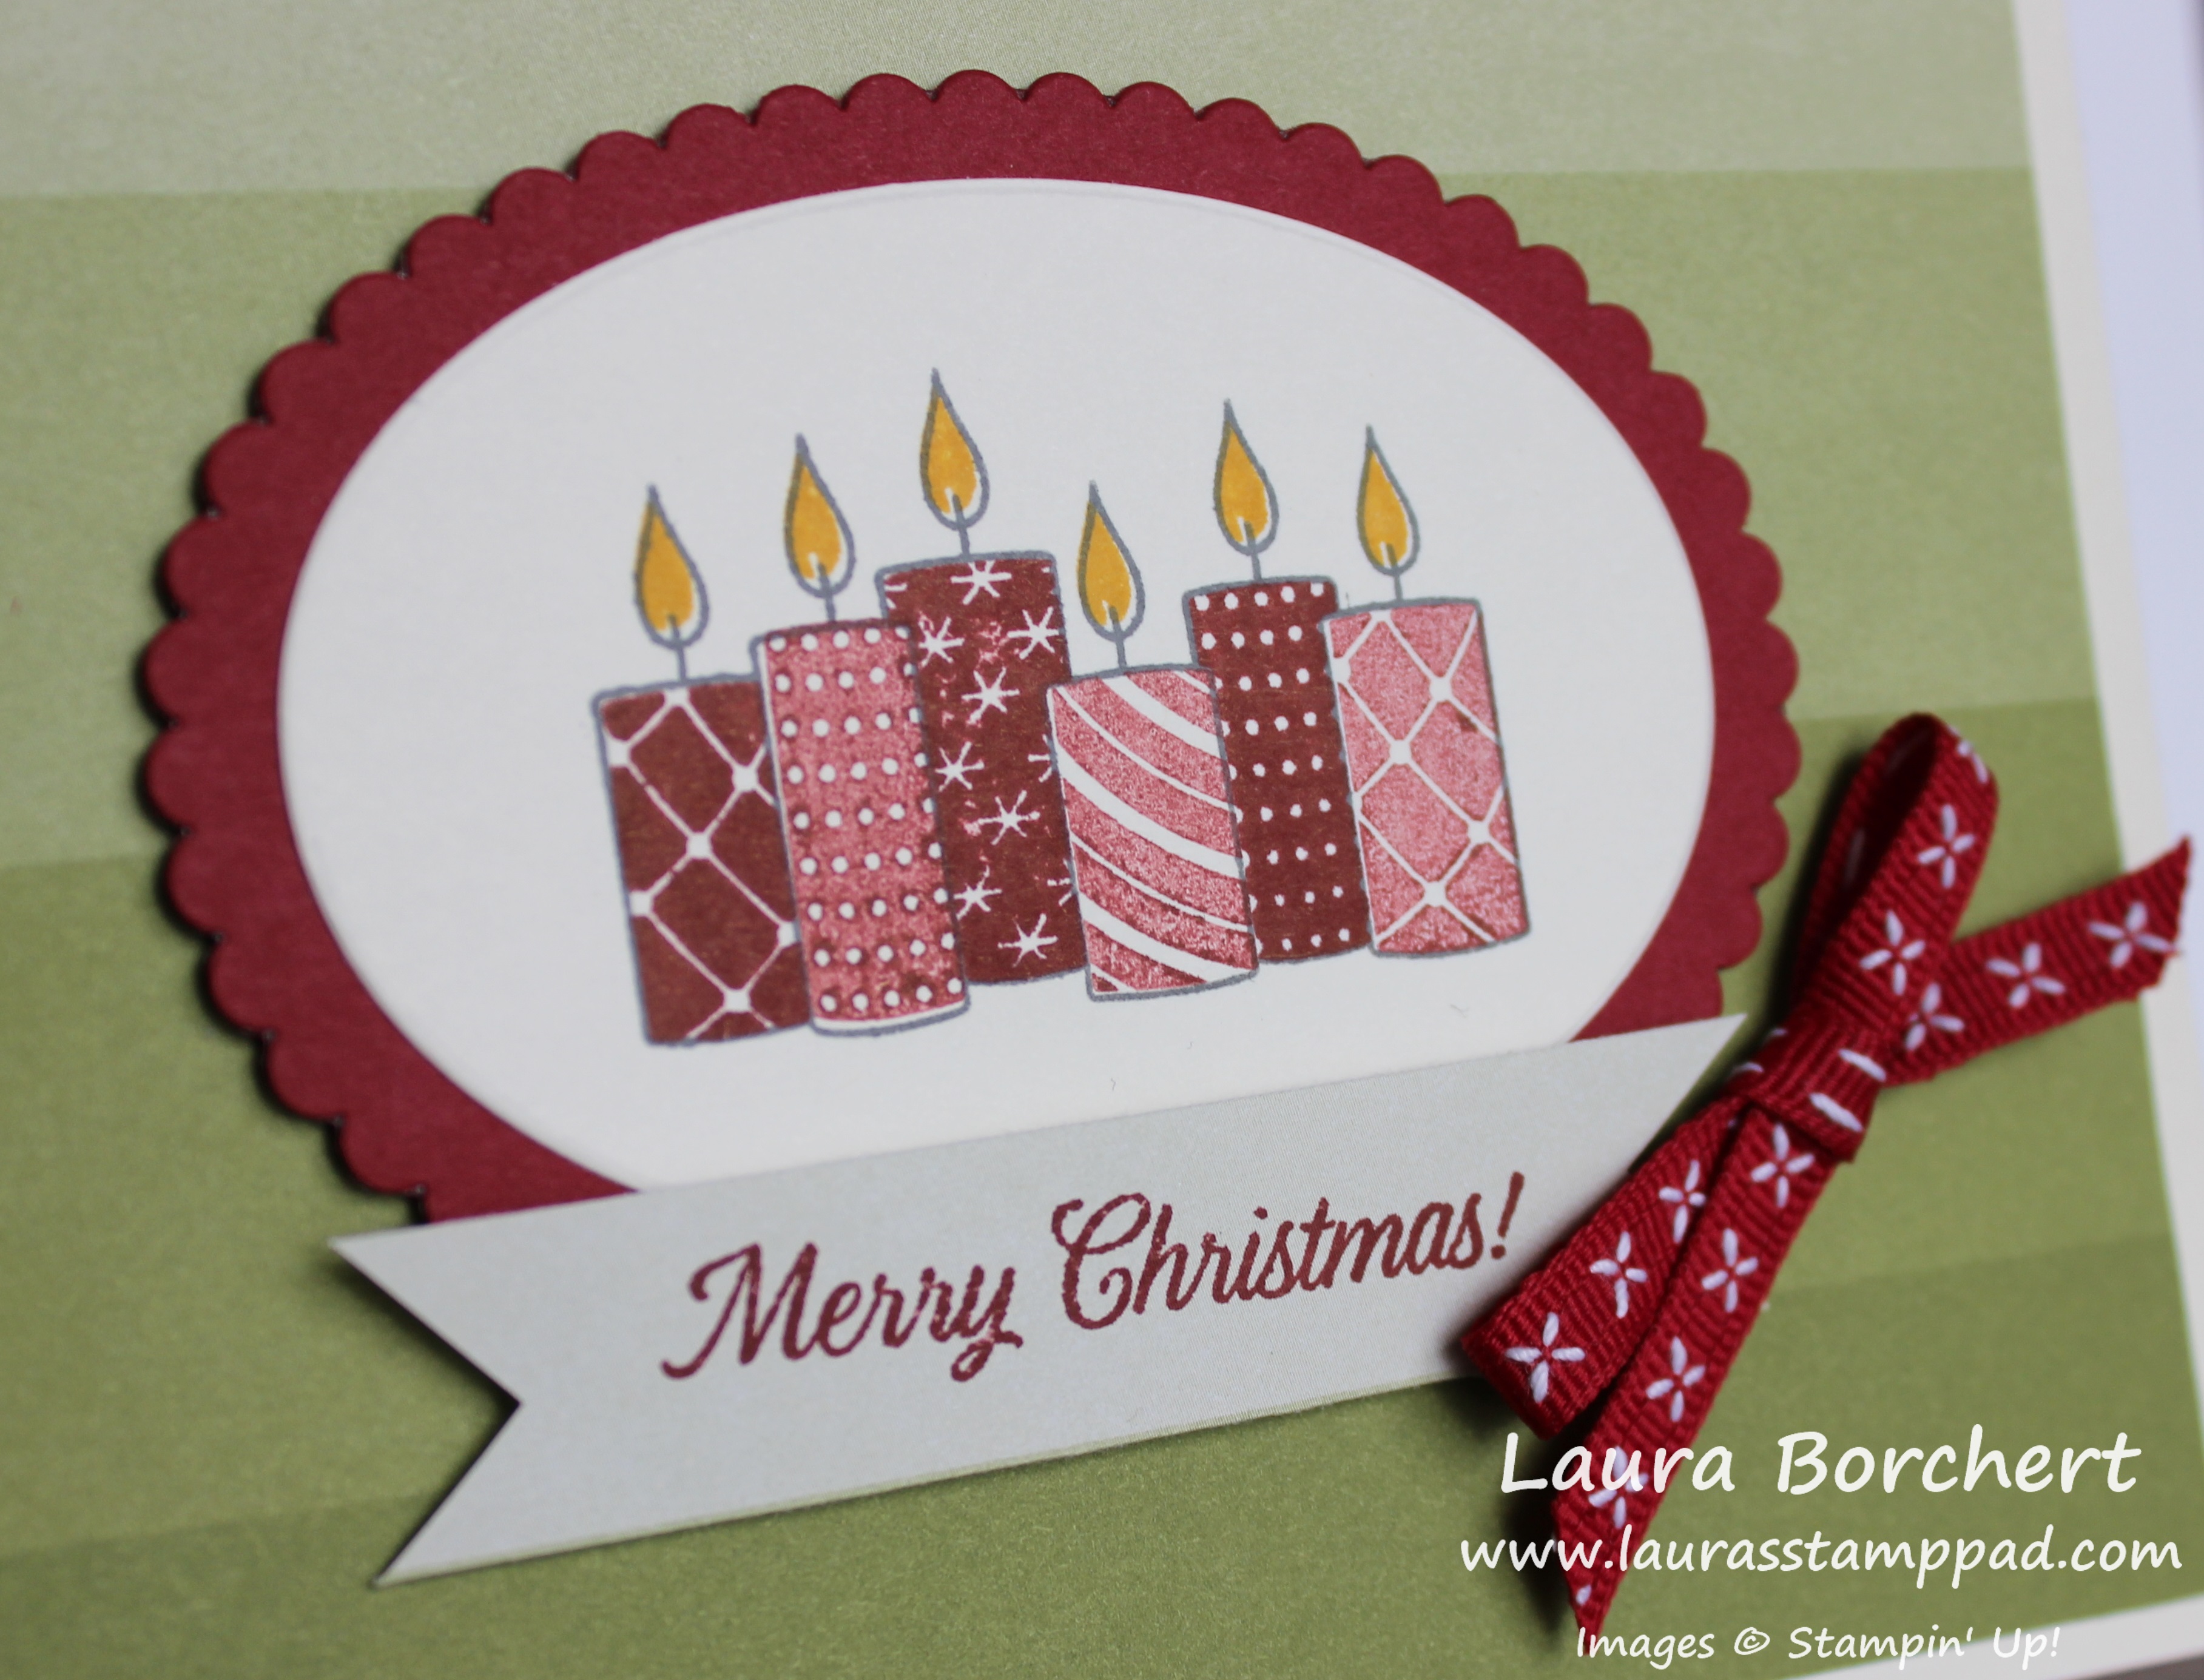
I started with a Very Vanilla card base. Next I layered on a piece of the Old Olive ombre paper from the Color Theory Designer Series Paper Stack. Don’t forget this is one in the Buy 3, Get 1 Free Paper Special this month! Then I used the Layering Ovals Framelits for the main focal point. Using the Merry Patterns Stamp Set, I stamped the outline of the candles first in Basic Black Ink. Next, I stamped one of the candles in full strength Cherry Cobbler Ink and the second one was stamped off once. This gives that variation in color. You could always pick 2 different colors for these too! The flames were stamped in Crushed Curry Ink. I layered this onto the scallop Cherry Cobbler oval and added it to the card front with Stampin’ Dimensionals.
For the greeting, I used a leftover scrap piece from the designer paper and stamped it in Cherry Cobbler Ink. I cut the banner tips on both ends and added it to the bottom of the candles. Using some Cherry Cobbler Double Stitched Ribbon, I tied a bow and adhered it with some Mini Glue Dots. I used the glue dots to rotate the one ribbon so it showed X’s and not the lines. I love using glue dots to make my ribbon look exactly how I want it to! 🙂
If you would like to see more samples using this stamp set, check out this post and this one!
Don’t forget this still time to take advantage of the Buy 3, Get 1 Free Designer Series Paper Special. Also, all order of $40 or more will earn Laura’s Loyal Stampers Stickers and orders of $75 or more will also earn the Free Stamp Set of the Month! You get to pick from Daisy Delight or Graceful Garden this month!!
It’s Wednesday and we are half way through the week! Here is a little something to brighten your day and help you get through the week! Just know you are a ray of sunshine! Just breath out and smile!!!
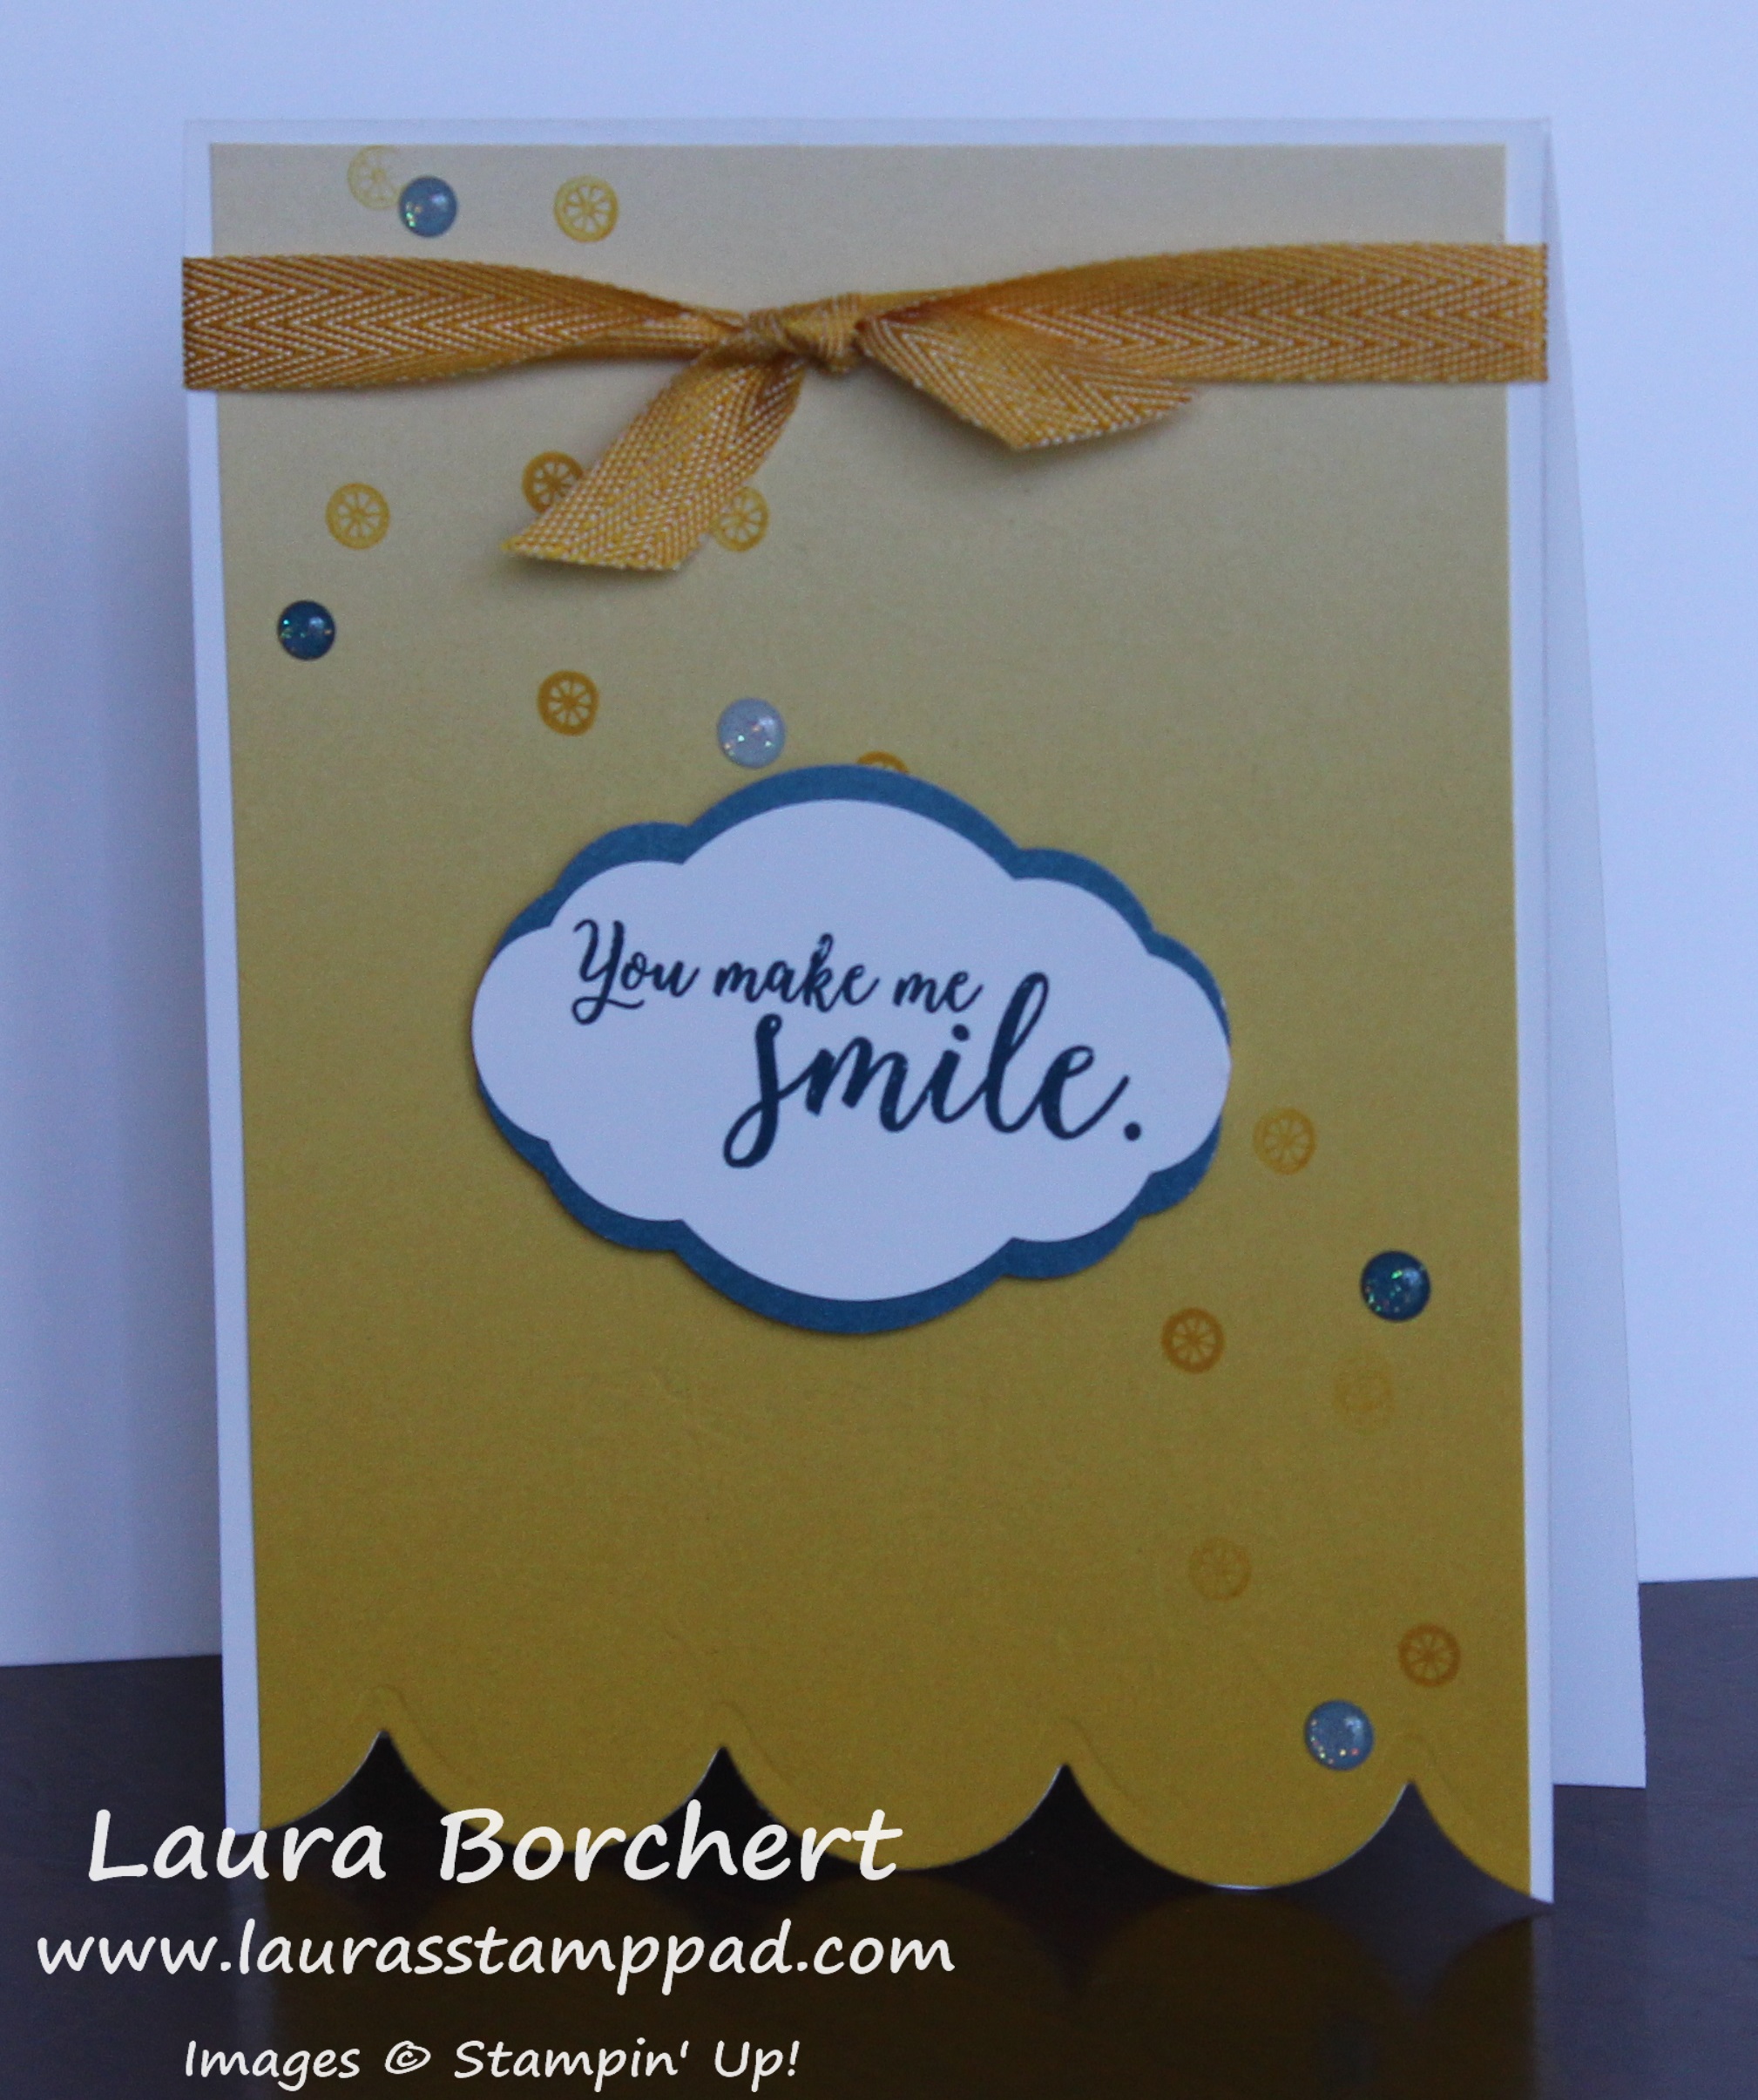
Here is another fabulous blue and yellow card and I just love it. Is this my new color combination that I will be using all the time now??? Check out this card for another fabulous blue and yellow combo!
For this card, I started with a Whisper White card base and layered on a piece of Color Theory Designer Series Paper (4″ x 5-1/4″). I just love this ombre pattern. Next, I placed the card base opened up onto my Precision Base Plate with the scallop die along the bottom and ran it through. This die is from the Seasonal Layers Framelits. Be careful that the die is centered so it doesn’t hit the edge of the Big Shot and move or bend. I like to use a Post-It Note to hold dies in place while die cutting!
Now it is time to decorate. I stamped the little circle from the Colorful Seasons Stamp Set diagonally from the lower right to the upper left corner in Crushed Curry. I stamped 3 times with each time I inked it up. This variation in color goes along with the ombre paper. Next, I tied some of the Crushed Curry Mini Chevron Ribbon around the top of the card and into a knot.
For the greeting, I used the Colorful Seasons Stamp Set (Bundle & Save 10%) and stamped it in Dapper Denim Ink. Then I punched it out with the Pretty Label Punch. I punched out a second one in Dapper Denim and cut it in half. I added one half to the top portion of the greeting and the other half to the bottom. Using Stampin’ Dimensionals, I added it to the card front. Finally, I finished off the card with some Glitter Enamel Dots in the various shades. These things are just beautiful!!! I love them!!
What is your favorite color combination right now? Let me know in the comments below! I would love to try some new ones out!
Happy Tuesday…..but feels like Monday! Today I’m sharing with you this amazing technique of creating a perfect beach scene! I am using the NEW Colorful Seasons Bundle from the 2017-2018 Annual Stampin’ Up Catalog which comes out on Thursday!!!!! Woot Woot! I so can’t wait!!!
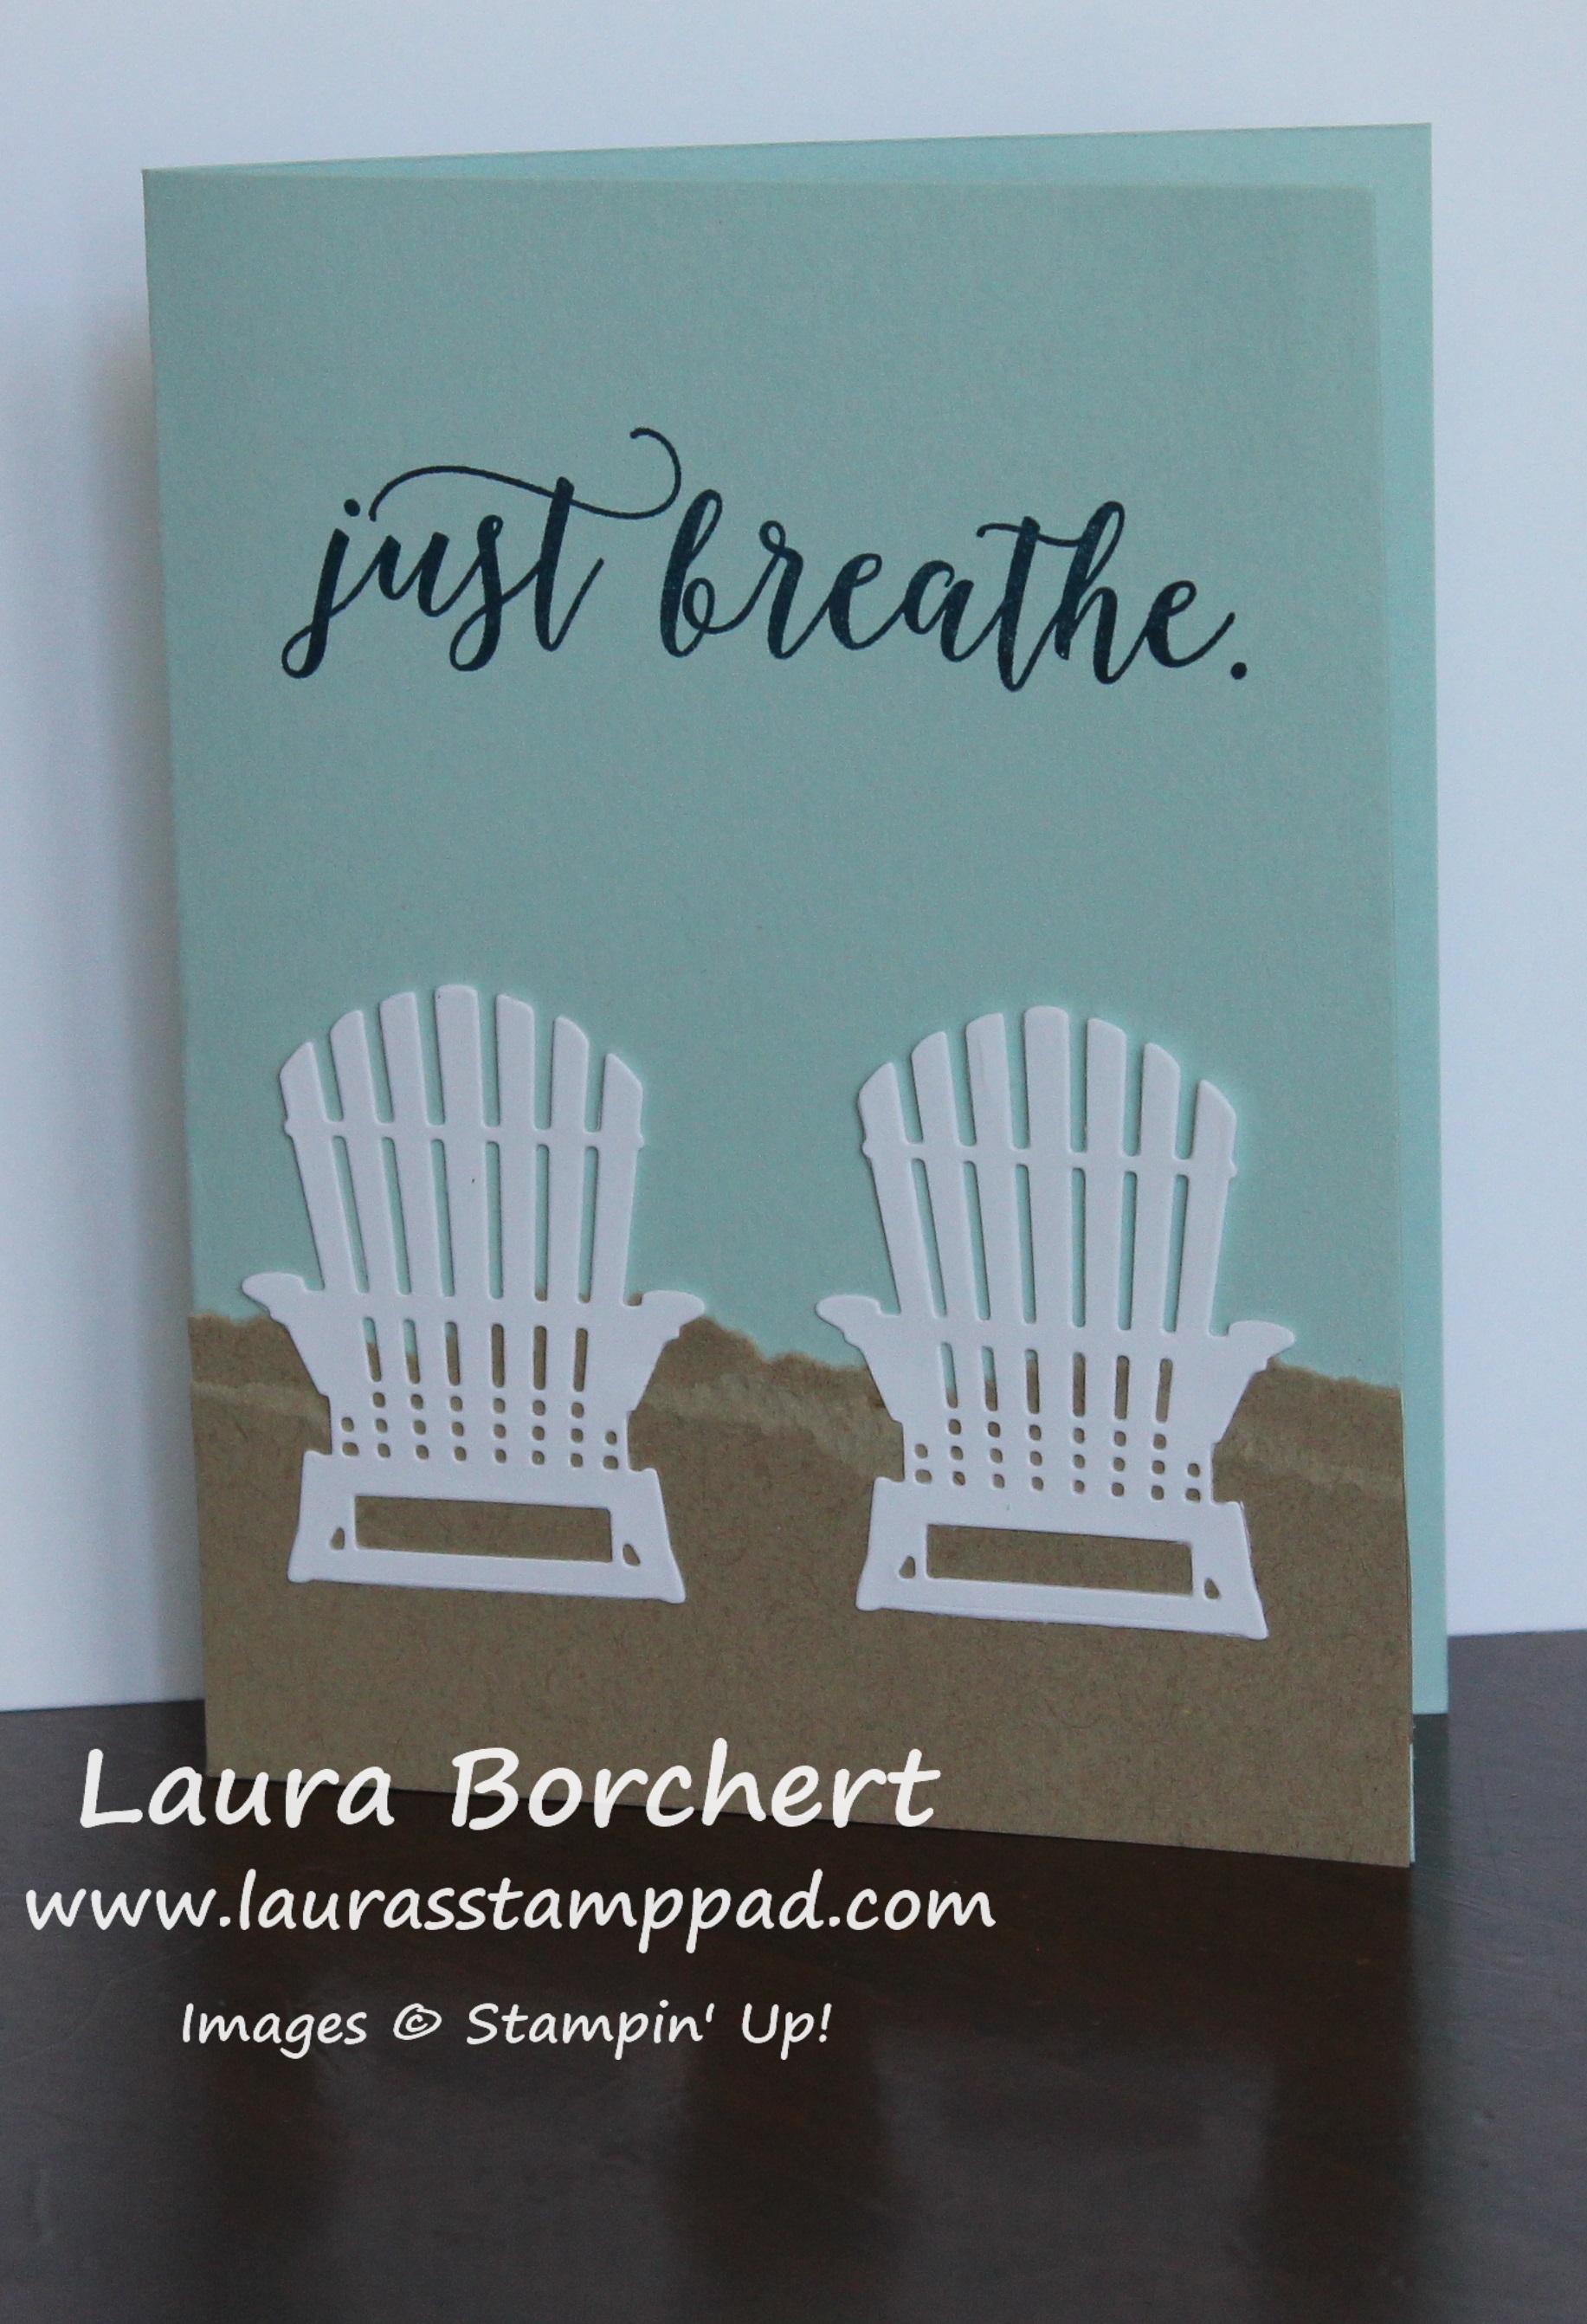
How amazing is this card?!?!?! I just love it for that amazing greeting, the calming blues, and the relaxing chairs. Can you feel the sun on your face or cool ocean breeze just looking at this card? I think I can! Let’s get started on how I created it!
I started with a Whisper White card base. Next, I layered a piece of the ombre Dapper Denim from the Color Theory Designer Series Paper Stack onto some Dapper Denim cardstock (4″ x 5-1/4″). Then I stamped the greeting, Just Breath from the Colorful Seasons Stamp Set in Dapper Denim. That greeting is just amazing. I added this to the card from with Stampin’ Dimensionals for a little pop!
Now for creating a perfect beach scene, it’s time to make the sand. I took a piece of Crumb Cake (2″ x 5-1/8″) and placed it in a box to spritz. Spritzing can be messy so I use a box on it’s side to spritz into. I place the cardstock laying down flat (on the side of the box since it’s sideways). Using a Spritzer with alcohol and Chocolate Chip Re-Inker, I spritzed the bottom of the box, allowing the spray of it to drop down onto the Crumb Cake. This way the cardstock just has little dots of ink all over and not a direct splatter of ink. Also, another BIG TIP is be sure to use an alcohol of 70 proof or less. If it is higher, it will start to break down the plastic in the spritzer and it will clog.
After spritzing, I ripped the Crumb Cake in half and layered it together on the bottom of the card front. Those amazing adirondack chairs are from the coordinating Seasonal Layers Framelit. I die cut them in Whisper White and added them to the card front with the Fine Tip Glue Pen. I put the adhesive on the bottom rectangle piece as well as the arms of the chair. This allows the top of the chair to pop out a bit since it isn’t secured down and it looks more 3D! I just love it!!!
Here is another version of the same card but fewer layers. This is the simple version and the stepped up version is at the top! For this card, I used a Soft Sky card base and stamped directly onto it. Then I added the sand and chairs below. Which card do you prefer – the simple or stepped up?
If you would like to see it all in action, check out the video tutorial below or click here! Don’t forget to give it a thumbs up if you liked it and be sure to subscribe if you are new!!!
Get ready for the NEW catalog on June 1st! It’s so fabulous!!!!
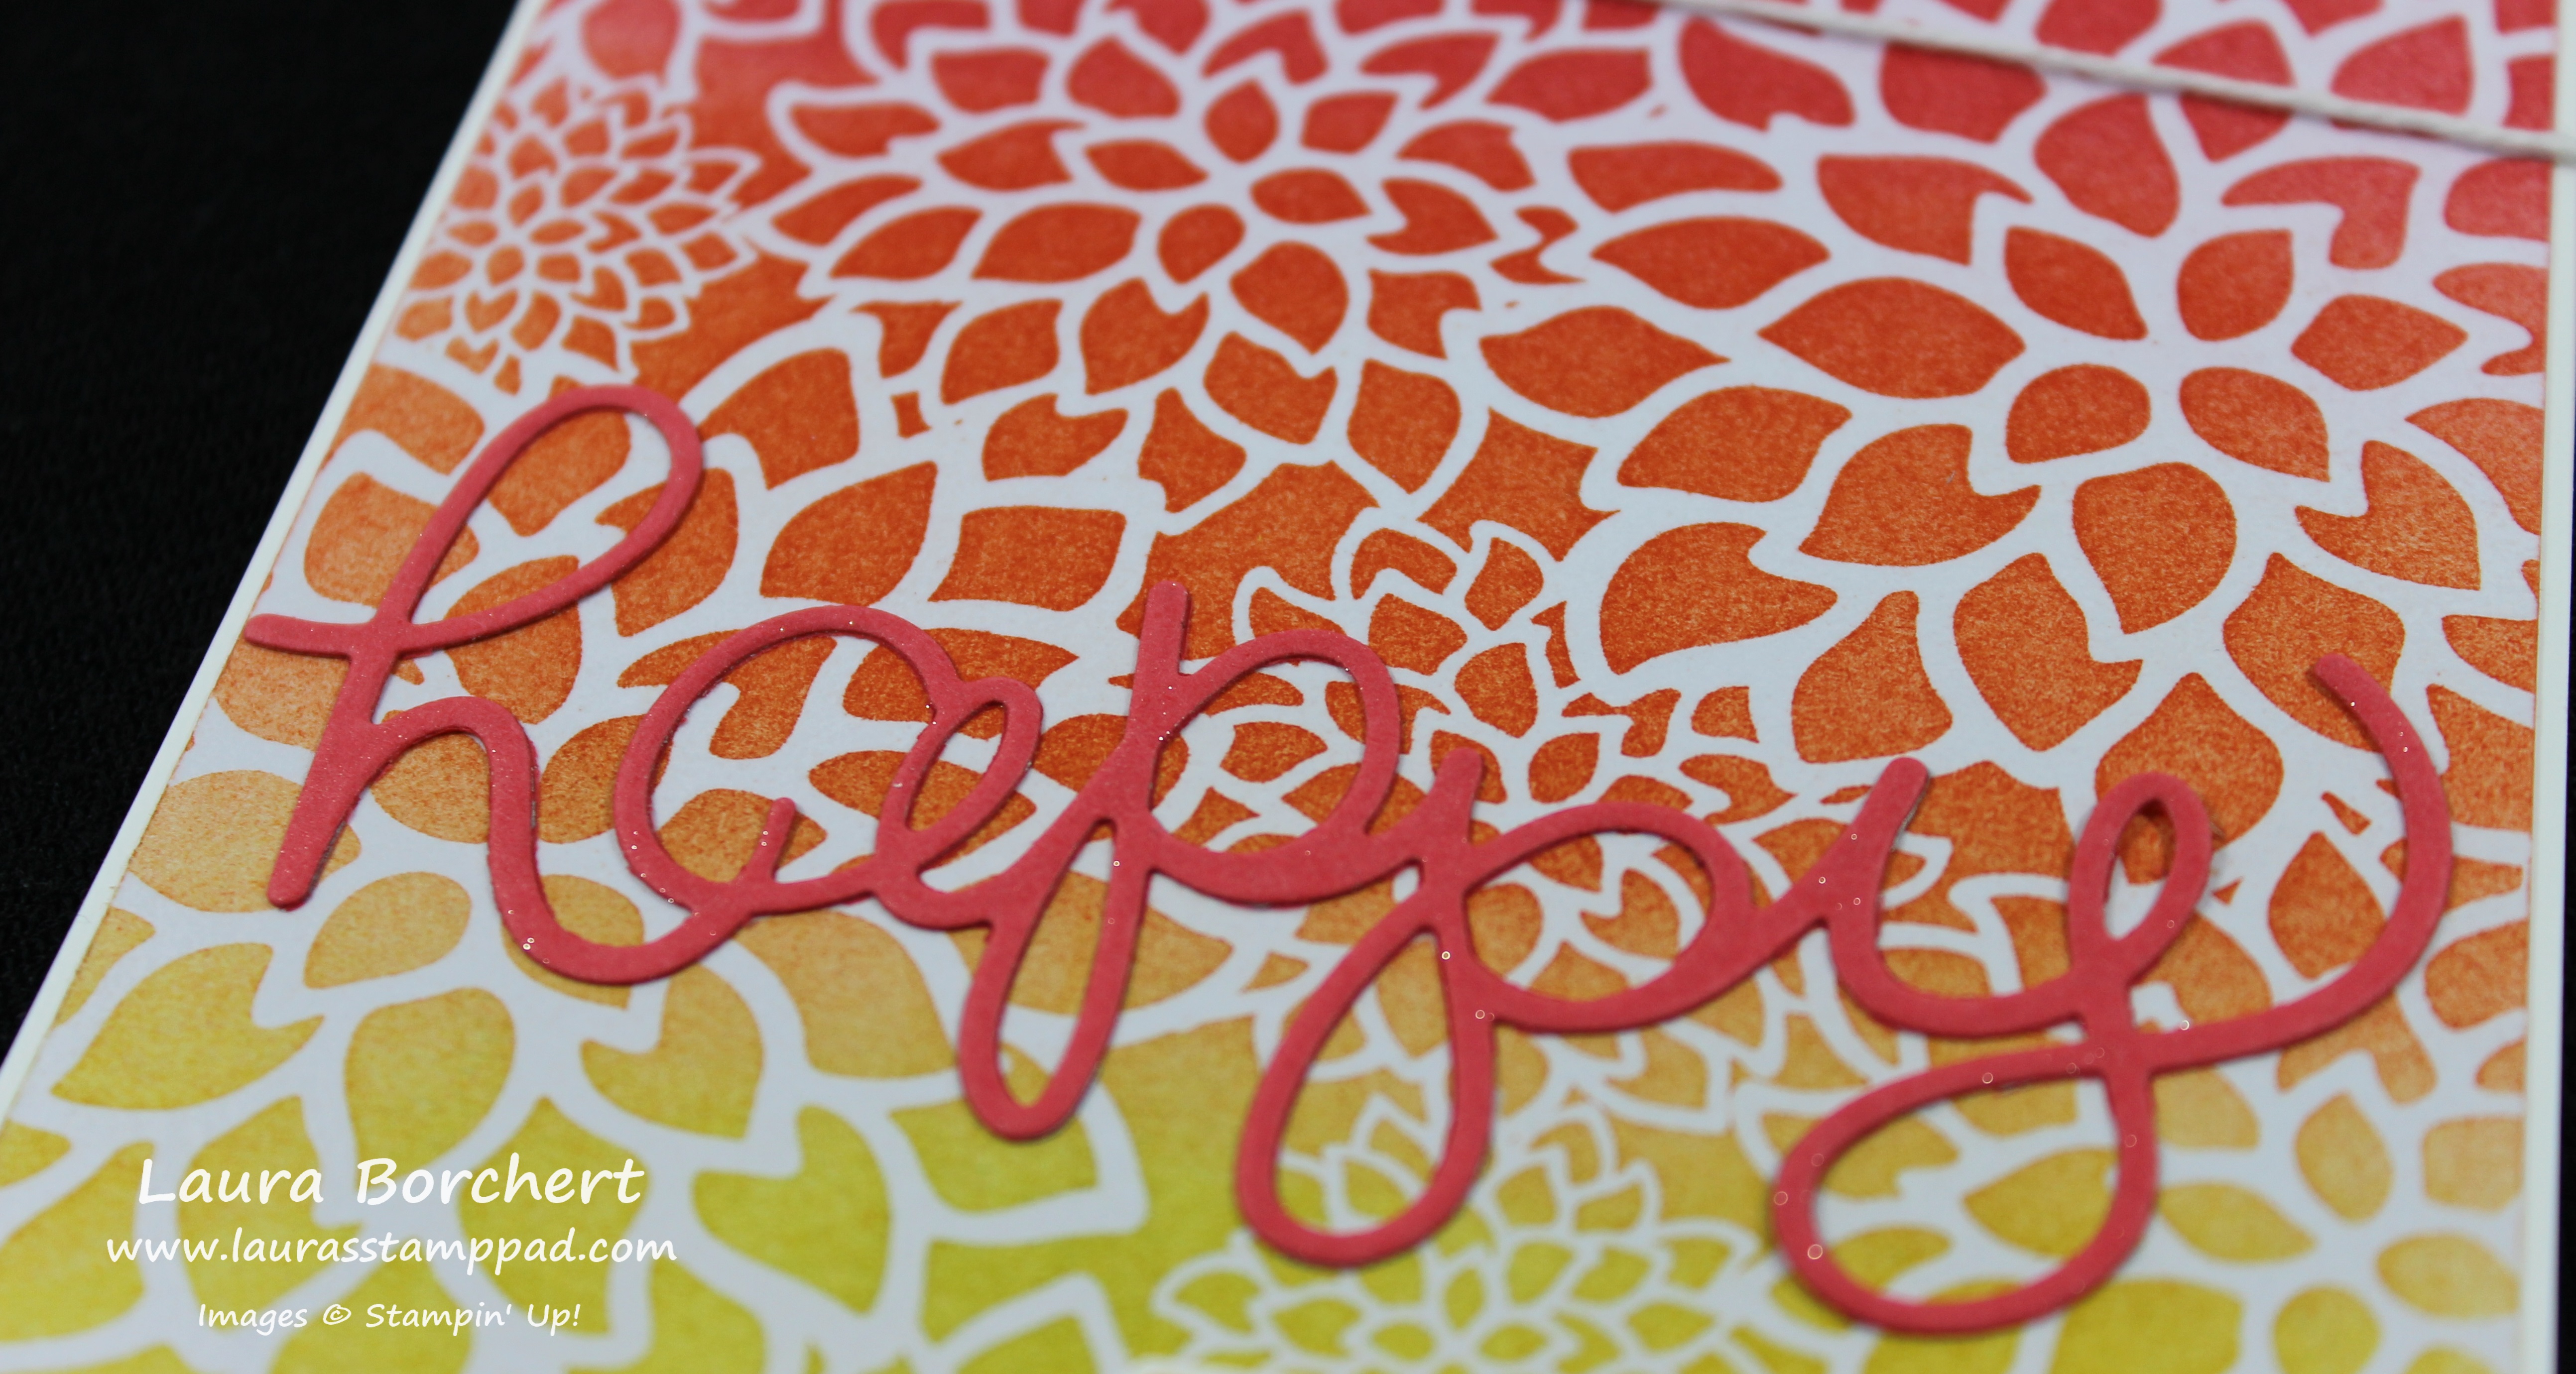
Happy Tuesday!!! I hope you are all having an amazing week! I have a fabulous technique to share with you today!!! I am showing you how to use the New Sponge Brayer on the Irresistibly Floral Designer Series Paper so you can get this fabulous look!!!
I am having so much fun with the Irresistibly Floral Designer Paper because it has FLOWERS and there are so many different fun ways to add color. I love it!!!
I started with a piece of the floral image from the Irresistibly Floral Designer Series Paper measuring 4-1/8″ x 5-3/8″. I didn’t want much of a border on my card front, just the beautiful flowers! I started with the lightest color – Daffodil Delight and rolled the Sponge Brayer over the ink pad. The sponge won’t pick up the ink like your are mopping up color, it will just be ever so slightly colored. Then I rolled it over the end of the Designer Paper – back and forth. The color will start to appear and you can continue until you have the desired shade. You will want to go about 1/3 of the way across the paper. Using a paper towel, you will want to wipe off any excess ink as it tends to sit on top of the embossed image. Then I changed out the sponge to a new one and did the same with Tangerine Tango. You will want to go over the top of the yellow a bit on that overlap portion so that it doesn’t look like stripes but instead like it fades into the next color. Wipe off the excess ink with the paper towel and then change out the sponge and finish off the Designer Paper with Watermelon Wonder. Be sure to go over that Tangerine Tango just a bit so your colors fade into each other! Wipe off the excess ink and you are all done!!! You can wash out your sponges with water and just keep squeezing them until they run clean and allow them to dry.
To finish off the card, I added this piece to a Whisper White card base and tied some Whisper White Baker’s Twine around the top of the card. For the greeting, I die cut the Happy from the Hello You Thinlits. I brushed some Wink of Stella over the top for a little shimmer and added it to the card front with the Fine Tip Glue Pen! If I would have planned this card out a little better, I would have put the yellow on the top of the card and placed the greeting up there so it popped some more. I already had it adhered to the card so I just went with it! I stamped the Crushed Curry border from the Thoughtful Banner Stamp Set and added the greeting from the Crazy About You Stamp Set (it coordinates with the Hello You Thinlits). I punched out the greeting with the Classic Label Punch and added it to my card with Stampin’ Dimensionals. I added a little Metallic Enamel Shape for a little more bling! This card is so bright and cheery and could be used for any occasion!
If you would like to see this in action, check out the Video Tutorial below or click here. Don’t forget to give it a thumbs up if you liked it and be sure to subscribe if you are new. I post every Tuesday and Thursday!
Happy Tuesday!!! That means I have a fun technique to share with you today! This one is super fun and simple and you can use your favorite colors!!!
Father’s Day is right around the corner!! Now is the time to start working on your cards. The New Thoughtful Banners Stamp Set is perfect for occasions like these. There are 53 images in this stamp set that you can build greetings like the card above or go simple like Hello! All of the images stamped on this card are from this stamp set!
For this card, I started with a Crumb Cake card base. Then I took a piece of Dapper Denim (5-1/2″ x 3) and Emerald Envy (4-1/2″ x 3″) and layered them down the center. With a piece of Whisper White measuring 3-1/2″, I stamped the bar image from the Thoughtful Banners Stamp Set. I started with Dapper Denim and stamped in the middle and then moved it up a smidge and stamped again and then again. I did the same thing with the Emerald Envy. There are two reasons I did this – 1. Getting the bar lined up is easiest when you don’t take it away for more ink. Just move the stamp up a little and stamp again. 2. I like the faded look so that you can stamp some of the greetings on top of the bar without needing black. Of course, you can always use a Stamp-A-Ma-Jig for a perfect line up. I stamped the Have A and Blessed in Dapper Denim. I stamped Fun and Father’s Day in Emerald Envy. For the amazing, I stamped the banner image in Dapper Denim onto scrap cardstock and the amazing in Emerald Envy. I used the coordinating Duet Punch (Bundle & Save 10%) to punch it out. I added the greeting to the card front with Stampin’ Dimensionals. It’s that simple. You can create lots of different greeting combinations and color combinations with the card style.
What colors would you use for the card style? Let me know in the comment below! I think a red, orange, yellow combination would be super fun!
If you would like to see this in action, check out the Video Tutorial below or click here! Be sure to give it a thumbs up if you liked it and don’t forget to subscribe if you are new! I post every Tuesday and Thursday!
This bundle is just one of the amazing NEW bundles in the New Catalog that I love. Have you checked out the New Catalog? Click here to see it all! Don’t forget that June is a great time to get lots of items on your wish list. As a Hostess, you can earn an additional $35 in Free Product when your party reached $350. That can be a single order, catalog party, online party, or private class with your friends. If you Want It All, you can join Stampin’ Up in June and get $125 in any product of your choice for $99 PLUS 2 additional stamp sets!!! Click here for more information!


")

")


 Designer Series Paper")


 Designer Series Paper")