Happy Tuesday!!! That means I have another technique to share with you!!! This Straight Shooting Arrows card is perfect for Valentine’s Day or an Anniversary!
The soft Flirty Flamingo and White in this card make it super sweet! I love it. The pretty hearts and arrows would even make it a fun baby card too!!!
Thanks to the Stamparatus this card is a breeze to create those perfectly spaced shooting arrows. That takes all of the stress out of the card which is awesome!
Using the Take Your Pick Tool to work with the Faceted Gems makes this super easy too!!! I love having crafting tools to make creating fun and simple! Check out the supply list below to get these fabulous items in your craft room! Don’t forget that it is Sale-A-Bration time. Every $50 in product, earns you a FREE Sale-A-Bration item. Who doesn’t love free stuff?!?!?!
Check out the full tutorial of this straight shooting arrows card in the video below or click here! Be sure to give the video a thumbs up if you liked it and don’t forget to subscribe if you are new. If you would like a notification when I post a new video, be sure to click the bell right next to the subscribe!!!
Happy Tuesday!!! You all know what that means! I have a fabulous technique to share with you! In fact, more than one fun technique today! I am showing you some easy stamping with the Stamparatus and creating your own designer paper!!! Let’s get started!
First, let’s start with the fun background “designer paper”! It is super to create because you just stamp all over! I used a piece of Seaside Spray and stamped the images from the Everything Amazing Stamp Set. Starting with the biggest image (the balloons), I stamped them randomly and falling off the cardstock. Then I added in some party hats in Night of Navy Ink as well. Filling in the holes, I stamped the confetti in Seaside Spray Ink. Once this was complete, I tied some ribbon on the bottom and added this to a Grapefruit Grove card base!
For the greeting focal point, I used the Stamparatus and the new Grid Mat! The Whisper White piece measures 4″ x 2-1/2″ and the greeting just fits perfectly which is why the Stamparatus comes in super handy. First, I stamped the Amazing in Seaside Spray. Next, I lined up the other greetings and stamped them in Night of Navy! Of course, once you greetings are all set in the Stamparatus, it’s super easy to make multiples! Boom Boom! Using the Detailed Trio Punch, I rounded 2 of them to add some texture and then added it to the card front. I finished it off with some Rhinestones for a little bling!
For the inside of the card, I added a few balloons and a party hat. You could always add those to the envelope too! Check out the supply list below if you would like to make this card! Have fun creating your own designer paper with this stamp set or any set. It’s super fun!
If you would like to see this all in action, check out the video below or click here! Be sure to give the video a thumbs up if you liked it and don’t forget to subscribe if you are new. If you would like a notification when I post a new video, be sure to click the bell right next to the subscribe!!!
I know it is Tuesday and I usually do Technique Tuesday but instead we are doing one of Laura’s Quick Tips! This is kind of a technique! It’s a great way to use less ribbon off the spool and possibly use those little scraps you have laying around!
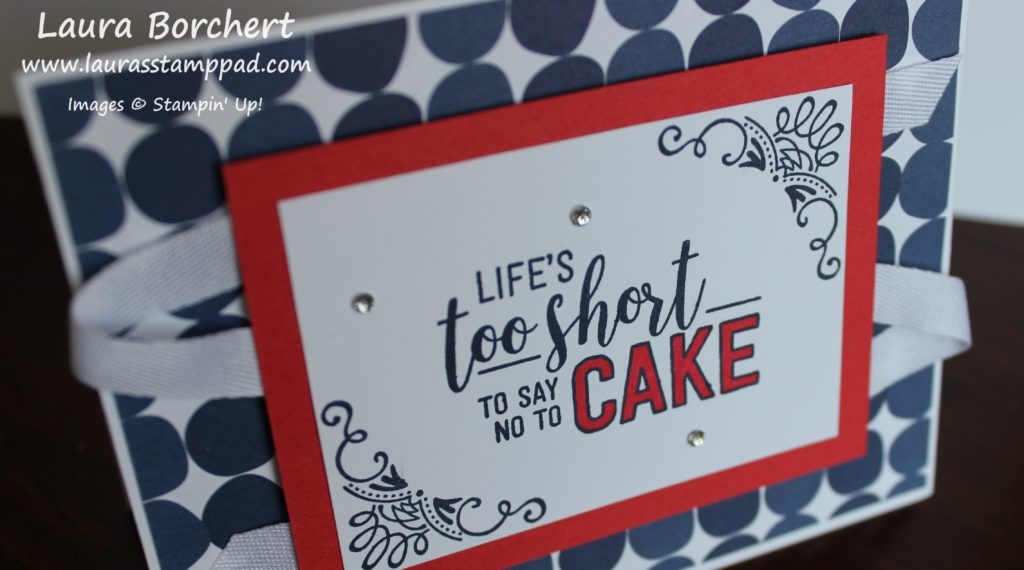
This is a fairly simple card to create. The fabulous colors, designer series paper, and fun greeting make it amazing! To create a bit of texture, I added in the ribbon!!!
I started with a Whisper White card base and layered on a piece of the Happiness Blooms Designer Series Paper! Next, I took a piece of Whisper White and stamped the greeting and fun corner images with Stamparatus. These images are from the Amazing Life Stamp Set (retiring soon). The Stamparatus makes those corner images fit perfectly into place. Using the Poppy Parade Dark Stampin’ Blends Marker, I colored in the word Cake! I love how it makes it POP!
One the images were stamped, I layered it onto a piece of Poppy Parade cardstock and flipped it over to add ribbon! Rather than adding one long strip of ribbon that starts at the top, loops across, back across, and comes out the bottom. It was over 12 inches of ribbon I would have needed. Instead, I laid the first piece down, secured it with Stampin’ Dimensionals and trimmed it off. Next, I cut a small loop and secured it to the other side with Stampin’ Dimensionals. I did this with another loop and another end piece. By only using small pieces of ribbon, I saved over 6 inches of ribbon. You could also use ribbon scraps that you have laying around!!
If you would like to see this all in action, check out the video below or click here! Be sure to give the video a thumbs up if you liked it and don’t forget to subscribe if you are new. If you would like a notification when I post a new video, be sure to click the bell right next to the subscribe!!!
Have you ever created a card and thought oh my goodness this is AMAZING?? I sure hope you have because all card are amazing and made with love. I will admit I don’t have that OMG feeling with all cards though. This feeling comes about once a year or sometimes longer. My last most amazing card was this one in November 2016! I still have that card and admire it randomly. Well today I’m sharing another one of my amazing cards! This one just screams beauty at me and I LOVE IT!
I hope you love it as much as I do but if not that’s okay too! The colors, the pattern and that little hint of bling do it for me!!!
I started with a Highland Heather card base and layered on a piece of Coastal Cabana measuring 4″ x 5-1/4″. Next, I took a piece of Whisper White (3-7/8″ x 5-1/8) and placed it in the Stamparatus. Using the Florentine Filigree Stamp Set and a Spectrum Pad, I created that amazing background! The colors for the Spectrum Pad are Gorgeous Grape, Highland Heather, Pool Party, Coastal Cabana, and Bermuda Bay. It is super easy to create because the Stamparatus does all of the work with spacing and stamping. Simply notch down the plate after each row.
TIP: The hardest part is probably making sure the ink pad is always stamping the correct color on the same end. Place the ink pad above the Stamparatus Plate after inking each time with the flat side of the ink pad on the left side.
Now for the focal point of those layered circles!!! Using the same Florentine Filigree Stamp Set, I stamped the circle image in Bermuda Bay and in Gorgeous Grape. I used the Layering Circles Framelits for the Bermuda Bay Circle and the 2″ Circle Punch for the Gorgeous Grape one. Next, I stamped the greeting in Bermuda Bay and slide the long skinny piece of Whisper White into the 1-1/4″ Circle Punch. That is how I got those slightly rounded ends. Then I added some of the Pool Party and Silver Baker’s Twine to the back securing with Stampin’ Dimensionals for texture. I finished off the card with a few Gingham Gala Adhesive Backed Sequins for some bling!
Isn’t it just fabulous??? What color combination would you use for your Spectrum Pad?? Let me know in the comments below because I have 2 left to ink up and I just can’t decide on the colors.
If you would like to see this all in action, check out the video below or click here! Be sure to give the video a thumbs up if you liked it and don’t forget to subscribe if you are new. If you would like a notification when I post a new video, be sure to click the bell right next to the subscribe!!!
Happy Tuesday, everyone! I have a little bit of a Technique Tuesday and a little Laura’s Quick Tips today! If this has happened to me, surely it has happened to you. I have my Stamparatus all lined up and ready to go. After stamping a few, I line up the next one and just as a go to stamp it down, I realize it is not lined up correctly. Did My Stamp Just Move???
Nope!!! The stamp didn’t move but the grid/scrap paper did or the foam mat did. My mind has been boggled so much on this and wondering how it moved and I could have thought I lined it up correctly. Then after looking at it more, I realize the paper or foam moved and it’s like Ahhh Hah!!! So when you think the stamp moved……check your paper and foam mat! 🙂
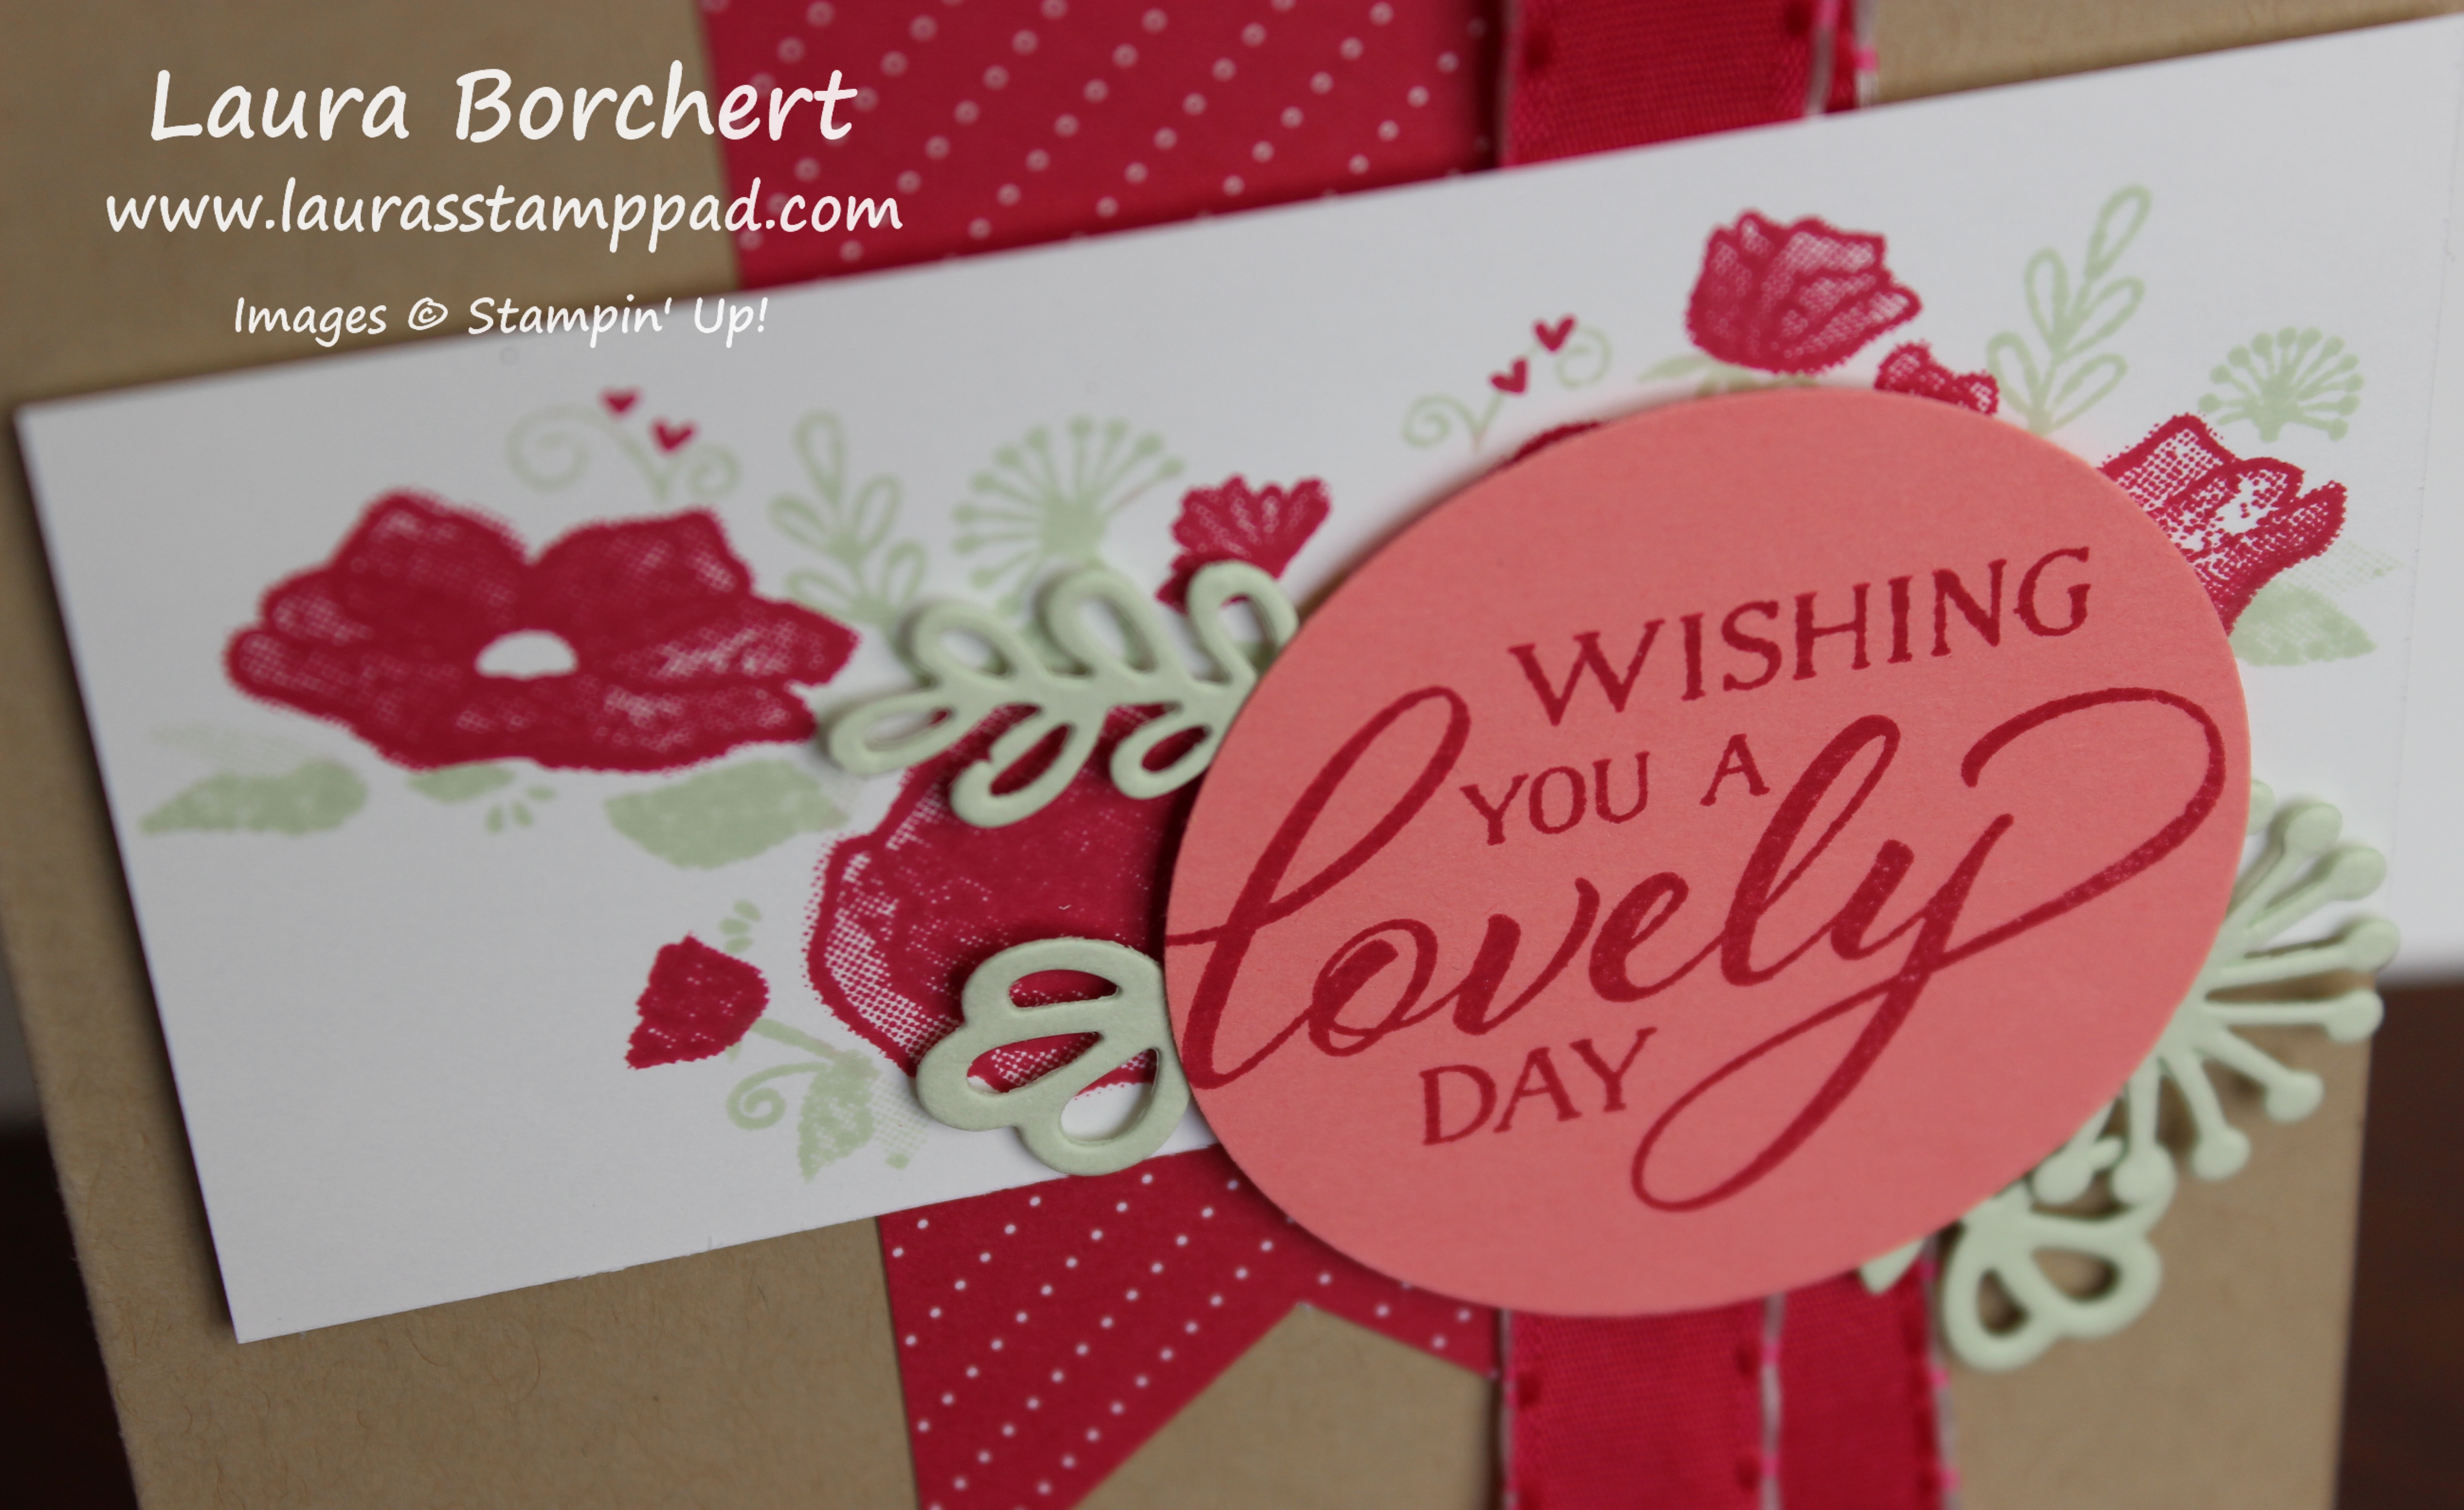
This fabulous card was created using the Stamparatus for that 2 step stamped image of flowers! The Stamparatus makes that image a breeze. One plate holds the folders for a fun color of your choice and the other plate holds the greenery piece! Boom Boom and you have a fabulous stamped image…..just make sure your grid and foam mat are in place!
I started with a Crumb Cake card base and then added a 2″ strip of the All My Love Designer Series Paper. I punched the bottom of it with the Banner Triple Punch to get those banner tips! Next, I added a piece of the All My Love Ribbon by just putting a little bit of Snail Adhesive down the banner and pressing the loop into it. It won’t feel secure at this time but when you place the stamped floral image over the top with Stampin’ Dimensionals, that will secure it better. For the floral piece I used Soft Sea Foam and Lovely Lipstick Inks.
For the greeting, I stamped it from the Forever Lovely Stamp Set in Lovely Lipstick. Can I say Lovely any more in one sentence?!?!? Then I punched it out with the 1-3/4″ Circle Punch! For a little texture, I die cut some of the greenery pieces from the coordinating Lovely Flowers Framelits. One of the framelits is actually a 2 for 1 piece. There are 2 of that greenery piece in the 1 framelit. I die cut the 3 framelits in Soft Sea Foam and got the 4 pieces to use around the greeting! The greeting piece was added to the card front with Stampin’ Dimensionals as well! Just lovely! (I had to do it.)
If you would like to see this all in action, check out the video below or click here! Be sure to give the video a thumbs up if you liked it and don’t forget to subscribe if you are new. If you would like a notification when I post a new video, be sure to click the bell right next to the subscribe!!!
Happy Wednesday! Anyone else think this week is dragging on? I sure do….but then again on Monday I felt like it was Thursday already. Stampin’ Up is spicing up the week with some fun! The Year-End Closeout Sale starts today as well as the Craft & Carry Stamparatus Bag being available now!!! Woot Woot!
These items are only available while supplies last or until January 2nd. Don’t wait long as some will sell out quickly. Click here to start shopping!
Click here to get the Craft & Carry Stamparatus Bag!!! I think this will be a HOT item so get yours today!
Don’t forget that all orders of $75 or more before tax and shipping will earn Laura’s Free Stamp Set of the Month! This month it is the Buffalo Check Stamp Set! Woot Woot!
I’m so excited to share with you all that Stampin’ Up has created a Craft & Carry Stamparatus Bag!!!! This bag is super cute and versatile!
First of all this bag is CUTE! I love the navy and coastal cabana colors. It is also super strong and thick canvas. This isn’t a thin bag that is going to tear or anything. It also have lots of pockets for all kinds of things! The Stamparatus goes on one side with the velcro strap holding it in tightly and padded pocket. There is no fear that the Stamparatus will break or get damaged. The other side has 2 pockets for the accessories like extra clear plates, grid papers, and even stamps and ink. There is also an outside pocket with a magnet closure. The zipper is super strong too! You could add in some stamps, cardstock, and ink pad to take with you somewhere. After all that is what cute bags are for, right??
Are you loving these colors and this amazing bag??? You can get one of your own starting tomorrow – December 5th! I’m telling you a day early to make sure you see this and get ready. I have a feeling these things will be HOT HOT HOT and I don’t want you to miss out or have to wait if they go on backorder!
If you would like to see me open this bag and show it off, check out the video below or click here! Be sure to give the video a thumbs up if you liked it and don’t forget to subscribe if you are new. If you would like a notification when I post a new video, be sure to click the bell right next to the subscribe!!!
Have you ever wanted an image stamped in each corner of your greeting or project?? Today, I’m going to show you how stamping perfect corners is super easy!!!
I am loving this greeting and it was super simple to create. Remember last week when I showed you Stamping In The Round??? We are going to use that same template for this card only this time, you just need to use the squares and not the diamonds on it!
I started with a Blackberry Bliss card base. Next, I took a piece of Tranquil Tide measuring 4″ x 5-1/4″ to layer on top. First, I thought it looked too plain so I stamped on it with the greenery from the Peaceful Noel Stamp Set in Tranquil Tide Ink. See the photo above. My husband said it looked too busy so I tried embossing it with the Swirls & Curls Embossing Folder. See the photo below!
Next up, I layered on a piece of the Joyous Noel Designer Series Paper measuring 4″ x 3″. I used this size so I could use up every inch of the fabulous paper! 🙂 I like to add this layer with Stampin’ Dimensionals when placing it on an embossed layer because I feel it is more secure in the grooves of the embossing. If you go the stamped route like the sample up top, you could layer it on with regular Snail Adhesive.
Using a 2-1/2″ square, I placed it in my Stamparatus using the square template. Then I stamped down the corner image in Sahara Sand Ink. After, I stamped, I rotated the cardstock around so a new corner was placed in the stamping spot and stamped it down. Once I had all 4 corners stamped, I stamped the greeting in the center. All of these images are from the Peaceful Noel Stamp Set. I layered this piece onto Blackberry Bliss.
Using the Tranquil Tide Mini Ruffled Ribbon, I flipped over the greeting and placed it along the top with a bit of a tail hanging off. I secured it in place with Stampin’ Dimensionals placed half on the ribbon, half on the cardstock. Then I looped it around and secured the middle section, made another loop and ran the the last piece across the bottom. Once you have it all set, add a few more dimensionals for good measure. After all they are on sale today and I love them so much! Then I added this piece to the card front!
Which one do you like best – embossed or stamped Tranquil Tide layer?? Let me know in the comments below!
If you would like to see this all in action, check out the video below or click here! Be sure to give the video a thumbs up if you liked it and don’t forget to subscribe if you are new. If you would like a notification when I post a new video, be sure to click the bell right next to the subscribe!!!
After posting the wreath card on Tuesday using the Stamping In The Round Technique, I had lots of people request a template tutorial! I’m always happy to help you all out so here it is – a template for the Stamparatus!!!
This template I created on Stampin’ Up Grid Paper but you can also use just a piece of printer paper like the one below. First up, I found the center from both sides and created that cross line in purple. Next, I took a scrap piece of paper in a square and placed it in the center. You can start with whatever size of square you would like. This square is the size of cardstock you will be stamping on for your project. The one above is a 3″ square down to a 2-1/4″ square. Trace the square centered and then rotate it into a diamond and trace again.
After you create the first square centered and in a diamond, trim off a 1/4″ from the top and one of the sides. Line up the square template in the center and trace along the edges. Keep going until you have the smallest square you need.
That is how I created the template. I’m thinking I will laminate this so that it is protected from ink or ripping and I can use it over and over again. Check out the wreath card that I created using this template here! Also, stay tuned as I have another fabulous sample coming soon!
If you would like to see this all in action and what the template looks like, check out the video below or click here! Be sure to give the video a thumbs up if you liked it and don’t forget to subscribe if you are new. If you would like a notification when I post a new video, be sure to click the bell right next to the subscribe!!!
Today, I wanted to share another card that I made for baby thank you notes. This Thank You Beary Much card is just so precious!!! Baby Bear looks so real and soft and cuddly! 🙂
Isn’t this teddy just adorable??? He is a 3 step stamped image but I used the Stamparatus and it was smooth sailing! I love that tool!
I started with a Crumb Cake card base. Next, I took a piece of the Springtime Foils Designer Series Paper from Sale-A-Bration (no longer available) and cut it into a 4″ x 5-1/4″ piece. Then, I took a piece of Whisper White measuring 3-1/2″ x 3-1/2″ and stamped the teddy bear from the Baby Bear Stamp Set! I used the Stamparatus for perfect placement especially since I was making multiples. I started with image #3 in Early Espresso Ink. Next, I used Soft Suede for image #2 and then Crumb Cake for image #1 (more solid image).
I was able to do 2 images at the same time and then I ran through for the last stamped bear image. It went fairly fast actually since I didn’t have to focus and line up each bear myself. This way I could watch a movie while stamping or let me mind wander. 🙂 After all, stamping should be relaxing and fun and not stressful! Once the bear was stamped, I layered it onto a piece of Powder Pink cardstock and added it to the card front with Stampin’ Dimensionals for some texture!
For the greeting, I cut out some Powder Pink and stamped the greeting in Early Espresso Ink. Using the Triple Banner Punch, I punched both ends and added a little knot of ribbon. I love that Powder Pink Shimmer Ribbon for a little bit of bling and shine! The greeting was added with Stampin’ Dimensionals too!
Since I made so many of this style of thank you note, I used different sheets from the Springtime Foils Paper Pack. Which is your favorite – dots, stripes, or floral?? Mine is the dots! I just like that random dotted look and the rose gold color! Leave your favorite in the comments below!


")

")


 Designer Series Paper")


 Designer Series Paper")


 Specialty Designer Series Paper")


 Mini Ruffled Ribbon")


