Pregnant???

Posted on

No, not me! My neighbor recently told us she was pregnant and of course we are super excited for them! I instantly had to make a fabulous card for them to congratulate them!

Pregnant, www.LaurasStampPad.com

Isn’t this the cutest card ever?!?! I just love the simplicity of the women standing there with her belly bump! It’s perfect!

I started with a Rococo Rose card base. Next, I took a piece of Whisper White (3-3/4″ x 5″) and stamped the pregnant lady in the lower right corner. I used Basic Gray Ink because I like that more subtle look when I’m coloring. The image is from the Wonderful Moments Stamp Set. Using the Rococo Rose Stampin’ Blends, I colored the lady’s dress. For her skin, I used Ivory Stampin’ Blends and Bronze for her hair!

Wonderful Moments Stampin' Up Stamp Set, www.LaurasStampPad.com

Once I was done coloring, I layered this piece onto a piece of Blushing Bride (4″ x 5-1/4″). Before adding it to the card front, I placed a piece of the Rococo Rose Scalloped Linen Ribbon on the left. I just wrapped the ends to the back side and secured it before adding it to the card base.

For the greeting, I stamped it in Rococo Rose Ink onto scrap Whisper White. Then using the Timeless Label Punch and the Everyday Label Punch to punch out the greeting and layer it together. I added the greeting to the card front with Stampin’ Dimensionals! To finish off the card, I added a few Faceted Gems!

Card Insert, www.LaurasStampPad.com

For the inside, I used one of the images in the stamp set to decorate! Simple yet fabulous, don’t you think?!?!? If you want to great this fabulous card for someone you know who is pregnant, check out the supplies listed below!

Happy Stampin’

~Laura

Product List

Snow Much Fun!!!

Posted on

In January, we shall have snow much fun….but for now I’m holding onto Summer! 🙂 How about you? Do you love snow or summertime? While we are enjoying the Summer sun and Fall leaves changing, we can still play with snow in our crafting!!! Check out these cuties!!!

Snow Much Fun, www.LaurasStampPad.com

This is the perfect kind of snowman because it comes out perfect no matter how much snow you get and you get to stay inside all warm!

I started with a Coastal Cabana card base measuring 4-1/4″ x 11″. Next, I cut 2 pieces of Whisper White measuring 4″ x 5-1/4″. One is for the front and the other is for the inside of the card! Then I took a piece of Sparkle Glimmer Paper measuring 4″ long and as tall as you wish. I ripped the top side for a snowy slope look. TIP: Rip away from you for a cleaner look. Also, if you are struggling to rip it because of the thick plastic-y back, use you scissors to get it started. Place this on the Whisper White as a guide for where to stamp your snowman so he isn’t floating in the air.

Snowman Season, www.LaurasStampPad.com

The snowmen were stamped from the Snowman Season Stamp Set and in Basic Gray Ink for that more subtle look. For the bigger snowman, I stamped him onto scrap white and punched him out with the coordinating Snowman Builder Punch. Using Stampin’ Blends, I colored in the buttons (Pumpkin Pie) and nose (Basic Black). I added the punched out snowman to the card front with Stampin’ Dimensionals. Then using the Let It Snow Embellishment Kit, I added some warm and cozy felt pieces. To spruce up the other snowman, I added Shimmery Crystal Effects to the snowballs!

For the greeting at the top, I added a strip of Let It Snow Designer Paper and added the greeting from the Snowman Season Stamp Set. I stamped the greeting in Real Red and added some Holiday Rhinestones!

Heartwarming Memories, www.LaurasStampPad.com

For the inside, I stamped the third snowman in the set in Basic Gray Ink. Using Stampin’ Blends, I colored him in! I also added the greeting in Real Red Ink. All the images are from the Snowman Season Stamp Set! It’s such a cute set! I love it!!!

If you would like to make this card, check out the supply list below!

If you would like to watch me create this cute let it snow card, check out the video below or click here! Be sure to give the video a thumbs up if you liked it and don’t forget to subscribe if you are new. If you would like a notification when I post a new video, be sure to click the bell right next to the subscribe!!!

Happy Stampin’

~Laura

Product List

Purple Monster!!!

Posted on

Happy Monday!!! It’s a new week and why not start it off with something super cute! This little purple monster is just the cutest thing ever. I know it is suppose to be creepy or scary but come on….it’s adorable! Don’t you think?

Purple Monster, www.LaurasStampPad.com

The instant I saw this little monster in the Boo To You Stamp Set, I had to have it. This little monster is perfect for kid cards, Halloween, and so much more! I pictured it in purple and orange right away. After creating this card, I thought a blue and green monster would be super cute too. What are some other color combinations??

I started with a Gorgeous Grape card base. Next, I layered on a piece of the Mercury Glass Designer Acetate next to the card fold. TIP: There is a very thin plastic cover over the acetate to keep it shiny. Be sure to peel this off before adding to your project. Have no fear if you forget because I did 20 of these cards before I knew about it. It looks just as perfect! I tied some Gorgeous Grape Striped Ribbon around the card and into a knot. This helps smooth out the look between the acetate and the cardstock.

Monster Halloween Card, www.LaurasStampPad.com

For the monster, I stamped him…or her…in Basic Gray Ink from the Boo To You Stamp Set. I like to use gray because it’s a lighter more subtle look for coloring. Using the Highland Heather and Pumpkin Pie Stampin’ Blends, I colored in the monster. Then I layered it onto Pumpkin Pie cardstock and added it to the card front with Stampin’ Dimensionals.

For the greeting, I stamped it in Gorgeous Grape from the Boo To You Stamp Set. After stamping it on Whisper White, I punched it out with the Timeless Label Punch and added it to the card front. I placed it on the right side and just trimmed off the excess. To finish it off, I added an orange rhinestone from the Holiday Rhinestones Pack! It goes perfectly!

You still have plenty of time to make some of these Purple Monster cards for Halloween or even birthdays! Click the supplies below to get everything you need! Be sure to check out other fun stuff from the Holiday Mini Catalog by clicking here!

Happy Stampin’

~Laura

Product List

Coloring Apples!!!

Posted on

The Holiday Mini Catalog begins tomorrow and I CAN NOT WAIT!!! There are so many fabulous products from Fall to Winter and Halloween to Valentine’s Day! I thought I would start off with this fun Fall or Back to School Card with coloring apples!

coloring apples, www.LaurasStampPad.com

Oh how I am loving Stampin’ Blends and the coloring fun you can create. Red apples would be super fun too!

I started with a Whisper White card base. Next, I took a piece of Night of Navy (4″ x 5-1/4″) and layered some of the Come to Gather Designer Series Paper on the left side! I used the Rectangle Stitched Shapes to die cut the designer paper to a little extra flare. The greeting was also die cut with the Stitched Rectangles and stamped in Night of Navy from the Harvest Hellos Stamp Set!

Granny Smith Apples, www.LaurasStampPad.com

For the apples, I stamped them in Basic Gray Ink onto scrap white. These are all from the Harvest Hellos Stamp Set and I punched them out with the coordinating Apple Builder Punch. Using the Granny Apple Green Stampin’ Blends, I colored in the apples and leaves. The stems and seed were colored in Soft Suede Stampin’ Blends. TIP: I found that by adding the dark color around the bottom and sides only and then blending it all with the light marker worked the best. I colored a million apples with the entire lower half in dark and it just would not blend out well. Have fun with it and enjoy a little variation in color because after all nature has variation.

I added the apples to the card front. One of them is flat and the other one and half are popped up on Stampin’ Dimensionals! Of course I had to have some dimension on the card! If you would like to recreate this card and coloring apples, check out the supplies listed below and you can start ordering the Holiday Mini Catalog goodies tomorrow!

If you would like to watch the coloring apples and assembling, check out the video below or click here! Be sure to give the video a thumbs up if you liked it and don’t forget to subscribe if you are new. If you would like a notification when I post a new video, be sure to click the bell right next to the subscribe!!!

Happy Stampin’

~Laura

Product List

Flying Away!!!

Posted on

I’m writing this blog after dropping Claire off at a Stay & Play for the first time. I’m so excited for her to play with other kids and new toys and have fun. There is also the excitement that I have dedicated time to work without interruptions. Then there is that little pull on my heart that misses her already and is wondering what is she doing and does she miss me. It’s like she’s already flying away from me. 🙁 But just like this card says, Let Your Dreams Soar!!!

Flying Away, www.LaurasStampPad.com

This card is perfect for this time of the year. Send it to someone who is heading off to college. Someone heading to a new job would love a card like this too! There are so many wonderful uses for this card that is sure to put a smile on their face and some warmth in their heart!

I started with a Pretty Peacock card base. Next, I took a piece of 4″ x 4″ Terracotta Tile and embossed it with the Subtle Embossing Folder. This gives just the perfect amount of texture! This piece was added on the left hand side of the card front. Then, I took a piece of the Follow Your Art Designer Series Paper and stamped hot air balloons all over in Pretty Peacock. All of these images are from the Above the Clouds Stamp Set. Then I added this layer to the card front.

Subtle Embossing Folder, www.LaurasStampPad.com

Now for the flying away balloon focal point and the greeting! I die cut a Stitched Circle in Very Vanilla! Then on a piece of scrap Very Vanilla, I stamped the Hot Air Balloon and greeting in Basic Gray Ink. Using Stampin’ Blends, I colored the balloon! I went with Pretty Peacock, Crushed Curry, and Calypso Coral. For the basket, I actually stamped in Basic Gray onto Smokey Slate cardstock. I added these to the circle with regular Snail Adhesive but then I popped up the full circle on the card front with Stampin’ Dimensionals! Off to the right, I added a little banner strip with the other greeting stamped in Terracotta Tile Ink. I finished off the card with a few Faceted Dots in Pretty Peacock!

If you would like to recreate this Flying Away card, check out the supplies listed below. You can also check out other samples using this set here and here!

Happy Stampin’

~Laura

Product List

Magnificent Magnolia!!!

Posted on

Happy Monday!!! Wow did I have an amazing weekend!!! So much fun at Vacation Stampin’ School with 100+ of my fellow stamping sisters. Also, it was a nice little getaway even for just 24 hours! I’ll chat more about that this week. Today, I’m sharing this magnificent magnolia that I think is just stunning!!!

Magnificent Magnolia, www.LaurasStampPad.com

I colored this card and was a little unsure if I liked it so I set it aside. Later, I glanced over at it on my table and was like WOW!!!! I thought it was stunning. I think this happens a lot for me so any time you don’t think someone looks good, set is aside and come back to it!!!

First, I started with a Soft Seafoam card base. Next, I took the magnolia from the Good Morning Magnolia Stamp Set and stamped it in Basic Gray. I like to use that color when coloring because it gives a lighter look rather than such a bold image. Then I colored it in with Stampin’ Blends!!!

Stampin' Blends Colors, www.LaurasStampPad.com

These were the colors I used! Light and Dark Soft Suede were used for the branch. Old Olive (both light and dark) were used for the leaves. The flower I added a Daffodil Delight center and some touches of Flirty Flamingo on the petals!

After coloring it, I added a small piece of Rococo Rose to the left side after running it though the Big Shot with the line from the Stitched Nested Labels Dies. How fabulous is that little stitched edge? It gives so much to this card a and it’s so simple!

Someone So Special, www.LaurasStampPad.com

Using the greeting and another flower from the Good Morning Magnolia Stamp Set, I decorated the inside! I LOVE IT!!!

Check out the supplies listed below for this magnificent magnolia card so you can make this fabulous card! Don’t forget to use you Bonus Bucks before the end of the month!

Happy Stampin’

~Laura

Product List

Pale Pink Birdies!!!

Posted on

You all know I love the color pink. This card inspiration came from the Bird Ballad Designer Series Paper and I was super excited to use pink for a birdie card. These pale pink birdies are perfect for a card for any occasion. What occasion would you use this look for?? Let me know in the comments below!

Pale Pink Birdies, www.LaurasStampPad.com

Isn’t this card just precious with the soft colors, beautiful flowers, and little birdies???

I started with a Petal Pink card base measuring 4-1/4″ x 11″. This size works well when tying ribbon around the card because then you use less ribbon. 🙂 Next, I layered a piece of the Bird Ballad Designer Series Paper onto Soft Suede cardstock! Before adding it to the lower half of the card front, I stamped a few leaves from the Free As A Bird Stamp Set in Petal Pink Ink. This adds a little decoration to the top solid portion but without being too bold.

Stitched Labels Dies, www.LaurasStampPad.com

After laying on the designer paper, I tied some Very Vanilla Scallop Lace Trim around the card front and into a knot. Then for the focal point, I die cut out a label from the Nested Stitched Label Dies. These are the Bundle & Save 10% dies that go with the Free As A Bird Stamp Set. Using that stamp set, I stamped the greeting and the birdies in Basic Gray. Next, I colored in the branch and birdies with Stampin’ Blends Markers!

Coloring birds with Stampin' Blends, www.LaurasStampPad.com

I added the pale pink birdies to the card front with Stampin’ Dimensionals for a little bit of texture and so the image was smooth over the ribbon! To finish it off, I added a few Rhinestones for some bling!

Pink Petal Flowers, www.LaurasStampPad.com

For the inside, I added a piece of Whisper White (4″ x 5-1/4″) and stamped the leaf image and then the little flower. Using Stampin’ Blends, I colored them in for the perfect coordination!

If you want to recreate this card, check out the supply list below! If you want to see more samples using the Free As A Bird Set, click here and here!

Happy Stampin’

~Laura

Product List

Cute As A Bug!!!

Posted on

Last week, I showed off a fun bug card with scallop frames and today I’m going with a quick and simple card. This one is still cute as a bug but takes less time and can be created in any color you wish!

Cute As A Bug, www.LaurasStampPad.com

I used Grapefruit Grove and Calypso Coral for this bug card! It could be done in blues, greens, or even purple too!

I started out with a Grapefruit Grove card base. Next, I took a piece of Whisper White measuring 4″ x 5-1/4″. Using the Wiggle Worm Stamp Set, I stamped 2 of the bugs all over in Calypso Coral Ink. I angled them differently and made sure to fall off the edge for a complete look. Then I added this to the card front!

Banner Triple Punch, www.LaurasStampPad.com

Now for the cute as a bug focal point of the card! Using the Banner Triple Punch, I punched all 3 of the banners for layering this greeting. The biggest layer was done with a piece of the Follow Your Art Designer Series Paper, then Grapefruit Grove and then Whisper White. The greeting comes from the Wiggle Worm Stamp Set too! I layered all of these one with Snail Adhesive. Then I stamped one of the bugs on a piece of Whisper White and colored it in with a Stampin’ Blends Marker! Using the coordinating Wiggly Bugs Dies, I die cut out the bug and added it to the card with Stampin’ Dimensionals. To finish it off, I added some enamel shapes from the Happiness Blooms Pack.

Coral Bugs, www.LaurasStampPad.com

On the inside of the card, I added some Whisper White (4″ x 5-1/4″) and stamped the greeting and another bug! I love coordinating the inside with the front of the card!

If you would like to create this card, check out the supplies listed below!!! Also, don’t forget to use your Bonus Bucks that you earned last month!!

Happy Stampin’

~Laura

Product List

Framed Wiggle Worms!!!

Posted on

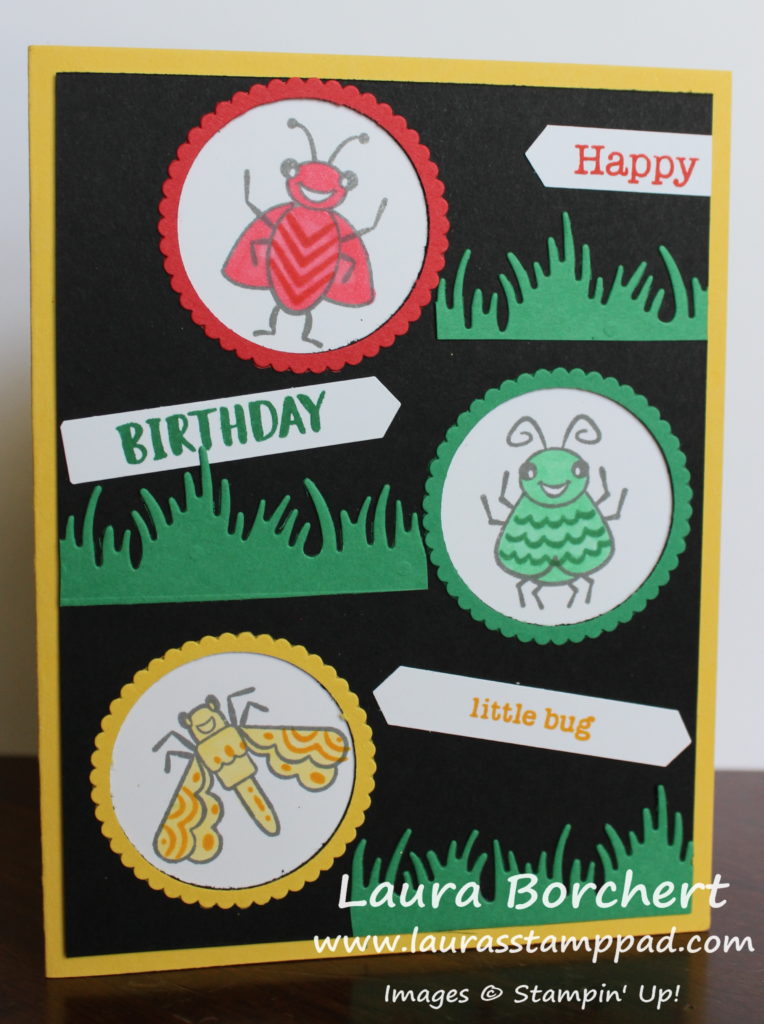
Happy Tuesday!! You all know what that means!! I have an adorable card to share with you today. These little framed wiggle worms are super fun and perfect for a kids card (or a kiddult)!!!

Framed Wiggle Worms, www.LaurasStampPad.com

Isn’t this the cutest thing ever?? I love it!

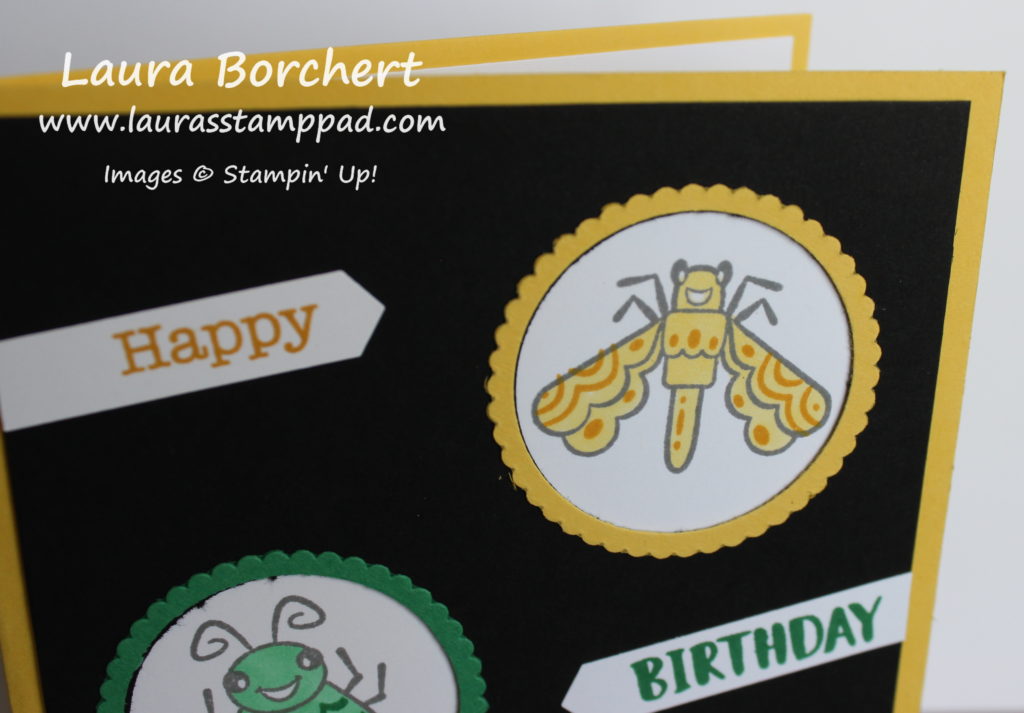
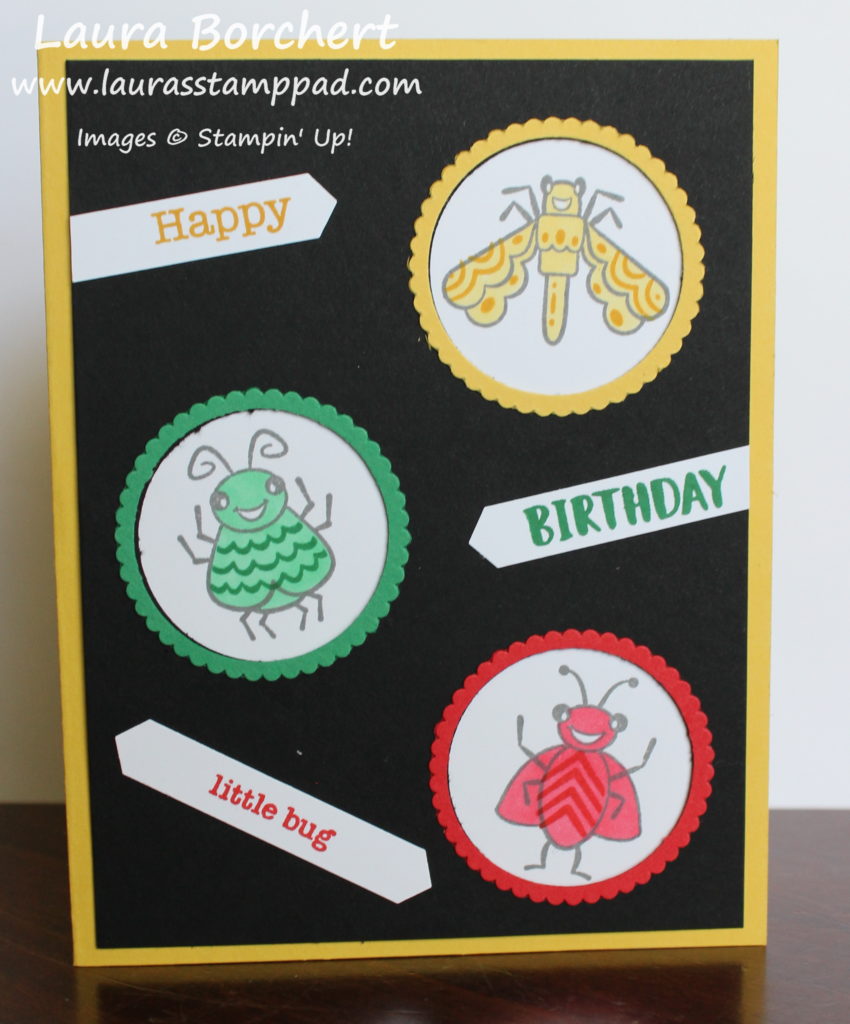
First, I started with a piece of Basic Black (4″ x 5-1/4″) and punched 3 holes in it with a 1-1/2″ Circle Punch. I did these in a “random” pattern which for me is a triangle pattern! 🙂 Next, I made 3 scallop rings for each of the holes. This was done by punching out the colored cardstock with the 1-1/2″ Circle Punch and then layering the scallop circle from the Layering Circle Framelits over it. I used a post-it note to hold it in place. This is much easier than cutting the scallop circle and then trying to line it up in the punch correctly!

Scallop Circle Frames, www.LaurasStampPad.com

Since these little frames are so delicate, I have found this little technique to adhere them on. Of course the Fine Tip Glue Pen would work too! Take a little bit of Multipurpose Glue and put it on the Silicone Mat. Then using a sponge, dab on just a little bit of glue all around the frame. This gives just enough glue to hold but not too much to have it squish out the sides.

Now for the bugs, I simply stamped them in Basic Gray onto Whisper White, added the details and then colored them in with Stampin’ Blends. Once they are all ready to go, I cut them a part from each other and secured them to the back of the black. Be sure to not cut too close to the bug or you won’t have enough white to cover the open circle. I added just a bit of adhesive to the back side of the black and then pressed the bug over it. If you have white hanging over the edge, simply trim it off.

Happy Birthday Little Bug, www.LaurasStampPad.com

For the greeting, I stamped it from the Wiggle Worm Stamp Set. The “happy” and “birthday” were stamped by just inking the word needed on the edge of the ink pad and stamping it down. Then clean it off and do the next word and color. Using the Classic Label Punch, I punched out each one. Some of the words, I placed on the edge with only 1 arrow end and some I placed father in for both arrow ends. This is all up to you! Another option is to add grass like the sample above. The grass if from the coordinating Wiggly Bugs Dies. Of course I stamped a little bug on the inside as well!

If you would like to see this Framed Wiggle Worms card in action, check out the video below or click here! Be sure to give the video a thumbs up if you liked it and don’t forget to subscribe if you are new. If you would like a notification when I post a new video, be sure to click the bell right next to the subscribe!!!

Happy Stampin’

~Laura

Product List

Coloring Like An Artist!!!

Posted on

Happy Tuesday!!! It is Tuesday. I feel like I need a giant neon sign telling me the day of the week as I am soooo off after last week. Tuesday means I have a fabulous technique to share with you! Woot Woot! I totally don’t feel like an artist but today I’m going to show you how easy it is to do! This card makes coloring like an artist possible and easy!!!

Coloring Like An Artist, www.LaurasStampPad.com

Isn’t this card just stunning?!?! I can’t believe I DID IT! Like that was colored and created by me. It still amazes me. I just love how Stampin’ Blends make me feel….like an artist!

I started with a Pool Party card base measuring 4-1/4″ x 11″. After folding it in half for my card, I cut off 2″ from the bottom. This allows a little peekaboo to see the inside of the card! On the inside, I added a piece of So Saffron (4″ x 5-1/4″). Using the Free As A Bird Stamp Set, I stamped the greeting in Basic Gray and the flowers in So Saffron. On the upper front flap of the card, I layered Bird Ballad Designer Series Paper (3-1/4″ x 4″) to some Calypso Coral (3-3/8″ x 4-1/8″).

Birds in a Bird Cage, www.LaurasStampPad.com

Using the Free As a Bird Stamp Set and coordinating Stitched Nested Labels, I created that fabulous focal point. I stamped the birds in Basic Gray because I like that lighter look for coloring rather than black!

Using various Stampin’ Blends, I started coloring. Pool Party was used for the flowers and Old Olive for the leaves. The branches were colored in Soft Suede. Now for the birdies, I colored the beaks in Dark Soft Suede. Next, I colored the top of the head to that little line at the eye in Soft Suede. Then I colored the belly and bottom most part in Dark Calypso Coral. I slowly moved my way to the center. Using Light Calypso Coral, I colored over the dark coral and up a little higher. Then using the Crumb Cake, I colored the Soft Suede and down into the coral. To finish it off, I went back over the coral and crumb cake with the Light Calypso Coral to blend it all together.

A couple tips when doing this is to give it time. After going over the colors to blend them, give it a bit to blend and dry because after a minute or so it will look better. This is better than coloring over and over and over again. I tend to color each one and then go back over each one. Another tip is sometimes I need to set it aside or walk away and then I come back and I’m like oh wow, look at that! It’s fabulous then! Just have fun coloring like an artist!

I added this piece to the card front by applying Tear And Tape just on the top half and sticking it on the bottom edge of the card front! Perfect!

If you would like to see all of this in action, check out the video below or click here! I will say that I did different colors….on accident but it still looks fabulous so just have fun with it! Be sure to give the video a thumbs up if you liked it and don’t forget to subscribe if you are new. If you would like a notification when I post a new video, be sure to click the bell right next to the subscribe!!!

Happy Stampin’

~Laura

Product List
Free As A Bird Bundle
$51.25
Calypso Coral Stampin' Blends Markers Combo Pack
$9.00
Pool Party Stampin' Blends Markers Combo Pack
$9.00
Soft Suede Stampin' Blends Markers Combo Pack
$9.00
Crumb Cake Stampin' Blends Markers Combo Pack
$9.00
Old Olive Stampin' Blends Markers Combo Pack
$9.00