Happy Friday!!! With Graduations, Bridal Showers, and Claire’s Birthday coming up…..Make It A Sweet Celebration!!!! I just thought this card captured it all! It’s quick, simple, and fabulous!!! After all, every day should be a sweet celebration!
This card is super simple and a create way to use up designer paper and ribbon!!!
I started with a Whisper White card base. Next, I stamped the greeting from Sweetest Thing Stamp Set at the bottom in Gorgeous Grape. I also stamped some gummy bears on the inside of the card too!!! Next, I took a piece of Coastal Cabana and ripped one edge. Then I adhered the How Sweet It Is Designer Series Paper (2″ x 5-1/2″) closer to the cut edge. I added this to the card front and then tied the Granny Apple Green/Coastal Cabana Reversible Ribbon around the card. I like to do that so it is more secure around the card and not just around the layer. That is all you need to do!
Simple and fabulous, right?? Check out the supplies below as some are retiring on June 3rd so get them before they are gone!!!
Happy Monday!!! I hope you all had a wonderful weekend!!! Today, I’m sharing a fabulous card and when I look at it, all I can think is crisscross applesauce. Who doesn’t say crisscross without applesauce following??? Unless maybe you were a big fan of the band!! Let me know in the comments if you were!
This is a simple card and a great way to use up designer series paper. Adding the stitched look to the rectangles and fun linen thread just makes it that much more special!!!
I started with a Fresh Fig card base and stamped the little flower all over in Fresh Fig Ink. The flower is from the Bloom By Bloom Stamp Set. Next, I took 2 pieces of the Floral Romance Designer Series Paper and die cut them with the Stitched Rectangle Framelits! Then, I stamped the greeting on the wooden one in Fresh Fig Ink. This greeting is from the Strong & Beautiful Stamp Set.
On the smaller rectangle, I wrapped Linen Tread down the rectangle and back again creating that fun crisscross pattern. I used Stampin’ Dimensionals on the back side to hold it all in place and for adhering to the card. This gives a little texture too. I finished it off with a little Frosted Flower Embellishment!
For the inside of the card, I rounded 2 corners with the Detailed Trio Punch. Using that same flower from the front, I stamped a few in Petal Pink and the coordinating greeting in Fresh Fig!!! I love the little decorated inside that just makes the card look so fabulous! After all, you can’t write on Fresh Fig cardstock anyway so why not add in some more fun!
Check out the supplies listed below so you can recreate this card! Many of these items are retiring so get them before they are gone!
I know it is Tuesday and I usually do Technique Tuesday but instead we are doing one of Laura’s Quick Tips! This is kind of a technique! It’s a great way to use less ribbon off the spool and possibly use those little scraps you have laying around!
This is a fairly simple card to create. The fabulous colors, designer series paper, and fun greeting make it amazing! To create a bit of texture, I added in the ribbon!!!
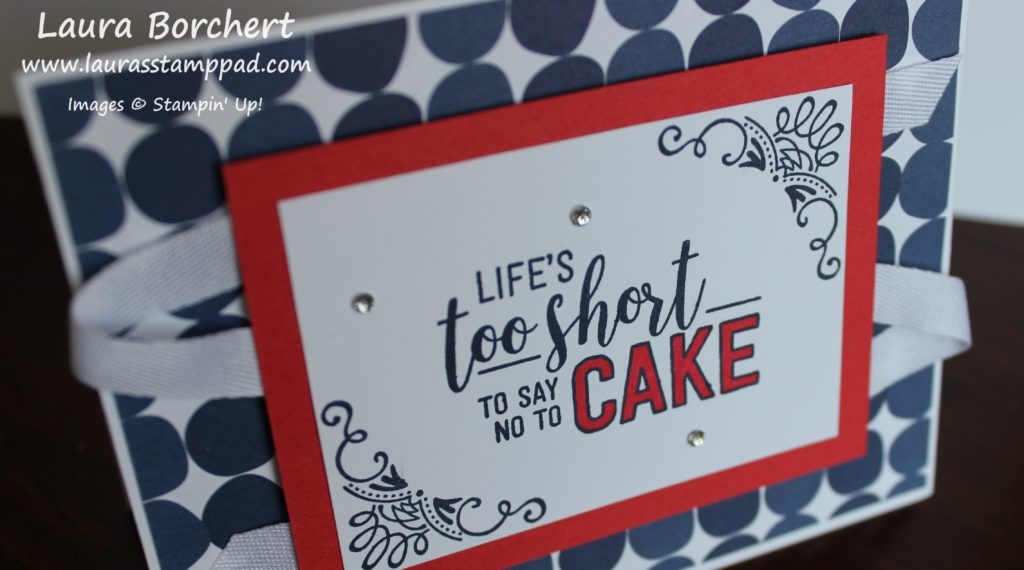
I started with a Whisper White card base and layered on a piece of the Happiness Blooms Designer Series Paper! Next, I took a piece of Whisper White and stamped the greeting and fun corner images with Stamparatus. These images are from the Amazing Life Stamp Set (retiring soon). The Stamparatus makes those corner images fit perfectly into place. Using the Poppy Parade Dark Stampin’ Blends Marker, I colored in the word Cake! I love how it makes it POP!
One the images were stamped, I layered it onto a piece of Poppy Parade cardstock and flipped it over to add ribbon! Rather than adding one long strip of ribbon that starts at the top, loops across, back across, and comes out the bottom. It was over 12 inches of ribbon I would have needed. Instead, I laid the first piece down, secured it with Stampin’ Dimensionals and trimmed it off. Next, I cut a small loop and secured it to the other side with Stampin’ Dimensionals. I did this with another loop and another end piece. By only using small pieces of ribbon, I saved over 6 inches of ribbon. You could also use ribbon scraps that you have laying around!!
If you would like to see this all in action, check out the video below or click here! Be sure to give the video a thumbs up if you liked it and don’t forget to subscribe if you are new. If you would like a notification when I post a new video, be sure to click the bell right next to the subscribe!!!
Happy Monday!!! It’s the start of a new week! Let’s make it a good one! Hopefully these cards will brighten you day and get it off to a good start! I know I am loving the Spectrum Pads and these amazing colors.
Aren’t they beautiful?? I stamped them at different angles so then when I went to assemble them onto cards, I had to work with it! It was super fun to try a different look for each. Which is your favorite??
The card base for each is Gorgeous Grape and I stamped the flower from the Humming Along Stamp Set in Gorgeous Grape Ink. The polka dot layer is from the How Sweet It Is Designer Series Paper and it measures 3-1/2″ x 3-1/2″. For the one below, I used a strip measuring 2″ x 5-1/2″.
For the hummingbird, I stamped it in a Spectrum Pad that I have inked with Gorgeous Grape, Highland Heather, Pool Party, Coastal Cabana, and Bermuda Bay. The Hummingbird is from the Humming Along Stamp Set as well. Some of them were stamped with blue on the top and some with blue on the bottom. Just changing the angle that you go across the ink pad can create a whole new look!
Of course, I had to decorate the inside of the card! I used more images from the Humming Along Stamp Set! It is just beautiful!!!
Don’t forget that Retiring List is out and these items are all while supplies last. The Humming Along Stamp Set and the Spectrum Pads are both retiring so get them today! Click here to start shopping or click the items below!
Typically I prefer a more clean, bold, solid look rather than shabby chic, rustic, or subtle look. What about you??? For this card though I decided to stamp on the background designer series paper rather than adding another layer. It like a whole new way of stamping for me. You should try it out! Stamping on Designer Paper is fun!
Isn’t it beautiful?? Have I mentioned I also like flowers?!?! lol I love them so much I even created a Tag for easy search on all my flower cards. Just click here!
I started with a Pool Party card base. Next, I took a piece of the Painted Seasons Designer Series Paper (Sale-A-Bration 2019) and adhered it down the center! Using the Painted Seasons Stamp Set and Tranquil Tide Ink, I stamped a few greenery pieces all around the top and bottom. This was done before layering the greeting and everything so it wasn’t in the way. Next, I added a little bit of adhesive in the center and pressed 2 pieces of the Pool Party Shimmer Ribbon into it. It is okay if the ribbon doesn’t seem super secure as the greeting will help hold it in place too!
The greeting is from the Part of My Story (Sale-A-Bration 2019) Stamp Set and I punched it out with the Pretty Label Punch. Using Stampin’ Dimensionals, I added the greeting to the card front. Dimensionals adhere to the ribbon and the bumps and grooves much better than using Snail Adhesive. Next, I stamped and die cut the flowers in Gorgeous Grape using the Painted Season Stamp Set. I added the flowers with Stampin’ Dimensonals too. To finish it off, I stamped a few Gorgeous Grape star clusters all around.
I really love how this card turned out and I am going to try stamping on designer paper more often now. What do you think?
Have you ever created a card and thought oh my goodness this is AMAZING?? I sure hope you have because all card are amazing and made with love. I will admit I don’t have that OMG feeling with all cards though. This feeling comes about once a year or sometimes longer. My last most amazing card was this one in November 2016! I still have that card and admire it randomly. Well today I’m sharing another one of my amazing cards! This one just screams beauty at me and I LOVE IT!
I hope you love it as much as I do but if not that’s okay too! The colors, the pattern and that little hint of bling do it for me!!!
I started with a Highland Heather card base and layered on a piece of Coastal Cabana measuring 4″ x 5-1/4″. Next, I took a piece of Whisper White (3-7/8″ x 5-1/8) and placed it in the Stamparatus. Using the Florentine Filigree Stamp Set and a Spectrum Pad, I created that amazing background! The colors for the Spectrum Pad are Gorgeous Grape, Highland Heather, Pool Party, Coastal Cabana, and Bermuda Bay. It is super easy to create because the Stamparatus does all of the work with spacing and stamping. Simply notch down the plate after each row.
TIP: The hardest part is probably making sure the ink pad is always stamping the correct color on the same end. Place the ink pad above the Stamparatus Plate after inking each time with the flat side of the ink pad on the left side.
Now for the focal point of those layered circles!!! Using the same Florentine Filigree Stamp Set, I stamped the circle image in Bermuda Bay and in Gorgeous Grape. I used the Layering Circles Framelits for the Bermuda Bay Circle and the 2″ Circle Punch for the Gorgeous Grape one. Next, I stamped the greeting in Bermuda Bay and slide the long skinny piece of Whisper White into the 1-1/4″ Circle Punch. That is how I got those slightly rounded ends. Then I added some of the Pool Party and Silver Baker’s Twine to the back securing with Stampin’ Dimensionals for texture. I finished off the card with a few Gingham Gala Adhesive Backed Sequins for some bling!
Isn’t it just fabulous??? What color combination would you use for your Spectrum Pad?? Let me know in the comments below because I have 2 left to ink up and I just can’t decide on the colors.
If you would like to see this all in action, check out the video below or click here! Be sure to give the video a thumbs up if you liked it and don’t forget to subscribe if you are new. If you would like a notification when I post a new video, be sure to click the bell right next to the subscribe!!!
This Country Floral Embossing Folder was one of the Sale-A-Bration items and that ended last week. If you earned it, try out this amazing card!!! If you didn’t earn it, don’t worry as it is coming back! Woot Woot!
I went very basic as I feel like the embossing folder is just so stunning. Adding a little gold bling and some navy makes it POP! You could use silver and any other color as well. What colors would you use? Let me know in the comments below!
I started with a Very Vanilla card base. Next, I took another piece measuring 4-1/8″ x 5-3/8″ and embossed it with the Country Floral Embossing Folder. I went a tiny border from the embossed piece and the card base so it looked like it filled out the card front more. I don’t like actually embossing the card front of the card base because then it makes the inside all bumpy and the card base less secure in my opinion. After adding this piece to the card base, I tied some Gold Metallic Edge Ribbon around the card.
For the greeting, I used Circle Punches and the Well Said Stamp Set from the Occasions Mini Catalog. I love this stamp set because it has lots of greetings for any occasion and it has a greeting for the inside of the card as well! Perfect! I stamped the greeting in Night of Navy Ink. To finish off the card, I added a few pearls for bling and texture!
This quick and simple card can be created with any style of embossing folder! It is great to have a few on hand and add a greeting as you need a card!
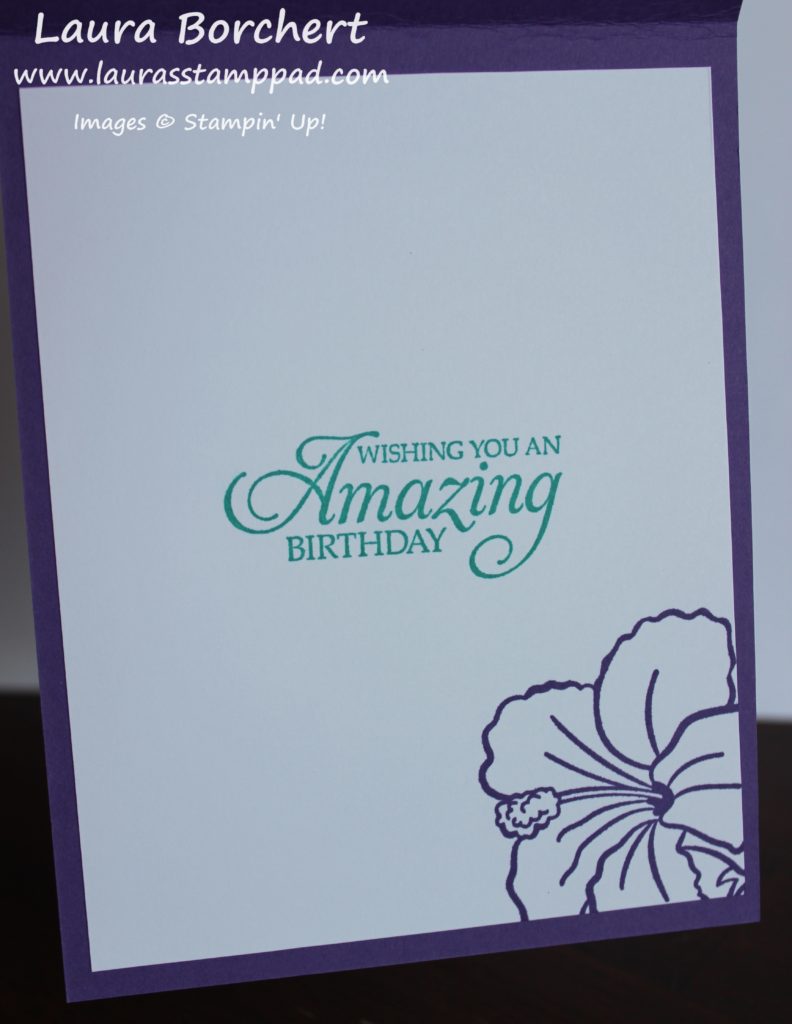
I know that Sale-A-Bration is over but I have a few more samples to share with you so I hope that is okay! I will be sharing them over the next week or so. Today, I’m sharing this quick and simple card with the Home to Roost Stamp Set. Just A Note…
I got the idea for this card from the fabulous Mary Schultz who sent me a similar one. Her card had another layer and she used the Rectangle Framelits for each layer. I went a little more on the simple side but it is just as fabulous!
I started with a Crumb Cake card base and layered on a piece of Pacific Point polka dots from the Brights 6″ x 6″ Designer Series Paper Stack. Next, I die cut out the rectangle with the Rectangle Stitched Framelits. Using the Home To Roost Sale-A-Bration Stamp Set, I stamped the rooster up top and the greeting down low. I went with a monochromatic look and used Pacific Point Ink too! Since the rooster seemed rustic, I tied some Linen Thread around the center and into a bow. This piece was added to the card front with Stampin’ Dimensionals for some texture!
Here is another fabulous one using the Poppy Parade Ink and Designer Paper from that same pack! Which one do you prefer – Poppy Parade or Pacific Point??? Let me know in the comments below!
Cupcakes are my favorite dessert followed by cheesecake. I love to make cupcakes and decorate them too! I think I have made cheesecake like twice…it is so expensive to make and finicky. So when it’s time for a celebration, we celebrate with cupcakes! What is your favorite dessert to eat, make, or celebrate with?? Let me know in the comments below!
Sale-A-Bration ends on March 31st so this is the last week. Get these cupcakes before they are gone! Unfortunately, the coordinating Call Me Cupcake Framelits are sold out already. If you were lucky and got a set, you can recreate this card exactly. If you missed out, You can always fussy cut out the cupcake or just stamp it in the corner!
I started with a Granny Apple Green card base and layered on a piece of Lovely Lipstick (4″ x 5-1/4″). Next, I took a piece of Whisper White (3-3/4″ x 5″ and stamped the little flower in Lovely Lipstick. You can stamp all over as a background or in a upper left to lower right diagonal pattern. For the greeting, I stamped it in Granny Apple Green Ink and punched it out with the Pretty Label Punch. All of the images on this card come from the Hello Cupcake Sale-A-Bration Stamp Set. Using a little bit of the Lovely Lipstick Ribbon from the All My Love Ribbon Pack in a loop, I placed it down and added the greeting on top with Stampin’ Dimensionals.
For the cupcake, I stamped the liner in Crumb Cake and the cake in So Saffron Ink. I love lemon cake or just a yellow cake. Yellow cake reminds me of my Grandma! 🙂 The icing was stamped in Lovely Lipstick and the little heart was stamped in Granny Apple Green. All 4 of these images were then die cut with the coordinating Call Me Framelits. If you have them, fabulous but if not, no worries. You can just fussy cut the images or stamp these directly to the Whisper White layer (just don’t stamp flowers in that corner). A final little touch that I did was add some Wink of Stella to the icing for a little shine! It did bleed the ink a bit but I was okay with that for a soft pink all around! Still looks tasty to me!
Check out the supply list below so you can create this card and earn the Hello Cupcake Stamp Set for Free with Sale-A-Bration (free item with every $50 spent).
Today, we shall be celebrating happiness! It is Wednesday after all and the week is half over. That is not all though, there are so many things to celebrate that make us happy! Remember all the good things in life and don’t dwell on the things we can’t change or the tough things you are going through. Celebrate Happiness!!!
I am loving this card and not just because it has a flower on it. I love the bright colors and all of the textures!! This card also uses the Free Stamp Set of the Month for March – Bloom By Bloom!!! All orders of $75 or more (before tax and shipping) earn this set for FREE! Click here to start shopping!
I started with a Lovely Lipstick card base and stamped the flower from the Bloom By Bloom Stamp Set all over. Using Lovely Lipstick Ink, it gives a nice watermark or tone on tone look. Be sure to fall off the cardstock so the pattern looks continuous. Next, I took a piece of the Happiness Blooms Designer Series Paper (2″ x 4″) and punched it with the Banner Triple Punch. I added it to the card front flush with the left side.
Next, I took a piece of Whisper White cardstock and stamped the flower on it. Be sure to stamp the flower first and then the stem. This will ensure that the stem isn’t too high or too far over for the bloom to fit. The bloom was stamped in Lovely Lipstick and the stem in Call Me Clover. I added the greeting in the lower right corner from the Well Said Stamp Set. It was stamped in Night of Navy.
I love the Well Said Stamp Set because it has perfect inside and outside greetings! I added a message on the inside as well as a little flower!
Back to the front focal point! After stamping, I layered this onto another piece of the Happiness Blooms Designer Series Paper. Taking a piece of the Calypso Coral Satin Ribbon folded in half, I laid it across the banner on the card front. The Stampin’ Dimensionals on the stamped flower layer secure this ribbon loop in place just perfectly!! To finish off the card, I added some Enamel Shapes to the flower for texture! Just perfect!
If you would like to recreate this card, click on the supply list below! Don’t forget that if your order is over $75 (before shipping and tax), you will get the Bloom By Bloom Stamp Set for FREE from me!
Another fabulous offer…..I am starting Laura’s Quick Kits which are card kits with all the pre-cut cardstock and embellishments provided. All you need to do is stamp and assemble. The stamps, ink, and adhesive are not provided. Click here to get your first Laura’s Quick Kits – Bloom By Bloom!


 Designer Series Paper")

 Reversible Ribbon")


 Specialty Designer Series Paper")


 Designer Series Paper")


 Metallic-Edge Ribbon")


 Designer Series Paper")


 Satin Ribbon")