July Online Exclusives!!!

Posted on

Have you heard?!?! Stampin’ Up! launched July Online Exclusives this month! Not only is the launch of new products kind of like Christmas but the items that were launched are perfect for the upcoming holidays!!!

Product List

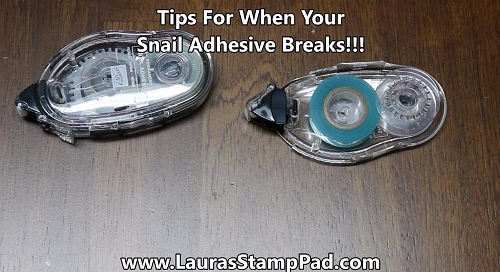
Here are just a few of the July Online Exclusives that launched that I’m loving so far!!!! EVERYONE needs Everyday Greetings because that is just a fabulous all occasion stamp set! I am loving it already and know I’ll be grabbing for it all the time! The embellishments are fabulous and perfect for Fall and Winter for sure! The Satin Ribbon is so elegant and beautiful. I will say I struggle with a wider ribbon so I have been using this across a card and secured on the back or tied into a bow and popped onto a card! Check out this post for ribbon tips! Stay tuned for more samples using these products.

It is so crazy to be working with holiday and winter stamps when I have a Heat Advisory dinging me on my phone but yet here we are! These hot days when it’s safest to stay inside, why not get started on those upcoming holidays. This way you can enjoy yourself more during those busy holiday times.

July Online Exclusives & Bonus Days, www.LaurasStampPad.com

Let me know your favorite July Online Exclusives! And don’t forget that you will earn BONUS BUCKS this month for every $50 you spend!!! WOOT WOOT! Shop.LaurasStampPad.com or click the photos above!

Happy Stampin’

~Laura


Catalog Helper!

Posted on

You all know how I love organization and lists. When the New Stampin’ Up! Catalog came out, I loved it for all of the samples and information on creating! The one thing I did not like was the layout of products though! So I created this Catalog Helper – a nice little layout list of die cuts, punches, ribbons, and designer paper!

Catalog Helper, www.LaurasStampPad.com

Here is the PDF Catalog Helper that I created for you to enjoy as well if you love organization like me. It is also great to shop with too! You can a complete snapshot of the items all in one spot!

If there is a category that you wish I did, let me know! Again, I want to make shopping easy and help out a fellow list/organizational person! 🙂

Happy Stampin’

~Laura


Cutting For Cards!!!

Posted on

Today, I’m sharing another one of Laura’s Quick Tips! This one is all about cutting for cards! I feel like I needed to share this forever ago since it’s the first step in card making! So here we go….

Cutting For Cards, www.LaurasStampPad.com

A few things that I use for cutting for my cards are the Stampin’ Up Stampin’ Trimmer and a ruler! I use the Stampin’ Trimmer to get that nice smooth straight cut. A regular medium sized card is just a piece of cardstock cut in half either way. You can cut at 4-1/4″ along the 8-1/2″ side or cut at 5-1/2″ along the 11″ side. This will create a 4-1/4″ x 11 card base to fold in half or a 5-1/2″ x 8-1/2″ card base cut in half. The majority of my card layers are done in 1/4″ increments. So I would layer on a piece of cardstock or designer paper on the front measuring 4″ x 5-1/4″ which is a 1/4″ in from the card base. Eighth of an inch is just too crazy to do all of the time in my opinion!

If you would like a little card cutting cheat sheet, you can get it for FREE when you sign up for my mailing list. Click here to join my mailing list for tips, ideas, promotions, and more!!

Check out the video below or click here to see this all in action as well as a few more tips! Be sure to give the video a thumbs up if you liked it and don’t forget to subscribe if you are new. If you would like a notification when I post a new video, be sure to click the bell right next to the subscribe!!!

Happy Stampin’

~Laura

Product List

Die Cutting Rectangles!

Posted on

I have another fabulous one of Laura’s Quick Tips to share with you today! I have received this question a few times lately so I thought I would share it on here too! If one person has it as a question, I’m sure many others do too! Today, I have tips for die cutting rectangles!!!

Die Cutting Rectangles, www.LaurasStampPad.com

Many times when die cutting rectangles, squares, or any image with a long straight line and the image doesn’t cut very well. There are also many times it cuts perfectly fine which is a win! 🙂 If you have this happen to you, my tip is to run it through at a diagonal. This allows the die cutting machine to apply pressure on a smaller section with each crank through, rather than hitting a long line at the same time. Also, it is really hard to crank it through when a solid line is going through at once. When you place it in at a diagonal, it goes through smoother and easier which is fabulous!!

To see this all in action, check out the video below or click here. Be sure to give the video a thumbs up if you liked it and don’t forget to subscribe if you are new. If you would like a notification when I post a new video, be sure to click the bell right next to the subscribe!!!

Happy Stampin’

~Laura

Product List
Precision Base Plate
[139684]
$25.00

Snail Adhesive Tips!!!

Posted on

Good morning everyone!!! Today, I’m sharing one of Laura’s Quick Tips! These Snail Adhesive tips are sure to make your crafting experience easier! After all Snail adhesive is the glue holding your projects together so let’s start off on the right foot! 😉

Snail Adhesive Tips, www.LaurasStampPad.com

First off, Snail adhesive has a base and a refill piece. Be sure to save that base piece (the black side which is not shown in the above picture) because after you have that you only need to purchase refills! Getting a refill is cheaper to purchase each time!

Now for a few tips for when your Snail Adhesive isn’t working! Sometimes it is because it needs to be advanced for the adhesive to show and therefore grab onto the cardstock. Then there are times when the clear tape breaks and the adhesive rolls no longer advances at all. Simply lay the clear strip on your project and press and then pull the strip up! This will lay down a strip of the adhesive. Now you don’t have to throw it away and waste adhesive!

Check out the video below or click here to see this all in action as well as a few more tips! Be sure to give the video a thumbs up if you liked it and don’t forget to subscribe if you are new. If you would like a notification when I post a new video, be sure to click the bell right next to the subscribe!!!

Happy Stampin’

~Laura

Product List

Make Your Own!!!

Posted on

Today, I’m sharing another one of Laura’s Quick Tips! This one is how to make your own adhesive backed sequins!!! It’s super simple and makes adding them to your project a breeze!

Make Your Own Adhesive Backed Sequins, www.LaurasStampPad.com

Here I took the Painted Poppies Sequins and just added them to Mini Glue Dots or sheets of those mini glue dots that come in Stampin’ Up Kits. I have millions of the sheets of dots because they come in card kits, Paper Pumpkin, and more. There are always plenty in each of the kits and I typically just use my Snail Adhesive for kits. These mini glue dots came in handy to make these sequins grab and go by adding adhesive to the back! It was amazing!!!

To see how to make your own adhesive backed sequins, check out the video below or click here. Be sure to give the video a thumbs up if you liked it and don’t forget to subscribe if you are new. If you would like a notification when I post a new video, be sure to click the bell right next to the subscribe!!!

Happy Stampin’

~Laura

Product List

Layering Label Me Lovely!!!

Posted on

Try saying that 5 times fast!!! Layering Label Me Lovely. LOL I just love punches and the new Label Me Lovely Punch is my new favorite!!!! Check out today’s Laura’s Quick Tips!

Layering Label Me Lovely, www.LaurasStampPad.com

Adding a greeting on a punched piece really can help make it POP. Also, if you mess up the greeting, you can just punch it again and not mess up your project! Double Bonus!!!

If you have stamp the greeting or focal point onto Whisper White and the card base is all Whisper White, it doesn’t POP! This is why layering is needed. With just this 1 punch, you can do both! Simply cut the label in half and add some to the top and bottom (or sides). With the Label Me Lovely Punch, you can also trim off some of the “bumps” for a completely different look!

Check out all of the different looks with the layering Label Me Lovely Punch in the video below or click here! Be sure to give the video a thumbs up if you liked it and don’t forget to subscribe if you are new. If you would like a notification when I post a new video, be sure to click the bell right next to the subscribe!!!

Happy Stampin’

~Laura

Product List

Kiss the Ink Pad!!!

Posted on

Today’s Technique Tuesday is all about inking up a stamp! This has come up a lot lately in my classes and I thought of a fabulous way to explain it so here it goes! Kiss the Ink Pad….don’t give it CPR!

Kiss the ink pad, www.LaurasStampPad.com

You will notice in the ink pad above that there are lighter spots all over. This happens when you press too hard with the stamp into the ink pad. Pressing harder does not give you more ink. In fact, it’s the exact opposite. It presses all the ink to the side and leaves you with very little ink on the stamp. So next time you are stamping, remember to lightly kiss the ink pad for nice full coverage ink color! No need to press on it like you are doing CPR!

Check out the full tutorial to just kiss the ink pad in the video below or click here! Be sure to give the video a thumbs up if you liked it and don’t forget to subscribe if you are new. If you would like a notification when I post a new video, be sure to click the bell right next to the subscribe!!!

Happy Stampin’

~Laura

Product List

Stamping Tips for Bonanza Buddies!!!

Posted on

No one likes to get frustrated while stamping so today I’m sharing some stamping tips for Bonanza Buddies Stamp Set. Stamping should be all about fun and even therapy. Heck, stamping is therapeutic for me for sure! Let me know in the comments below if you enjoy stamping therapy!

Stamping Tips for Bonanza Buddies, www.LaurasStampPad.com

I have been loving the Bonanza Buddies Stamp Set and playing with it a lot. Stay tuned because I will be sharing them on here! As I have been playing, I have come across a few tips that I would like to share!

The Stampin’ Pierce Mat has been my best friend recently. This mat makes stamping solid images or large images and getting a crisp nice stamped look. It may frustrate you or you may not even notice. When stamping an image and the color isn’t nice and solid but rather has white splotches on it….that’s when you need this handy dandy tool! For just $5, it’s amazing!!!

Another big tip is that while normally I stamp and then die cut, sometimes that’s not always the way to go. When I stamped the balloons in this set and then die cut them, it moved and my balloon was off. I die cut a white scrap and stamped it and NAILED IT! Now that doesn’t happen every time but I was impressed with myself. Also, remember that every piece of paper has 2 sides so you get a second chance! 🙂 Thank you paper! Another way to keep your die from moving on your cardstock while cranking it through is to use a post-it not to hold it in place!

Check out all of the stamping tips for the Bonanza Buddies Stamp Set in the video below or click here! Be sure to give the video a thumbs up if you liked it and don’t forget to subscribe if you are new. If you would like a notification when I post a new video, be sure to click the bell right next to the subscribe!!!

Happy Stampin’

~Laura

Product List


New Year’s Resolution??

Posted on

Do you have a New Year’s Resolution? Are you still going strong? I usually have one but not really this year. Sure I have goals for the year and lists of lists but that’s normal for every day/week/month/year for me. One of the things I like to do every January though is re-ink all of the ink pads!

New Year's Resolution, www.LaurasStampPad.com

Probably because I’m an OCD freak and like to do everything together or it will mess up the universe…told you I’m crazy! I like to re-ink all of my ink pads at the same time so I know they are all fresh and ready to go as of X date (aka January). Sure some of them might not need a lot or any ink but checking and inking helps keep the pads fresh and ready to go. I do re-ink pads other times throughout the year after using them a lot or to fix a color stain or something.

So gather all of your ink pads and ink refills and let’s reink all of them together now! If you don’t have the ink refills, click here to get them!

Sale-A-Bration is going on right now. That means for every $50 you spend (increments of $50) you will earn a FREE item of your choice from the Sale-A-Bration brochure. Now is a great time to stock up on ink refills, cardstock, envelopes, adhesive, and of course all those items on your wish list. If you order is over $150, you will earn Free stuff as a Hostess. Reach $300 and you will also get the exclusive Ladybug Stamp Set for FREE on top of everything else! How amazing is that?!?!?! Start shopping now!

But wait….there is more! As a customer of mine, there are special perks! For every $40 you spend, you will be earning Laura’s Loyal Stampers Stickers. After 10 stickers, you get a $40 gift certificate from me! Hello Shopping Spree! You will also get the Free Stamp Set of the Month when you order $75 or more in a month! Woot Woot! It’s great to be a stamper with me!

Check out the video below or click here to see tips for re-inking your ink pads! Check off that New Year’s Resolution to keep on task and organized! 🙂 Be sure to give the video a thumbs up if you liked it and don’t forget to subscribe if you are new. If you would like a notification when I post a new video, be sure to click the bell right next to the subscribe!!!

Happy Stampin’

~Laura