Technique Tuesday – Ombre Butterfly!!!

Posted on

Happy Tuesday!!! You know what that means! I have a fabulous technique to share with you today. Creating an ombre butterfly, adding some splatters to your card and adding a hint of glitter with Wink of Stella! I love it all!!

Ombre Butterfly, www.LaurasStampPad.com

Isn’t this card just beautiful?!?!?! It is so much better in person so be sure to check out the video tutorial below to take it all in! Let’s get started on this amazing card!

SUPPLIES NEEDED: Butterflies Thinlits, Gold Metallic Thread, Wink of Stella, Aqua Painter

So remember last week when we die cut the white butterfly out for that beautiful card? Today we are using that white butterfly that was created with the Butterflies Thinlits! Using your Aqua Painter, you will color the butterfly with Watermelon Wonder. I started in the middle and worked my way to the tips of the wings. I got this amazing ombre look and LOVE IT!!! Just remember that each time you grab some ink, start in the middle and work your way out! Then I brushed the butterfly with the Wink Of Stella for that perfect shine! For the card, I used Tip Top Taupe for the base and added a layer of Mint Macaron (4″ x 5-1/4″). Then I took a piece of Whisper White (3-3/4″ x 5″) and added the splatter. I did this by squeezing the Aqua Painter a bit (just a bit) and picked up some Tip Top Taupe. I tapped the pen against my finger so it would splatter on the card. This is one of those techniques that isn’t going to be perfect. If you think you want a little more or some in a specific spot, don’t do it! 🙂 It might end up dripping too much water or just never hitting that spot. After all it is suppose to look messy! After your splatters, you are ready to add your washi tape. I used the It’s My Party Washi Tape and added some on the top left and bottom right. Then I stamped the greeting from the Greatest Greetings Stamp Set in Tip Top Taupe. Now you can add this piece to your card base. For the butterfly, I added Mini Glue Dots to the back down the middle. I wrapped some Gold Metallic Thread around 4 fingers about 10-15 times (up to you as to how much you want). I slide the thread off my fingers and twisted it in the middle into an 8 and then placed it on the Mini Glue Dots. You can add more Mini Glue Dots to the top of the thread if you need to or just add the butterfly like that to your card! LOVE IT!

Wink of Stella, www.LaurasStampPad.com

To see this all in action, check out the Video Tutorial below or click here! Be sure to give it a thumbs up if you liked it and don’t forget to subscribe if you are new!

Happy Stampin’

~Laura

Button Retire

TODAY IS THE LAST DAY!!! Click here to get those Retiring Items!


Pretty Petals Card Bundle!!!

Posted on

Yesterday, I shared how you can create over 70 cards with the Pretty Petals Designer Series Paper Stack! Today I’m going to share the rest of the samples with you! Let’s get started!

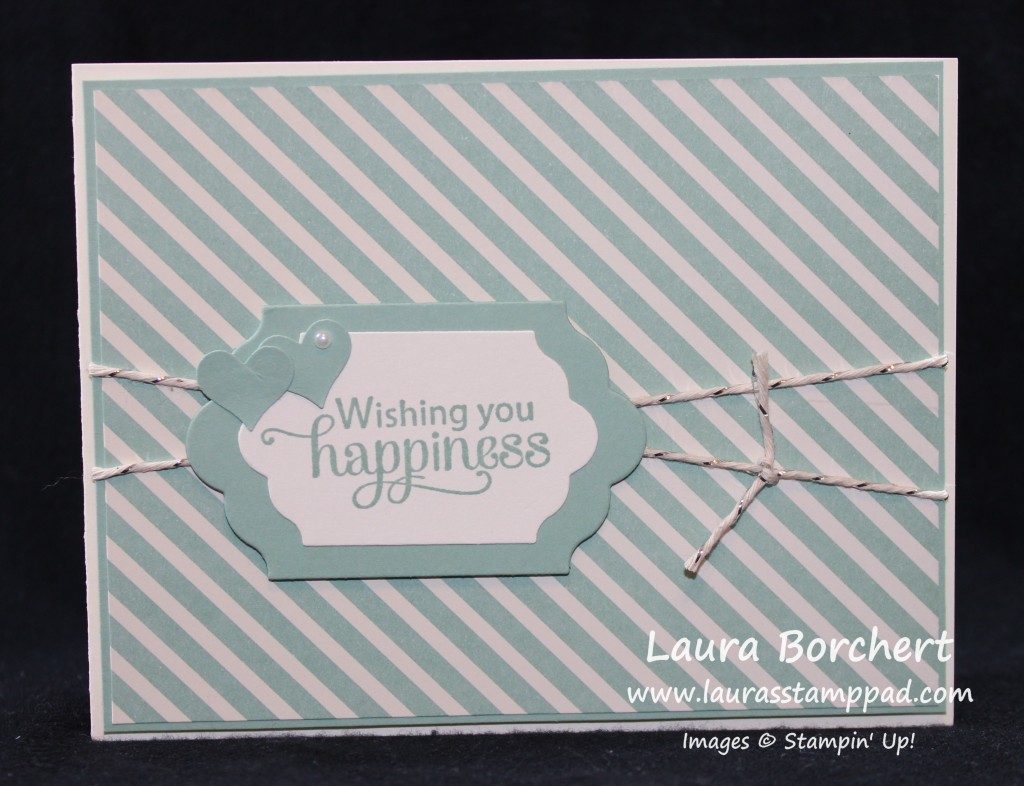
Anniversary Card, www.LaurasStampPad.com

This card uses a Very Vanilla card base. The Pretty Petals Designer Series Paper measures 5-1/4″ x 4″. You can get 1 of these from one sheet and since there are 4 sheets of this pattern, that is 4 cards like this! The Designer Series Paper is layered onto a piece of Mint Macaron measuring 5-3/8″ x 4-1/8″. I wrapped some Silver Baker’s Twine around the paper and tied it into a knot. The greeting is from the Blessed By God Stamp Set and die cut with the Lots of Labels Framelits. I added the greeting to the card with Stampin’ Dimensionals. To finish it off, I punched out two hearts with the Itty Bitty Accents Punch and added a Pearl to one of them. It is so cute! It makes it look like a little girl and boy heart! This card would be perfect for an Anniversary or Wedding!

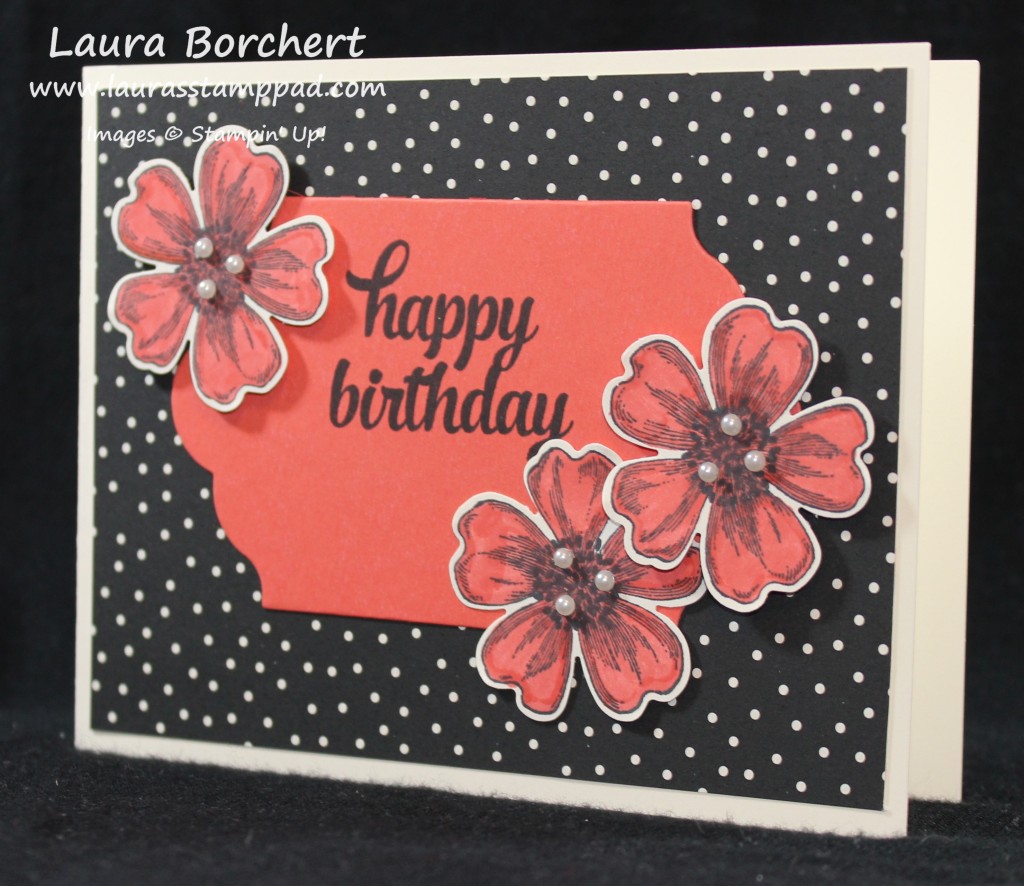
Polka Dots and Flowers, www.LaurasStampPad.com

This card uses a Very Vanilla card base. The Pretty Petals Designer Series Paper measures 5-1/4″ x 4″. You can get 1 of these from one sheet and since there are 4 sheets of this pattern, that is 4 cards like this! The greeting is from the Tin of Cards Stamp Set and die cut with the Lots of Labels Framelits. I added the greeting to the card with Stampin’ Dimensionals. The flowers were stamped with the Flower Shop Stamp Set and punched out with the coordinating Pansy Punch (Bundle & Save 15%). I added the flowers to the card with Stampin Dimensionals and placed a few Pearls on each! I love the Black and White with a pop of color!

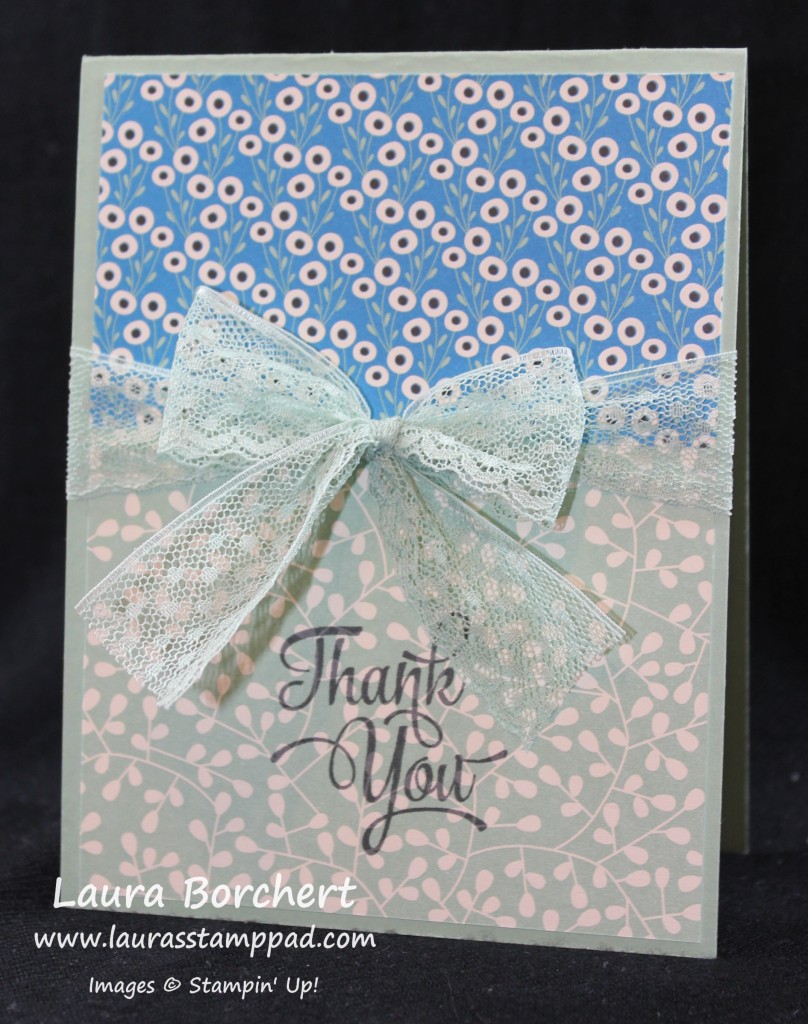
Lace - Thank You, www.LaurasStampPad.com

This card uses a Mint Macaron card base. The Pretty Petals Designer Series Paper measures 4″ x 5-1/4″. You can get 1 of these from one sheet and since there are 4 sheets of this pattern, that is 4 cards like this! I cut the piece of Designer Series Paper into 2 pieces so I could use both sides. The top piece measures 4″ x 2-1/4″ and the bottom measures 4″ x 3″! I tied a bow at the spot that the paper comes together with the Mint Macaron Lace Trim! I stamped the greeting from the One Big Meaning Stamp Set!

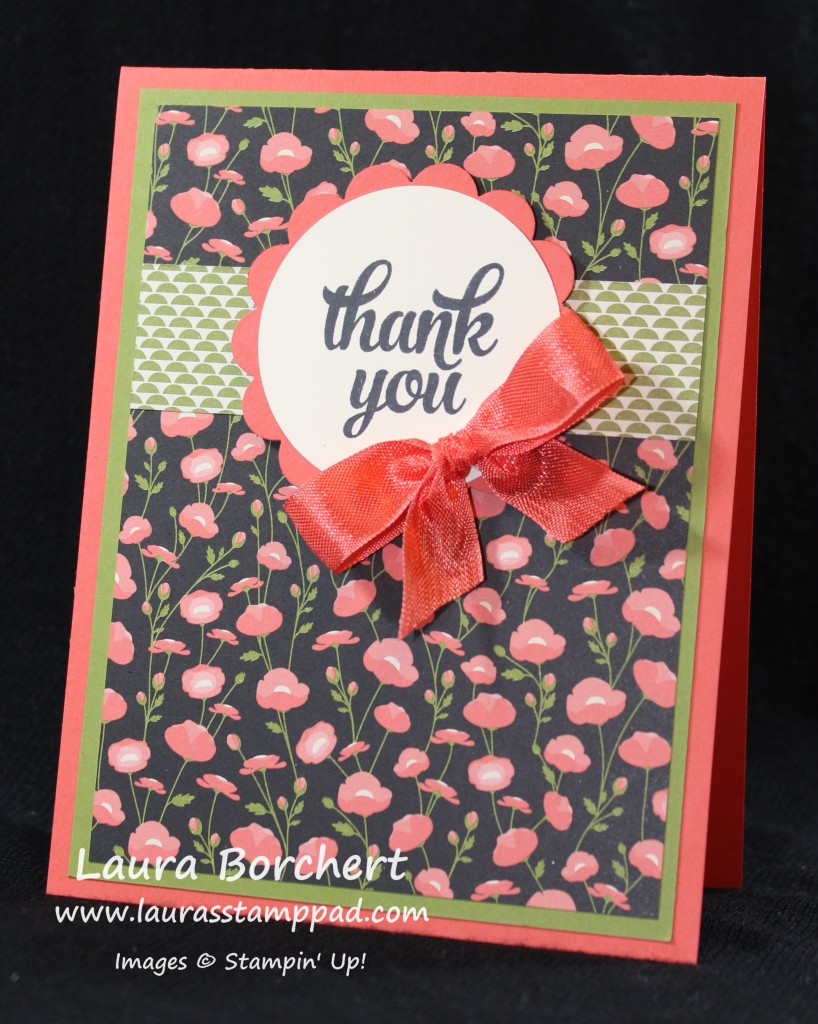
Pretty Petals Thank You Note, www.LaurasStampPad.com

This card uses a Calypso Coral card base. The Pretty Petals Designer Series Paper measures 3-3/4″” x 5″. You can get 1 of these from one sheet and since there are 4 sheets of this pattern, that is 4 cards like this! With some of the leftover pieces, I cut a 3-3/4″ x 1″ piece to use the back side pattern for that strip under the greeting. The greeting is from the Tin of Cards Stamp Set and punched out with the 2″ Circle Punch, then layered onto a 2-3/8″ Scallop Circle Punch! I layered the Designer Series Paper onto a piece of Old Olive measuring 4″ x 5-1/4″ and then placed the other strip of Designer Series Paper on the top half! I attached the greeting with Stampin’ Dimensionals. To finish it off, I tied a bow with some Calypso Coral Seam Binding!

Butterfly Moment, www.LaurasStampPad.com

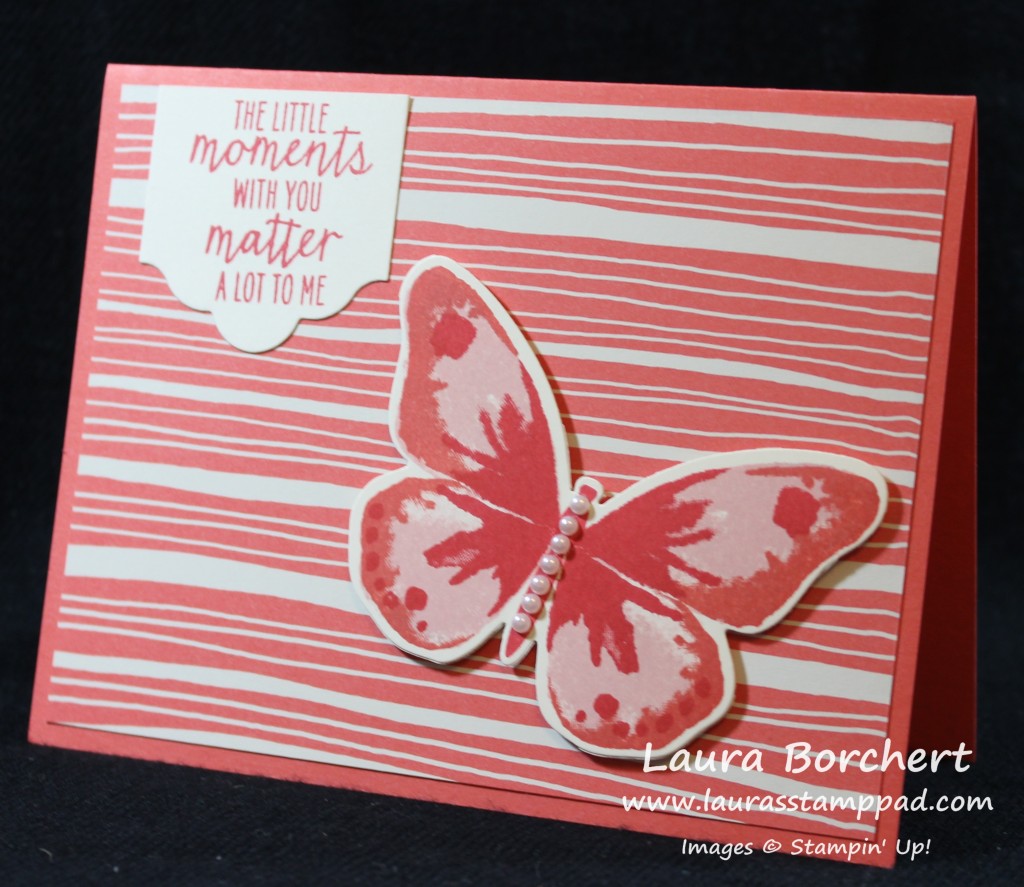
This card uses a Calypso Coral card base. The Pretty Petals Designer Series Paper measures 5-1/4″” x 4″. You can get 1 of these from one sheet and since there are 4 sheets of this pattern, that is 4 cards like this! I stamped the butterfly from the Watercolor Wings Stamp Set in Pink Pirouette, Calypso Coral and Watermelon Wonder! Click here to see a tutorial on that. I die cut the butterfly with the coordinating Bold Butterfly Framelits (Bundle & Save 15%). I added the butterfly to the card with Stampin’ Dimensionals and finished it off with a few Pearls. For the greeting, I used the Watercolor Wings Stamp Set on a Lots of Labels Die Cut that was cut in half. I love the look like it’s a banner coming down!

Cross Over Happiness, www.LaurasStampPad.com

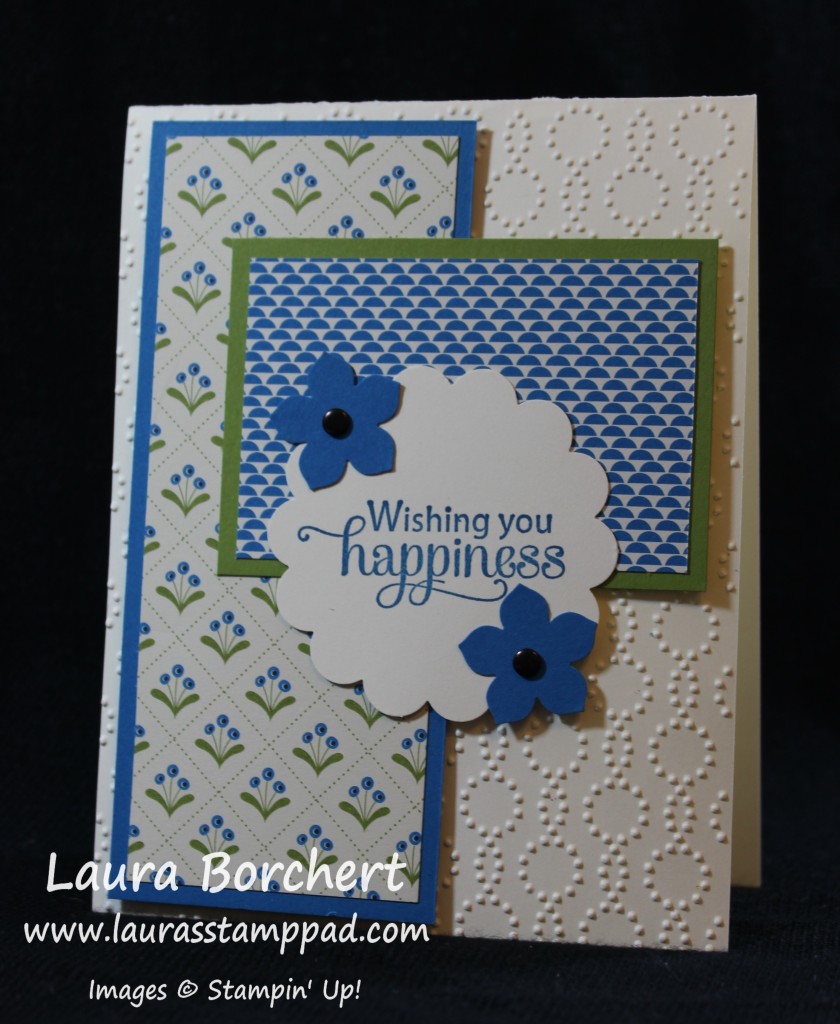
This card uses a Very Vanilla card base and I embossed the front with the Elegant Dots Embossing Folder. The Pretty Petals Designer Series Paper measures 2″ x 5″ and 3″ x 2″. You can get 1 of the big pieces and 3 of the little pieces from one sheet. Since there are 4 sheets of this pattern, you can create at least 6 cards like this! The larger piece is layered on a piece of Pacific Point measuring 2-1/4″ x 5-1/4″ and adhered to the card front with Stampin’ Dimensionals. The smaller piece of DSP was layered onto a piece of Old Olive measuring 3-1/4″ x 2-1/4″. I added this to the card with Stampin Dimensionals on the right hand side and Snail Adhesive on the left. This makes it level across! I stamped the greeting from the Blessed By God Stamp Set and punched it out with the 2-3/8″ Scallop Circle Punch! I finished the card off with a few punched flowers with the Petite Petals Punch and some Black Candy Dots! TIP: If you run out of black, you can always color in any of the other colors with a black sharpie!


Technique Tuesday – 70+ Cards from 1 Stack!!!

Posted on

Happy Tuesday!!! You know what that means!!! I have a fabulous technique to share with you today. I will show you how to create over 70 Cards from a Designer Series Paper Stack! I used the Pretty Petals Stack and created cards for every occasion – man, women, sympathy, birthday, anniversary, wedding and more!!! I love it!
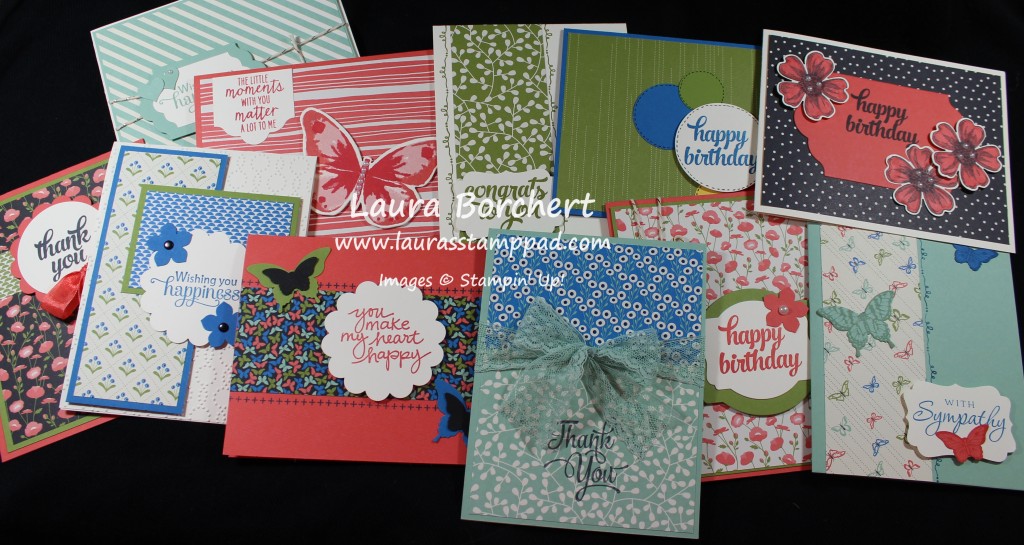
Pretty Petals Card Set, www.LaurasStampPad.com

Here are the cards that I created with each sheet in the Pretty Petals Designer Series Paper Stack! You can get multiples of each of these cards and then use the leftover scrap pieces to create quilt cards like these samples! I will be posting a few of these today and the rest tomorrow!!! 🙂 Let’s get started!

Butterfly Lovely Amazing You, www.LaurasStampPad.com

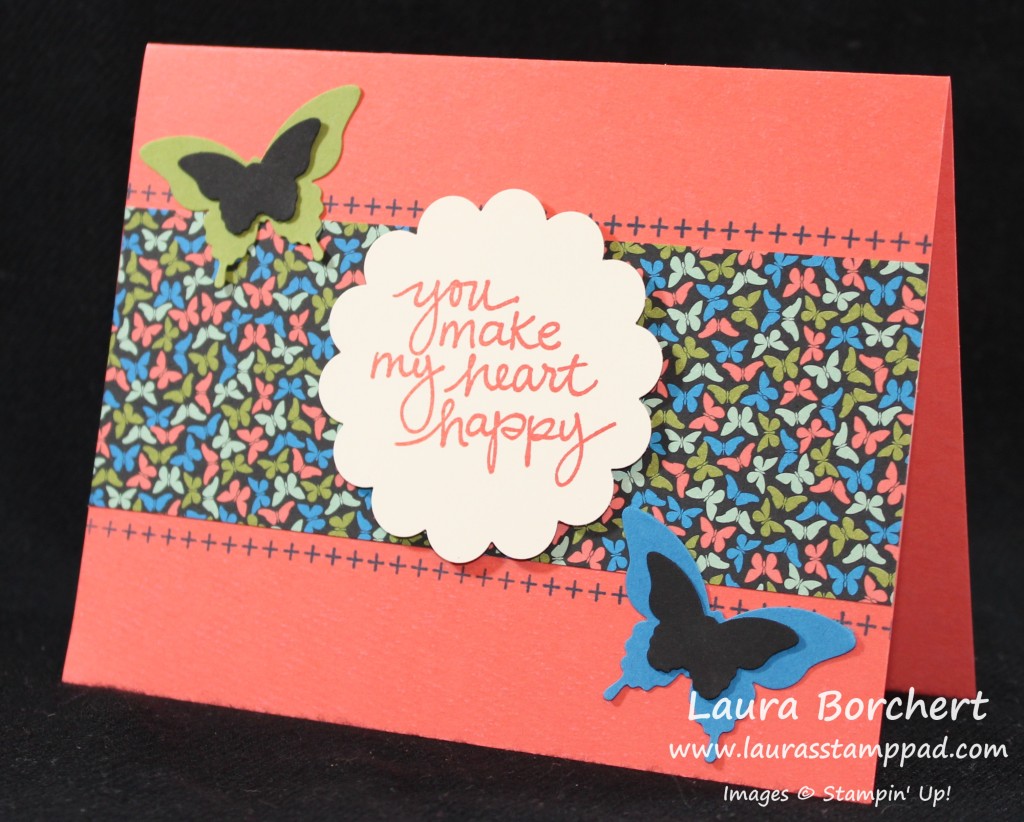
This card uses a Calypso Coral card base. The Pretty Petals Designer Series Paper measures 5-1/2″ x 2″. You can get 3 of these from one sheet and since there are 4 sheets of this pattern, that is 12 cards like this! The border on the top and bottom is from the Tin of Cards Stamp Set. I stamped the greeting from the Lovely Amazing You Stamp Set and punched it out with the 2-3/8″ Scallop Circle Punch! The butterflies were punched out from the Elegant Butterfly Punch and Bitty Butterfly Punch!

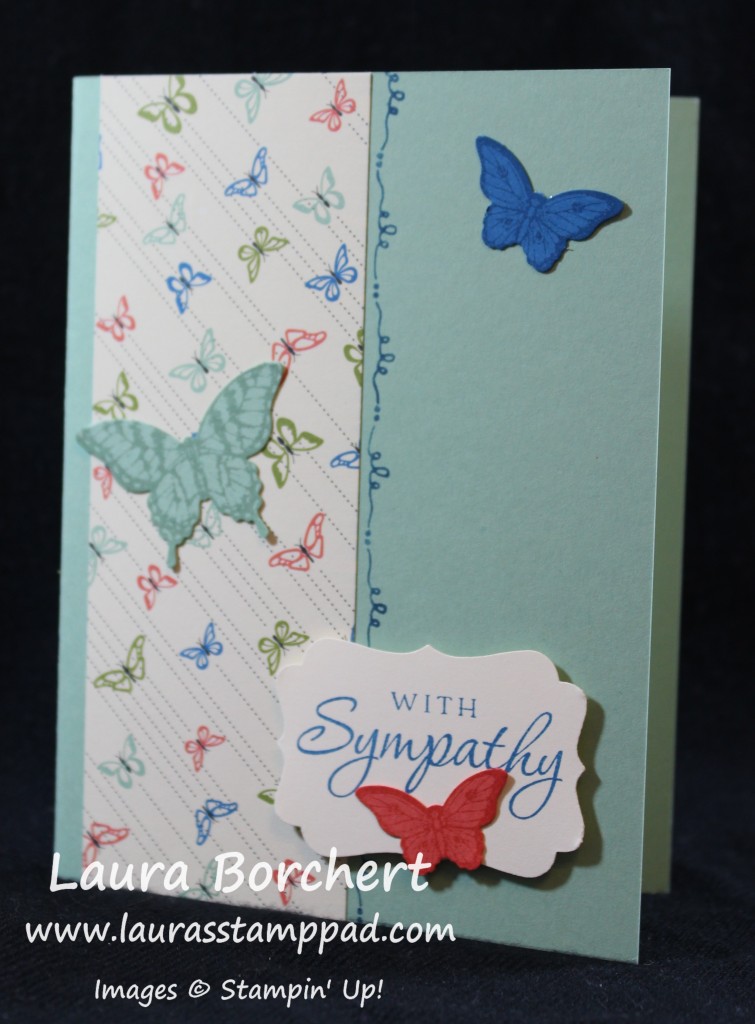
Sympathy Card, www.LaurasStampPad.com

This card uses a Mint Macaron card base. The Pretty Petals Designer Series Paper measures 2″ x 5-1/2″. You can get 3 of these from one sheet and since there are 4 sheets of this pattern, that is 12 cards like this! The border along the side is from the Tin of Cards Stamp Set. I stamped the greeting from the August Paper Pumpkin Kit and punched it out with the Decorative Label Punch! The butterflies were stamped from the Papillion Potpourri Stamp Set and then punched out from the Elegant Butterfly Punch and Bitty Butterfly Punch!

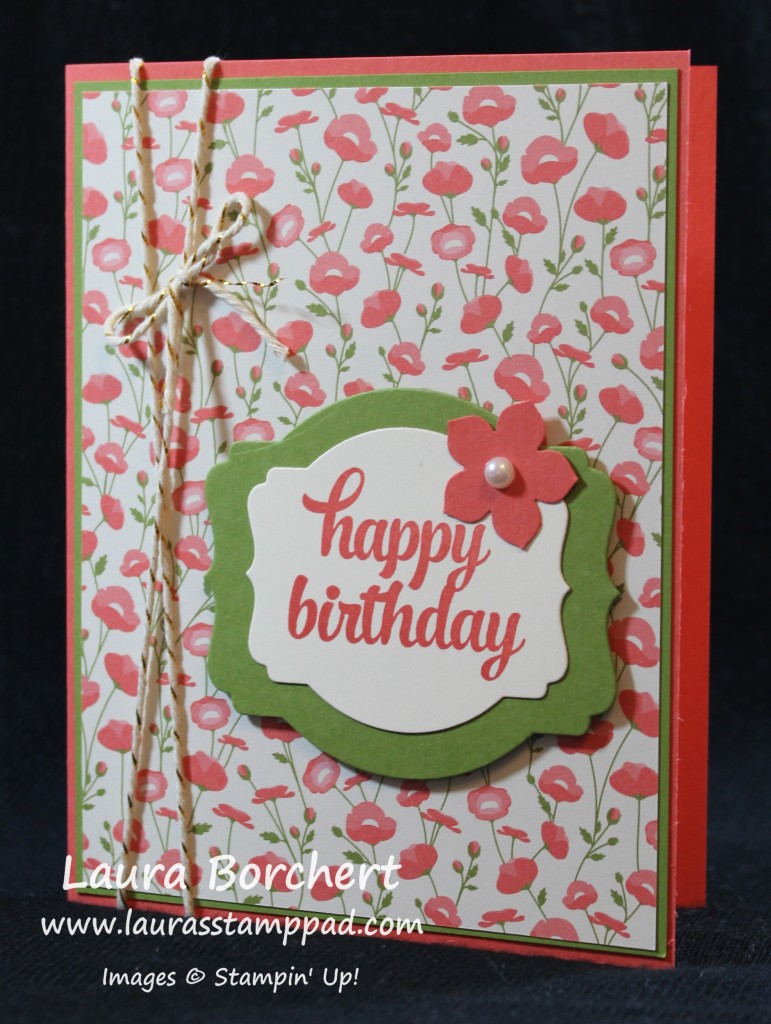
Coral Flowers, www.LaurasStampPad.com

This card uses a Calypso Coral card base. The Pretty Petals Designer Series Paper measures 4″ x 5-1/4″. You can get 1 of these from one sheet and since there are 4 sheets of this pattern, that is 4 cards like this! The Designer Series Paper is layered onto Old Olive measuring 4-1/8″ x 5-3/8″. I wrapped some Gold Baker’s Twine around the left edge and tied it into a bow! The greeting is from the Tin of Cards Stamp Set. I die cut the greeting out with the Deco Label Framelits and added a layer of Old Olive with the next frame size up! I added a flower that was punched out with the Petite Petals Punch and I placed a Pearl in the center!

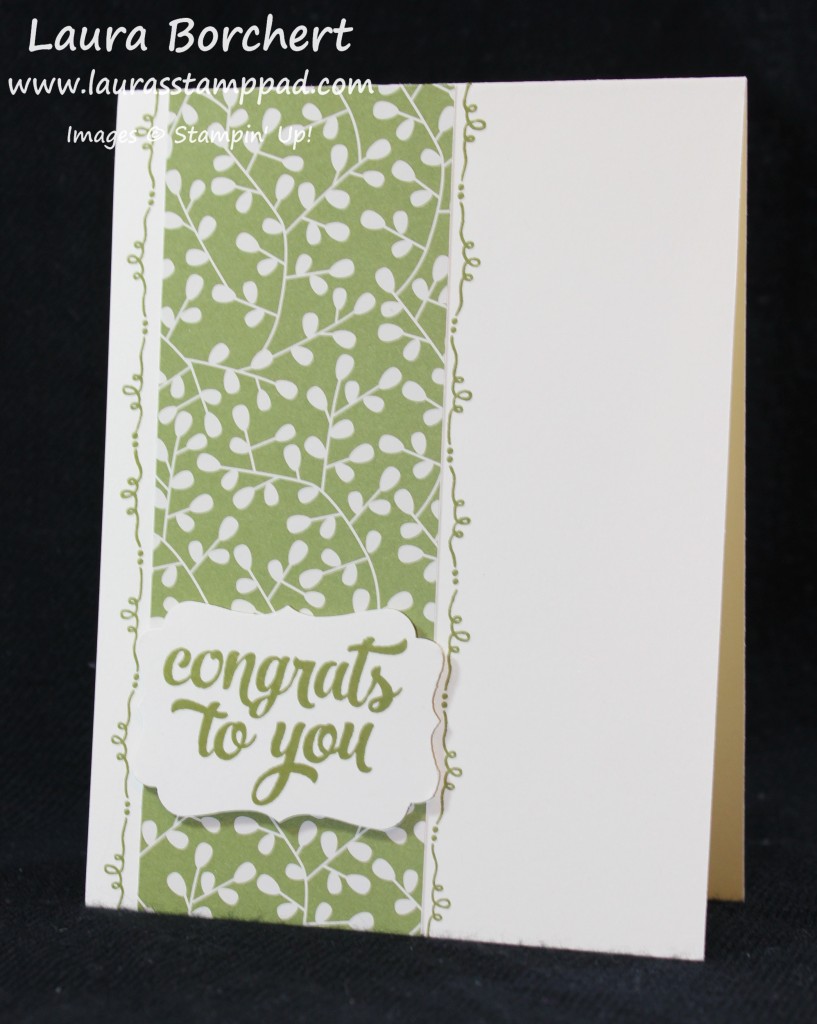
Quick Simple Card, www.LaurasStampPad.com

This card uses a Very Vanilla card base. The Pretty Petals Designer Series Paper measures 2″ x 5-1/2″. You can get 3 of these from one sheet and since there are 4 sheets of this pattern, that is 12 cards like this! The border on the left and right of the DSP is from the Tin of Cards Stamp Set. I stamped the greeting from the same set and punched it out with the Decorative Label Punch!

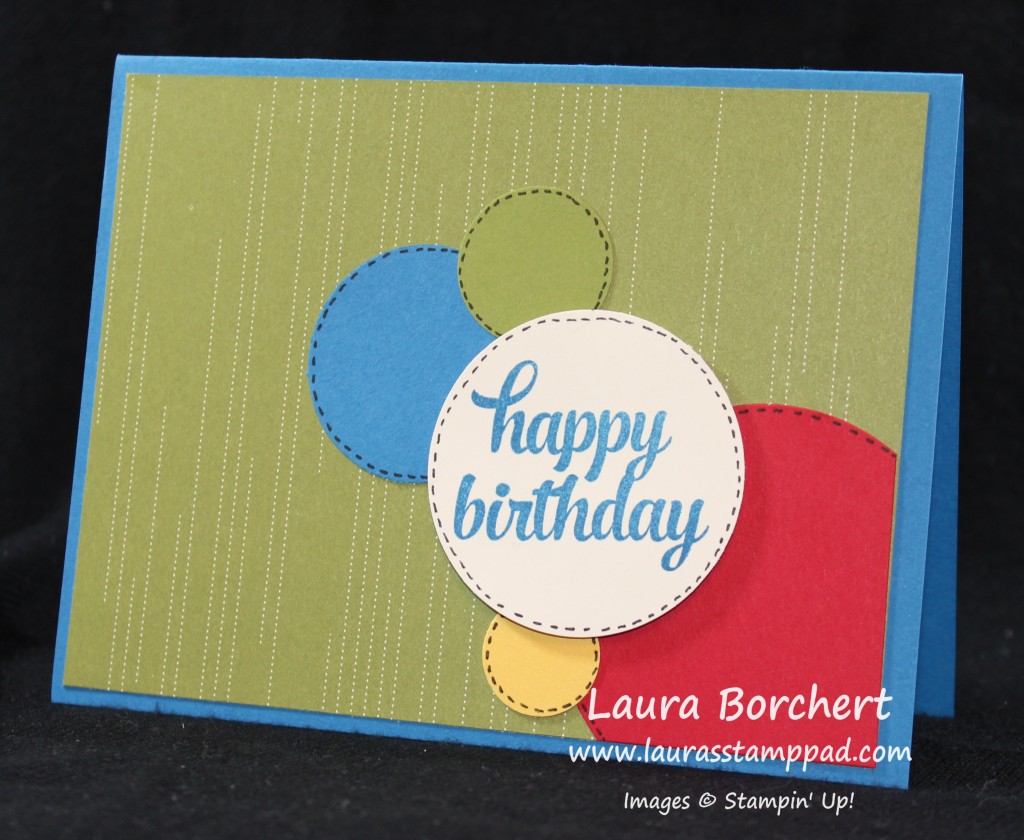
Birthday Circles, www.LaurasStampPad.com

This card uses a Pacific Point card base. The Pretty Petals Designer Series Paper measures 5-1/4″ x 4″. You can get 1 of these from one sheet and since there are 4 sheets of this pattern, that is 4 cards like this! I used some of my scraps of cardstock in Real Red, Daffodil Delight, Old Olive and Pacific Point. I used various sizes of circle punches. The greeting is from the Tin of Cards Stamp Set. I thought the circles looked a little plain at first so I added the little stitches around the edges and I think it really makes them pop! Love it!! This would make a fabulous kid’s card!

I will be posting the rest of the cards in the set tomorrow! If you would like to see all of this in action, check out the Video Tutorial below or by clicking here! If you liked the video, be sure to give it a thumbs up! Don’t forget to subscribe to my blog so you don’t miss tomorrow’s post! 🙂

See you tomorrow! Which one of these is your favorite so far? Let me know in the comments below!

Happy Stampin’

~Laura


Pink Perfection!!!

Posted on

Pink Butterfly, www.LaurasStampPad.com

I found another sample using the Watercolor Wings Stamp Set that I haven’t shared yet!!! You all know how much I love this one because it is so many fabulous shades of Pink!! (Don’t forget that Paper Pumpkin is going Pink this month!)

I started with a Pink Pirouette card base and then I took a piece of Rose Red and stamped the greeting from the Thoughts & Prayers Stamp Set! Then I took a White Tea Lace Doily and cut it in half and added adhesive to the center half circle and placed it on the top of the Rose Red. I didn’t like the edge of the Doily showing so I added a strip of Whisper White Organza Ribbon and adhered the ends to the back. Now you can place this onto your card front! For the butterfly, I took a piece of scrap Whisper White and used the Watercolor Wings Stamp Set! I used Pink Pirouette for the base, Rose Red for the second one (sides), and Melon Mambo for the third one (center and outside dots). Love it! Don’t stamp the center thorax piece until after you have cut it out. I found that if I stamped it now, sometimes it was up to high and others down to low. Using the Bold Butterflied Framelits (Bundle & Save) and the Big Shot, I cut it out! Woot Woot for not fussy cutting! Once it is cut out you can stamp the center piece in Basic Black! Of course I added the butterfly to the card with Stampin’ Dimensionals!

Butterfly Color Template, www.LaurasStampPad.com

Here are lots of butterfly color combinations that you can use!!! Also, you can check out more samples using the Watercolor Wings here, here and here! You can check out a Video Tutorial here!!!

Which one is your favorite?? Let me know in the comments below!

Happy Stampin’

~Laura


Golden Butterflies!!!

Posted on

Blue Butterfly, Gold Foil, www.LaurasStampPad.com

I absolutely love the Gold Foil overlay on these butterflies. It is stunning, adds a little bling, and really makes the butterflies POP!!! You could create this card in various colors and use either the Gold Foil or Silver Foil!!!

I started with a Marina Mist card base and stamped on a piece of Whisper White measuring 4″ x 5-1/4″. The dots from the Watercolor Wings Stamp Set were stamped in Night of Navy. I stamped them a few times before returning to the ink pad so I could have a variation of colors! The greeting Just Because is from the A Dozen Thoughts Stamp Set! For the butterflies, I stamped them on a scrap piece of Whisper White with the following colors – 1. Soft Sky, 2. Marina Mist, & 3. Night of Navy! The butterflies are amazing just like that but I added the foil overlay to really make them pop. I used the coordinating Bold Butterflies (Bundle & Save 15%) and the Butterflies Framelits for cutting out the butterflies and the overlays!!! Of course the butterflies were added to the card with Stampin’ Dimensionals and I adhered the overlay with a Mini Glue Dot down the center of the butterfly! Simple and fabulous!!

Butterfly Color Template, www.LaurasStampPad.com

Here are some other butterfly color combinations that I have been using!!! You can also check out a Video Tutorial on the Watercolor Wings Stamp Set by clicking here! Let me know your favorite color combination in the comments below!!

Happy Stampin’

~Laura


Fluttering By….

Posted on

Fluttering By, www.LaurasStampPad.com

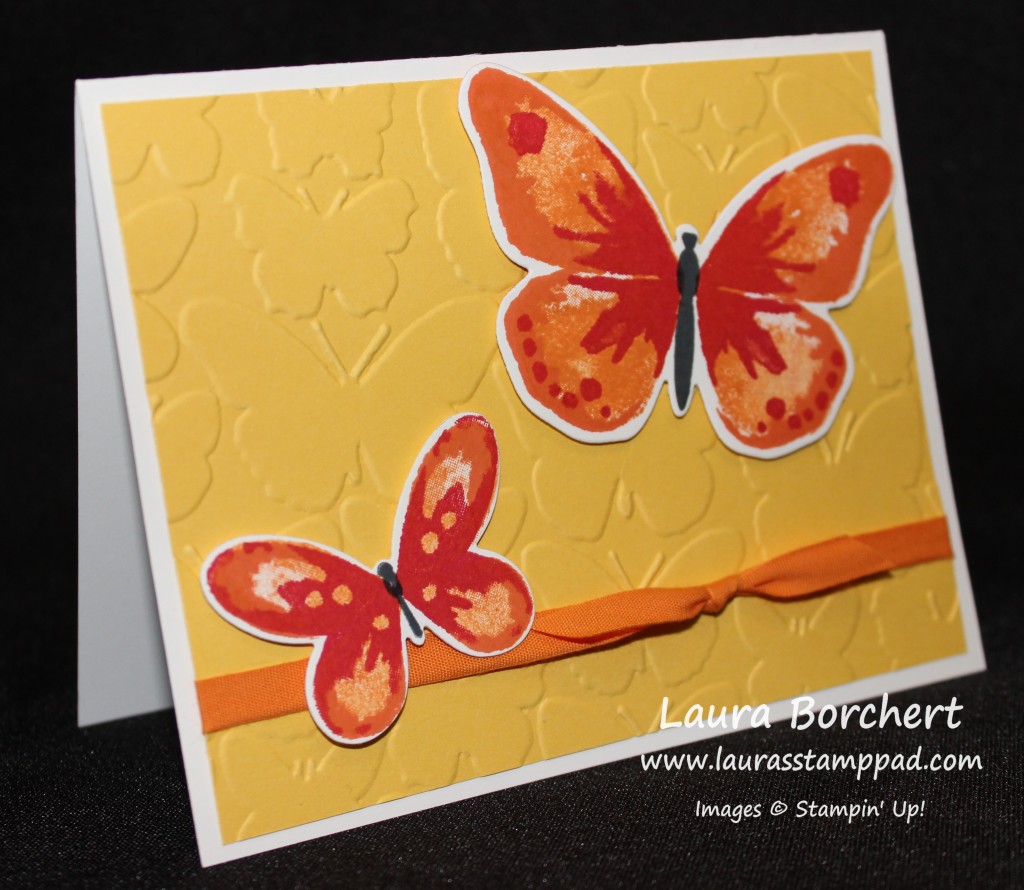
I told you I have had lots of fun with the Watercolor Wings Stamp Set and here is another amazing creation!!! Click here to see more! I love how the Fluttering Embossing Folder gives a great background texture to the card! I embossed a piece of Daffodil Delight measuring 4″ x 5-1/4″ and tied a piece of Pumpkin Pie Cotton Ribbon around the lower half. I adhered this to a Whisper White card base! For the butterflies, I used a scrap piece of Whisper White and used the Watercolor Wings Stamp Set. I used Pumpkin Pie for the first stamp, Tangerine Tango for the second, and Real Red for the third one. Then I used the coordinating Framelits to cut these out. You can Bundle & Save 15% when you purchase the Watercolor Wings Stamp Set and Bold Butterfly Framelits! You will also want to get the Butterflies Framelits! Together both sets of Framelits will cut out both the big and little butterflies as well as do the overlay which I will be showing some fabulous samples with that next week! 🙂 Stay tuned!!!

Butterfly Color Template, www.LaurasStampPad.com

Here are some butterfly color combinations that I have created and click here to see a Video Tutorial on the Watercolor Wings Stamp Set!!!

Happy Flutterin’

~Laura


Wonderful Watercolor Wings!!!

Posted on

Watercolor Wings, www.LaurasStampPad.com

I am having so much fun making all kinds of butterflies! The Watercolor Wings Stamp Set is so amazing. It is a 3-Step Stamping Set so you can create amazing colors and a true masterpiece!!! I LOVE IT!!! All of these samples I’m showing today use all Whisper White cardstock – base, front piece and scraps for the butterfly. I embossed the front of the card base above with the Zig Zag Texture Embossing Folder. I stamped the butterfly in Daffodil Delight, Crushed Curry, and Tangelo Twist! I stamped the greeting from the Watercolor Wings Stamp Set in Tangelo Twist and I brushed the edges with Crushed Curry and a Sponge Dauber!!! I added the butterfly and the greeting piece to the base with Stampin’ Dimensionals!!! For the antenna, I stamped that in Basic Black onto the greeting piece and then placed the butterfly over it! Also, no fussy cutting necessary as there is a great Framelit Set to match – Bold Butterfly (Bundle & Save)!!!

Purple Butterfly, www.LaurasStampPad.com

I love these shades of purple!!! I used Wisteria Wonder, Perfect Plum, and Elegant Eggplant for this butterfly!! For the dots behind the butterfly, I used the image from the Watercolor Wings Stamp Set and stamped halfway from the left and halfway from the right. This way the meeting of the two images is hidden behind the butterfly. I used the Lovely Lace Embossing Folder for the card front and the greeting is from the Thoughts & Prayers Stamp Set. Butterflies are the perfect image for any occasion – sympathy, baby, wedding, anniversary, thinking of you, birthday and everything in between!

Butterfly on Bricks, www.LaurasStampPad.com

There is something about that Brick Embossed background that makes me LOVE this card. That and how the greeting fits so perfectly in that brick. Ahhh I just love it!!! The colors used on this butterfly are Pool Party, Lost Lagoon, and Island Indigo! The greeting is from the Watercolor Wings Stamp Set as well!

Butterfly Cards, www.LaurasStampPad.com

Here are three more cards in a similar pattern as the ones above. The far left one uses Mint Macaron, Cucumber Crush, and Basic Gray and the far right one uses Soft Sky, Marina Mist and Night of Navy. The middle one is the same as the first card up top. I used the Happy Together greeting from A Dozen Thoughts Stamps Set. Can you tell I had tons of fun making all kinds of cards with this set???

Butterfly Color Template, www.LaurasStampPad.com

Here is a color chart of the colors I found to be super fabulous!!!!

Bad Colors

Here are the color combinations I did not like!!!!

And of course I had to do a Video Tutorial on this stamp set and show you all the fun and excitement I am having so check that out here!!! Let me know your favorite color combination in the comments below!!!

Don’t forget to subscribe to My Channel so you don’t miss any videos!!! They are lots of fun!!!

Happy Stampin’

~Laura


Sheer Perfection!!!

Posted on

Sheer Perfection Vellum, www.LaurasStampPad.com

The NEW Sale-A-Bration item – Sheer Perfection Vellum is lots of fun! It is 6″ x 6″ and there are 2 sheets each of 12 different designs. That is a lot of FUN in one pack!!! Here are some creations I made with this stuff! The sample above has a base of Calypso Coral and then a layer of Whisper White (4″ x5-1/4″). I took a piece of the flower vellum and colored it with my markers and since vellum shows the adhesive I only added it along the top under the Paper Doily! For the greeting I used the 2-3/8 Scallop Circle Punch and 2″ Circle Punch. The greeting is from the Lovely Amazing You Stamp Set! I love that set for the perfect greetings!!!

Sheer Perfection Vellum, www.LaurasStampPad.com

The perfect Man Card is what I made here, don’t you think? I used Basic Gray and Tempting Turquoise!!! I used some of the dotted line vellum for the banners and attached them to the card with staples! I’m not a huge fan of staples but use them every once in awhile. If you don’t like that look, you can always add adhesive to the banner half that is overlapped. The greeting is from the Big News Stamp Set!!!

Sheer Perfection Vellum, www.LaurasStampPad.com

This one is my favorite! I love butterflies!!!! I used my markers (Pear Pizzazz, Lost Lagoon, and Pool Party) to color the Butterflies and then I adhered it to a piece of Whisper White. For the greeting, I used the Lovely Amazing You Stamp Set and the stamped butterfly comes from another fabulous Sale-A-Bration Stamp Set – Nature’s Perfection! You can earn this for FREE with a $50 (US) purchase! Sale-A-Bration ends tomorrow, March 31st so be sure to stock up on everything now so you can earn Sale-A-Bration items! Also, don’t forget that when you order online here, you will earn Laura’s Loyal Stampers Points! WOOT WOOT!!!!

Happy Shoppin’

~Laura


Big Shot Promotion – Top Note Treat Topper!

Posted on

Happy Big Shot Fun Week! If you missed out on the rest of this week, click the day to see Monday, Tuesday, and Wednesday! Today I am showing you ways to use your Top Note Die for an adorable treat topper!

Top Note Tag Topper, www.LaurasStampPad.com

This little treat bag is adorable! At first I added in the piece of Pool Party cardstock in the bag just so you could see the clear bag better but I kept it in there because it gives a great background to the treats! 🙂 I used the Top Note Die for the tag topper and just folded it in half! If you are using a smaller bag, you can always fold it the other way! The Top Note was done in Pear Pizzazz and then I stamped the greeting from Million & One in Basic Gray! Fabulous! I then punched out 2 butterflies – Elegant Butterfly Punch with Pool Party and Bitty Butterfly Punch with Pear Pizzazz. Layer your butterflies and attach to the treat topper with a Stampin’ Dimensional and then add a few Rhinestones for some bling! These treats would be perfect for teachers (Happy Back to School), neighbors, party favors, etc! To see this project in action, check out the Video Tutorial below! Don’t forget to give me a thumbs up if you like it and want to see more videos like this!

Only 11 more days to take advantage of Stampin’ Up’s Big Shot Promotion – purchase the Big Shot and get your choice of one of five select Bundles for FREE!!! If you already own the Big Shot, you can purchase the specials Bundles at 15% off!

Happy Stampin’

~Laura


Flutter by Butterfly!

Posted on

I love butterflies so much! As a kid I remember watching them, running after them, trying to catch them, and caging caterpillars in hopes to watch it turn into a butterfly! And now as an adult, I still enjoy them! Butterflies are colorful and beautiful and I think they can brighten anyone’s day!

Butterfly Photo Frame


I made this fabulous Butterfly Frame with the Beautiful Wings Embosslits! I used lots of my paper scraps (who doesn’t have a million of those around) and used every Stampin’ Up! color! I love how it turned out and then I added a few pearls in there too! Gotta have some bling! This is hanging right inside the door to my stamp room! I love it!


Multi Colored Butterfly, www.LaurasStampPad.com

This fabulous card is super quick and simply. Just take a few markers in any colors and start inking up your butterfly, stamp it down, layer it onto your card and Voila! You are all done and have just created a beautiful, bright and simple card! This card doesn’t even need a greeting so it could be used for any occasion! This card uses the Swallowtail Stamp!

Butterfly Shaker Card, www.LaurasStampPad.com

This last card is actually a shaker card! The bling in that center butterfly moves around under a clear window sheet! Check out my Technique Tuesday next week to learn more about Shaker Cards! This card uses the Papillion Portpouri Stamp Set and Elegant Butterfly Punch!

There are lots of other butterfly items too – Beautiful Butterfly Bigz DieBitty Butterfly Punch and wheels and more!! And don’t forget about the Butterfly Bundle this month! You get 15% off when you purchase the bundle this month!!!

Hope you have a bright and cheerful day after seeing all these butterflies!

Happy Stampin’

~Laura