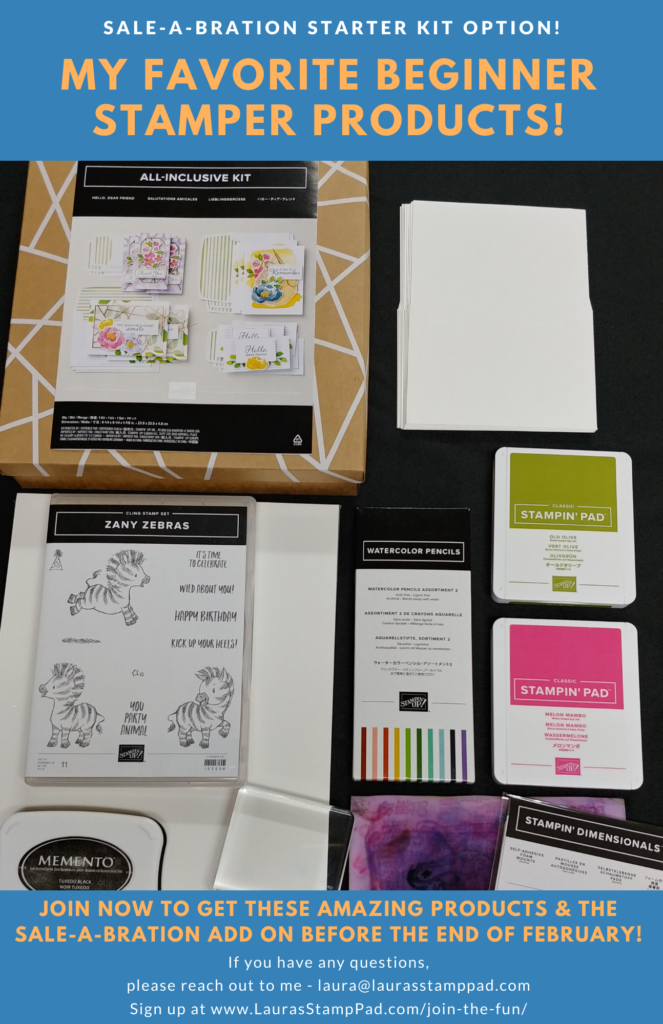
Bye Bye 2020!

Posted on

Happy New Year’s Eve!!! How are you celebrating and saying Bye Bye 2020??

Bye Bye 2020

Sometimes I feel a little sad on New Year’s Eve because another year has gone by but this yeah I’m waving real big and happy to say good bye! I’m sure a lot of us are feeling that way! I’m excited about 2021 because that means Baby Aaha is coming! That means hopefully all the chaos of 2020 is left behind and we have a fresh new start!!!

As for my plans for tonight…..sleep!!!! I’m not sure I can stay awake till midnight and still get up and function with a toddler and being pregnant! We shall see! 🙂

I can’t wait to stamp, share, and connect with all of you in 2021!!! Here’s to a new year of stamping fun!

Happy Stampin’ Bye Bye 2020!

~Laura


What Day Is It???

Posted on

Welcome to that week every year where you have no clue what day it is or even month or year! It’s the week between Christmas and New Years!!! So if you are asking yourself, “What Day Is It?” It’s Tuesday, December 29th, 2020.

What Day Is It, www.LaurasStampPad.com

Just relax….like this kitten! Isn’t he adorable?!?!?! I love kittens!!! Anyway, I just thought I would post a few reminders and check-ins with you today!

GIANT YEAR END CLOSE OUT! Don’t forget that the Holiday Mini Catalog ends on January 4th and many of those items are on sale up to 50% off! Get them before they are gone as some are gone already! Be sure to check out the Clearance Rack as well because Stampin’ Up adds items there randomly and you can get ribbons and embellishments and more for amazing prices!

All orders placed through me get fun and fabulous rewards! I appreciate you all so much and always try to give back! Orders in increments of $40 earn Laura’s Loyal Stampers Stickers!!! Orders of $75 or more before tax and shipping earn my Free Stamp Set of the Month!!! Woot Woot! And of course all orders each month get a handmade card from me to reuse as you wish! 🙂

COMING SOON: January 5th, 2021 begins the January to June Mini Catalog as well as Sale-A-Bration Promotion! Let the party begin! I will be having my Girls Night Out Catalog Launch Party virtually starting on January 7th so near or far, you can all celebrate and experience the fun!

Wishing you all an amazing week even if you don’t know what day it is! Here’s to some relaxing, stamping, and laughter!

Happy Stampin’

~Laura


Merry Christmas to All!!!

Posted on

Just wanted to write a quick post to say Merry Christmas to all of you!!!

Merry Christmas to All, www.LaurasStampPad.com

I just wanted to take a chance to to wish you and your family a wonderful and safe holiday season!

We will be celebrating today with a nap and our traditional supper of homemade chicken nuggets with roasted potato wedges. This has just been a meal we have made years ago and just keep coming back to it. It’s not the perfect tradition. Tonight, Brad and I will be building a kitchen for Claire while watching Christmas Vacation! Wish us luck that it actually goes together okay and we aren’t up so late that Santa skips over our home! 🙂

Happy Stampin’

~Laura


Be Merry!!!

Posted on

Have you ever created your own designer series paper??? It’s super fun and simple because you simply stamp all over. For this Be Merry card, I did just that to create a fun holly background! When I did this card for a class, everyone was asking where the holly paper was!!! 🙂

Be Merry, www.LaurasStampPad.com

I started with a Garden Green piece of cardstock measuring 5-1/2″ x 4-1/4″ and this is my card base! It sounds weird but follow me! 🙂 Next, I added strips of Toile Tidings Designer Series Paper (1″ x 4″) on either side. I found that putting these on first really helped with my spacing. Then I took a piece of Garden Green cardstock measuring 8-1/2″ x 3″ and folded it in half at 4-1/4″ for that center card piece!!!

Now to decorate the center card, I cut 2 pieces of Very Vanilla measuring 2-3/4″ x 4″. One is for the front and one for the inside! On the front, I stamped the holly berries in Real Red and the leaves in Garden Green. Be sure to fall off the edge of the cardstock in order to make it look like the pattern continues on! Stamp a few holly berries and leaves on the piece for the inside too! All of the stamped images are from the Banner Year Stamp Set. I love how versatile this set is!

Christmas Wishes, www.LaurasStampPad.com

For the greeting on the front, I used the Everyday Label Punch and Timeless Label Punch. The greeting was stamped in Real Red and I attached it partially hanging off the card piece. Just be sure to only add adhesive to the left side so you don’t seal your card closed! I finished off the card with some Gilded Gems!

If you would like to recreate this Be Merry Christmas Card, check out the supplies listed below! Want them all, simply click ADD ALL TO CART for easy shopping! If you don’t need any more Christmas Card, you can always use this layout for any upcoming occasion!!!

Happy Stampin’

~Laura

Product List

Copper Foil Fun!

Posted on

On Tuesday, I shared a Copper Heat Embossed card using the Christmas Gleaming Suite. Check that out here. If you are looking for an easier look for making multiples this season or are scared to jump into heat embossing, check out this copper foil fun card!

Easy Foil Look, www.LaurasStampPad.com

I started with a Pretty Peacock card base. Then I layered on a piece of the Brightly Gleaming Designer Series Paper. The elegant foil really makes for a stunning shine! Next, I tied some copper ribbon around the inside spine of the card. This ribbon is from the Basket Weave & Metallic Ribbon Pack.

Deck the Halls, www.LaurasStampPad.com

The greeting was created with the Tasteful Labels Dies. I die cut in Very Vanilla and stamped the greeting in Pretty Peacock Ink. The greeting is from the Christmas Gleaming Stamp Set! I layered this onto a piece of Copper Foil Paper to really add as much shine to the card as possible! The greeting was added to the card front with Stampin’ Dimensionals!

Be Jolly This Season, www.LaurasStampPad.com

For the inside of the card, I added a piece of Very Vanilla (4″ x 5-1/4″) with a little scrap piece of designer paper on the left hand side. Using more stamps from the Christmas Gleaming Set, I stamped the greeting and holly in Pretty Peacock! Simple and fabulous!!!

If you would like to recreate this copper foil fun card, check out the supplies listed below! These items are retiring so get them before they are gone!

Happy Stampin’

~Laura

Product List

Copper Shine…but it takes time!!!

Posted on

Heat Embossing is something that I pull out here and there because it takes more time and effort but boy is the look STUNNING! This Copper Shine card with the Brightly Gleaming Suite is beautiful!!!

Copper Shine, www.LaurasStampPad.com

I started with a Night of Navy card base. Next, I took a piece of Very Vanilla (4″ x 5-1/4″) and stamped the right corner with the greeting in Night of Navy Ink. All of the images used are from the Christmas Gleaming Stamp Set! One the left hand side I added a piece of the Brightly Gleaming Designer Series Paper as well as a little strip of Pretty Peacock cardstock just to add a little more POP!

Copper Embossing Powder, www.LaurasStampPad.com

For the ornaments, I stamped them in Versamark ink onto Night of Navy cardstock. Then I heat embossed them with Copper Embossing Powder. Using the coordinating punches, I punched out the ornaments! Then I added some Copper Ribbon to the top of the ornament securing it with a Stampin’ Dimensional and wrapping the other end over the Very Vanilla. Next, I added the Very Vanilla to the card front. To finish it off, I tied little bows in Night of Navy Ribbon and added them with Mini Glue Dots! I really love how it all turned out!

Be Jolly This Season, www.LaurasStampPad.com

For the inside of the card, I added a piece of Very Vanilla cardstock (4″ x 5-1/4″) with some Brightly Gleaming Designer Paper on the bottom and stamped the greeting in Night of Navy!

If you would like to recreate this Copper Shine card, check out the supplies listed below! Don’t forget that many of these products are retiring soon so get them before they are gone!!! Also, if heat embossing is too intense or time consuming for you, stay tuned for Thursday’s card!!!

Happy Stampin’

~Laura

Product List

Embossed Designer Paper!!!

Posted on

I feel like this season there is a chance for more mailed Christmas presents than normal. That means sending a fun thank you will be needed, right?!?!? This embossed designer paper card with a super cute seasonal greeting is perfect….and simple!

Embossed Designer Paper, www.LaurasStampPad.com

I started with a Night of Navy card base. Next, I took a piece of the Snowflake Splendor Designer Series Paper (ON SALE) and embossed it with the Winter Snow Embossing Folder. This gives some cool texture and really makes the splatter/cloudy designer paper pop more! Then I layered this onto a piece of Seaside Spray cardstock (4″ x 5-1/4″). Using some Night of Navy ribbon from the Playing With Patterns Ribbon Pack, I tied it around the layered embossed piece. Then I added it to the card front.

Thank You Snow Much, www.LaurasStampPad.com

For the greeting, I die cut out the label from the Painted Labels Dies. The greeting is from the Snowflake Wishes Stamp Set! I stamped the greeting in Night of Navy Ink and then I stamped a few snowflakes around in Seaside Spray. For the snowflakes, I did stamp off once to make sure it was a subtle background look and not overwhelming on the greeting! This was added to the card front with Stampin’ Dimensionals!

On the inside of the card, I added a piece of Whisper White (4″ x 5-1/4″) and stamped a few snowflakes along the right side!!! Don’t forget you can always stamp the envelope as well to really pull it all together!

Check out all of the supplies for this embossed designer paper card below. Want them all, just click ADD ALL TO CART!!! It’s that simple!

REMINDER: Christmas is right around the corner. Let your friends and family know what you want with a Stampin’ Up List! Fill this out and pass it out to anyone who asks! All of my contact information is on there for them to reach out and place an order for you or order online! I have already had fun being an elf this year and helping some with early shopping!

Happy Stampin’

~Laura

Product List

December 2020 Specials!

Posted on

A new month means new specials! The December 2020 Specials are…….drum roll………

December 2020 Specials, www.LaurasStampPad.com

All orders placed this month that are $75 or more (before tax and shipping) will get this stamp set for FREE!!! Woot Woot! This set is perfect for backgrounds and all occasions!!! Click here to start shopping!

Beary Comforting Paper Pumpkin Kit, www.LaurasStampPad.com

Try out Paper Pumpkin in December and get this Beary cute card kit. It includes 12 full size cards with a bear theme! Paper Pumpkin comes with everything you need to create the kit including stamps and ink! Click here to sign up for the December Kit!! Paper Pumpkin is also a great gift because any one can create the kits since it’s all inclusive! 🙂

in December and get this Beary cute card kit. It includes 12 full size cards with a bear theme! Paper Pumpkin comes with everything you need to create the kit including stamps and ink! Click here to sign up for the December Kit!! Paper Pumpkin is also a great gift because any one can create the kits since it’s all inclusive! 🙂

Starting today…..GIANT YEAR-END CLOSEOUT!!!! Woot Woot! Check out these great deals by clicking here!

Enjoy these December 2020 Specials all month long!!! Reach out if you need help with your Christmas Shopping and don’t forget I offer Gift Certificates too!

Happy Stampin’

~Laura


All the Presents!!!

Posted on

It’s December so let the decorating, baking, card sending, and gifting begin!!! NOTE: Stampin’ Up! suggestions orders be placed by December 9th to ensure the delivery will arrive before Christmas. Want to recreate this fun All the Presents card?? Check out the technique below!

I started with a piece of Real Red cardstock for the card base (5-1/2″ x 8-1/2″). Next, I layered on a piece of Heartwarming Hugs Designer Series Paper (4″ x 5-1/4″) on top. Then I took a piece of Real Red Double Stitched Satin Ribbon and wrapped the ends around a scrap piece of Pear Pizzazz. I added this to the center of the card. When I assembled the card, I thought the focal point didn’t pop enough. The ribbon also got lost in the stripes but when I added the Pear Pizzazz it was PERFECT!

Now for the focal point, I die cut a Stitched Nested Label in Whisper White. Then using the Most Wonderful Time Stamp Set, I stamped both the presents and the greeting. For the greeting, I used Mossy Meadow Ink.

For the present which are all connected on one stamp, I inked one of the outside presents in Real Red Ink. Since it’s photopolymer, I was able to see how far in I needed to add ink. Then I inked the other end and middle present in Pear Pizzazz Ink (light green). Finally I inked the present on the end that’s already inked in Pear Pizzazz in Mossy Meadow. Since I went from light green to dark green, I wasn’t that worried about mixing ink colors. Then I stamped it down onto the label. All of the bows were inked in Real Red Ink and stamped down! Check out this video of Laura’s Dose of Stampin’ Therapy for a better look at this technique!

On the inside of the card, I stamped the little tree 3 times after inking it just once in Mossy Meadow Ink. This gives that fun variation in color and looks like there are multiples! The greeting was stamped in Real Red Ink. Both of these images are from the same Most Wonderful Time Medley!

To recreate this All The Presents card, check out the supplies listed below! Need all of them, click Add All To Cart for quick and simple shopping!

Happy Stampin’

~Laura

Product List

One of A Kind!!!

Posted on

Happy December!!!! It’s been one heck of a year and here we are in the last month. This year is one of a kind and staying connected with family and friends is sooooo important. Whether it’s a Christmas Card, Birthday Card, or Just Because card, remember to share your love of stamping with those around you by sending a card.

One of A Kind, www.LaurasStampPad.com

This card makes for the perfect #happymail card this season! It has the winter theme and that sweet greeting!!

I started with a piece of Pacific Point as the card base. Next, I took a piece of Whisper White measuring 4-1/8″ x 5-3/8″ and stamped the greeting on the bottom right corner in Pacific Point Ink. Then I layered on a piece of Silver Foil Paper (4″ x 4″) and Snowflake Splendor Designer Series Paper (3-3/4″ x 3-3/4″) up top. Before adding this to the card base, I tied around some Whisper White Faux Linen Ribbon from the Flowers For Every Season Ribbon Pack. This gives the card some texture and also softens the transition from the designer paper to the greeting!

I added this layer to the card base with Stampin’ Dimensionals and then finished it off with a few Basic Rhinestones!!! A card is just so much better with a little bit of bling.

Check out the supplies listed below to recreate this One of A Kind Winter Card! Change up the designer paper for each season and you have a card for all year long!

Happy Stampin’

~Laura

Product List