Watercolor Wonder Designer Series Paper!!!

Posted on

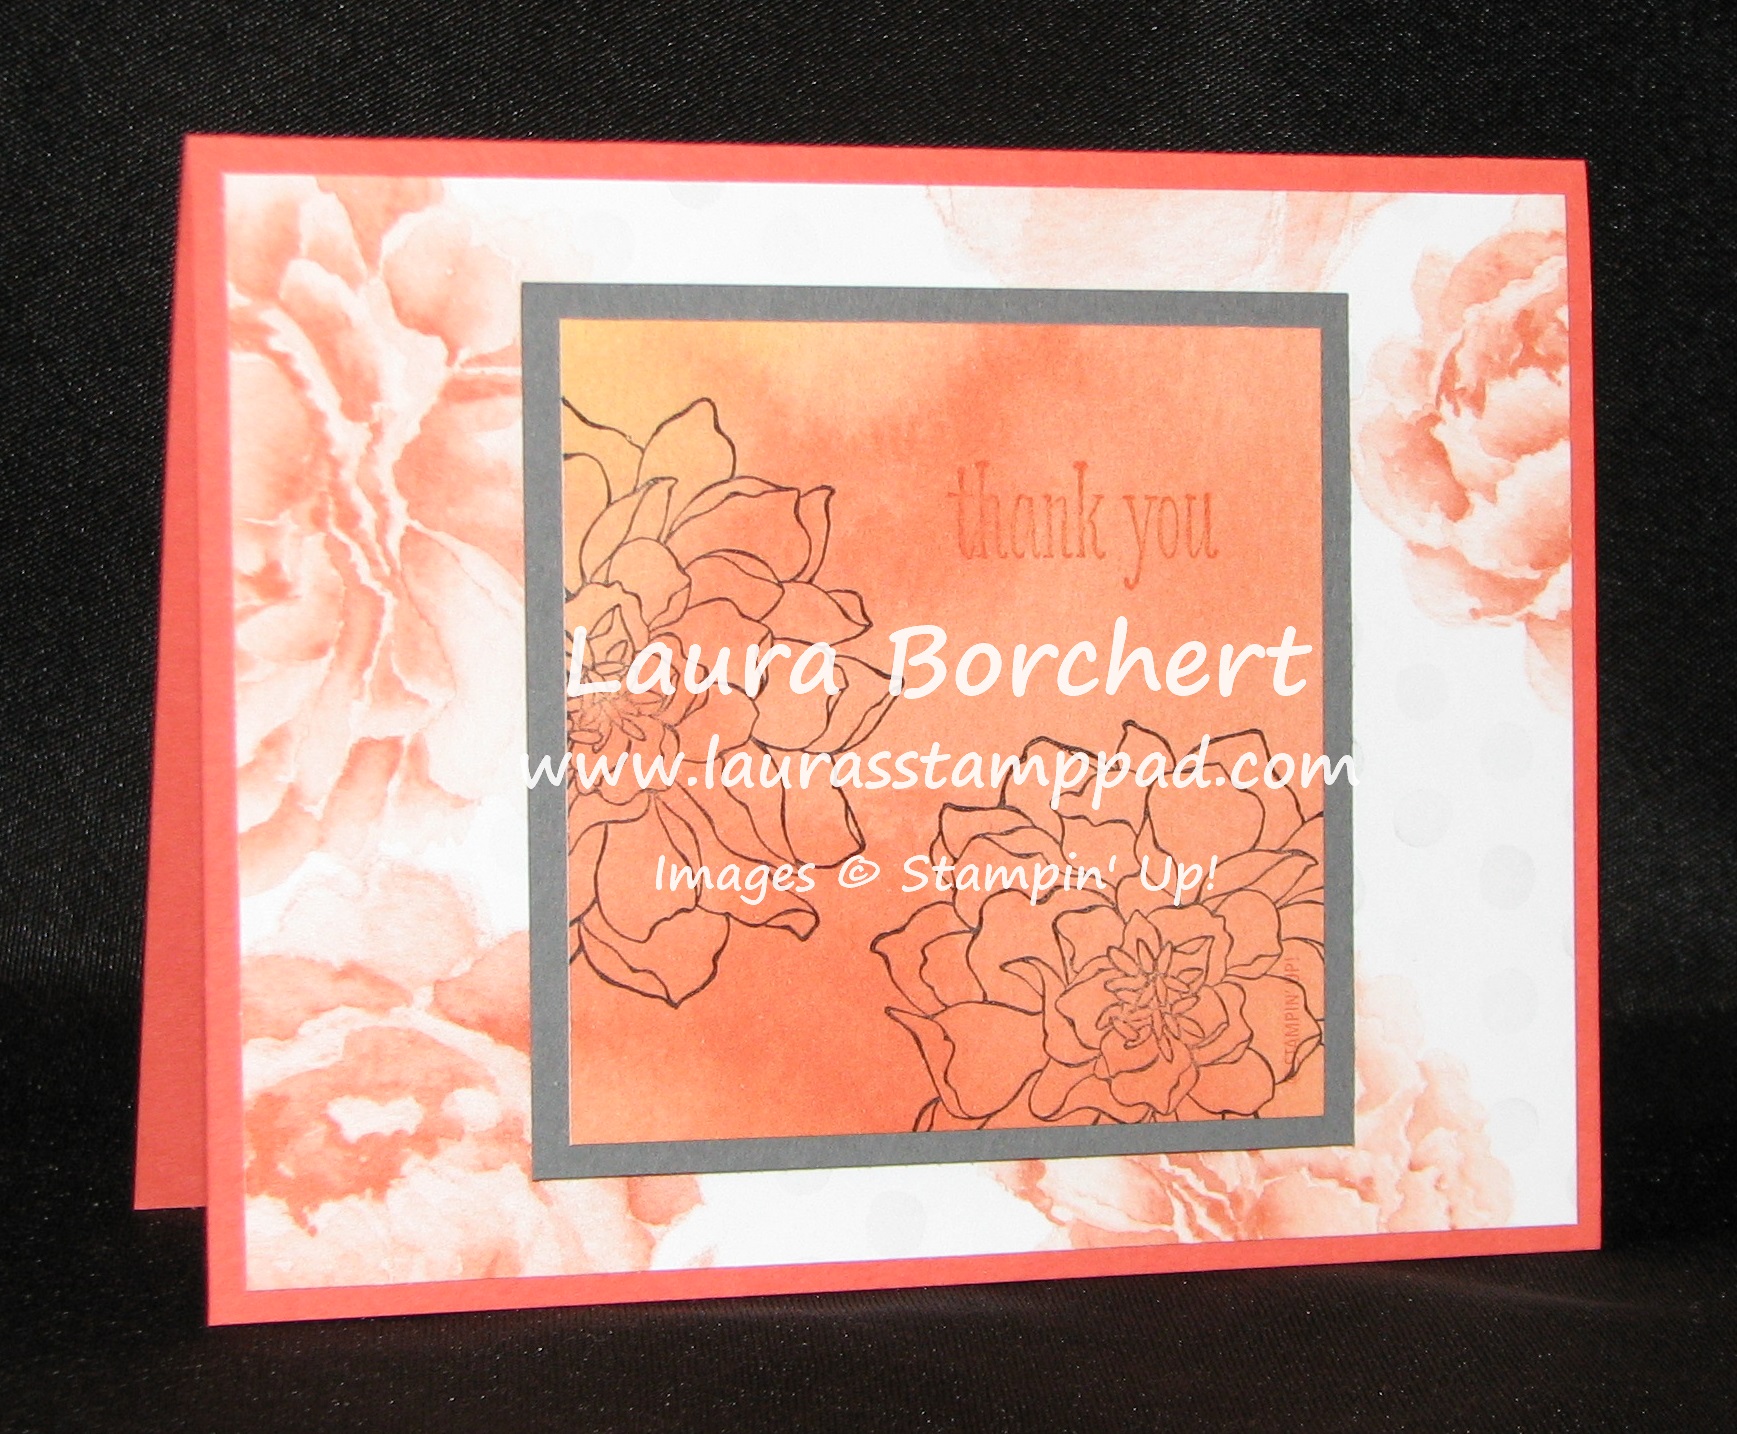
Do you ever have a product that you just reach for EVERY SINGLE time you sit down to stamp??? It may be a ribbon or stamp set or Designer Series Paper (DSP). For me, right now, it is the amazing Watercolor Wonder DSP!!!! Oh my, I am loving this paper and I think I have gone through at least 3 packs of it and it’s only been out since January! You can find it in the Occasions Mini Catalog which will ends on June 1st so be sure to stock up now!!!

Peaceful Petals Watercolor Wonder DSP, www.LaurasStampPad.com

Isn’t that just amazing? Although I should have stamped the greeting in Basic Gray as well rather than Calypso Coral. I used my Peaceful Petals Stamp Set which has amazing flower images (Love) and two greetings – Thank You and Thinking of You – two super useful ones!!! The best part about this card is you can make multiples very quickly. First, you will take the sheet of paper that is Calypso Coral and Daffodil Delight and cut that into 3″ x 3″ squares. You get 16 from just one sheet! Then you will layer that onto a 3-1/4″ square of Basic Gray. I then took various other sheets for the DSP pack and cut 4″ x 5-1/4″ rectangles to layer onto Calypso Coral & Daffodil Delight card bases (5-1/2″ x 8-1/2″)

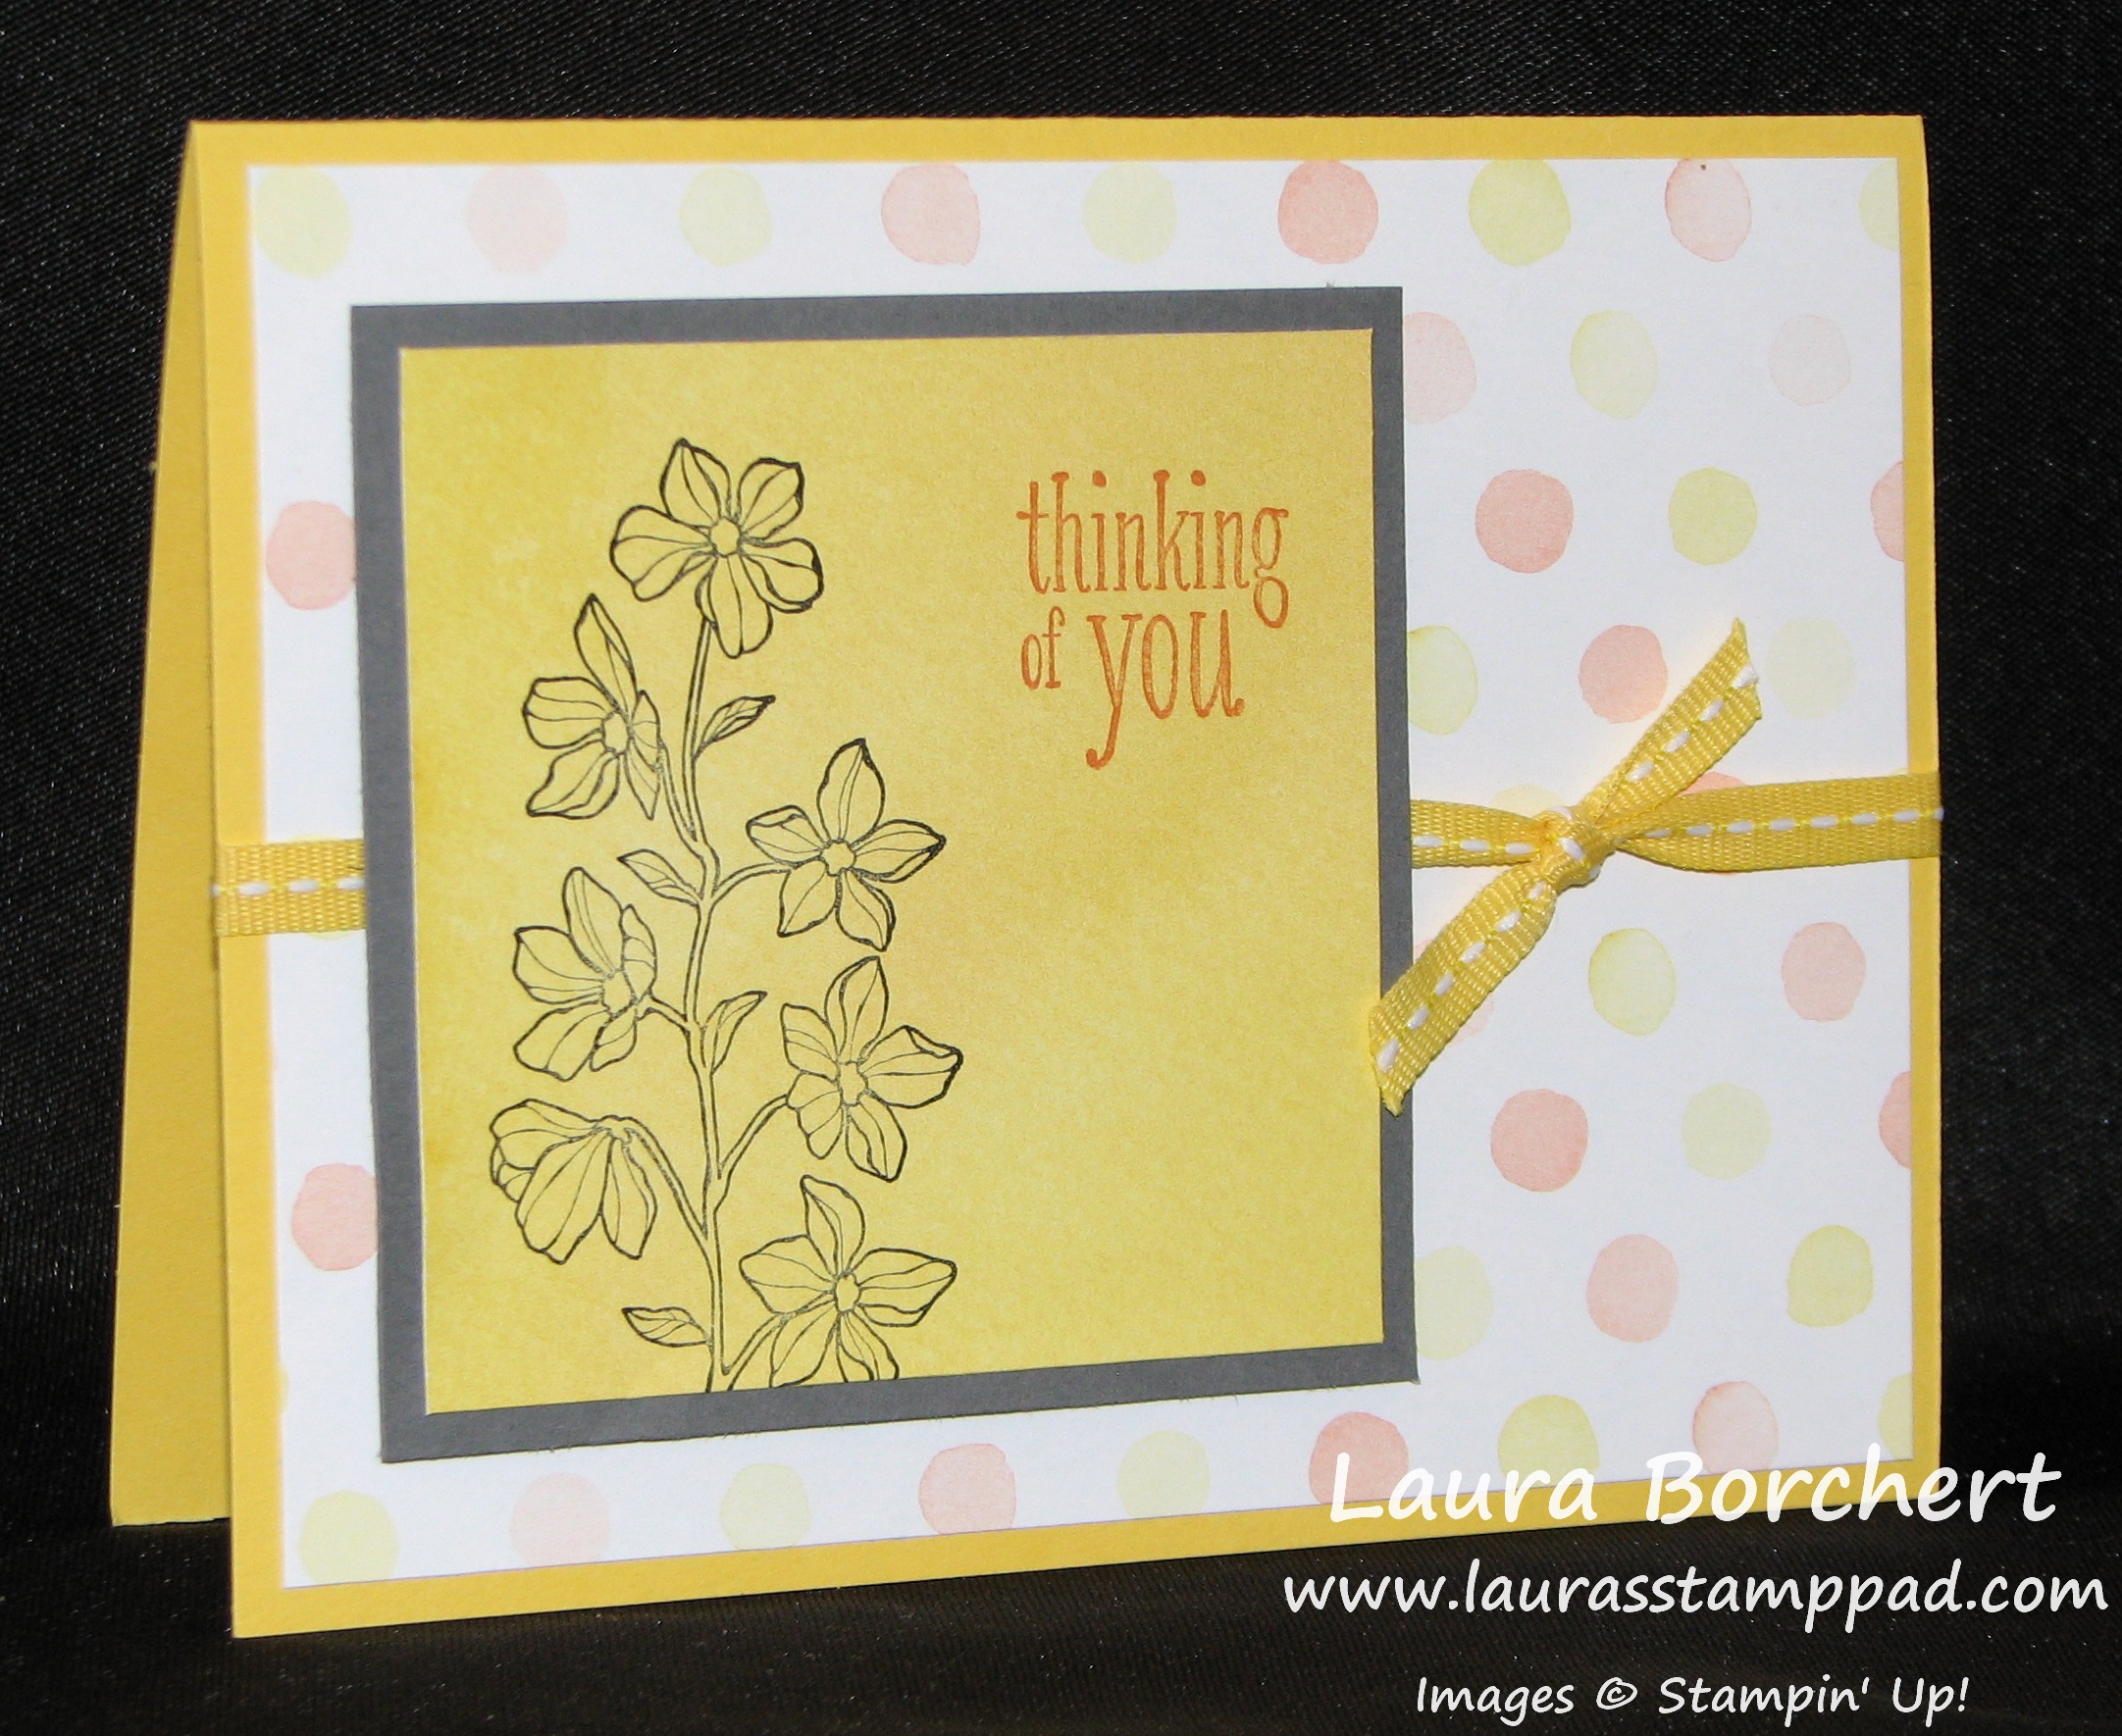
Peaceful Petals Watercolor Wonder DSP, www.LaurasStampPad.com

This one uses a different flower image from the Peaceful Petals Stamp Set and the Calypso Coral greeting shows up better on the yellow! Also, I added a little Daffodil Delight Stitched Ribbon!!!

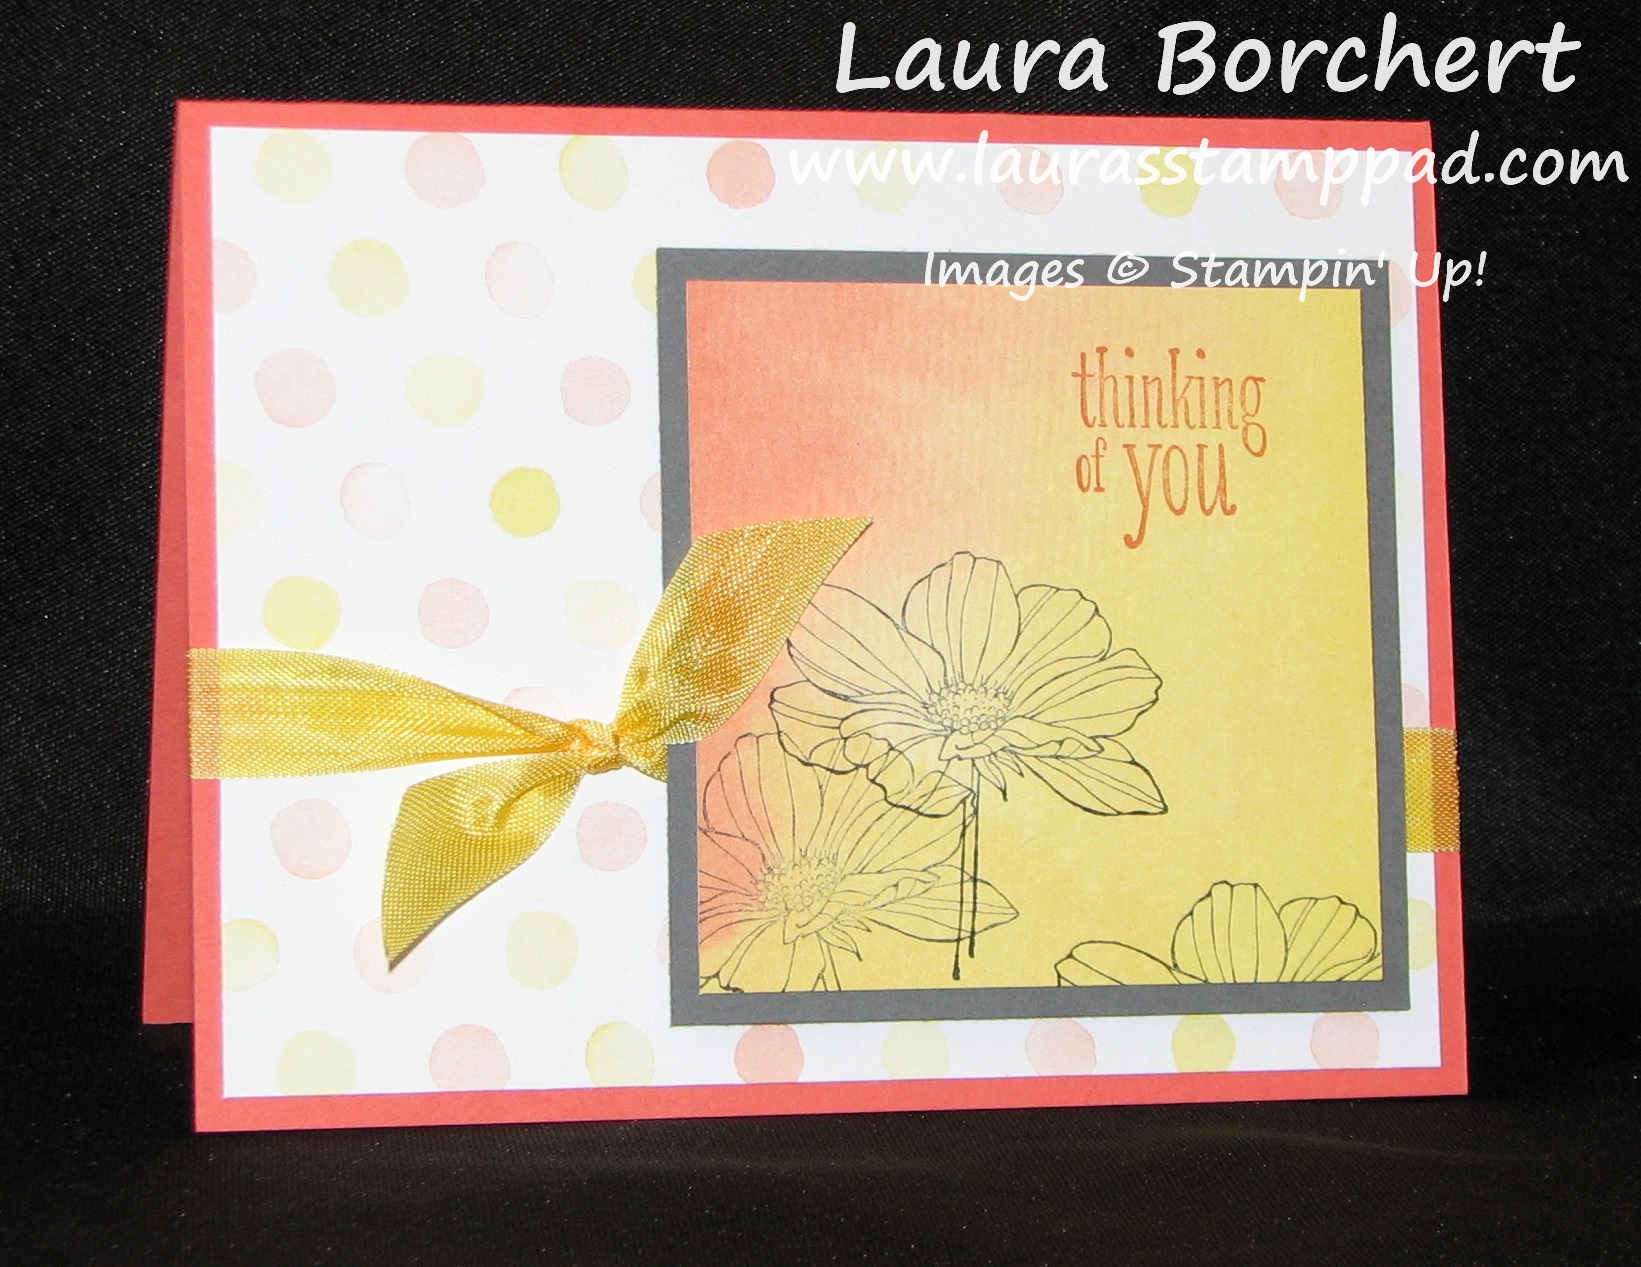
Peaceful Petals Watercolor Wonder DSP, www.LaurasStampPad.com

This one uses yet another flower from the Peaceful Petals Stamp Set and I went for some Daffodil Delight Seam Binding. I love all of the different ways you can make this card out of the same supplies!!!! LOVE IT! Be sure to get your Watercolor Wonder Designer Series Paper TODAY by clicking here!!! Also, it will qualify for my Anniversary Special that I’m running this week! Check it out here!

Happy Stampin’

~Laura


Wonderful Washi Tape!!!!

Posted on

I love playing with Washi Tape! There are so many ways you can use it and there is no need for adhesive because its sticky! Just apply in any direction, stamp a greeting and BOOM you are done!!! Check out these fabulous samples!

Washi Tape Card, www.LauasStampPad.com

I used the Watercolor Wonder Washi Tape from the Occasions Mini Catalog on this card and layered it on Baked Brown Sugar! I love how the Baked Brown Sugar goes with gold very well!!! I used the Washi Tape as little banners and just ripped the ends off which makes it even better – no scissors necessary!

Washi Tape Card, www.LauasStampPad.com

This card would be perfect for Graduation which is just around the corner. I used the Retro Fresh Washi Tape which is in the Occasions Mini Catalog as well. I stamped the greeting in Tangerine Tango in the middle and then without re-inking, stamped above and below the first greeting! There are so many colors you can get out of just one ink pad by stamping off!!!

Washi Tape Card, www.LauasStampPad.com

Father’s Day is right around the corner as well! Man cards are always hard for me because I like the color PINK and flower stamps! This is quick and simple and is the perfect man card for any occasion. I used the Epic Day Washi Tape for this one!

I hope you enjoyed these fabulous samples. You can check out more here and here! Washi Tape is perfect when you need to make multiples because it is just $4.95 for 3 Rolls! Now that’s a steal. Also, don’t forget you can order it this week and take advantage of my Anniversary Special! To celebrate my 10 years with Stampin’ Up!, when you place an online order using the HOSTESS CODE: XNYWCB4B, you will get a FREE gift from me!!!! I have Stamp Sets, Big Shot Dies, Ribbon, Designer Series Paper, and so much more that is just waiting to be in your stamp collection. But wait there’s more, I will also be drawing one lucky winner to get ALL of the Hostess Benefits!!!! Who doesn’t love FREE STUFF! This special will end on April 25th!!!

Happy Washi Tapin’

~Laura


Technique Tuesday – Coloring Ribbon!!!

Posted on

Have you ever looked at your ribbon stash and thought none of those colors go with this project? Well now you don’t have to worry! You can color your white ribbons to any color you desire!!!

Color Ribbon with Markers, www.LaurasStampPad.com

How simple is that? I have seen that when coloring on my Whisper White Organza Ribbon, the color comes out darker than the marker. When I colored on the Whisper White Taffeta Ribbon, it came out lighter. You could always allow it to dry and then go back and add more. Here is another sample using Pistachio Pudding!

Color Ribbon with Markers, www.LaurasStampPad.com

This is a fabulous way to get a ribbon to match ANY project you might be making without having to buy every single color out there!!! You can also use your Spritzers to color the ribbon. Just add alcohol (less than 90%) and some drops of re-inker. I prefer using alcohol over water because it dries quicker and you all know I don’t have the patience for watching it dry slowly. 😉 I hope you try this out and enjoy today’s Technique!!!

Don’t forget about my Anniversary Special that I’m running this week! Check it out here!!!

Happy Stampin’

~Laura


My Stampin’ Up 10 Year Anniversary Special!!!!

Posted on

My Stampin’ Up Anniversary of 10 years is this Saturday, April 19th!!! I wanted to share my celebration with all of you because it is because of all of you that I have been with Stampin’ Up and loving it for 10 amazing years. I can’t believe or be more thankful to have Stampin’ Up in my life! It has brought me all of you who are amazing, talented, wonderful friends of mine! I have traveled to a few cities I had never been to before! It has allowed me to quit my job when I just couldn’t take it anymore! It has allowed me to have a creative escape! Here is a picture of me around when I began as a Stampin’ Up Demonstrator (on the left) and me now (on the right). As you can see I’m still loving every minute of it (and this is just proof I love the color PINK!)

Anniversary Photo, www.LaurasStampPad.com

So of course we MUST celebrate!!!! Starting today, when you place an online order using the HOSTESS CODE: XNYWCB4B, you will get a FREE gift from me!!!! I have Stamp Sets, Big Shot Dies, Ribbon, Designer Series Paper, and so much more that is just waiting to be in your stamp collection. But wait there’s more, I will also be drawing one lucky winner to get ALL of the Hostess Benefits!!!! Who doesn’t love FREE STUFF! This special will end on April 25th!!!

Of course, if you would like to start your amazing journey with Stampin’ Up and me, click here to learn more or contact me with any and all questions you may have! I would love to help you out and let you have lots of fun like I am having!!!

Happy Stampin’

~Laura


Amazing Events and Anniversary Special!!!!

Posted on

Every year in April, 100 demonstrators gather together for one of the most amazing weekends ever!!! I have met many of them in years past and it is always great to get together and catch up and chat Stampin’! There are also lots of new people and one of the things I love the most about Stampin’ Up is meeting new people!!!! There were five ladies at my table this year that I had never met before and it was so great to hear their stories and swap ideas!!! After all, that is what Stampin’ Up is all about – CASEing (Copy And Share Everything). 🙂 The event consisted of Inspiring Speakers, Samples, Stampin’ Demonstrations, Techniques, Samples, Laughter, PRIZES and more Samples!!!!

Spring Into Stampin, www.LaurasStampPad.com

Here are just a few of the amazing ideas and samples I saw at the event! My mind is just exploding and I have been “playing” in my stamp room every day since just trying out these new ideas. Eeeee It was sooooo much fun! The picture of ME is while I was doing a demonstration of Wedding Items. You all know how I love weddings and so I shared some of my wedding samples!!!

Spring Into Stampin, www.LaurasStampPad.comOne of my favorite parts of the event was this service project that we were able to participate in for Ronald McDonald House! You can see here that Stampin’ Up and lots of Demonstrators do a lot to support the Ronald McDonald House. At the Spring Into Stampin’ Event, we stamped adorable animal images from the Storybook Friends Stamp Set onto 6 Notecards and Envelopes. We then stuck them in a little Polka Dot cellophane bag with some crayons and added a tag! They were super cute and will be given to the children at the Ronald McDonald House to enjoy! 🙂 Love it!!!

Spring Into Stampin, www.LaurasStampPad.com

Then there is the Annual Photo that I love taking – me and my upline – Meg!!!! She is the one who had that workshop 10 years ago and asked me if I would be interested in joining the fun! UM…YEAH I WOULD! Now 10 years later, I’m having the time of my life! Speaking of 10 years, April 19th is my official Anniversary Date and I’m offering a special starting TODAY!!!!

Starting today, when you place an online order using the HOSTESS CODE: XNYWCB4B, you will get a FREE gift from me!!!! I have Stamp Sets, Big Shot Dies, Ribbon, Designer Series Paper, and so much more that is just waiting to be in your stamp collection. But wait there’s more, I will also be drawing one lucky winner to get ALL of the Hostess Benefits!!!! Who doesn’t love FREE STUFF! This special will end on April 25th!!! I hope you enjoy celebrating with me!

If you are interested in joining the fun and attending this amazing Spring Into Stamping Event with me next year, click here to ask me any questions you may have or click here to learn more!!!!

Happy Stampin’

~Laura


Fabulous Friday!!!

Posted on

Happy Friday!!!! I have some Fabulous Deals to share with you today!!!!

Weekly Deals, www.LaurasStampPad.com

Loving the deals this week! Although I just bought 2 packs of the Indigo Baker’s Twine for some wedding invites I was making and now it goes on sale. Ugh….but that stuff is amazing and the cheapest ribbon ($0.0038 per inch)! I love using it to tie other ribbons like this or to wrap around the card like this or create an amazing lollipop like this! So many amazing ways to use this ribbon and it is my go-to for balloons too. As for my second favorite item….I think it is tie between the Punch Pack and the Secret Garden Framelits. You know me and my love for flowers! 🙂 Here and here are a few samples with the Punch Pack!!! These punches are perfect to decorate the center of flowers, add as a little background pop, and eyes for a little Punch Art piece with the circle!!! Here is an amazing project with the Secret Garden Framelits! I hope you enjoyed these samples using some fabulous products that are on sale!!!! Double Bonus!

Happy Stampin’ and have a Wonderful Weekend!!!

~Laura


Wedding Programs!!!

Posted on

As you all know, I LOVE weddings and have started working with Brides to create fabulous custom pieces to make their day even more special! I have been doing lots of wedding lately but I am waiting to post them till after the wedding! Well today I am sharing with you some Wedding Programs that I recently did for an amazing couple!!!

Wedding Programs, www.LaurasStampPad.comOkay, so first of all I love the colors – Melon Mambo and Night of Navy!!!! (Melon Mambo was one of my wedding colors 🙂 ) These were very basic but super fabulous! I did some in Melon Mambo and some in Night of Navy which was super cute because then they were able to enjoy both colors! Also, these are perfectly personalized with the “R” monogram! These programs were double sided – one side was the order of events and the other side was the wedding party and family members!  I loved making these and when the Bride came to pick them up, she was so excited and bursting with happiness! I’m so happy I was able to add this special touch to make her wedding day even better! If you are getting married or planning a party and need help with the invitations, programs, thank you notes, party favors and so much more, reach out to me! I’m happy to help you! You can check out more samples that I have created here and here!


Easter is Coming!!!

Posted on

Embossing Foil, www.LaurasStampPad.comI know Easter is still a few weeks away but now is the time to start making your cards and gift projects! Here is a quick and simple Easter Card but you could always change out the greeting and this card would be perfect for any occasion! I used the Summer Picnic Designer Series Paper which has perfect Spring colors! I love it! Then I stamped a flower from the Mixed Bunch Stamp Set and punched it out with the coordinating Blossom Punch! I stamped one flower in Wisteria Wonder and then another one in Pear Pizzazz. After punching them out, I cut off two petals from the Pear Pizzazz flower and attached it to the back of the Wisteria Wonder flower to make it look like leaves! I added a little Candy Dot in the middle of the flower for a little POP! Also, have you noticed the shiny foil in the background? That’s right, I embossed some of the Silver Foil with the Argyle Embossing Folder! It gives a little shine, texture, and dimension. Perfect!!! For more samples with Foil, click here and here! I hope this gives your some inspiration for your Spring or Easter projects!

Happy Stampin’

~Laura


Technique Tuesday – Treat Boxes with the Tag Topper Punch

Posted on

Happy Tuesday!!! You know what that means – I have a fabulous technique to share with you today!!! I love using products in more ways than the obvious use. The Tag Topper Punch is for making fabulous tags or bookmarks like these!!! But now I can fabulous little treat boxes too!!!

Tag Topper Punch Treat Box, www.LaurasStampPad.com

Isn’t it cute??? And the best part is it was super simple (and quick) to make and we all know that you always need more than one treat box when you are making them!!!!

Supplies Need: Cardstock, Tag Topper Punch (Scallop or Angled), Sticky Strip, and any kind of decoration (Stamps, Designer Series Paper, Ribbon, etc)

For my little box (which holds about 8 Hershey Kisses), I started with a piece of cardstock measuring 2″ x 6-1/2″. Then you will score that piece long ways at 2-3/4″ from each end (that will leave an inch between the two score lines). Then you will punch both ends with your Tag Topper Punch and fold on the score lines. Then you will need two 1-1/2″ squares which you will score on two opposite sides 1/4″ in. (Score lines are marked in pen for you to see!)

Tag Topper Punch Box Template, www.LaurasStampPad.com

Now you will add Sticky Strip (best hold for boxes) to the scored tabs on your 1-1/2″ Squares! You will then attach those to the ends of your box!!! Now your box is complete and you can decorate and add goodies! I decorated mine with the Kaleidoscope Designer Series Paper belly band and stamped my greeting from the Label Love Stamp Set in Crushed Curry and punched it out with the Artisan Label Punch!!! Then I added a little bit of Whisper White Taffeta Ribbon on the top to hold the kisses in!!!

Tag Topper Treat Box, www.LaurasStampPad.com

You can make your boxes as big or small (long) as you need but they will always be 2″ wide in order to fit into the punch. With this one I made it with only 1/2″ long to fit the little Hershey Bars (fits 2 perfectly). I also didn’t put sides on this one and instead let my belly band be the sides and what holds it together! So many fun little boxes you can create with this punch!!! I hope you try it out and let me know what you think in the comments below! I love hearing from you all!!!

Happy Punchin’

~Laura


Scallop Tag Topper Punch!!!

Posted on

The NEW Tag Topper Punches that are in the Occasions Mini Catalog are super cute and fun to use! There is the Scallop Tag Topper Punch and then Angled Tag Topper Punch!!! Here are a few samples using them to make tags….the obvious use! Check back tomorrow to see some super cool ways to use these AMAZING punches!

Tag Topper Bookmark, www.LaurasStampPad.com

Look how cute and simple this bookmark is! All you need is a 2″ wide piece of cardstock (it can be as long as you wish) and punch the top and decorate! I used the Corner Rounder Punch for my layers so it would match the rounded corners of the tag. I added some of my favorite Designer Series Paper – Watercolor Wonder!!!! (LOVE!) For the Ribbon top, I used some Calypso Coral Chevron Ribbon and rather than making a knot, I just took some Baker’s Twine and tied the ends! Super cute and knot (hehe) as bulky! This is super simple that you could make tons of them for Teacher Gifts, Bible Study Groups, as a gift with a Cookbook or together with a child or group of children!

Flower Tag Topper Punch, www.LaurasStampPad.com

Here is another fabulous project – this card has a stamped tag on the the front. I used more Watercolor Wonder DSP and my Peaceful Petals Stamp Set! I stamped the image in Calypso Coral and then added a little color on some petals with my Blender Pens. I cut out one of the flowers, added some leaves, and used Stampin’ Dimensionals to make it pop out!!! Love love love the colors of this one! Be sure to check back tomorrow for another fabulous way to use this punch! And remember this adorable card using this punch? I LOVE when one punch can do so many different things! It really gives you more bang for you buck!!!

Happy Stampin’

~Laura