I’m telling you Gold is In!!!! This Good As Gold Card Kit from the Sale-A-Bration Catalog is super cute and so easy!!!! It comes with everything except adhesive and in many different languages! I stuck with Thank You and For You because I’m not sure what the rest say….except Merci! Is this cute or what??
This fabulous kit comes with the pre-printed Polka Dot Card base, all 3 of the little banners (pre-printed and ready to go) and a piece of Gold Cord and Island Indigo Baker’s Twine for each card! And that’s not all, it also comes with the Crumb Cake envelope and gold liner!!!! I popped out that tiny little gold star and stuck in the corner on the inside of my card for a little bling in there! This card hits almost all of my favorites – Polka Dots, Colorful, and Bling – only missing some PINK! 🙂 You can earn this fabulous kit for FREE for every $50 in product you order!!!! Now that calls for a Sale-A-Bration!!!!
I think my favorite items from the Sale-A-Bration Catalog are the Banner Blast Stamp Set and coordinating Banner Punch! I mean how can you not love it when you see a card this cute?!?!?!
Eeee So precious and super simple! I couldn’t help myself and created a million (okay like 8) of these cards using the New In-Colors – Crisp Cantaloupe, Coastal Cabana, Strawberry Slush, Pistachio Pudding, and Baked Brown Sugar! I picked one of those colors for my card base and then got out my Whisper White scraps. The piece in the middle is 3″ x 5-1/2″. I used Whisper White Baker’s Twine and adhered it to the back of the cardstock with Stampin’ Dimensionals (LOVE). I added more Dimensionals to attach it to the card front. I think took all of my scraps and stamped the little Banners in all different colors and punched them out! I attached each of them with a Dimensional too! (I’m telling ya, I love those things!) Some of the cards I used all of the colors, others I used the same color as the base, and others I mixed 2 colors of banners. Not sure which I prefer the most though! What do you think? Leave a comment below! The greetings are from the Happy Day Stamp Set and I used the Baked Brown Sugar for that. I had this card at my stamp party this past weekend and the ladies there thought it was an adorable baby card. I think it is an adorable card for all occasions! 🙂 And remember both of these items are FREE Sale-A-Bration items that you can earn with every $50 you spend from now till the end of March!
There are so many fabulous specials and exciting news to share with you! First of all, the greatest promotion ever has begun – Sale-A-Bration!!!! You can check out the brochure here – Sale-A-Bration Catalog 2014! This year Stampin’ Up created a few bundles which total about $50 and then you will get your FREE item! These bundles are perfect for someone just getting started or the seasoned stamper. There is a card making bundle, home decor bundle, scrapbook bundle and gift packaging bundle! LOVE THEM! Now is the time to stock up or purchase your supplies for an upcoming project!!! There is also a great deal for Hostesses! When you party hits $300 or more, you earn an additional $30 in Hostess Dollars! That’s a lot of FREE Stuff!!! AND if you just can’t narrow down your wish list, you can join Stampin’ Up with the Starter Kit which is still just $99, but not you get $150 worth of product rather than the usual $125!!!! And all of your future orders are 20% off! You can join for the discount on fabulous products, to meet new people, to earn a little extra income or maybe another reason! There are all types of Demonstrators out there! If you have any questions, feel free to ask me! I would love to chat with you about it! This promotion ends on March 31st!!!
Have you always wanted to emboss your cards to have a little texture or bump bump (that’s a technical term 😉 )on your card? Have you longed for the Big Shot but it just never fit in your crafting budget? WELL NOW YOU CAN! Stampin’ Up has come out with this fabulous Texture Impressions Embossing Machine! This little machine is only $29.95!!! I love love love embossing!!! I find that the little bit of Polka Dots or Baroque image can really take a card from wow to AMAZING! AND when you purchase this and a few embossing folders to equal $50, you can get the Decorative Dots Embossing Folder for FREE!!! Click here to check out a video on how it works! Note: This machine can not do Big Shot Dies or Framelits, only Embossing Folders!
And of course, don’t forget this week’s Weekly Deals!
So many fabulous things going on right now! Let me know if you have any questions, need to place an order, or would like to Hostess a Party! I’m glad its HOT HOT HOT in my crafty world because it is COLD COLD COLD in the real world! 🙂
Happy Tuesday!!! You know what that means – I am sharing a fabulous Technique with you!!!! This card is beyond amazing!!!! It looks fabulous and you use lots of scraps….who doesn’t have a million of those hanging around?
I cut strips 1/2 inch by 2-3/4 inches in various colors and then ran them all through the Big Shot in an embossing folder. You can pick whichever one you have handy or your favorite. I used the Beautifully Baroque Embossing Folder. I then started placing them on the card. I placed the 2 end candles down and then the middle one and then filled in. This helped me with spacing each of them! I used my Basic Black Marker (pen tip) to make the wicks. Then using So Saffron cardstock, I punched out the wing from the Bird Punch! I brushed the rounded (bottom) part of the flame with my Sponge Daubers and Pumpkin Pie ink. I adhered each of them to the card with a Stampin’ Dimensional on the back. Then I took my Dazzling Details (love this because it adds bling without the powder going EVERYWHERE) and added a little to the tips of each of the flames. I did this after assembly so it could be set aside to dry for a bit. The greeting is from the Bring On The Cake stamp set and punched out with the Decorative Label Punch. Then I punched another Decorative Label in Basic Black, cut it in half long ways and adhered it to my other punched piece. This gives the perfect little layering affect. LOVE IT! The little red dots bordering my greeting were created with my Real Red Marker….just dot dot dot dot and a million more dots. 🙂 I hope you have enjoyed this technique for making a amazingly adorable card with lots of scraps!!! Try it out yourself and send it to me! I would love to see what you have created!
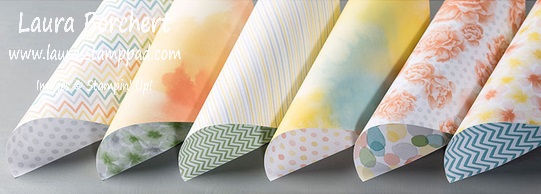
This paper is so beautiful and fun to use for springy cards…or any other type of card. I am looking forward to spring A LOT though! Check out this fabulous sample that was created by a fellow demonstrator of mine – Mary Ellen Stites!
The Note Cards and Envelopes are fabulous because you get 20 printed cards and envelopes for just $12.95! All you really need to do is add a greeting for a complete card! You can also decorate it up a little with some ribbon or embellishments!
So many fabulous ways to create a watercolor look without ever getting out some water or waiting for you masterpiece to dry! I hope you try out watercoloring though because it is super fun! Check out some ways to watercolor here!
The Wedding Trend for awhile now has been Rustic and Elegant. It seems everyone is doing the burlap, doily, lace, pearls, mason jars, barn theme! Here are a couple samples of cards that I have recently done to help out a friend with her daughter’s wedding!!!
Here are a few of the items that were made! The cards above were the Thank You cards for the Bride to send out to all of the guests after the wedding! They were quick and simple and kept the theme of the wedding going! And speaking of cards, I created these adorable ring binders for the Bride to keep all of the cards she received together! The one has the last name initial on it and the other one has the initials of the Bride and Groom! I kept the doily, lace, pearl theme with these items too!
This is the actual Wedding Invitation (well half of it to keep the privacy of the Bride and Groom). The wording was on the right and on the left was this fabulous white doily using the Hello Doily Stamp! It was stamped and then embossed in Whisper White which gave it a fabulous raised texture! This piece of Crumb Cake was also layered on a piece of Very Vanilla Cardstock but I didn’t get a picture of the final piece.
This adorable tag was used at the Bridal Shower on the little tea cups that everyone got as a favor for coming! Again I kept with the theme and used the Victoria Crochet Trim for a rustic look!
And last but not least, this is the wedding card that I made! Again I used the Hello Doily Stamp and embossed it. Then I took a sponge dauber (love them) and added a little Chocolate Chip ink around the doily. I really loved how it turned out!
If you are getting married or planning a party and need some help with the invitations, party favors, or more, reach out to me and I can assist you with your crafty side or I can create the item for you! Email me for more information or comment below! Check out more samples here and here!
It was probably less than a year ago when I heard about the Ombre look (I never said I was a fashionista or super knowledgeable about current trends). 🙂 BUT since then I have seen it literally everywhere…..cakes, hair, clothing, decorations, and so much more! I have loved the look with my cards too!!! It is so beautiful and the gradual colors are amazing! You can check out another Ombre Card here!
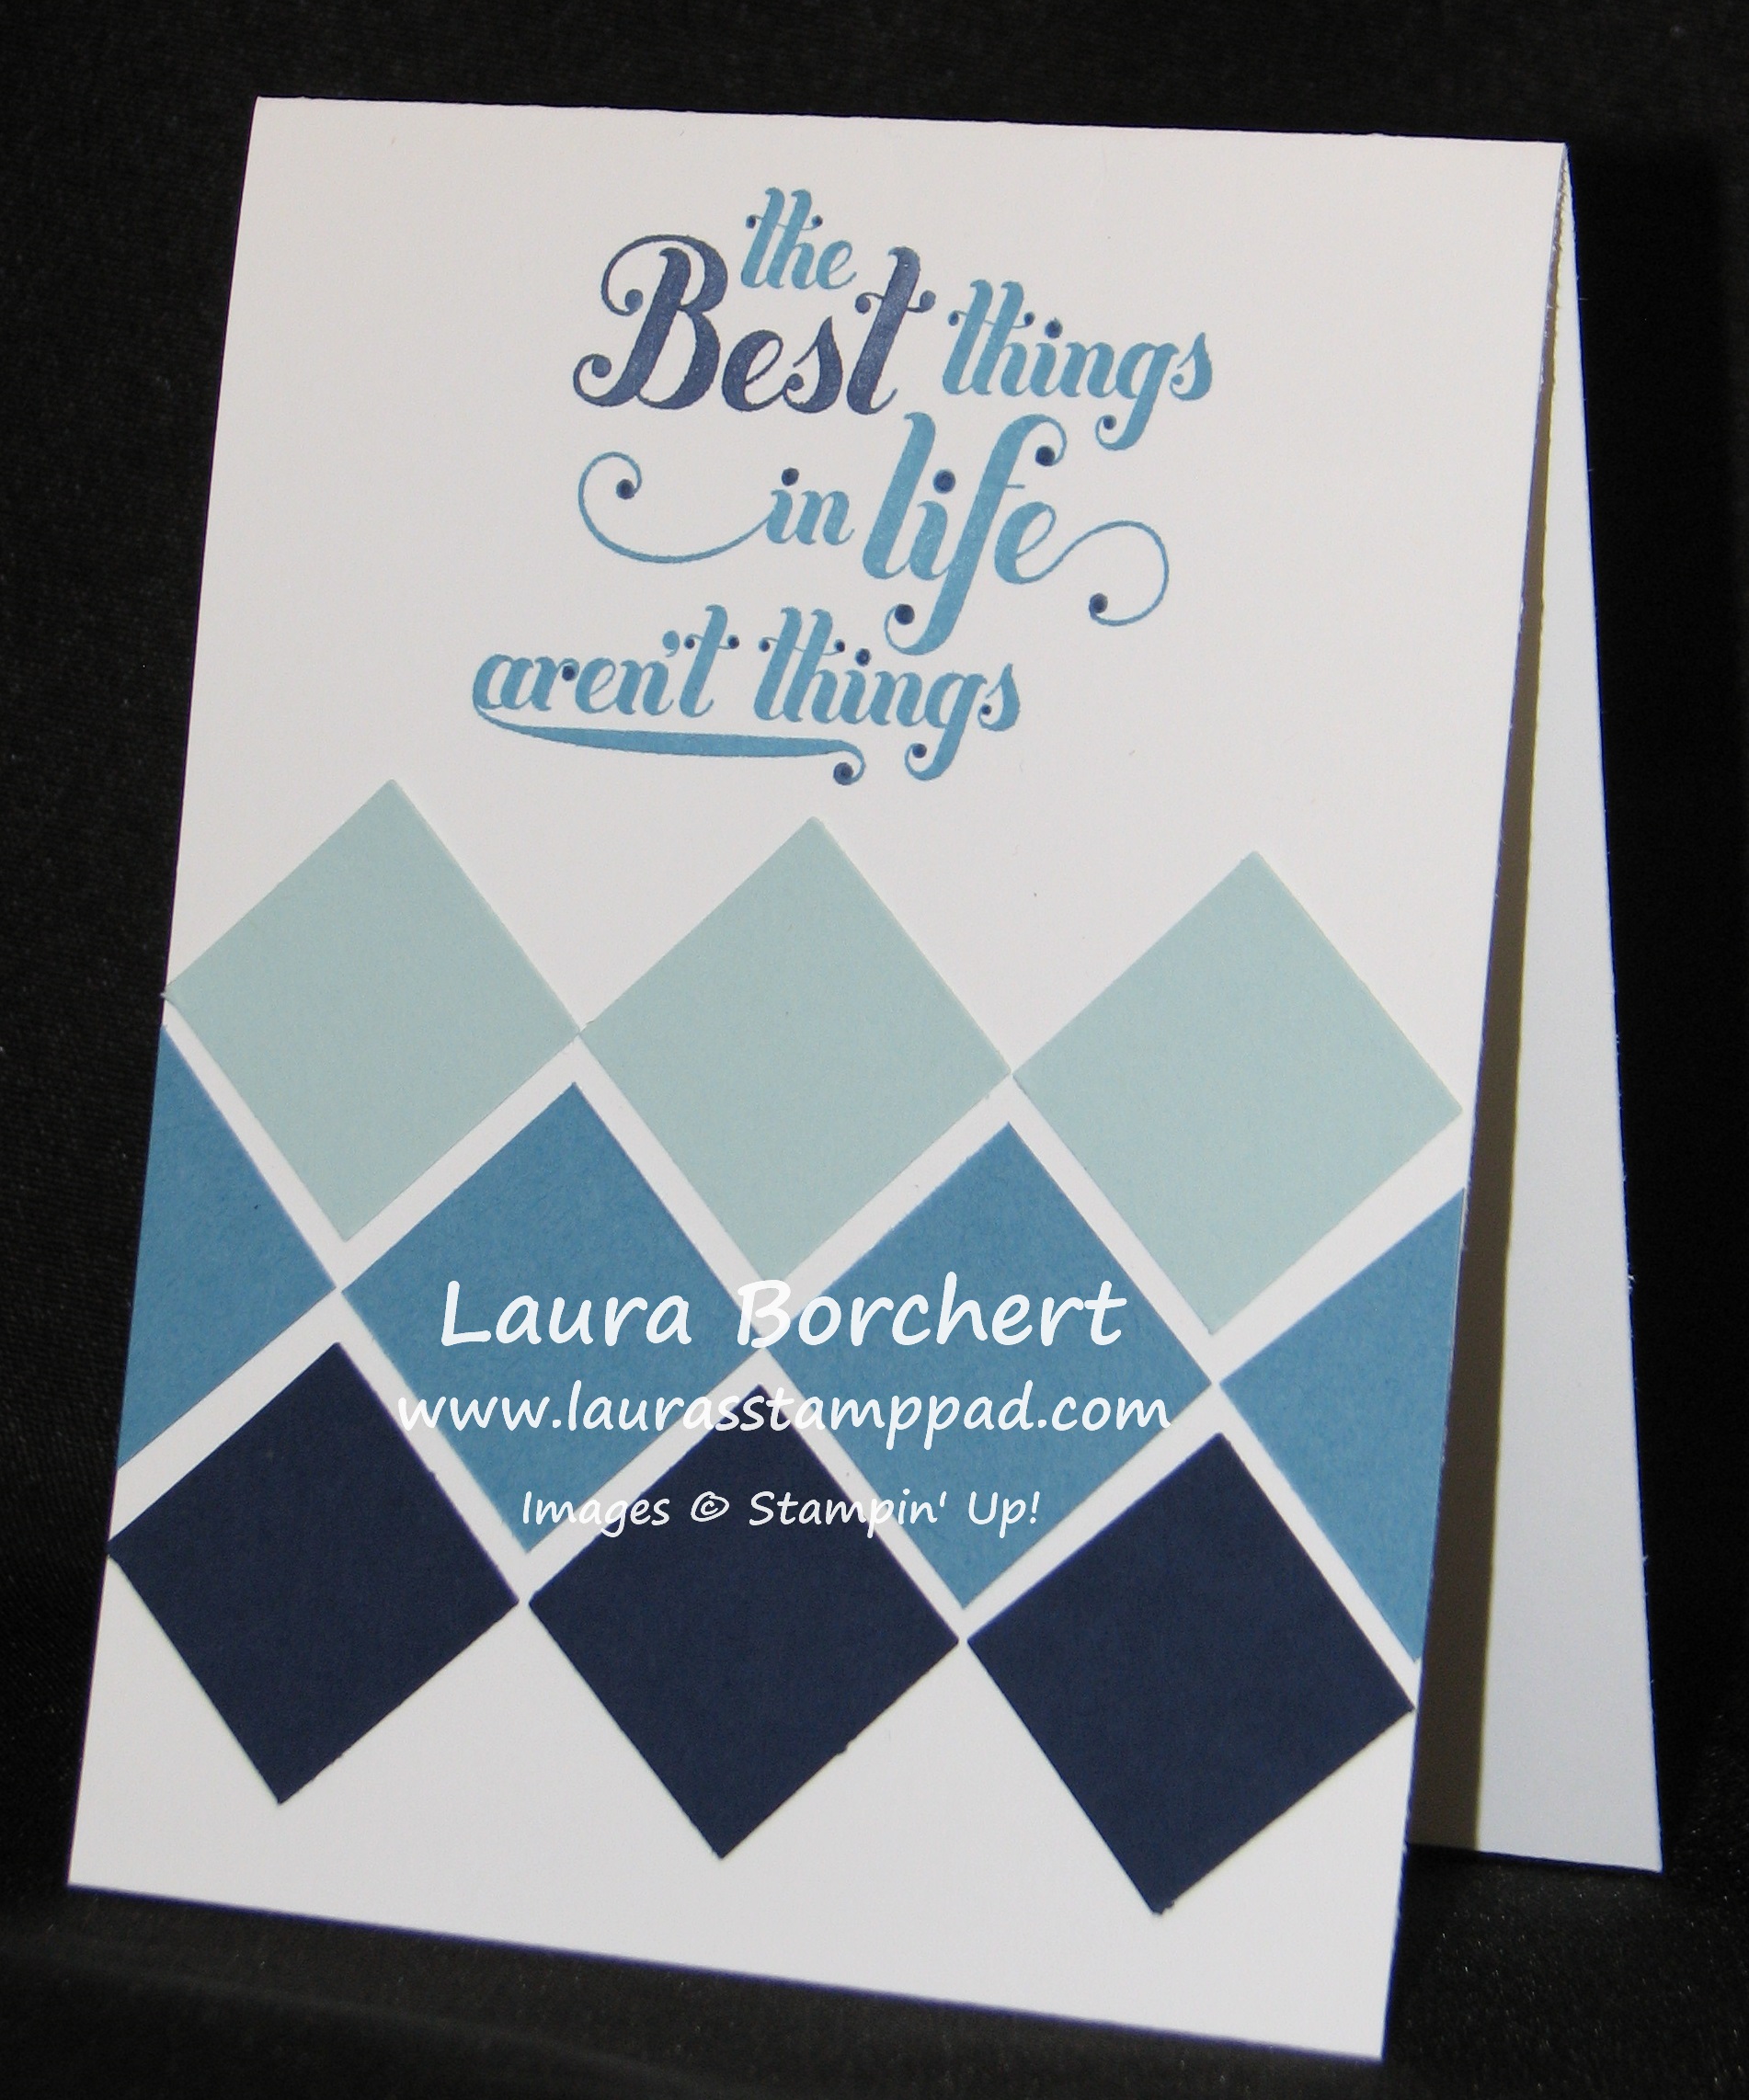
This card is so beyond simple I almost felt the need to add something more to it but then I thought no, simple it good! I have punched Night of Navy, Marina Mist, and Soft Sky one inch squares. You could just use your paper cutter to create the one inch squares too! The greeting is from the Feels Good Stamp Set and I used my markers to ink it up so I could use more than one color! This is a great use of those left over scraps that you have laying around too! Try out an Ombre look and send me you masterpiece! I would love to see what you come up with!
Mason Jars are so cute to me and what is even better is how useful they are!!! I have done lots of decorated mason jars for various gift ideas like adding layered cookie mixes, adding actual cookies or candy, adding a few gift items like nail polish and a nail kit, and so many more fabulous ideas! Another great idea is to use them at parties. You can create a layered dessert in them, add some of the items listed above as a party favor or use for the drinks at the party! The possibilities are endless!
How cute are these? I have decorated the one on the far left with a Tea Lace Paper Doily and then a punched circle piece of cardstock! The middle one is decorated with punched circles of cardstock on the lid and layered on the side with Ruffled Ribbon around the edge! Super adorable! The one on the right is the same Ruffled Ribbon tied around the jar and into a bow and some punched circles for the lid! You could add any type of greeting on the side to match you Bridal Shower, Wedding, Birthday or Gift theme! Greetings such as Thank you for coming, Happy Birthday, Enjoy your treats, and so many more! You can check out some of my other decorated mason jars here!
Happy Tuesday!!!! That means I have a fabulous Technique to share with you! This week I’m going to show you some watercoloring techniques! There are so many different ways to watercolor and tools to use like regular cardstock and Watercolor Paper, Blender Pens and Aqua Painters, reinkers and markers, and so much more!
This is for the card pictured above! First you will stamp your image with Stazon onto your Watercolor Paper! I love using flowers for watercoloring partially because I LOVE flower stamps and partially because they are so much fun to watercolor! You will need to use Stazon Ink because this ink is permanent and will not bleed when you spritz it with water! After it is stamped, I took my Daffodil Delight and Pumpkin Pie markers and colors the flower in. Once you have colored the entire flower, you will spritz it with water generously and tilt the piece of paper so that the colors run to the edge and bleed all over. This will then need to sit aside till it dries before assembling your card!
Here is another Watercolored Card! This card uses our Naturals Composition Designer Series Paper – most amazing paper ever because it comes pre-embossed!!!! There are 2 sheets of the following: music notes, damask, flowers (pictures above), notebook lines with a flower image in the corner, woodgrain, and filigree. It is so much fun to color with this paper! For this card, I used my Aqua Painter (filled with water) and picked up color from a reinker drop and then painted on this card. The embossing helps to keep the water contained in the image. I have also done a similar card but used just markers on the paper and it came out just as beautiful! Using the markers gives it a darker, bolder color which I LOVE because I love bold colors. I know there are people out there who like a lighter color and a more watercolor look though! 🙂
I hope you try out watercoloring. You don’t have to be an artist to do watercoloring….trust me I am not an artist and I have a lack of patience for the drying process but I can still do it so you can too!!! Check out other watercolor project here! Try it out and let me know how it goes in the comments below!!!
So I thought I would share a few more pages of my 2013 Scrapbook that I am creating in My Digital Studio! You can see the pages that I have shared before here and here!!!
My Scrapbook pages are more about the pictures than the embellishments partially because I am a camera freak and take millions of photos for even the simplest occasions and partially because that is what is most important to me in my scrapbook! The page above uses one of my favorite features – the corner rounder! I love rounded corners on my pictures. I added in some brads and some journaling and I was done!!!
Now this page has a few more embellishments but that’s not what I see at first glance! I see my adorable nephew with amazing little blonde curls! Eeee So Precious!?! As you can see I rounded the corners of these photos as well and added some journalling. On this page, I added color to the work Family so it would POP and a few flowers from one of the Simply Scrappin’ Kits!!!
Okay finally a page I didn’t round the corners so you all don’t think I’m crazy 😉 (although I’m pretty sure I am) This page is pretty simple as well with just a few pictures and some journaling! I do have some pages with more embellishments and layers but those aren’t all complete yet! I tend to make my pages and leave room for journaling but move on to the next page. Then I go back and do all of my journaling and final touches later. I sat down one evening and did August – November in one evening while watching TV too! And the best part was at the end of the evening all I had to do was hit save and close my laptop. Digital Scrapbooking is much easier and a lot less messy than traditional scrapbooking! And there are always new downloads available every Tuesday!!! I hope you enjoyed these pages and keep on the lookout for more because I am hoping to have this album complete soon so I will be sharing more pictures! If you want to try out My Digital Studio (MDS), you can for FREE for 30 days! It is a great chance to check it out before deciding if it is for you! Click here to start your trial!