Happy Valentine’s Day!!!

Posted on

HAPPY VALENTINE’S DAY! I love Valentine’s Day because it is a wonderful day of showing your love! Of course, we should show our love every day of the year but this day is dedicated to it! Here are some of the ways I showed my love!

Valentine's Day Treat Bags, www.LaurasStampPad.com

Each of my nieces and nephews got a little monster with a piece of candy in it! I thought those were fitting….after all they are all my little monsters. 😉 The treat bags went to their parents! I didn’t want to leave them out and of course if the children needed more candy, there was plenty in there! And this fabulous card went to my #1 Valentine – MY HUSBAND!

Be My Valentine, www.LaurasStampPad.com

That card was created with the Banner Blast Stamp Set and matching Banner Punch from the Sale-A-Bration brochure! The little heart made a perfect background as well as a cute banner! I used Strawberry Slush cardstock and ink on this one….of course it had to be PINK, my favorite! I hope you have a wonderful Valentine’s Day and know that I love you all today and every day!

 Happy Valentine’s Day!

~Laura


NEW Personalized Stamps!!!!

Posted on

New Personalized Stamp, www.LaurasStampPad.com

I love how Stampin’ Up is allowing us to create our own stamps now! This fabulous NEW Photopolymer Stamp can be personalized to whatever you want it to be. Here are just a few ways you could use this stamp:

~Address stamp
~Thank you
~From the classroom of (for a teacher gift)
~From the kitchen of
~Made with love
~This book belongs to
~From the desk of
~Just married
~Save the date
~Promote your business (add your name, website, and contact info)

So many fabulous ways that you could use this stamp! It coordinates with the 1-3/8″ Circle Punch and you will need Clear Block B or bigger! Order your’s today by clicking here! And don’t forget if there is another image you would like to stamp but can’t seem to find a match with a set in the catalog, you can create your own with the Undefined Kit! Check out one of mine here! I hope you try it out and be sure to share with my your carved stamp as I would LOVE to see what you come up with!

Happy Stampin’

~Laura


Weekly Deals – I’m So Excited!

Posted on

This week’s Weekly Deals have me SUPER EXCITED!!!!! The Floral Frames Framelits are on sale this week and that is HUGE!!!! I love these frames and the matching Daydream Medallion Stamp Set!

Weekly Deals 2.11, www.LaurasStampPad.com

You can check out a few posts I have done with the Floral Frames Framelits by clicking here and here! And I have a few more more projects coming next week using these amazing framelits. LOVE THEM!!!!! The best part is you can get the Daydream Medallion Stamp Set, Floral Framelits and one other little item to get your order to $50, and then you get to pick out a FREE items from the Sale-A-Bration brochure! Gotta love free stuff!!!

Another favorite item of mine that is on sale this week is the Artisan Label Punch! I just recently got this punch (within the last 2 months) and it is amazing! There is a matching stamp set for this punch as well – Label Love! You can check out a few samples here using those fabulous products!

Remember these items are only on sale until Monday, February 17 at midnight! You can always ask your Valentine for Stamp stuff this year! That would win my heart over! 😉

Happy Stampin’

~Laura


Technique Tuesday – Diagonal Designer Series Paper Card

Posted on

Happy Tuesday!!! You know what that means – I’m sharing a fabulous technique with you. I’m not going to lie, I had a hard time coming up with the name for this card so Diagonal Designer Series Paper Card is what it is!!!

Diagonal Designer Series Paper, www.LaurasStampPad.com

Supplies Needed: 12″ x 5-1/2″ piece of Designer Series Paper, Paper Cutter, Score Blade or Bone Folder

Using a 12” x 5-1/2” piece of Designer Series Paper, score at 2”, 4”, 8”, and 10”. Fold on those score lines making mountains on either side of the center. Along the 5-1/2” side, put a little mark at 2-3/4” with a pencil. Then cut from the 4” score diagonal to that 2-3/4” mark! Do that on both sides. You will then flip those pieces over and layer them on the bottom of the mountains. Then decorate your card as you wish!!! If you want to watch a video of me using this technique click here!

Diagonal Designer Series Paper, www.LaurasStampPad.com

I always need Thank You cards so I went with that greeting for this card. I used the Sweet Sorbet Designer Series which is one of the items you can earn for FREE through Sale-A-Bration! The greeting is from the Lots of Thanks Stamp Set! The things I love the most about this fabulous card is that you can get 2 out of one sheet of 12″ x 12″ Designer Series Paper and you get to see both sides of the fabulous paper. It is hard for me sometimes to pick which side of paper I want to use and this card doesn’t require that decision! 🙂 I hope you enjoyed this technique and try it out for yourself! Let me know your thoughts in the comments below!

Happy Stampin’

~Laura


Daydream Medallion Birthday Invitations!!!

Posted on

A friend of mine reached out to me to make invitations for her mother’s 60th Birthday Party! I was so excited to be able to help with this party!! I know that the Mother’s favorite color is Purple and she loved a rustic/vintage look. Here is what I came up with:

Daydream Medallion Invitation, www.LaurasStampPad.com

What do you think?? I think I nailed it on the head!!! I used the Daydream Medallion Stamp Set which has quickly became my go to stamp set. You can check out more samples here and here! LOVE IT! I randomly stamped all over and then added a little more ink with my sponge daubers for the bottom half of the card. Then I die-cut all of the smallest flowers from the Floral Frames Framelits and brushed the edges with Elegant Eggplant ink and my sponge daubers. I brushed the edges of the banners as well. Here are a few of the steps I took when making these.

Daydream Medallion Invitation, www.LaurasStampPad.com

Remember assembly line is the best way to make multiple cards!

Daydream Medallion Invitation, www.LaurasStampPad.com

I even stamped a little on the corner of the envelopes to make them match and a decorated envelope in the mail is sooooo exciting to receive! I love how they turned out and the Birthday Girl LOVED them too! HAPPY BIRTHDAY, Sue!!!!!

If you are having a party or wedding and need help with the invitations, programs, party favors, and more let me know and I would love to help you make the perfect party!!!!

Happy Stampin’

~Laura


Fabulous Deals You Won’t Want to Miss!

Posted on

WeeklyDeals, www.LaurasStampPad.com

Here are the fabulous Weekly Deals!!! All of these items are on sale until Monday night at midnight! Great chance to stock up on ribbon and other fabulous embellishments! Check out a few samples here and here for ways to use these products!

My Paper Pumpkin, www.LaurasStampPad.com

There is a fabulous My Paper Pumpkin deal going on now too!!!! When you sign-up for the subscription, you will get the five 2012-2014 In Color Markers! That is a fabulous deal and a great start to your stamp/ink collection. This kit is just $19.95 and it comes right to your door with everything you need to create a little crafty project! And even after the project is created, you will still have ink, markers, clear block, and stamps to use for future projects! JUST $19.95!!! That’s a steal! Sign-up before February 10 to take advantage of this special by clicking here! I hope you enjoy your monthly creative escape!

Happy Stampin’

~Laura


You’re Lovely!!

Posted on

It is Sale-A-Bration time!!!! That means that your earn free stuff as a customer, hostess, and if you wish to join Stampin’ Up! The stamp set You’re Lovely is so amazing! It has fabulous flowers and greetings! Check out this sample!

You're Lovely, www.LaurasStampPad.com

This card is super simple and so amazing! I used my favorite color – Pool Party and Basic Gray! The Designer Series Paper is also one of the items you can earn for FREE with Sale-A-Bration – Sweet Sorbet! I added a little White Baker’s Twine for some texture. For the greeting, I stamped the image in Basic Gray on a scrap piece of Whisper White and then again on a piece of Basic Gray. I die-cut the Basic Gray piece with the Deco Labels Framelits and I punched out the white piece out with my Circle Punch! Then I layered them with Stampin’ Dimensionals! TIP: That layered piece of Pool Party cardstock is 4″ x 5-1/4″ which is just 1/4″ inch less than the card base. When cutting these pieces out, you end up with a little extra piece of cardstock. I have millions of these pieces and so I started putting that little piece on the inside as a little decoration. That is the piece that you can see on the inside of the card! 🙂 Always looking for ways to use my scraps!

Happy Stampin’

~Laura


Bright Butterflies!!!

Posted on

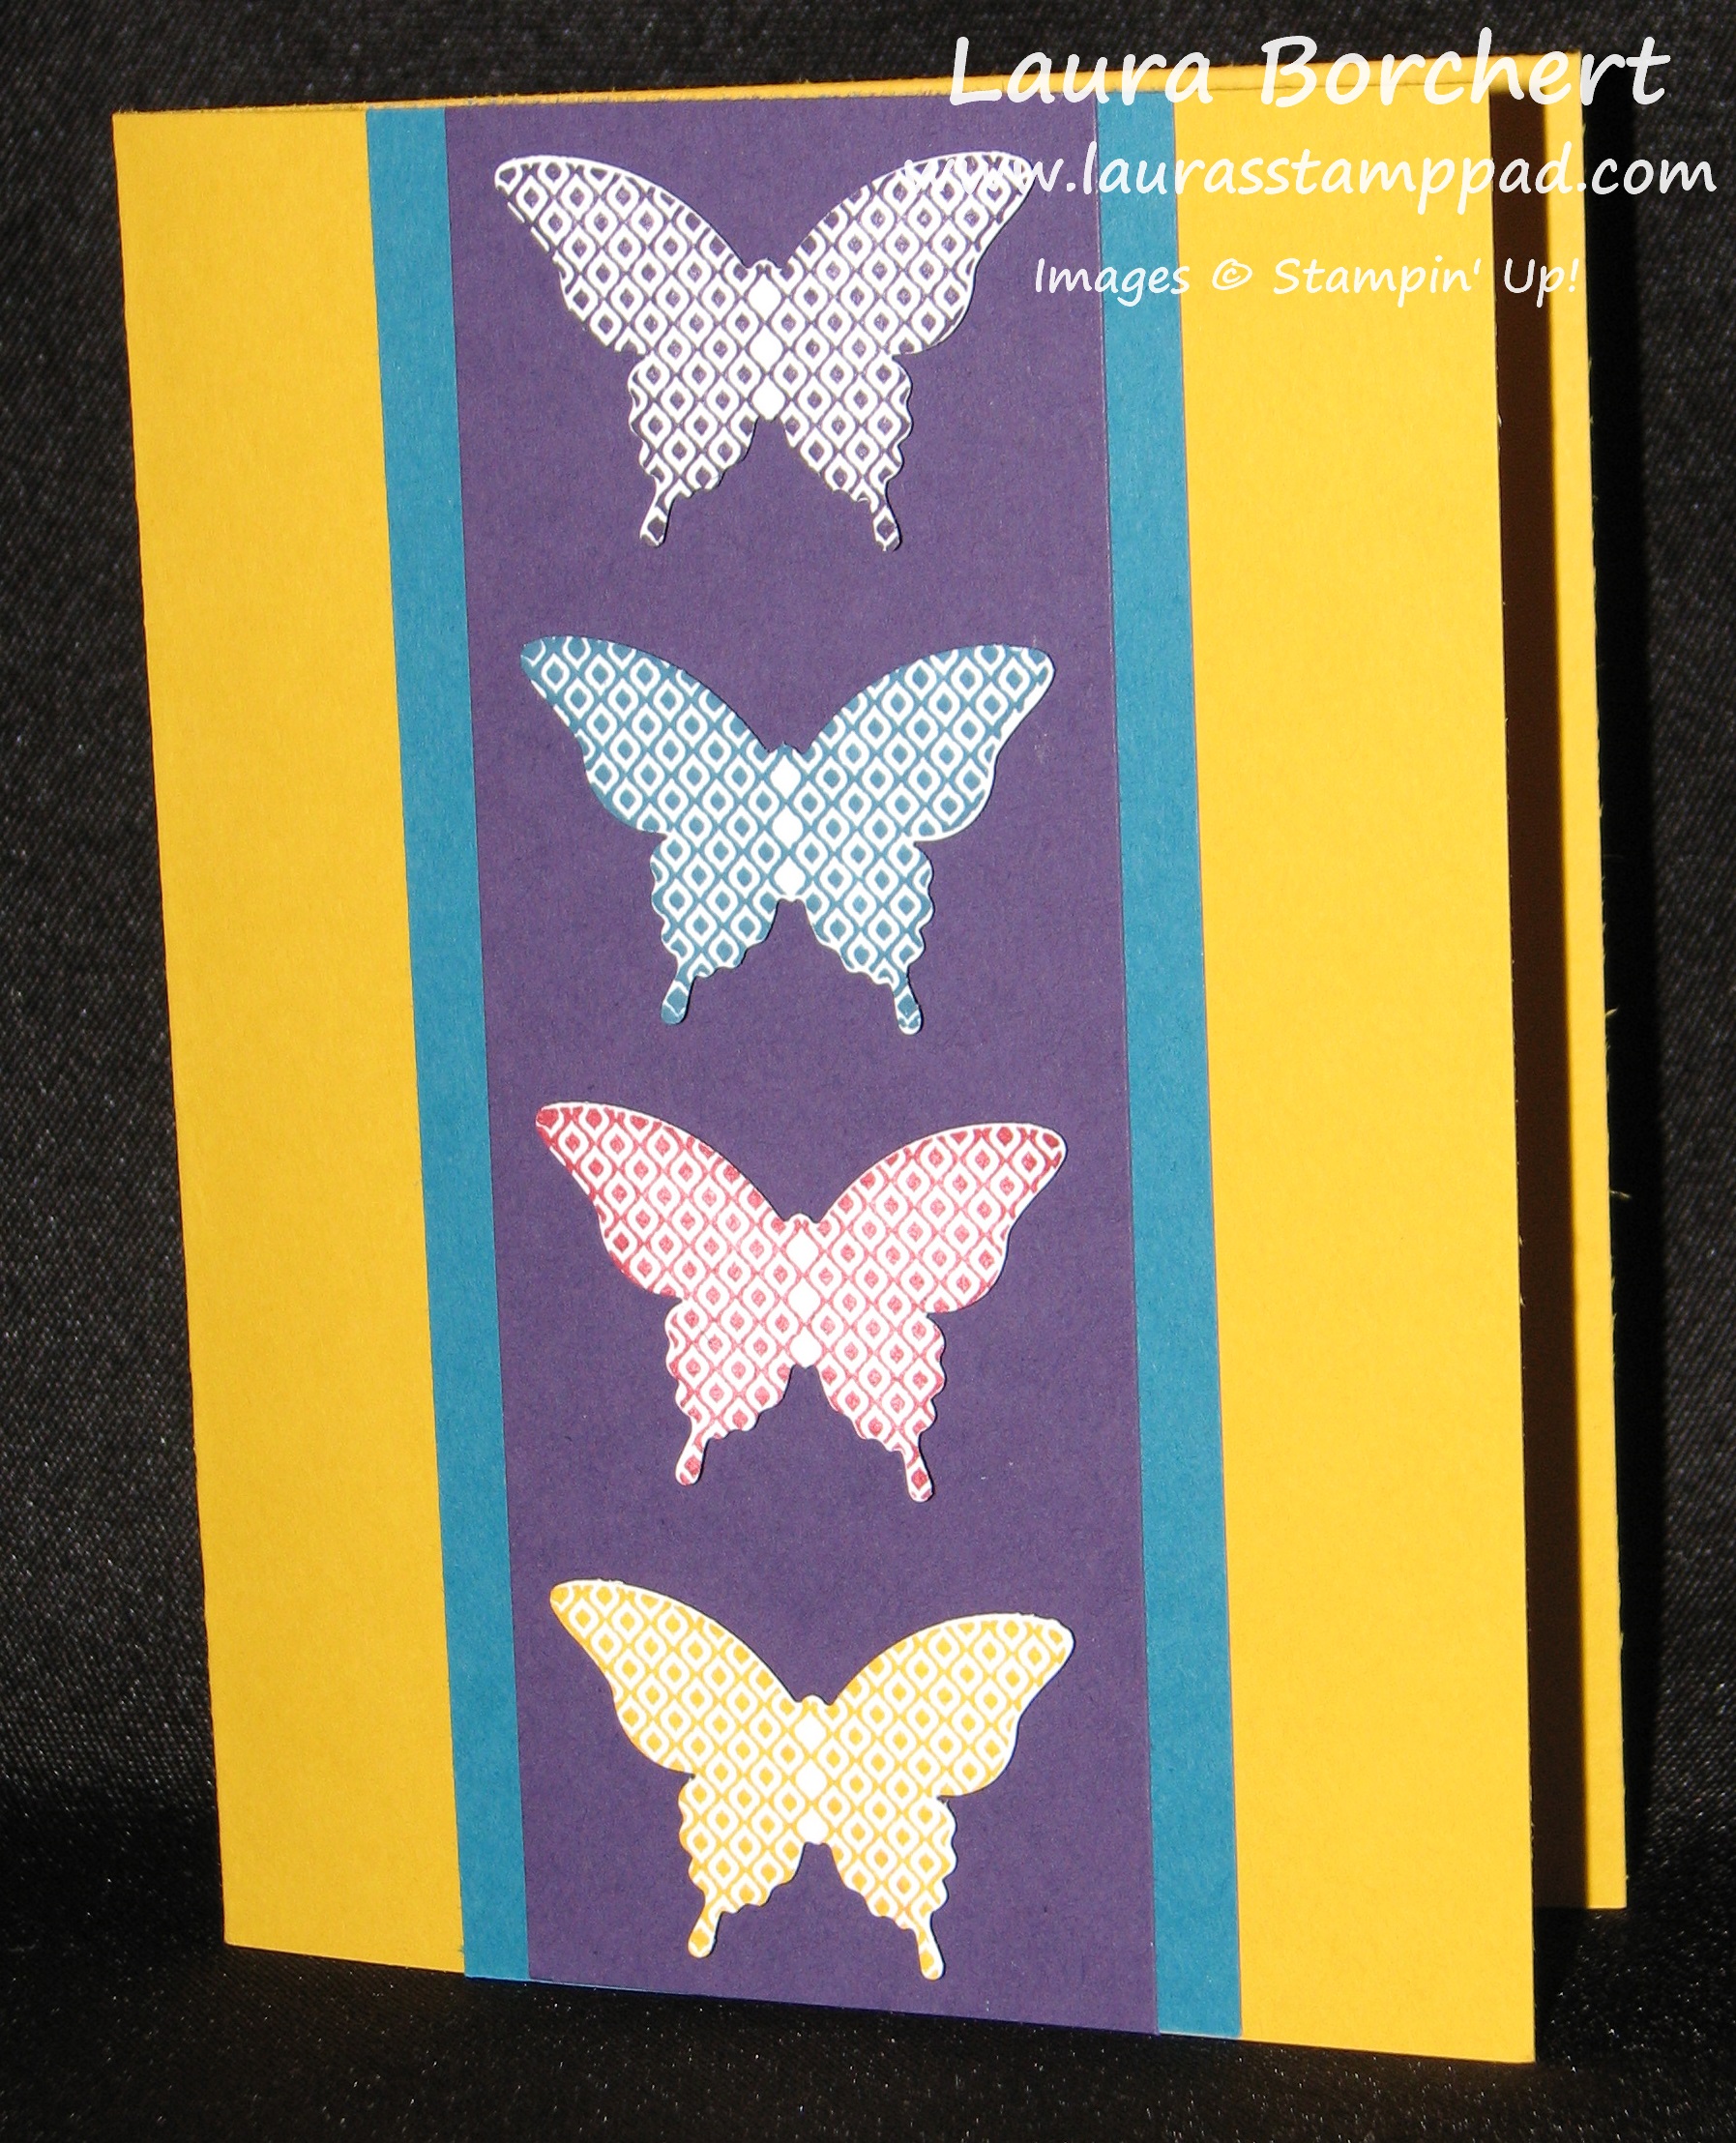
This card is so amazing because it has BUTTERFLIES (which I have recently fallen in love with) and lots of color! I just feel like cards need to be colorful and POP! Another bonus for this card, it uses up some of the scraps you have laying around!

Papillion Portpourri, www.laurasstamppad.com

The fabulous card was created with the Papillion Portpourri Stamp Set and matching Elegant Butterfly Punch! I stamped the same butterfly image 4 times on scraps of Whisper White Cardstock using Crushed Curry, Cherry Cobbler, Island Indigo and Elegant Eggplant (all in the Regals Collection). You could always use different butterfly images so you don’t have to keep cleaning to stamp before going to the next color (be sure to clean it well for the Crushed Curry 😉 ) I love how bright and cheery this card is and again it could be used for any occasion! Can’t wait for spring so I can use this stamp set more and more! For more samples using this stamp set, click here and here!

Happy Stampin’

~Laura


Technique Tuesday – Making Multiple Cards!!

Posted on

Happy Tuesday All!!! You know what that means, I’m sharing a Technique with you! I get asked a lot of time how long it takes for me to make cards! Well I am going to share with you this card that I created a total of 400 and it only took me a few hours on 2 different days!!!

Lots of Thank You Cards, www.LaurasStampPad.com

This is what 400 cards looks like (and yes it was hard for me to mess them up to take this picture rather than keep them in their perfect stacks of 25 🙂 ) So I’m sure you are wondering how I made 400 of them in just a few hours on 2 days. I used Very Vanilla and Whisper White Cardstock. TIP: Use Washi Tape for fun and fabulous quick cards! I didn’t cut the 8-1/2″ x 11″ cardstock in half for the typical card size until after I put the Washi Tape on, this way I only had to grab my scissors to cut the Washi Tape every 2 cards (so only 200 times, rather than 400). So I had a stack of cardstock and put the 2 strips of Washi Tape on the cardstock and then cut it in half on the 8-1/2 side like you see below!

Washi Tape Card, www.LaurasStampPad.com

Then I stamped my name on the back of all the cards and folded them in half. Thank you Bone Folder for helping me fold 400 cards in half and not having to use my thumb! Then I stamped the various Thank You greetings from the Lots of Thanks Stamp Set! TIP: Making multiples of 1 card is much easier than making 400 different cards! These cards were super simple and affordable to make! Washi Tape also comes in so many fabulous styles too so your possibilities are endless! I made these cards for all of the amazing Brides that I met with at the Gateway Bridal Fair last week!

Happy Stampin’

~Laura


Rolls of Ribbon!!!

Posted on

Ribbon Card, www.LaurasStampPad.comI LOVE Ribbon! It is one of my favorite embellishments (after pearls or rhinestones)!!! And I always end up with a tons of little pieces of ribbon left over, whether it be from the end of a roll or I cut more than I needed! So I was looking for ways to use them up and this is one of the cards I cam up with!!!!! Here I used the 5 In-Colors Crushed Curry, Raspberry Ripple, Primrose Petal, Midnight Muse and Gumball Green 3/8″ Stitched Satin Ribbon! This card is perfect for any occasion so you could make a few up with your extra ribbon scraps and stamp a greeting onto the card as you need them! The stamp I used was from the Lots of Thanks Stamp Set! A few other ways to use your scraps are to fold a little piece in half and tuck it (or staple it) under one of your layers or tie various ribbons on ring binder notebooks or other albums! Let me know if you have any other tips for using up those scraps of ribbon in the comment below!

Happy Stampin’

~Laura