Happy Tuesday!!! You all know what that means!!! I have a super fun technique to share with you – creating a marbled background!!! Check this out!!

Isn’t the background super cool?? It is super easy as well. All you need are ink pads and baby wipes!!! I got this technique from fellow demonstrator, Sandy Jacobson! I love sharing ideas!!!
SUPPLIES NEEDED: Ink Pads, Baby Wipes
For creating the marbled background, I started with a piece of Shimmery White cardstock measuring 4″ x 5-1/4″. You can use regular Whisper White or Very Vanilla cardstock if you wish! It works the same with all but I liked the little hint of shimmer! Next, I took a wet baby wipe and balled it up and very lightly tapped it into an ink pad and then pounced all over the cardstock. I used Bermuda Bay Ink, Cucumber Crush Ink, and Pumpkin Pie Ink. You can pounce with each color as little or as much as you wish. It’s as simple as that! Super fun and comes out different each time. You can mix and match any color combination!
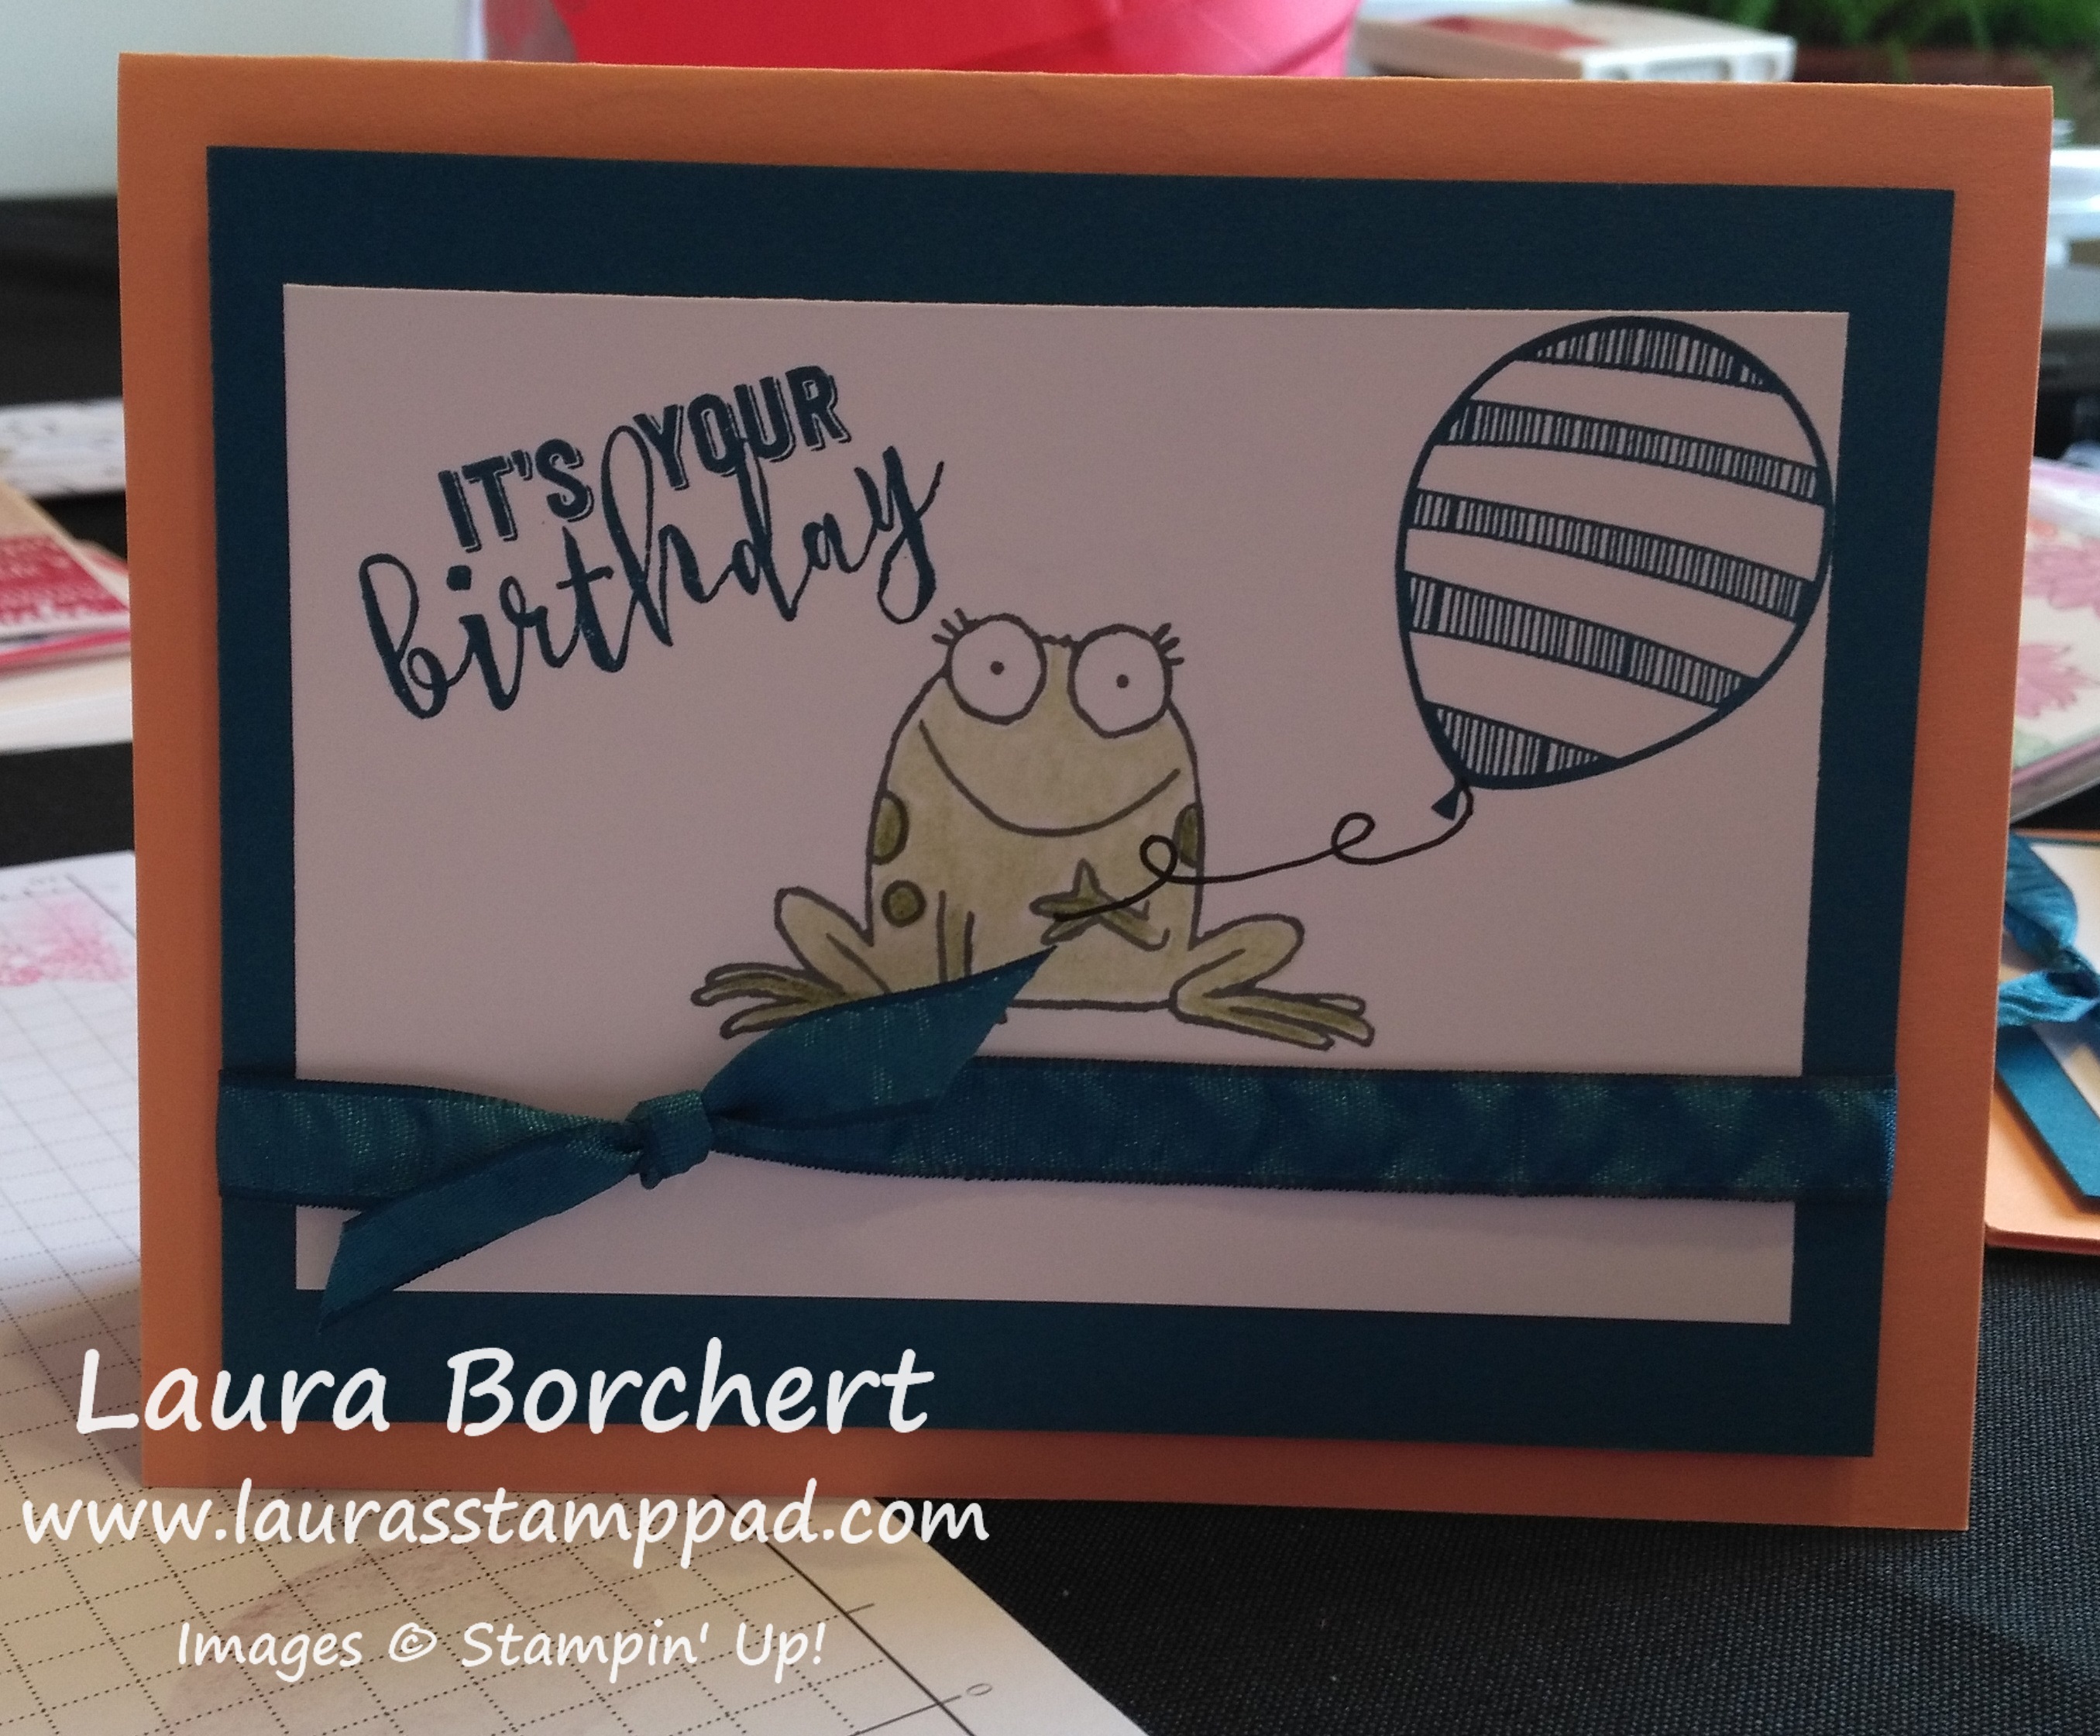
To finished the above card off, I placed it onto a Bermuda Bay card base. I stamped the birthday greeting in the lower right corner from the Balloon Adventures Stamp Set. The die cuts came from the Stitched Shapes Framelits in Cucumber Crush and a t-shirt from the T-Shirt Builder Framelits in Bermuda Bay. I stamped the front of the shirt with the Suite Sentiments Stamp Set. Next, I added the t-shirt to the square with Stampin’ Dimensionals to make it look a little more 3D. I added loops of Whisper White Baker’s Twine to the back of the square, securing it with Stampin’ Dimensionals and then adding it to the card front! Perfect Man Card!

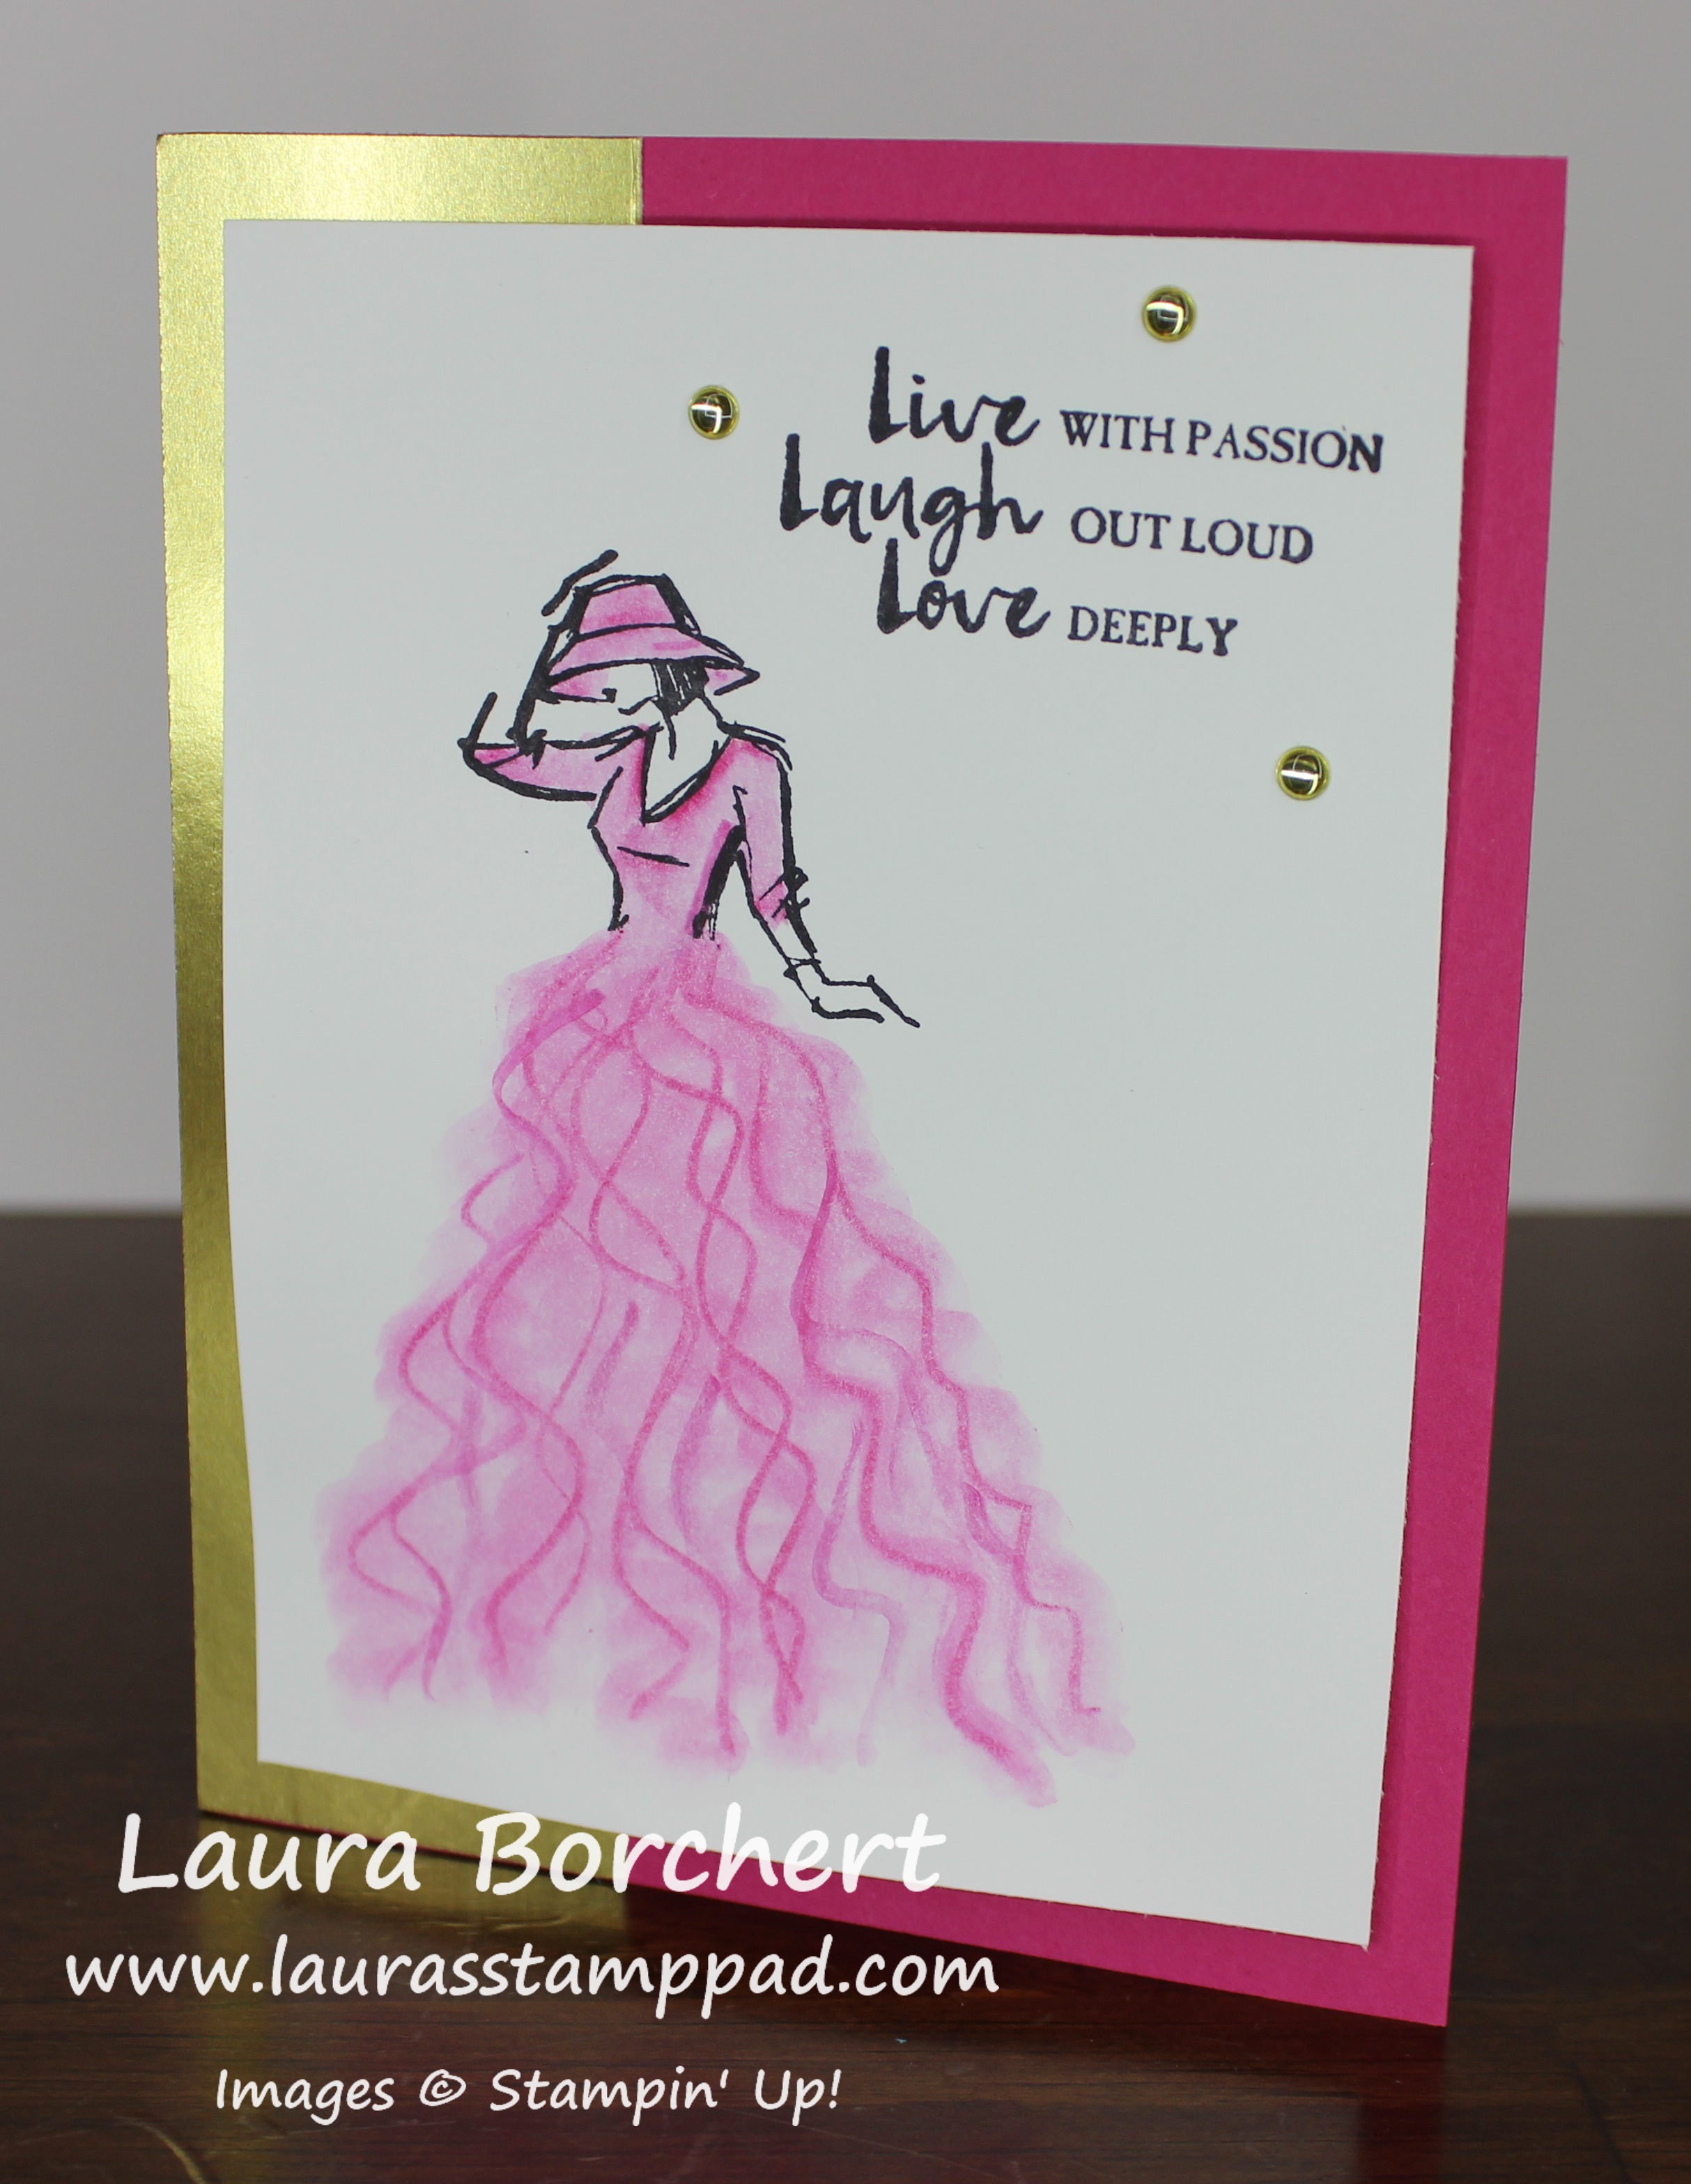
I used Wisteria Wonder Ink and Rich Razzleberry Ink for this one. For the decoration, I stamped the lady from the Beautiful You Stamp Set in Basic Black and her dress in Rich Razzleberry. The greeting was done in Wisteria Wonder. I went over her dress with a Wink of Stella Pen which added a little shine and blended it together a bit. I used the leftover bit of ink on the tip to color in her hat. Then, I layered this piece onto Silver Foil Paper and added it to the card front. To finish it off, I added a few White Perfect Accents. Love it!
If you would like to see this all in action, check out the Video Tutorial below or click here! Don’t forget to give it a thumbs up if you liked it and be sure to subscribe if you are new! I post every Tuesday and Thursday!
Have fun trying this out yourself! What color combination will you use? Let me know in the comments below!
Happy Stampin’
~Laura