Hey Chick Sale-A-Bration Stamp Set!!!

Posted on

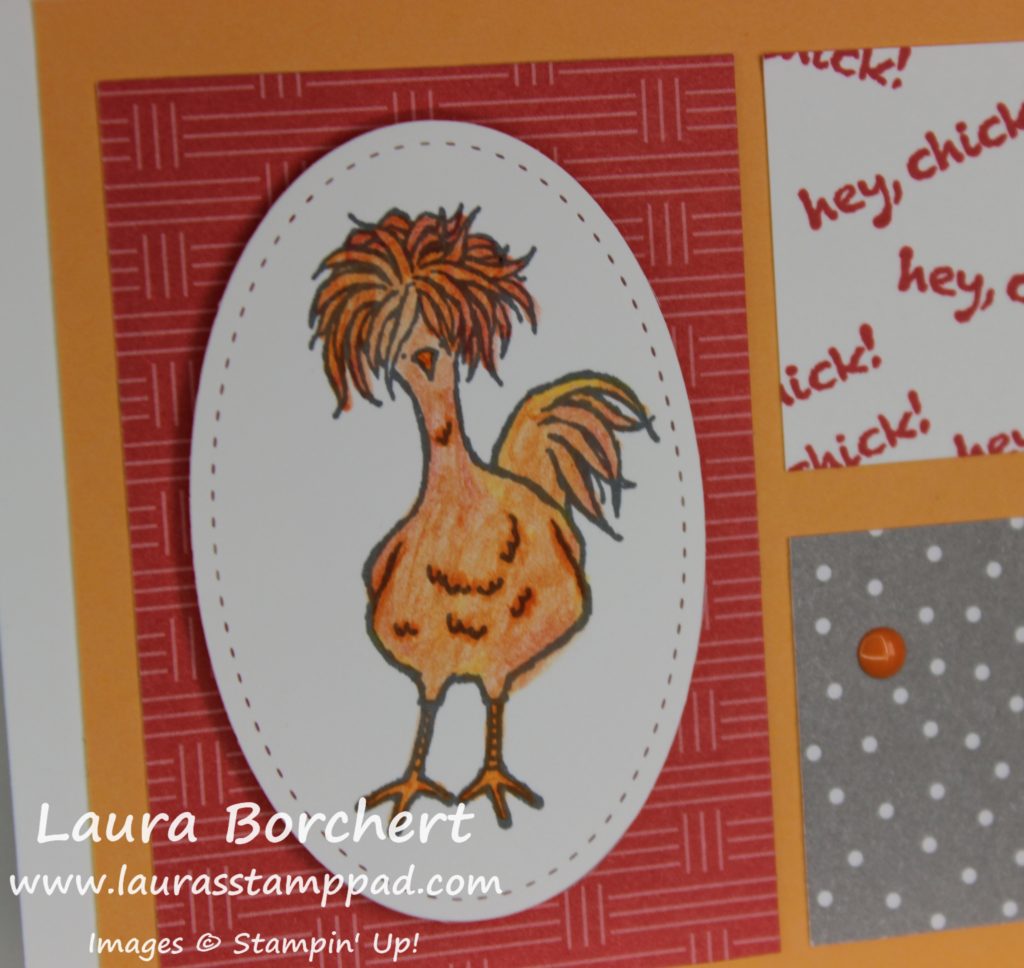
The Hey Chick Sale-A-Bration Stamp Set has been super popular….probably because of  this crazy fabulous one!!! He is my favorite of all of them! I love the greetings as well! They are just so fun and different!!!
Hey Chick, www.LaurasStampPad.com

Let’s get started on this fun card!!! I started with a Whisper White card base and added a piece of Peek-A-Boo Peach measuring 3-3/4″ x 5″! Then I took a piece of Whisper White (2-1/4″ x  1-1/2″) and stamped the greeting Hey Chick all over in Watermelon Wonder. I cut out 2 pieces of the Carried Away Designer Series Paper (Sale-A-Bration item) measuring 2-1/4″ x 1-1/2″ (for below the greeting) and 2-1/4″ x 3-1/4″ for under the chick! It is easiest to line up all the pieces on the card and then pick one up, add adhesive, and place it back down. This way you know your spacing is all good!!

For the chick, I die cut one of the ovals from the Stitched Shapes Framelits. I stamped the chick from the Hey Chick Sale-A-Bration Stamp Set in Basic Gray Archival Ink. I always like to use gray over black for that softer look! Then using the Daffodil Delight, Pumpkin Pie, and Real Red Watercolor Pencils, I colored that crazy chicken! I used the Blender Pens to blend the colors together! I attached this to the card with Stampin’ Dimensionals for a little pop! To finish it off, I added a few Pumpkin Pie Enamel Shapes.

Crazy Chicken, www.LaurasStampPad.com

I love the coloring blocking and the use of Designer Series Paper on this card! I need to keep this style in mind for future cards too! 🙂 Do you like to reuse a certain card style with lots of different card types and stamp sets?? Let me know in the comments below!

Don’t forget that Sale-A-Bration ends on Friday, March 31st!!! Click here to see the 3 different brochures of items you can pick from! There are the originals (minus the card tin), the extras that came out in February (minus the Glimmer Paper), and the items they released last week that are in the Occasions Mini Catalog (minus the embossing folders). Items are going fast and while supplies last so don’t wait to place you order. Click here to start shopping! You will earn a free item for every $50 you spend!

Happy Stampin’

~Laura

A Beautiful Watercolor Sky!!!

Posted on

Watercolor Sky, www.LaurasStampPad.com

This amazing watercolor sky is perfect with so many different stamped images – trees, flowers, scenery, hot air balloons, birds, etc. It was super easy to create and oh how I love that deep blue color!! Now let’s get started on how I created this!

I started with a piece of Pacific Point measuring 4-1/4″ x 11″ for my card base. Typically I just see what I have in my scraps section and pull out a piece so that is why sometimes it is 4-1/4″ x 11″ and sometimes 8-1/2″ x 5-1/2″! This one works perfectly for the ribbon to go around the card up and down! Then I took a piece of Watercolor Paper measuring 3″ x 3-3/4″ and colored rather dark/hard all down the middle with the Pacific Point Watercolor Pencil. Let me preface by saying that I’ve always colored really hard so this was easy for me. You can always go lighter and add in more color if you wish! Once you are finished adding color to the paper, I took an Aqua Painter and brushed back and forth. You want to make sure it is nice and wet (not dripping/soaked but wet and moving the color around.) You can take the color all the way to the edge or just keep it down the middle. Of course, the cool…or maybe frustrating…..thing about watercolor is that no two come out the same. You just never know what you will get. Now set it aside to dry!

Once it was all dry, I stamped the hot air balloons from the Lift Me Up Stamp Set in Basic Black. PS: if you have no patience for it to dry like me, you can use your Heat Tool to speed it up! 🙂 Next, I layered this onto Whisper White (4″ x 3-1/4″) to really make it POP. I placed it onto the card front on the left side! Then I wrapped some of the Succulent Garden Ribbon around and tied it into a knot! For the greeting, I stamped using the Lift Me Up Stamp Set onto Pacific Point. Using the Layering Oval Framelits, I die cut the greeting and scallop oval. Next, I added the greeting to the card front with Stampin’ Dimensionals so it would look smooth over the ribbon! I thought it looked a little empty in the upper right corner so I added a few White Perfect Accents! That was the perfect fix!

Do you love to watercolor? Let me know your favorite watercolor tools in the comments below – Blender Pens, Aqua Painters, etc? To see more samples using watercoloring, check them out here, here, and here!

Happy Stampin’

~Laura


Coloring Flowers to Highlight the Pattern!!!

Posted on

Coloring Flowers to Highlight, www.LaurasStampPad.com

I have really started to love coloring especially when you don’t have to color all of it! Coloring flowers to highlight the pattern like I did in this sample is just as powerful! It makes the flowers pop and the background of black and white is fabulous too! Less coloring means more time to make multiples!!! 🙂

I started with a piece of Melon Mambo for my card base. Then I cut each piece of the Inside the Lines Sale-A-Bration Designer Paper into 1-1/2″ x 1-1/2″ squares. I punched opposite corners with the Corner Rounder Punch for some added texture. Next, I colored the flowers to highlight the pattern with the Watercolor Pencils and a Blender Pen. You really don’t have to use the Blender Pens. If you like the pencil look or if you want the image to stay bold and dark (if you press hard), just color and stop there! Once all of the pieces were colored, I layered the squares onto a piece of Old Olive cardstock measuring 3-1/2″ x 3-1/2″. Next, I added this piece to a piece of Whisper White (3-3/4″ x 5″) with Stampin’ Dimensionals. I stamped the greeting at the bottom in Melon Mambo Ink from the Designer Tee Sale-A-Bration Stamp Set. Finally, this was then layered onto the Melon Mambo card base and I finished it off with some Brights Enamel Shapes (melon mambo and old olive).

If you would like to see this all in action, check out the video tutorial below or click here! Don’t forget to give it a thumbs up if you liked it and be sure to subscribe to my channel so you don’t miss out on future videos! I post every Tuesday and Thursday!

Do you like to color? Does it overwhelm you? Have you selected the Inside the Lines Designer Paper as one of your FREE Sale-A-Bration items? Let me know in the comments below!!! Also, don’t forget that as we come to the end of Sale-A-Bration, the items will run out so don’t wait till the last minute. The Card Tin is already gone!

Happy Stampin’

~Laura


Inside the Lines Designer Series Paper!!!

Posted on

Inside the Lines, www.LaurasStampPad.com

When I first saw the Inside the Lines Sale-A-Bration Designer Series Paper, I thought it looked beautiful but a little intimidating! That is a lot of coloring…..and time consuming….at least for me who isn’t a big fan of coloring. I enjoy coloring a little bit but only to make 1 card or only a small amount. Then I got this idea from Stampin’ Up back in November when I attended the OnStage Event. You only have to color one small square and it looks AMAZING!!!

~Card Instructions~

I started with a Calypso Coral card base and stamped the greeting from the Avant Garden Sale-A-Bration Stamp Set in Calypso Coral Ink all over the background. I stamped a few times to get those various shades. It is super fun that you can read some and others are falling off. It is a super cool look and adds more meaning to the card!

Next, I took a piece of the Inside the Lines Designer Series Paper measuring 2-3/4″ x 3-1/2″. You will want to cut a 1″ strip from the left side (or right, it doesn’t matter either way). With the leftover piece, I cut it in half creating two 1-3/4″ squares. Now it’s time to color and you can pick whichever section you would like. I colored mine with the Watercolor Pencils and Blender Pens. I adhered the designer paper to the middle of the card and added some Basic Black Baker’s Twine to the left hand side, tied into a bow. For the greeting, I die cut the circle from the Stitched Shapes Framelits (smallest one) and stamped the greeting from the Avant Garden Stamp Set. I added the greeting to the card front with Stampin’ Dimensionals. Love it!!!

To A Wonderful Friend, www.LaurasStampPad.com

This is the card I created at the Stampin’ Up! OnStage Event. We did the greeting a little differently with some of the Burlap Ribbon and banner tips! I just decided to mix it up and go with my own take on it! Both are super fabulous and have the same concept!

Which one is your favorite??? Let me know in the comments below – stitched shape greeting or burlap banner greeting!!! Don’t forget that you can get the Inside the Lines Designer Paper for FREE through the end of March as your Sale-A-Bration item! Every $50 order, earns you a Free item from the brochure. Remember that there are 3 new items that were released at the end of February! You can check those out here! Click here to start shopping!

Happy Stampin’

~Laura


Watercoloring Flowers in Bright Colors!!!

Posted on

I just love any and all flowers and even more during this time of year! Spring is near and flowers will start blooming and shining bright! The colors of it all are just stunning! Watercoloring flowers in bright, fun colors is even more fun!!!

~ Card Instructions ~

For this card, I started with a Tip Top Taupe card base measuring 4-1/4″ x 11. You can create this card on it’s side like I did or up and down! It’s all up to you! Also, I went with a neutral base so that I can color the flowers in any color and it would match! I took a piece of Very Vanilla (4″ x 5-1/4″) and stamped the flowers and greeting from the Avant Garden Sale-A-Bration Stamp Set. This is one of the sets you can get for Free with every $50 order which is even better! I stamped the images in Basic Gray Ink which is great for watercoloring and it’s not as bold as black is! Not it is time to color. I used the Watercolor Pencils to color in the flowers. For the card above, I did the watercoloring flowers with Pumpkin Pie, Daffodil Delight, and Calypso Coral. I colored the stems and leave in Old Olive. The easiest way to color these is you add color on the lines/dark spots of the flowers and then blend the colors around with a Blender Pen.  Pink Lillies, www.LaurasStampPad.com

For this one, I used Melon Mambo and Old Olive! It might not be so obvious in these photos but after I blended the flowers, I went back through with the pencil and colors on the dark centers again to add shadows and texture to them! Once I was finished coloring, I added this to the card base! Finally I finished it off with some Metallic Ribbon which comes in both gold and silver! This is another one of the Sale-A-Bration items that you can pick as your FREE item! Get those items on your wish list and stock up on cardstock and adhesive so you can pick out tons of fabulous Sale-A-Bration items now till the end of March!

You can see more samples using this set and ribbon here and here!

Happy Stampin’

~Laura


Technique Tuesday – Creating a Ruffle Dress!!!

Posted on

Happy Tuesday!!! You all know what that means! I have a fabulous technique to share with you today using the Watercolor Pencils. We will be creating a Ruffle Dress!!! Check out this beauty!!

Creating a Ruffle Dress, www.LaurasStampPad.com

I love this dress because it is PINK (of course) but it is also so big and beautiful! I went to my Junior year Prom in a huge baby blue Cinderella ball gown and it was amazing! Now I can create that amazing dress on the beautiful women in the Beautiful You Stamp Set! Love it!!! Thank you to Tandra Boyer for this amazing idea!!!

SUPPLIES NEEDED: Beautiful You Stamp Set, Basic Black Archival Ink, Watercolor Pencils, Aqua Painter

I started with a piece of Whisper White cardstock measuring 3-3/4″ x 5″. Next, I inked up the top portion of the lady from the Beautiful You Stamp Set with Basic Black Archival Ink. I used this ink because it won’t bleed when you watercolor. If you aren’t comfortable inking up just the top half of the stamp, you can always ink it all up and then mask over the bottom half with a piece of scrap paper! After stamping her, I took the Melon Mambo Watercolor Pencil and make swirly lines starting at her waist and going down. Just keep adding squiggly lines until it looks full. I added a little bit of color along the lines of her shirt as well. Then I took the Aqua Painter and traced over the top of the swirly lines, allowing the color to bleed. Just keep swirling along each of those lines and color in the top as well. If it seems to get rather wet, you can always stop and allow it to dry a bit and then come back in with some some more color to accent or create shadows. You can make the skirt as full or straight as you wish! Just have fun with it!!

Purple Dress, www.LaurasStampPad.com

I created this ruffle dress with the Rich Razzleberry Watercolor Pencil! It is just so beautiful!

To finish off the card, I used a Melon Mambo card base and a strip of Gold Foil Paper along the left side (1-1/2″ x 5-1/2″). I stamped the greeting from the Beautiful You Stamp Set in Basic Black in the upper right corner and then added this piece to the card front with Stampin’ Dimensionals. I liked the added texture of the dimensionals and it hold the paper on real well since it can curl a bit after the watercoloring. To finish it off, I added a few Gold Metallic Enamel Shapes! I just love it!!! I might do the purple one with silver! 🙂

If you would like to see this all in action, check out the Video Tutorial below or click here! Be sure to give the video a thumbs up if you liked it and don’t forget to subscribe if you are new! I post every Tuesday and Thursday!!!

If you would like to see more samples using the Watercolor Pencils, click here and here! Have fun playing with the Watercolor Pencils!

Happy Stampin’

~Laura


You’re Sublime!!!

Posted on

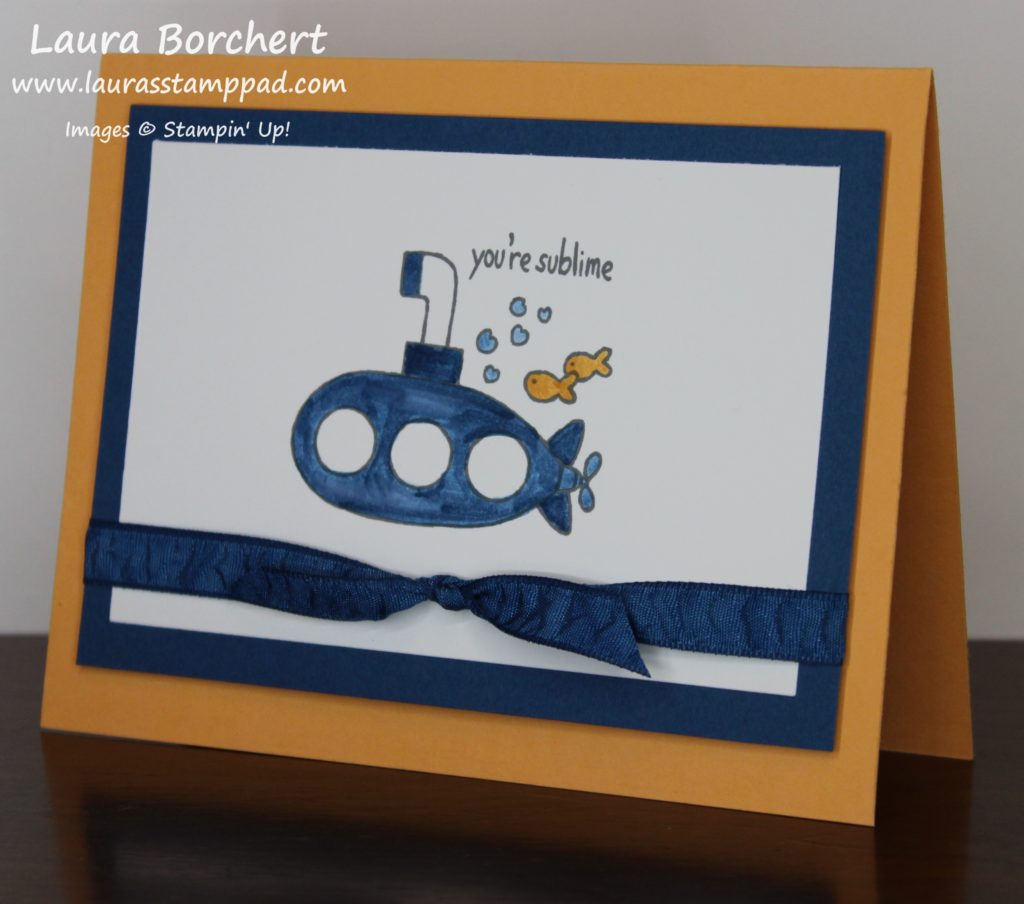
You're Sublime, www.LaurasStampPad.com

How adorable is this?!?!?! This cute card is perfect for Valentine’s Day and it uses a non-Valentine’s Day stamp set – You’re Sublime! It is such an adorable stamp set!!!

I started with a Peek-A-Boo Peach card base! Then I took a piece of Whisper White (4-1/2″ x 3″) and stamped the little submarine from the You’re Sublime Stamp Set in Basic Gray Ink. You will need to use a Stazon or Archival Ink since I did watercoloring and you won’t want it to bleed! I prefer Basic Gray because I like the softer look rather than Basic Black. I hadn’t received my Watercolor Pencils order at the time of making this so I used an Aqua Painter and ink. You can see a complete tutorial on watercoloring like this HERE! I used Dapper Denim Ink and Peek-A-Boo Peach Ink. I layered this onto Dapper Denim measuring 5″ x 3-1/2″ and tied some Dapper Denim Ruched Ribbon around it on the bottom. I added this piece to the card front with Stampin’ Dimensionals!

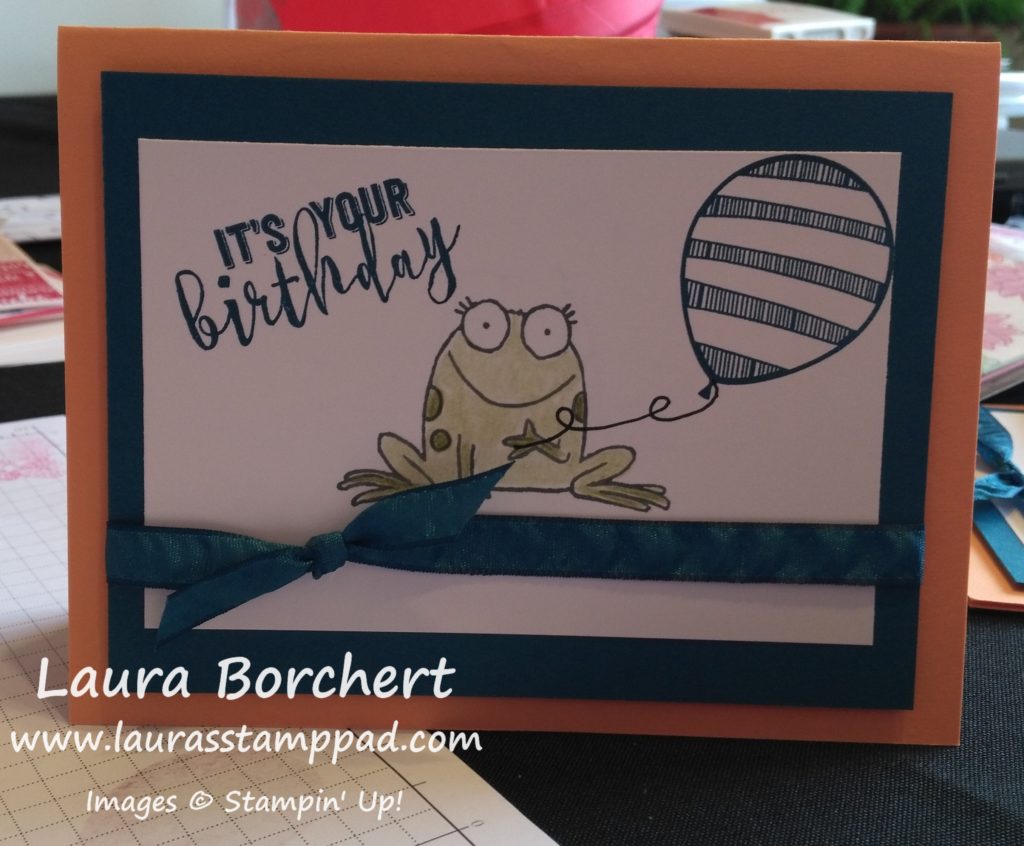
Froggy Card, www.LaurasStampPad.com

When we did this card in class, I let the stampers pick any of the images from the You’re Sublime card and here is one of the fabulous creations! Sondra went with the froggy and she used the Watercolor Pencils and Blender Pen to color him in. The ribbon covered up the greeting so we went with a Birthday greeting from the Balloon Adventures Stamp Set! It is sooo adorable! I love when my stampers change up my cards with their own creativity! It gives me great ideas too! 🙂

Stamping is always fun with you do it with others! Sharing creativity, conversations, and laughs is what I love the most about being a Stampin’ Up! Demonstrator! 🙂

Have a wonderful weekend!!! Happy Stampin’

~Laura


Tasty Trucks & Cupcake Exhaust!!!

Posted on

Cupcake Exhaust, www.LaurasStampPad.com

The Tasty Trucks Stamp Set from the Sale-A-Bration Promotion is super cute and can be turned into so many different looks – sweets, tacos, hot dogs, and any other type of delivery. Super cute! I got this idea of cupcake exhaust from a fabulous stamper friend, Mary Ellen Stites! I would follow this truck all over town! I love cupcakes!!!

For this card, I started with a Smokey Slate card base which is perfect because then you can use any colors for your truck! Then I took a piece of Whisper White (4″ x 5-1/4″) and stamped everything from the Tasty Trucks Stamp Set in Basic Gray Archival Ink! I like using gray over black because it is a softer look! I colored in everything with the Watercolor Pencils and Blender Pens!

Watercolor Tutorial, www.LaurasStampPad.com

I love the Watercolor Pencils because you can just outline or color in a bit and then take the Blender Pen and even out the color! I like to go in a circular motion and just swirl around till everything is colored in. If you would like certain spots to be darker, just go back in with pencil and add more color! I love it!! After coloring everything in, I tied some Silver Metallic Ribbon (Sale-A-Bration) around it. That ribbon is super fabulous and a little bling-y! Then I added the piece to the card front! Love it!!

Sweetest Ever, www.LaurasStampPad.com

I couldn’t stop with just one truck so here is another!!! I tied the ribbon into bow on this one and went up and down! Super fun!!

3 Ways to Use Watercolor Pencils, www.LaurasStampPad.com

 Here I colored with the Watercolor Pencils in 3 different ways – colored in (Coral), with the Blender Pens (Purple), and with an Aqua Painter (Blue). They are super easy to use and I have found that the color looks so even. Sometimes when using ink or markers with the Blender Pen or Aqua Painter, there can be streaks and lines on your project. With the pencils, there are no lines or streaks. It is just pure, rich color. You can always add in more details with the pencil after blending it together. You can even add more color by touching the Blender Pen or Aqua Painter to the tip of the pencil to pick up some color. There are so many fun ways to color with these! There are 13 pencils in the pack for just $16.00! That is a steal for so many colors, I think!

If you would like to see an up close and personal on the Watercolor Pencils, check out the Video Tutorial below or click here! Don’t forget to give this video a thumbs up if you liked it and be sure to subscribe if you are new! I post a video every Tuesday and Thursday!

Do you like Watercolor Pencils, Markers, or Ink Pads for coloring in with Blender Pens and Aqua Painters? Let me know in the comments below!!!

Happy Stampin’

~Laura


My Mom’s Frog Birthday Card!!!

Posted on

Mom's Birthday Card, www.LaurasStampPad.com

My Mom’s Birthday was earlier this month and this is the card I created for her! She actually fell in love with this stamp set and bought it for me so we could make cards with it. (Note to self: we still need to do that!) 🙂 I started playing with this set and the New Watercolor Pencils and knew this was the perfect set for her card!

I started with a Crumb Cake card base and then I layered a piece of Old Olive cardstock (4″ x 5-1/4″) on top. I took a piece of Whisper White (3-3/4″ x 5″) and lightly brushed over it with a Sponge Dauber. I did Old Olive Ink on the bottom 1/3 and Pool Party Ink on the upper 2/3. I added a strip of Pool Party Stitched Satin Ribbon across the top and then added it to the card base. For the frog and the wheelbarrow, I stamped them from the You’re Sublime Stamp Set in Basic Gray onto scrap Whisper White.

Wheelbarrow, www.LaurasStampPad.com

I used the Watercolor Pencils to color in a bit and then I took a Blender Pen and swirled around to move the color and fill in! Once it was all colored, I fussy cut out both images and adhered them to the card base with Stampin’ Dimensionals.

Lil Froggy, www.LaurasStampPad.com

For the greeting, I stamped it from the Number of Years Stamp Set in Old Olive Ink. I punched out the greeting with the Decorative Label Punch. Then I sponged the edges with Pool Party and added it to the card front with Stampin’ Dimensionals too! I love it! I think it turned out perfectly. My Mom loves nature and has a huge garden. This was fabulous!

Do you like making cards specifically for a special someone or do you just make general cards for everyone?? Let me know in the comments below!

Happy Stampin’

~Laura


On the 9th Day of Stamps-Mas!!!

Posted on

On the 9th Day of Stamps-Mas, my true love gave to me…..coloring tools!!! Markers, Aqua Painters, and Blender Pens make coloring stamped images or background so much fun!!! Also, you will notice……Watercolor Pencils in this photo. That is because they are coming out in the Occasions Mini Catalog on January 4th!!! WOOT WOOT!

10thDayofStampsMas, www.LaurasStampPad.com

Aqua Painters are probably my favorite out of all of these above. I feel like I have found my groove on using them and just love the look that comes out. I like to use a Clear Block pressed into an ink pad as my color palette. Then just brush into the color and then color on your project. You never really want to squeeze when coloring because then you will too much water. You also don’t want to press hard on tip because it will flare the bristles and allow more water to come out. You can use these for a watercolor background like in this sample or to color small details like this sample. You can also add other things into the pen like alcohol or bleach for many other techniques!!! Also, you don’t always have to use these with Watercolor Paper. You can use any type of paper like Whisper White, Very Vanilla, or Shimmery White. Check out this video tutorial to see more on these!

Blender Pens are similar to Aqua Painters but they are more like a clear marker. There isn’t a way to squeeze out too much water so you never have to worry about that. Again, you can pick up color from a marker, pencil, or color palette like the one mentioned above! I feel like these are to much like a marker and I end up with streaks but for small things I think they work well. When doing a large image, I prefer Aqua Painters.

Markers are always great to have on hand. Any time I leave my house to craft, I always take them because then if I forget an ink pad I still have every color. I love that you can color with the markers directly onto the stamps to create multi-colored stamped images, omitted images, and so much more! I don’t really prefer to color in an image with the markers, at least not a large image. I tend to always see the strokes of the marker when I use them for coloring. Each marker has 2 ends – a larger marker tip and a smaller pen tip. This makes journaling fun when you are scrapbooking! Because there are 2 ends to the markers, you want to make sure that you store the markers on their side so the ink doesn’t go all the way to one side.

Watercolor pencils are coming out in the Occasions Mini Catalog in January!!! I have played with them a little and they are super fun to color with and then blend with an Aqua Painter or Blender Pen. You can color images in and even do a watercolor background with them. Stay tuned for more on these as I play with them more!!! 🙂

What is your favorite coloring tool?? Let me know in the comments below!!

If you have missed out on the past days of Stamps-Mas, you can check them out here – Day 1, Day 2, Day 3, Day 4, Day 5, Day 6, Day 7, and Day 8. Be sure to subscribe to my blog so you don’t miss the next 3! You can do that by adding your email address in the subscribe box on the right hand side (on a computer) or at the bottom of the page (on a phone). 

Happy Stampin’

~Laura