More Reverse Watercoloring!!!

Posted on

Reverse Watercolor, www.LaurasStampPad.com

So yesterday I showed you how to do Reverse Watercoloring with snowflakes and all winter/holiday themed! You can check that out here. Today, I’m bringing bright and cheery flowers to you with the Reverse Watercolor Technique!!!

SUPPLIES NEEDED: Shimmery White Cardstock, Aqua Painter, Clear Embossing Powder, Heat Tool, VersaMark, Stamp Set of your choice and embellishments

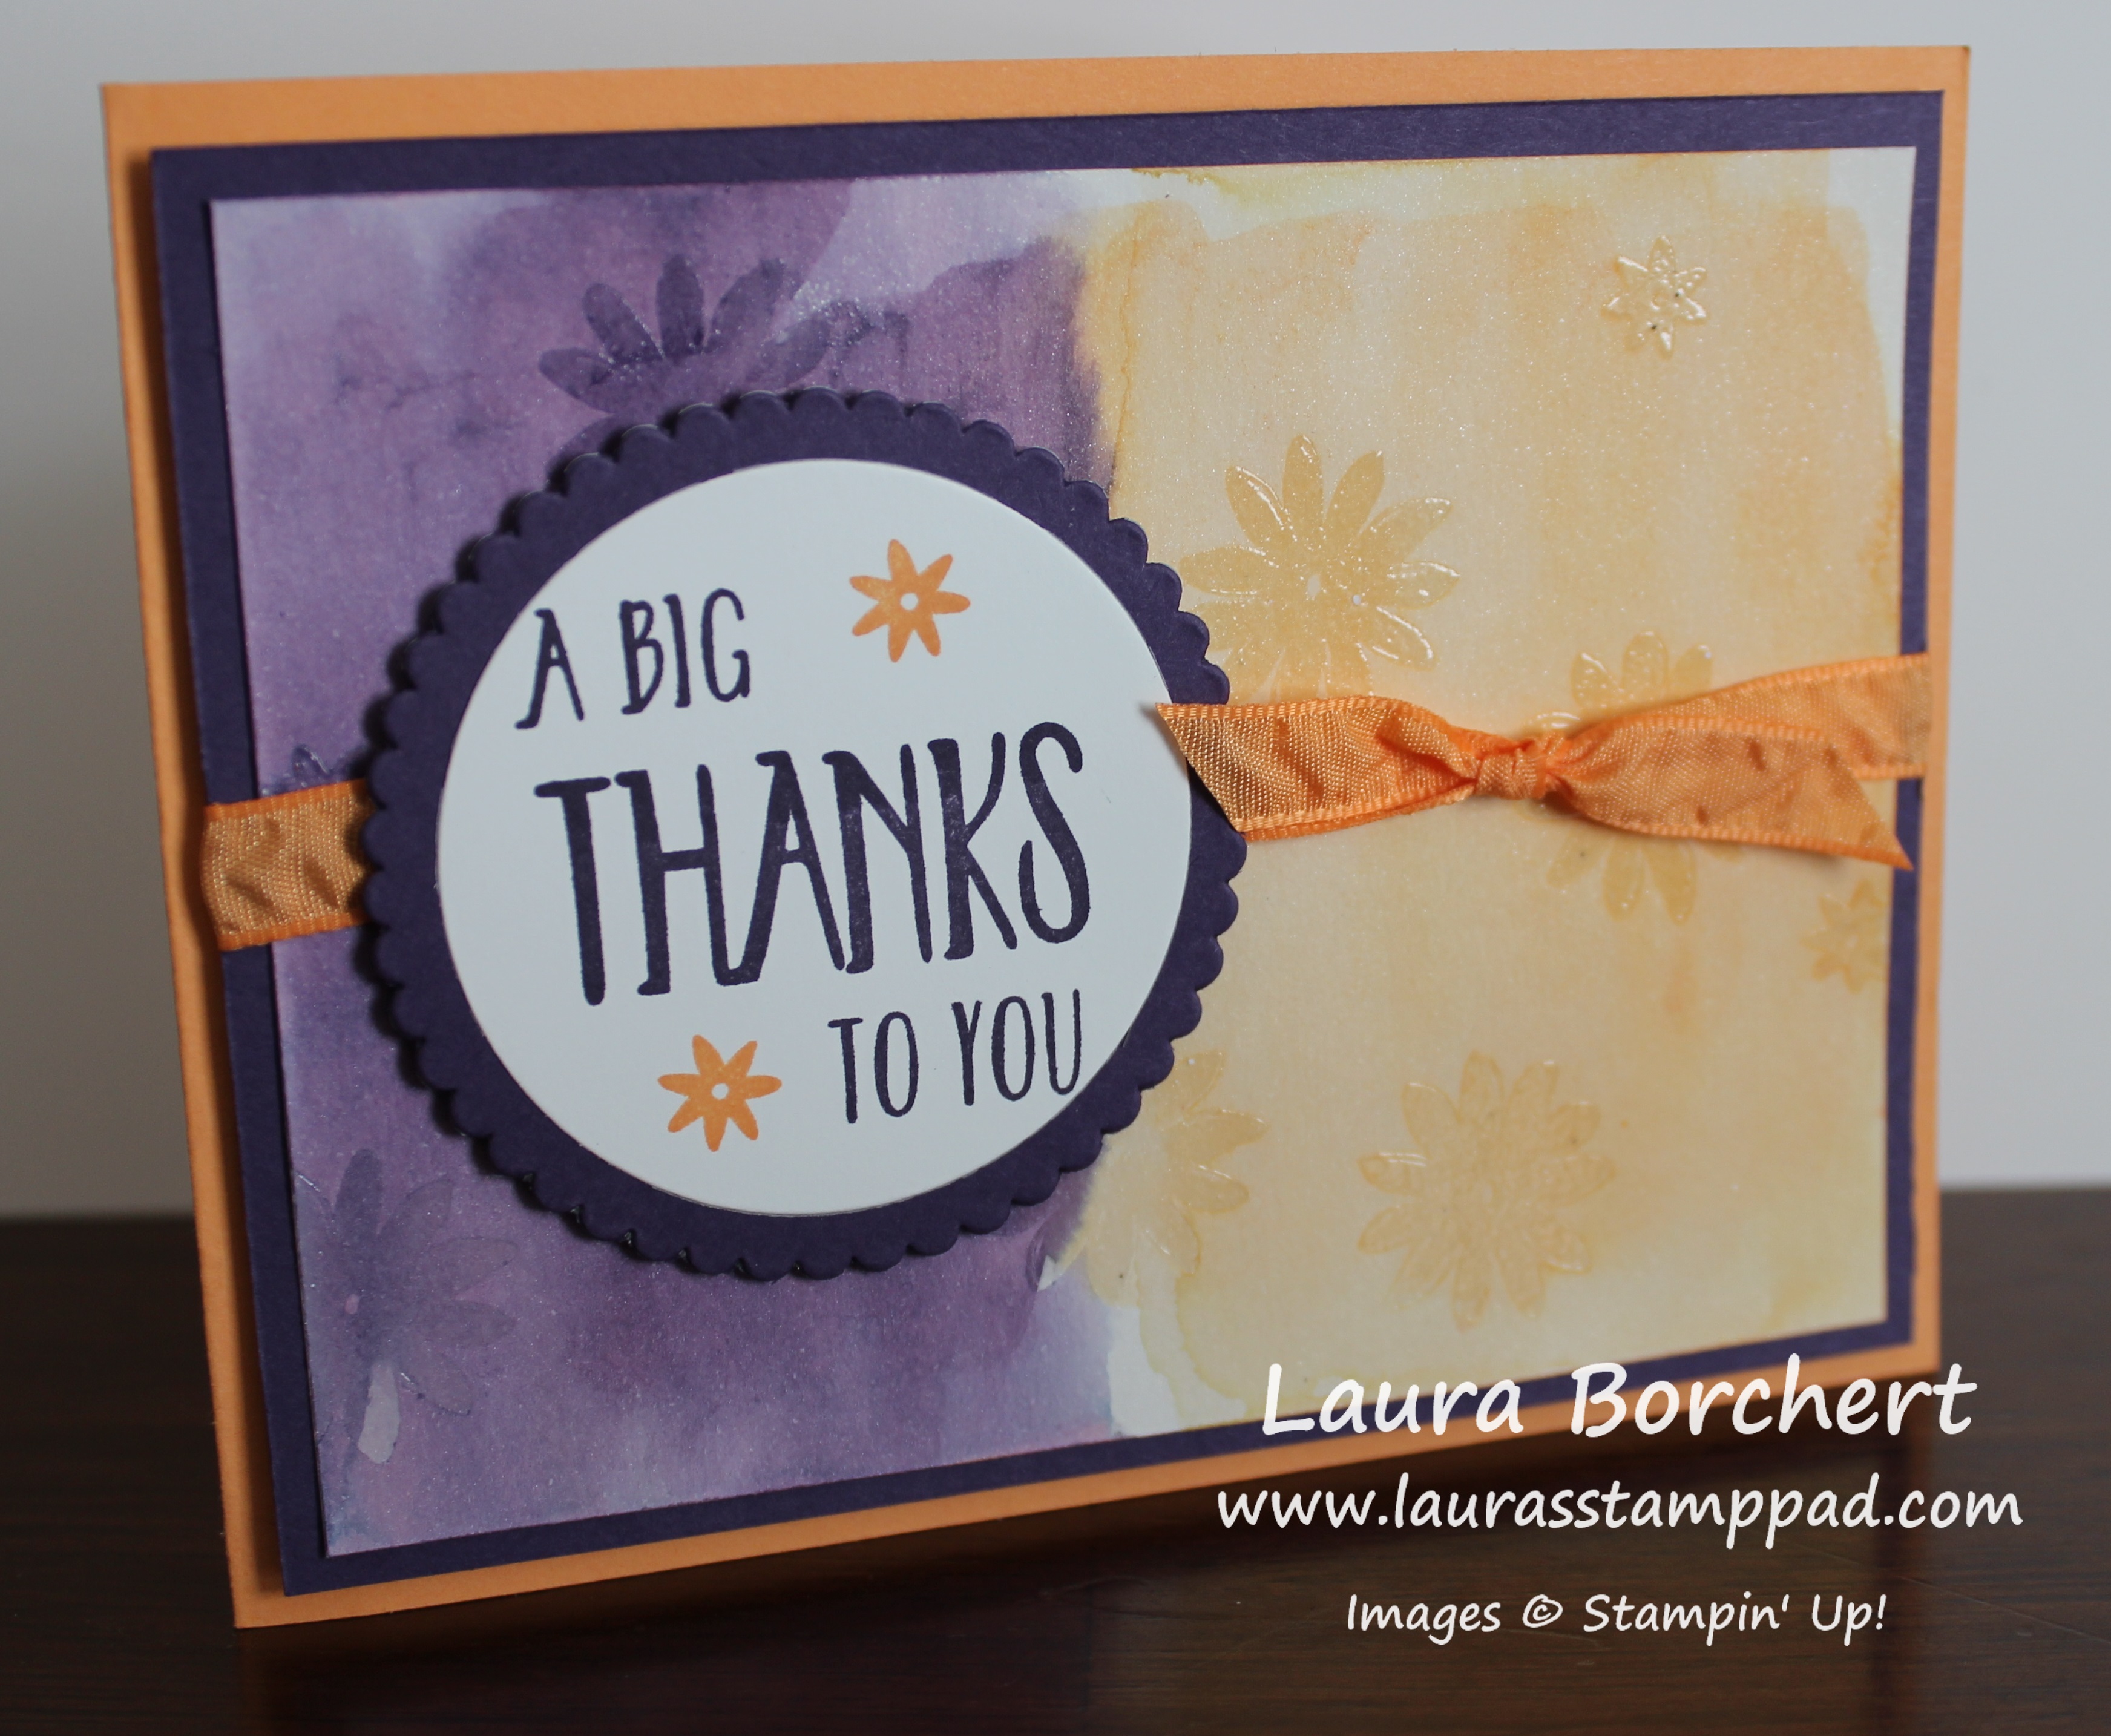
I started with a Peek-A-Boo Peach card base. Then I took a piece of Shimmery White Cardstock (3-3/4″ x 5″) and went over the entire piece with the Aqua Painter to wet it down a little. This will help the color bleed and sort of prime the paper. You don’t need to soak it but just a little brush of water over the top. Now pick up some Peek-A-Boo Peach Ink and watercolor wash over half of the paper. Clean off the brush and do the other half in Elegant Eggplant. You can go to the edge or leave a border. That is all up to you! Now allow this to dry by setting it aside or using the Heat Tool!

Side Notes while it dries……I use Shimmery White cardstock because of the fabulous shimmery look but also because it is a little bit thicker than Whisper White but not as thick and textured as Watercolor Paper. Watercolor Paper has too much texture so it won’t get a nice stamped image for clear embossing. Also, when you are using the Aqua Painter, you can either press your ink pad into the lid and use that as your color palette or you can press a clear block into the pad and use that. I prefer using the clear block because it isn’t as messy and I can easily clean it up. You could also drop re-inker onto the clear block and do it that way as well!

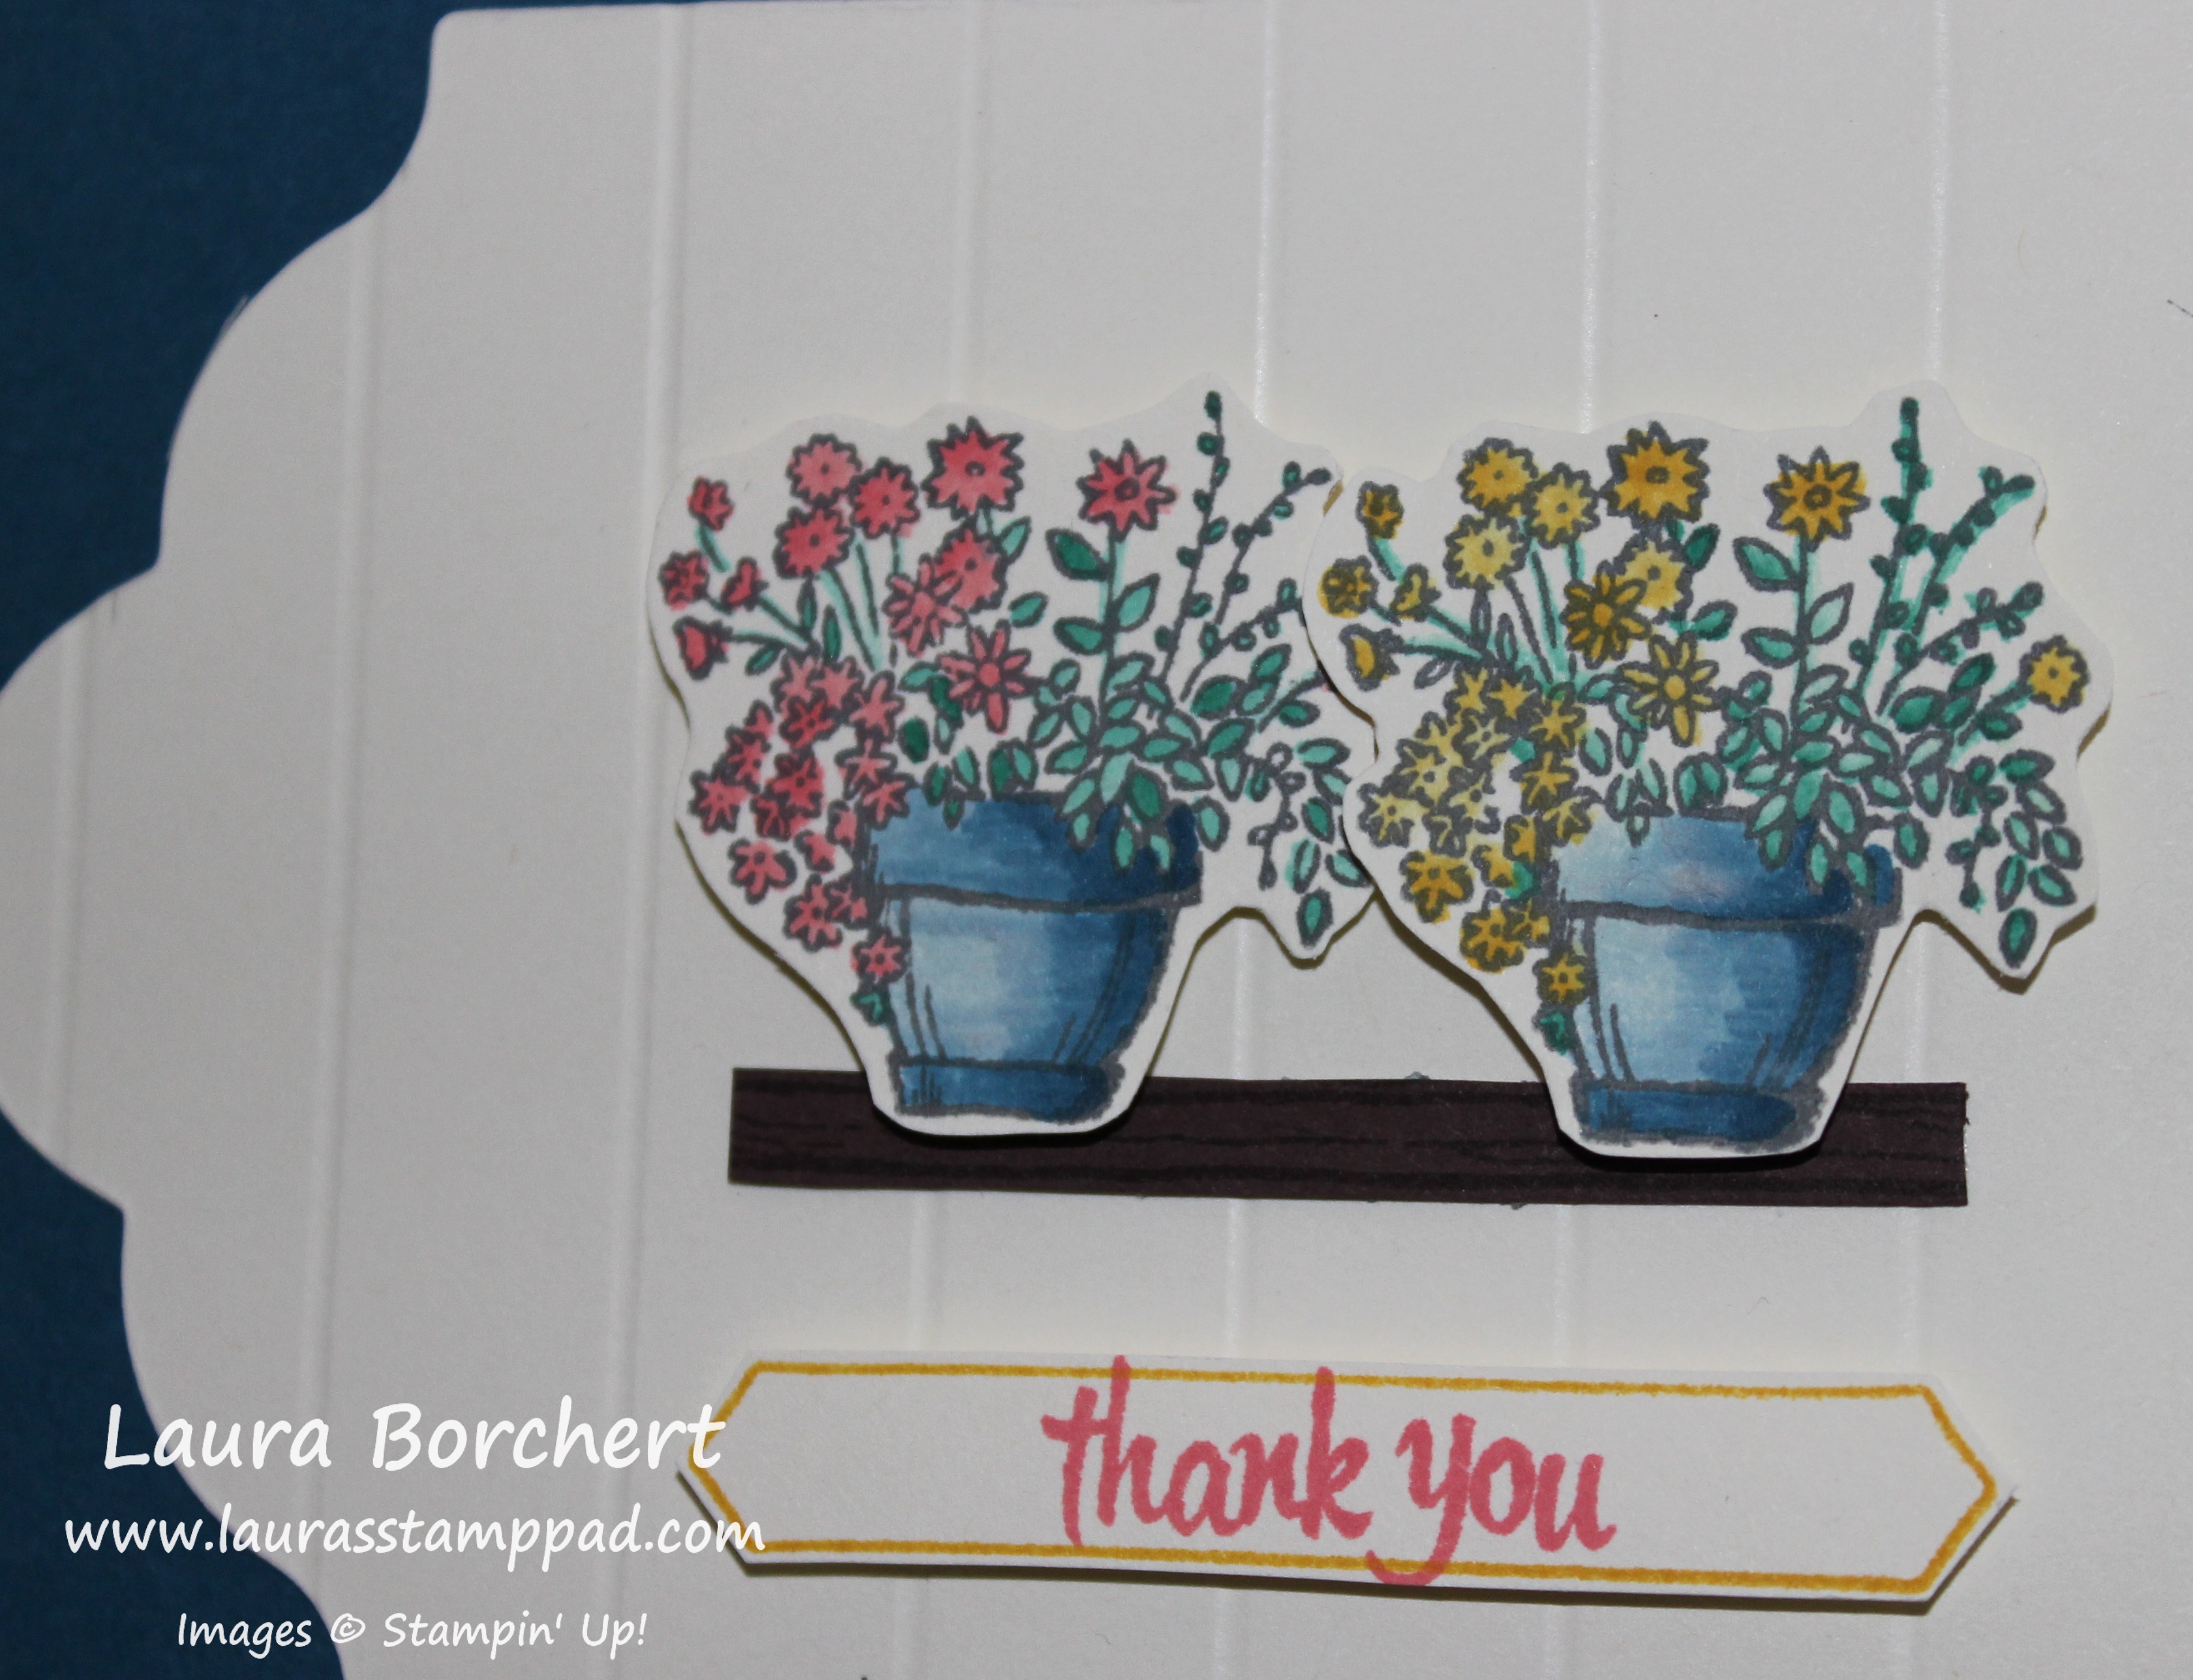
Once it is dry, you will stamp all over in a solid image stamp set with VersaMark Ink. I used a large and small flower from the Perfectly Wrapped Stamp Set. Apply Clear Embossing Powder over the top and set it with the Heat Tool. You can see a tutorial on Heat Embossing here. Now that your embossed image are set, they will hold the color underneath. Using your Aqua Painter, you will gently brush over the entire cardstock like you did in the beginning but this time with no color on your brush. You are just adding water which is taking some of the watercolor wash off that you applied earlier. The color is still being held under the images so they are popping more now. That is the Reverse Watercolor Technique!!!

Color Lifting, www.LaurasStampPad.com

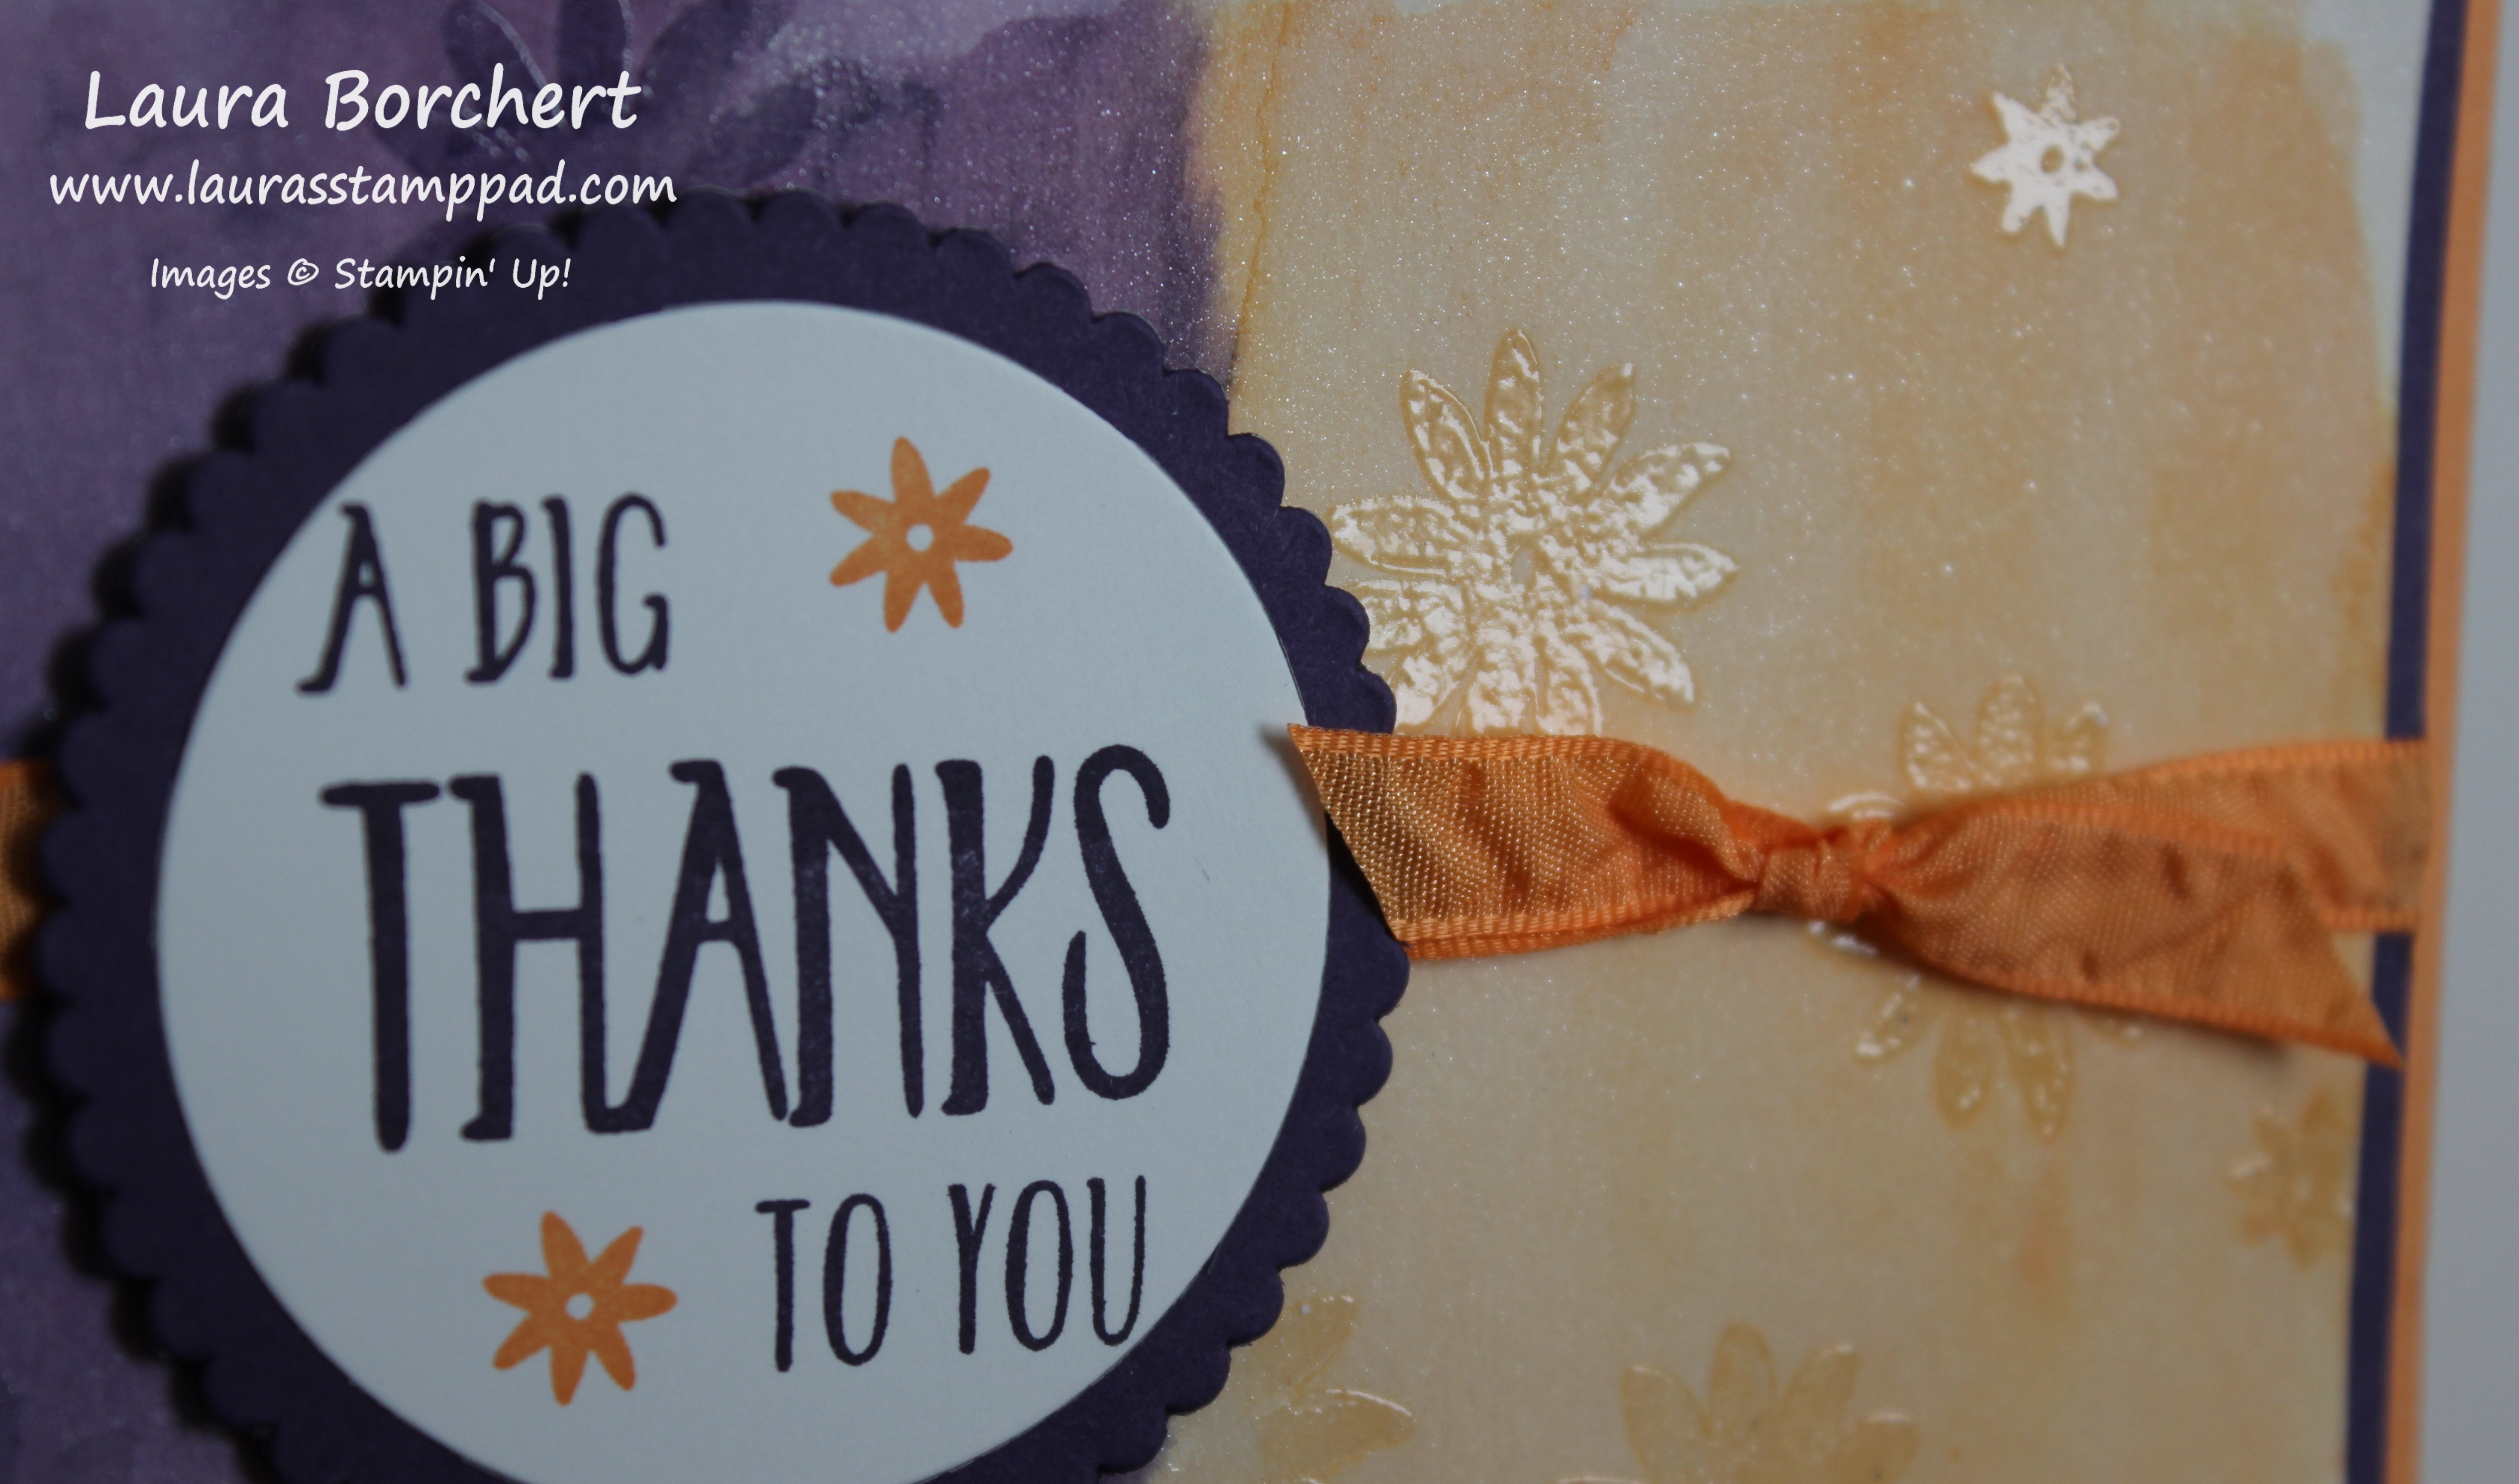
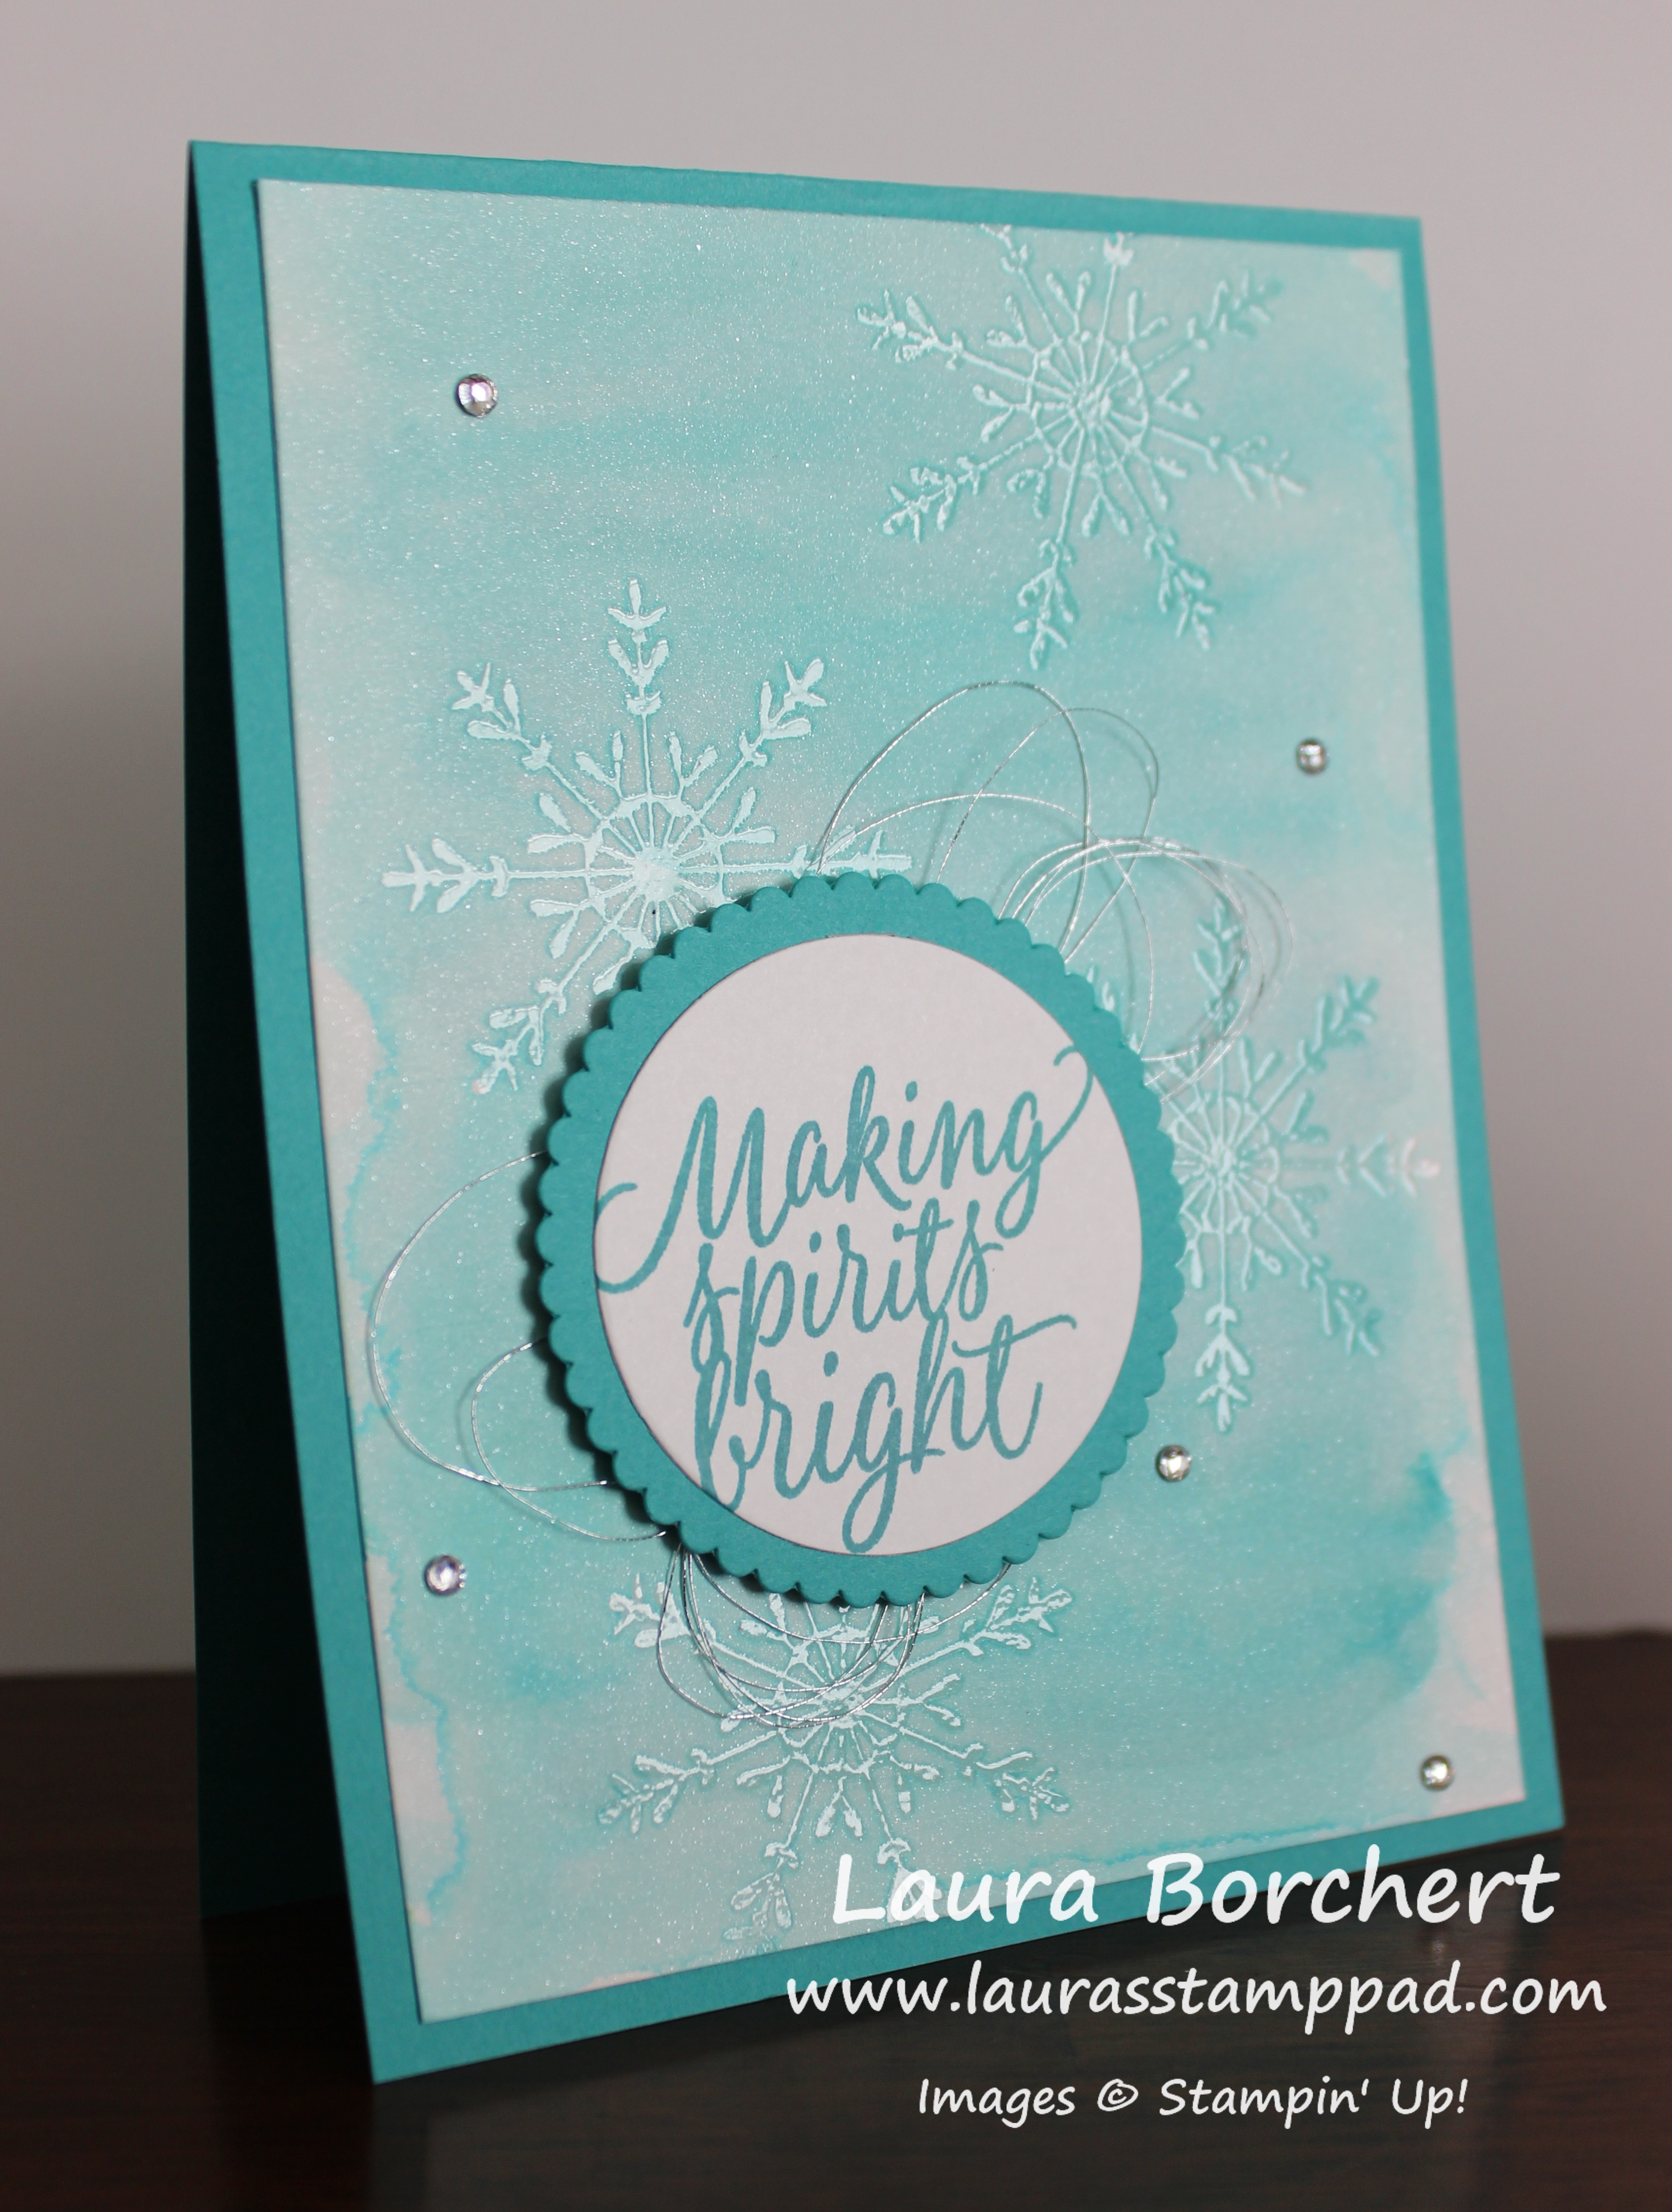
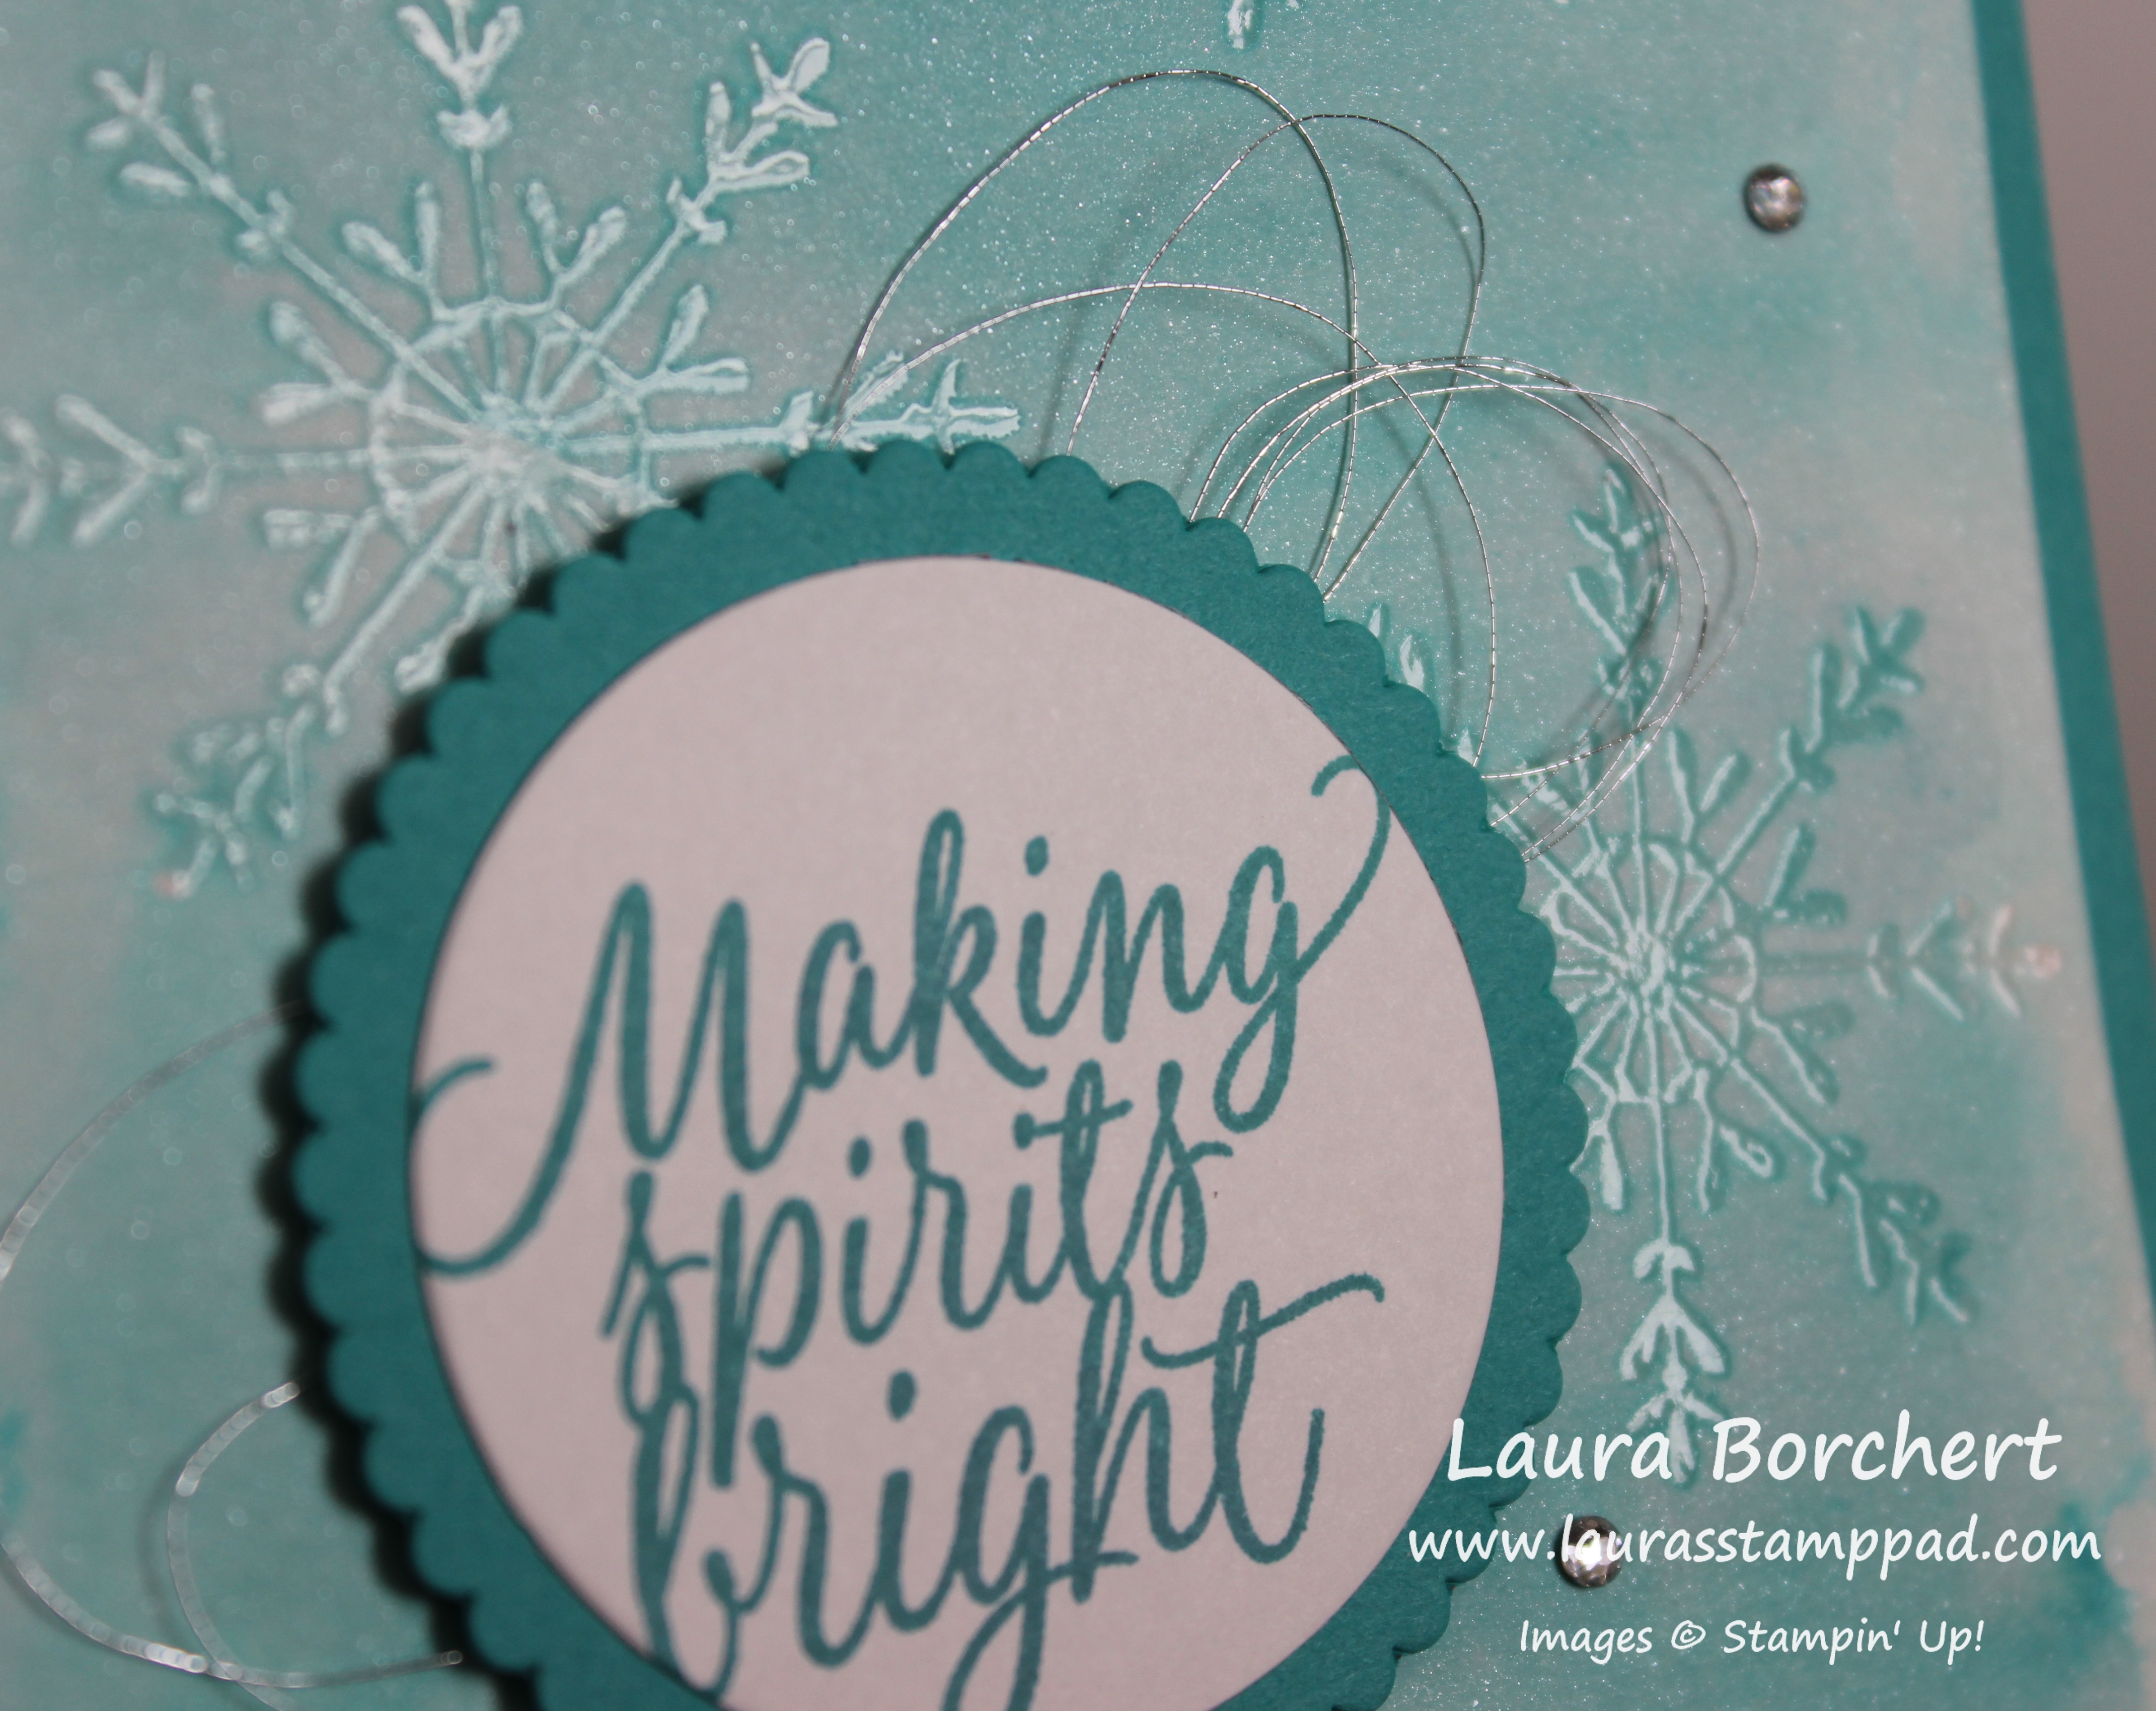
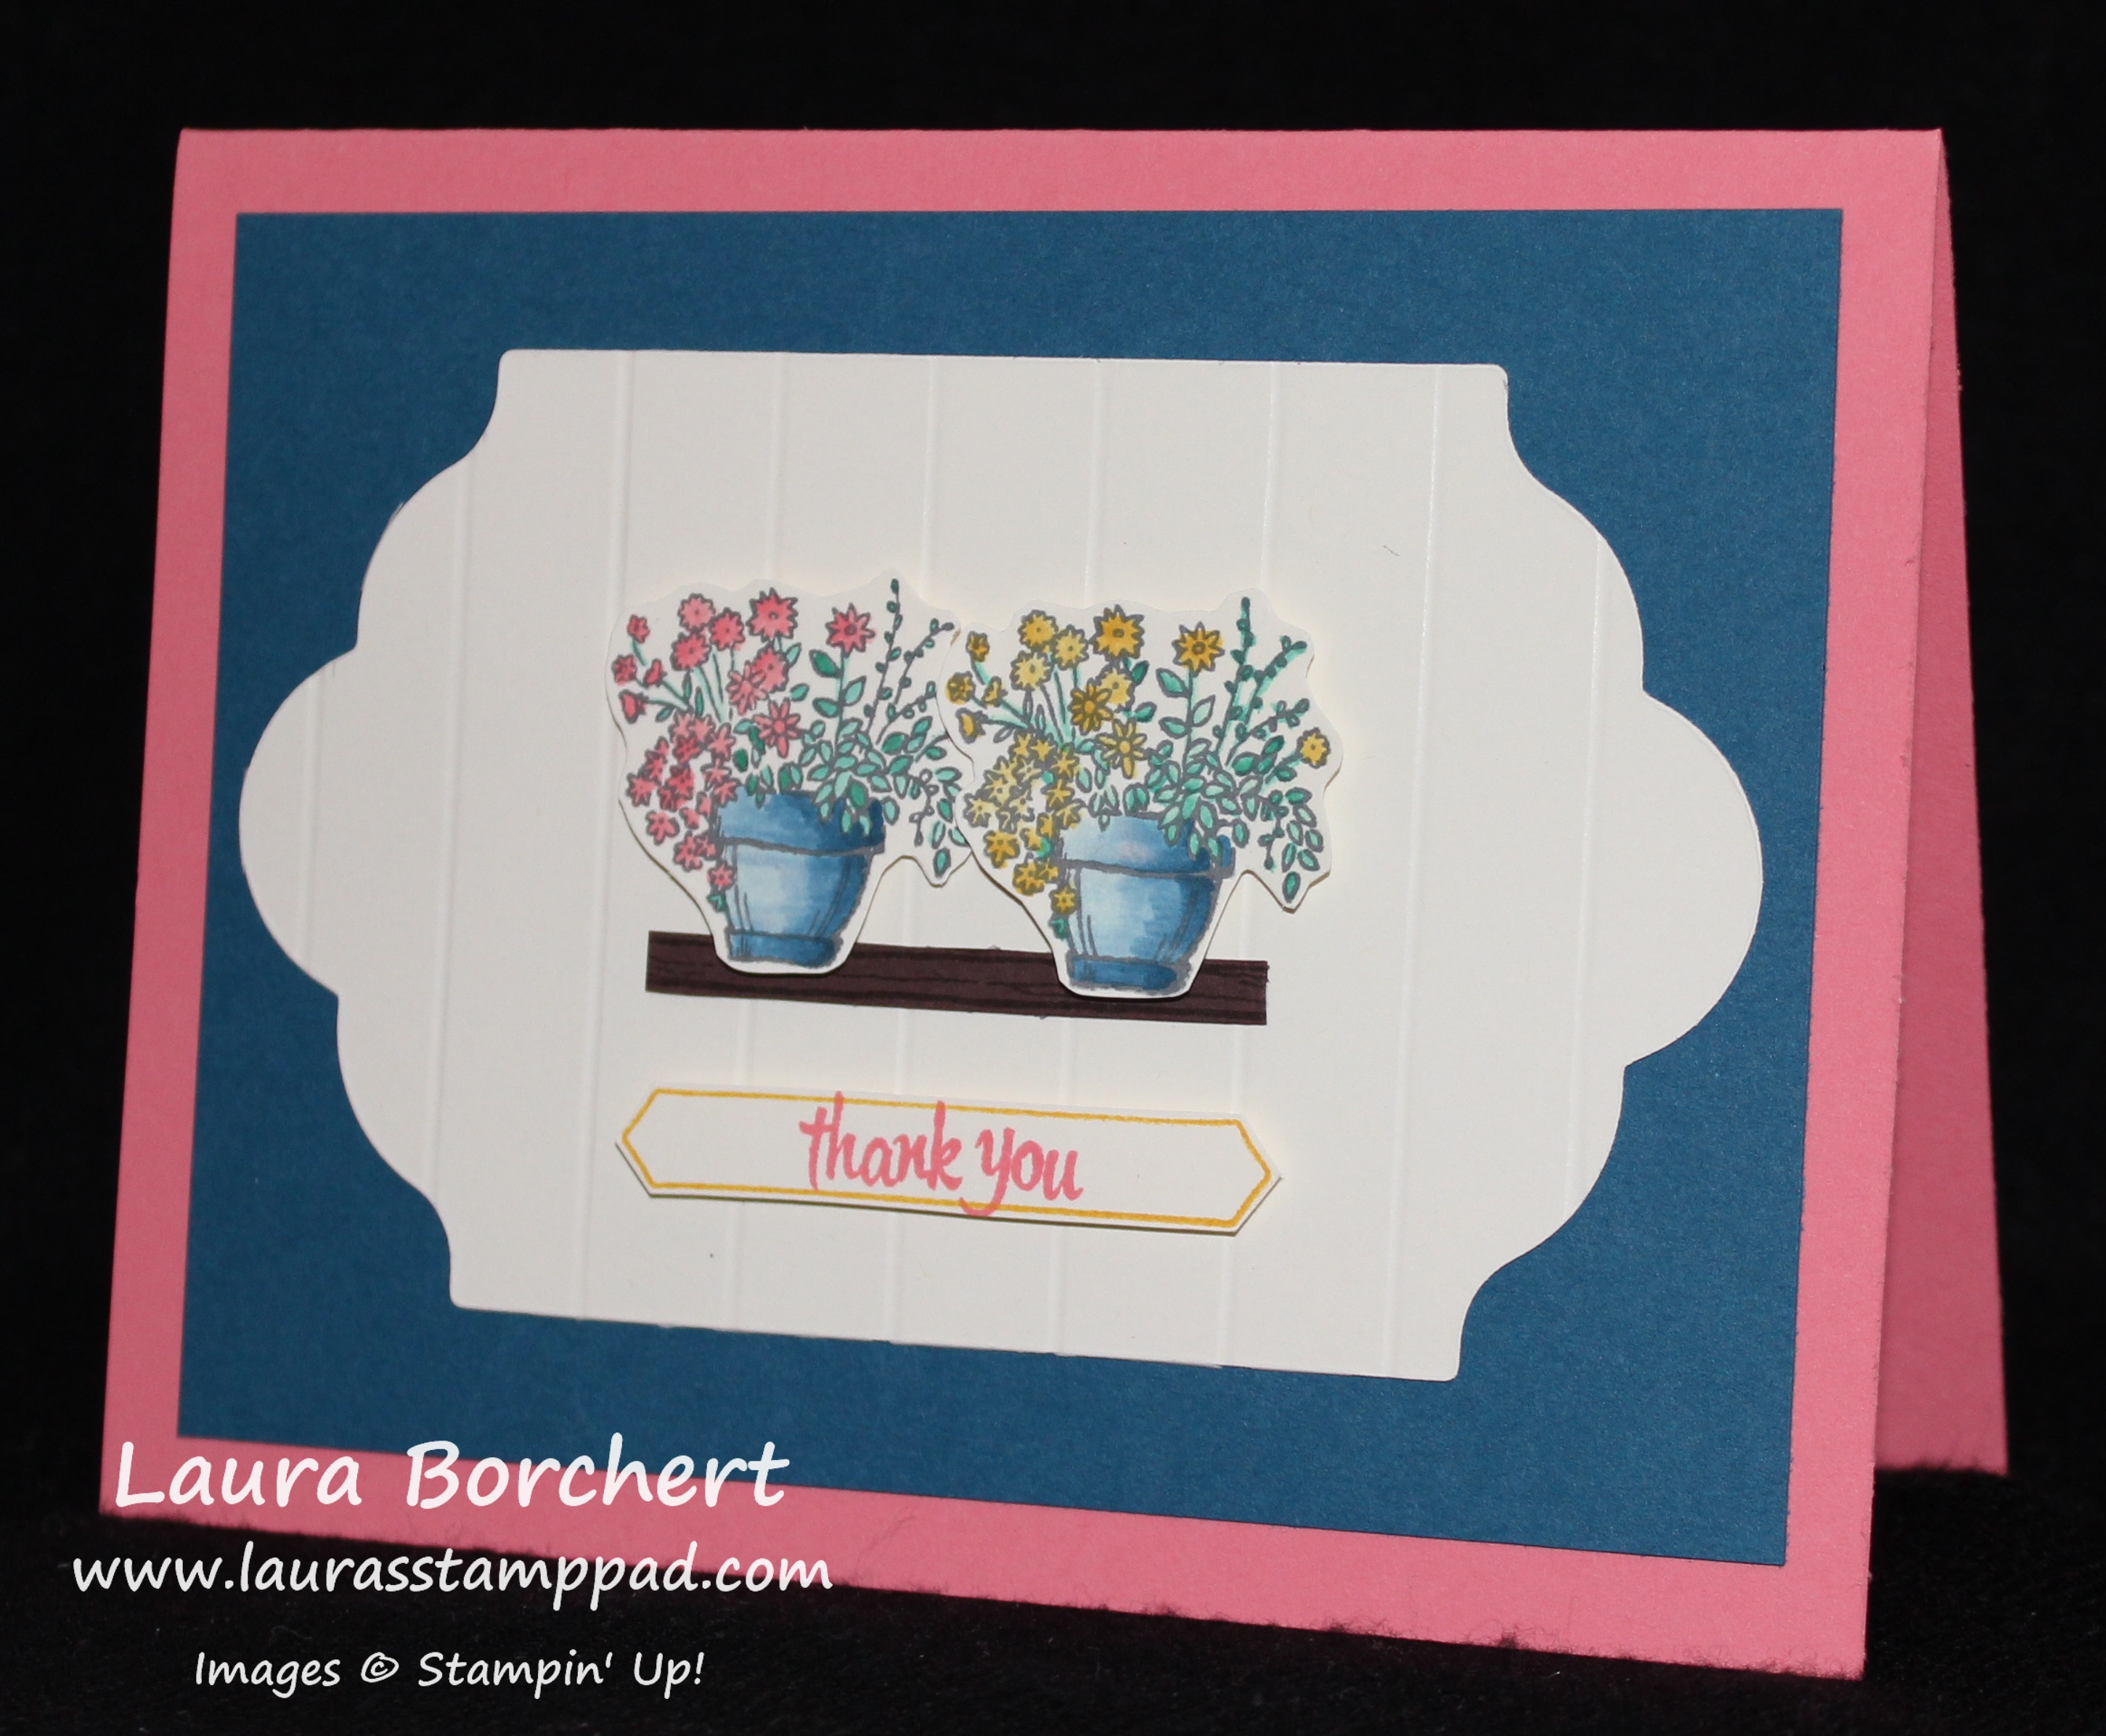
Once your watercolor is dry, I added this piece to some Elegant Eggplant measuring 4″ x 5-1/4″! I used Fast Fuse for a strong hold since the cardstock is warped a little. Then I wrapped some of the Peeka-A-Boo Peach Ruched Ribbon around it and tied it in a knot. For the greeting, I used the Perfectly Wrapped Stamp Set and stamped onto Whisper White. I added a few flowers to the greeting as well to really pull it all together! Using the Layering Circle Framelits, I die cut the greeting as well as a scallop in Elegant Eggplant. I added the greeting to the card front with Stampin’ Dimensionals.

See you can use this fabulous technique for holidays, all occasion, and so much more! I hope you have really enjoyed this technique as much as I have. You can see the complete Video Tutorial on this technique here!

Happy Stampin’

~Laura


Technique Tuesday – Reverse Watercoloring!!!

Posted on

Happy Tuesday everyone!!! I hope you have survived the fabulous turkey feast and shopping craziness! Now it is back to the craft room to prepare for the next holiday!!! This technique is super fabulous for Christmas Cards and cards all year long!!!

Watercolor Lifting, www.LaurasStampPad.com

I just love the shades of blue this card has and, without the snowflakes, I can dream of blue water and white sand on the beach! I said I can dream…..I know that doesn’t exist in Illinois especially this time of the year!!! Let’s get started on this amazing technique!

SUPPLIES NEEDED: Shimmery White Cardstock, Aqua Painter, Clear Embossing Powder, Heat Tool, VersaMark, Stamp Set of your choice and embellishments

I started with a Bermuda Bay card base. Then I took a piece of Shimmery White Cardstock (4″ x 5-1/4″) and went over the entire piece with the Aqua Painter to wet it down a little. This will help the color bleed and sort of prime the paper. You don’t need to soak it but just a little brush of water over the top. Now pick up some Bermuda Bay Ink and watercolor wash over the paper. You can go to the edge or leave a border. That is all up to you! Now allow this to dry by setting it aside or using the Heat Tool!

Side Notes while it dries……I use Shimmery White cardstock because of the fabulous shimmery look but also because it is a little bit thicker than Whisper White but not as thick and textured as Watercolor Paper. Watercolor Paper has too much texture so it won’t get a nice stamped image for clear embossing. Also, when you are using the Aqua Painter, you can either press your ink pad into the lid and use that as your color palette or you can press a clear block into the pad and use that. I prefer using the clear block because it isn’t as messy and I can easily clean it up. You could also drop re-inker onto the clear block and do it that way as well!

Once it is dry, you will stamp all over in a solid image stamp set with VersaMark Ink. I used the snowflake from the Tin of Tags Stamp Set. Apply Clear Embossing Powder over the top and set it with the Heat Tool. You can see a tutorial on Heat Embossing here. Now that your embossed image are set, they will hold the color underneath. Using your Aqua Painter, you will gently brush over the entire cardstock like you did in the beginning but this time with no color on your brush. You are just adding water which is lightening the watercolor wash that you applied earlier. The color is still being held under the images so they are popping more now. That is the Reverse Watercolor Technique!!!

Snowflake Tin of Tags, www.LaurasStampPad.com

Once your watercolor is dry, you can add it to your card base. I used Fast Fuse for a strong hold since the cardstock is warped a little. For the greeting, I used the Tin of Tags Stamp Set and stamped onto Whisper White. Using the Layering Circle Framelits, I die cut the greeting as well as a scallop in Bermuda Bay. I adhered these together and added loops of Metallic Silver Thread to the back and then placed it on the card front. For the Metallic loops, just wrap it around your finger as many times as you wish (8-12 times). Then twist the loops in the middle to create a figure 8 and place it on the back of the greeting. Using Stampin’ Dimensionals to secure it to the back of the greeting and then add it to the card front! I still thought it needed a little bit more bling so I added some Rhinestones all over! Love it!!!

Be sure to check back tomorrow as I will be sharing another sample using this technique! Tomorrow’s sample is a card for any time of the year!

If you would like to see this in action, check out the Video Tutorial below or click here. Don’t forget to give it a thumbs up if you liked it and be sure to subscribe if you are new!!

Happy Stampin’

~Laura


Flirty Flamingo Flowers!!!

Posted on

Hello Jar, www.LaurasStampPad.com

My obsession for pink and flowers continues!!! This card is such a beauty. I got the inspiration for it from a fellow demonstrator in the Netherlands – Tinie. Thank you for the amazing idea!

I started with a card base of Flirty Flamingo! Then I took a piece of Whisper White measuring 4″ x 5-1/4″ and stamped the jar and greeting from the Jar of Love Stamp Set in Basic Black Archival Ink. To get the light blue hue in the jar, I brushed over it with an Aqua Painter and some Pool Party Ink. For the flowers, I stamped them onto scrap white cardstock from the Jar of Love Stamp Set. The large background flower image was stamped in Flirty Flamingo Ink and the inside cup looking flower piece was stamped in Watermelon Wonder Ink. I added the 3 little dots for the center of the flower in Basic Black. I really think those little black centers really make this flower come to life. I love it!!! I die cut all six of the flowers with the coordinating Everyday Jar Framelits (Bundle & Save 10%). Before adding the flowers to the card, I stamped the greenery from the Jar of Love in Pear Pizzazz. I actually bent the end of the stem around the clear block so the stem wasn’t as long and stamping all over my card. For the flowers, I added 3 flat to the card and 3 were popped up with Stampin’ Dimensionals. I love how that gives the bouquet dimension and texture. I stamped the bow in Daffodil Delight Ink and die cut it as well. I had to use some of the dimensional edge to pop up the bow!

If you would like to see more samples using the Jar of Love Bundle, check them out here, here, here, and here! I hope you are enjoying my love of flowers too!

Happy Stampin’

~Laura

Don’t forget about the Paper Pumpkin BOGO Sale for new subscribers!!! Click here to get started and be sure to enter the Promo Code: BOGO

PP_BOGO_Facebook_US, www.LaurasStampPad.com


Tin of Tags Project Kit!!!

Posted on

30 Christmas Tags, www.LaurasStampPad.com

The Tin of Tags Project Kit caught my attention right away because of the adorable tin! I just had to have it….not sure what I’m going to do with it but…!!! It is super precious and comes with all of the supplies to make 30 tags (3 each of 10 designs).

Christmas Tags in a Tin, www.LaurasStampPad.com

Isn’t it fabulous??? Here is the tin with all of the tags inside so you can see it holds a lot!! Even if you didn’t care for the little tin (gasp, who wouldn’t?) you could use this tin of tags in your wrapping paper area/container/closet. It is hard and won’t damage the corners of your tags so it’s perfect to hold them!

Gift Tags, www.LaurasStampPad.com

To create the tags, you will need the Tin of Tags Stamp Set or your favorite greeting set. The kit also calls for the following ink colors – Island Indigo, Real Red, Crushed Curry, and Old Olive. One of the other tips that is stated in the instructions (but let us be honest, who reads those?) is to stamp the “To: From:” images on the back of each of the tags. This is a big tip because of course it is handy to have that but also because you might want to stamp them all in the beginning so you don’t forget and then it is hard to stamp on a bumpy surface. I stamped all of the backs with Island Indigo Ink.

Gift Tags for Christmas, www.LaurasStampPad.com

I love these tags! I am really not a tag person but I think it is because the holidays can be so crazy and that is the last thing I want to try to come up to decorate. This is why you start early! 🙂 Also, it is super easy when it is all put together for you. I was super amazed at how fast and easy this kit was to create. The tags are super cute and I love how they don’t just say a simple greeting or just To/From. It is fun to have the greeting and then the names on the back. I love it!!! You could really use these tags all year long with different greetings. The tag bases are simple and watercolored so really just add Happy Birthday and the sequins and you have tags all year long!

If you would like to see all of the supplies in the kit, check out this unboxing and reveal of the Tin of Tags Kit below or click here! Don’t forget to give this video a thumbs up if you liked it and be sure to subscribe if you are new!

Do you like to get creative with gift packaging? Do you love the little red polka dot tin as much as me? Come on, leave me a comment below so I’m not alone! 🙂

Happy Stampin’

~Laura

Don’t forget about the Paper Pumpkin BOGO Sale for new subscribers!!! Click here to get started and be sure to enter the Promo Code: BOGO

PP_BOGO_Facebook_US, www.LaurasStampPad.com


Amazing Marker Bonus!!!

Posted on

Marker Bonus Fact, www.LaurasStampPad.com

I love how this card turned out but it was a struggle to create it. When I first imagined the idea, I was thinking I would use Marina Mist and Pear Pizzazz. I thought it would look stunning and couldn’t wait to see how it turned out…..sometimes it turns out better than I imagined, exactly how I imagined, or not at all like I imagined. Ahhh the joys of being crafty!!! So I got started with a piece of Very Vanilla cardstock measuring 3-3/4″ x 5″ and stamped the flourish image from the Flourishing Phrases Stamp Set in Basic Gray Archival Ink. I got out my Marina Mist Marker Pear Pizzazz Marker to color it in and was sad to see the Marina Mist Marker was dead. At first, I thought it would be okay and I could go with a pink (my favorite) or another color. After a little thought, I just couldn’t imagine this card in another color but I remembered I have an Aqua Painter and Blender Pen and could use those just like a marker! So that is what I did! I used an Aqua Painter and pulled ink from the ink pad to color this image. It looks just the same. Isn’t that fabulous that even though Stampin’ Up doesn’t sell the markers individually, you can still have every marker at your finger tips with these products! I love it and got super excited! That perfect Ahh Hah moment! After coloring it, I layered this piece onto Pear Pizzazz (4″ x 5-1/4″) and then onto a Marina Mist card base. I stamped the greeting from the same Flourishing Phrases Stamp Set in Marina Mist onto Very Vanilla. I punched it out with the Decorative Label Punch and layered it with Pear Pizzazz. You can check out a fun video on how to do that here. I added the greeting to the card with Stampin’ Dimensionals. Perfect and just like I imagined!!!

I love the Flourishing Phrases Stamp Set and coordinating Flourish Thinlits (Bundle & Save 10%). It is that perfect image and greeting combination that is perfect for all types of occasions! There are flowers too! 🙂

If you would like to see the comparison of Markers, Blender Pens, and Aqua Painters, check out this Video Tutorial below or click here! Don’t forget to give it a thumbs up if you liked it and be sure to subscribe if you’re new!!!

Happy Stampin’

~Laura

Click here to start shopping and earning Bonus Bucks!!!

Bonus Days


Flower Pots on a Shelf!!!

Posted on

Flowers on a Shelf, www.LaurasStampPad.com

This card is just stunning – the coloring, pink, flowers, and that cool texture of the wall! Doesn’t the background look like wall paneling? I sure do and love the added texture! So let’s get started on this beautiful card!

I started with a Flirty Flamingo card base and added a piece of Dapper Denim measuring 5″ x 3-3/4″. Then I took a piece of scrap Very Vanilla and stamped the flower pots from the Sitting Here Stamp Set in Basic Gray Archival Ink. I used this ink so that it wouldn’t bleed when I watercolored the image and because I wanted a lighter shade than black. I used an Aqua Painter to color using Dapper Denim for the pots, Emerald Envy for the greenery and Flirty Flamingo and Crushed Curry for the flowers. If you would like to see a Video Tutorial on coloring with Aqua Painters, check this out! Set the flowers aside to dry before cutting them out. While they are drying, you can die cut the background with the Lots of Labels Framelits. To add the lines for a panel look, I placed it in the Stampin’ Trimmer and scored every 1/2″ inch. You could also use a straight edge and a Bone Folder. I added this to the card front!

Flower Pots, www.LaurasStampPad.com

For the shelf, I took a scrap piece of Chocolate Chip cardstock and stamped the bottom of the swing from the Sitting Here Stamp Set in Chocolate Chip. Then I cut off that bottom piece of the swing below the cushion. This gives the shelf some texture and wood look! I added the shelf to the “wall” and then I added the potted flowers with Stampin’ Dimensionals. For the greeting, I used the Thoughtful Banners Stamp Set. I stamped the border in Crushed Curry and the greeting in Flirty Flamingo. I punched it out with the Classic Label Punch. I added the greeting the to the card with Stampin’ Dimensionals! Love it!!!!

Do you love flower cards as much as me too? Do you like watercoloring? Let me know in the comments below if I’m all alone here or if you all love it too!!!

Happy Stampin’

~Laura

Bonus Days

Bonus Days are here!! For every $50 you spend, you will earn $5 to use from August 2nd – 31st!!! Click here to start shopping!!!


Sweet Little Orange Kitten!!!

Posted on

Kitty On A Swing, www.LaurasStampPad.com

I admit it……I’m a cat person!!! I just love little kittens to play with, the purring, the craziness, the soft kitty. But don’t worry, there is a puppy in this stamp set for all of you puppy lovers out there as well! 🙂 A comfy swing, a purring kitty, and a cool breeze is the perfect combination for a relaxing moment!

This card was created with a Crumb Cake card base. Then I took a piece of Very Vanilla measuring 5″ x 3″. I stamped the swing from the Sitting Here Stamp Set in Basic Gray for that softer look. When stamping the swing be sure it is inked up really well and be sure to press in the middle for a good stamped image. The greeting is from the same set and stamped in Dapper Denim. Be sure that both images are towards the left so that you can tear the right edge. I used an Aqua Painter to color in the swing in Crumb Cake and cushion in Dapper Denim. For the kitty, I stamped him onto scrap Very Vanilla in the Basic Gray and colored him with Peekaboo Peach! I cut him out and adhered him to the swing with the Fine Tip Glue Pen! Once it is all dry, you will want to tear along the right hand side – small little tears. You will also tear a piece of Dapper Denim. I used a scrap piece measuring 5″ x 1-1/2″. You just need a little bit to add some adhesive and stick it on the edge of your swing piece. Once that is attached, I wrapped some Linen Thread around and tied a bow. I attached this to the card front and then it’s done! I love it! This card is perfect for so many occasions!

What occasion would you use this card for? Let me know in the comments below!

Happy Stampin’

~Laura


Beautiful Basket of Flowers!!!

Posted on

Make Me Smile, www.LaurasStampPad.com

Happy Friday!!! Here in Illinois it has been a hot week and I have to say in order to keep my basket of flowers looking beautiful I have to water them every evening. So far, so good but I have more “inky fingers” than a green thumb so we shall see how long I can get them to last! 🙂

For this beauty, I started with a Peekaboo Peach card base and I splattered some Peekaboo Peach Ink onto it with an Aqua Painter just for a little texture. I stamped the greeting on the bottom in Dapper Denim from the Sitting Here Stamp Set! The Baker’s Twine I used is actually retired but I have made some since this sample using the new Gold Natural Trim! Perfect!!! For the Flower Basket, I stamped it from the Sitting Here Stamp Set in Basic Gray Archival Ink. I also stamped the line image below the basket in the same. That image is perfect for getting that shadow line so the basket doesn’t look like it is floating! I used the Basic Gray because I like the softer look for the image (rather than black) and since I watercolored the images I needed something that wouldn’t bleed! I colored in the image with an Aqua Painter and used Dapper Denim, Peekaboo Peach, Emerald Envy, and Chocolate Chip. I love it. I layered this piece (2″ square) onto a 2-1/4″ Dapper Denim square. I attached it to my card front with Stampin’ Dimensionals!

If you would like to see more samples using the Sitting Here Stamp Set, check them out here and here and stay tuned. I have been having so much fun with this set!!! 🙂

Yesterday I posted a video showing you how to fix an ink pad that has been stamped in with the wrong color. It happens to everyone, you get on a roll and start stamping and hit the wrong ink pad or think it is one color when it is another. Have no fear, it is really easy to fix. You can check that out here!!!

Have a wonderful weekend and I’ll see you back here on Monday!!! 🙂

Happy Stampin’

~Laura


Watercolor Background!!!

Posted on

Sugarplum Wash, www.LaurasStampPad.com

You can create beautiful watercolor background with a little ink and an Aqua Painter! It is really quick and simple and you can do it in any color you desire. You can even use a few colors for an ombre look or rainbow look!

I started with a piece of Whisper White cardstock measuring 4″ x 5-1/4″. I went over the top of the cardstock with my Aqua Painter just to lightly wet it. There was no ink on the brush just quickly brush over the entire piece. Then I picked up some ink and brushed quickly over the front. I used Sweet Sugarplum for the one above and Flirty Flamingo for the one below!

Flamingo Wash, www.LaurasStampPad.com

Once I had enough color that I wanted, I cleaned off the brush and picked up some Tip Top Taupe Ink. I squeezed the barrel a bit to release more water and then I tapped the end on my finger so that it would splatter on my card. That is how I got those little brown dots all over. It adds a little bit of interest and texture to the card. You will want to set the card aside for a minute to dry, more or less time depending on how wet it is. If you don’t have time for that, you can always use your Heat Tool to dry it faster. Once it was dry, I stamped the greeting from the Layering Love Stamp Set in Tip Top Taupe. I added this piece to a card base of Tip Top Taupe with Stampin’ Dimensionals. Since the watercolor makes the paper curl and bend a bit, I found that the Stampin’ Dimensionals allow for that rather than trying to stick it down flat. I tied some ribbon around the card on the left side using the coordinating color. I am loving the NEW Ruched Ribbon! Quick, Simple, and fabulous!!!

Of course, if you aren’t a fan of watercolor, you could always get the Watercolor Wash Stamp Set. Today I did a Video Tutorial on how to stamp with large background stamps. They are rather large and can be a little more difficult to stamp with. I show a few tips and tricks on getting the perfect look! Check that out here or below! Don’t forget to give it a thumbs up if you enjoyed it and be sure to subscribe so you don’t miss out on any others!

Happy Stampin’

~Laura  


Technique Tuesday – Rounding Your Pillows!!!

Posted on

Happy Tuesday everyone!!! You know what that means….I have an amazing technique to share with you! Today we are playing with watercolor and I’m going to show your how to create a rounded out pillow! It’s super fun and easy and looks amazing on your comfy porch swing!

Sitting Here Thinking of You, www.LaurasStampPad.com

Isn’t this card so calming and peaceful? I love it! Those bright colors in the pillows and cushion look comfy and I can feel the cool summer breeze just looking at it. Can’t you????

SUPPLIES NEEDED: Sitting Here Stamp Set, Basic Gray Archival Ink, Inks of Choice, and Aqua Painter

Let’s start with the focal point first. I got a piece of Very Vanilla cardstock (3-3/4″ x 5″) and stamped the swing and birdie from the Sitting Here Stamp Set with Basic Gray Archival Ink. You will want to use an Archival Ink so that the color doesn’t run when you start watercoloring! I went with gray because it is a little softer than black. Using an Aqua Painter, I colored the swing with Chocolate Chip, birdie in Crushed Curry, and the bench cushion in Bermuda Bay. Remember you never need to squeeze additional water in your Aqua Painter unless you are cleaning out the color to move to another one. You also want to focus on using just the tip of the pen….that very small point. If you press harder the brush will fan out and go all over and it will release more water then. When you are ready to change colors, just brush onto a scrap piece of paper or paper towel till the brush is clean and then move to the next color. I stamped the other 2 pillows in Basic Gray onto scrap cardstock and colored them as well. I used Tangerine Tango and Crushed Curry. Then I cut out the pillows. I added the orange pillow to the card with regular Snail Adhesive. For the round pillow, I took the other end (not the brush tip) of my Aqua Painter and ran it around the edge of my round pillow. The rounded end of the Aqua Painter presses on the cardstock and makes it curl in like a bottle cap. This is how you get that fabulous rounded pillow. Then I adhered the pillow to my card with a Stampin’ Dimensional. I love how it looks so real and amazing. Those rounded edges cover up the dimensional and make it look so real. Thank you to Glenda Travelstead for that amazing technique! I love it! I stamped the greeting from the Sitting Here Stamp Set on the bottom in Bermuda Bay. Now it is time to assemble. I tied some Bermuda Bay Stitched Ribbon around the vanilla piece and then layered this onto a piece of Tangerine Tango (4″ x 5-1/4″). I added this all to a Crumb Cake card base!

Pillows Popped Out, www.LaurasStampPad.com

If you want to see this all in action, check out my Video Tutorial below or click here. Don’t forget to give it a thumbs up if you liked it and be sure to subscribe if you are new! I post every Tuesday and Thursday!

Happy Stampin’

~Laura