Technique Tuesday – Debossed Dots!!!

Posted on

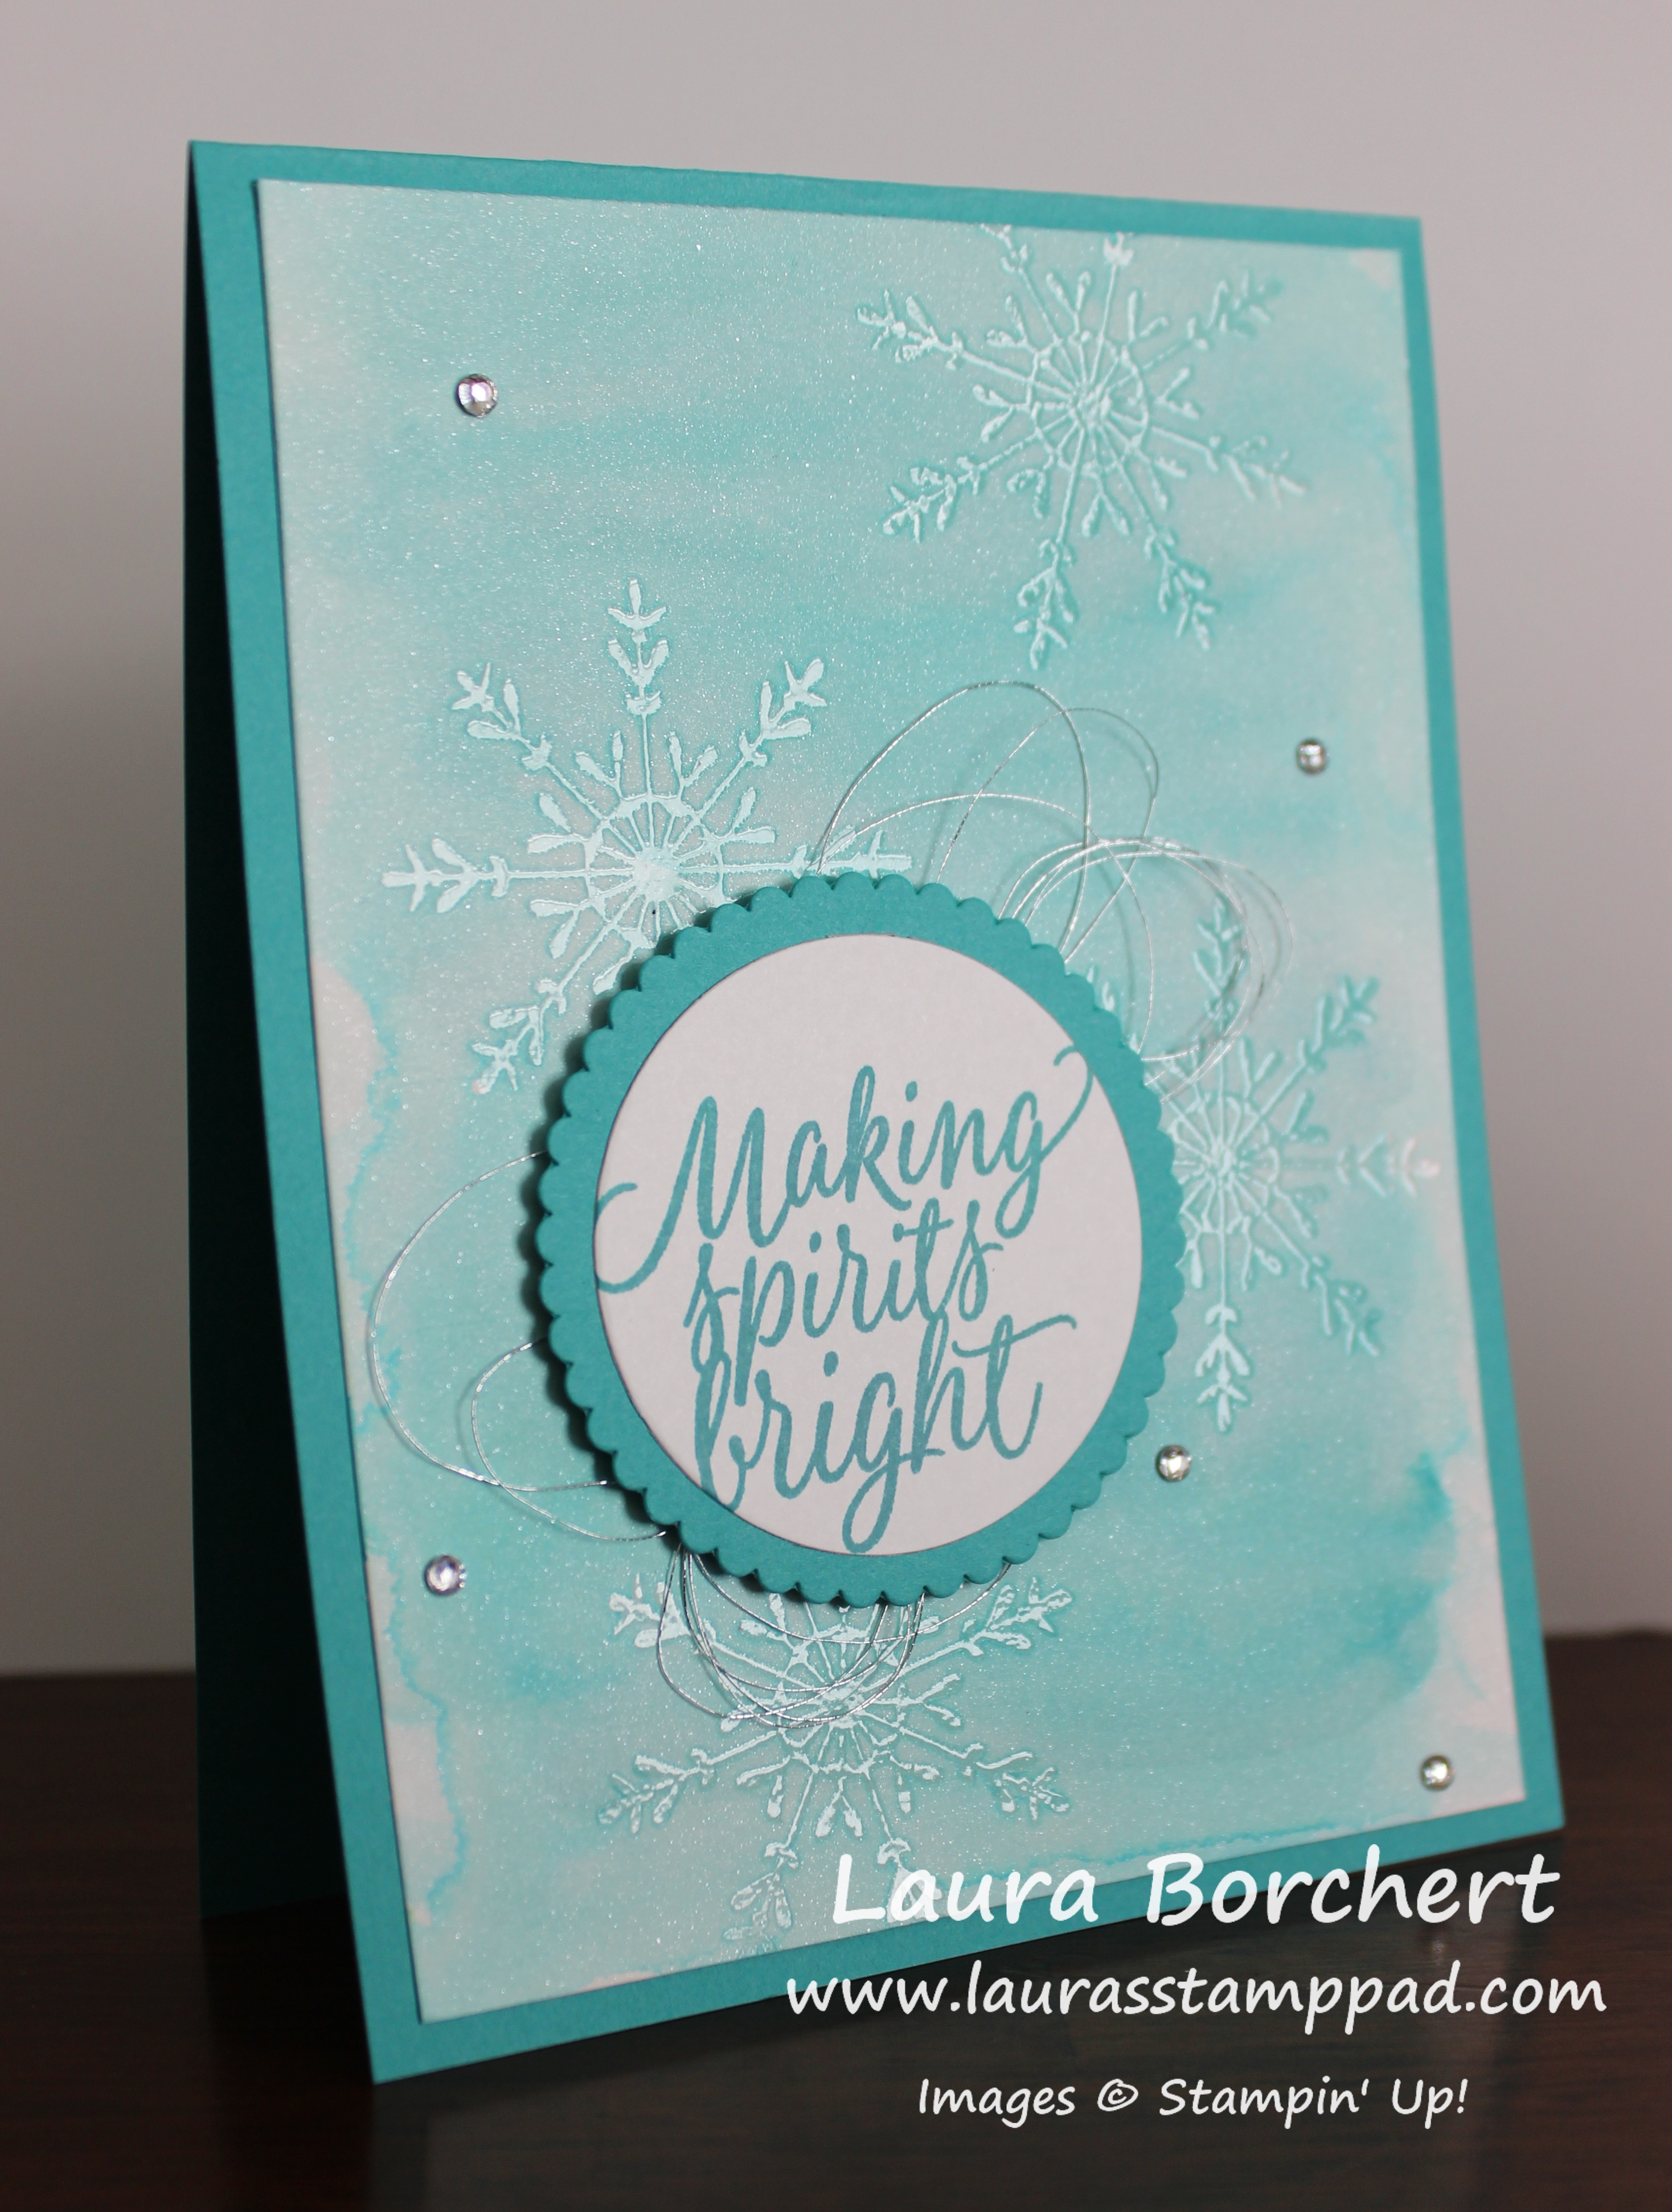
Happy Tuesday!!! You all know what that means!!! I have a fabulous technique to share with you today – de-bossing and polka dots!!!! Super fabulous and fun for any occasion!!!

debossed polka dots, www.LaurasStampPad.com

Isn’t this card amazing? I love polka dots! You could change up the colors for a more masculine card! Let’s get started!!!

SUPPLIES: Celebrations Duo Embossing Folder, Big Shot, Happy Celebrations Stamp Set, Stampin’ Pierce Mat

I started with a Watermelon Wonder card base. Then I took a piece of Whisper White (4″ x 5-1/4″) and ran it through the Big Shot with the Celebrations Duo Embossing Folder in the middle. The Celebrate and Happy both de-boss the cardstock and then when you stamp over the top, the greeting will POP! I love it!! I have found that stamping over the top of the de-bossed image turns out the best when you stamp on top of the Stampin’ Pierce Mat. This mat has some gives for the cardstock to press into rather than a hard surface. I used the Happy Celebrations Stamp Set to stamp the polka dots all over and make the greeting pop! I went with Watermelon Wonder Ink, Tangerine Tango Ink, and Daffodil Delight Ink. I stamped the dots all over the cardstock, some in full strength and some as the stamped off shade of ink. For this card, I highly recommend going back to the ink pad each time and if you want the lighter shade, then stamp off onto a scrap piece of paper rather than on the card. The reason for this is because if you fall half off the cardstock, it makes the second stamp image have a line on it. Also, if you stamp over the celebrate greeting, the second stamp will have the letters in a darker ink so to avoid this, just go to the ink pad each time! 🙂 Be sure to stamp the dots with firm even pressure. Since the stamps are photopolymer, you can see when the paper and ink touch so sometimes you need to rock it a bit gently!

Celebrate Mistakes, www.LaurasStampPad.com

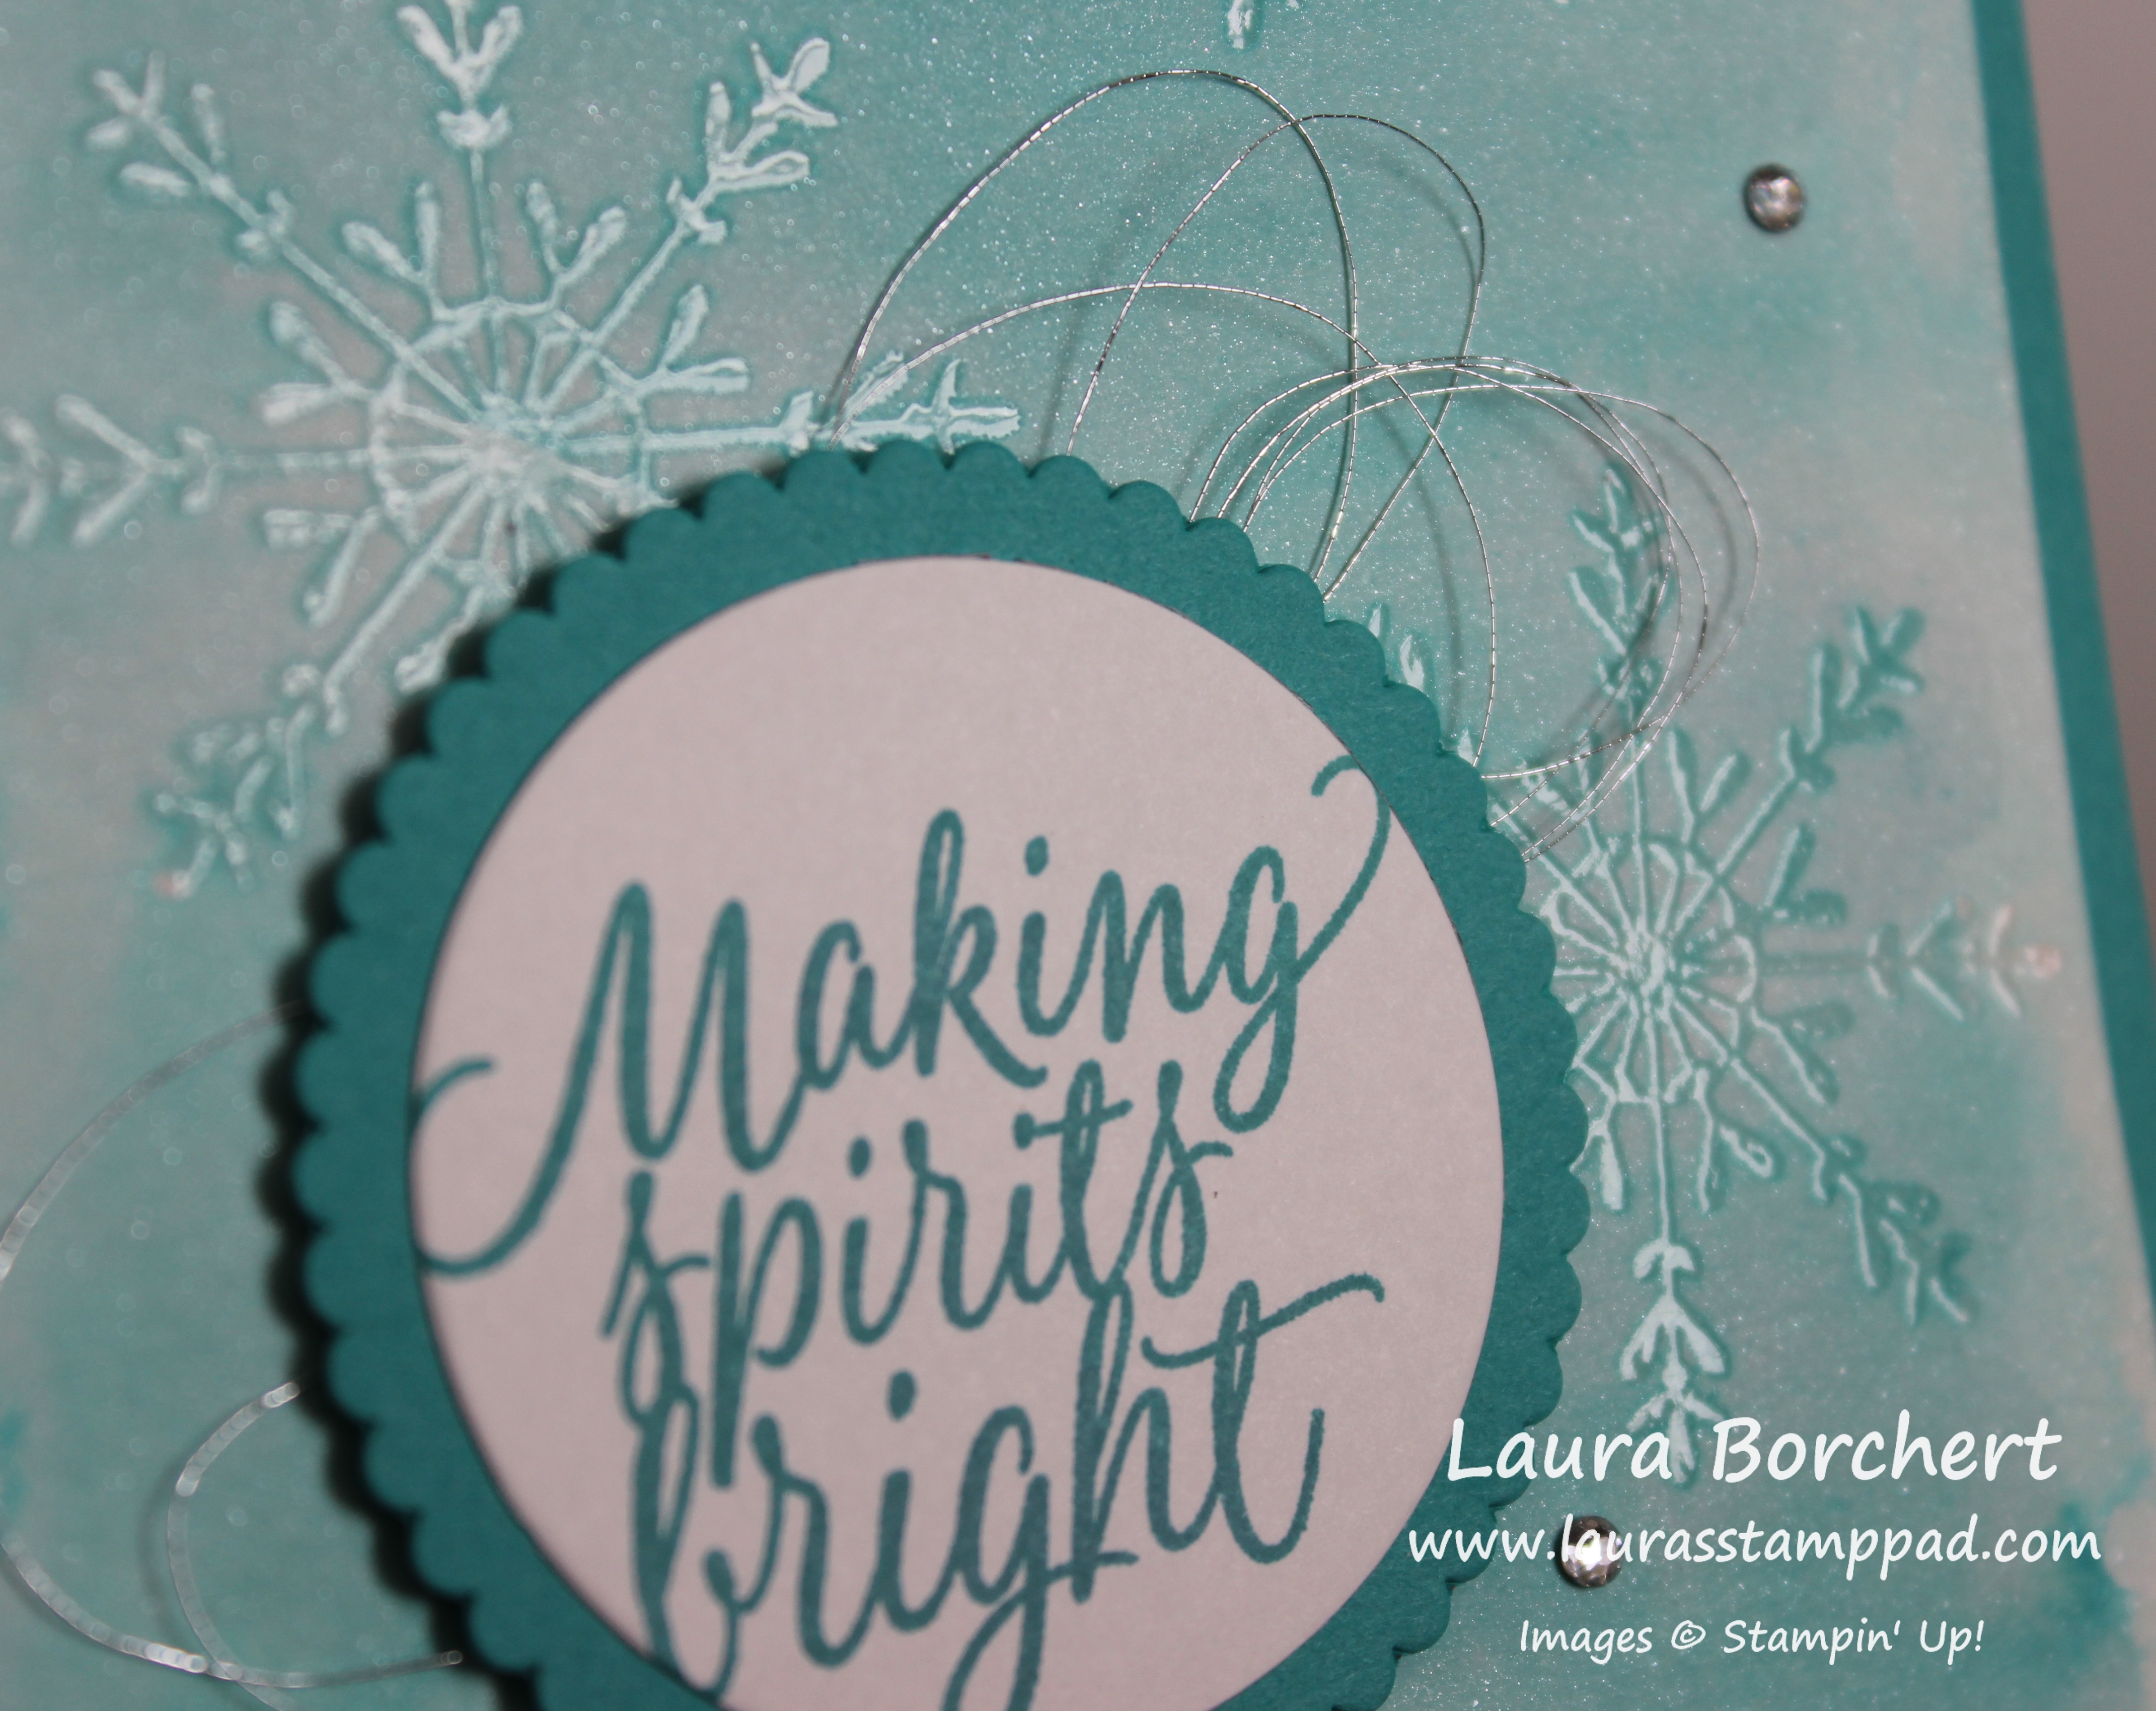
After all of the dots were complete, I wrapped some Gold Metallic Thread around the card a few times and tied a knot on the backside. I added this piece to the card base with Stampin’ Dimensionals! Then for the little greeting of “Your Day”, I stamped it in Tangerine Tango Ink onto Whisper White and layered it onto Tangerine Tango! I used the Banner Triple Punch to add the banner tips. I added the greeting to the card front with Stampin’ Dimensionals. I love it and think I should do some blues and greens next!!! What colors would you use for this card? Let me know in the comments below!

If you would like to see all of this in action, check out the Video Tutorial below or click here! Be sure to give it a thumbs up if you liked it and subscribe if you are new!! I post a video every Tuesday and Thursday!

Happy Stampin’

~Laura


Technique Tuesday – Balloon Pop Out Card!!!

Posted on

Happy Tuesday!!! That means I have a fabulous technique to share with you today. The cool thing about this technique is the Balloon Pop-Up Thinlits do all the hard work and you just get to enjoy the POP UP!!!!Birthday Pop Out Card, www.LaurasStampPad.com

This card looks fairly basic on the front but it’s the inside that has the MAJOR WOW factor! I love it! Also, check out that adorable little charm!!! Let’s get started!

I started with a Crushed Curry card base!!! For the front, I cut a piece of the Party Animal Designer Series Paper (4-3/4″ x 3-3/4″) and tied some Emerald Envy Taffeta Ribbon around it and into a bow! Then I took a piece of Whisper White (3″ x 2″) and stamped the confetti from the Balloon Adventures Stamp Set in Crushed Curry. I stamped the greeting in Pacific Point Ink. I added the greeting to the card front. For the Party Animal Charm, I attached it with some Crushed Curry Baker’s Twine! Now for the inside, I cut a piece of Whisper White measuring 5″ x 7-1/2″ and scored it in the middle at 3-3/4″. Then take the Balloon Pop Out Thinlits (Bundle & Save 10%) and line up the center with the center score line of the thinlit. This is super simple since the thinlit has a distinct center and the little triangle on the bottom to help find the center. Run it thought the Big Shot and it creates the perfect Pop Out! Before folding the score line, you will want to do all of the stamping. Give firm even pressure on the stamping so it comes out clean even with the score lines.

Inside Balloon Pop Out, www.LaurasStampPad.com

I stamped the 3 styles of balloons from the Balloon Adventures Stamp Set in Crushed Curry, Tangerine Tango, and Emerald Envy. The greeting was stamped in Pacific Point Ink. Once you are done stamping, you can fold on the score lines in mountain/valley fold. I added Snail Adhesive on the far outside panels. With the card all the way open, I place the right side down. Then I folded the mountain/valley all the way down and closed the card on top of it. I always find it best to close the card to seal the second side rather than just laying it flat. This way there isn’t an uneven pop out and it will close smoothly!! I added the little decoration on the ends by cutting pieces of the Party Animal Designer Series Paper measuring 1/2″ x 4-1/2″ and adhering them down. The pop out is so much fun but these pictures don’t do it justice at all.

You can see this all in action n the Video Tutorial below or click here! If you liked the video, be sure to give it a thumbs up! Don’t forget to subscribe if you are new. I post videos every Tuesday and Thursday!!!

If you would like to see more samples using the Balloon Adventures Bundle, check them out here, here, and here! The best part is when you purchase this bundle, you get to pick out a FREE Sale-A-Bration item!!!

Happy Stampin’

~Laura


Technique Tuesday – Diagonal Backgrounds!!!

Posted on

Happy Tuesday!!! You all know that means I have a fabulous technique to share with you!! Today we are using those scraps that you all have on hand…..come on, I know I’m not the only one with scraps! Check out this beauty!!!

Create a Background, www.LaurasStampPad.com

I love the combination of foil and cardstock in this background!! These are the two paper scrap bags that had the most in them so I went with it! I cut the Pool Party into 1/4″ strips and the Silver Foil Paper into 1/2″ strips. Love it!!! Thanks to Stampin’ Up! for showing this amazing technique!

I started with a Pool Party card base! Then I took a piece of Whisper White (4″ x 5-1/4″) and placed the scrap strips on it diagonally. I cut the Pool Party into 1/4″ strips and the Silver Foil Paper into 1/2″ strips but you can always do any size of strips you wish! There is no right or wrong way to do this technique. That is the fabulous thing about this! I used the Fine Tip Glue Pen to adhere the strips because it was easy and I didn’t have to worry about the width of the Snail Adhesive. Just place the strips down and trim off the ends. You can then use the cut off pieces again on the ends!

Striped Background Tutorial, www.LaurasStampPad.com

After you are all done with the background, add it to the card base and decorate!!! For the greeting, I stamped it from the Suite Sentiments Stamp Set onto Whisper White. Then I die cut it with the Stitched Shapes Framelits (coming back soon, stay tuned). I love that fabulous stitching for the texture and pattern without an additional layer!!! 🙂

A Friend Like You, www.LaurasStampPad.com

But I couldn’t stop there! I added some loops of Metallic Silver Thread to the back to the back of the greeting and secured it with some Stampin’ Dimensionals.

Silver Foil Strips, www.LaurasStampPad.com  Look at that shine!!! I just love this! You could do this technique with Cardstock, Designer Paper, Glimmer Paper, or Foil Paper. There are so many options! Whatever you have scraps of, use them for this fabulous design!!! Go all out and have fun!

If you would like to see this all in action, check out the Video Tutorial below or click here!! Don’t forget to give it a thumbs up if you liked it and be sure to subscribe if you are new! I post every Tuesday and Thursday!

Happy Stampin’

~Laura


Technique Tuesday – Balloon Background!!!

Posted on

Happy Tuesday!!! Today I have a fabulous technique to share with you that you could use with lots of different stamp sets!!! Creating backgrounds is perfect for all types of projects from cards, scrapbooks, 3D projects and more!!!

Year of Adventures, www.LaurasStampPad.com

All the shades of purple are used in this amazing balloon background card – Sweet Sugarplum, Perfect Plum, and Elegant Eggplant!

I started with a Perfect Plum card base! Then I took a piece of Whisper White measuring 3-3/4″ x 5″ and stamped the greeting from the Balloon Adventures Stamp Set in Basic Black Archival Ink. I love this set for the amazing greetings and fun balloons!!! While waiting for the greeting to completely dry before watercoloring it, I worked on the background. I started with the border/outline balloon images from the Balloon Adventures Stamp Set. There are 5 total balloons stamped with the outlines. I stamped the top left corner in Elegant Eggplant Ink and then stamped the bottom right balloon with it as well (without going back to the ink). This gives even more color variation to the card besides the 3 colors already. I stamped the middle balloon and bottom left balloon in Sweet Sugarplum Ink (both full strength). The balloon on the upper right is Perfect Plum Ink. After the 5 base balloons are set, I filled in the balloons with the solid balloon stamp. I stamped each of the balloons and then stamped a few of the solid ones along top of the cardstock to resemble more balloons in the background. You can play with the color variations by stamping off on scrap paper for some or using full strength! One big tip – when using the 2nd stamped image be sure it is only after stamping the first image completely. What I mean by this is that if you stamp the image and half of the balloon is falling off the cardstock, don’t stamp it again completely on the card. If you do it, it will stamp as a dark image on the half that was “falling off” and light on the half that was stamped before. To avoid this, you can stamp off directly on a piece of scrap paper before stamping onto your project so it is an even stamp off. Now that the background is all complete, I colored in the letters of the greeting with an Aqua Painter and ink from the ink pads – Elegant Eggplant and Perfect Plum. Once it was dried, I adhered it to a piece of Elegant Eggplant (4″ x 5-1/4″). I tied some of the Sweet Sugarplum Ruched Ribbon around the bottom of the cardstock and added it to the card base with Stampin’ Dimensionals. I liked using dimensionals when I have ribbon wrapped around because it makes it look nice and smooth and I just love the added texture. It is purple perfection!!!

If you would like to see this all in action, check out the Video Tutorial below or click here! Don’t forget to subscribe if you are new and give it a thumbs up if you liked it!

Also, you can get the Balloon Adventures Stamp Set with the Balloon Pop Up Thinlits as a Bundle and Save 10% and you can pick out a FREE Sale-A-Bration item!!!! I love this time of year!!!

Happy Stampin’

~Laura


Technique Tuesday – Stamp-A-Ma-Jig!!!

Posted on

Happy Tuesday!!! I hope you are all recovered from the New Year festivities and ready to get back into the swing of things! Today I’m sharing a fabulous technique using the Stamp-A-Ma-Jig! This is one of those handy tools that makes stamping perfect!!!

Stamp-A-Ma-Jig, www.LaurasStampPad.com

Are you wondering where that fabulous Thanks greeting came from??? It’s in the Double Take Stamp Set in the Occasions Mini Catalog which starts TOMORROW!!!! I’m super excited to start sharing with you all of the fabulous new products!!! This stamp set is a 2-step stamping set which allows for you to create those amazing drop shadows with different colors! I love it!! The stamp set is photopolymer which makes it super easy to see through to line it up. If you want to make sure it’s perfect every time though, you can use a Stamp-A-Ma-Jig!!!

For the greeting, I took a piece of Whisper White (1-1/2″ x 3-3/4″) and stamped the solid Thanks greeting from the Double Take Stamp Set in Mint Macaron. That’s the easy one! Then I took the other Thanks image (the one that’s more broken up and not as solid) and inked it in Night of Navy Ink. If you ink it lightly and don’t get ink on your block or all around the stamp, it is much easier to line up with the mint image and stamp it down. If you would like a sure fire way to know it’s going to be perfect, you can use a Stamp-A-Ma-Jig! This is a tool to help you line up your stamping images every time whether it be a perfectly straight and centered greeting or a 2 step stamping set. There is a “T” shaped plastic piece as well as a clear imaging sheet that is square. You will place the imaging sheet in the corner of the “T” shaped piece, either on the left side or the right depending on which you are more comfortable with. I am right handed and I place it on the right side. Then stamp your image onto the imaging sheet making sure that the block of the stamp is pressed against that “T”. So if you are doing it like me, your stamped image would be in the lower left corner of the imaging sheet. You want to make sure to use the “T” as a guide as you stamp your image down because this is creating your guide for the actual stamped image. Now place the imaging sheet over your white cardstock greeting exactly as you wish to stamp this 2nd image. Place the “T” in the corner like you did before, remove the imaging sheet without moving the cardstock, then place the stamp in the “T” corner and stamp it down.

Stamp-A-Ma-Jig Tutorial, www.LaurasStampPad.com

Your image should have come out perfectly! A few tips – be sure to slide the block down along the “T” evenly and not at an angle. If it is angled it will hit the paper in a different spot and can move the cardstock. If you wish to add a small dab of adhesive to the back of your cardstock to ensure it won’t move that can be handy! Make sure you press the block against the “T” and not just close to it, otherwise your image won’t be lined up exactly. It’s okay if your stamp is on the block diagonal or crooked because the Stamp-A-Ma-Jig will help correct that and make it right. Just be away that it might look crooked when you are stamping, don’t over correct that. Trust the Stamp-A-Ma-Jig.

Now that you have your perfect greeting, you can finish the card! I layered the greeting onto Night of Navy cardstock (1-3/4″ x 4″). My card base is Daffodil Delight. I took a piece of Affectionately Yours Designer Series Paper (3-3/4″ x 5″) and layered it onto Watermelon Wonder cardstock (4″ x 5-1/4″) and wrapped some White Baker’s Twine around it! I added this piece to the card front with Stampin’ Dimensionals. I added the greeting to the card with them as well. To finish it off, I put a few Enamel Shapes randomly on the card for texture. I just love this look and all of the layers – both in cardstock and stamping!!!

To see this all in action, check out the Video Tutorial below or click here! Don’t forget to give it a thumbs up if you liked it and be sure to subscribe if you are new!!

Don’t forget that the Holiday Mini Catalog ends tonight! Tomorrow the Occasions Mini Catalog and Sale-A-Bration Promotion begin!!! WOOT WOOT!!!

Happy Stampin’

~Laura


Technique Tuesday – Floral Boutique One Sheet Wonder!!!

Posted on

Happy Tuesday!!!! I hope you are having a wonderful week and if you are like me, you have no clue what day it really is….the holidays always do this! Before long it will be the weekend again and another holiday!!! Today I’m sharing a favorite – One Sheet Wonders!!!
Floral Boutique One Sheet Wonder, www.LaurasStampPad.com

So technically only 9 of these cards came from 1 sheet of 12″ x 12″ Designer Series Paper but I couldn’t stop at just 1 sheet so I made TONS!!!

Supplies for the One Sheet Wonder, www.LaurasStampPad.com

You will need the following:

9 Crumb Cake Card Bases – 5-1/2″ x 8-1/2″

9 Night of Navy Cardstock – 4-1/8″ x 5-3/8″

1 Sheet of 12″ x 12″ Floral Boutique Designer Series Paper – cut into 4″ Squares = 9 squares

Floral Boutique Washi Tape

9 Whisper White Cardstock – 1-1/2″ x 4″

For all of the greetings and stamped decorations, I used the Designer Tin of Cards Stamp Set and Flourishing Phrases Stamp Set in Night of Navy Ink and Crumb Cake Ink! I like using just 1 or 2 stamp sets and ink pads because it makes it quick and simple without pulling out all of the supplies you have and making a huge mess!!!

Sympathy Note, www.LaurasStampPad.com

For the card on the left, I added some Washi Tape to the greeting piece and layered it all together. For the card on the right, I cut an inch off the top of  4″ Square giving me a 1″ piece for the top and 3″ for the bottom!

Floral Boutique Paper, www.LaurasStampPad.com  You can swap the Designer Paper to be on the top or bottom. I added a little bit of the Washi Tape on the overlap of the Designer Paper and greeting piece!

Sending You Love, www.LaurasStampPad.com

I will say for the diagonal one, you will need a longer piece of Whisper White but that depends on your angle. Just take a strip that is 1-1/4″ and then trim down once you have cut your Designer Paper. The 4″ square was cut diagonal at any angle you wish! For the card on the right, I cut the 4″ square in half and put it on the top and bottom!

Navy and Tan, www.LaurasStampPad.com

I used the Washi Tape on both of these. You can add some more design to the greeting piece with stamps, enamel shapes, or punched pieces!

Fantastic Person, www.LaurasStampPad.com

I love the confetti swirl in the Designer Tin of Cards Stamp Set! Super fun!!!

You Can Do It, www.LaurasStampPad.com

So many fun prints but they all look amazing! You could cut up the entire package of Floral Boutique Designer Paper and make 108 cards in no time at all!!!

If you would like to see these cards in action, check out the Video Tutorial below or click here! Don’t forget to give it a thumbs up if you liked it and be sure to subscribe if you are new!!!

Have you tried a One Sheet Wonder? Do you love them too? Let me know in the comments below and check out others here, here, and here!

Happy Stampin’

~Laura


Technique Tuesday – Star of Light!

Posted on

Happy Tuesday everyone!!! I hope you are having a fabulous week so far! Today I have a fabulous card to share with you! It’s odd that this was the first Holiday card I made this season and yet I have waited this long to share it with you!! This card is also part of my Cut For Christmas Special Offer!!!
Staroflight, www. LaurasStampPad.com

I made this card with the Star of Light Bundle (Save 10%) and I loved it so much I put the set back away and moved on to the next set I had. It was like I had made the perfect card and didn’t need to make more. I have since pulled this one back out and played with it some more!! 🙂

SUPPLIES NEEDED: Heat Tool, Silver Embossing Powder, VersaMark, Star of Light Bundle, Silver Metallic Thread

I started with a Whisper White card base. Then I took a piece of Dapper Denim cardstock (4″ x 5-1/4″) and brushed it over with the Embossing Buddy to reduce any static before embossing. I used the large swirl image from the Star of Light Stamp Set and inked it up in VersaMark. I stamped at an angle from the left bottom corner up and the top right corner down so that it looks like it is going across your card. After stamping the swirl, pour the Silver Embossing Powder all over it and then heat it with the Heat Tool to set the powder. Remember to focus the heat on one section until it melts and then move it around rather than swinging it all over the entire image. When you do that, it just disperses the heat and takes longer. Once it is all set, you can take a paper towel or your shirt (like me) and wipe over the top to take off an extra powder from the Embossing Buddy! I stamped the greeting from the Star of Light Stamp Set in Dapper Denim in the lower right corner and added this to my card base. Next up, I stamped the large star image from the Star of Light Stamp Set onto a piece of Whisper White and die cut it out with the coordinating Starlight Thinlits. Then I took some of the Metallic Silver Thread and wrapped it around my fingers a few times. I usually do it about 8-10 but I forget about half way through so it can be as many times as you wish! Slide the loops off of your fingers and twist them in the middle to create a figure eight. Now place the loops onto the back of the die cut star and secure in the middle with a Stampin’ Dimensional. Fan out the loops and add more dimensionals securing the loops in the desired location. Now you can add this to the card front and you are all set!

That silver embossing shine and the texture of the metallic thread but makes this card POP! Plus, I always love silver and dark blue whether it be Dapper Denim or Night of Navy. If you would like to make these for your holiday cards, you can get a head start by having me do all of the cutting. Check out my Cut For Christmas offer as this is one of the cards in the selection!!

If you would like to see this in action, check out the Video Tutorial below or click here! Don’t forget to subscribe if you are new and be sure to click the Like button!!!

Happy Stampin’

~Laura


Technique Tuesday – Reverse Watercoloring!!!

Posted on

Happy Tuesday everyone!!! I hope you have survived the fabulous turkey feast and shopping craziness! Now it is back to the craft room to prepare for the next holiday!!! This technique is super fabulous for Christmas Cards and cards all year long!!!

Watercolor Lifting, www.LaurasStampPad.com

I just love the shades of blue this card has and, without the snowflakes, I can dream of blue water and white sand on the beach! I said I can dream…..I know that doesn’t exist in Illinois especially this time of the year!!! Let’s get started on this amazing technique!

SUPPLIES NEEDED: Shimmery White Cardstock, Aqua Painter, Clear Embossing Powder, Heat Tool, VersaMark, Stamp Set of your choice and embellishments

I started with a Bermuda Bay card base. Then I took a piece of Shimmery White Cardstock (4″ x 5-1/4″) and went over the entire piece with the Aqua Painter to wet it down a little. This will help the color bleed and sort of prime the paper. You don’t need to soak it but just a little brush of water over the top. Now pick up some Bermuda Bay Ink and watercolor wash over the paper. You can go to the edge or leave a border. That is all up to you! Now allow this to dry by setting it aside or using the Heat Tool!

Side Notes while it dries……I use Shimmery White cardstock because of the fabulous shimmery look but also because it is a little bit thicker than Whisper White but not as thick and textured as Watercolor Paper. Watercolor Paper has too much texture so it won’t get a nice stamped image for clear embossing. Also, when you are using the Aqua Painter, you can either press your ink pad into the lid and use that as your color palette or you can press a clear block into the pad and use that. I prefer using the clear block because it isn’t as messy and I can easily clean it up. You could also drop re-inker onto the clear block and do it that way as well!

Once it is dry, you will stamp all over in a solid image stamp set with VersaMark Ink. I used the snowflake from the Tin of Tags Stamp Set. Apply Clear Embossing Powder over the top and set it with the Heat Tool. You can see a tutorial on Heat Embossing here. Now that your embossed image are set, they will hold the color underneath. Using your Aqua Painter, you will gently brush over the entire cardstock like you did in the beginning but this time with no color on your brush. You are just adding water which is lightening the watercolor wash that you applied earlier. The color is still being held under the images so they are popping more now. That is the Reverse Watercolor Technique!!!

Snowflake Tin of Tags, www.LaurasStampPad.com

Once your watercolor is dry, you can add it to your card base. I used Fast Fuse for a strong hold since the cardstock is warped a little. For the greeting, I used the Tin of Tags Stamp Set and stamped onto Whisper White. Using the Layering Circle Framelits, I die cut the greeting as well as a scallop in Bermuda Bay. I adhered these together and added loops of Metallic Silver Thread to the back and then placed it on the card front. For the Metallic loops, just wrap it around your finger as many times as you wish (8-12 times). Then twist the loops in the middle to create a figure 8 and place it on the back of the greeting. Using Stampin’ Dimensionals to secure it to the back of the greeting and then add it to the card front! I still thought it needed a little bit more bling so I added some Rhinestones all over! Love it!!!

Be sure to check back tomorrow as I will be sharing another sample using this technique! Tomorrow’s sample is a card for any time of the year!

If you would like to see this in action, check out the Video Tutorial below or click here. Don’t forget to give it a thumbs up if you liked it and be sure to subscribe if you are new!!

Happy Stampin’

~Laura


Technique Tuesday – Santa’s Reindeer!!!

Posted on

Happy Tuesday!!! Are you ready for this amazing masterpiece??? I have to say this is probably THE MOST amazing, detailed, stunning card I have ever made in my 12+ years of stamping. Check it out!!!

Double Z Fold Sleigh, www.LaurasStampPad.com

There are just no words for this card. I honestly don’t think I am going to send it out. I’m going to save it and display it every year ever so proudly. I just love it so much!!! Now let’s get started on how to make it with the Santa’s Sleigh Bundle (Save 10%)!!!

I started with a Night of Navy card base measuring 11″ x 4-1/4″ and a strip of Whisper White measuring 11″ x 1″. Both of these are scored at 2-3/4″ and 5-1/2″ which creates the Z folds! For the panels, I cut Soft Sky cardstock into the following measurements – 4″ x 5-1/4″ and two pieces of 4″ x 2-1/2″. Then I cut Whisper White to layer on top measuring 3-3/4″ x 5″ and two pieces of 3-3/4″ x 2-1/4″. Go ahead and layer the white onto the Soft Sky and then onto the card base. You can stamp the greeting in the upper right corner. I used the one from the Santa’s Sleigh Stamp Set!

Reindeer Sleigh, www.LaurasStampPad.com

Now you can add the Whisper White strip to the bottom of the card. I lined it up with the bottom of the white on the panels. Be sure that you are only adding adhesive to the small flap and half of the long flap. I like to fold it all up and then add the adhesive to the spots showing (see video below). Place it on the card and then you can work on all of the decorations. I added the trees first. I stamped 2 blue trees using the Santa’s Sleigh Stamp Set and die cut them out with the Santa’s Sleigh Framelits (Bundle & Save 10%). I also cut out a tree in Silver Foil Paper! I added two trees to the large panel and one to the middle small panel. Next up are the reindeer. I stamped all of them in Chocolate Chip Ink onto Crumb Cake cardstock. You will need 6 reindeer. I die cut them out. I also die cut the sleigh in Night of Navy, the sleigh overlay in Silver Glimmer Paper, 12 stars in Silver Glimmer Paper (one for each reindeer and a few others to decorate, and a few bows for the presents in Silver Glimmer Paper!

Santa's Reindeer, www.LaurasStampPad.com

Now to assemble the second Z with the Whisper White strip! All you need to do is take a strip of white scored cardstock and add it to your card opposite folds as the base. Fold it like a Z and the long panel will go across the front (sticking to the left side) and the short panel will adhere to the back right hand side. I used Fast Fuse Adhesive for a strong hold and placed it on the bottom lined up with the bottom of the white panel. I added 2 reindeer to each of the little panels of the white Z fold overlapping them just a little. Be sure that when you add adhesive to the reindeer that you are only adding it on the legs so that adhesive isn’t showing and then glues your card together.

Presents in the Sleigh, www.LaurasStampPad.com

Before placing the last reindeer on, I added the sleigh to the card. I placed the Silver Glimmer overlap onto the navy sleigh with Fine Tip Glue Pen and then added it to the far left of the card. I did trim off a little bit of the sleigh on the bottom rung. Once the sleigh is in place, you can add that final reindeer. Now is also when you will add all of your presents. I stamped the 3 different styles of presents from the Santa’s Sleigh Stamp Set onto Night of Navy and Soft Sky cardstock and cut them out. They are super easy to cut since they are rectangles! Place as many presents as you wish in the sleigh. Then I added the ribbons and all of the Silver Glimmer stars to the card with the Fine Tip Glue Pen. For the reins, I added some of the glue from the Fine Tip Glue Pen to the first reindeer, placed the Whisper White Baker’s Twine down and then added a star. Press and hold for a few seconds and then move to the next one. You could also use a Mini Glue Dot for this part if you wish. Be sure to leave some slack between each reindeer so it doesn’t pull tight when you open the card and so it swags just a bit. I glued the end of the reins under the front of the sleigh at the end. Now you are all set! The most amazing card ever! Yes it is a bit time consuming but it is just so stunning!!! I can’t wait to display mine…..I don’t think I can part with it and send it out.

If you would like to see that all in action, check out my Video Tutorial below or click here! Don’t forget to give it a thumbs up if you liked it and be sure to subscribe if you are new!!!

Happy Stampin’

~Laura

Don’t forget about the Online Extravaganza going on all week long!!! Great chance to get fabulous product on super sale!! Click here to check it out!


Technique Tuesday – Hand Sanitizers!!!

Posted on

Happy Tuesday!!! That means I have a fabulous technique to share with you and this one is perfect for this time of year – gift giving!!! These little hand sanitizers are perfect for stocking stuffers, Secret Santa, and hostess gifts…..but they are perfect for all year long as well!

Hand Sanitizer, www.LaurasStampPad.com

Aren’t they fabulous??? I got the idea from Meg Loven who shared this at one of our Team Meetings!! They are perfect for sitting on your desk, coffee table, or even in your purse!!! Let’s get started!

SUPPLIES NEEDED: Cardstock, Designer Series Paper, Favorite Greeting, Punches or Framelits, Embellishments

Starting with a piece of cardstock measuring 1-7/8″ x 11″, you will score at 2″, 3″, 6-1/4″, 7-1/4″, 9-1/2″, & 10-1/2″. You can get lots of these out of one sheet of 8-1/2″ x 11″ which is awesome. TIP: If you are using all of the 8-1/2″ x 11″ sheet of cardstock, be sure to score the entire sheet and then cut it into strips, this will save time and less scoring. 🙂 Fold on all of the score lines. On the end with the 1/2″ tab, you will need to punch out a hole for the top of the hand sanitizer to fit though. I used the 3/4″ Circle Punch and slide in it, centered it, and made sure I was just over that first score line and into the 2nd “box”. Now that you have your hole in there, add some Fast Fuse Adhesive to that 1/2″ flap, place your hand sanitizer in there and adhere it to the back panel. I like to use Fast Fuse or Tear & Tape for this because it has a nice strong hold. If you would like, add some Washi Tape around the neck of the bottle to coordinate with your decoration and designer paper! Now you can decorate with Designer Paper of your Choice. You will need 3 pieces measuring 1-5/8″ x 3″ (back panel), 1-5/8″ x 2″ (bottom front), and 1-5/8″ x 1-3/4″ (top flap). You can always add these pieces before putting the hand sanitizer in but just be sure you have them right side up if the pattern requires that. I used Pop of Pink Designer Paper, Presents & Pinecones Designer Paper, Affectionately Yours Designer Paper, and Candy Cane Lane Designer Paper in all of the samples pictured.

reindeer sanitizer, www.LaurasStampPad.com

For the decoration, you can use your favorite greeting or image. For the one above and the gingerbread man, I used the Cookie Cutter Christmas Stamp Set and coordinating Cookie Cutter Builder Punch (Bundle & Save 10%). The Be Joyful is from the Merriest Wishes Stamp Set. I really just had so much fun playing with different greetings, designer paper, and ribbons! For the decoration, I added it to the bottom half of the hand sanititzer and added it with Stampin’ Dimensional on the lower portion only. This is so the top flap can slide under the greeting/reindeer/image and hold closed. You could also use a little piece of velcro too!

fill-me-with-happiness, www.LaurasStampPad.com

This one uses the Papillon Potpourri Stamp Set and Bitty Butterfly Punch! Let me know which one your favorite is in the comments below. I’m thinking my favorite is the butterfly and reindeer ones!!

If you would like to see this all in action, check out the Video Tutorial below or click here! Be sure to give it a thumbs up if you liked it and don’t forget to subscribe if you are new! I post videos every Tuesday and Thursday!

Happy Stampin’

~Laura

Only 2 more days left to get a chance at winning a Big Shot!!! Check out all the details here!!!

Big Shot Code:HSQJBEPD, www.LaurasStampPad.com