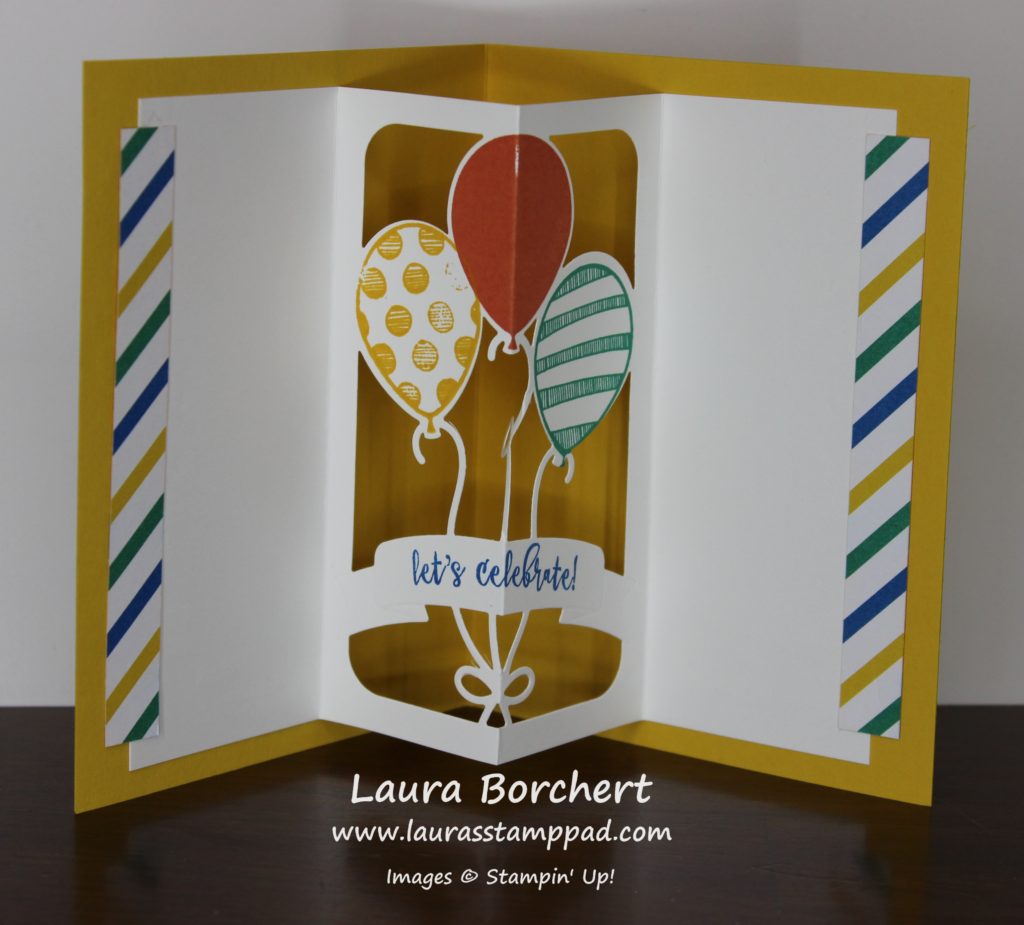
Happy Tuesday!!! That means I have a fabulous technique to share with you today. The cool thing about this technique is the Balloon Pop-Up Thinlits do all the hard work and you just get to enjoy the POP UP!!!!
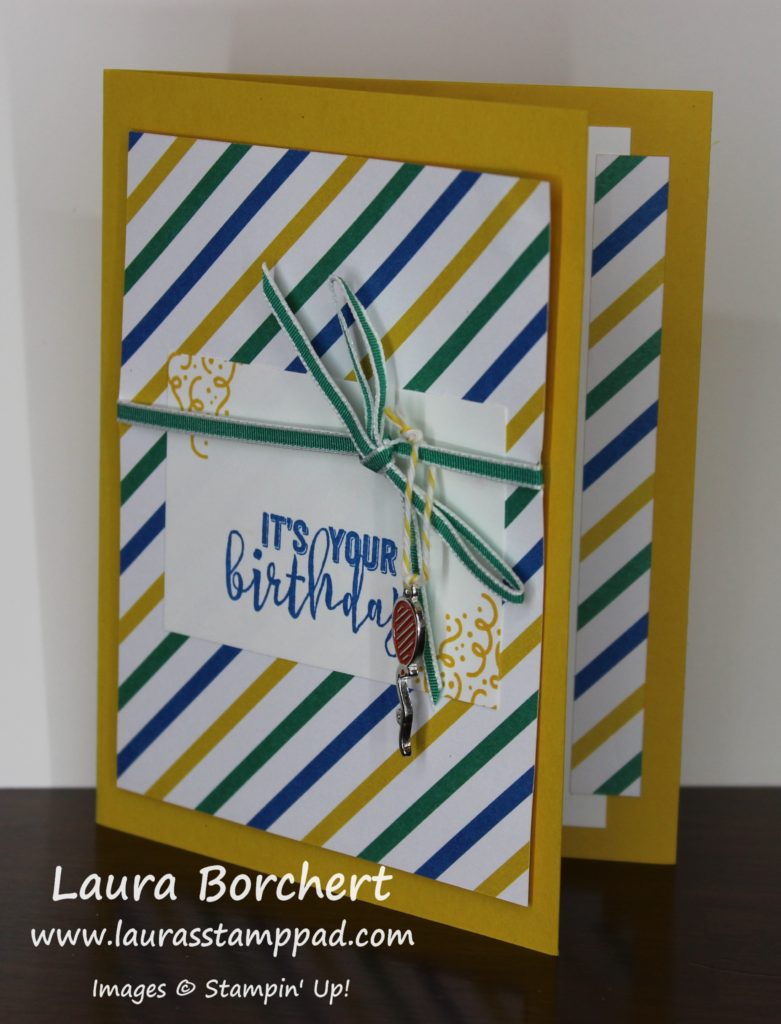
This card looks fairly basic on the front but it’s the inside that has the MAJOR WOW factor! I love it! Also, check out that adorable little charm!!! Let’s get started!
I started with a Crushed Curry card base!!! For the front, I cut a piece of the Party Animal Designer Series Paper (4-3/4″ x 3-3/4″) and tied some Emerald Envy Taffeta Ribbon around it and into a bow! Then I took a piece of Whisper White (3″ x 2″) and stamped the confetti from the Balloon Adventures Stamp Set in Crushed Curry. I stamped the greeting in Pacific Point Ink. I added the greeting to the card front. For the Party Animal Charm, I attached it with some Crushed Curry Baker’s Twine! Now for the inside, I cut a piece of Whisper White measuring 5″ x 7-1/2″ and scored it in the middle at 3-3/4″. Then take the Balloon Pop Out Thinlits (Bundle & Save 10%) and line up the center with the center score line of the thinlit. This is super simple since the thinlit has a distinct center and the little triangle on the bottom to help find the center. Run it thought the Big Shot and it creates the perfect Pop Out! Before folding the score line, you will want to do all of the stamping. Give firm even pressure on the stamping so it comes out clean even with the score lines.
I stamped the 3 styles of balloons from the Balloon Adventures Stamp Set in Crushed Curry, Tangerine Tango, and Emerald Envy. The greeting was stamped in Pacific Point Ink. Once you are done stamping, you can fold on the score lines in mountain/valley fold. I added Snail Adhesive on the far outside panels. With the card all the way open, I place the right side down. Then I folded the mountain/valley all the way down and closed the card on top of it. I always find it best to close the card to seal the second side rather than just laying it flat. This way there isn’t an uneven pop out and it will close smoothly!! I added the little decoration on the ends by cutting pieces of the Party Animal Designer Series Paper measuring 1/2″ x 4-1/2″ and adhering them down. The pop out is so much fun but these pictures don’t do it justice at all.
You can see this all in action n the Video Tutorial below or click here! If you liked the video, be sure to give it a thumbs up! Don’t forget to subscribe if you are new. I post videos every Tuesday and Thursday!!!
If you would like to see more samples using the Balloon Adventures Bundle, check them out here, here, and here! The best part is when you purchase this bundle, you get to pick out a FREE Sale-A-Bration item!!!
Happy Stampin’
~Laura

This is adorable! I love it. Pinned.
Glad you loved it! It’s super fun! Have fun making it! ~Laura
Pingback: All the Pink Balloons!!! | Laura's Stamp Pad