Technique Tuesday – Owl Builder Punch Animals!!!

Posted on

Happy Tuesday!!! That means I have some fabulous techniques to share with you! Today I’m sharing more Punch Art using the Owl Builder Punch! I hope you are all enjoying this series! Click to see the September Punch Art and October Punch Art! Now let’s get started on the November Punch Art!

November Punch Art, www.LaurasStampPad.com

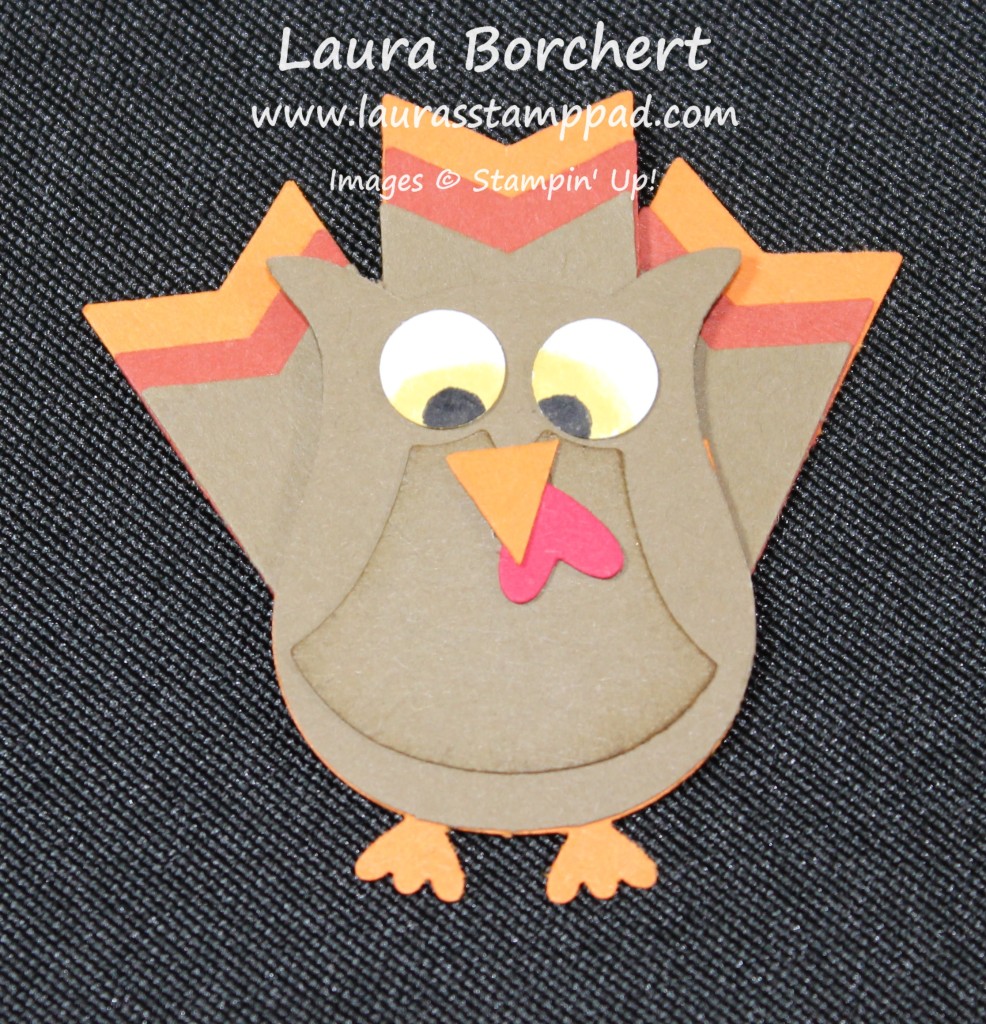
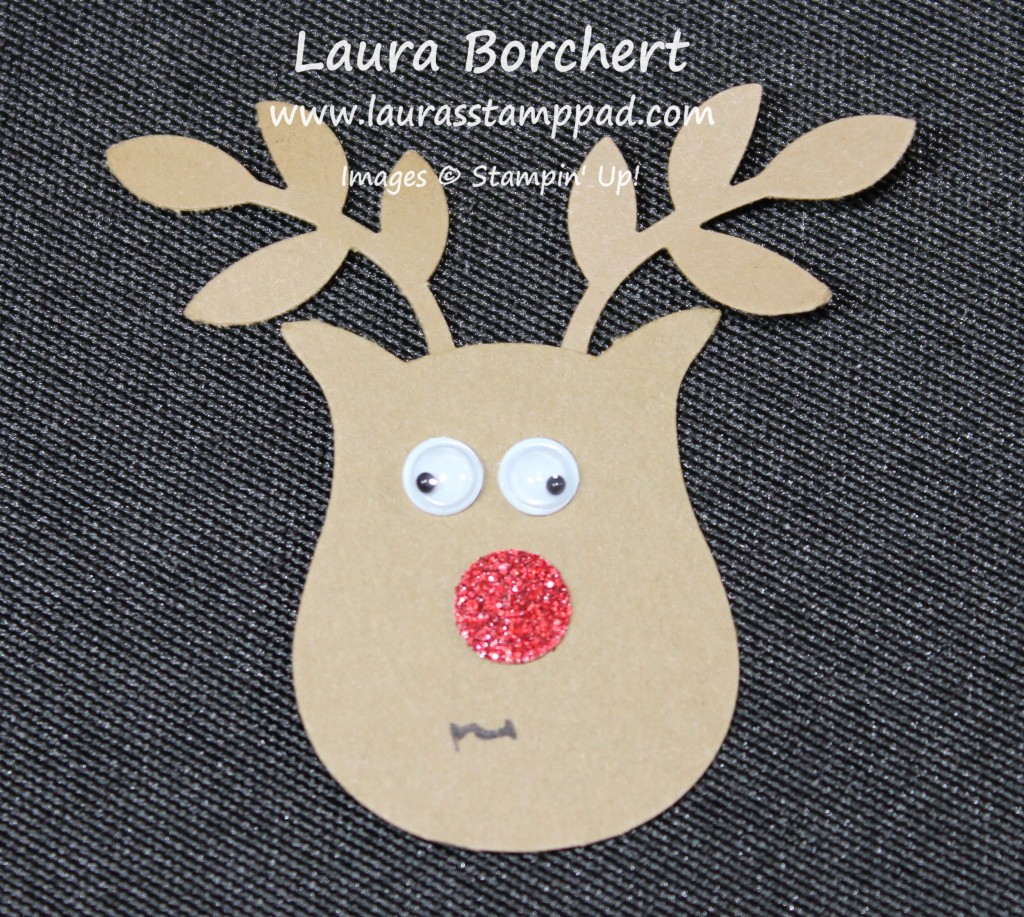
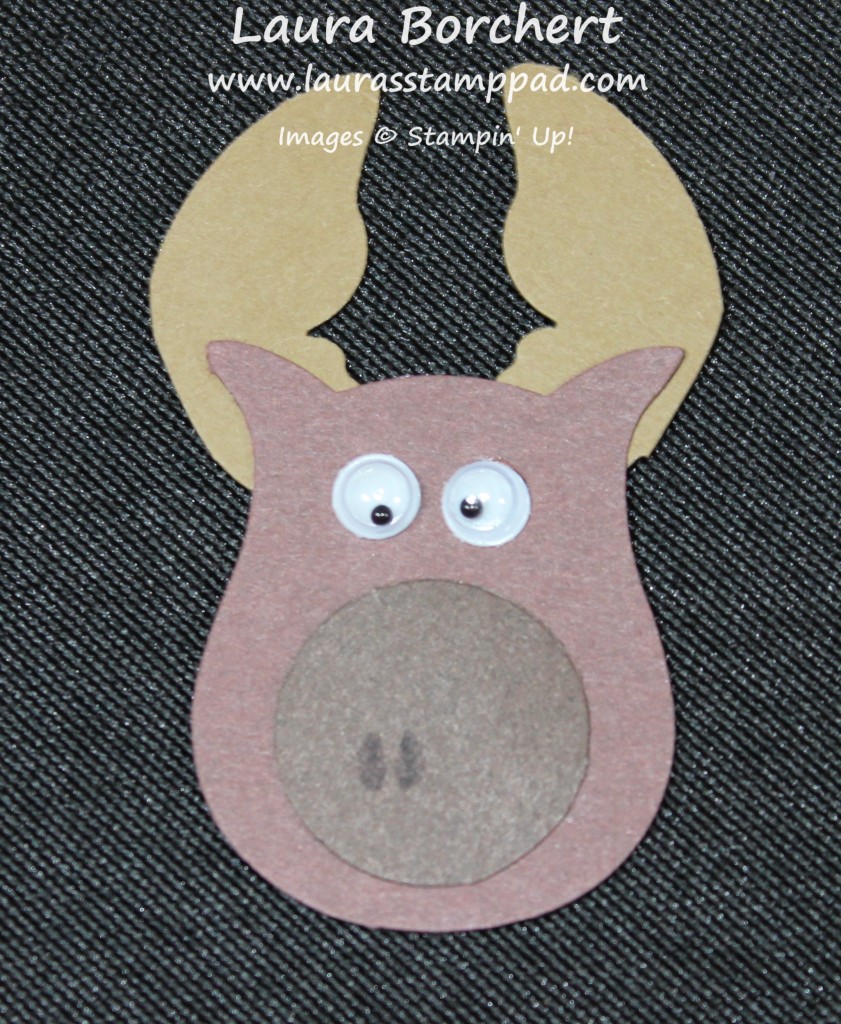
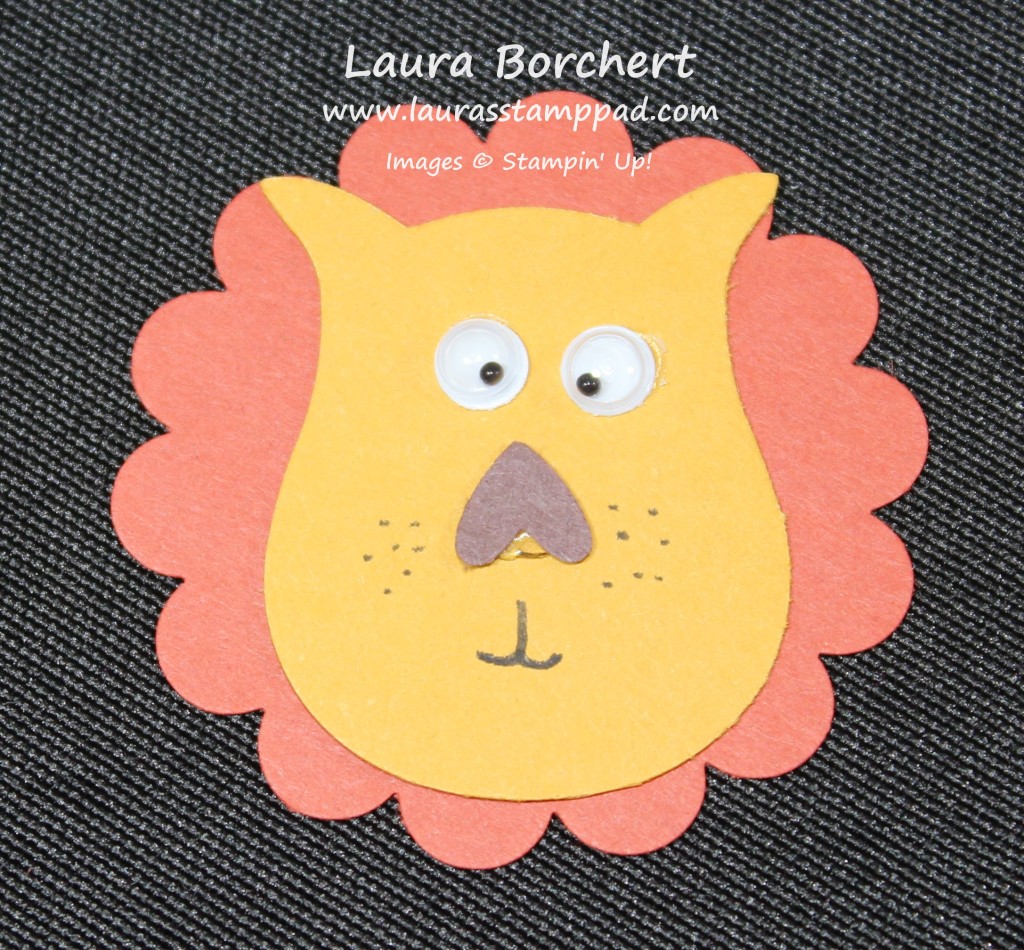
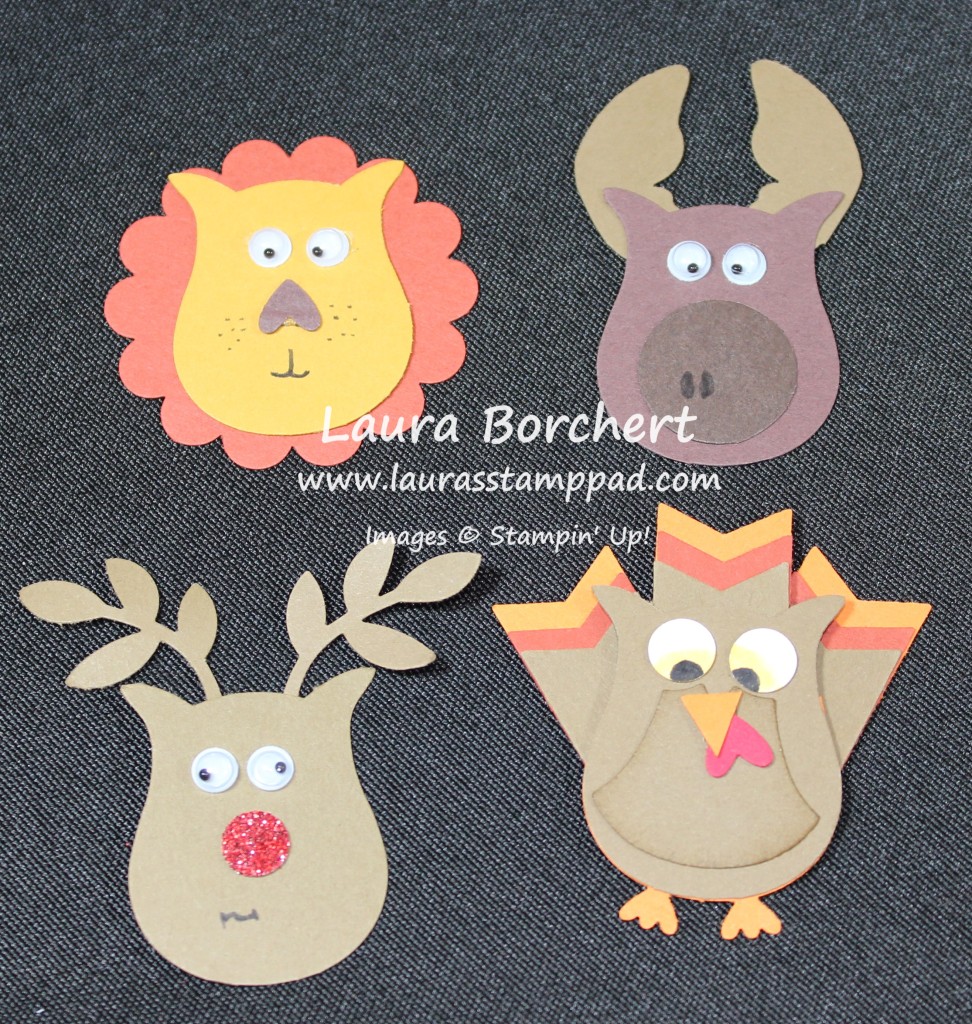
With all of the different holidays coming up, I thought I would share the Turkey, Moose, Reindeer and Lion this month! Lots of animals…..and yet not one owl! 🙂 Let’s get started!

Turkey Punch Art, www.LaurasStampPad.com

This little turkey was created with the Owl Builder Punch! You need a Soft Suede owl body and breast piece. You will need a Pumpkin Pie lower owl body including the feet. You will need 4 Pumpkin Pie Banners from the Banner Punch! Also, 3 Cajun Craze Banners and 3 Soft Suede Banners. You will need a Real Red heart from the Owl Builder Punch and 2 white circles from the Owl Builder Punch. I brushed the edges of the breast piece with a Soft Suede Sponge Dauber to add a little darker color and dimension. I cut of the Soft Suede feet and adhered the Pumpkin Pie piece to the back allowing those feet to show! Layer the 3 banners together for all of the feathers and adhere those to the back of the owl body. For the eyes, I used a Daffodil Delight Marker to color the bottom half and then a Basic Black Marker to color the dots! I added those to the body with Mini Glue Dots! I used the 4th Pumpkin Pie banner to cut the triangle nose and paired that with the heart for his gobbler!!! He is so cute!!! You could use him on a tag, place setting, treat bag, or card this Thanksgiving!

Reindeer Punch Art, www.LaurasStampPad.com

The little reindeer uses the Owl Builder Punch and Bird Builder Punch! You will need 1 owl body and 2 leaves from the bird punch in Soft Suede. I used Red Glimmer Paper for his nose and punched it out with the small circle in the Owl Builder Punch. I added the nose with Mini Glue Dots and put the leaves on the top of his head! I added googly eyes because I think they are adorable and drew in the mouth with a Basic Black marker! He would be perfect for a tag, treat bag or even on a card!

Moose Punch Art, www.LaurasStampPad.com

The moose uses the Owl Builder Punch, Elegant Butterfly Punch and 3/4″ Circle Punch! I used lots of shades of brown to give him some dimension and variation. The owl body was punched in Chocolate Chip, the antlers with the Elegant Butterfly Punch were punched in Soft Suede and the circle was punched in Early Espresso! I used a Basic Black Marker to color 2 little nose holes (like tear drops) and then adhered it to the owl body. Of course I cut off the little feet from the owl. I cut the butterfly wings off and rounded them off a little. I attached the wings behind the owl body for the antlers and added the googly eyes!!!

Lion Punch Art, www.LaurasStampPad.com

This little Lion was created with the Owl Builder Punch and the 1-3/4″ Scallop Circle Punch! I punched the owl body out in Crushed Curry and the little heart from the Owl Builder punch in Chocolate Chip. The scallop circle was punched out in Cajun Craze. I cut off the little feet from the owl and added the googly eyes and the heart nose. I used a Mini Glue Dot for the nose…..be sure to push it all onto the paper before placing it on the owl otherwise it will look like a snotty nose like mine above. 🙂 I used a Chocolate Chip Marker to create the mouth and the little freckles! I layered this onto the scallop circle and you are all done! This would be perfect for a kid’s birthday party favor, tag, or card!

If you would like to see all of these in action, check out the Video Tutorial below or by clicking here! Be sure to give it a thumbs up if you liked the video! Don’t forget to Subscribe to My Channel so you don’t miss any of my other videos and next month’s Punch Art!

Which little animal is your favorite? Let me know in the comments below! I think the lion is my favorite or the reindeer! They are all just so cute!

Happy Stampin’

~Laura

Polka Dots & Penguins!!!

Posted on

Penguin, www.LaurasStampPad.com

I have been having lots of fun with this little penguin! I have really loved him more than the snowmen which I’m kind of surprised! All of them from the Snow Place Stamp Set are all just so cute! You can get the coordinating Snow Friends Framelits as well. Purchase them together and you will save 15%! I did everything on this card on one layer because I was going for a simple look!

I started with a Cherry Cobbler card base and added a piece of Merry Moments Designer Series Paper Stack measuring 4″ x 5-1/4″! There are 24 pieces of this design in the stack so that makes making multiples much easier! I stamped the penguin from the Snow Place Stamp Set in Basic Black and colored in his feet and beak with a Pumpkin Pie marker! I stamped the little bow tie in Real Red. I used the Circle Framelits to cut out the penguin and create the Old Olive layer! I added this piece to the card with Stampin’ Dimensionals as well as the greeting! The greeting was from the November 2014 Paper Pumpkin Kit! I am doing a large class with lots of Holiday cards using many different sets so I dipped into a few of my Paper Pumpkin Stamps to make sure I had different greetings on each! The greeting was punched out with the Washi Label Punch! I brushed the edges with a Real Red Sponge Dauber to make it pop out more!

Which image do you prefer – the snowmen or the penguin?? Let me know in the comments below!

Happy Stampin’

~Laura

Technique Tuesday – Owl Builder Punch Art!!!

Posted on

Happy Tuesday everyone!!! You know what that means….I have some fabulous techniques to share with you today! Today we are playing with Punch Art! It is so much fun to create lots of different creatures and images from the punches you already have (or need to get after today)! When you can use a punch for more ways that the obvious circle or square, it makes it worth so much more as well! Let’s get started!!!

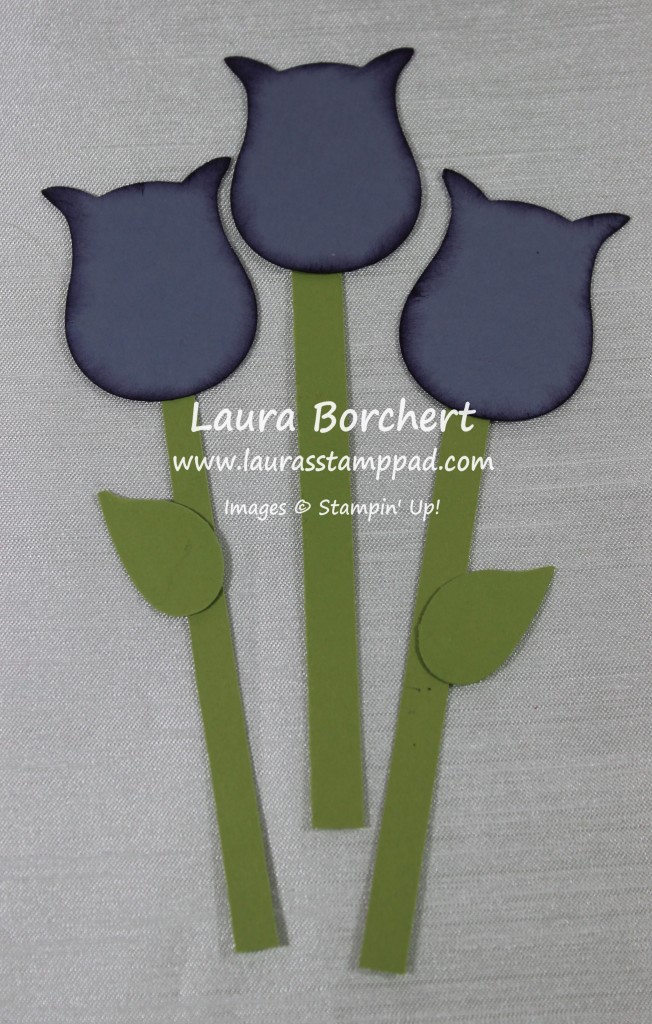
Tulips Punch Art, www.LaurasStampPad.com

We will start with the Tulips! I love tulips and they make me think of Spring…..can we just skip Winter this year? These tulips can be created in any color! I used Wisteria Wonder to punch out 3 owl bodies from the Owl Builder Punch. I snipped off the feet of the owl and brushed the edges with Elegant Eggplant and a Sponge Dauber. I like how this gives texture and dimension to the tulip. For the stems and leaves, I used Pear Pizzazz cardstock. I cut long strips for the stems. They don’t have to be rectangle or perfect because flower stems never are so make it a long triangle or a short rectangle or a not perfectly straight stem! It all works! The leaves were punched out with the Bird Builder Punch for the final touch! You can create bouquets or just a few along the bottom of your project or just one elegant tulip! I love these!

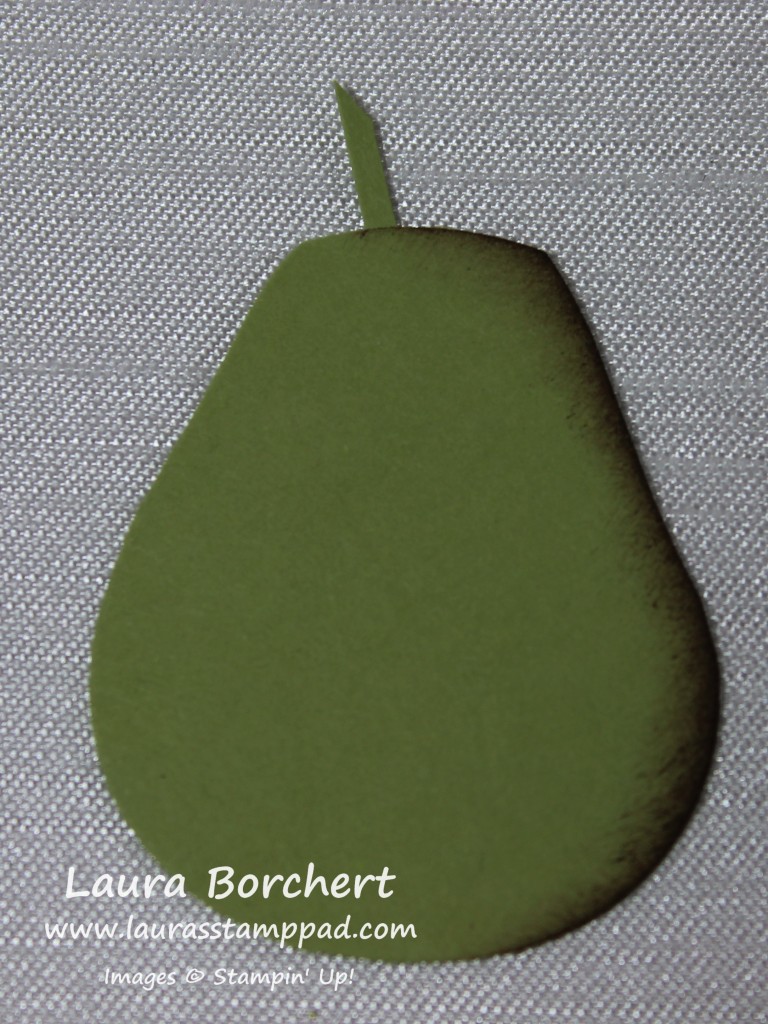
Pear Punch Art, www.LaurasStampPad.com

This little pear is super easy to create with the Owl Builder Punch! Just punch out an owl body with some Pear Pizzazz cardstock and cut off the feet and ears, slopping to the center to give that rounded off look. Then with a little piece of scrap Pear Pizzazz or brown of your choice, cut a little piece for the stem. I brushed the edges of the pear with a Chocolate Chip Sponge Dauber to give texture and make it look rounded! Simple and fabulous!

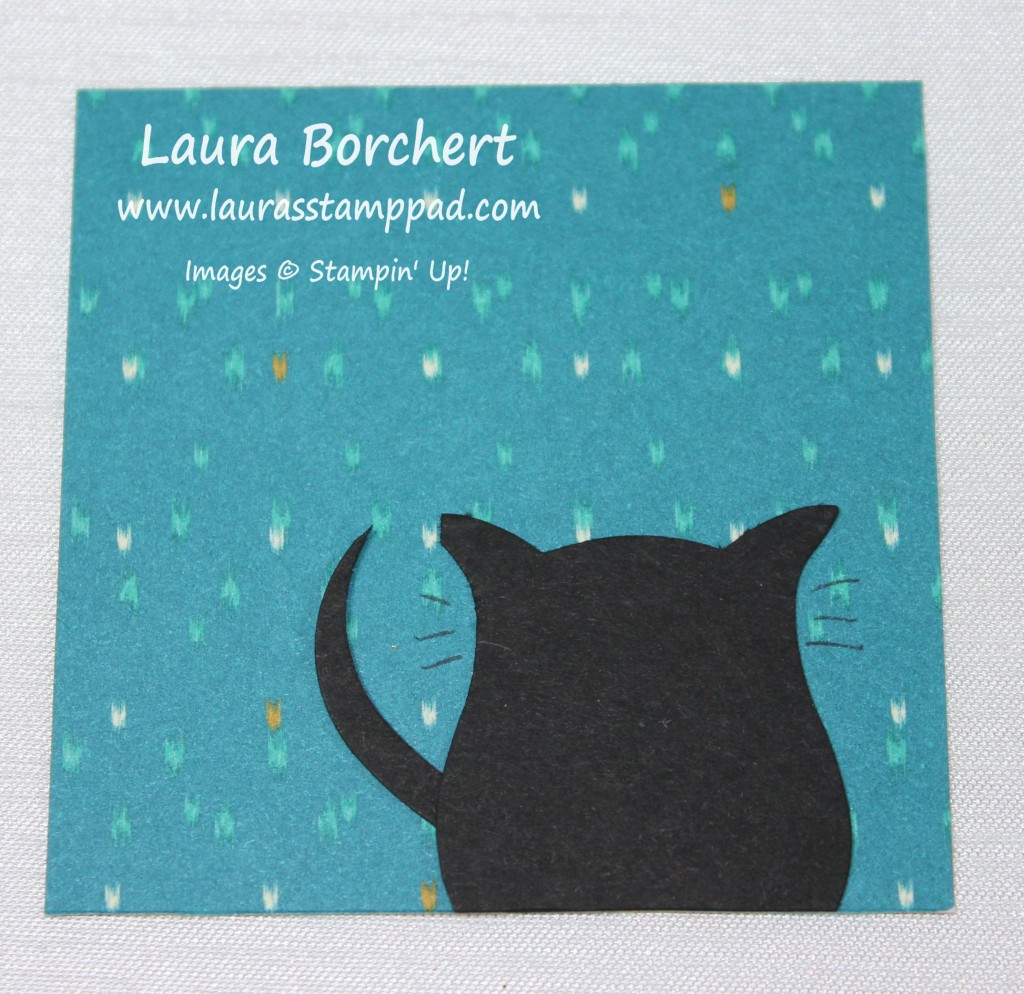
Kitty Punch Art, www.LaurasStampPad.com

This little kitty is just adorable and would look super fabulous looking out the window using the Hearth and Home Thinlet Dies! For the kitty, I punched out an owl body in Basic Black with the Owl Builder Punch. Then I punched just a sliver of the body from the side to create that little curved tail. I adhered the owl body to a piece of Bohemian Designer Series Paper with the tail off to the left and then trimmed the bottom off. I like using the Designer Series Paper as a guide to cut straight! There is your kitty silhouette! I did take a Basic Black Marker to create a few whiskers. You could create a face and have the kitty looking at you if you wished! Mine is looking out the window!

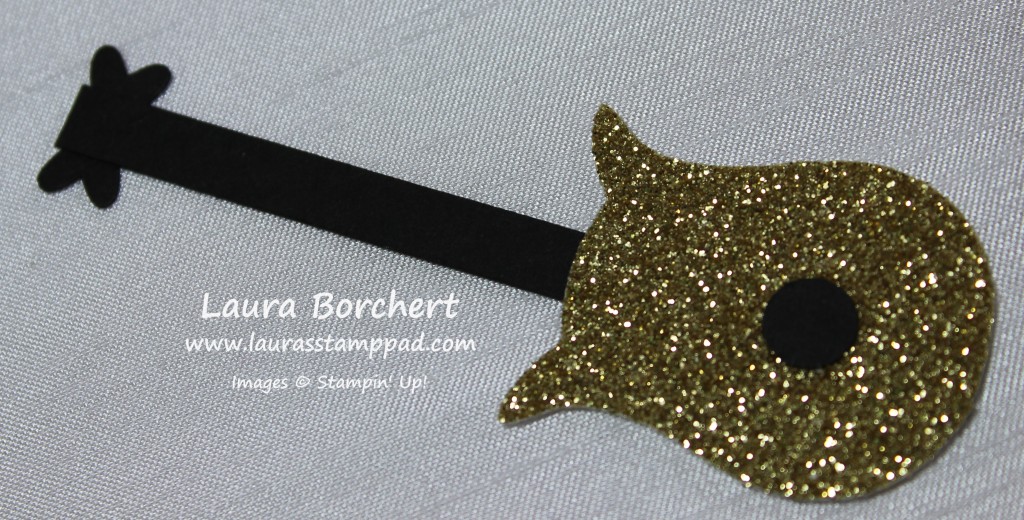
Guitar Punch Art, www.LaurasStampPad.com

The guitar is perfect for any rockstar!!!! You could use Silver, Gold, Red, or Dazzling Diamonds for your guitar. You can even spritz the Dazzling Diamonds with some re-inker and get any color! ROCK ON!!!! I punched an owl out in the Gold Glimmer Paper and cut off the feet. You will also need the Owl Builder Punch for 1 eye (smaller circle above the body) and 2 hearts. Placing the 2 hearts point to point, place a Mini Glue Dot on the end of some Basic Black measuring 3/4″ wide and however long you wish and stick it on the hearts. This creates your guitar end. The little eye will be added to the center of the glimmer paper with a Mini Glue Dot. This is the whole in the guitar. Now adhere the other end of the long black piece to the guitar body. You are all set! You could always take a Signo White Gel Pen and create strings! Love it!!!

If you would like to see all of these in action, check out the Video Tutorial below or click here! Don’t forget to give the video a Thumbs Up if you liked it! Let me know in the comments below which Punch Art items you would like to see next month! You can see last month’s Punch Art here!

Happy Punchin’

~Laura


Technique Tuesday – Ways to Use the Woodland Folder!

Posted on

Happy Tuesday!!! That means I have a fabulous technique to share with you! Even better…..it will continue til Thursday!!! That’s right; I will be showing you ways to use your Woodland Embossing Folder for 3 days!! Woot Woot!!!

Woodland Embossing Folder, www.LaurasStampPad.com

I love the rustic Man look of this card; perfect for lots of the men in my life who are hunters and farmers! This woodsy card is perfect for them or even a Holiday card!! I used the Woodland Embossing Folder from the Holiday Mini Catalog. I’m sure you are wondering how I got my tree trunks brown so let’s get started!

SUPPLIES NEEDED: Woodland Embossing Folder, Big Shot, Brayer

I started with a Mossy Meadow card base and then I cut a piece of Whisper White cardstock measuring 4″ x 5-1/4″. Using the Woodland Embossing Folder, I added Chocolate Chip ink to the trees (the side that doesn’t say Sizzix). You can add the ink with a Sponge Dauber (light), a direct to folder with the ink pad (not always clean), or a Brayer! I found that the Brayer worked the best for a bold image and I didn’t fall into the spots between the trees at all like I did with the ink pad (see left corner on the sample above). Once it is all inked up, place your white cardstock in and close it. Run it through the Big Shot like you normally would and when you are done, you will get these fabulous brown trees. Now since you are doing the trees and those are the images that pop forward, you will notice that your trees are de-bossed (meaning they are pressed in rather than popping out). That is how it is suppose to come out! 🙂 Now you can add it to your card front and decorate. I added some Mossy Meadow leaves using the Sprinkles of Life Stamp Set. For the greeting, I stamped Happy Birthday from the Teeny Tiny Wishes Stamp Set in Mossy Meadow and punched it out with the Word Window Punch. I layered that onto a Mossy Meadow Washi Label Punched piece. I layered this with Stampin’ Dimensionals onto a piece of frayed Burlap Ribbon. First I cut the ribbon in half length ways and then just pull out some of the stitching to get that frayed look. Very masculine and rustic looking!

If you would like to see a Video Tutorial on how to create this look, check out the video below or click here! Don’t forget to give it a thumbs up if you liked it and be sure to subscribe so you don’t miss the Part 2 tutorial!

Happy Stampin’ and see you back here tomorrow!!!

~Laura


Technique Tuesday – Snowflake Background!!!

Posted on

Happy Tuesday!!! You know what that means!!! I have a fabulous technique to share with you today…just in time for the upcoming season – winter. I don’t want it to come any sooner so let’s not mention it! 🙂
Penguin in Snow, www.LaurasStampPad.com

Aren’t these little penguins holding hands just adorable?? I love them but they are not the technique that I’m sharing with you today. I’m going to show you how to create that beautiful snowy background without stamping on your penguins! Let’s get started!!!

SUPPLIES NEEDED: Background Stamp of Choice, Scrap piece of paper

I started with a card base of Basic Black and then cut 2 pieces of Whisper White measuring 4″ x 5-/4″. One of the pieces is for the inside of the card and the other piece is for the card front. I started by stamping the little penguins and accessories from the Snow Place Stamp Set (Bundle & Save 15%). I stamped the penguins in Basic Black and colored in the beak and feet with a Pumpkin Pie Marker! I did a Real Red bow tie and Rich Razzleberry earmuffs! Now for the snowflake background that I stamped in Pool Party. Stamp all around and be sure to fall off of your piece of paper for a continuing look. Be sure not to stamp on top of your penguins. When you get close to them, use a scrap piece of paper to cover them up like a mask. This will give you the chance to stamp between and above them for a really snowy look! Simple and yet fabulous!!! I love it! For the greeting, I stamped it in Pool Party from the Snow Place Stamp Set and then die cut with the Lots of Labels Framelits and the Big Shot! I brushed the edges of the greeting with a Sponge Dauber! I added some White Glitter Ribbon along the top and placed the greeting over top with Stampin’ Dimensionals! You could change this card up a bit and stamp the number of penguins in your family or you could spread them out and add as many as you would like! I love it!

If you would like to see a Video Tutorial of the background technique, check out the video below or click here! Don’t forget to give it a thumbs up if you liked it!!

Happy Stampin’

~Laura

Christmas Wreath Card!!!

Posted on

Wreath on a Brick Wall, www.LaurasStampPad.com

I love this card for the Brick Wall! I know that isn’t the focal point but it really sets the scene!!! I went a little outside the box for this card and love the way it turned out!!! Let’s get started!!!

I used a card base of Basic Gray cardstock. Then I took a piece of Real Red (4″ x 5-1/4″) and ran it through the Big Shot with the Brick Wall Embossing Folder. Using my Sponge Dauber, I rubbed side to side and up and down with Cherry Cobbler Ink. This gives darker edges to the brick and a little texture. It really makes that brick wall come to life! Love it!!!! Then I cut out a wreath from the Wonderful Wreath Framelits in Mossy Meadow. Using one of the branch stamps from the Berry Merry Stamp Set and Mossy Meadow Ink, I stamped it all over the wreath. I stamped a few times before going back to the ink pad and I stamped in all directions to give a full look to the wreath! I added the wreath to the card with Stampin’ Dimensionals and then attached a Whisper White Satin Stitched bow with Mini Glue Dots!! For the greeting, I stamped Merry Christmas in Mossy Meadow from the Snow Place Stamp Set! I used a 1″ piece of Whisper White for the greeting and punched the ends with the Banner Triple Punch! I curled the ends by running them over a Bone Folder like curling ribbon. The greeting was added to the card with Stampin’ Dimensionals as well! 🙂

Up Close Wreath on Brick, www.LaurasStampPad.com

If you would like to see this card in action, check out the Video Tutorial below or by clicking here!!! Don’t forget to give it a thumbs up if you liked it!!!

Happy Stampin’

~Laura


Technique Tuesday – Halloween Treats!!!

Posted on

Happy Tuesday!!! Halloween is right around the corner and today I have some simple yet fabulous treat packaging ideas for you!!! It’s never to early to get start but wait to buy the candy to avoid temptations of eating it all before Halloween arrives!!! 😉

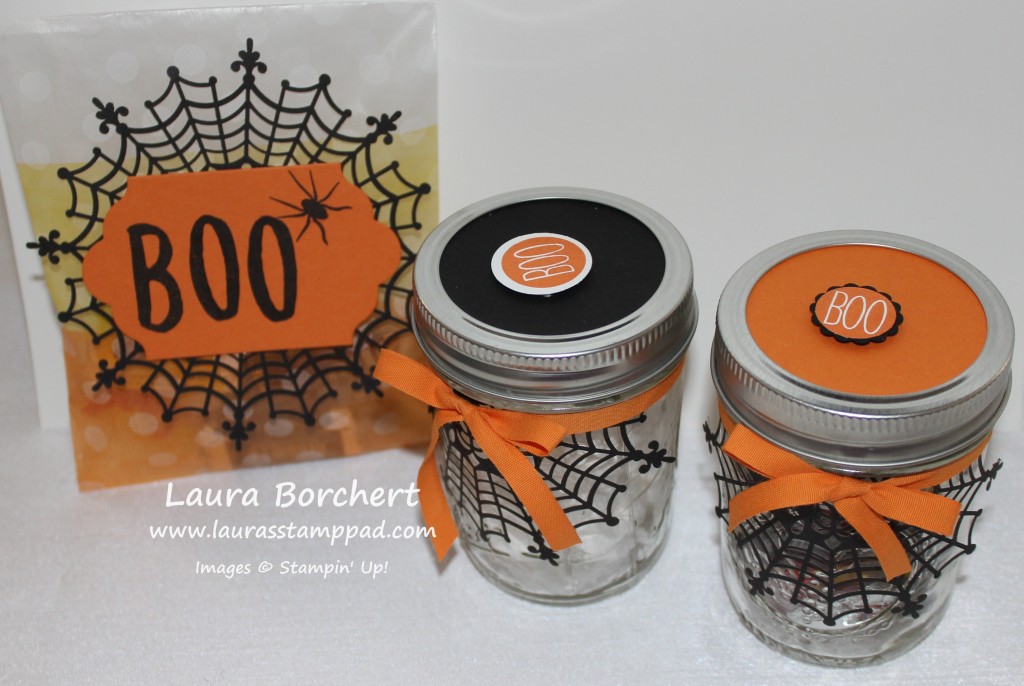
Halloween Spider Doily Treat Packaging, www.LaurasStampPad.com

I am loving the Spider Web Doilies and they really are so fabulous you don’t need much else to decorate!!!

SUPPLIES NEEDED: Spider Web DoiliesSketched Dots Tag & Bag Gift Bags, Sponge Daubers, Alphabet Stamp Set, Pumpkin Pie Cotton Ribbon, 1″ Circle Punch, 3/4″ Circle Punch, 7/8″ Scallop Circle Punch

First let’s start with the little mason jars. These are really quick and simple and you can put lots of different gift options in there for teachers, neighbors, friends, family, etc – Gift Card, Nail Polish, Candy, Cookies, Chex Mix, Hot Cocoa, and more! I started off by taking my 2-1/2″ Circle Punch and either Basic Black or Pumpkin Pie cardstock for the top lid! The greeting that I used came from the Cheer All Year Stamp Set from the Holiday Mini Catalog. One of them I punched out with a 1″ Circle Punch added it to the lid with a Stampin’ Dimensional. The other one I punched out with the 3/4″ Circle Punch and layered it onto a 7/8″ Scallop Circle in Basic Black!

Mason Jar Lids, www.LaurasStampPad.com

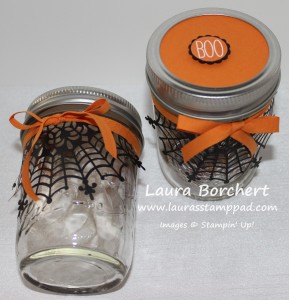
Now for the side, I added Tear & Tape half way around the jar right along the top! This is what holds the half of Spider Web Doily onto the jar! Of course since the doily has holes in it and the sticky comes through, I added the ribbon to cover it up! I used Pumpkin Pie Cotton Ribbon to tie around the jar and into a bow. On one of them I placed the bow over the doily and on the other one I placed it on the back side of the doily! All done!!! Fill with goodies and enjoy!!!

Spider Web Treat Jars, www.LaurasStampPad.com

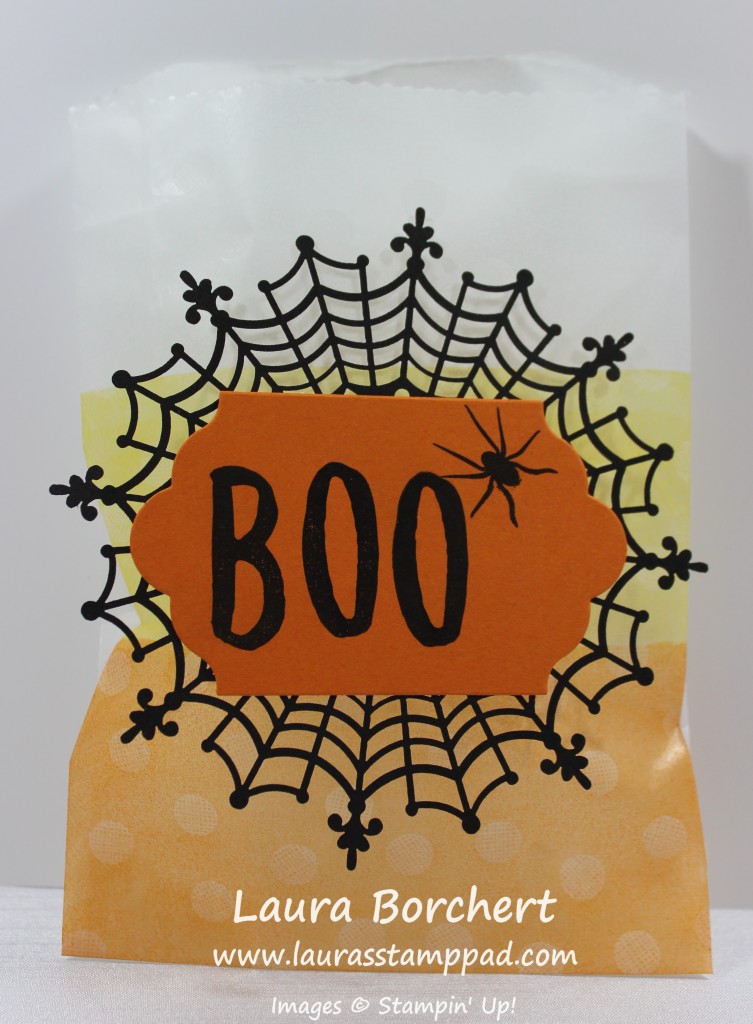
For the Treat Bag, I started with a Sketched Dots Gift Bag and used my sponge daubers to add Pumpkin Pie and Daffodil Delight for the candy corn look!!! You can use the ink pad directly to the bag but I found this to be super messy and all of the ink doesn’t soak in so it is a bit of a waste! For the tag, I stamped the word BOO from the Layered Letters Alphabet Stamp Set and the little spider is from the Cheer All Year Stamp Set! These were stamped onto Pumpkin Pie cardstock and then die cut with the Lots of Labels Framelits! I adhered the tag to the Spider Web Doily and then to the front of the bag!!! Fill with goodies and enjoy!!!

Candy Corn Bag, www.LaurasStamppad.com

I am not a huge fan of Halloween so I’m never really drawn to Halloween Stamp Set. I do like to make a few cards and treats for the very few trick-or-treats (if any) that we do get. I usually end up giving them to stampers at classes, the cashier at the grocery store and my neighbors! Finding out of the box ways to create the Halloween look is sometimes more fun too!!!

If you would like to see today’s technique in action, check out the video below or click here!!! Be sure to give it a thumbs up if you liked it!!! Don’t forget to subscribe to my channel so you don’t miss and future videos too! 🙂

Happy Trick-Or-Treatin’

~Laura


Incredible Ivy!!!

Posted on

Brick Wall Vines, www.LaurasStampPad.com

Is this card not super elegant and fabulous? What occasion would you use this card for?? Let me know in the comments below! I’m thinking Wedding or Anniversary or Birthday or a Wine Lover? It has that wine look doesn’t it?

For this card, I started with a piece of Very Vanilla measuring 4″ x 5-1/4″. This piece is smaller in the sample above because I made a mistake with the sponge dauber and had to cut off some. 🙂 First, you will color the vine image from the Thoughts & Prayers Stamp Set with Elegant Eggplant and Mossy Meadow Markers! Since this is a larger image, you might want to huff on the image a little before stamping it down to re-moisten the ink. I stamped the image twice before inking it up again so I could have some color variation and so I didn’t have to color it as many time. Once it is all stamped, I ran it through the Big Shot with the Brick Wall Embossing Folder. You will want to make sure your cardstock is in the folder correctly….laying on the rectangle popped up pieces. I did do it the other way and it looked great as well but the sponge dauber hits more surface area so it came out darker.

Reverse Brick Wall, www.LaurasStampPad.com

After embossing the cardstock, I used a So Saffron and Soft Suede Sponge Dauber to add a little color and rustic look to the brick wall. Be sure to go really light so there aren’t streaks or blobs of color. To finish it off, I added some Gold Satin Ribbon to the bottom and attached it with Stampin’ Dimensionals to an Elegant Eggplant card base! Love it!!!

To see this all in action, check out my Video Tutorial below!! Don’t forget to give it a thumbs up if you liked it!!!

Don’t forget to let me know what occasion you would use this card for!!!

Happy Stampin’

~Laura


Color Me Irresistible!!!!

Posted on

Color Me Irresistible Paper, www.LaurasStampPad.com

Have you seen the NEW Color Me Irresistible Specialty Designer Series Paper in the NEW Stampin’ Up! Catalog??? It can be tricky to understand exactly what it is but it is very similar to the Designer Series Paper from Sale-A-Bration! This is what it looks like in the catalog!!!
Color Me Irresistible, www.LaurasStampPad.com

Half of the sheets in the pack already have color – the 2015-2017 In-Colors and Basic Black. Then there is a coordinating piece of Whisper White with the same pattern! This paper is clear embossed with fun images which will resist ink when you add color. You can add color with a Sponge Dauber, Spritzer, Brayer, Marker, and even a stamped image!

The card above uses the Watermelon Wonder dotted paper which makes a fun, quick, and simple card! I added the greeting from the You’ve Got This Stamp Set and some Whisper White Satin Stitched Ribbon!

Tuxedo Card, www.LaurasStampPad.com

This fun little card was created with the Whisper White striped paper. I could have added color but I wanted it to look like the under shirt of a tuxedo. I like this card due to the texture and fun better than my Tuxedo Card here! For the “V” cut out, I marked the center of the paper along the top and cut down the paper there. Then I cut diagonally to that center cut from the sides!!! I added the Designer Series Paper to a Basic Black card base. I added a few Pool Party Candy Dots for a little color and flare. You could always use Black Candy Dots too! For the Bow Tie, I used the Bow Builder Punch which is super simple to punch and assemble!!! If you mail this card, I’m sure the bow will flatten but that’s okay!!! I love it!! This would be great for a Groom’s Card on the wedding day, and engagement card, or just a little something fancy for the man in your life!!!

I love this paper!!! Check back for more samples using this paper!!!

Happy Stampin’

~Laura


Loving the Sunset!!!

Posted on

SunSet wedding invite, www.LaurasStampPad.com

Months ago I started working with an amazing couple who were planning their wedding! Their colors were those in a sunset – Real Red, Melon Mambo, Pumpkin Pie, Tangerine Tango and Daffodil Delight. You know how much I love my bright colors!!! I really enjoyed creating the perfect wedding suite for this couple!!!

The invitation was a 5″ x 7″ Invite printed on Whisper White and then I used my Sponge Daubers to add all of those fun colors!!! My fingers did get rather inky but it was totally worth it!!!

Lots of sponge dauber inking, www.LaurasStampPad.com

I added some Silver Ribbon towards the bottom and stamped the scroll-y flower image from the Flowering Flourishes Stamp Set in Perfect Plum at the top!!! Then I layered it onto a piece of Melon Mambo!!! The Hotel Card and RSVP cards were printed on Daffodil Delight and Pumpkin Pie respectively with the Perfect Plum stamped image on them as well!!!

Candy Labels, www.LaurasStampPad.com

How adorable are these? The Bride came up with this amazing saying that is a sweet as the cake pops they were attached to! The tags were printed on each of the colors – Perfect Plum, Melon Mambo, Daffodil Delight, Real Red, and Pumpkin Pie!!! I used the Label Collections (now retired) Framelits to cut them out and the little oval for the ribbon to slide through was created with the Chalk Talk Framelits!!! Love it!!!!

I really enjoy working with Brides and Grooms to create their perfect wedding! Each bride has such amazing ideas and I love it! You can check out some of the others I have created here! If you are getting married, planning a birthday party or anniversary party or any other type of celebration, let me know! I would love to help you create the perfect piece for your event – Invitations, Programs, Save The Dates, Place Cards, Favor Tags, and much more!!!

Happy Stampin’

~Laura