I think I’m really starting to like Gray a little more lately! Do you ever have a color that you don’t use for awhile and then when you do, you find yourself reaching for it a lot??
For this card, I used a Whisper White card base. I took a piece of Bermuda Bay and ran it through the Big Shot with the Polka Dot Embossing Folder. Then I took my Sponge Dauber and colored the raised dots a little for a darker look!!! I love sponge daubers! I added that to the card front. I used the Banner Triple Punch to create the banner tips in the gray striped paper from the Neutrals Designer Series Paper Stack!!! For the circles, I used the Circle Framelits which layer so perfectly together. I stamped the Dude greeting from the April Paper Pumpkin Kit in Bermuda Bay and then stamped it a second and third time without re-inking the stamp. I love the ombre look! After stamping the Dude, I added in the Hey! Of course the circles were added to the card with Stampin’ Dimensionals! I thought it needed a little something more so I added the little bow with some Basic Gray Baker’s Twine! Does this mean it isn’t manly anymore?? Let me know in the comments below!
This fabulous card uses a Cucumber Crush card base and a strip of Cherry On Top Designer Series Paper along the left hand side. It is 2″ x 4-1/4″! There are so many fabulous patterns that you could use for this card which makes making multiples a breeze! For the greeting, I stamped the center greeting from Friendly Wishes in Watermelon Wonder and then die cut it out with the Deco Label Framelits! Then I added the little swirls on the sides. NOTE: Do Not Rock with this stamp because you will end up with a line. (See sample below.) The swirls were stamped in Bermuda Bay! Then I brushed the edges with Crushed Curry and a Sponge Dauber! I added the greeting piece to my card with Stampin’ Dimensionals!
Here is another sample using a different piece from the Cherry on Top Designer Series Paper Stack! You can see the swirl on the right hand side has a little line from rocking on it! See we all make mistakes and that’s okay! “Made with Love, Not Perfection!” One of my stamper girls told me that and I love it and use it all the time! Love it!!!
You can check out more samples using the Friendly Wishes Stamp Set here, here and here! Also, be sure to check out my YouTube Channel! I posted a video about how to re-ink your ink pads!!! Enjoy!!!
If you know me at all, you know I LOVE LOVE LOVE cupcakes. There isn’t a time in my life I could pass up a cupcake (cake – yes, but a cupcake – no). They are just so fabulous and little and Yummy!!!! When the New Catalog came out, I saw the Ronald McDonald House Stamp Set – Sprinkles of Life and feel in love instantly. This stamp set is so much fun to play with and I could make cupcake cards every day! Love them! Plus, $3.00 for every stamp set goes to Ronald McDonald House Charities!
So now lets get started on this fabulous card! I used a card base of Bermuda Bay and added a few banners from the Cherry On Top Designer Series Paper Stack. I cut the banner tips with the new Banner Triple Punch. You are able to cut tips in paper measuring 1″, 1-1/2″, and 2″ but as long as it is centered you can do 2″ and any size under!!!! Then I added some Whisper White Baker’s Twine with a little bow! For the cupcake, I stamped the bottom (wrapper) in Watermelon Wonder onto Watermelon Wonder cardstock and cut it out. I know I know we don’t like to fussy cut but at least it is straight lines!!!! For the frosting, I punched it out in the Cherry On Top Designer Series Paper Stack with the Tree Builder Punch which coordinates with the Sprinkles of Life Stamp Set. I adhered it down with some Stampin’ Dimensionals! I added the greeting and brushed the edges with a sponge dauber! To finish it off, I added 3 little Candy Dots from the Brights Collection! Love it!
I have so many more samples to share with you using the Sprinkles of Life Stamp Set!!! You need to order your’s today so you will be ready to re-create these! Stay tuned!!!
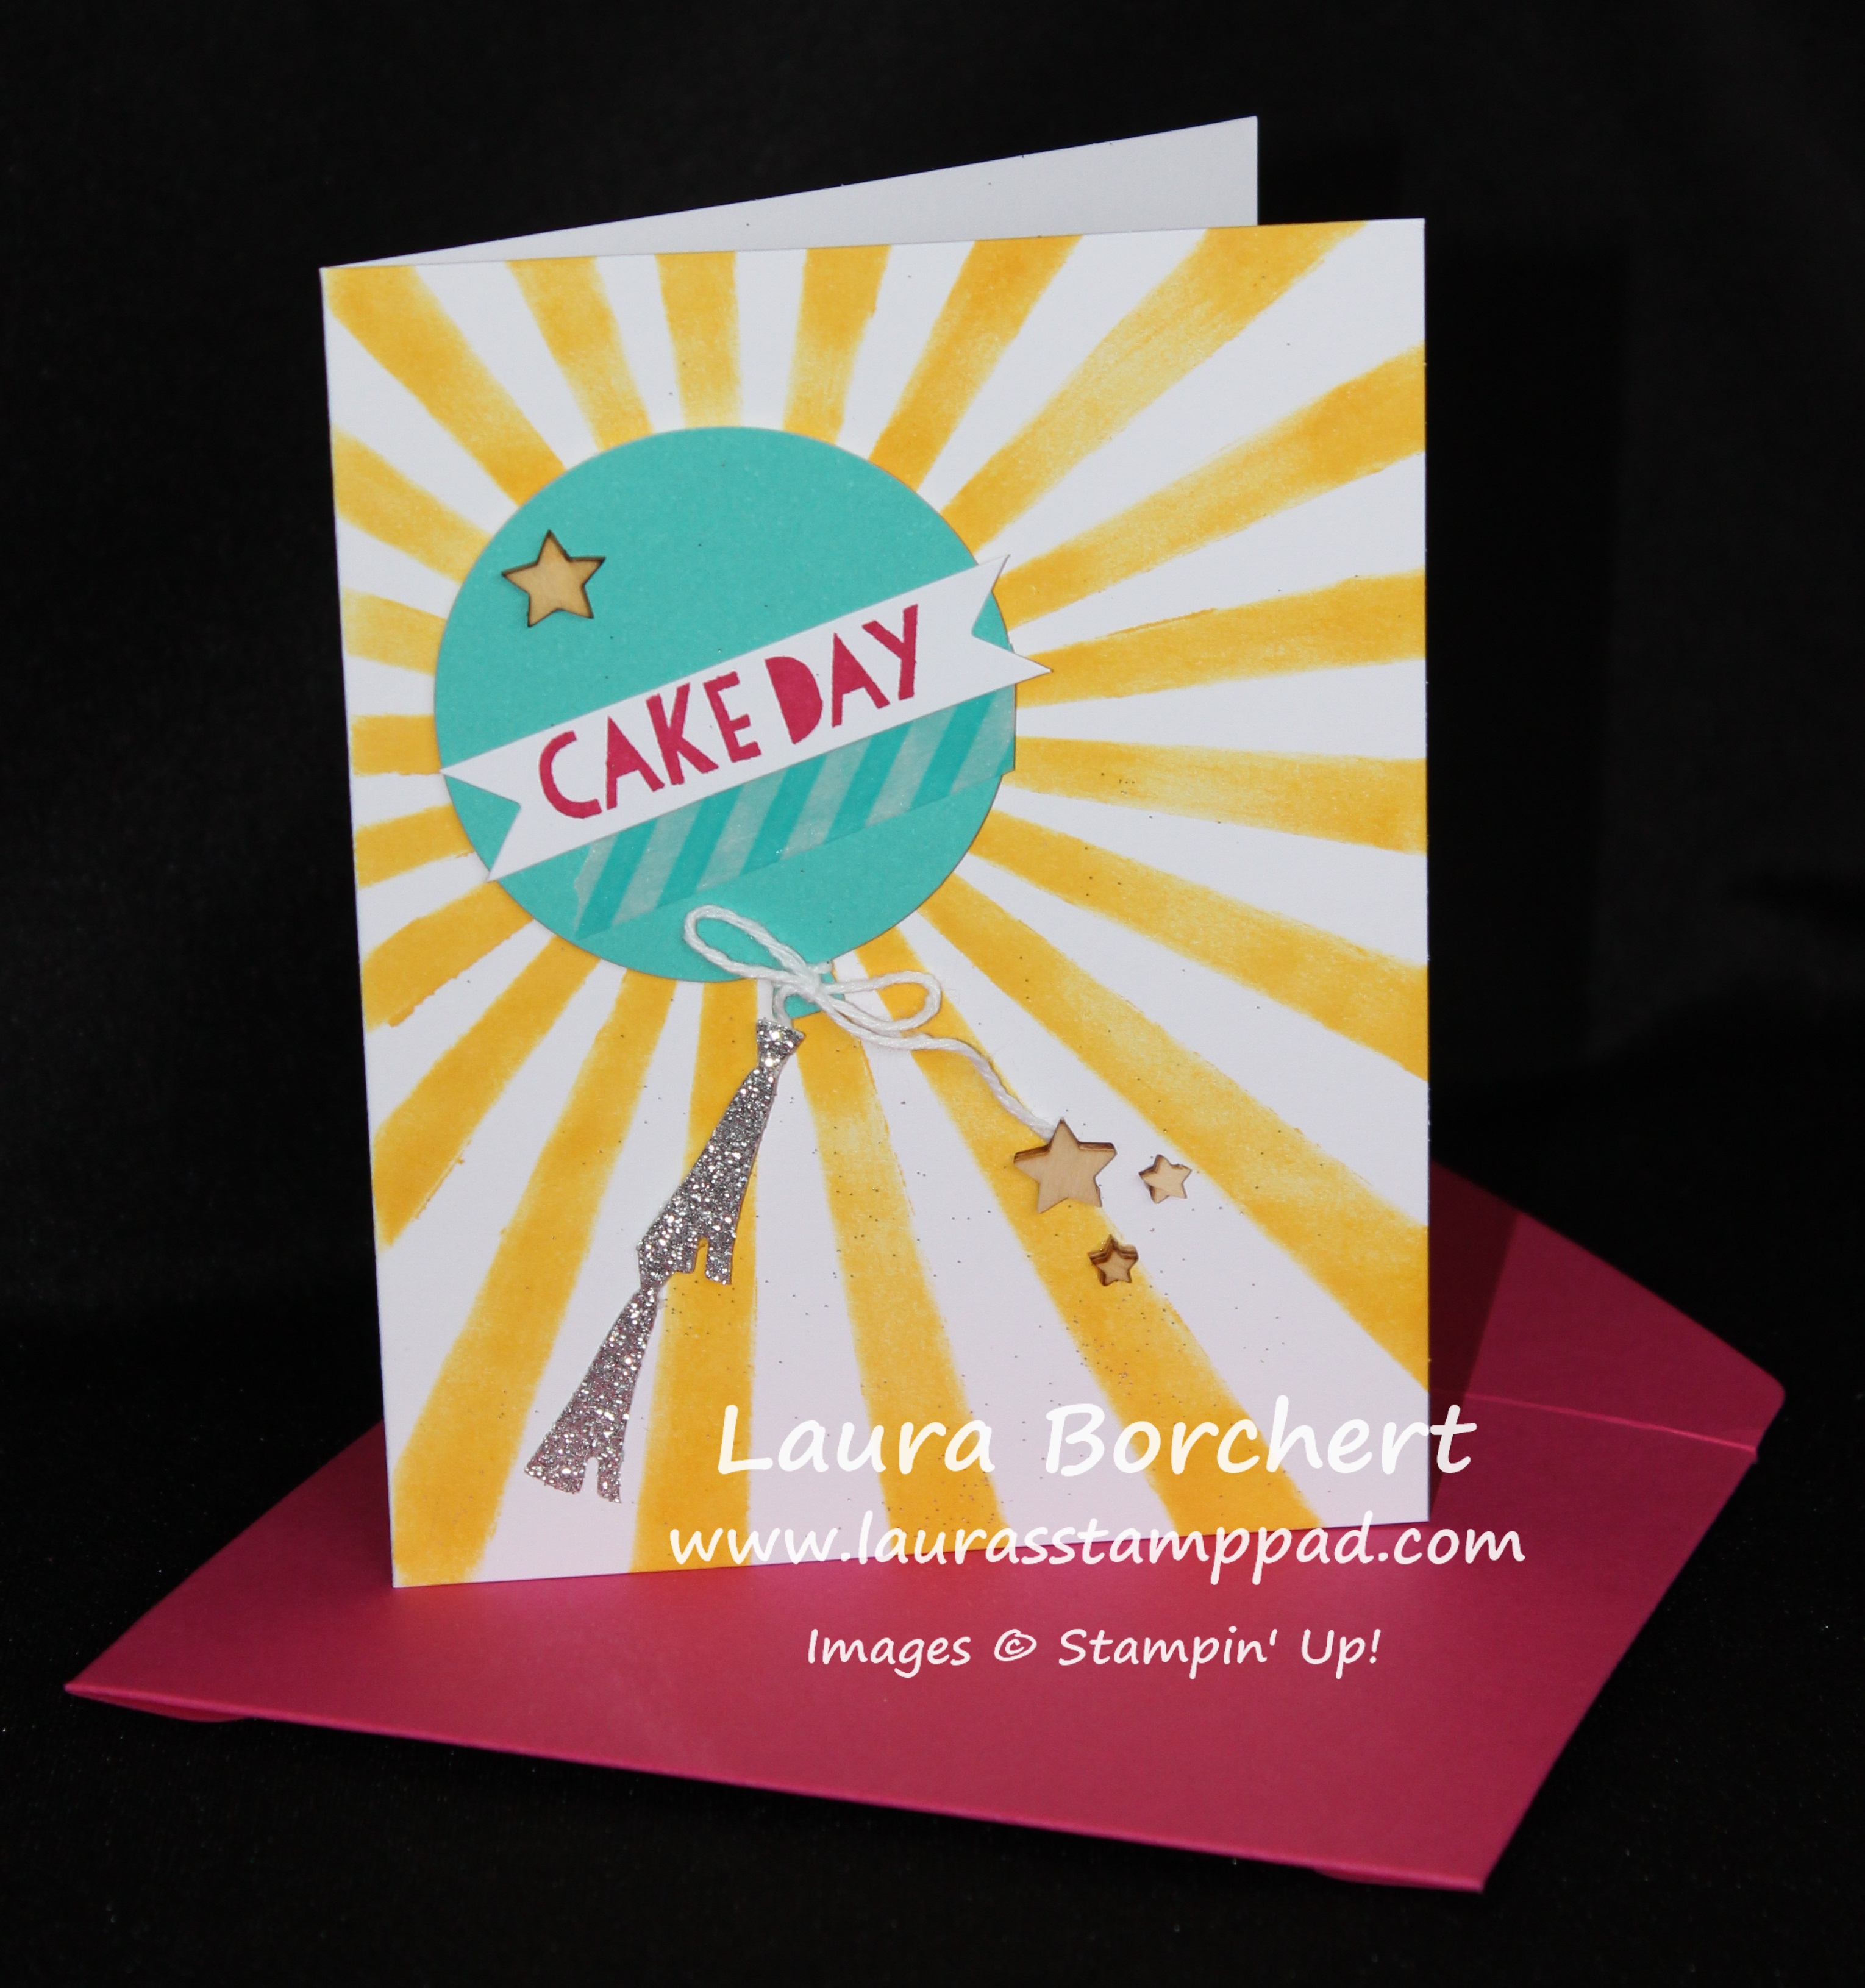
I LOVE this card….which is why I paired it with the Melon Mambo envelope! <3 It was super fun to make and you can make tons of them because the template in the kit is reuse-able! Again, I used my Sponge Daubers for this one rather than the included spritzer. I like to have more control over my color and get a strong line image. I love the bright colors and bold look of this sun! You could always do it in other colors as well. Many of my stampers at the class I held on this kit did Melon Mambo. They sure know the way to my heart! 🙂 TIP: If you drop your sponge dauber down at the center circle of this template and rub out on each ray you will get a fabulous ombre look. It will be really dark around the center and lighten up as you go out! It looks amazing!!! I stamped my greeting from Age Awareness and add all the little goodies which were provided in the kit. I would love to do this card with a greeting stamped in the middle of the sun and maybe some Dazzling Details! That would be awesome too!!
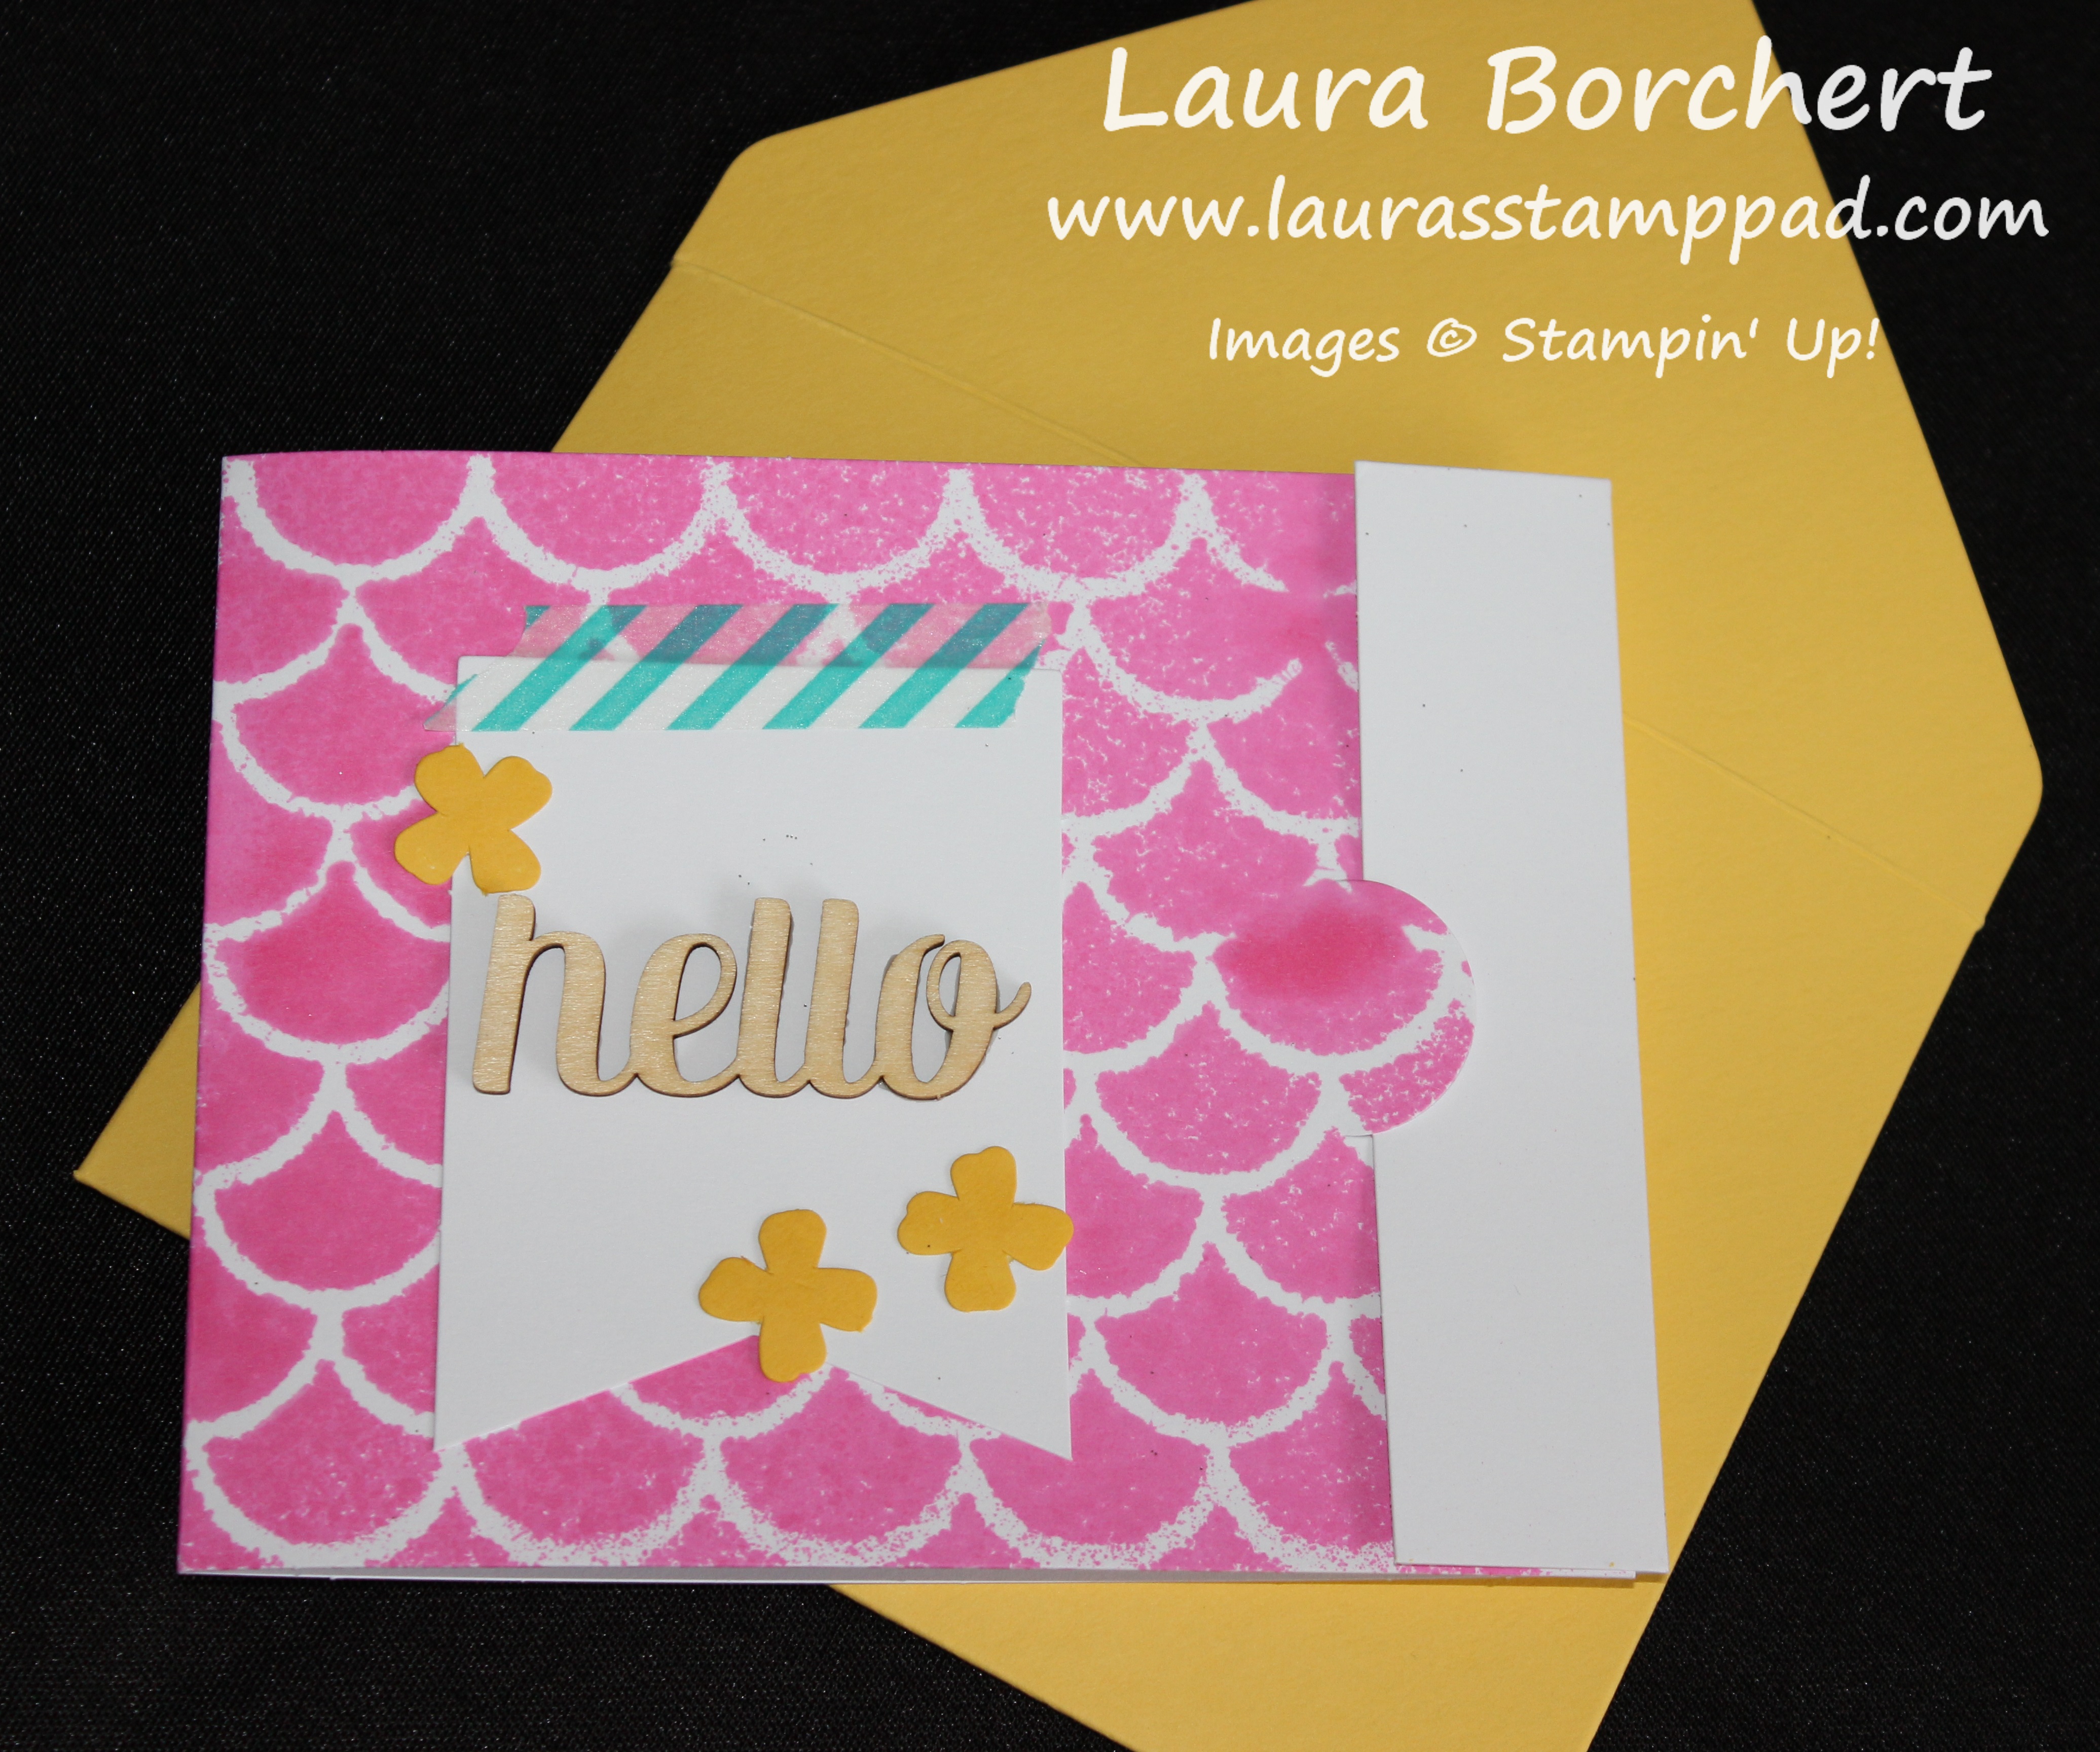
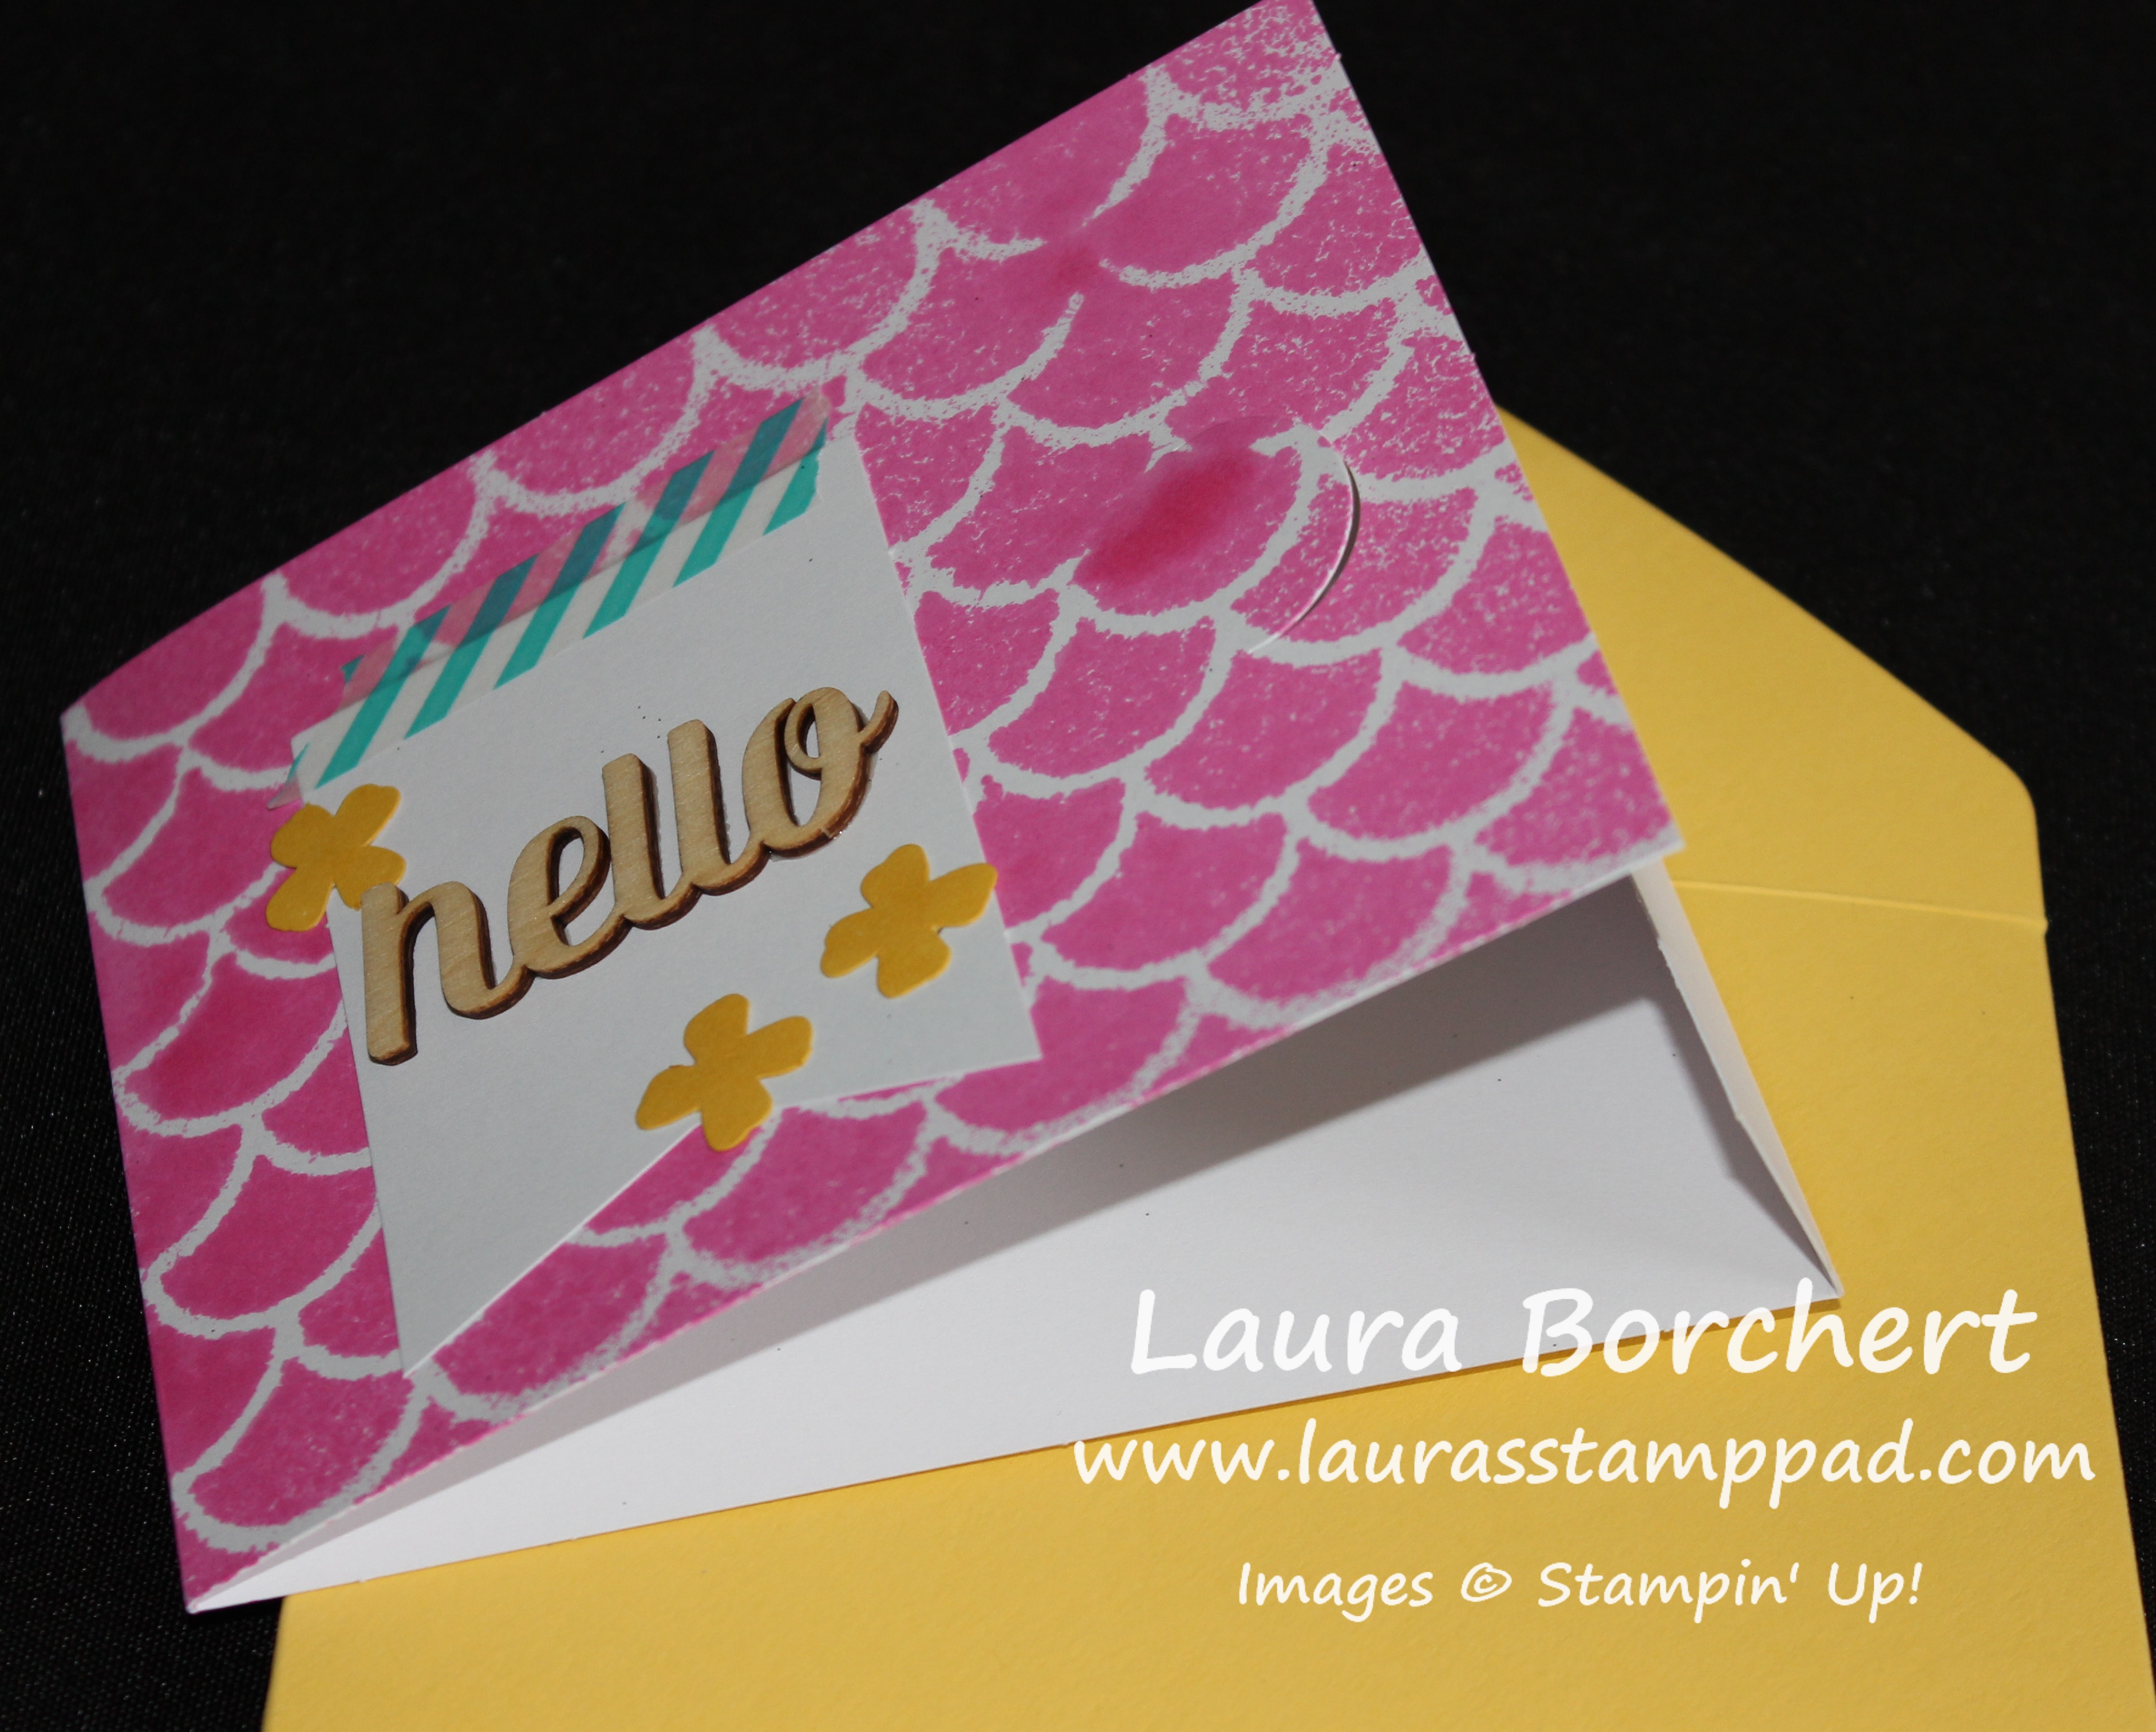
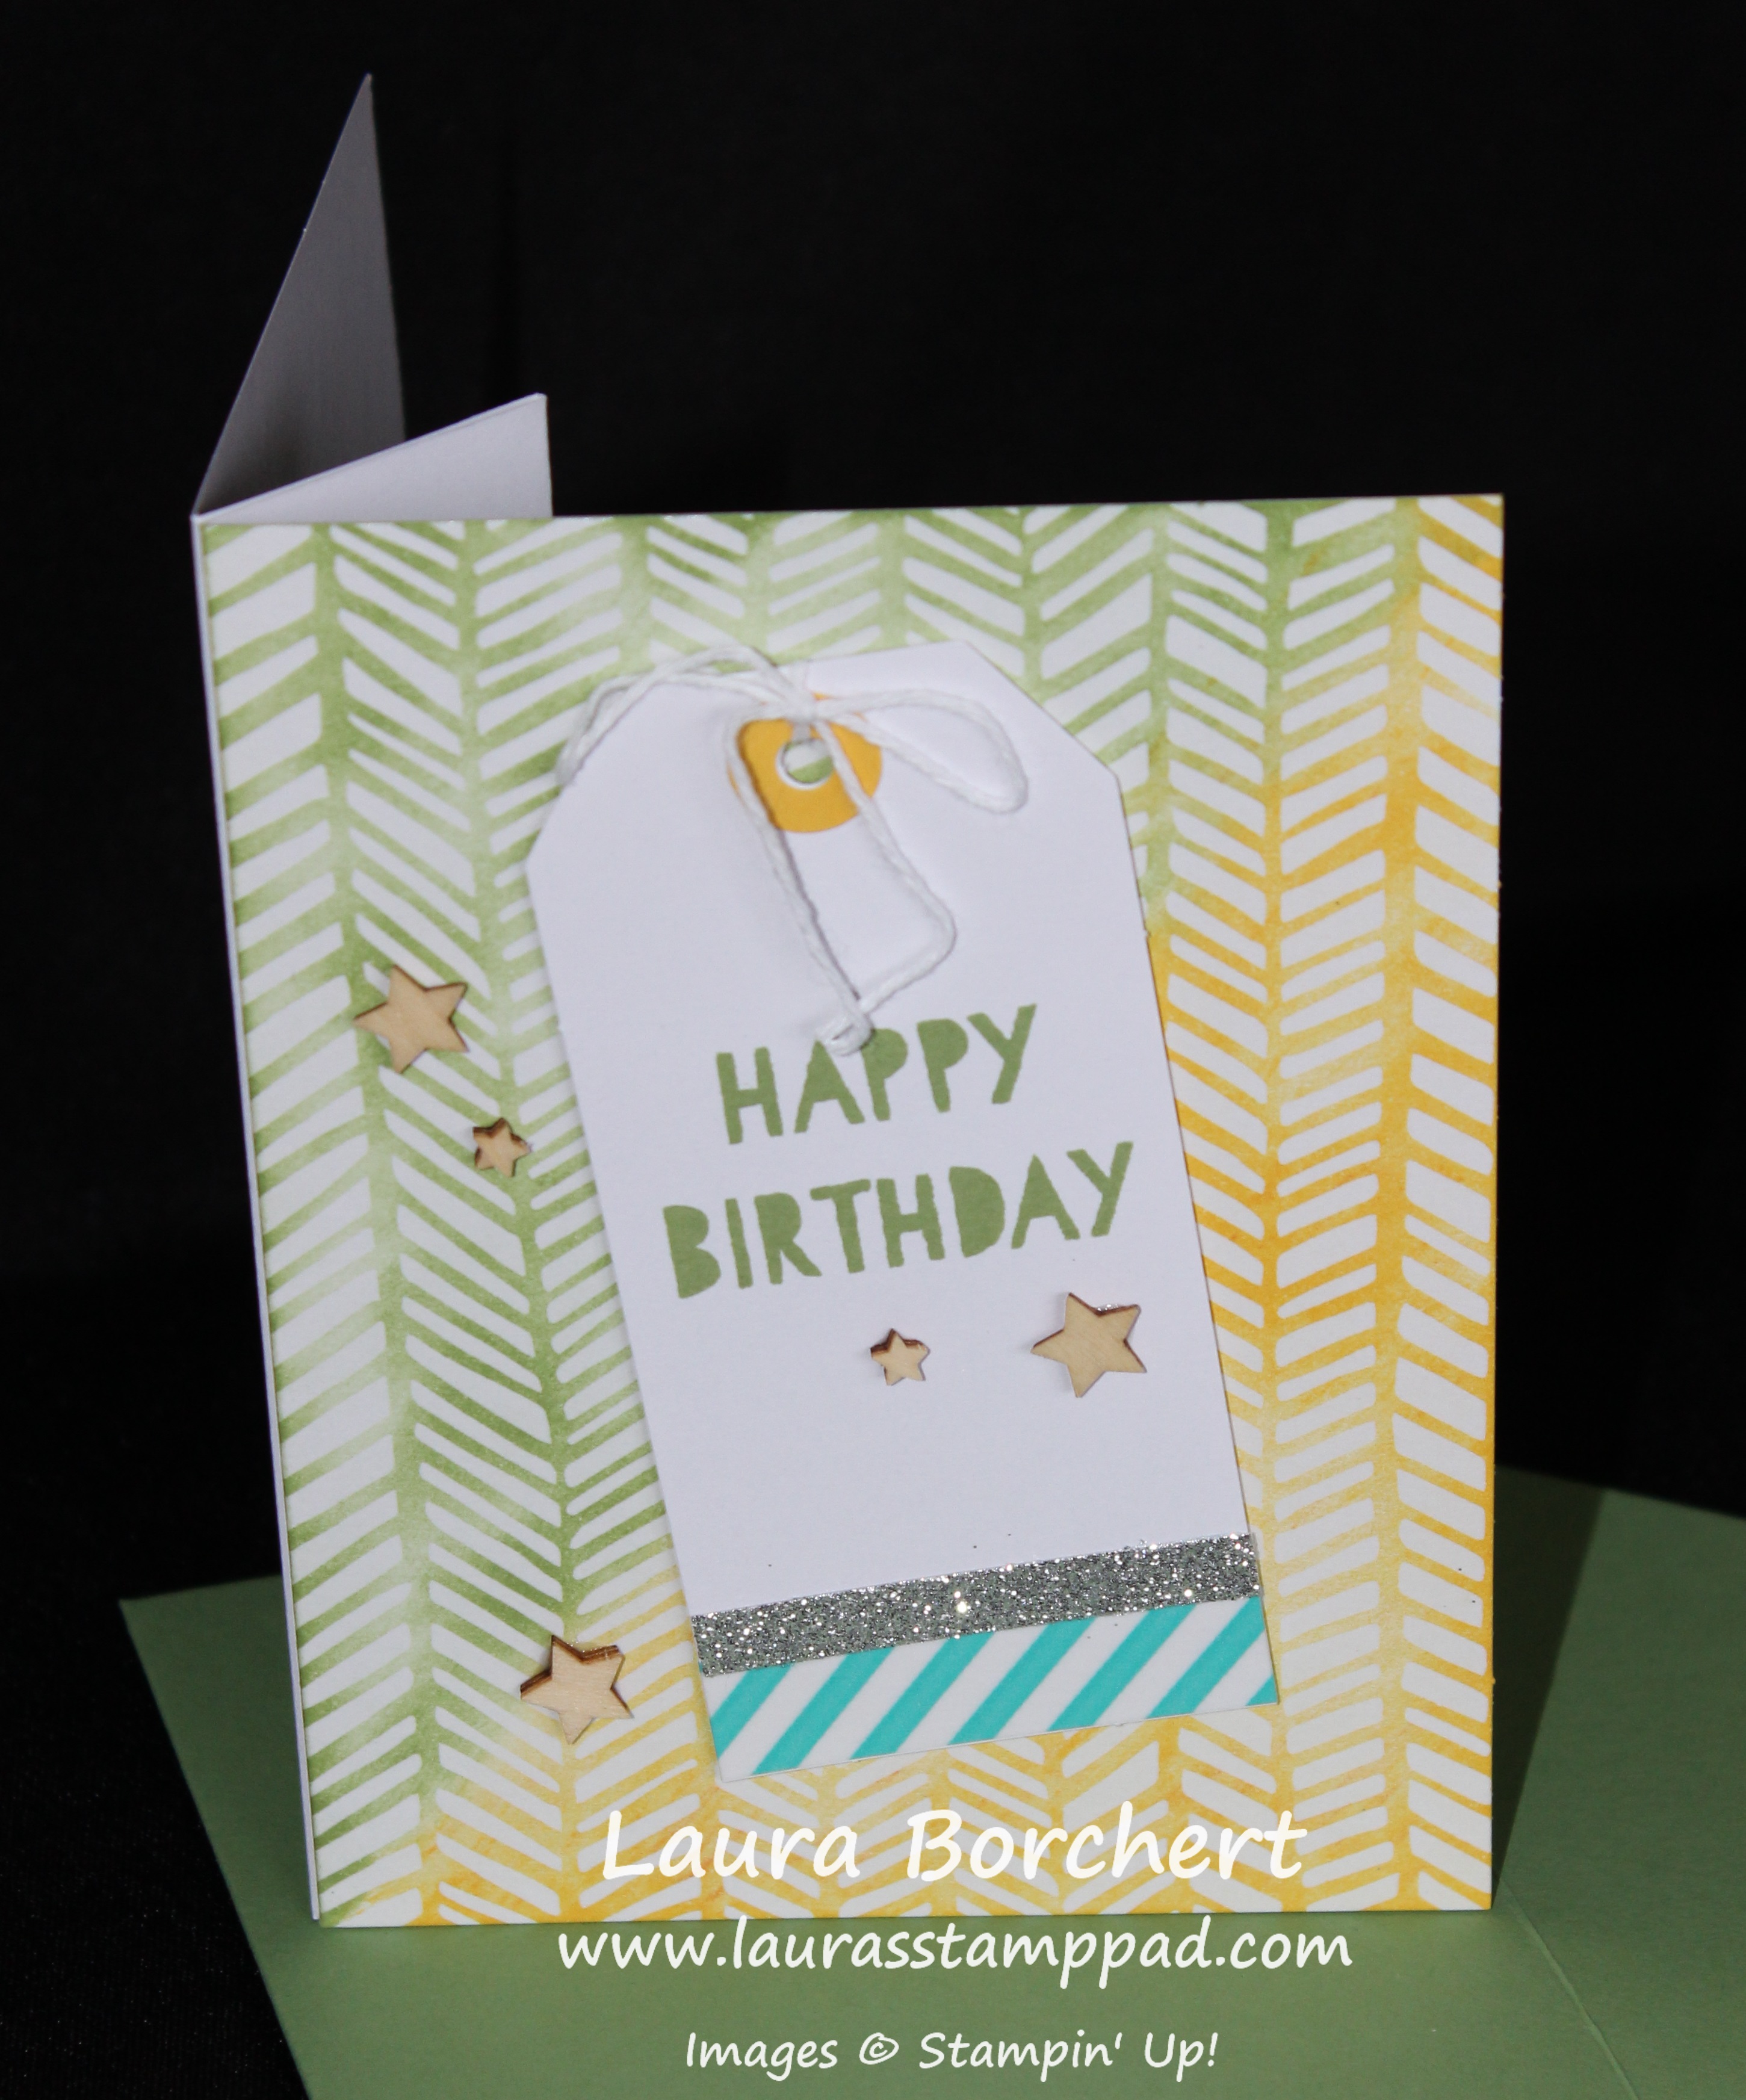
Now for the final card! This card comes scored and cut with that little tab! How cute is that? I used the scallop template for this one and used my Spritzer with Melon Mambo Re-inker in it (Alcohol 70 Proof or less and as few or many drops of re-inker you wish). I love the look of this card as it makes me think of a mermaid but you can see how the lines are very distinct and the colors vary across the card. It looks cool but the OCD in my goes a little crazy. When there is a spot that doesn’t have ink or enough ink, I spritz and spritz and then over do it. Ehhh What are you going to do? Remember less is more! 🙂 I added the wooden greeting and the tag. The little flowers came in the kit but are white so I pounced a few times on them with my Daffodil Delight Sponge Dauber and make them yellow! 🙂 Love it! Here is another photo showing that tab look of this card!
I was really impressed with all of the goodies that were included in this kit and how amazing the cards are! I really loved making them and seeing what my other stampers came up with in the class!
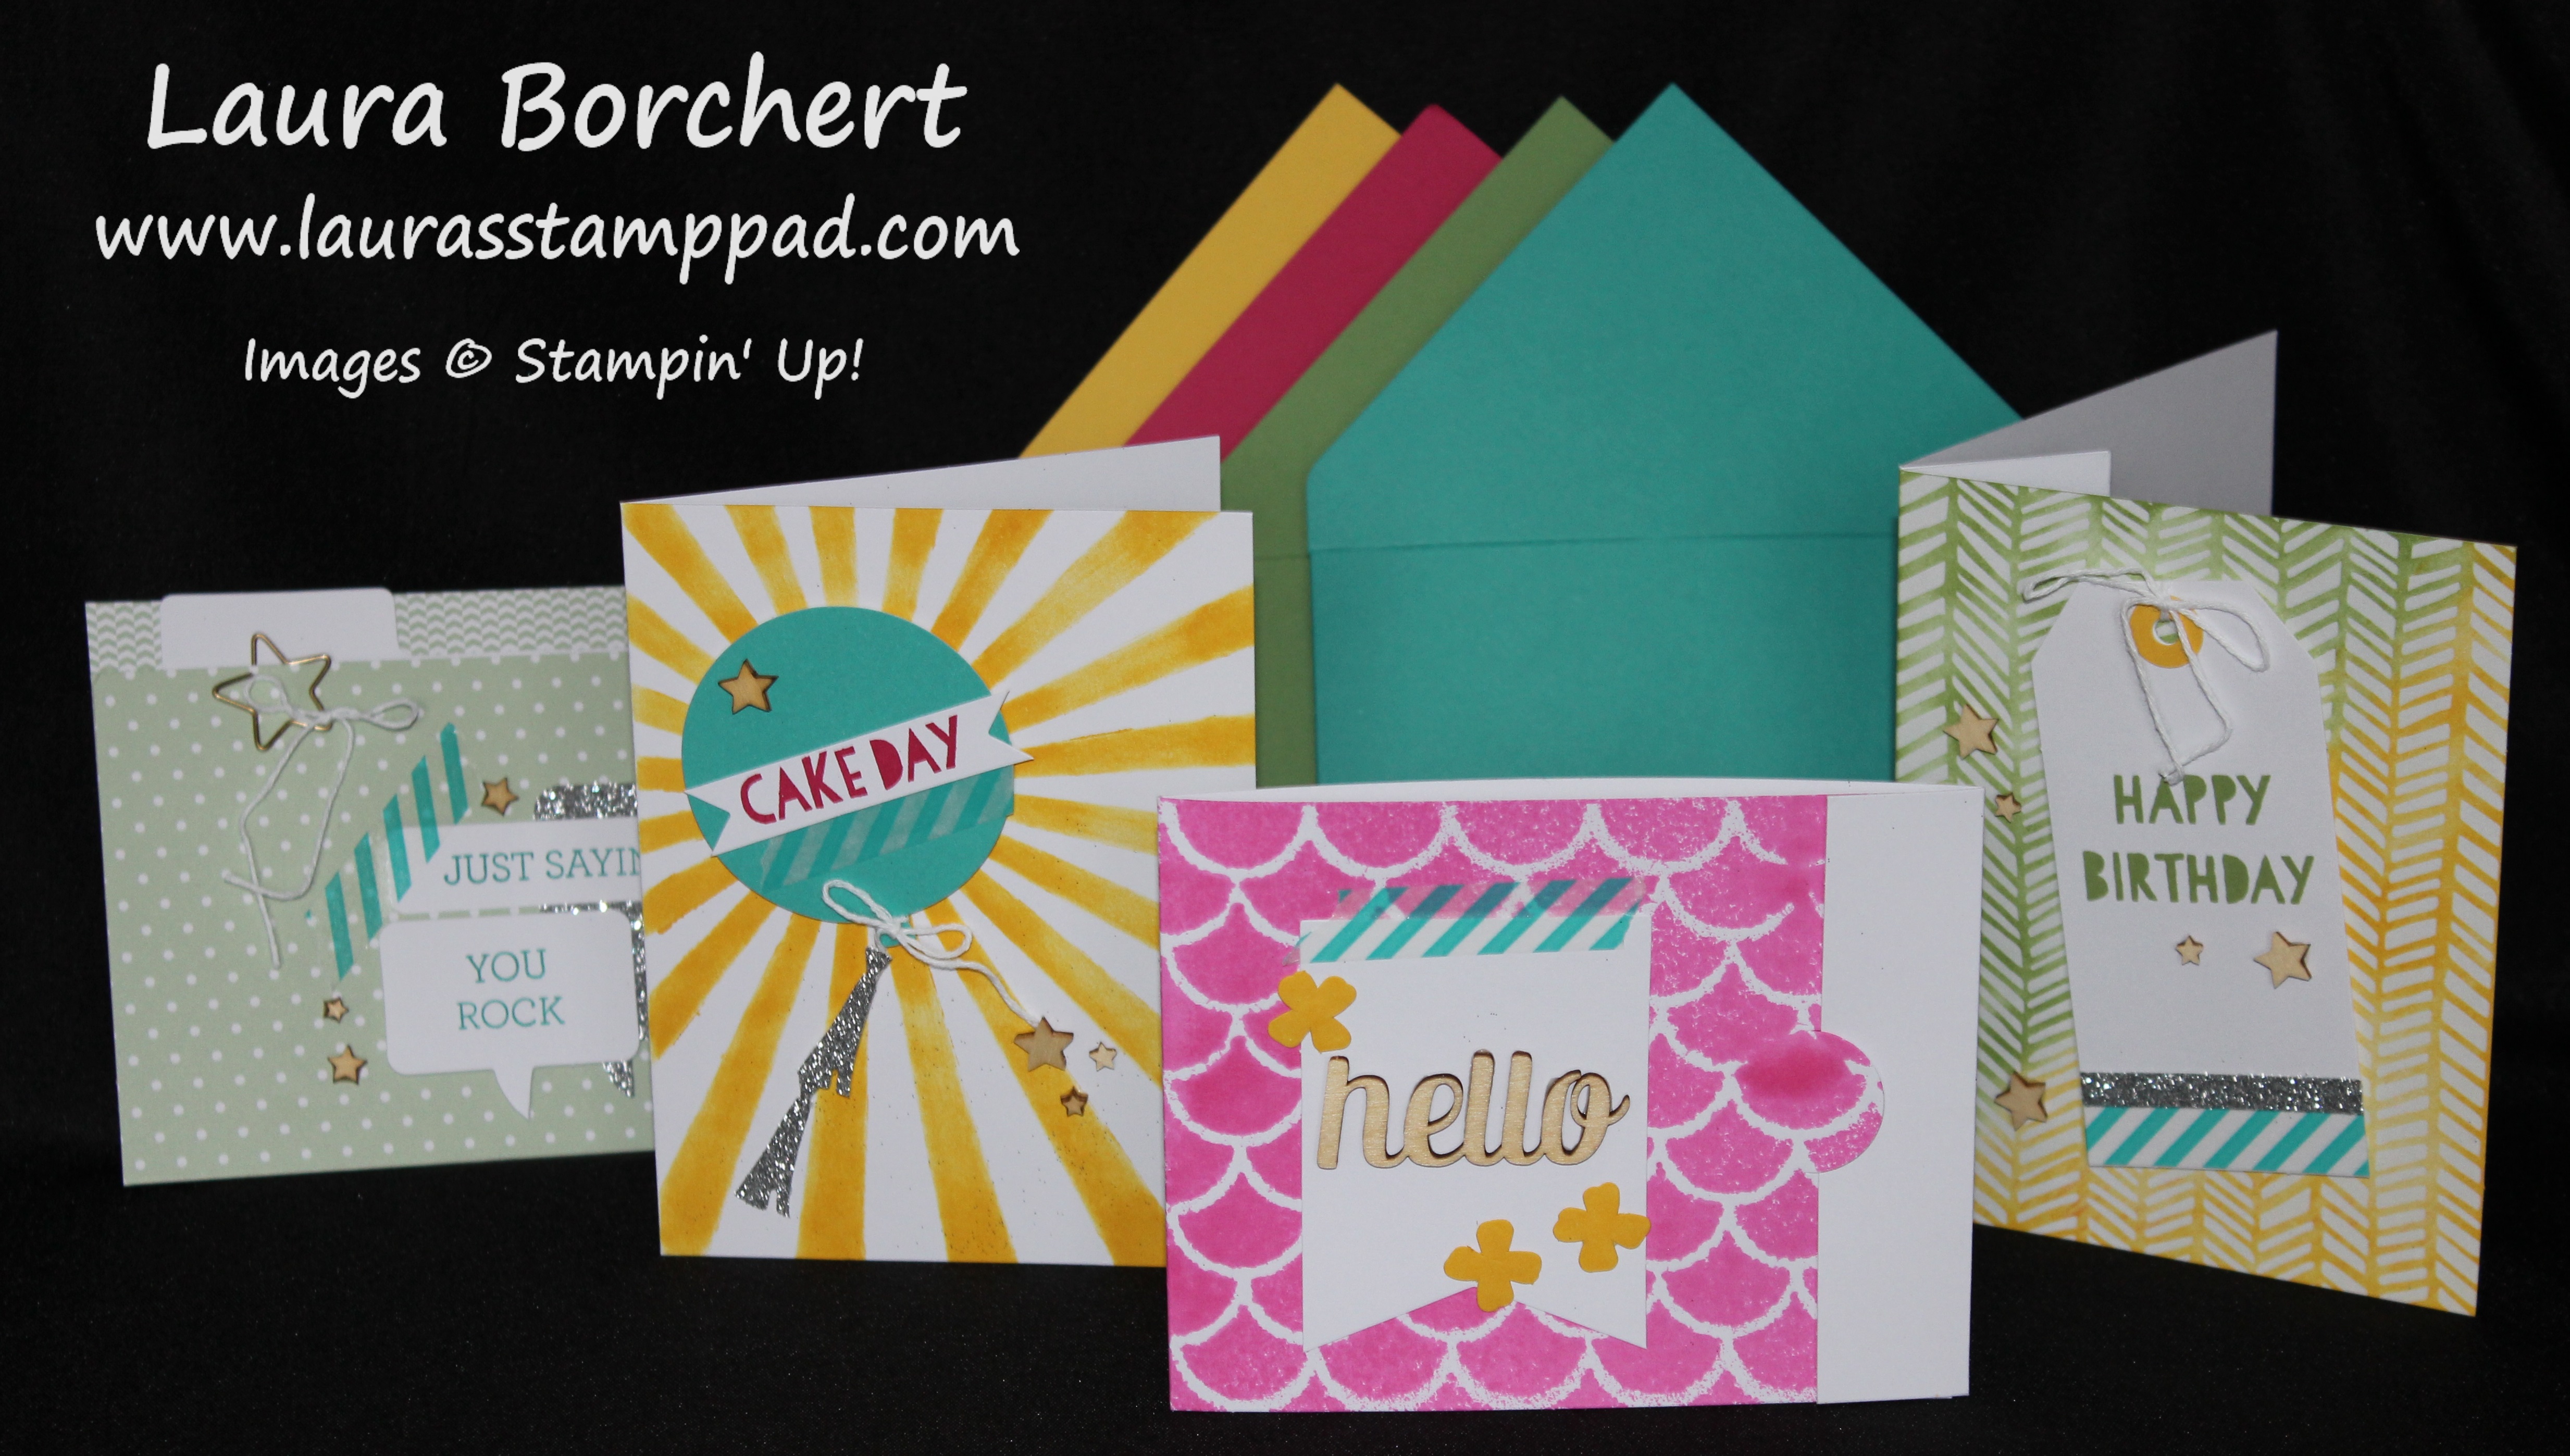
Here is another snapshot of all of the supplies! And here is 1 set of all of the cards. The kit makes 5 each of these!
Be sure to get your kit before it is gone on June 2nd! Click here to get yours! I hope you enjoyed these and if you make these cards and add your own flare I would love to see what you come up with! Please share in the comments below!
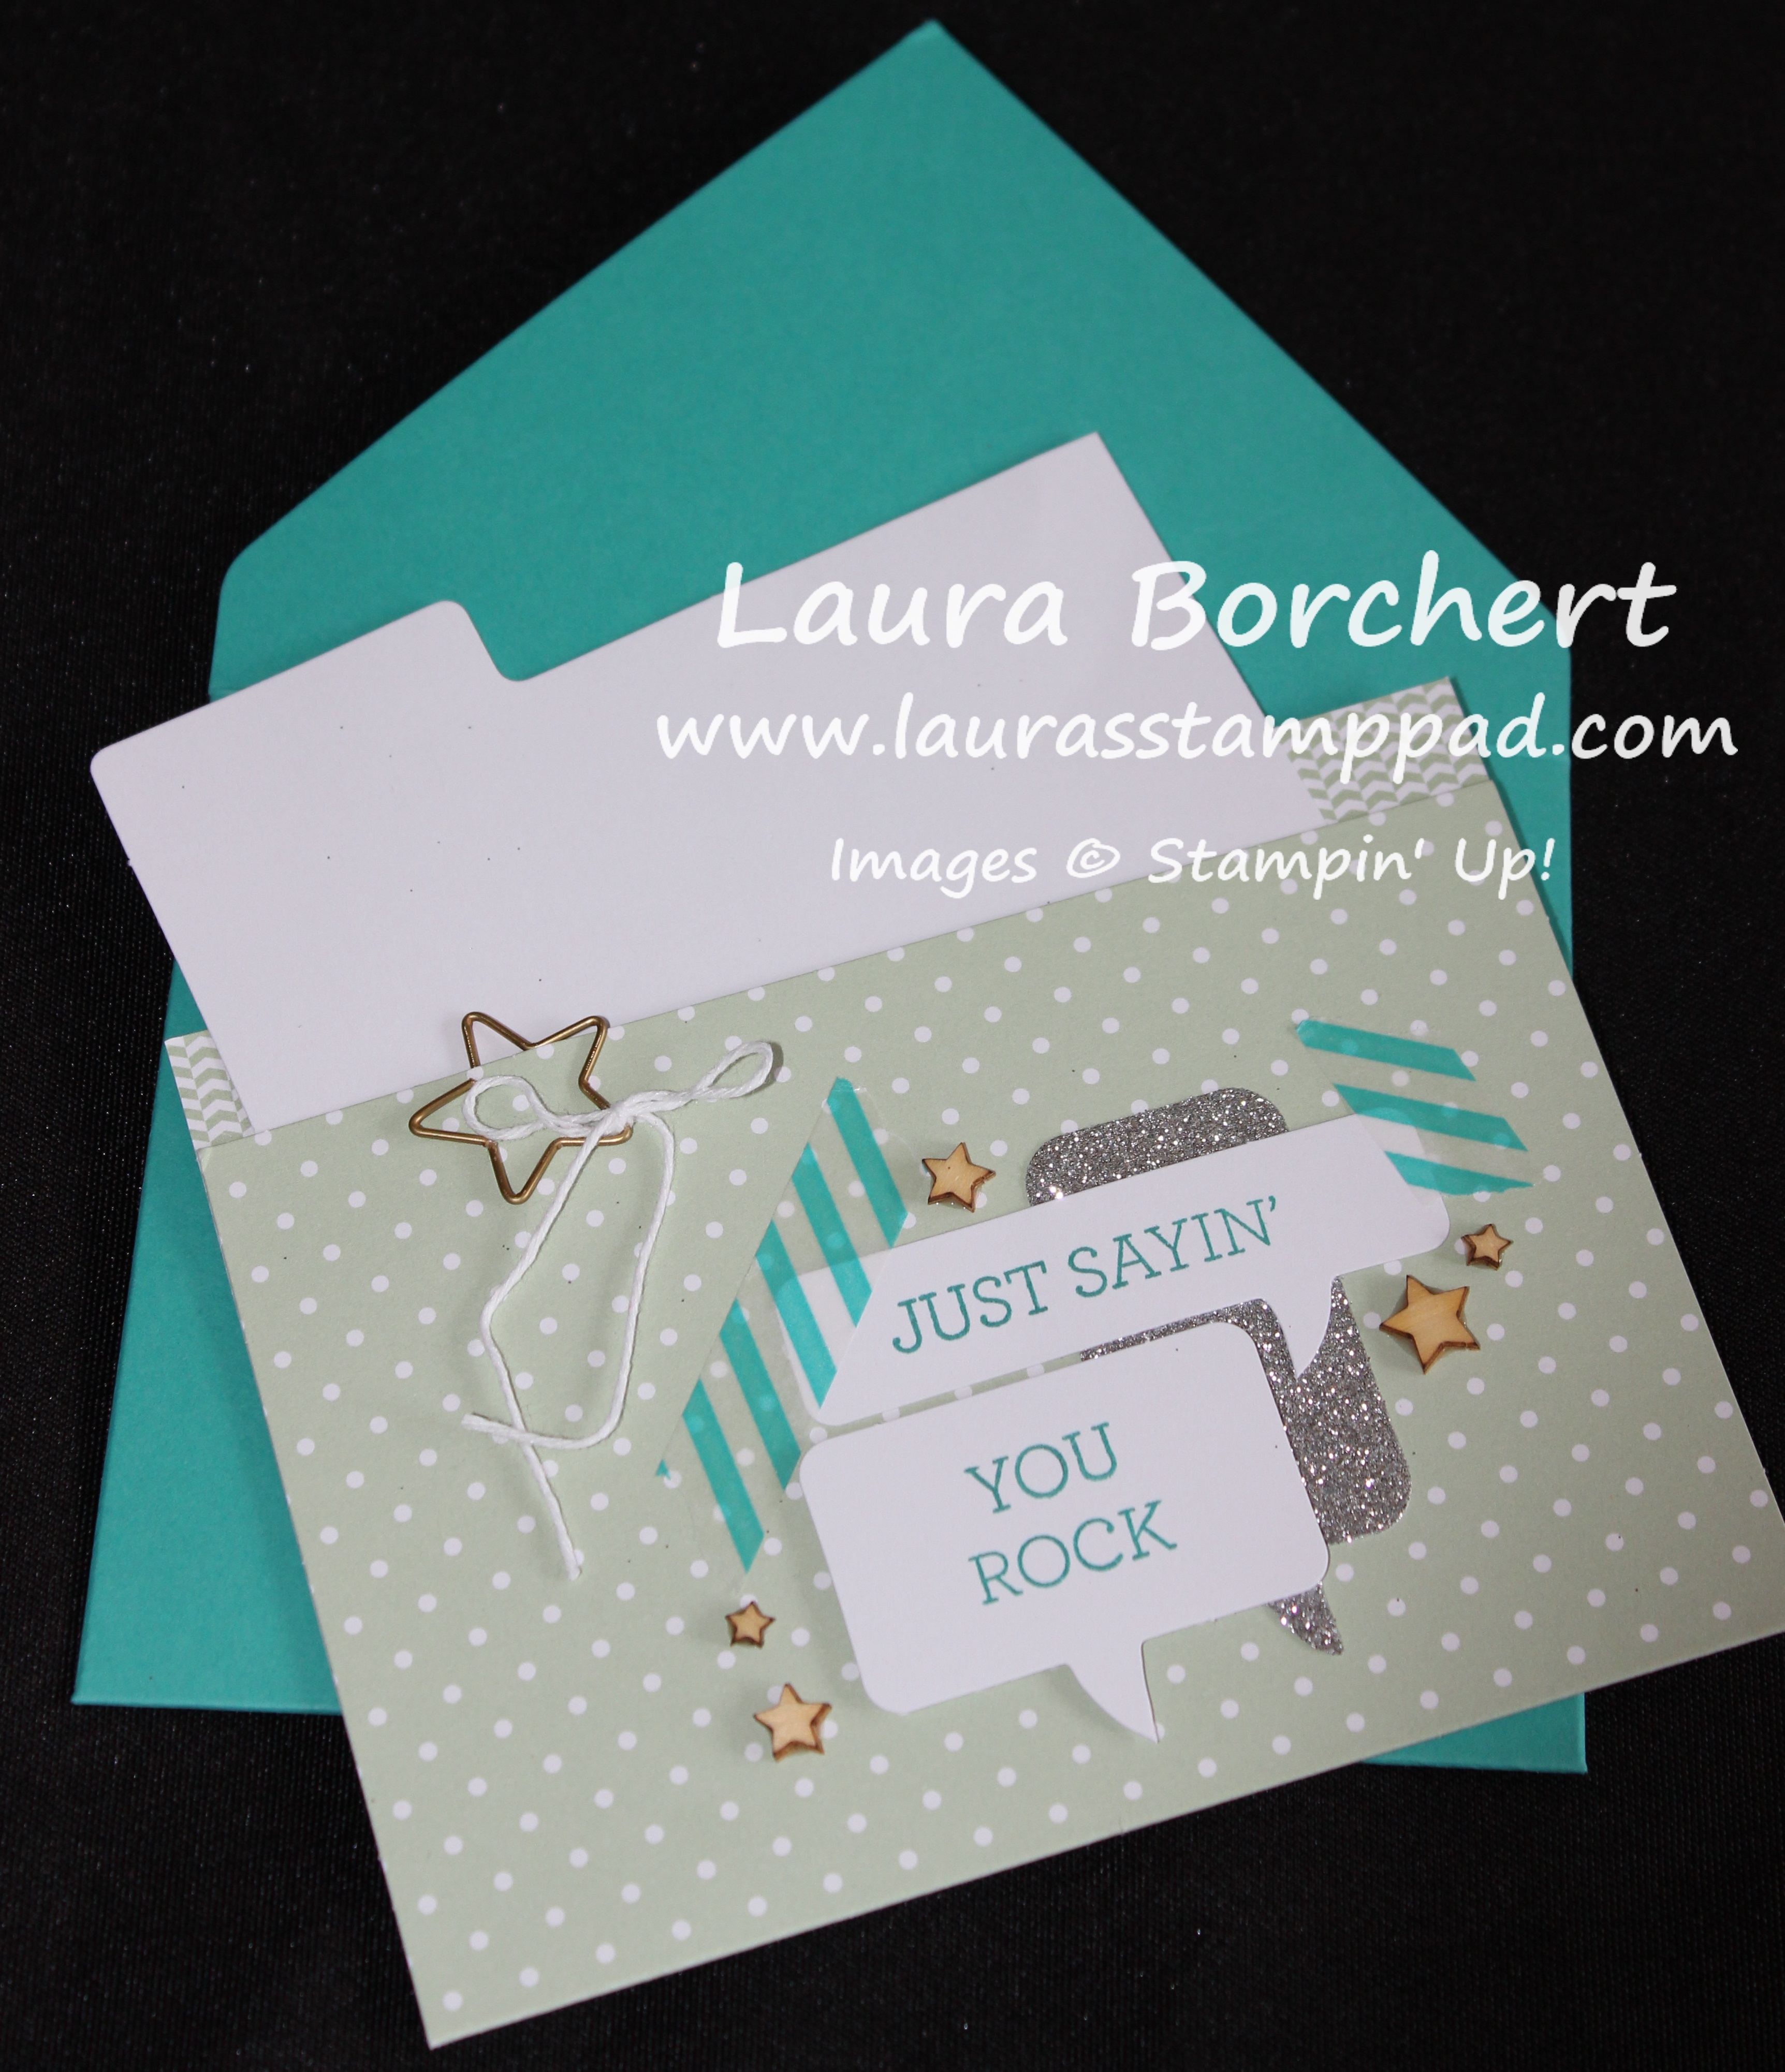
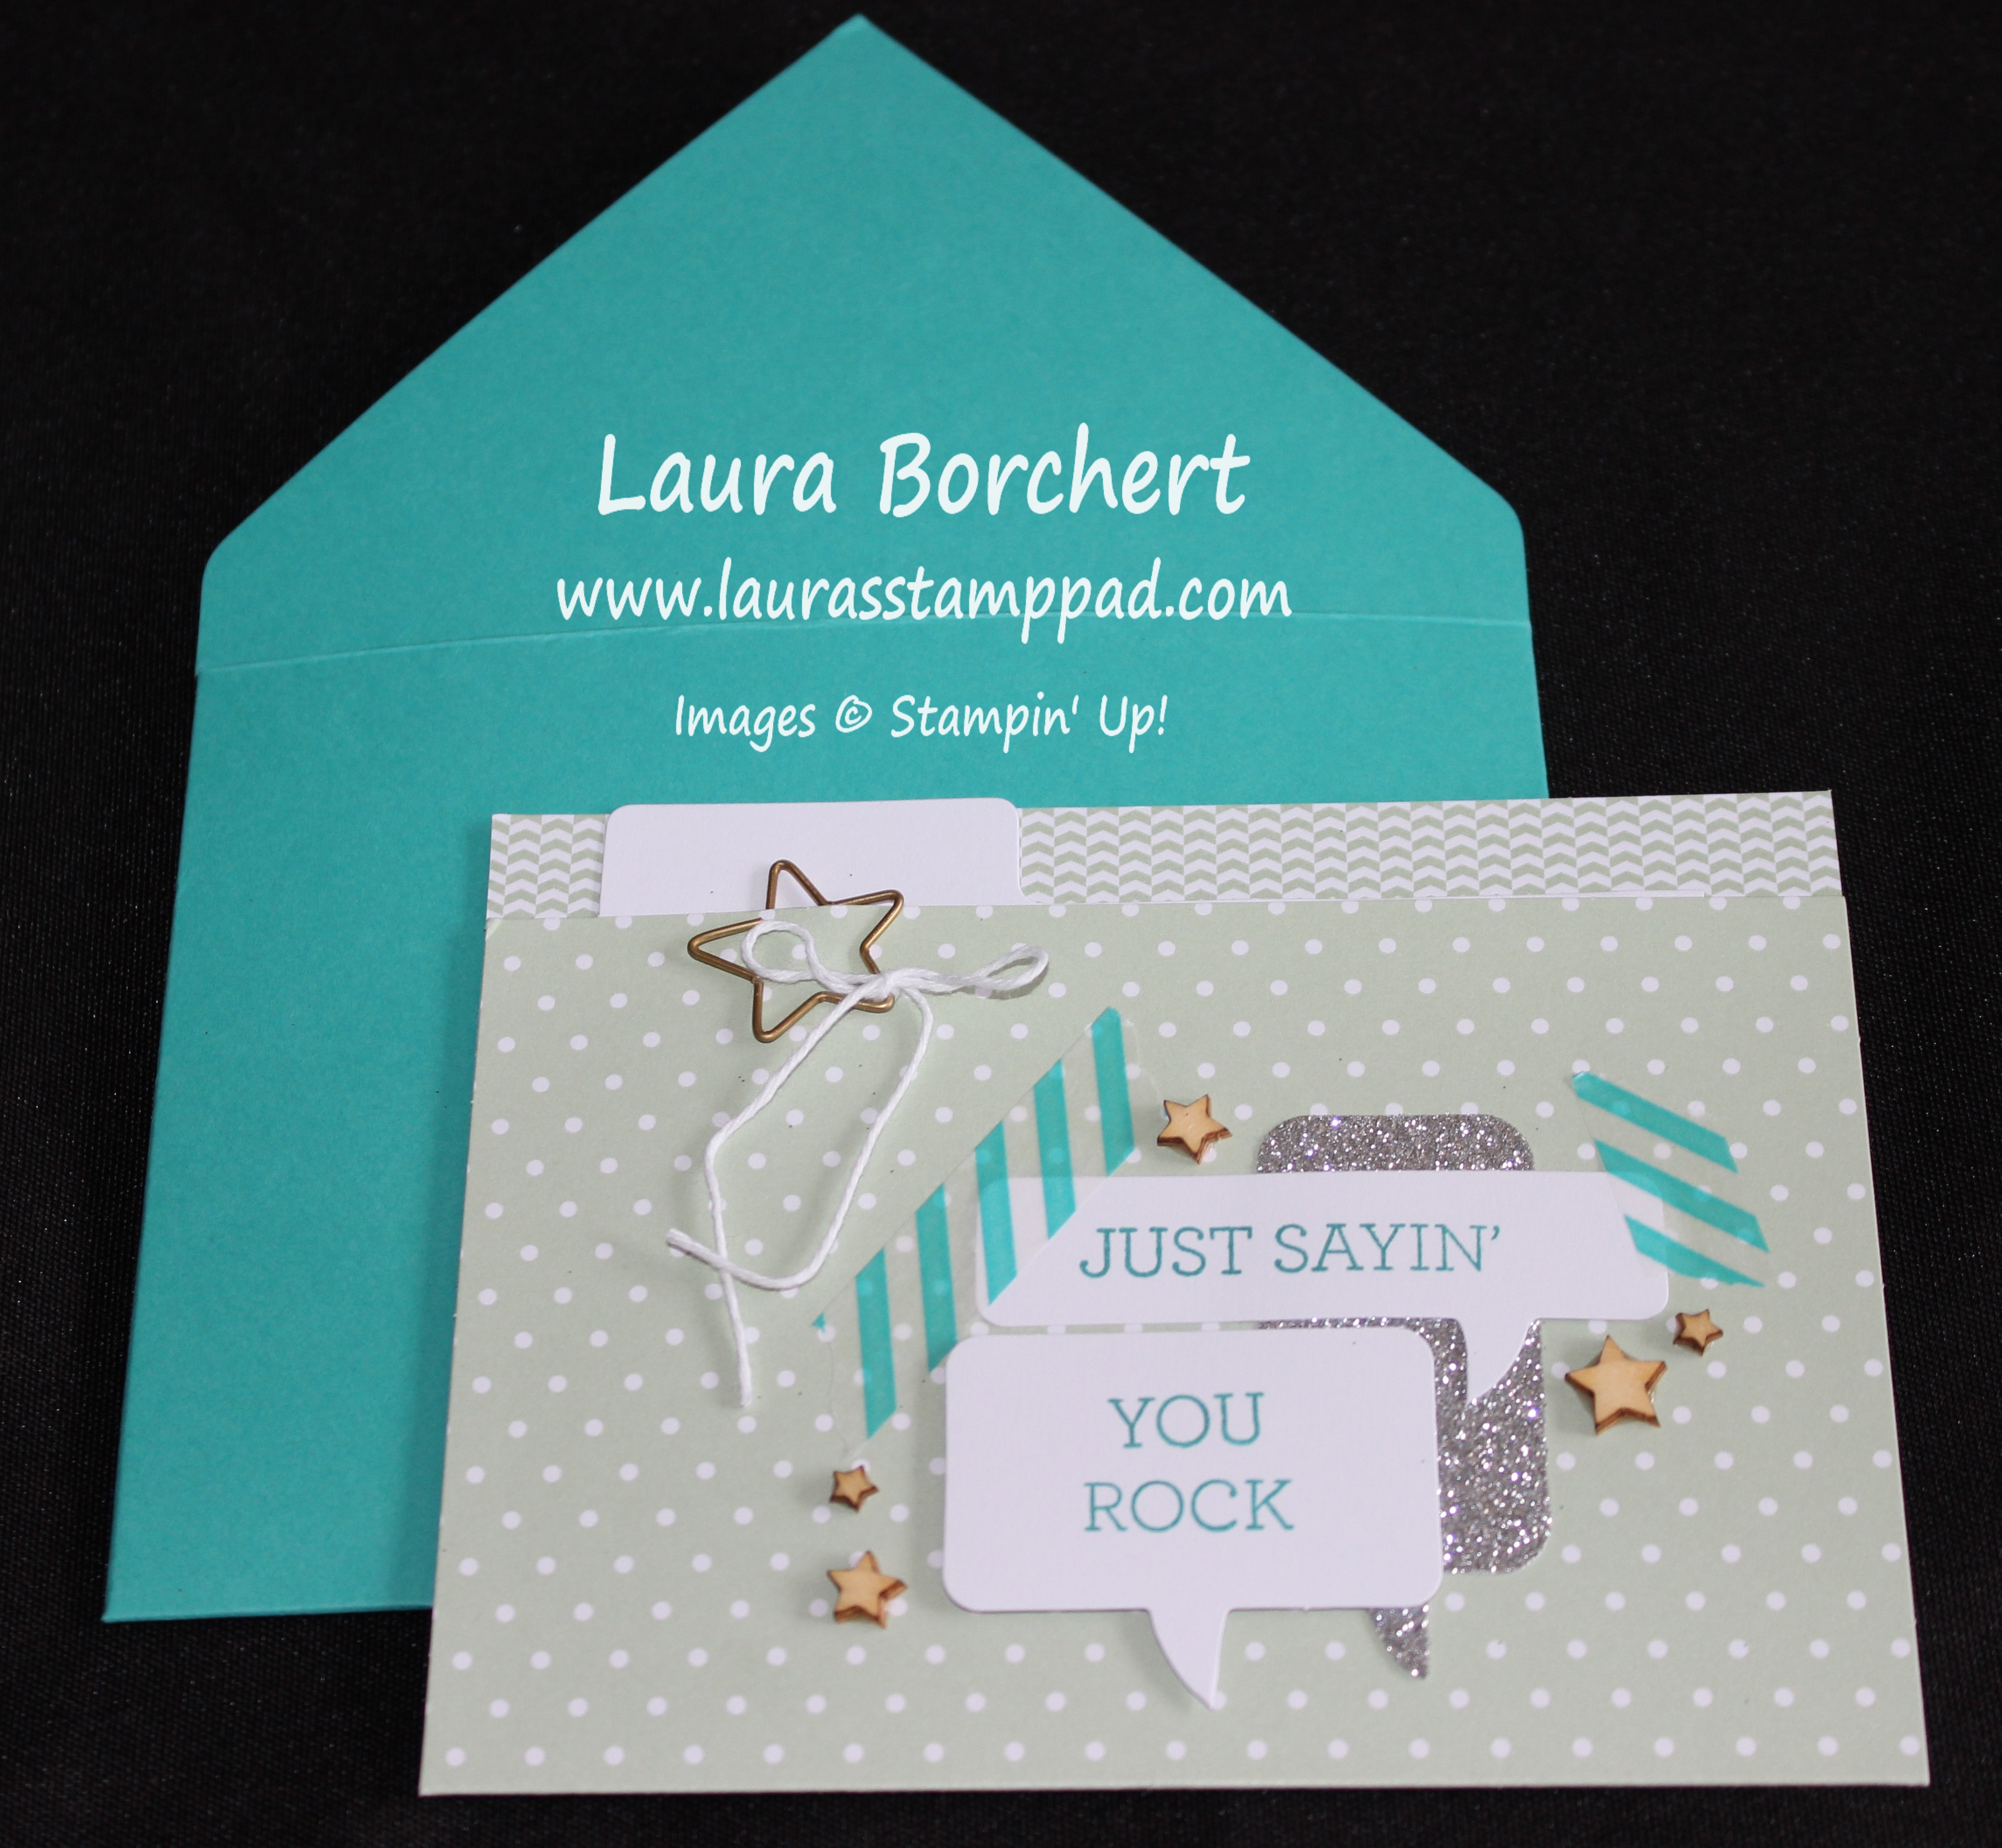
This is just one of the fabulous cards you can create from the Hooray It’s Your Day card kit from the Occasions Mini Catalog (which ends on June 2nd)! I had some much fun with this kit and I made a lot of modifications! Remember, you don’t have to follow the instructions on these kits! The kit comes with 5 each of 4 different designs for a total of 20 cards including envelopes. I think the envelopes are my favorite part – Bermuda Bay, Melon Mambo, Wild Wasabi, and Daffodil Delight! LOVE THEM!!!!
Look at all these goodies!!! Of course the spritzer and mask templates can be used over and over again. Also, there is tons of Washi Tape on that roll and I didn’t come close to using it all. Love it! Okay so let’s get down to the fun stuff!!! I will be showing 2 cards today and the other 2 tomorrow! 🙂
Here is another photo of the File Folder Card! This is super cute and the file folder style is really popular right now. Still not sure if it is my thing but I’ll go with it! TIP: When sealing your Wild Wasabi pocket for the file card to go in, you need to stay really, really close to the edge. Even staying close, I had to cut down my file card. Another option would be to use your washi tape to seal the ends by wrapping it around the side. This would allow for plenty of room for your file card! Then you can decorate as you wish with the thought bubbles, washi tape, wooden stars, and star clip! I used the Crazy About You Stamp Set for this card. (I didn’t purchase the coordinating stamp set – Hooray It’s Your Day and just used a few of my favorite greeting sets!) Also, I didn’t add any color to this one…..I noticed that a few days later that mine didn’t look like the sample in the kit photo! 🙂
I love love love this one because it is an emboss resist card. The card comes already embossed on the front with that fish tail look.What do you call that pattern? Let me know in the comment below! I actually used my sponge daubers on this card rather than the spritzer. You know how much I love those things. Then for the tag, I stamped the greeting from Age Awareness and added a little Washi Tape and Silver Glimmer Paper (included in the kit). The other cool thing about this card is it comes with a gift card holder built in. All of the score lines are created and you just need to add a little adhesive (Fast Fuse works best) on the outer edge! Check this out! Perfect for a Graduation card!!!
Now you have to wait until tomorrow to see the other 2 cards in the kit. Be sure you are subscribed to my blog in the upper right hand corner and you will receive an email of my blog post so you don’t miss out! See you tomorrow!
It was my husband and I’s Wedding Anniversary at the end of April and if you have followed my blog for long you know I like to make really fun and personal cards for him! You can check out my Mario Card here, Minion Card here, and Kirby here! If you haven’t guessed it, my husband likes video games!!! So for our Anniversary I made him this card!!!!
I really love how it turned out and my husband thought it was really good. He mostly commented on the bricks which I thought was hilarious. He also said that she is cross-eyed and he kept trying to fix it 🙂 I started by making her head which uses Circle Punches, the Owl Builder Punch, the Bird Builder Punch (hair), Hearts A Flutter Framelits, and Oval Punch. I drew her eyelashes on with my Basic Black Marker! For the crown, I used Gold Glimmer Paper and punched 3 petals with the Flower Medallion Punch! Then using some Red Glimmer Paper and the Petite Petals Punch I added that red gem! Here she is close up!
I realized that I couldn’t just put her face on a card so I needed some background and that is when I thought I would create her Castle and make it look like she is hanging out the window waving at Mario or screaming for him to rescue her! I needed a little bit of her body so I punched some more circles! For her collar, I punched the Scallop Oval Punch and cut a piece off! For the gem on her chest I cut out one of the gold circles from the Gold Designer Vellum and trimmed it up! Then I started on the bricks which were created with scraps of Smokey Slate and Basic Gray. I rounded the edges with my Project Life Corner Rounder. I brushed the edges using my Sponge Dauber in Basic Gray and pounced all over with some Encore Silver Ink and a Sponge Dauber! That gave the bricks a bit of a shiny brick look! The placement was a bit tricky but I made it work!!! The best part is it was made for my husband and with love!!! After all our cake topper on our wedding was Princess Peach and Mario!!
I do have to admit that Princess Peach was not my original idea for a card……I planned on doing Grumpy Cat.
She just looks like she was in a fight and is made I put a bow on her head.
Do you love Punch Art? What is your favorite? Any suggestions on the next one I should do? Leave me a comment down below!
Happy St. Patrick’s Day and Happy Tuesday !!! You know what that means…I have a fabulous technique to share with you! I’m super excited about this one because it includes flowers (Eeee) and PINK (EEeeee)!!!! How amazing is this card????
I love this so much that I almost want to frame it just to look at beautiful pink flowers everyday!!!! Now lets get started on how I created this beautiful masterpiece!!!
My card base in the card above is Melon Mambo (8-1/2″ x 5-1/2″) with a piece of Pink Pirouette layered on top (4″ x 5-1/4″). Then my Whisper White cardstock measures 3-3/4″ x 5″. You can always omit the second layer and have your Whisper White measure 4″ x 5-1/4″. Using your Lotus Blossom Stamp Set you will start to stamp your flowers all over (click here to see a how to video). I used Pink Pirouette and Melon Mambo for the sample above and stamped 6 flowers. I guess I totally ignored my “decorating in odd numbers” rule! Opps! 🙂 Once you have all of your flowers stamped, using the #3 flower image, stamp it on a piece of scrap paper and cut out the flower. You will then use this as a mask to cover up that center bottom flower when you are adding your stem. This is so you don’t stamp on top of it and create a mess on top of that flower! It also gives the illusion of a vase of flowers in the front and back. Once you are done stamping your stems it is time to add your vase. Using my Oval Framelits and my Big Shot, I cut out the #4 oval…..fourth from the biggest and fourth from the smallest!!! You will then cut off the top and the bottom of the oval. I started by cutting one end and then placing it on my card to see how much I needed to cut off the other end. It will always vary depending on how low your flowers are on your cardstock! Before adhering the vase to my card, I brushed the edges with my Sponge Dauber (LOVE) to give that darker look and make it seem more rounded and 3D!
For this sample, I used Hello Honey as my card base and Island Indigo as my vase! The flowers were stamped in Island Indigo/Lost Lagoon and Tangelo Twist/Hello Honey! The stems were done in Mossy Meadow! So many color options for your vase and just fabulous looking for any occasion. To see this in action, I created a Video Tutorial for you!!! Be sure to give it a Thumbs Up if you like it!!!!
Don’t forget that you can earn the Lotus Blossom Stamp Set with every $50 (US) you purchase from now till the end of March – only 15 more days!!! Place your order online by clicking here and you will earn points as one of Laura’s Loyal Stampers!!!
This card is Simply Wonderful!!! I am having so much fun with the Irresistibly Yours Designer Series Paper from Sale-A-Bration. You can create so many amazing looks. I have a card base of Crumb Cake! Then I cut my Designer Series Paper into 3-3/4″ x 5″ pieces and added color with my Sponge Daubers. Love them! Here I used Tempting Turquoise! I layered that onto a piece of Tempting Turquoise measuring 3-7/8″ x 5-1/8″ and attached it to my card. For the greeting, I used my Simply Wonderful Stamp Set which is also in the Sale-A-Bration Brochure and punched it out with the Decorative Label Punch! Quick, Simple, and Fabulous!!!
This one was done with Mossy Meadow and would make a fabulous Man Card! 🙂
This one was created with Perfect Plum! I love it! I don’t always get this color out but I really like the softer purple for this card. It goes very well with the Crumb Cake and this time of year!!!! Which one is your favorite? Leave me a comment down below!
If you want to check out more samples using the Irresistibly Yours Designer Series Paper, click here and here and here! If you would like to see how to color this paper, check out this video!
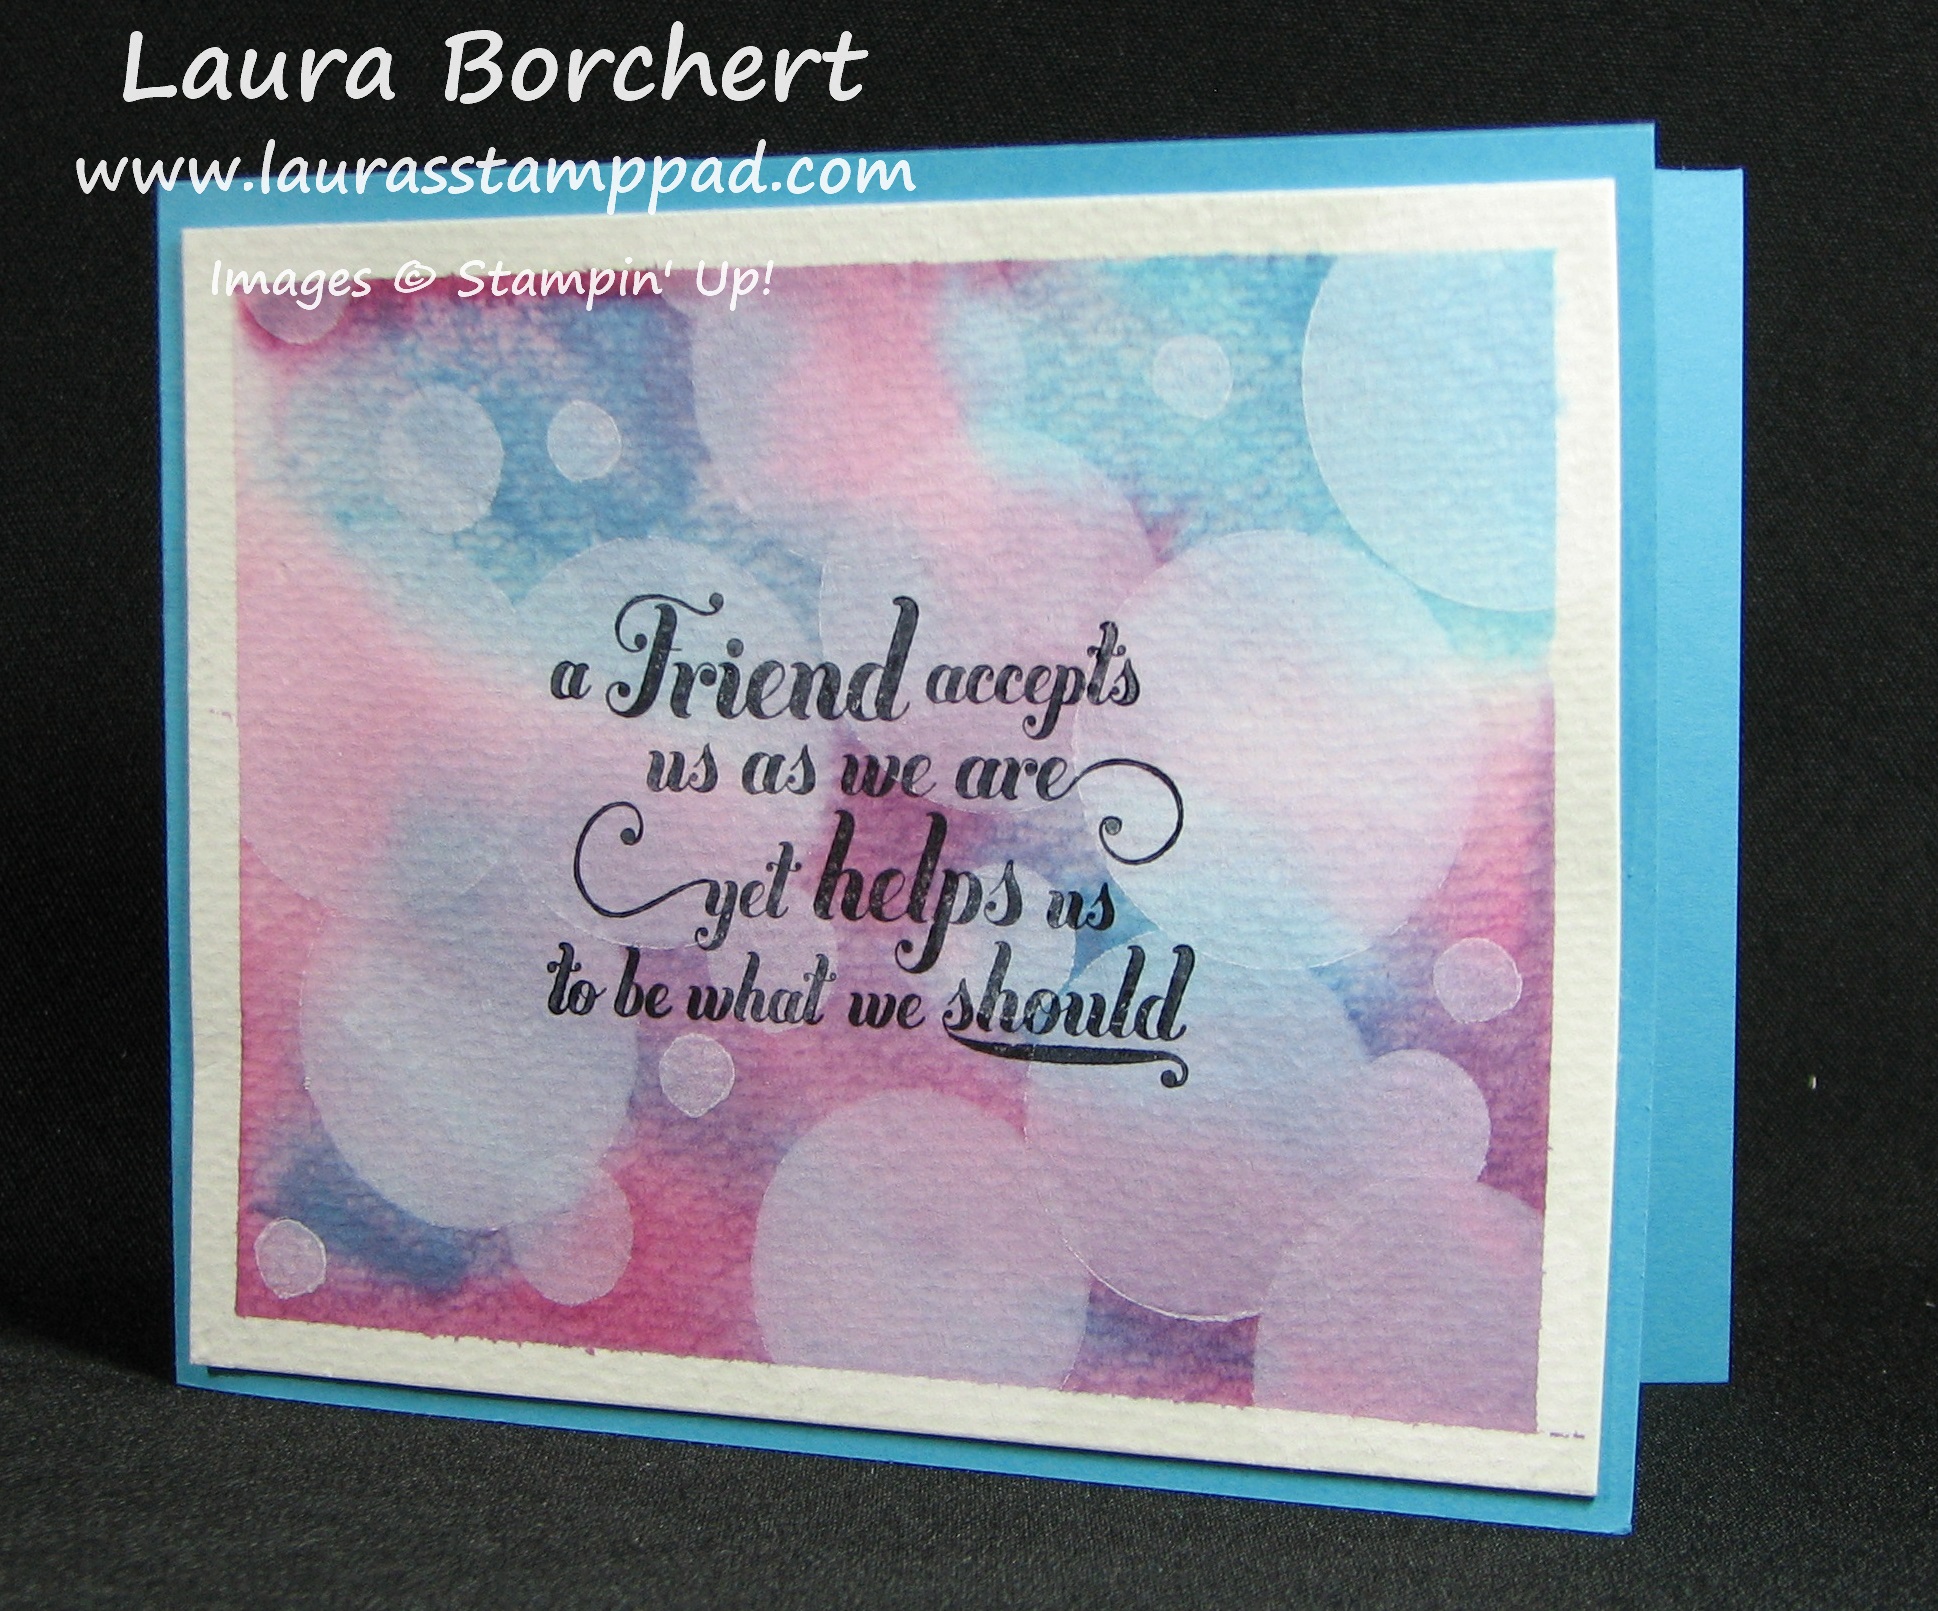
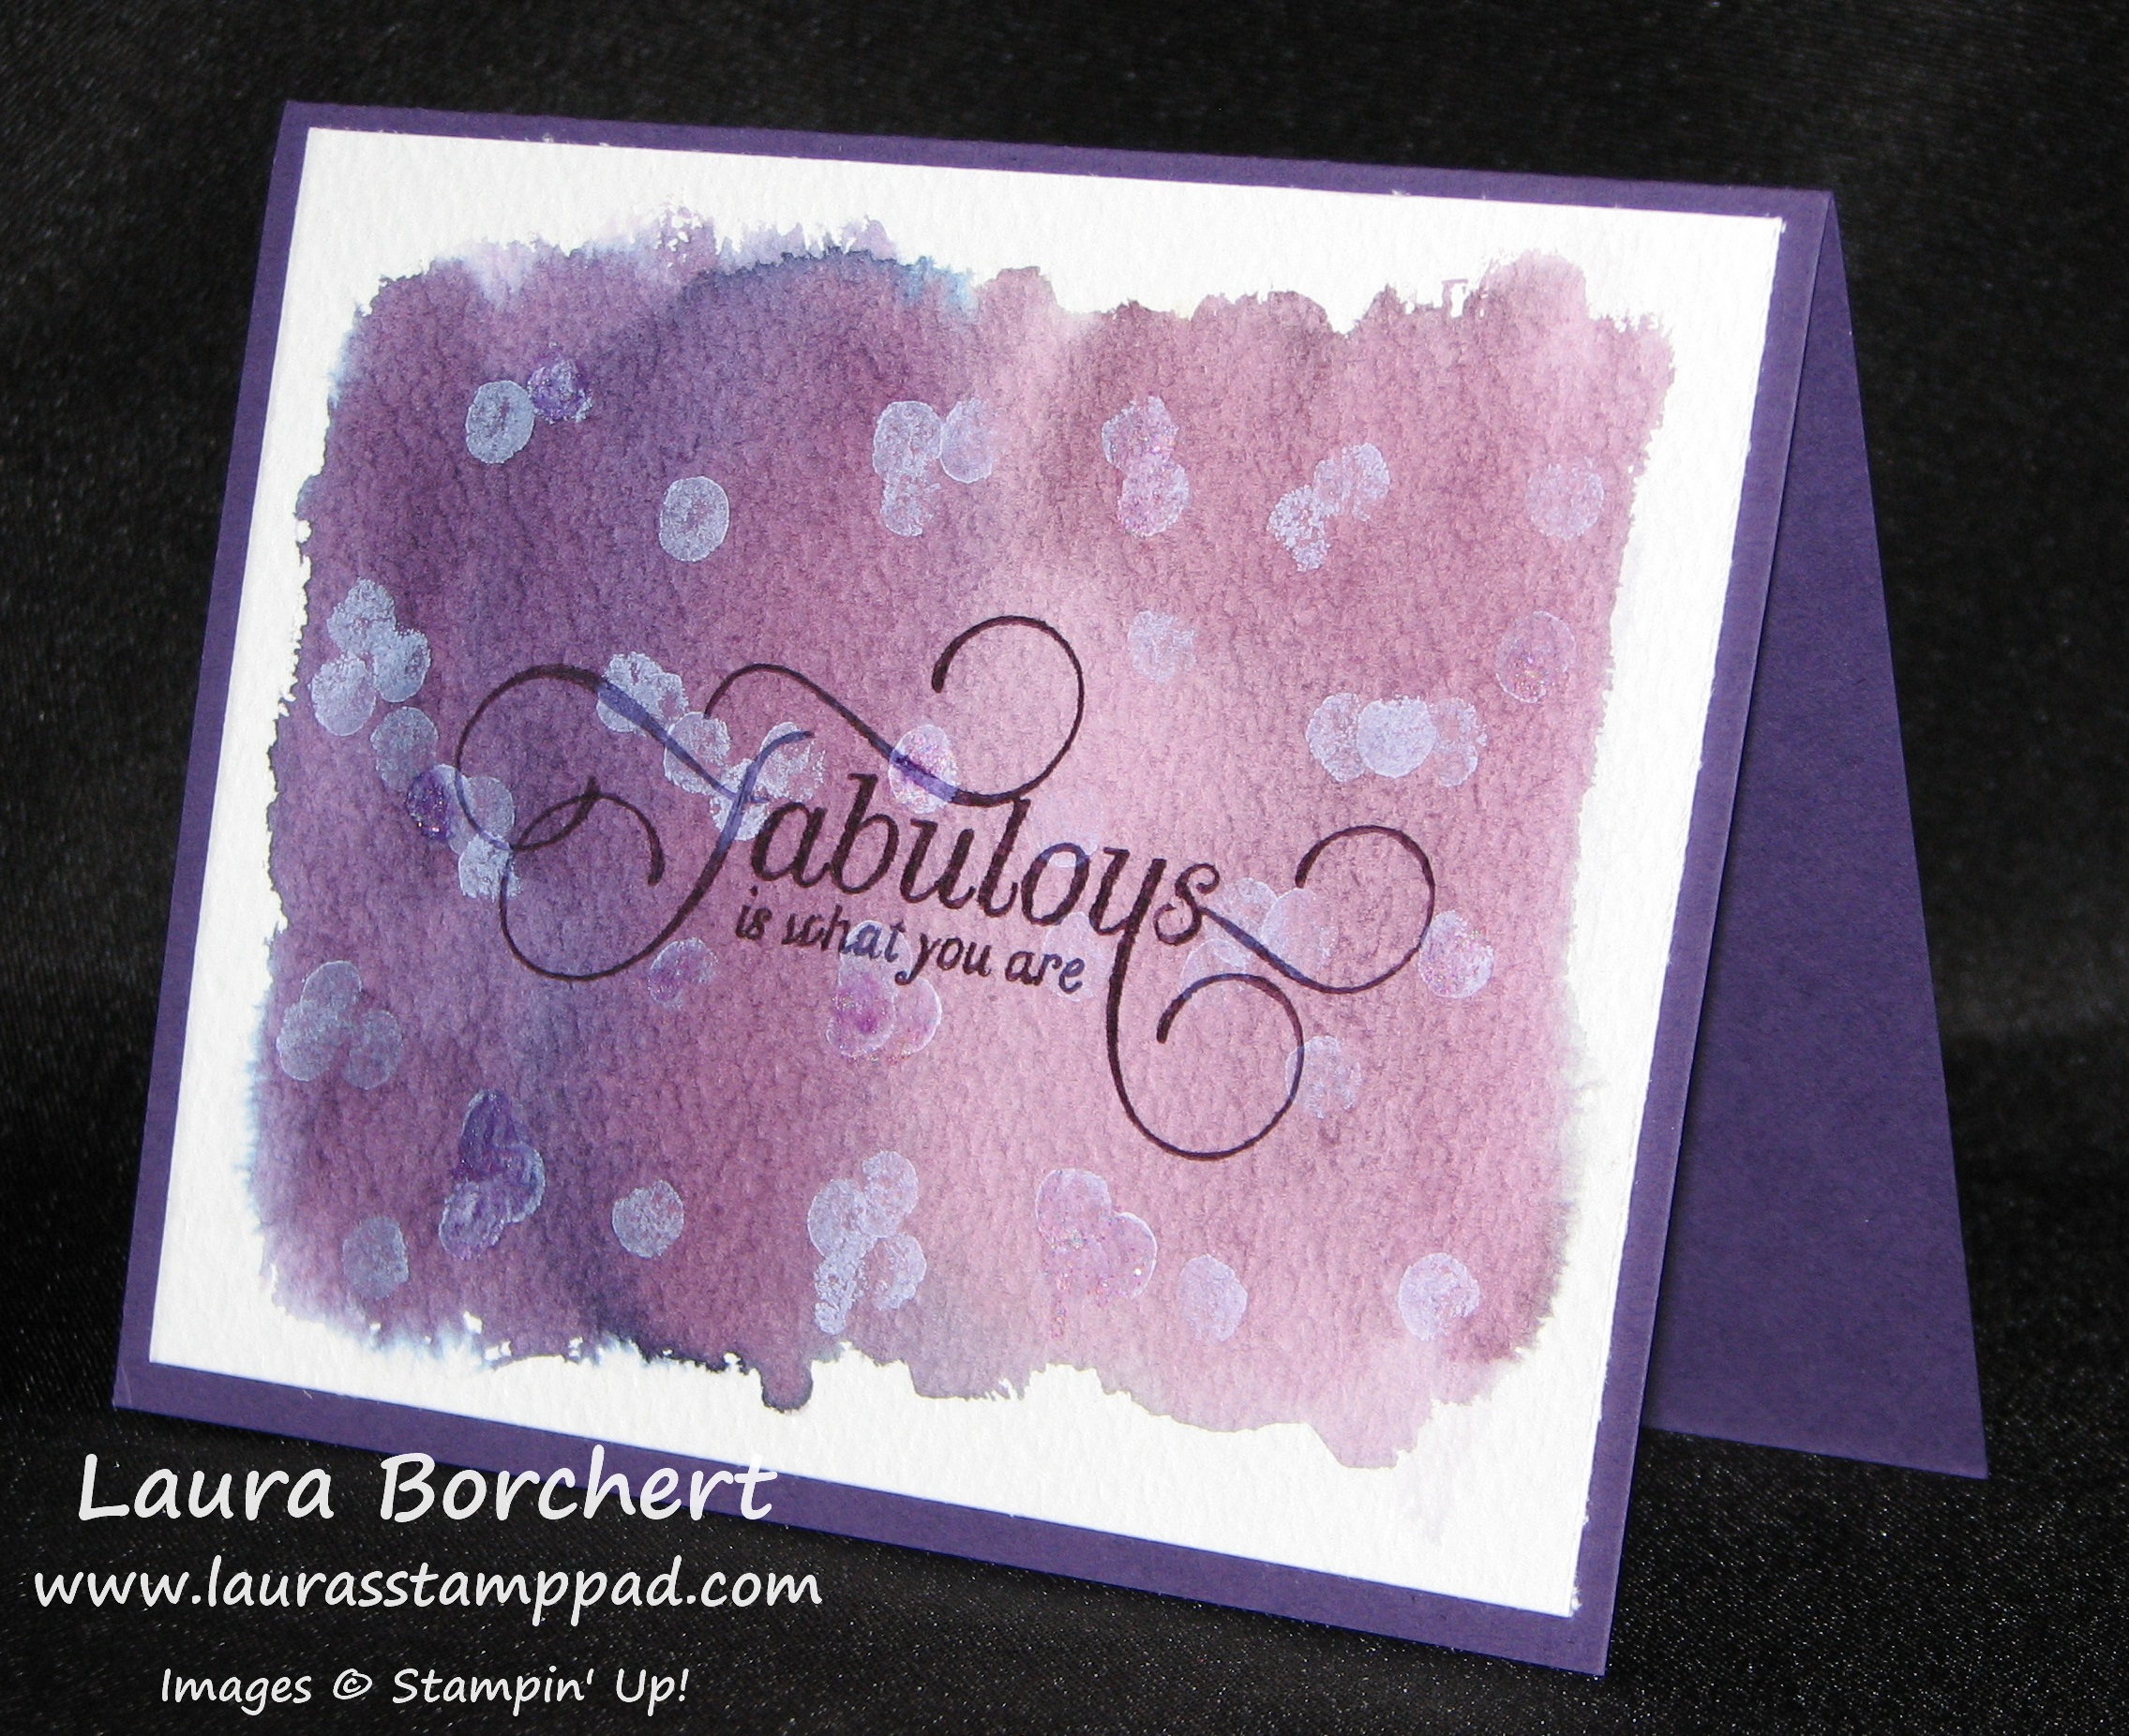
Happy Tuesday!!! That means I have a fabulous technique to share with you and this one is exactly that….fabulous!!! I’m sure you have heard of or see the Bokeh look before. It is those shiny blotches of light in a photograph. So the real definition is the visual quality of the out-of-focus areas of a photographic image, especially as rendered by a particular lens. See you know what I mean, right?
Isn’t this just gorgeous??? I used Tempting Turquoise and Rich Razzleberry for the background and the greeting is from the Feel Goods Stamp Set! This style I got from a fellow demonstrator Mary Ellen! You can check her out here and see her tutorial on this technique here! I love the idea of using Painter’s Tape to hold down your Watercolor Paper and it gives that perfect trim!!!
Here is another look at this technique!!! With this one, I just added a few brush strokes of ink (Island Indigo and Pool Party) to some Watercolor Paper with my Aqua Painter. After it dried, I used the Wondrous Wreath Berry Stamp to create the dots. I added the dots with Whisper White Craft Ink! How fabulous?!?! The greeting is from the A Dozen Thoughts Stamp Set! I layered it with the Oval Punch and Scallop Oval Punch! Here is another sample using Perfect Plum and Elegant Eggplant. I added some Dazzling Details and the dots were created with Whisper White Ink and my pencil eraser!!!
Want to see this in action?? Check out my Video Tutorial below! Be sure to give it a thumbs up if you like it!!!
I hope you try out this technique and let me know how it goes. I would love to see your creations. You could do this technique in a million different colors and get a different look with each! Love it!
I chose the title of the post today because of the project that I’m sharing! I’m using the Irresistibly Yours Designer Series Paper from Sale-A-Bration which was brought to life with a little ink and a sponge dauber. I added a Butterfly that was die cut from the Butterfly Thinlits that is found in the Occasions Mini Catalog! Butterflies always make me think of new beginnings and hope! So that is why I thought this title was fitting! Now here is the amazing card that I created!
Just Beautiful! I love it!!!! I used a little piece of the Irresistibly Yours Designer Series Paper that I had leftover from another project. I used my Sponge Dauber to add Mossy Meadow Ink to it. Then I layered it on some Mossy Meadow Cardstock and placed it on the left hand side of my card front. I stamped the greeting from the Petite Pairs Stamp Set in Tangelo Twist! Also, I brushed the edges of my Butterfly with the Tangelo Twist Sponge Dauber! I love that butterfly and the amazing look of this card!
To be honest…..I think I like this blue one better! Something about it just draws me in so much more. This one I did with Lost Lagoon and I brushed the edges of the Butterfly in Lost Lagoon with my Sponge Daubers as well. Both of these cards are just amazing and fairly simple to create! Be sure to check out my Video Tutorial on the Butterfly Thinlits here and you can check out the other sample that I created in the video by clicking here! I hope you enjoyed these ways to use your Butterfly Thinlits!