Talking is Priceless!!!

Posted on

Happy Monday everyone!!! If you know me even for a second, you will find out I’m loud. I’m a talker and I’m a bit crazy! Aren’t we all a bit crazy though?!?!? Today, I’m going to focus on the second one though. Talking is priceless!!!

Talking is priceless, www.LaurasStampPad.com

This greeting speaks to me heart and soul! A chat with a friend to forget about the chaos in your life. Talking over something that is bothering you to help get it off your chest. Telling stories of past times to laugh and cry over the wonderful memories. It’s all so fabulous!

I started this card with a Blackberry Bliss card base. Next, I layered some Coastal Cabana and Lily Impressions Designer Series Paper. The Lily Impressions Paper is one of the Sale-A-Bration FREE items and I highly recommend it. It’s so beautiful! For the greeting, I used the Thanks For The Laughs Stamp Set from the 2020 Mini Catalog! I stamped it in Blackberry Bliss on a scrap of white. The banner tips were created with the Banner Triple Punch. I do recommend punching first so that you don’t end up punching off your greeting! To finish it off, I wrapped a few loops of Bermuda Bay Baker’s Twine around my fingers and laid it on the back of the greeting. Using Stampin’ Dimensionals, I secured it down and placed it on the card front!

Thank You For The Laughs, www.LaurasStampPad.com

On the inside of the card, I added a layer of Whisper White (4″ x 5-1/4″) and stamped the coordinating greeting on the bottom. On the left, I added a little leftover piece of the Lily Impressions Designer Series Paper (using the back side of the paper this time). It’s so fabulous and perfect for anyone that you talk too! After all, talking is priceless!

I just love Sale-A-Bration time and getting free stuff! The Baker’s Twine is also a Sale-A-Bration freebie. Buy the stuff you love and get more stuff you love for FREE! Woot Woot! Check out the supplies listed below to recreate this card!

Happy Stampin’

~Laura

Product List

What Would You Get With $125?

Posted on

What would you get for $125 with Stampin’ Up??? That is the question of the day!!! Today, I’m going to share my picks of what I would get as a beginner stamper and avid stamper. These are some of my favorites right now!

What Would You Get with $125, www.LaurasStampPad.com

Right now is the best time to join Stampin’ Up because the Starter Kit is amazing! I mean it’s always amazing but NOW you get 3 extra goodies that really make the fireworks go off!!!

For just $99, you get……
~$125 in anything you want
~Mini Paper Cutter
~6″ x 6″ Designer Series Paper Sampler Pack
~Any Stamp Set of your Choice (go for the expensive one!!!!!)
~Free Shipping

And that is just the beginning!!! After all of that you get to be on my Fabulous Friends Team which is a wonderful group of stampers. We share stamping ideas, business tips, and our lives with each other. These ladies are like family to me! You also get a discount on future Stampin’ Up product, information on new products coming out, the opportunity to pre-order items before everyone else, and TRIPS!!! This year alone you can go to New Orleans and Salt Lake City to Stampin’ Up Events! Once you join Stampin’ Up, it’s all about you and what you want out of it. There are no obligations to do anything! Click here to join the fun!

Check out my video below to see all of these items and why I selected each one. Click here to view the video if it’s not working here. Be sure to give the video a thumbs up if you liked it and don’t forget to subscribe if you are new. If you would like a notification when I post a new video, be sure to click the bell right next to the subscribe!!!

Happy Stampin’

~Laura

Product List

Kerchief Card Kit!!!

Posted on

The Kerchief Card Kit is one of the new Sale-A-Bration items that you can earn for FREE. I LOVE this kit! It’s so beautiful with the foil accents and vellum layers.

Kerchief Card Kit, www.LaurasStampPad.com

Isn’t this card beautiful? It’s the perfect card to send to anyone at any time. It might be for sympathy, going through a tough time, a promotion a work, good news to celebrate. Anything at all! After all I think we should send more cards just because! 🙂

This kit comes with all of the supplies to create 4 each of these 2 designs. The decorated envelopes are included as well. No stamping or supplies necessary except scissors to cut the twine. I ended up not using the twine on the blue card. I just felt it was beautiful without so I am holding on to it for another project!

Get this Kerchief Card Kit for FREE when you spend $50 now till the end of March! Click here to start shopping and earning! Don’t forget that the Free Stamp Set of the Month for orders of $75 or more before shipping and tax is the Perfectly Framed Stamp Set! That means you can earn lots of FREE stuff during Sale-A-Bration!

Perfectly Framed, www.LaurasStampPad.com

Happy Stampin’

~Laura


Dainty Note Cards!!!

Posted on

Sometimes you need just a little card to toss in with a gift or an item you are mailing out or to sneak on the desk of a co-worker! The dainty note cards in the Best Dressed Suite are PERFECT for that!!!

Dainty Note Cards, www.LaurasStampPad.com

These little notecards have a splash of watercolor on them so they are a perfect base card. You can go elegant, playful, masculine, or feminine! It’s perfect.

Thoughtful Blooms Sale-A-Bration Stamp Set, www.LaurasStampPad.com

I used the Thoughtful Blooms Sale-A-Bration Stamp Set for all of these cards and it was super fun to mix and match the flower patterns. There is also a coordinating Sale-A-Bration Small Bloom Punch! Check out the other cards for even more fun flower patterns!

The little flowers in the background were stamped off once before stamping them on the card front. Then I stamped them a third time on the card for 2 lighter shades of Grapefruit Grove. I really love how you can get various shades from 1 ink pad.

Best Dressed Note Cards & Envelopes, www.LaurasStampPad.com

Each of the card, I finished off with a few jewels. I used Glitter Enamel Dots for this one here. The Happiness Blooms Enamel Dots were used on the Grapefruit Grove card. The Petal Pink Rhinestone Gems were used on the first card! It’s so fun to mix and match!

Which one of these dainty note cards is your favorite??? Let me know in the comments below! If you would like to recreate these or make a few new designs, click on the supplies listed below! Remember that every $50 spent earns you a FREE Sale-A-Bration item!!!

Happy Stampin’

~Laura

Product List

Birthday Sparkles!!!

Posted on

Happy Monday! Happy back to normal….or at least I’m hoping! I’m a very routine girl so I’m ready to get back at it. Although I did really enjoy the down time! I thought I would start off with some birthday sparkles today. After all who doesn’t love bling and we all celebrate birthdays!!!

Birthday Sparkles, www.LaurasStampPad.com

This card is actually sort of a mini card. It still fits into a regular envelope but it’s 4″ x 4-1-1/4″. I cut the cardstock at 4-1/4″ (in half) and then at 8″ to fold in half. Something a little different!!!

My card base is Bermuda Bay and I layered on a piece (3-1/4″ x 4″) of the Lily Impressions Sale-A-Bration Designer Series Paper with Stampin’ Dimensionals. Next, I took a piece of Whisper White (3″ x 3-3/4″) and stamped the cake in Melon Mambo Ink. The cake is from the Happy Birthday to You Sale-A-Bration Stamp Set. Right after stamping, I took the Wink of Stella Pen and colored over the flowers. This makes the ink bleed just a bit while adding the perfect amount of sparkle!

Coloring with Wink of Stella, www.LaurasStampPad.com

I love the perfect hint of pink and shimmer! After coloring this, I layered it onto the card front and added a few Champagne Rhinestones. You can also use some of the Peacock Rhinestones for different color options! I love them all!

Glittered Flowers, www.LaurasStampPad.com

For the inside of the card, I stamped the greeting from the same set in the center and then did the top corner of the cake stamp in the bottom right corner. This gives the perfect flower coordination to the inside of the card. Of course, I colored it with some Wink of Stella too!

If you want to create this Birthday Sparkles card, click the supplies listed below. Remember that you get a Sale-A-Bration item FREE with a $50 order!

Happy Stampin’

~Laura

Product List

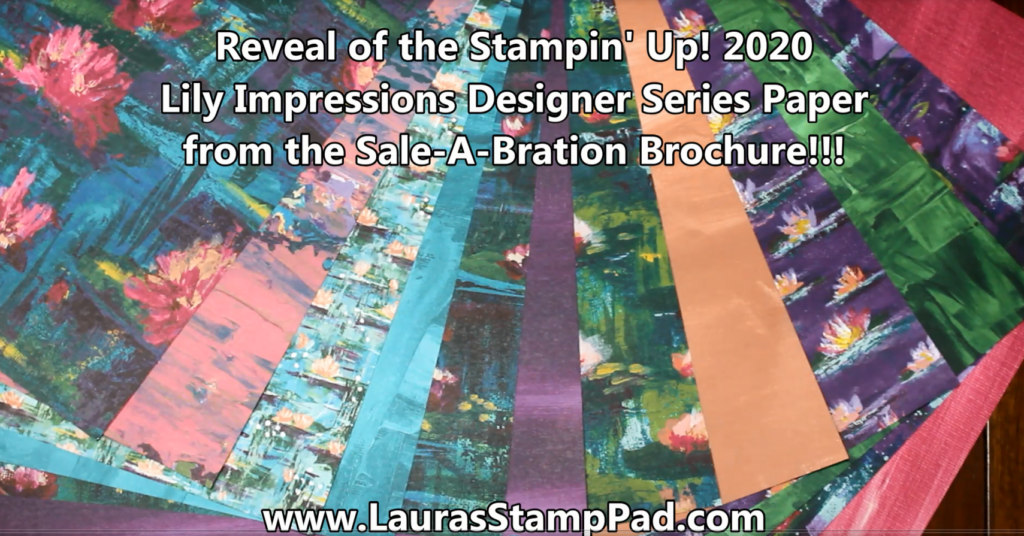
Lily Impressions Designer Paper!!!

Posted on

Happy Tuesday!!! Another snow day here in Illinois. It’s okay till Christmas but I’m still counting down the days till Spring. I really helps to go to my craft room and look at all the pretty floral papers like this Lily Impressions Designer Paper!

Lily Impressions, www.LaurasStampPad.com

This paper is gorgeous even without flowers because I’m loving the color combinations. I love pink as it is and now added with this fabulous purple, green, and blue. It is amazing!!! The lily images are very watercolor-esk for a real fun look.

The best part about this paper is that you can earn it for FREE!!!! Sale-A-Bration starts on January 3rd so you can start earning this paper for FREE from then till the end of March. Every $50 order earns you a free item and this can be yours!

Want to check out more designer paper coming in the 2020 Mini Catalog and Sale-A-Bration? Check them out here and here!!!

Want to check out each full sheet of the Lily Impressions Designer Paper to really see how it looks?? Check out the video below or click here! Be sure to give the video a thumbs up if you liked it and don’t forget to subscribe if you are new. If you would like a notification when I post a new video, be sure to click the bell right next to the subscribe!!!

Happy Stampin’

~Laura


Stamping On Designer Paper!!!

Posted on

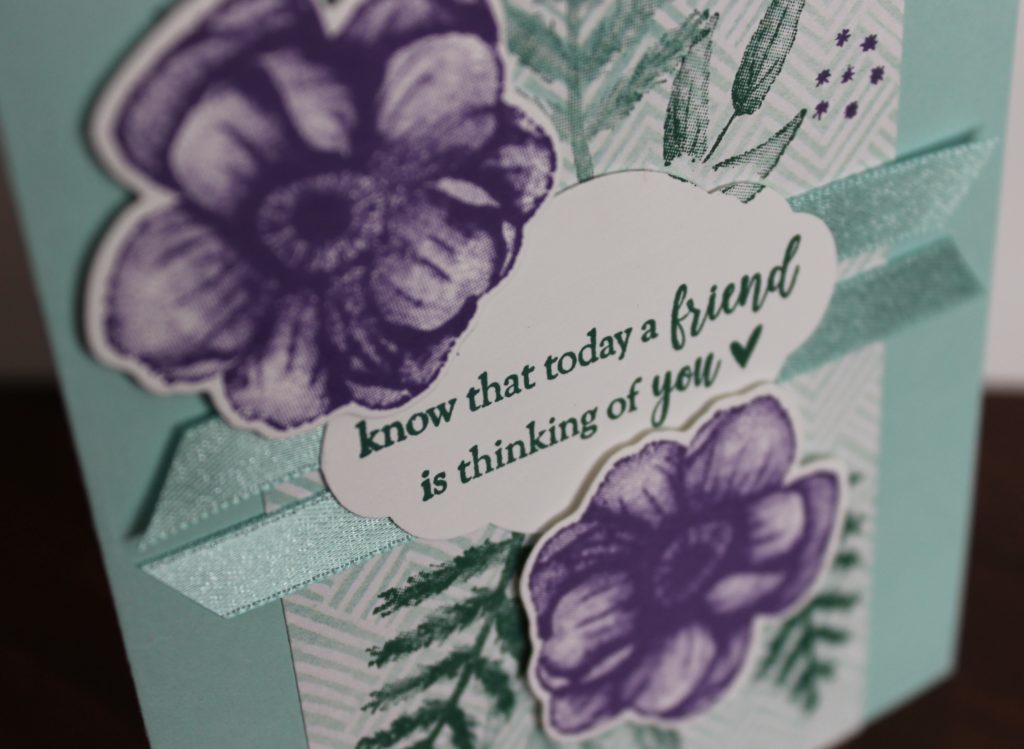
Typically I prefer a more clean, bold, solid look rather than shabby chic, rustic, or subtle look. What about you??? For this card though I decided to stamp on the background designer series paper rather than adding another layer. It like a whole new way of stamping for me. You should try it out! Stamping on Designer Paper is fun!

Stamping on Designer Paper, www.LaurasStampPad.com

Isn’t it beautiful?? Have I mentioned I also like flowers?!?! lol I love them so much I even created a Tag for easy search on all my flower cards. Just click here!

I started with a Pool Party card base. Next, I took a piece of the Painted Seasons Designer Series Paper (Sale-A-Bration 2019) and adhered it down the center! Using the Painted Seasons Stamp Set and Tranquil Tide Ink, I stamped a few greenery pieces all around the top and bottom. This was done before layering the greeting and everything so it wasn’t in the way. Next, I added a little bit of adhesive in the center and pressed 2 pieces of the Pool Party Shimmer Ribbon into it. It is okay if the ribbon doesn’t seem super secure as the greeting will help hold it in place too!

Painted Seasons Sale-A-Bration, www.LaurasStampPad.com

The greeting is from the Part of My Story (Sale-A-Bration 2019) Stamp Set and I punched it out with the Pretty Label Punch. Using Stampin’ Dimensionals, I added the greeting to the card front. Dimensionals adhere to the ribbon and the bumps and grooves much better than using Snail Adhesive. Next, I stamped and die cut the flowers in Gorgeous Grape using the Painted Season Stamp Set. I added the flowers with Stampin’ Dimensonals too. To finish it off, I stamped a few Gorgeous Grape star clusters all around.

I really love how this card turned out and I am going to try stamping on designer paper more often now. What do you think?

Happy Stampin’

~Laura

Product List

Country Floral!!!

Posted on

This Country Floral Embossing Folder was one of the Sale-A-Bration items and that ended last week. If you earned it, try out this amazing card!!! If you didn’t earn it, don’t worry as it is coming back! Woot Woot!

Country Floral, www.LaurasStampPad.com

I went very basic as I feel like the embossing folder is just so stunning. Adding a little gold bling and some navy makes it POP! You could use silver and any other color as well. What colors would you use? Let me know in the comments below!

I started with a Very Vanilla card base. Next, I took another piece measuring 4-1/8″ x 5-3/8″ and embossed it with the Country Floral Embossing Folder. I went a tiny border from the embossed piece and the card base so it looked like it filled out the card front more. I don’t like actually embossing the card front of the card base because then it makes the inside all bumpy and the card base less secure in my opinion. After adding this piece to the card base, I tied some Gold Metallic Edge Ribbon around the card.

Welcome Baby, www.LaurasStampPad.com

For the greeting, I used Circle Punches and the Well Said Stamp Set from the Occasions Mini Catalog. I love this stamp set because it has lots of greetings for any occasion and it has a greeting for the inside of the card as well! Perfect! I stamped the greeting in Night of Navy Ink. To finish off the card, I added a few pearls for bling and texture!

This quick and simple card can be created with any style of embossing folder! It is great to have a few on hand and add a greeting as you need a card!

Happy Stampin’

~Laura

Product List

Just A Note…

Posted on

I know that Sale-A-Bration is over but I have a few more samples to share with you so I hope that is okay! I will be sharing them over the next week or so. Today, I’m sharing this quick and simple card with the Home to Roost Stamp Set. Just A Note…

Just A Note..., www.LaurasStampPad.com

I got the idea for this card from the fabulous Mary Schultz who sent me a similar one. Her card had another layer and she used the Rectangle Framelits for each layer. I went a little more on the simple side but it is just as fabulous!

I started with a Crumb Cake card base and layered on a piece of Pacific Point polka dots from the Brights 6″ x 6″ Designer Series Paper Stack. Next, I die cut out the rectangle with the Rectangle Stitched Framelits. Using the Home To Roost Sale-A-Bration Stamp Set, I stamped the rooster up top and the greeting down low. I went with a monochromatic look and used Pacific Point Ink too! Since the rooster seemed rustic, I tied some Linen Thread around the center and into a bow. This piece was added to the card front with Stampin’ Dimensionals for some texture!

Home to Roost, www.LaurasStampPad.com

Here is another fabulous one using the Poppy Parade Ink and Designer Paper from that same pack! Which one do you prefer – Poppy Parade or Pacific Point??? Let me know in the comments below!

Happy Stampin’

~Laura

Product List

Coloring the Lovely Lattice!!!

Posted on

Hello Stampers!!! Do you like to color?? Do you have time to color?? I am somewhere in the middle. Sometimes, I don’t mind coloring a little bit but too much overwhelms me. I DO love bright colors and lots of colorful images though!!! Today, I’m sharing a card that is just that! Coloring the Lovely Lattice Sale-A-Bration Stamp Set would take some time but here I achieved beautiful color quickly!

Coloring the Lovely Lattice, www.LaurasStampPad.com

For this card, I started with a Real Red card base. Next, I took a piece of Whisper White (3-3/4″ x 5″) and stamped the Lovely Lattice image on the top of it. I used the Spectrum Pad which I inked up with the following colors: Real Red, Poppy Parade, Pumpkin Pie, Mango Melody, and Pineapple Punch. Since the image is rather large, I left the inks apart and inked across the image moving slightly up and down as I went across to ensure full coverage of ink.

Lovely Lattice Sale-A-Bration Stamp Set, www.LaurasStampPad.com

After stamping the image, I decorated and stamped the greeting on the bottom. I just couldn’t decide which one I liked the best. A simple greeting and some of the Gingham Gala Adhesive Backed Sequins or a greeting and some Pineapple Punch Ribbon. Then for the third one, I punched the greeting out with the Pretty Label Punch and brushed the edges in Real Red Ink with a Sponge Dauber. Which one do you like the best???

Technique Tuesday, www.LaurasStampPad.com

Don’t forget that Sale-A-Bration ends on Sunday so you only have a few days left to earn this amazing Lovely Lattice Stamp Set for FREE! Click here to start shopping!

If you would like to see this all in action, check out the video below or click here! Be sure to give the video a thumbs up if you liked it and don’t forget to subscribe if you are new. If you would like a notification when I post a new video, be sure to click the bell right next to the subscribe!!!

Happy Stampin’

~Laura

Product List