Happy Monday!!!!

Posted on

Happy Monday everyone!!! Today seems like a BIG DAY because it’s the start of the first full week of the year. Most are back to work today. The Holiday Mini Catalog ends today! The Year End Sale ends today!

Year End Sale

Today is also the day that my car gets towed and worked on. 🙁 Saturday evening, we were about a mile from our house (in town) and 3 deer crossed right in front of us and the third one ran into us. The entire front corner of my car is busted/missing/destroyed. My husband and I are okay and that is the most important part but I sure fell apart when I saw my car. This was my first accident. I just keep telling myself that we are okay and my car will be fixed; that’s why insurance is for. So let’s forget about that and think about the fact that tomorrow is the beginning of the Occasions Mini Catalog and Sale-A-Bration Promotion!!! WOOT WOOT!

Thank You Party Paper, www.LaurasStampPad.com

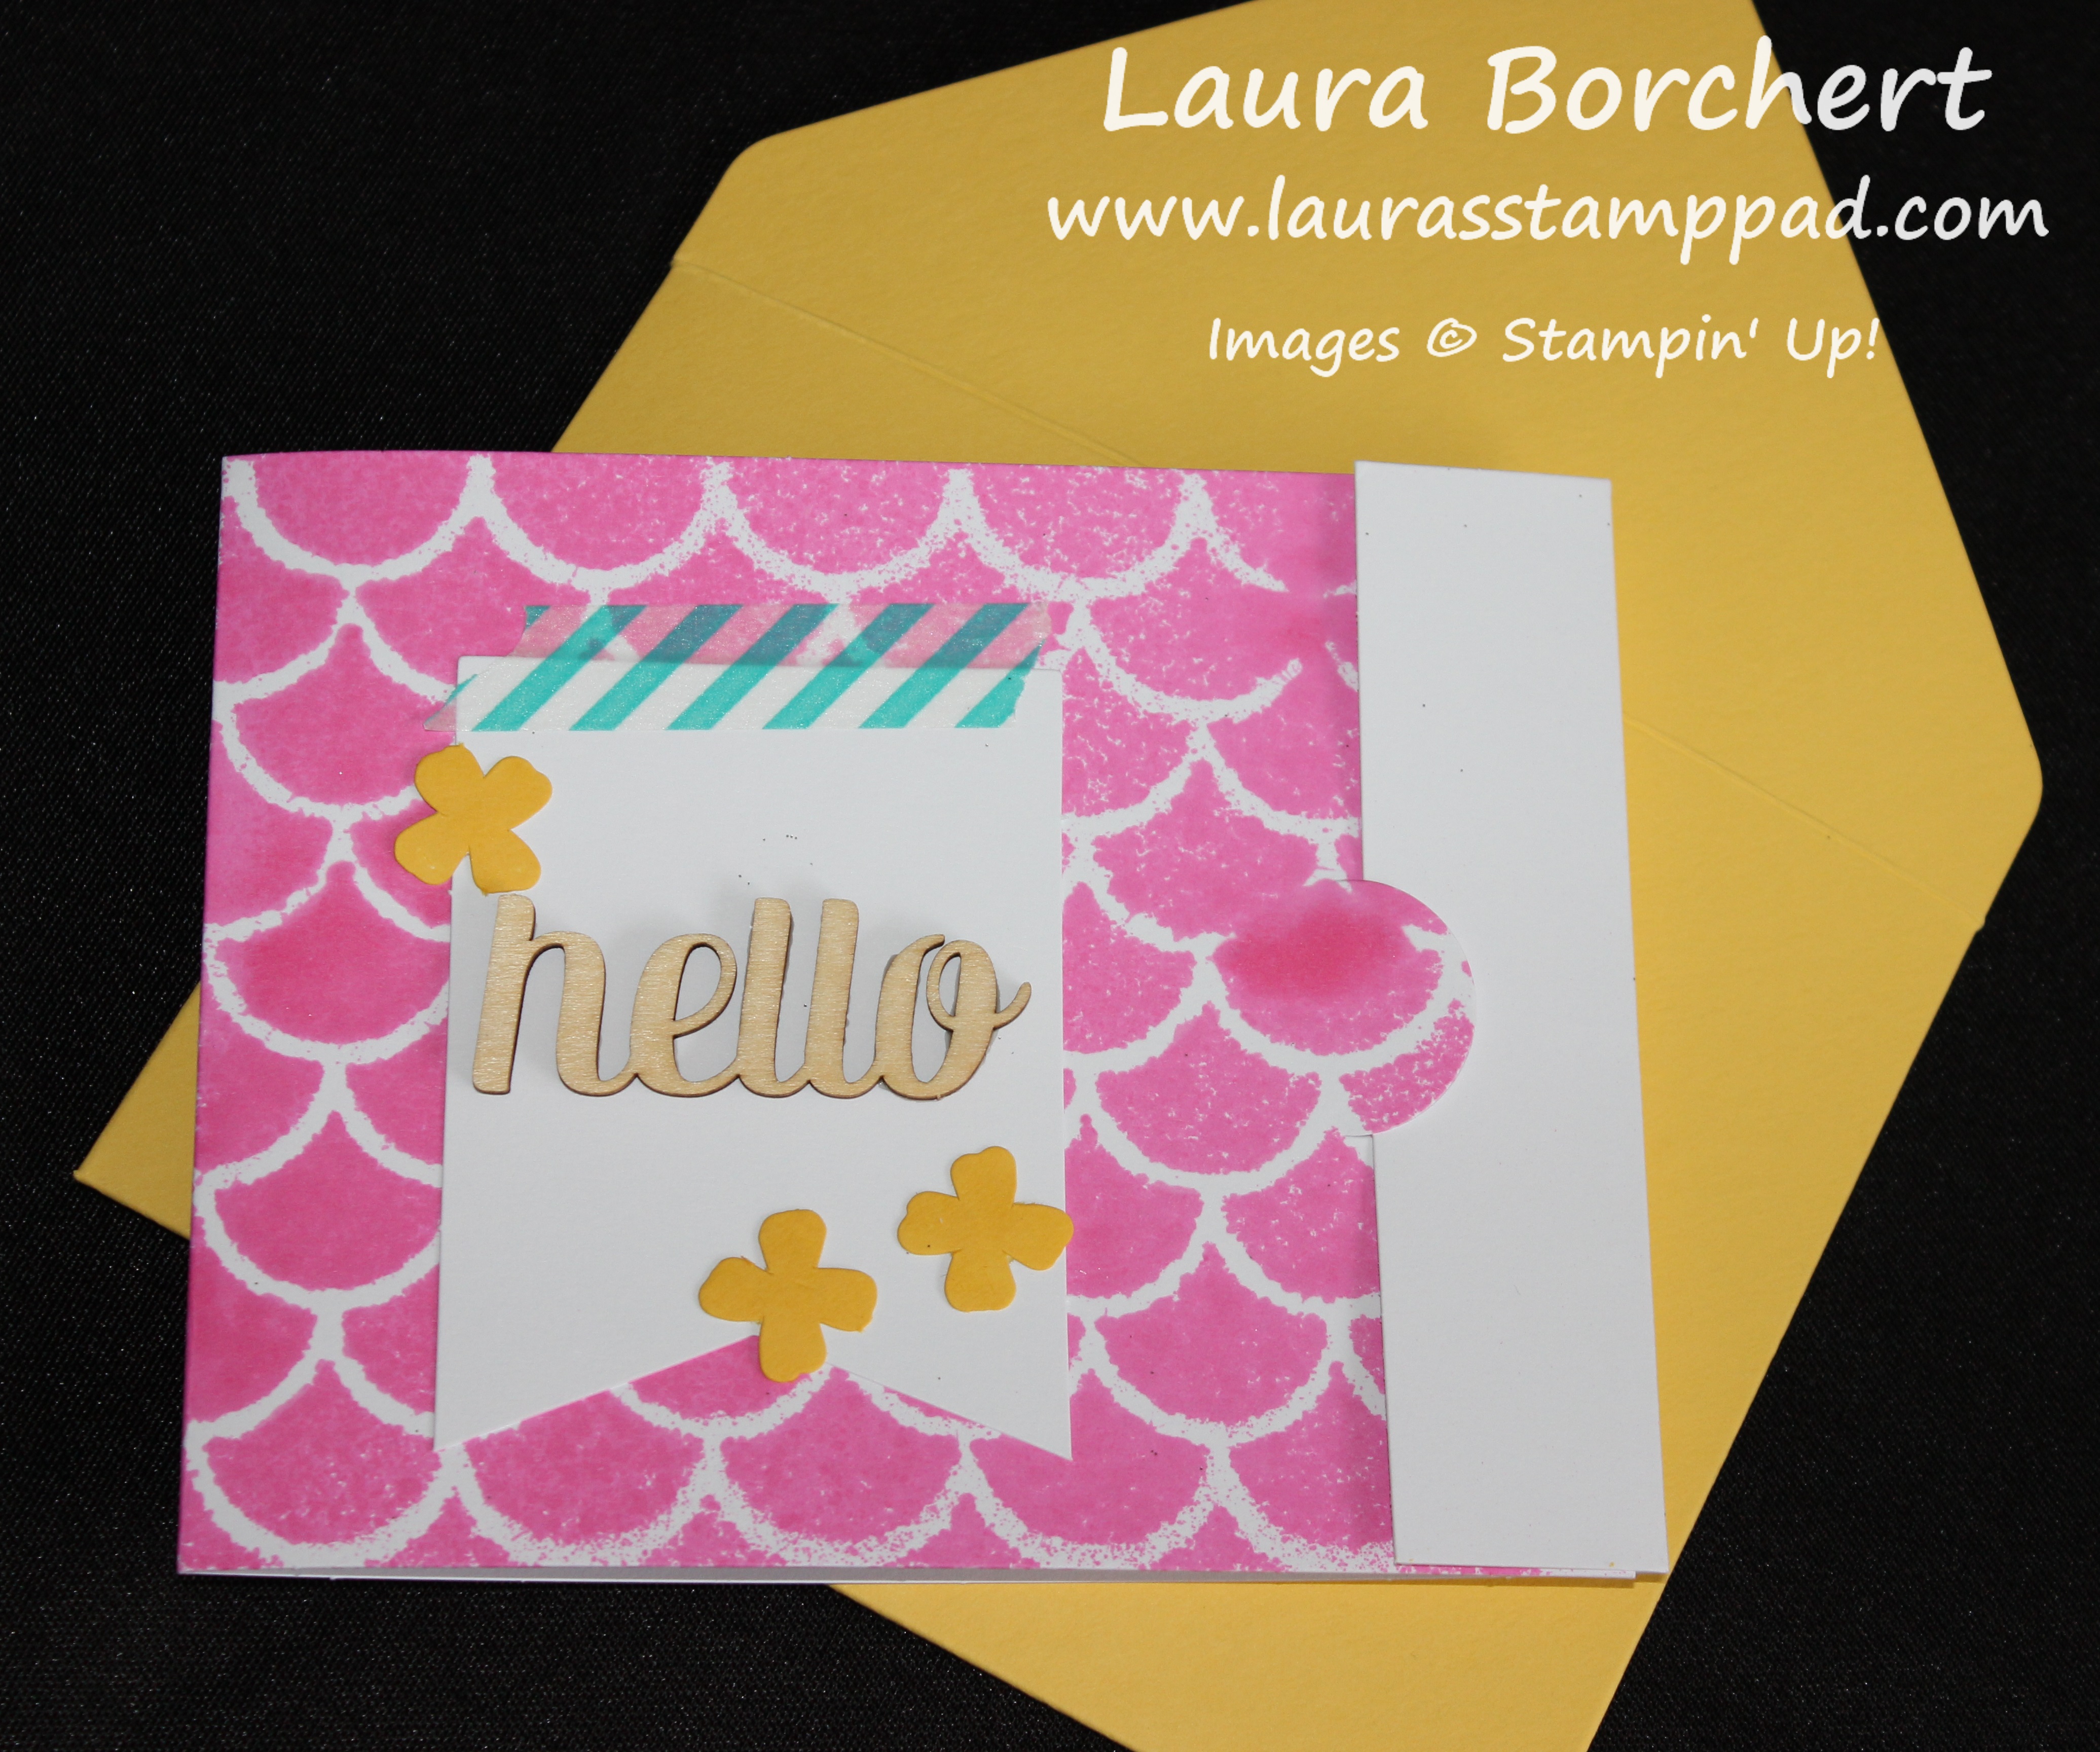
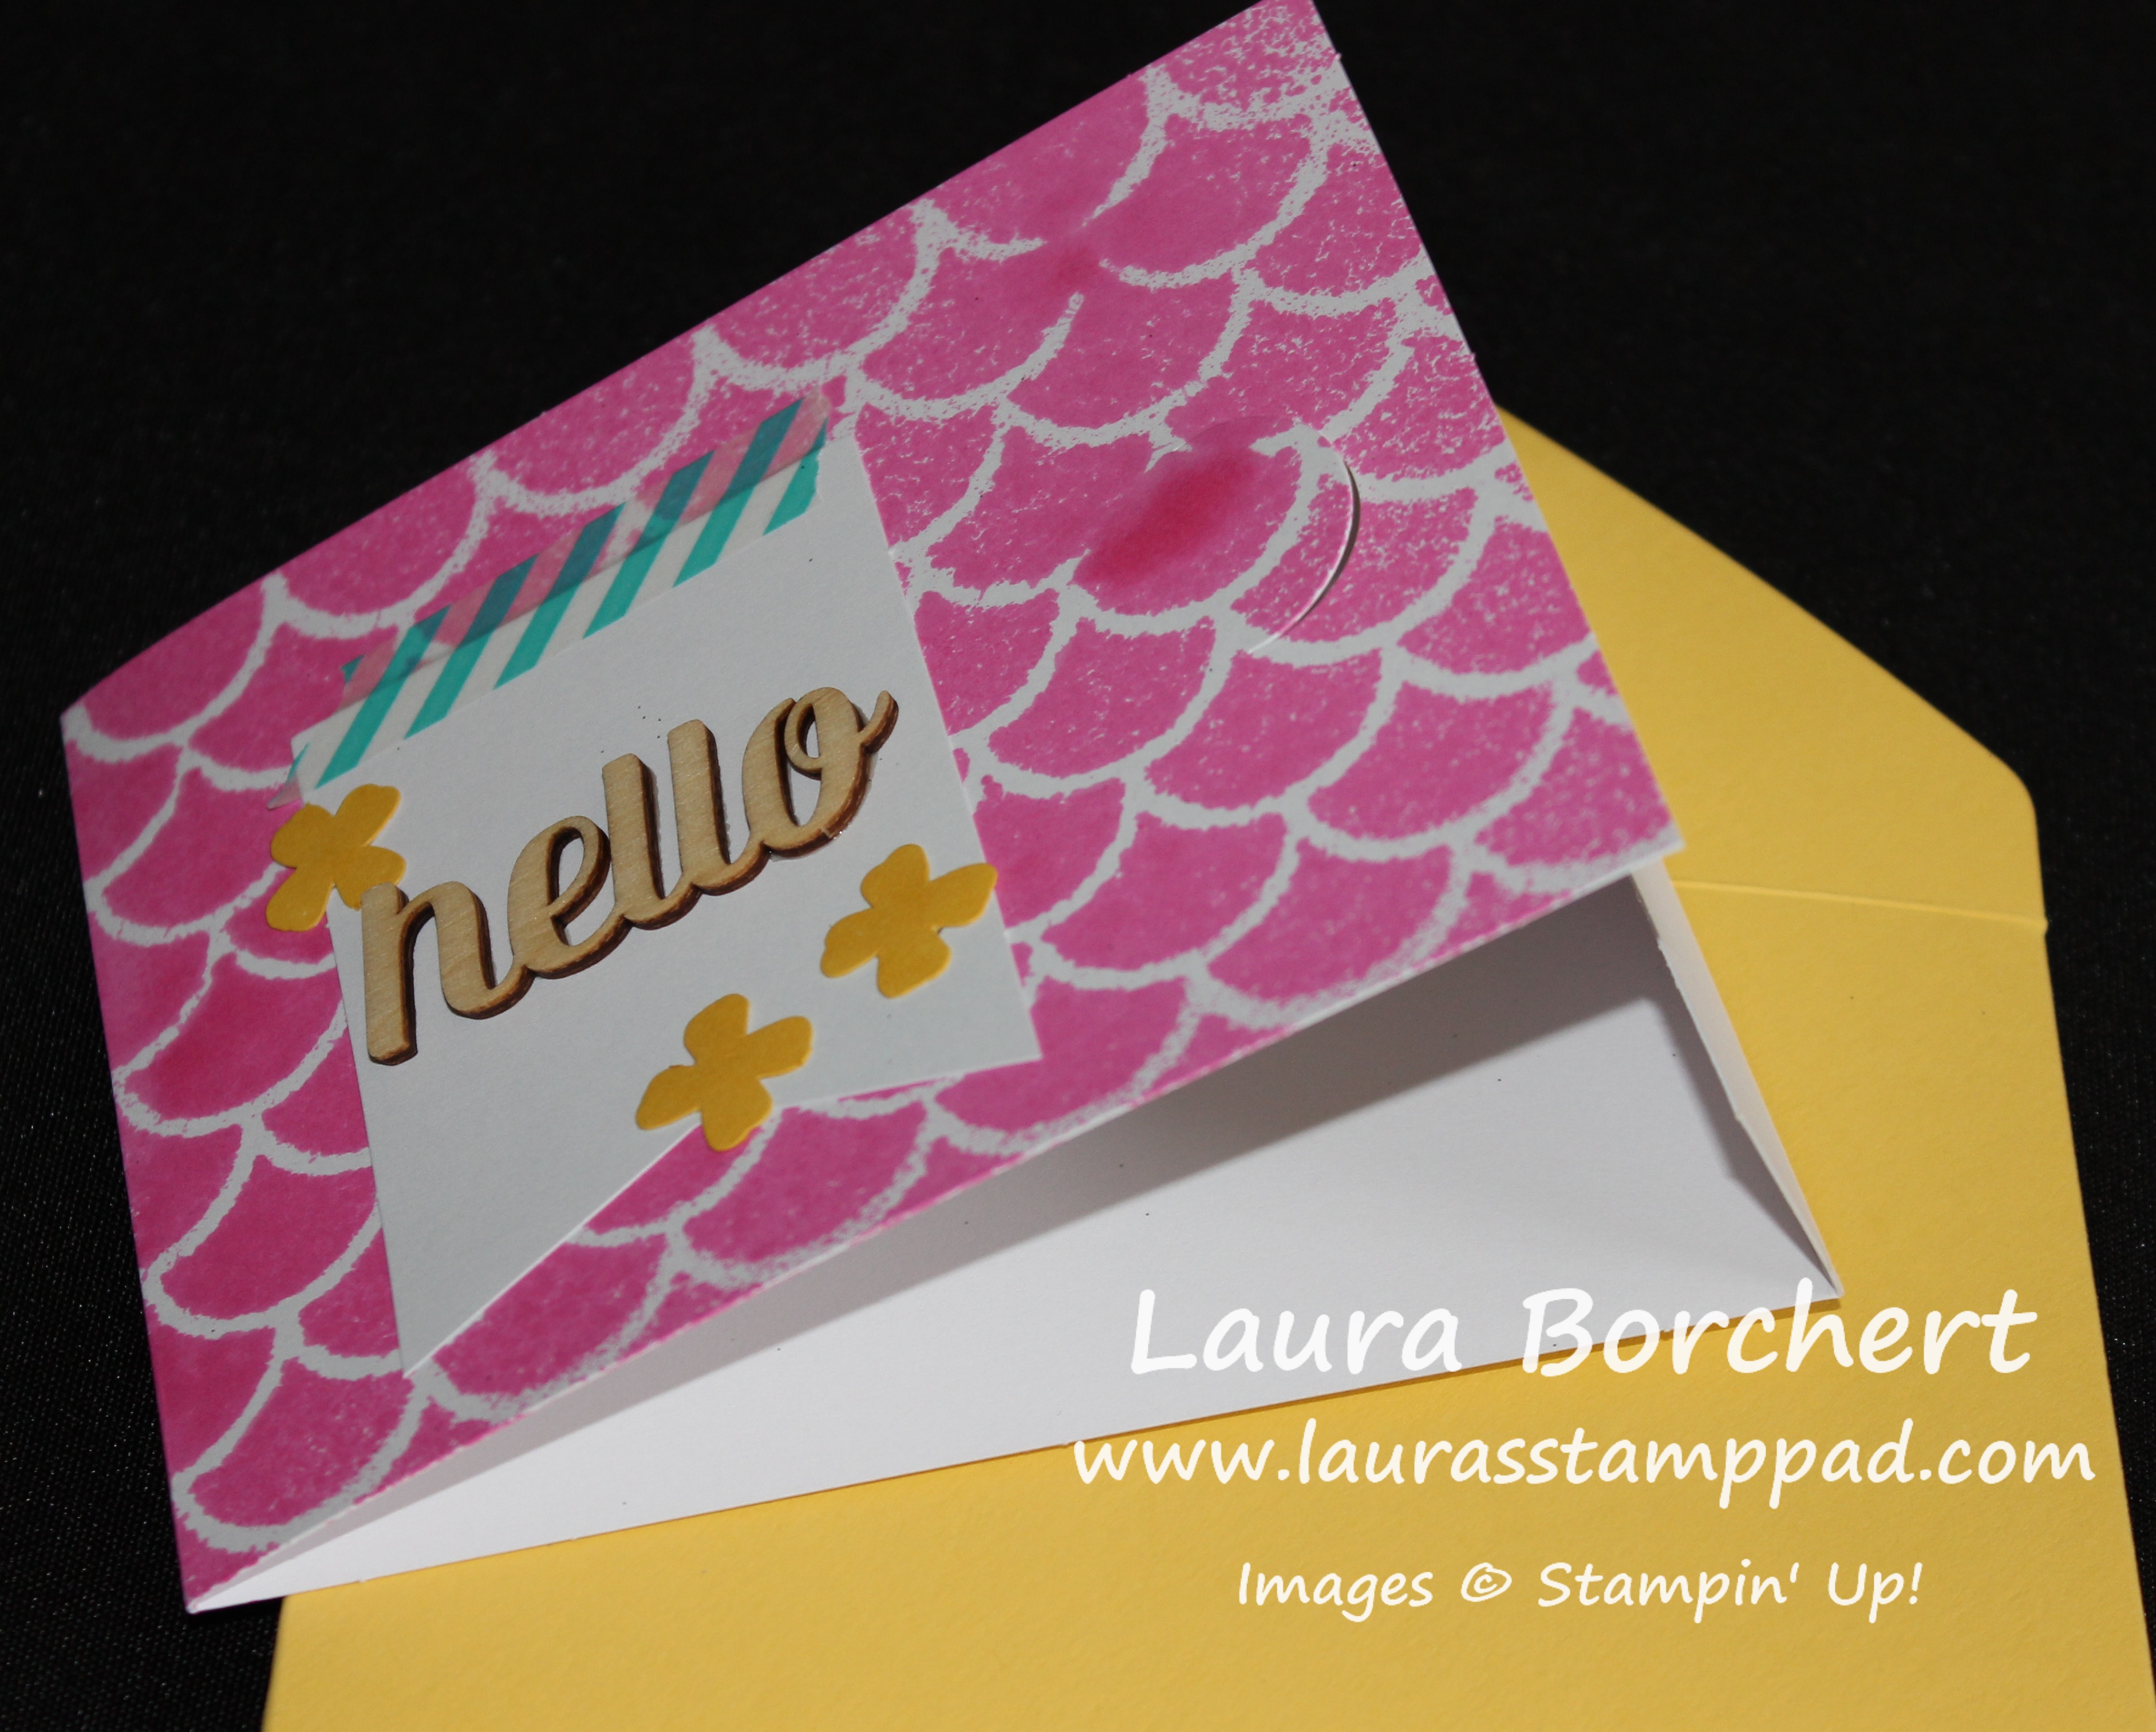
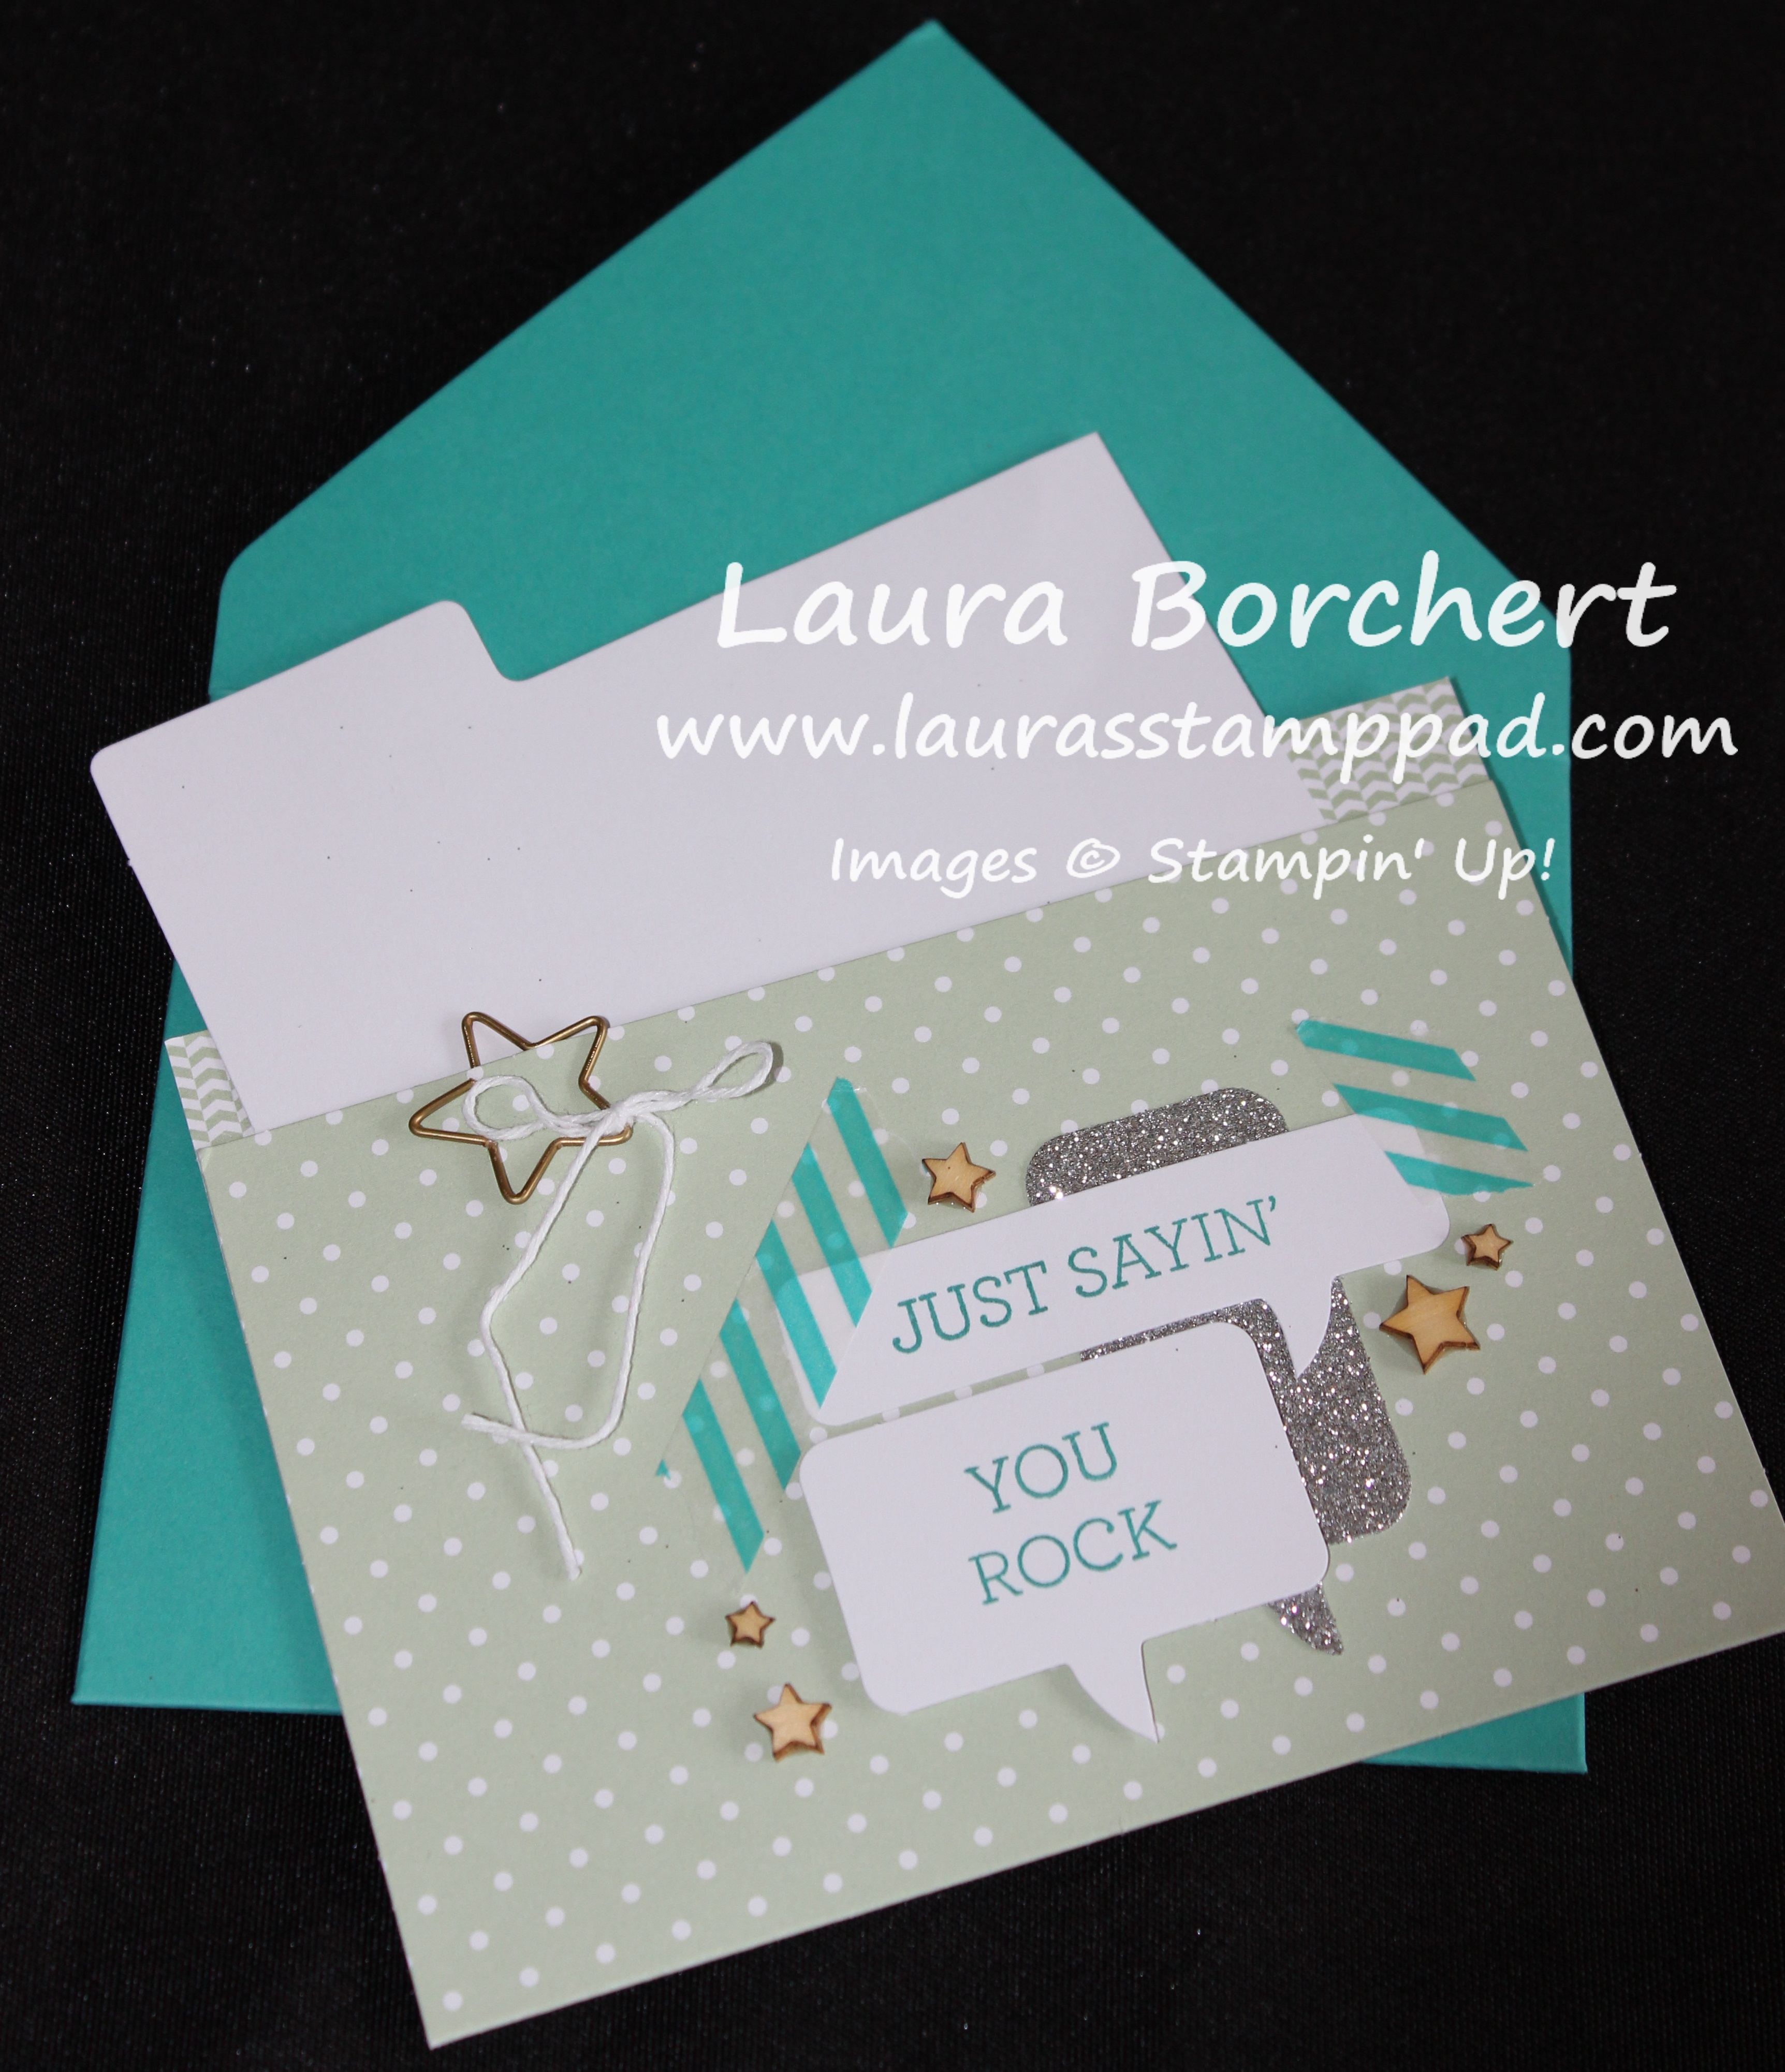
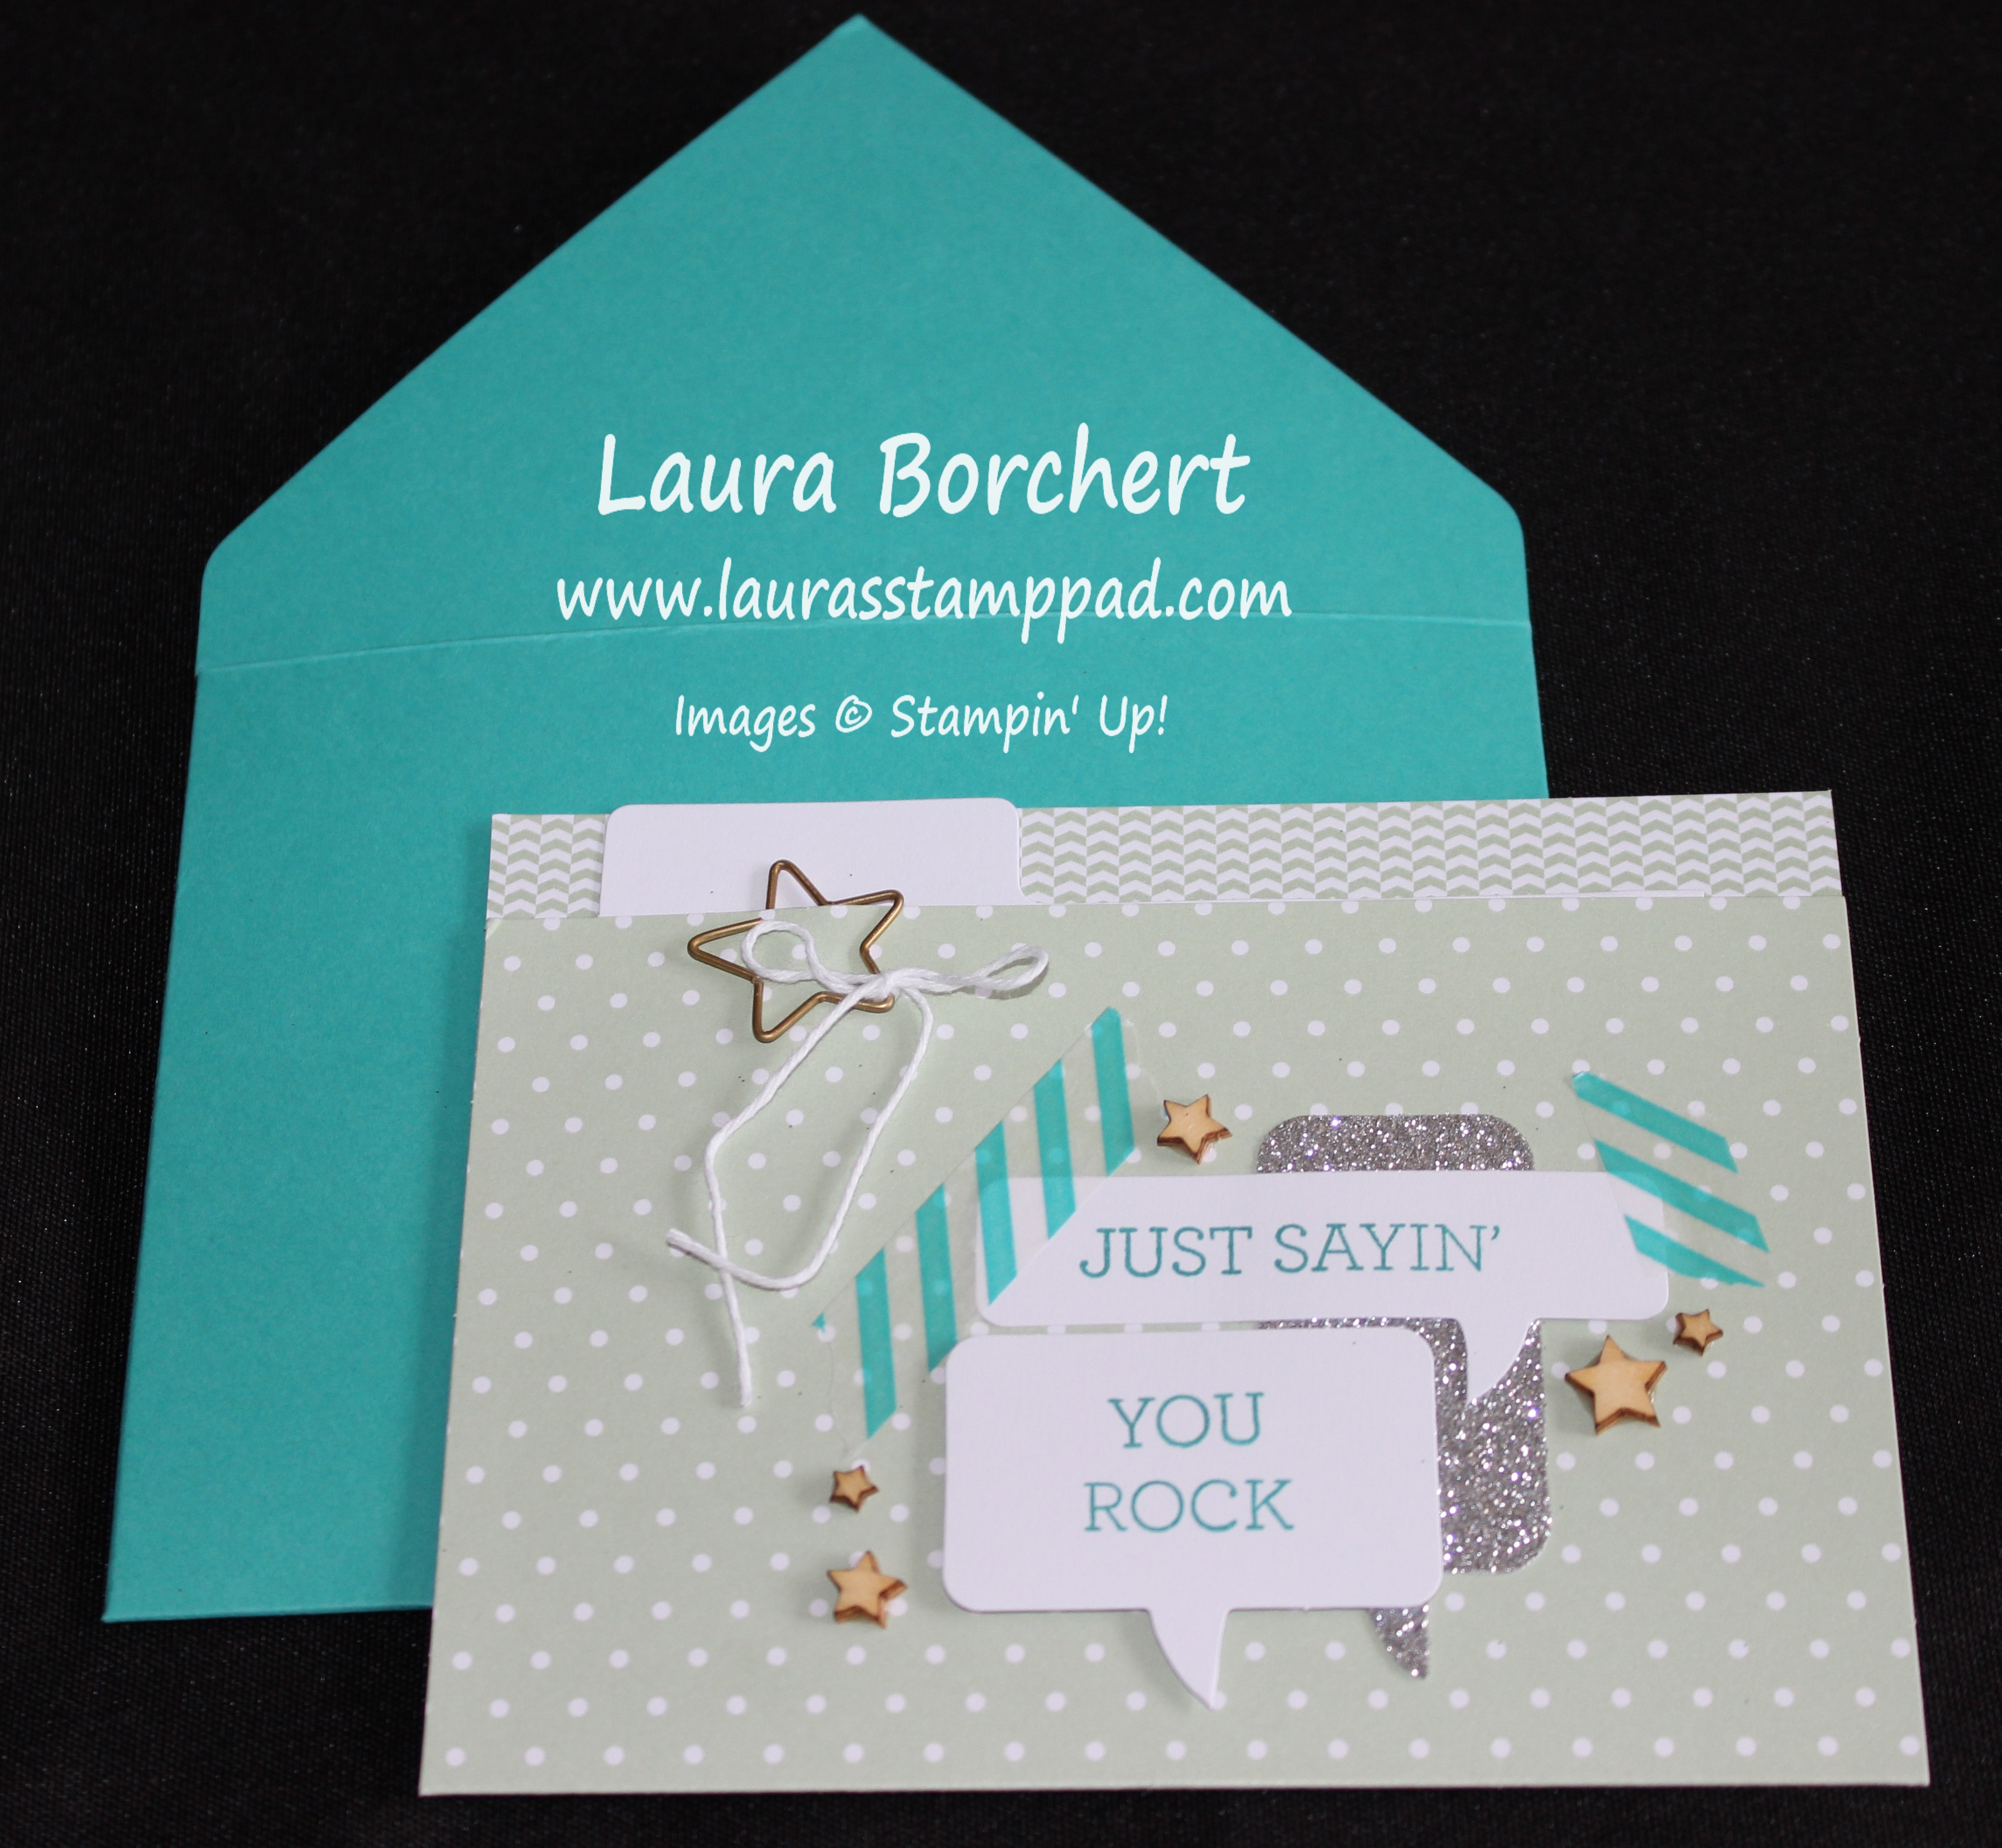
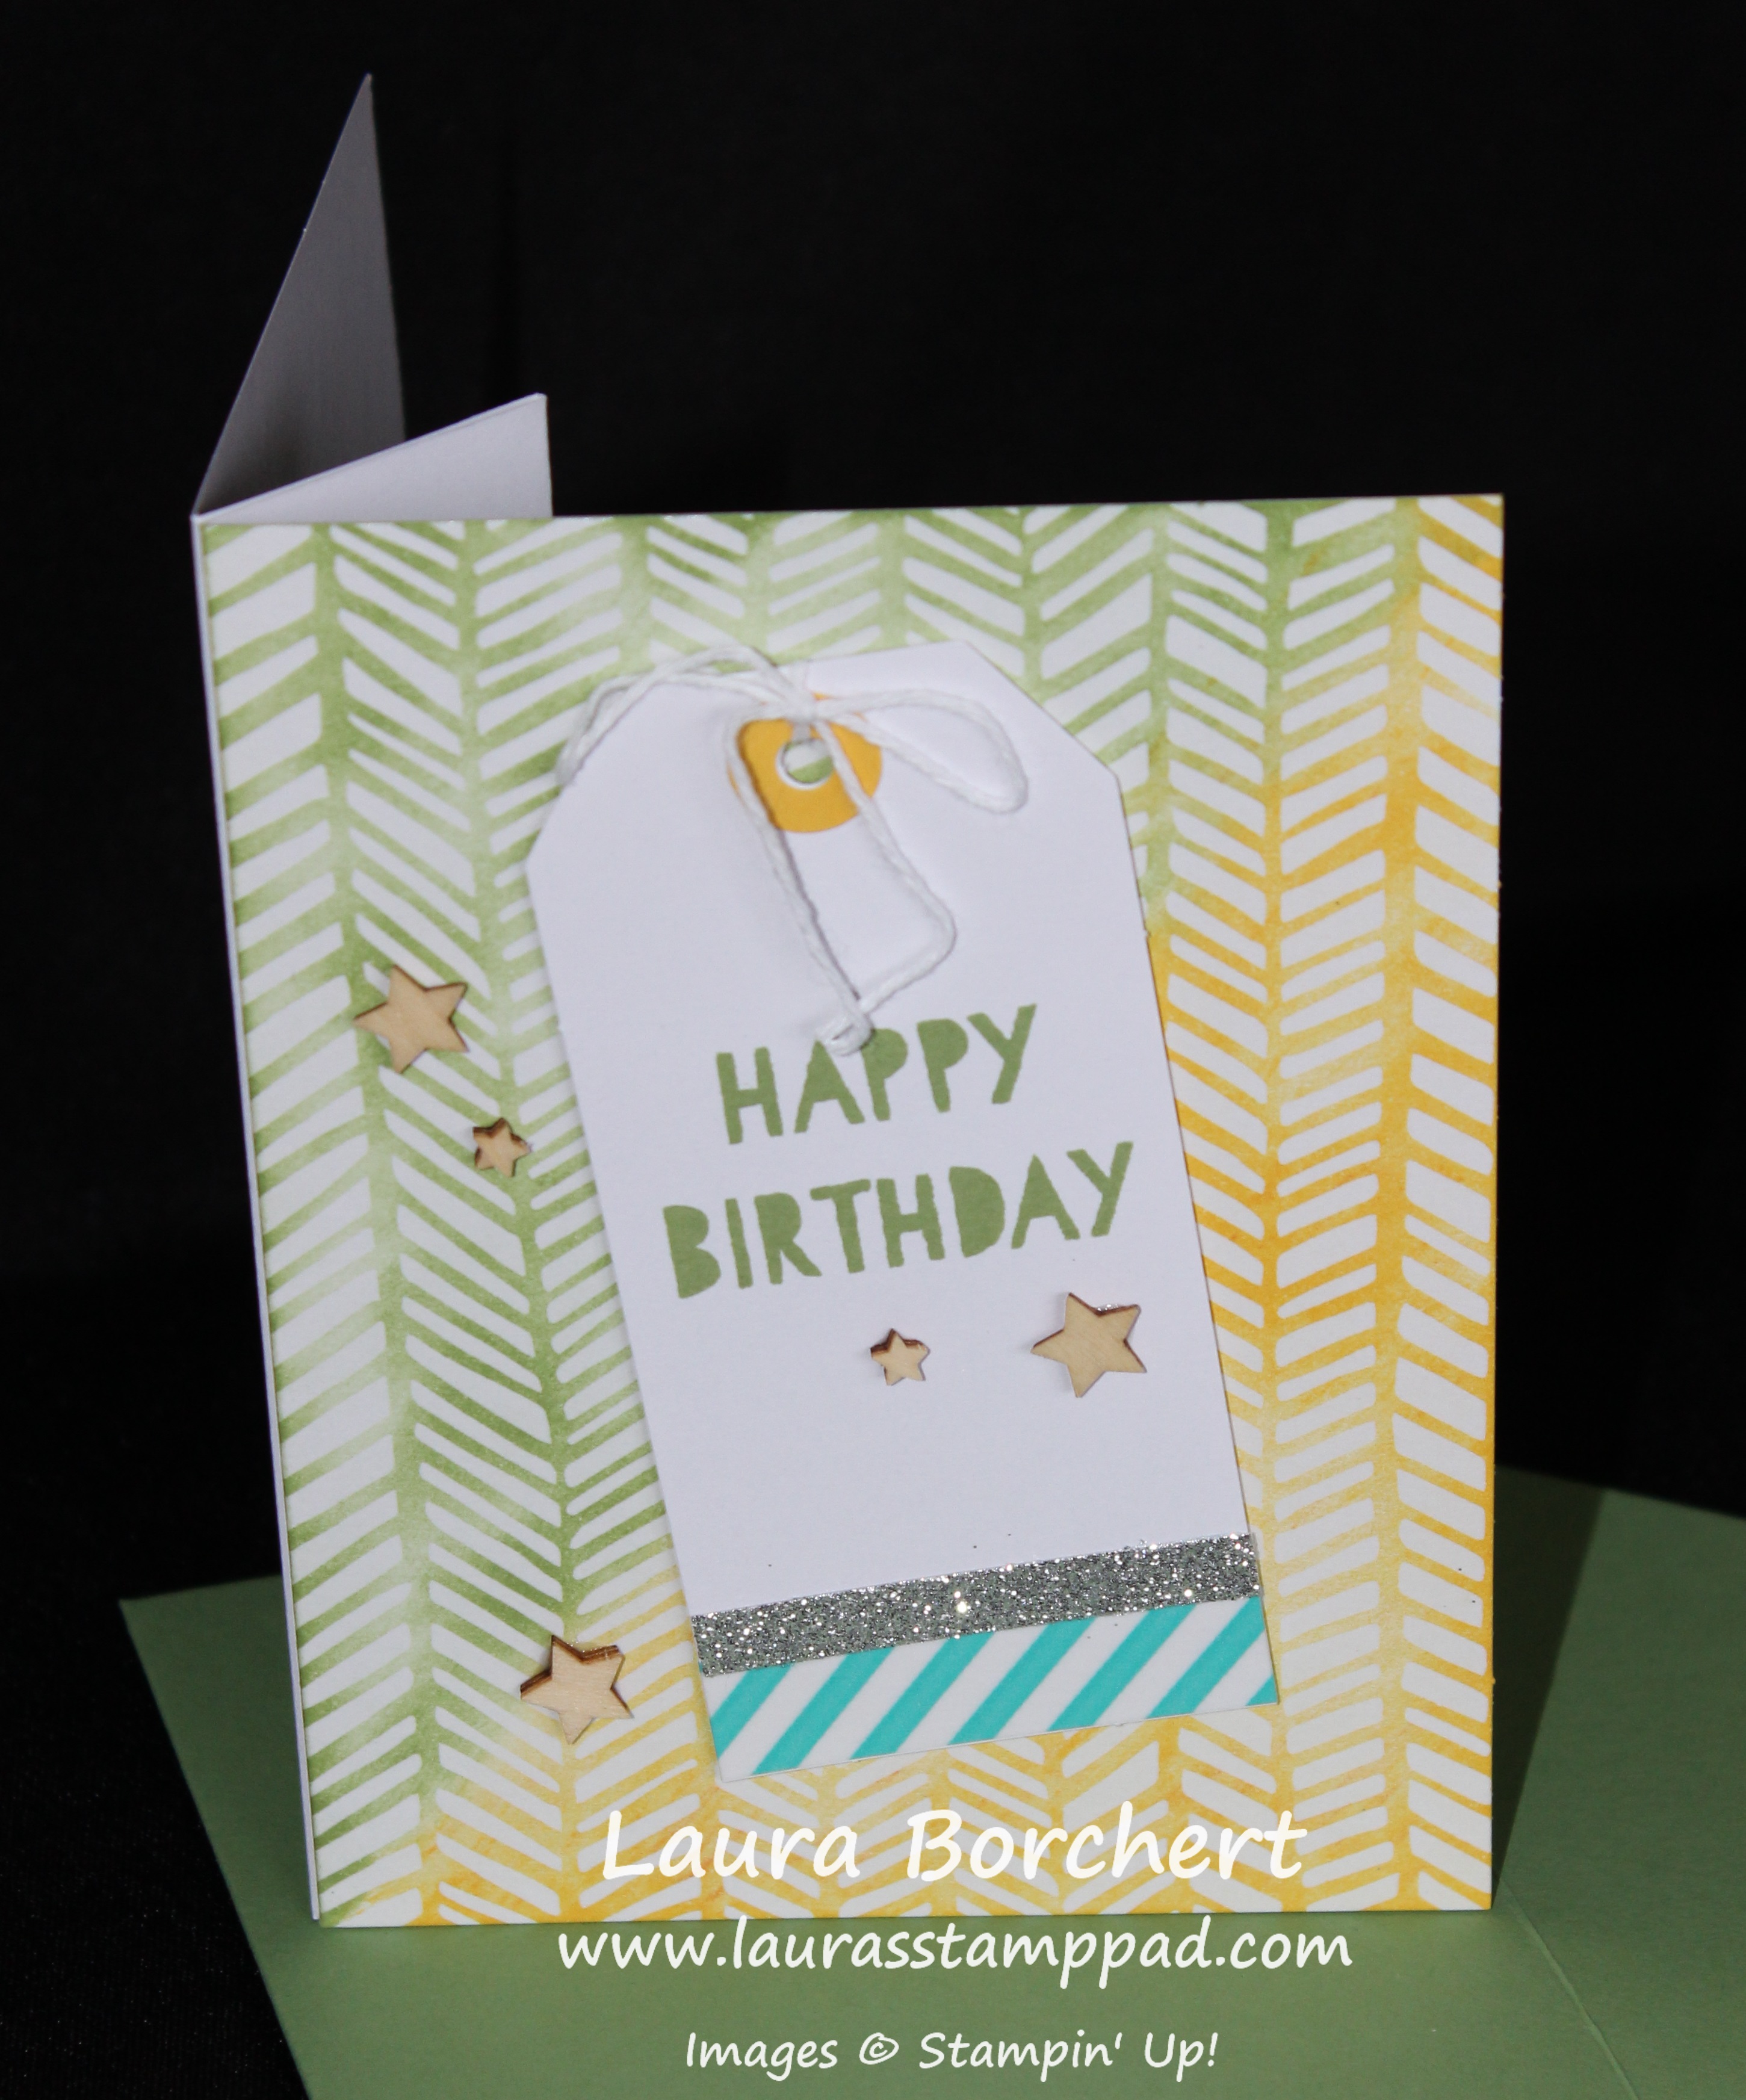
 Here is a quick and simple card using some of the new product from the Occasions Mini Catalog and Sale-A-Bration Brochure. I started with a Crushed Curry card base and used some of the It’s My Party Designer Series Paper. I used the DSP into a piece measuring 4″ x 5-1/4″ and then cut it at 3″ and flipped one piece over. I love that both sides are super cute and coordinate together! I tied a piece of Melon Mambo Cotton Ribbon around the card at the spot that the paper meets to cover it up! For the greeting, I used the Thank You from the Perfect Pairings Sale-A-Bration Stamp Set. I then punched it out with the 1″ Circle Punch and then layered it onto a Mint Macaron piece punched out with the 1-1/4″ Scallop Circle Punch! I added the greeting to the card with Stampin’ Dimensionals! This card would be perfect for any occasions, just change up the greeting!!!

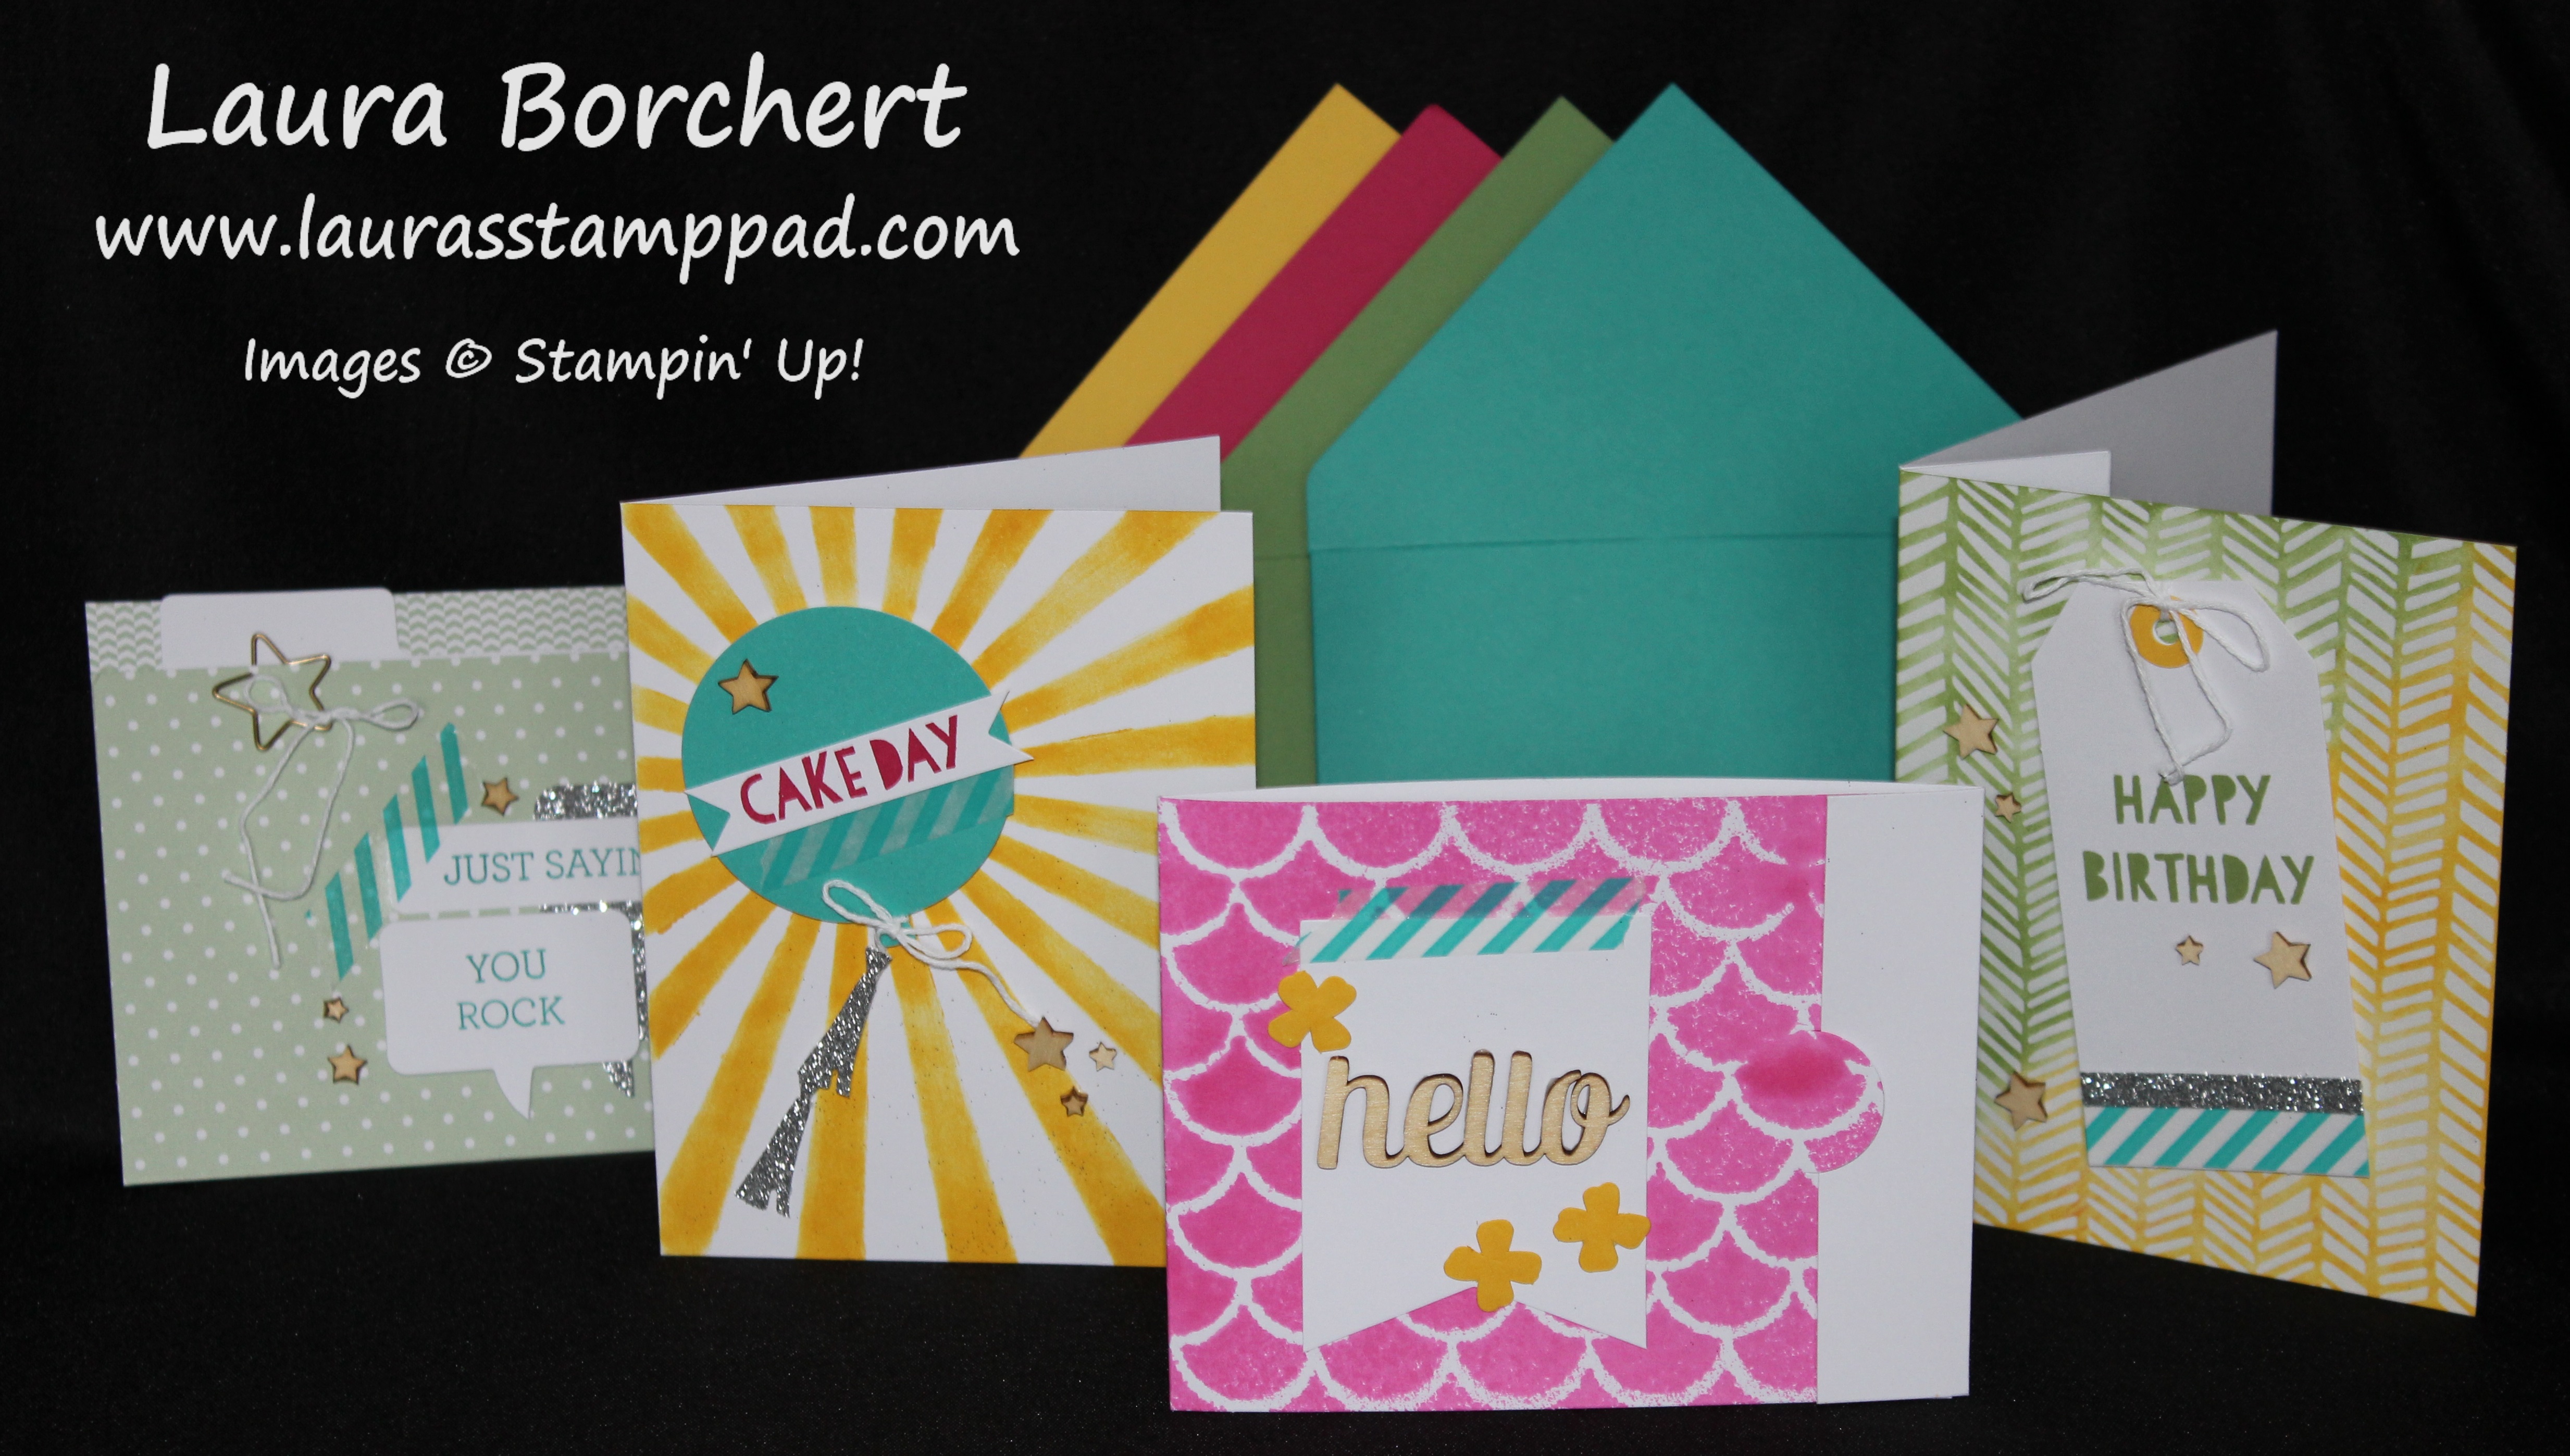
I will be posting a lot more samples using the new product after tomorrow! I can’t wait to share all these ideas and goodies with you! Let me know if there is something specific you would like to see in the comments below! I will do my best to make that happen!

Happy Stampin’

~Laura


SNEAK PEAK: Birthday Balloons!

Posted on

I know it is Technique Tuesday but today my technique is a Sneak Peak! I can’t wait for the Occasions Mini Catalog to begin on January 5th!!! Here is a sneak peak of some of the products from the It’s My Birthday Suite! I love all of these products because I make lots of Birthday cards. What can I say I have a big family and they all have birthdays!!!! 🙂 Also, the color combination in the It’s My Party Designer Series Paper Stack is amazing – Melon Mambo, Mint Macaron, and Crushed Curry. Ahhhh I love it all!!!!

Birthday Balloons, www.LaurasStampPad.com

This card was created with a Mint Macaron card base. I cut a piece of the It’s My Party Designer Series Paper into a 4″ x 3″ square….this way you can get 12 of these pieces from one sheet! Woot Woot! I added some Melon Mambo Satin Stitched Ribbon around the card at the top of the designer paper! Then I stamped the greeting from the Party Wishes Stamp Set in Tip Top Taupe as well as the balloon strings! The little balloons are from the same set and coordinate with the Party Punch Pack (Bundle and Save 15%)! I love it. It has a candle, a cupcake, and a balloon. I stamped my balloons on some scrap Whisper White in Melon Mambo, Crushed Curry and Mint Macaron and then punched them out. A full Stampin’ Dimensional fits on the back which is super fabulous! Some of the balloons were attached with Snail Adhesive and some with Stampin’ Dimensionals! I love how the balloons look more real and really pop on the card! 🙂

I love this suite so much that the first class of 2016 is all about the It’s My Party Suite! I can’t wait to start classes back up. I haven’t had a class in almost 2 weeks and I miss all my stampers!

Let me know what you are most excited about from the Occasions Mini Catalog in the comments below!!! If you are on my mailing list, you should have received yours in the mail. If you would like me to mail you one, send me your address at laura[at]laurasstamppad[dot]com. You can also see my Occasions Mini Catalog Haul here!

Also, I shared on my YouTube Channel one of my favorite storage containers in my stamp room! You can check it out here or by clicking below! Be sure to give it a thumbs up if you liked it!!!

Happy Stampin’

~Laura


Technique Tuesday – Reflection Technique!!!

Posted on

Happy Tuesday!!! You know what that means? I have a fabulous technique to share with you today! It has a major WOW Factor and it is actually fairly simple to create!!! It makes great man cards too!! 🙂

Lovely As A Tree Reflection, www.LaurasStampPad.com

How cool is that? The reflection of the trees in the “pond”, or whatever water it is, is just stunning!! I love it! You can do this technique with lots of different images and not just trees! Now let’s get started!

SUPPLIES NEEDED: Sponge Daubers, Window Sheet, Stamp Set, and Ink

See I told you it was easy since the supply list is so short! I have a feeling you all doubt me on that! 🙂 The piece of Whisper White cardstock that I used for this one measures 4-1/4″ x 3-3/4″. I started by sponging my cardstock first. I saw this technique at Spring Into Stamping and Debbie advised to do that first! I used the Soft Sky Sponge Dauber for the very bottom (pond) with just a few passes back and forth. Then I used the Pool Party Sponge Dauber above that for the pond and at the top for the sky. The leftover (middle) section I filled in with the Wild Wasabi Sponge Dauber. I added the brown at the end; using the tree stamp as a guide for those marks! Once you have your cardstock all colored in, you will stamp the trees from Lovely As A Tree with Chocolate Chip Ink in the Wild Wasabi section of your card. Now ink up your stamp again and stamp it onto a piece of Window Sheet! Be very careful to press evenly and not slide all over. If it does, no worries, just wipe it off with a baby wipe or wet paper towel and do it again! Now you will take your window sheet, flip it over, and press it down to your cardstock either just below your already stamped trees or down further. You can do it either way, it also might depend on where your water starts. Once you lay the window sheet down, just gently press all over so the ink is touching the cardstock and soaking in! Now lift up and voila! That’s it!!! See I told you it was easy! After looking at the sample above, I decided it needed a little dirt at the pond’s edge so I went in with some brown and did a few passes!!! You could also use a darker green!

Lovely As A Tree Reflection, www.LaurasStampPad.com

Here is another sample that I created! My pond was much smaller so I could only fit half of the trees on there. I actually think I like this one better. The card at the top made me always wonder which way was up but with this one I know!

Sheltering Tree Reflection, www.LaurasStampPad.com

Here is another sample that I created with the Sheltering Tree Stamp Set. I really love this one because the reflection image is sort of fuzzy looking so it really looks like a reflection in the water. I think it came out like that because it is a more solid image and the ink pooled in places on the window sheet. The Lovely As A Tree Stamp is very fine and small so it came out more clear and crisp! For the card above, I stamped the tree first and then did the Window Sheet reflection of the tree. Then I did the leave and the reflection of the leaves. I added the grass and flower stems (for more texture) to the card and then just sponged Pool Party below the grass. So I actually sponged last for this card! I added the greeting from Teeny Tiny Wishes and punched it out with the Word Window Punch and layered it onto Wild Wasabi Modern Label Punch! I added the greeting to the card with Stampin’ Dimensionals! 

If you would like to see this technique in action, you can check out my Video Tutorial below! Don’t forget to give it a thumbs up if you liked it and subscribe to My Channel so you don’t miss out on future videos!

Let me know in the comment below which of these 3 you liked best! If you are planning on trying out this technique, let me know if you will be using a tree or another type of image! I can’t wait to hear all about it!

Happy Stampin’

~Laura


Monogram One Sheet Wonder Card Set!!!

Posted on

Okay this is the last set that I have done recently so I promise to take a few months before sharing more of these! 🙂 The One Sheet Wonder Technique is just sooooo much fun and I have needed some gifts lately which these are perfect for! A few weeks ago, I attended Spring Into Stamping (check that out here) and I stayed at my friend’s house that weekend! Of course I wanted to give her a little gift for her hospitality! Since she is getting married soon, I know she will be sending out lots of Thank You Notes so this was perfect!

Monogram Card Set, www.LaurasStampPad.com

Look at all of these cards!!! That is correct, I got 14 cards out of one sheet of 12″ x 12″ Real Red Designer Series Paper. My friend’s favorite color is Red so that is why I chose this paper! I used Whisper White for all of the card bases which made these even easier to wipe together! Her and her fiance’s initials are M and R and their last name will be W. I used the Sophisticated Serifs Stamp Set which is in the Occasions Mini Catalog. The little plus sign was from the April Paper Pumpkin Kit! I had just received that in the mail and when I was thinking about these cards, it popped in my head that that image would be perfect! Love it!!! I used the 2″ Circle Punch, 2-3/8″ Scallop Circle Punch and 1-3/4″ Scallop Circle Punch for all of the letter layering! Here are some more close up photos!

Monogram One Sheet Wonder, www.LaurasStampPad.com

Some of the cards used the front side of the paper and some used the back side! I love how all of the cards are very similar but a little different. I layered with a little bit of Real Red cardstock!

Monogram One Sheet Wonder, www.LaurasStampPad.com

You can check out more samples using the One Sheet Wonder Technique here and here! You can also see the Template for cutting the Designer Series Paper here! I have also done lots of videos on this technique which you can see here! I hope you are enjoying this technique as much as I have! Leave me a comment down below on which one your favorite is!

Happy Stampin’

~Laura


Technique Tuesday – Baby Wipe Technique!!!

Posted on

Happy Tuesday!!! You know what that means….I have a fabulous technique to share with you today! This is an oldy but a goody! It is so much fun and super simple too! The look comes out different each time but it is really fabulous!

Baby Wipe Flowers, www.LaurasStampPad.com

Amazing shades of pink and I’m in heaven!!!! Love love love it!!!! Now let’s get started!!!

SUPPLIES NEEDED: Baby Wipe, Re-Inkers, Cardstock

This is a really simple technique. You just take your baby wipe and fold it up. For this I folded it into quarters but if you are using a larger stamp, then you can fold it in half. Be sure it is at least 2 layers thick. If you are using a large stamp, just layer 2 wipes. Place them on a plate, plastic container, or clear block stamp case like I did!!! Then using your Re-Inkers you will squeeze dots all around in Melon Mambo and Pink Pirouette! I went with the lightest and darkest pinks for a strong contrast but you could use any colors you use! Now the baby wipe is your ink pad. It is as simple as that! Then I took the flower from the Crazy About You Stamp Set and used my new baby wipe ink pad to stamp flowers all over scrap Whisper White cardstock. Then I punched them out with the coordinating Flower Medallion Punch so that I could use them on my card. For my card, I have a Whisper White base (5-1/2″ x 5-1/2″) with Melon Mambo (5-1/4″ x 4″) on top! With another Whisper White piece measuring 3-3/4″ x 5″, I stamped the leaves from the Crazy About You Stamp Set in Wild Wasabi and added my greeting in Melon Mambo from the Lovely Amazing You Stamp Set! Now it is time to add your flowers! I placed one in the corner with Snail adhesive and trimmed off the excess. For the other 2 flowers, I added those with Stampin’ Dimensionals!!!! You know how I love those things!!! Beautiful!!! I just love it! I really think that purple would be fabulous too – really any color would be amazing!

Baby Wipe Gorgeous Grunge, www.LaurasStampPad.com

Here is another one that I created! For this card, I used Tempting Turquoise, Elegant Eggplant, and Daffodil Delight Re-Inkers on the Baby Wipe. I just placed drops all over the place. They bleed together and created that beauiful green! This is just a really fun technique! For this card, I used the Gorgeous Grunge Stamp Set and just stamped all over a piece of Whisper White cardstock (3″ x 5″). I layered that onto a piece of Tempting Turquoise (3-1/4″ x 5-1/4″) and added it to my card base of Daffodil Delight! I added some Daffodil Delight Seam Binding around the card and stamped the greeting at the bottom. This greeting is from the Remembering Your Birthday Stamp Set so the coordinating greeting is stamped on the inside! 🙂 I think this card scream Teens or Tweens. It’s like rockstar, punk rock looking…..or something? Am I alone here? Let me know in the comments below!!!

Also, I created a Video Tutorial for you on this cool technique and a few tips and tricks! Don’t forget to give it a thumbs up if you liked it!!!

Happy Stampin’

~Laura


Crazy About Butterflies!!!

Posted on

Crazy About You, www.LaurasStampPad.com

I thought the title for today was perfect since it is a mash up for the Crazy About You Stamp Set and Papillion Potpourri Stamp Set! Also, you know how much I love butterflies!!! This card was inspired by one of the Make and Takes at Spring Into Stamping which I attended a few weeks ago (Check that out here!)! The fabulous Julie Davison is the creator of our Make and Takes and she really wowed us this year! I love how simple and fabulous the front is but then you open it up and…..WOW!

Butterfly Pop Out Card, www.LaurasStampPad.com

How fabulous is that??? I love when the inside is decorated too! It just pulls it all together to make a beautiful card and has such a WOW factor!!!! Love it!!!!

To get started, I have a card base of Blackberry Bliss measuring 4-1/4″ x 11″. The front was decorated with the Crazy About You leaves and then the Papillion Potpourri butterflies! I punched out the butterflies with the Bitty Butterfly Punch and the circle is the 2-1/2″ Circle Punch! The greeting is from the Crazy About You Stamp Set as well. I love how there are so many different greetings in that stamp set that you can mix and match with!!! Now for the inside, you will need a piece of Whisper White cardstock measuring 3-3/8″ x 9-1/2″ and score along the 9-1/2″ side at 1″, 2-3/4″, and 4-1/2″. This is what gives you that center pop-up piece! Fold on all of the score lines so you have a mountain at the top and then slide in your 2-1/2″ Circle Punch halfway and punch on that fold line. Using a Mini Glue Dot or Fast Fuse, adhere your Window Sheet (1/2″ x 3-1/4″) to the sides of your circle. Now you can attach this to the inside of your card. Make sure that the fold is on the fold of your card base! I noticed it seems to close better if you don’t have it tight in that fold and instead space the lower portion of the white down a little bit (small smidge) from that center card fold and the top portion up a small smidge from the center card fold. I hope that makes sense! 🙂 Once that is placed inside your card, you can adhere your butterflies. I used the bigger butterfly for the inside and punched it out with the Elegant Butterfly Punch! I just used regular Snail adhesive to adhere the butterflies to the front and back of the Window Sheet! I stamped the leaves from the Crazy About You Stamp Set in the lower corner of my Whisper White. For the Lost Lagoon piece (3-3/8″ x 5″) at the top, I stamped butterflies randomly all over in Lost Lagoon and then adhered it on, covering that top Whisper White lip.

SIS Sample

Here is the original card that was created at Spring Into Stamping. It used the Kinda Eclectic Stamp Set! I love the original but didn’t have that stamp set so I had to modify! 🙂 Do you like to modify samples that you see or copy exactly what it looks like? Let me know in the comments below!

Happy Stampin’

~Laura


Beautiful Butterflies!!!

Posted on

I was asked by the local Library to create a craft at a Volunteer Luncheon that they were having as a Thank You to these lovely ladies! The theme was butterflies and here is what I came up with!!!

Butterfly Curvy Keepsake Box, www.LaurasStampPad.com

These little Curvy Keepsake Boxes were a hit!!! They were able to pick from 4 different colors. We stamped butterflies all over with the Papillion Potpourri Stamp Set! The boxes were assembled using Fast Fuse adhesive and then we added on the Butterflies on the outside! The top butterfly was cut out in Vellum! They are so cute!

Butterfly Bookmarks, www.LaurasStampPad.com

The other project that everyone got to make was 1 of these bookmarks! I started with a piece of Whisper White cardstock measuring 5-1/2″ x 2″. The tops were punched out using the Scallop Tag Topper Punch and Ornate Tap Topper Punch!

The Butterfly Bookmark used the Papillion Potpourri Stamp Set and coordinating Bitty Butterfly Punch and Elegant Butterfly Punch! We used Tangelo Twist and Hello Honey. The greeting is from the Lovely Amazing You Stamp Set and I just had to brush the edges with my Sponge Daubers! I couldn’t resist! I used some of the Tangelo Twist and Hello Honey Satin Stitched Ribbon for the top!

The Flower Bookmark uses the Crazy About You Stamp Set for the flowers and leaves! The colors used were Crisp Cantaloupe, Calypso Coral and Wild Wasabi! We punched out the flowers with the coordinating 1-3/4″ Scallop Circle Punch! We used Calypso Coral Seam Binding for the top!

Both of these projects were lots of fun to create and simple enough for those who have never crafted before. It was a wonderful time celebrating all the amazing things these women do at the Library and they really enjoyed the afternoon! I had so much fun!

Happy Stampin’

~Laura


Technique Tuesday – Pop Up Box

Posted on

Happy Tuesday!!! You know what that means….I have a fabulous technique to share with you! You have seen the Cards in a Box before here and here! Well I have another version of a box card and it is super cute and I would say it is easier!!! I sure thought so!

Glimmer Hello You Framelits, www.LaurasStampPad.com

See how cute??? It does still fit in a regular Medium Envelope too!!! Now let’s get started!

SUPPLIES NEEDED: Cardstock, Paper Trimmer, and Fast Fuse

Starting with a piece of cardstock measuring 4-1/4” x 11”, you will score along the 11” side at 1/2”, 4-3/4”, 5-3/4, and 10” with your Paper Trimmer or Simply Score Tool. Turn the cardstock 90 degrees and score along the 4-1/4” side at 1”. Cut along all of the solid lines as shown in the template below. You will be removing the 1/2″ x 3-1/4″ piece on the far left. You will be removing a 1″ x 3-1/4″ piece in the middle and on the far right. Then you can either place the cardstock into your Paper Trimmer or free hand it, you will be cutting 4-1/4″ x 2-1/4″ from the right hand side front piece. This is what allows the box to be open in the front but still have that back piece!  Now it is time to assemble. Add Sticky Strip or Fast Fuse to that far left tab (1″ x 1/2″) and then lay the card flat and close it, allowing the adhesive to stick to the opposite end. By laying it flat to seal it, you make sure that is isn’t crooked or off. It will now be flat and close well for mailing!

Pop-Up Box Template, www.LaurasStampPad.com

Now with a piece of cardstock measuring 1” x 5-1/4”, you will score 1/2″ from each end along the 5-1/4” side. This will be uses on the inside of the box to hold your greeting (That middle piece of cardstock in the photo above!) Fold along score lines to create a “Z” shaped fold. Add Sticky Strip or Fast Fuse to both scored ends of 1” x 5-1/4” strip on opposite sides. Now you will place it on the inside of your box with the sticky facing out to adhere to the sides of the box.

Birthday Box Card, www.LaurasStampPad.com

Now you can decorate!!! I used the Birthday Bash Designer Series Paper from the Occasions Mini Catalog for the back (3″ x 4″) and for the front lip (3/4″ x 4″). I layered the Designer Series Paper piece on the lip onto a piece of Tangelo Twist (7/8″ x 4-1/8″). For the greeting, I stamped Birthday from the Bloom with Hope Hostess stamp set on a scrap piece of Whisper White and made little banner tips. I added this with Stampin’ Dimensionals (of course)! I used the Cupcake Builder Punch for the background. For the Happy, I used the Hello You Thinlits and some Gold Glimmer Paper. I LOVE how that turned out – just beautiful! I used some Multipurpose Liquid Glue (green lid) to adhere it to some little Window Sheets and then adhered the window sheets to that center tab! Love it!!!! Super cute and fun to create and give!!!

Don’t forget to save the negative of your Happy to use on another project like this one! I love using up scraps and getting the most out of my paper!!!!

Sneak Peak

Happy Stampin’

~Laura


Hooray It’s Your Day!! (Part 2)

Posted on

Sunshine Template, Hooray It's Your Day, www.LaurasStampPad.com

Welcome back!!! Today is Part 2 of the Hooray It’s Your Day Card Kit from the Occasions Mini Catalog! If you missed Part 1 yesterday, you can check that out here!!

I LOVE this card….which is why I paired it with the Melon Mambo envelope! <3 It was super fun to make and you can make tons of them because the template in the kit is reuse-able! Again, I used my Sponge Daubers for this one rather than the included spritzer. I like to have more control over my color  and get a strong line image. I love the bright colors and bold look of this sun! You could always do it in other colors as well. Many of my stampers at the class I held on this kit did Melon Mambo. They sure know the way to my heart! 🙂 TIP: If you drop your sponge dauber down at the center circle of this template and rub out on each ray you will get a fabulous ombre look. It will be really dark around the center and lighten up as you go out! It looks amazing!!! I stamped my greeting from Age Awareness and add all the little goodies which were provided in the kit. I would love to do this card with a greeting stamped in the middle of the sun and maybe some Dazzling Details! That would be awesome too!!

Scallop Template, Hooray It's Your Day, www.LaurasStampPad.com

Now for the final card! This card comes scored and cut with that little tab! How cute is that? I used the scallop template for this one and used my Spritzer with Melon Mambo Re-inker in it (Alcohol 70 Proof or less and as few or many drops of re-inker you wish). I love the look of this card as it makes me think of a mermaid but you can see how the lines are very distinct and the colors vary across the card. It looks cool but the OCD in my goes a little crazy. When there is a spot that doesn’t have ink or enough ink, I spritz and spritz and then over do it. Ehhh What are you going to do? Remember less is more! 🙂 I added the wooden greeting and the tag. The little flowers came in the kit but are white so I pounced a few times on them with my Daffodil Delight Sponge Dauber and make them yellow! 🙂 Love it! Here is another photo showing that tab look of this card!

Scallop Template, Hooray It's Your Day, www.LaurasStampPad.com

I was really impressed with all of the goodies that were included in this kit and how amazing the cards are! I really loved making them and seeing what my other stampers came up with in the class!

Hooray It's Your Day Kit

Here is another snapshot of all of the supplies! And here is 1 set of all of the cards. The kit makes 5 each of these!

Hooray It's Your Day Card Kit, www.LaurasStampPad.com

Be sure to get your kit before it is gone on June 2nd! Click here to get yours! I hope you enjoyed these and if you make these cards and add your own flare I would love to see what you come up with! Please share in the comments below!

Happy Stampin’

~Laura


Hooray It’s Your Day!! (Part 1)

Posted on

File Folder Card, Hooray It's Your Day, www.LaurasStampPad.com

This is just one of the fabulous cards you can create from the Hooray It’s Your Day card kit from the Occasions Mini Catalog (which ends on June 2nd)! I had some much fun with this kit and I made a lot of modifications! Remember, you don’t have to follow the instructions on these kits! The kit comes with 5 each of 4 different designs for a total of 20 cards including envelopes. I think the envelopes are my favorite part – Bermuda Bay, Melon Mambo, Wild Wasabi, and Daffodil Delight! LOVE THEM!!!!

Hooray It's Your Day Kit

Look at all these goodies!!! Of course the spritzer and mask templates can be used over and over again. Also, there is tons of Washi Tape on that roll and I didn’t come close to using it all. Love it! Okay so let’s get down to the fun stuff!!! I will be showing 2 cards today and the other 2 tomorrow! 🙂

File Folder Card, Hooray It's Your Day, www.LaurasStampPad.com

Here is another photo of the File Folder Card! This is super cute and the file folder style is really popular right now. Still not sure if it is my thing but I’ll go with it! TIP: When sealing your Wild Wasabi pocket for the file card to go in, you need to stay really, really close to the edge. Even staying close, I had to cut down my file card. Another option would be to use your washi tape to seal the ends by wrapping it around the side. This would allow for plenty of room for your file card! Then you can decorate as you wish with the thought bubbles, washi tape, wooden stars, and star clip! I used the Crazy About You Stamp Set for this card. (I didn’t purchase the coordinating stamp set – Hooray It’s Your Day and just used a few of my favorite greeting sets!) Also, I didn’t add any color to this one…..I noticed that a few days later that mine didn’t look like the sample in the kit photo! 🙂

Gift Card Holder, Hooray It's Your Day, www.LaurasStampPad.com

I love love love this one because it is an emboss resist card. The card comes already embossed on the front with that fish tail look.What do you call that pattern? Let me know in the comment below! I actually used my sponge daubers on this card rather than the spritzer. You know how much I love those things. Then for the tag, I stamped the greeting from Age Awareness and added a little Washi Tape and Silver Glimmer Paper (included in the kit). The other cool thing about this card is it comes with a gift card holder built in. All of the score lines are created and you just need to add a little adhesive (Fast Fuse works best) on the outer edge! Check this out! Perfect for a Graduation card!!!

Gift Card Holder, www.LaurasStampPad.com

Now you have to wait until tomorrow to see the other 2 cards in the kit. Be sure you are subscribed to my blog in the upper right hand corner and you will receive an email of my blog post so you don’t miss out! See you tomorrow!

Happy Stampin’

~Laura