Technique Tuesday – Masking a Scenery!!!

Posted on

Happy Tuesday everyone!!! We made it through Monday and now it’s time to check out this amazing technique! I am loving the new Sponge Brayers and all the fun you can have with them! Check out this beauty using the masking technique!!!

Masking Scenery, www.LaurasStampPad.com

That simple, yet amazing color of green grass and blue sky just makes this card so beautiful! I love it. Then you have those white lines of where the color stops and it just looks perfect!

SUPPLIES NEEDED: Sponge Brayer, Marina Mist Ink, Pear Pizzazz Ink, Lovely As A Tree Stamp Set

You will start with a piece of Whisper White (4″ x 5-1/4″) and mask off a section of the cardstock for your coloring and trees. Make sure it is wide enough to stamp the trees. You can use scrap paper as a mask but I found Post-It Note Tape so it is sticky paper tape (that comes off without ripping your cardstock) that holds perfectly. Thank you to Kim Schultze for all the tips and tricks at a recent demonstrator gathering! 🙂

Post It Note Tape Masking, www.LaurasStampPad.com

I added the top piece level with the top of the cardstock and the top of the tape. Then for the second piece I went down about 3/4 of the way of the cardstock. Again, you can go as wide as you wish, just make sure it is big enough for your stamped image. Then you will take a Sponge Brayer and Marina Mist Ink and add it to the top half of the masked off space. Just lightly roll over the ink and then lightly over the cardstock until you get the desired color. Pressing hard won’t make the color darker, just keep going back to the ink for a darker color. Once you have the desired blue, you will move to the bottom section of the masked space and add Pear Pizzazz Ink. Be sure to overlap the colors a bit so it fades nicely together and doesn’t look like stripes of blue and green. Once you have your desired shade of green, you are all set. You can remove the scrap paper or Post-It Note Tape and complete your card. I stamped the trees from Lovely As A Tree in Chocolate Chip. The greeting is from the Thoughts & Prayers Stamp Set. I thought it needed a little bit more so I cut a small piece of Burlap Ribbon and added it to the top left corner. I adhered it on the front with a little Tear & Tape and secured it on the back with Stampin’ Dimensionals. I added more dimensionals on the back and adhered it to the Marina Mist card base!

I love it! This makes a great man card but also a simple and elegant card for thinking of you, sympathy, and just about any occasion. It is such a beautiful scenery! You could always use this same technique to create a colorful background and stamp flowers over the top or any other favorite image. Stay tuned as I have a lot more masking samples to share with you! 🙂

If you would like to see this technique in action, check out the Video Tutorial below or click here. Don’t forget to give it a thumbs up if you liked it and be sure to subscribe if you are new!

Happy Stampin’

~Laura

Don’t forget about the Paper Pumpkin BOGO Sale for new subscribers!!! Click here to get started and be sure to enter the Promo Code: BOGO

PP_BOGO_Facebook_US, www.LaurasStampPad.com


Technique Tuesday – Just Add Salt!!!

Posted on

Happy Tuesday!!! That means I have a fabulous technique to share with you today!!! We will be playing with water and salt and it is so cool!!! I learned this technique from Mary Ellen at our Demonstrator Meeting! I love sharing ideas with fellow demonstrators! If you are interested in becoming a demonstrator to get a fabulous discount on the product, have lots of fun and learn new techniques, click here for more information or reach out to me any time! I would love to chat with you and answer any questions you might have!

Night Sky Salt Technique, www.LaurasStampPad.com

Can you see that fabulous background that is all crackles and amazing looking?? I love it! it adds so much more to the project and it is very simple. I used Table Salt!!!! We all have that in the house, right? Let’s get started!!!

SUPPLIES NEEDED: Table Salt, Stampin’ Spritzer (water), Shimmery White Cardstock, Sponge Daubers, and Ink

I started with a piece of Shimmery White cardstock measuring 4″ x 5-1/4″. This paper adds a little extra shimmer to your project and it is a little bit thicker so it works well when you spritz it with water! You will sponge your background any way you like. You can do lots of colors, just one color or a night sky. I was going with a sunrise/sunset look in the sample above! I used Night of Navy, Bermuda Bay, and Crushed Curry (the green came from the bleeding of the yellow and blue). Once you have added your color with the Sponge Daubers, spritz it all over with the Stampin’ Spritzer. The spritzer should have just regular water in it. This allows the colors to run and bleed. Then you will add regular table salt and watch the magic happen! You will start to see the salt soak up the water/color. You can set it aside to dry or use a Heat Tool to speed up the process. I like using the Heat Tool because 1. I have no patience and 2. I love to watch the magic happen. You will see the paper start to flatten back out and the water crawls around and the crackles begin to appear. It really super cool to watch! Once it is all dry, you can decorate. You could stamp an image over top and cut it out or use it as a background. I stamped the trees from Lovely As A Tree in the sample above. I thought it needed a little more but then I didn’t want to cover up the amazing look. I finally decided on the Silver Ribbon and simple greeting from One Big Meaning! I punched the greeting out with the Washi Label Punch!

Rainbow Salt Technique, www.LaurasStampPad.com

You all know how I LOVE bright colors! This one I created like a rainbow using Real Red, Pumpkin Pie, Daffodil Delight, Cucumber Crush, Pacific Point, Bermuda Bay, and Elegant Eggplant! I love how amazing the colors look with that crackled look and a hint of shimmer. I thought the greeting from the Feel Goods Stamp Set went perfect on this card! I added a little bit of Whisper White Cotton Ribbon and was all set! I love it!!

If you would like to see this technique in action, check out the Video Tutorial below or by clicking here! Don’t forget to give it a thumbs up if you liked it!!!

Happy Stampin’

~Laura


Ornament Elegance!

Posted on

embellished ornaments, www.LaurasStampPad.com

I love using Purple for Christmas Cards. It might not seem traditional but it is just so elegant and royal and I love that!!! What color do you like to use the most for your Holiday Cards? Let me know in the comments below!

I started with a Blackberry Bliss card base. Then I took a piece of Whisper White measuring 4″ x 5-1/4″ and stamped the trees from the Wonderland Stamp Set (or you could use the Lovely As A Tree Stamp Set) in Mossy Meadow and stamped them at the top left corner. I stamped a few times before returning to the ink pad and made sure to take in different angles and some far in and others just a little bit. This will give a full tree look! I stamped the greeting from the Embellished Ornaments Stamp Set in Mossy Meadow in the bottom right corner. For the ornament, I took a piece of white scrap paper and stamped the ornament in Blackberry Bliss. Then I die cut it with the coordinating Thinlits – Delicate Ornament Thinlits (Bundle & Save 15%)! I also die cut the little ornament cap from the Thinlits using Silver Foil Paper. I used a Mini Glue Dot to attach that to the top of the ornament. I tied a bow with the Silver Ribbon and attached it with a Mini Glue Dot as well. I added the ornament to the card with Stampin’ Dimensionals! 🙂 I love it!! It is very simple and elegant!!

If you would like to see a Video Tutorial on how to create the tree branch, check out the video below or click here! Be sure to give it a thumbs up if you liked it!

Happy Stampin’

~Laura


Shades of Green!!!

Posted on

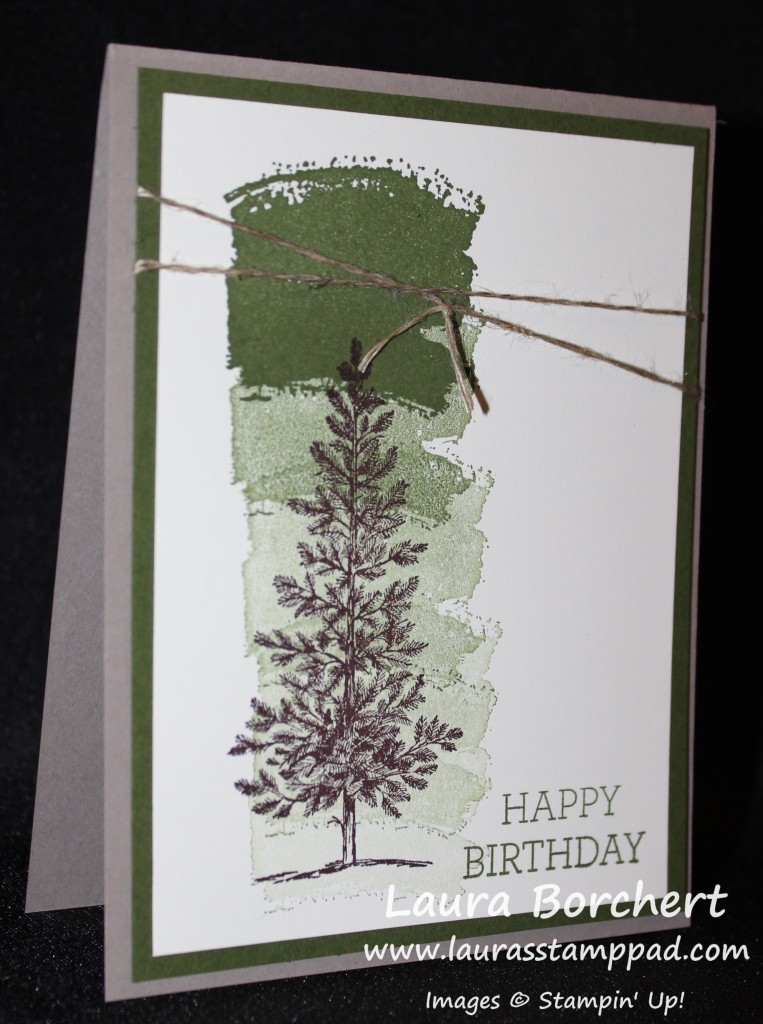
Ombre Lovely As A Tree, www.LaurasStampPad.com

Happy July!!! I can’t believe it is July already….where does time go??

Today I’m sharing one of my “Man Cards” with you! This one is basic and could be used for any occasion for a guy! I started with a Crumb Cake base and then added a piece of Mossy Meadow cardstock measuring 4″ x 5-1/4″. Then I took a piece of Very Vanilla cardstock (3-3/4″ x 5″) and stamped on it. For the ombre look, I used the image from the Work of Art Stamp Set and inked it up in Mossy Meadow. Starting at the top, I stamped it and then continued to move down and stamp again without ever returning to the ink pad. So simple and yet super amazing looking!! I also stamped the greeting in Mossy Meadow. It is from the Crazy About You Stamp Set. The tree from Lovely As A Tree was stamped in Chocolate Chip! I added the stamped piece to the Mossy Meadow and wrapped some Linen Thread around it twice and tied a knot (not a bow, since it’s a man card). I added this to my card base with Stampin’ Dimensionals!!! Simple and yet fabulous and not flowers, pink or girlie!!! Love it!!!

Happy Stampin’

~Laura


Technique Tuesday – Reflection Technique!!!

Posted on

Happy Tuesday!!! You know what that means? I have a fabulous technique to share with you today! It has a major WOW Factor and it is actually fairly simple to create!!! It makes great man cards too!! 🙂

Lovely As A Tree Reflection, www.LaurasStampPad.com

How cool is that? The reflection of the trees in the “pond”, or whatever water it is, is just stunning!! I love it! You can do this technique with lots of different images and not just trees! Now let’s get started!

SUPPLIES NEEDED: Sponge Daubers, Window Sheet, Stamp Set, and Ink

See I told you it was easy since the supply list is so short! I have a feeling you all doubt me on that! 🙂 The piece of Whisper White cardstock that I used for this one measures 4-1/4″ x 3-3/4″. I started by sponging my cardstock first. I saw this technique at Spring Into Stamping and Debbie advised to do that first! I used the Soft Sky Sponge Dauber for the very bottom (pond) with just a few passes back and forth. Then I used the Pool Party Sponge Dauber above that for the pond and at the top for the sky. The leftover (middle) section I filled in with the Wild Wasabi Sponge Dauber. I added the brown at the end; using the tree stamp as a guide for those marks! Once you have your cardstock all colored in, you will stamp the trees from Lovely As A Tree with Chocolate Chip Ink in the Wild Wasabi section of your card. Now ink up your stamp again and stamp it onto a piece of Window Sheet! Be very careful to press evenly and not slide all over. If it does, no worries, just wipe it off with a baby wipe or wet paper towel and do it again! Now you will take your window sheet, flip it over, and press it down to your cardstock either just below your already stamped trees or down further. You can do it either way, it also might depend on where your water starts. Once you lay the window sheet down, just gently press all over so the ink is touching the cardstock and soaking in! Now lift up and voila! That’s it!!! See I told you it was easy! After looking at the sample above, I decided it needed a little dirt at the pond’s edge so I went in with some brown and did a few passes!!! You could also use a darker green!

Lovely As A Tree Reflection, www.LaurasStampPad.com

Here is another sample that I created! My pond was much smaller so I could only fit half of the trees on there. I actually think I like this one better. The card at the top made me always wonder which way was up but with this one I know!

Sheltering Tree Reflection, www.LaurasStampPad.com

Here is another sample that I created with the Sheltering Tree Stamp Set. I really love this one because the reflection image is sort of fuzzy looking so it really looks like a reflection in the water. I think it came out like that because it is a more solid image and the ink pooled in places on the window sheet. The Lovely As A Tree Stamp is very fine and small so it came out more clear and crisp! For the card above, I stamped the tree first and then did the Window Sheet reflection of the tree. Then I did the leave and the reflection of the leaves. I added the grass and flower stems (for more texture) to the card and then just sponged Pool Party below the grass. So I actually sponged last for this card! I added the greeting from Teeny Tiny Wishes and punched it out with the Word Window Punch and layered it onto Wild Wasabi Modern Label Punch! I added the greeting to the card with Stampin’ Dimensionals! 

If you would like to see this technique in action, you can check out my Video Tutorial below! Don’t forget to give it a thumbs up if you liked it and subscribe to My Channel so you don’t miss out on future videos!

Let me know in the comment below which of these 3 you liked best! If you are planning on trying out this technique, let me know if you will be using a tree or another type of image! I can’t wait to hear all about it!

Happy Stampin’

~Laura


Lovely As A Tree!!!

Posted on

Lovely As A Tree, www.LaurasStampPad.com

This card has been the favorite in all of my Christmas Card Classes this year! The funny this is……it is not even a Christmas Stamp Set – it’s Lovely As A Tree!!! While I am not a fan of the color brown, I do really like this card and that POP of color with the Cherry Cobbler Seam Binding!

For the card base, I used a piece of Soft Suede measuring 4-1/4″ x 11 and I ran that through the Big Shot with the Decorative Dots Embossing Folder. TIP: You will want to fold your cardstock in half first so that you know where your crease is and won’t put the card in too deep on the folder! If so, you will end up with a few dots on the back of your card. Then you will take a piece of 2-1/2″ x 5-1/2″ Very Vanilla cardstock and stamp the tree towards the top and the greeting towards the bottom; leaving space in between for your ribbon. The tree is from the Lovely As A Tree Stamp Set and the greeting is from the October Promotional Set – Good Greetings. You can always use the Teeny Tiny Wishes Stamp Set or any other favorite greeting of yours. Now you will adhere this to a piece of Crumb Cake measuring 2-3/4″ x 5-1/2″. Once those two pieces are together, you will tie your Cherry Cobbler Seam Binding around them both. I just did a knot but you could always do a bow if you wish. Now you will place this piece onto your card front with Stampin’ Dimensionals! DONE! This is a fairly simple card so you can crank out many of them in a little amount of time!

I hope you enjoyed this sample! Let me know your favorite Holiday Card that uses a non-holiday Stamp Set in the comments below!

Happy Stampin’

~Laura


Have you seen the Northern Lights???

Posted on

Happy Tuesday!!! You know what that means…..I have an amazing technique to share with you!!! This was blows my mind because you start out with just three colors but it creates so many more! Seeing the Northern Lights is on my Bucket List too! Until then, I shall just make the Northern Lights in my craft room!

Northern Lights Technique, www.LaurasStampPad.com

Supplies Needed: Sponge Daubers, Tempting Turquoise Ink, Rich Razzleberry Ink, Daffodil Delight Ink Pad, Night of Navy Ink Pad, Lovely As A Tree Stamp Set, Label Collections Framelits, Chalk Marker or White Gel Pen

You will need a piece of Whisper White cardstock and the size will depend on the size of Framelit you would like to use. I used a piece that is 5-1/2″ x 4-1/2.” Starting with the Daffodil Delight and your sponge dauber, you will make do up and down making a stripe. Then move over about a 1/2″ and make another one, continuing across the cardstock. Next you will do the same with your Rich Razzleberry and then Tempting Turquoise. Be sure to overlap the colors a bit because that is how your will get a little orange and green in there too! Don’t worry if it looks super bright and colorful at this time! That is the way it should look! Using one of the trees from the Lovely as a Tree Stamp Set, stamp it in the center with Stazon! Now you can pick the size of Framelit that you wish to use and cut it out with your Big Shot! After you have cut it out, you will take the Night of Navy Ink Pad and Sponge Dauber and fill in the bottom portion using the stamped “ground” as your guide. Also, I brushed the edges of the entire image as well. You can go over the entire image very lightly with the Night of Navy as well for a more subtle look. Then using your Chalk Marker or Signo White Gel Pen, makes dots all over your card for a starry look! Now you are all done and you can add it to your card. I layered mine onto a piece of Basic Gray that was ran through my Big Shot in the Perfect Polka Dots Embossing Folder and then only a piece of Night of Navy. I added a little Silver 1/8″ Ribbon too! In case some of the instruction listed above were a little confusing, here is a Video Tutorial for you to see this card in action!

I hope you enjoyed this technique and try it out! I want to thank Kay Kalthoff for this fabulous idea! Also, be sure to leave a comment down below and let me know what you think!

Happy Stampin’

~Laura


Lovely As A Tree!!!

Posted on

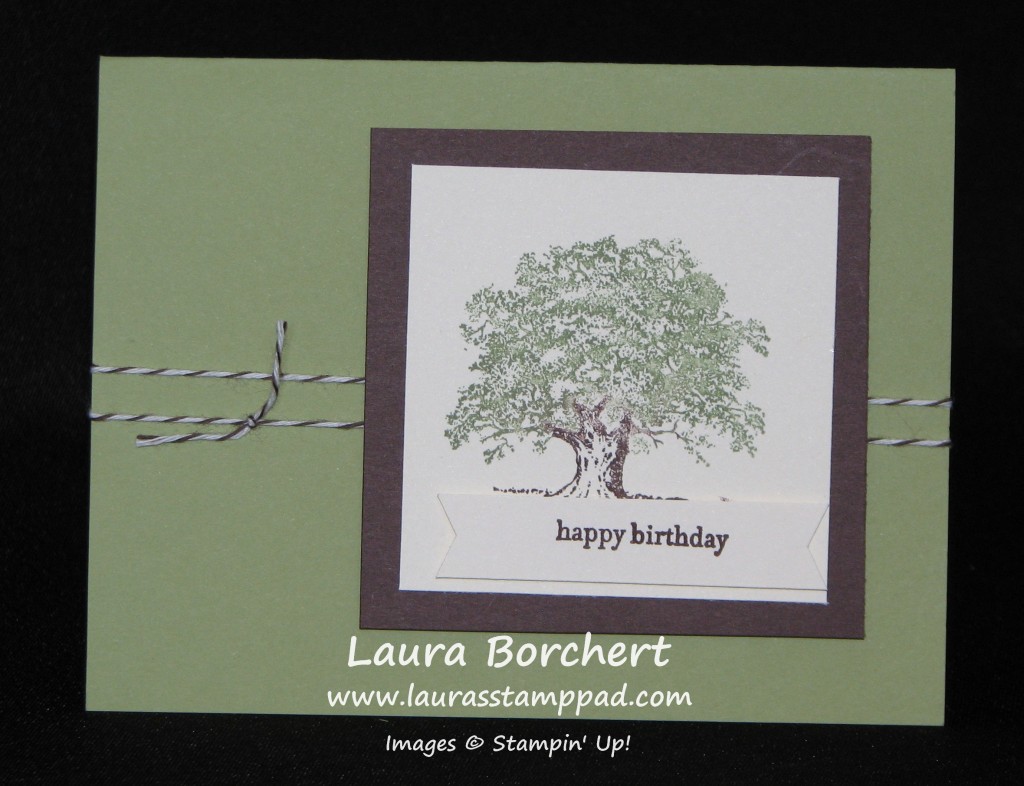
Lovely As A Tree, www.LaurasStampPad.com


Lovely As a Tree Stamp Set has been around since the dawn of time….okay maybe not that long ago. I just recently added this set to my collection to see what the fuss was all about. Results….I’m loving it! Look how simple this card is! It makes the perfect man card for a Birthday or Father’s Day! It would also be a great Thinking of You or Sympathy card as well! You could always mix up the colors to match a season too! I used Pear Pizzazz for this card but on the tree I went a little darker – Garden Green! I used the Birthday greeting from Teeny Tiny Wishes. The Baker’s Twine adds a little texture and pattern in the background as well! Simple yet fabulous!

Do you have this stamp set in your collection? What types of cards have you created with it? Leave me a comment down below!

Happy Stampin’

~Laura