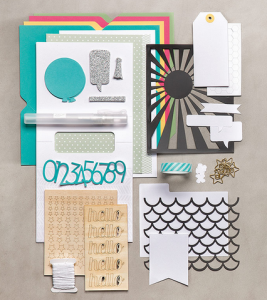
Perfectly Wrapped!!!

Posted on

Perfectly Wrapped Kit, www.LaurasStampPad.com

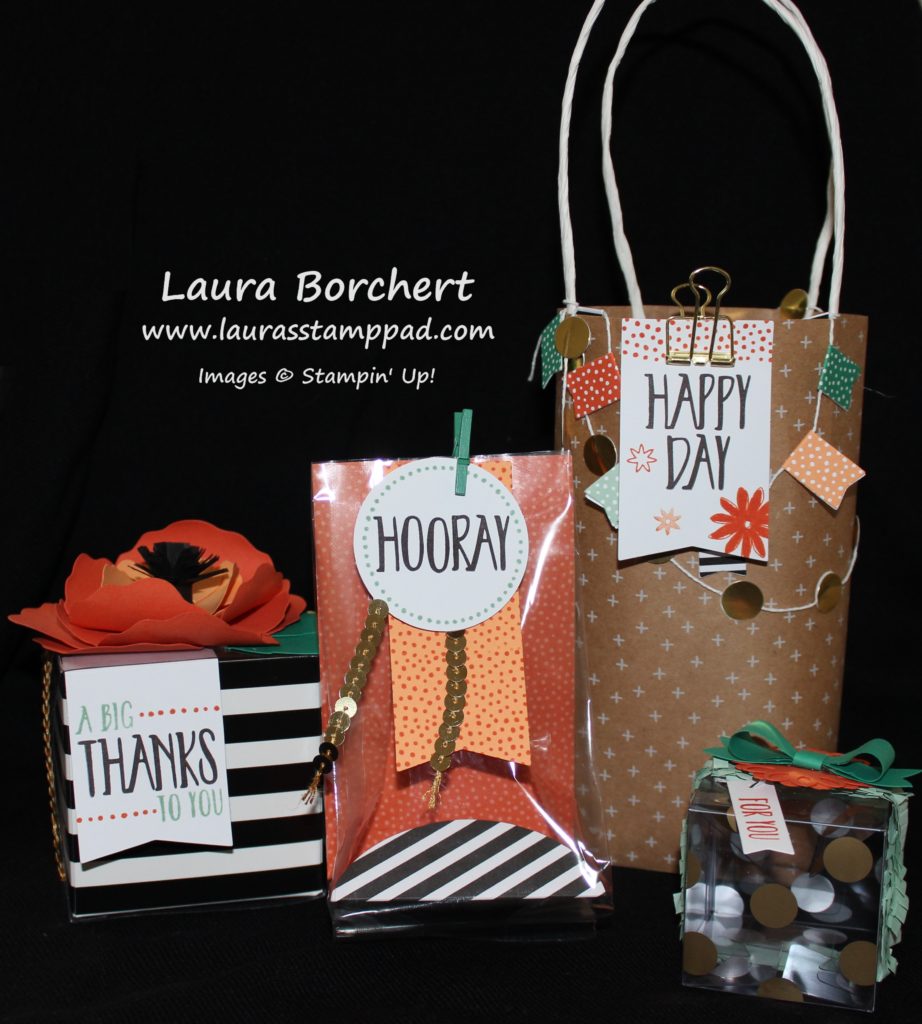
I know, I know, you are probably wondering why I got this kit since I am not a huge fan of gift boxes but I couldn’t resist. This kit is super cute and I wanted to see what all it entails. Each of the items are super fun and rather easy to create. I will use these for upcoming classes, hostess gifts and various other gift giving moments. This is the Perfectly Wrapped Project Kit and it coordinates with the Perfectly Wrapped Stamp Set. I think the stamp set is super fabulous with great greetings to use on lots of different projects. I love it!!! Now here is a little information on each box/bag individually.

Flower Box, www.LaurasStampPad.com

Okay so I think this is my favorite one of all, although I do love a few aspects of the others as well. I love flowers and black and white so this one had me at hello! The black and white box is super cute and then you can slide the clear plastic over the top to close it. The flower petals come already die cut and you just need to curl them a little bit by running them over a Bone Folder. You will want to assemble the flower with a hot glue gun. Wrap a little bit of the Gold Sequin Trim (provided) around the box and add the flower and greeting banner! Fun and Fabulous!

Bow Box, www.LaurasStampPad.com

This box is super cute and I love the ruffled trim. All of the pieces to decorate this box are already die-cut and ready to go. I used Mini Glue Dots on the box so that I could place the adhesive exactly where I wanted it. Super cute and loving those ruffles!

Happy Day, www.LaurasStampPad.com

This one I LOVE for those amazing swags. Eeee They just make me so excited! There is a banner swag and a gold dot swag. The gold dots have adhesive on the back and you add one in the front and one in the back. There are tons of gold dots as well so no worries about not having enough. TIP: When you add the banners to the Baker’s Twine, press them or stick them in the binder clip to ensure the adhesive gets a strong seal. I noticed after I did mine, they started to pop open. I stuck them all in the binder clip over night and they have been perfect since then! I almost would rather have one handle on the bag or make them shorter. I felt the bag was just too tall but it is rather large and great for bigger gift items!

Cellophane Bag Insert, www.LaurasStampPad.com

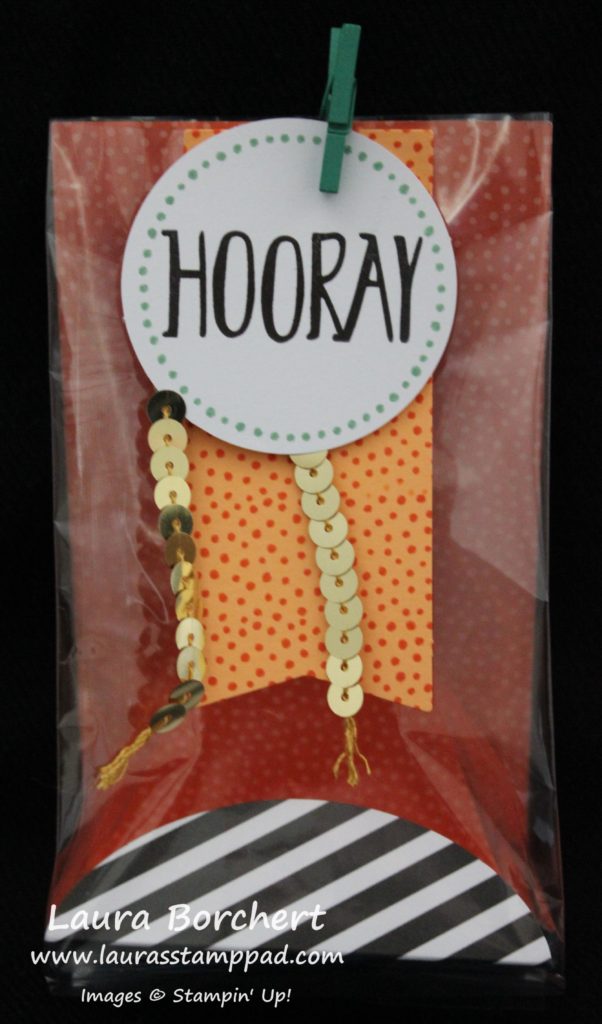
I love this one because of that cool little insert. This is just a regular gusseted cellophane bag but that fabulous insert to add that pop of color and hold the bag up a little more. Stamp the tags and cut some gold sequin trim to add to the top with a little clothespin. Quick and simple and perfect for some cookies or some chocolate! 🙂

Which one is your favorite?? Let me know in the comments below! If you would like to see all of the pieces of this kit, you can check out my Perfectly Wrapped Unboxing & Reveal Video here!

Happy Stampin’

~Laura

Oh Happy Day!!!

Posted on

Oh Happy Day Kit, www.LaurasStampPad.com

It truly is a Happy Day….isn’t every day?!?!?! 🙂 The Oh Happy Day Card Kit is super amazing and I had so much fun putting it together. This kit is all inclusive meaning it comes with ink, stamps, a clear block, instructions, and all of the supplies to create 20 cards!!! That is a LOT of cards!! This kit is perfect for a beginner stamper or even as a gift to someone! Are you ready for lots of pictures??? Here they come!

Kit Contents, www.LaurasStampPad.com

Because I have this amazing new table in my stamp room, I have tons of room to spread out. I laid out all of the card bases and popped out each of the pieces and set them on the card base. All of the pieces are numbered so it is super easy to know what part goes with what card. I love that. Then I sat down and just started working on the cards!

Matchbook Cards, www.LaurasStampPad.com

The first 5 cards are little matchbook style cards. These are just precious. That bottom solid strip of color is actually a tab that folds up and slides under the frame. Isn’t that adorable?? Just be sure when you are adding the frames with Stampin’ Dimensionals (provided) that you don’t add any to that bottom portion so the flap can slide in.

Matchbook Thank You, www.LaurasStampPad.com

Here is a photo with the flap popped open!

Heart Flap Cards, www.LaurasStampPad.com

If the last set of cards didn’t WOW you, then these will for sure. These cards are all decorated on the heart and you open the heart up and the patterned paper folds down to open to the inside of the card. HOW PRECIOUS??? I love it!!! Here is a photo showing that off!

Open Heart Card, www.LaurasStampPad.com

I love this style the best!!!

Notecards, www.LaurasStampPad.com

These cards are a bit smaller than a regular size – more like a note card size! I love the bright colors and flowers. I really thought about taking the pieces and adding my own flare but I love the designs so much. There were a few greetings that I changed up because I didn’t care for it like Party Time. I’m just not sure I would use that greeting very much but there are tons of others for all occasions!

Full Size Cards, www.LaurasStampPad.com

The last 5 card are full size cards! There is lots of room to add Baker’s Twine loops (provided) and Enamel Dots. Here are so up close photos of some of my favorites!

Why Thank You, www.LaurasStampPad.com The stars and those loops add so much fun and texture!

Love You, www.LaurasStampPad.com

20 cards in one kit! I really did have lots of fun creating this kit and I would recommend it to anyone – beginners and advanced stampers. You can pick up your kit here! If you would like to see all of the contents, you can check out the Unboxing and Reveal of this kit in the video below or click here! Don’t forget to give this video a thumbs up if you liked it and be sure to subscribe if you are new!

Happy Stampin’

~Laura

Click here to start shopping and earning Bonus Bucks!!!

Bonus Days


Enjoy The Little Things!!!

Posted on

Enjoy The Little Things, www.LaurasStampPad.com

I got the Enjoy The Little Things Project Kit and Enjoy The Little Things Stamp Set months ago. I opened up the kit and thought it was very detailed and pretty! You can see all the supplies here! I just couldn’t decide what I wanted to do with this kit. I loved the little chalkboard easel and I loved all of the cards but I just didn’t think I would display this or have a place for it. So I held off all of these months and finally decided to just make it into cards! I always need cards and I loved the designs. I got 13 cards out of the kit and used only my own Whisper White for the card bases! I could have easily made many more cards with all of the supplies but instead made the cards just like the samples for the home decor piece! Here are more photos!

Cards For All Year, www.LaurasStampPad.com

There is a card for every occasion, season, and moment throughout the year! I love all the intricate details and pieces!

Golden Cards, www.LaurasStampPad.com

These 4 are my super favorites! I really like all of them but these are the best! I love the colors, the golden accents, and the designs!!! Let me know what you favorites are in the comments below!

Happy Stampin’

~Laura


You’re So Lovely!!!

Posted on

You're So Lovely Kit, www.LaurasStampPad.com

The You’re So Lovely Project Kit in the Occasions Mini Catalog peaked my interest the moment I laid eyes on it. The little foam roller just looked like so much fun…..and the diamonds!!! 🙂 I got the kit and opened it up with all of you. Check that out here! I was a little confused/worried about the foam roller and thinking how is that going to press into the template enough to make a mark. Well let me tell you I found out right away and there was nothing to worry about. I had so much fun rolling all afternoon, I couldn’t stop myself. It was super easy and the ink showed up perfectly with minimal pressure. I was so impressed! I loved it!

Treat Bag In Action, www.LaurasStampPad.com

Look at me going to town. You can see that the top portion has been rolled over the bottom hasn’t. The whole thing looks pink because I had done several of them. Another fabulous point, the foam roller hardly has any ink on it at all. It’s not all squishy and dripping (I’m a press dark, go dark type of person) and messy. You could probably touch it and it wouldn’t even barely leave ink on you. Once you are done with the templates, you can rinse them off or clean them with a baby wipe.

Template Trick, www.LaurasStampPad.com

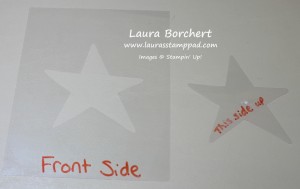
Speaking of template, I have a BIG TIP for you. Using a Sharpie Marker, write this side up or Front on your templates so that all of the die-cut images fit correctly. In the card below, the star is off-set because I did it with the template backwards so the die-cut star didn’t fit perfectly.

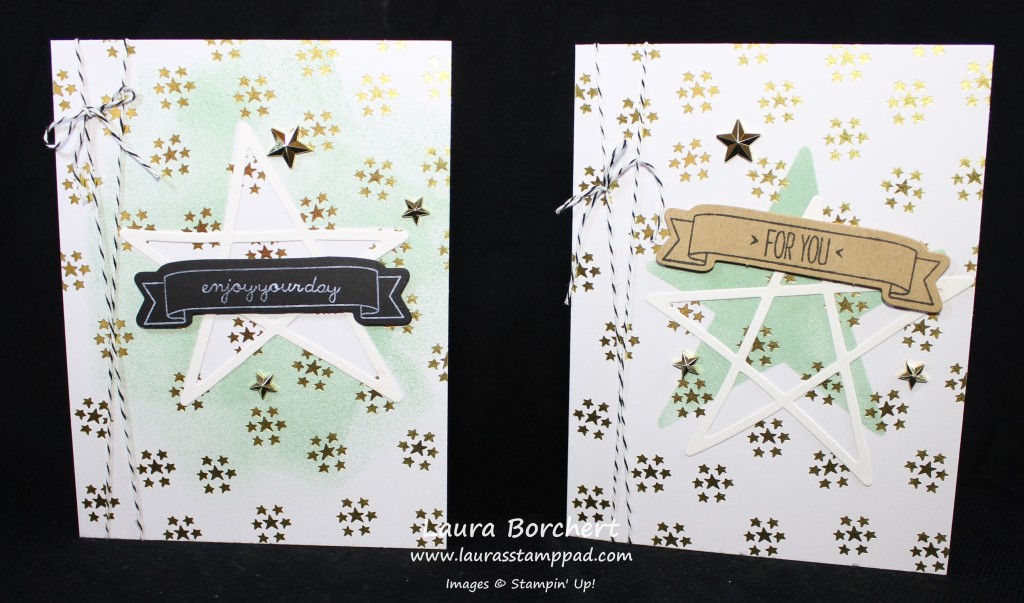
Stars Template, www.LaurasStampPad.com

I loved the star image on the gold foil star card front. All of the supplies on these cards are from the kit!!! I did get the coordinating You’re So Lovely Stamp Set for all the greetings and that banner outline! Also, I decided I liked the black chalkboard banners better than the kraft ones. I thought the kraft ones looked too rustic for the gold foil and star bling. There are enough of both to do all of the cards so it wasn’t a problem at all!

Butterfly Template, www.LaurasStampPad.com

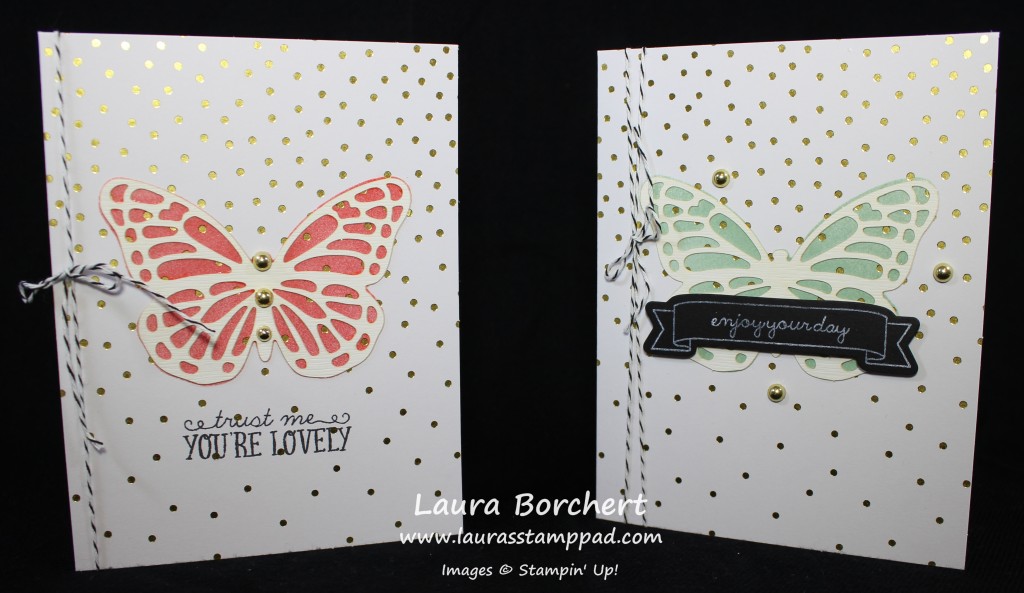
Oh how I loved the butterflies and just couldn’t decide which color I liked best. I squealed with excitement at the placement of the Gold Dots down the center of the butterfly. Love it!!!!

Diamonds are a Girls Best Friend, www.LaurasStampPad.com

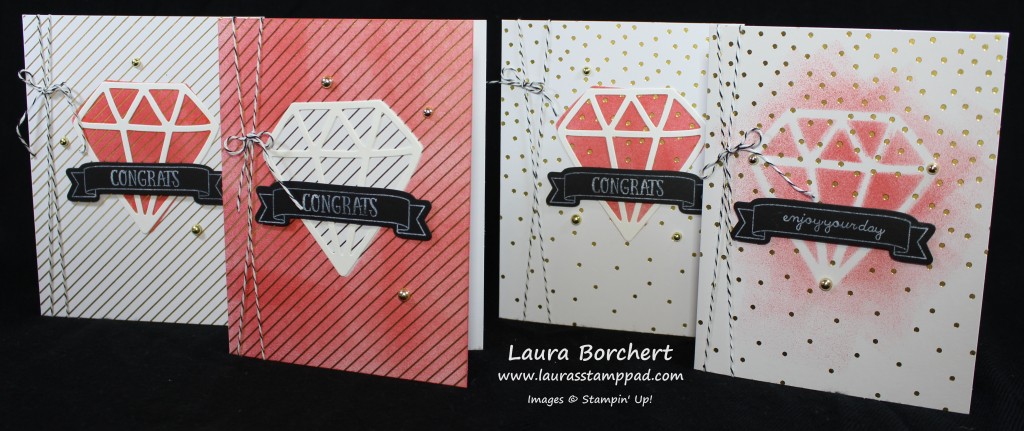
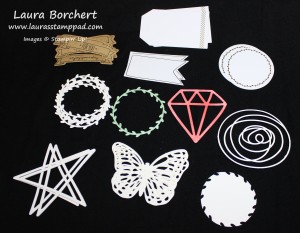
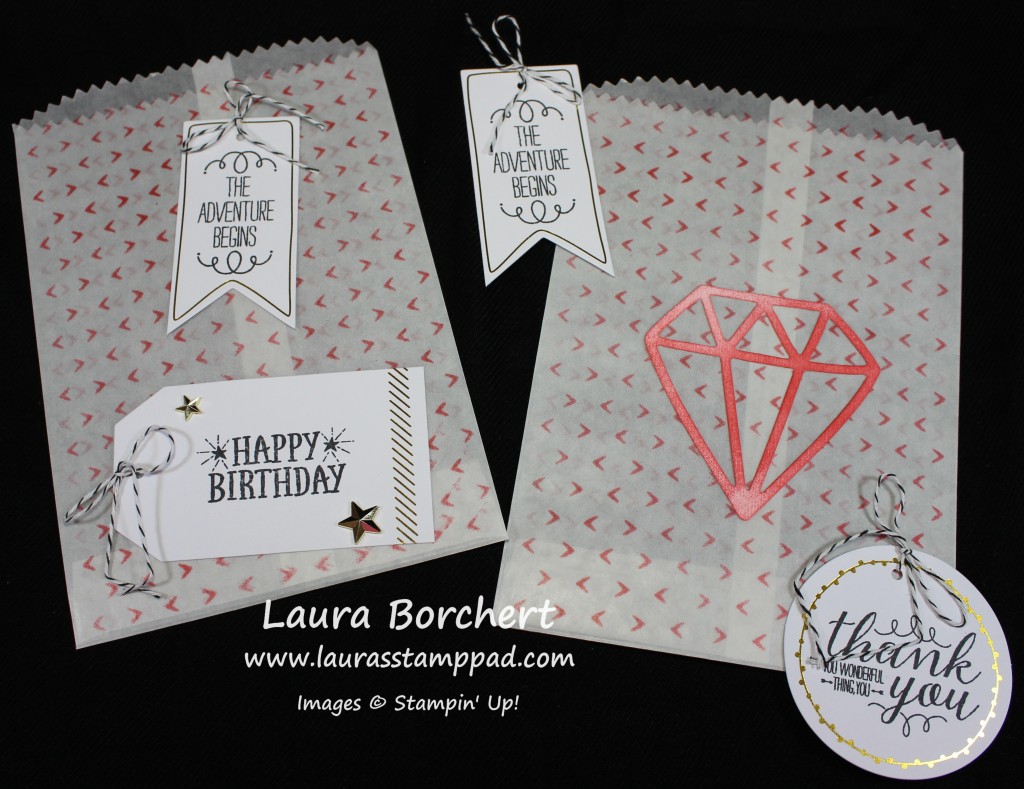
Diamonds are a Girls Best Friend!!! I started with the diamond and was having so much fun, I couldn’t stop. Then I realized I needed to play with the others as well. I did the full template with the far left, then I did the reverse template with the next one and for the far right, I laid the die-cut image down and wheeled over it. Wait till you see the treat bag with the Watermelon Wonder Diamond on it! Eeeeee So much fun!!!

Circles Template, www.LaurasStampPad.com

I played with these circles so much that I totally forgot about the wreath die-cut. I tell you that I had so much fun with this kit, I didn’t even know what I was doing.

Die Cut Pieces, www.LaurasStampPad.com

Look at all of these leftover pieces. There are tons of the wreaths since I didn’t use them. The image in far bottom right is the center of the wreath that looks like a Disk Blade. With my family being farmers, I thought I might be able to use them for a Man Card!

Treat Bags, www.LaurasStampPad.com

Here are a few of the treat bags. The kit creates 12 cards and 12 treat bags with tags! I really enjoyed this kit and can’t wait to use the templates and foam roller for many more projects! I hope you enjoyed all of these pictures. I’m telling you this is a fabulous kit and always remember that YOU’RE SO LOVELY!!!

Happy Stampin’

~Laura


Witching Decor….Spooky!!!

Posted on

Witching Decor Project Kit, www.LaurasStampPad.com


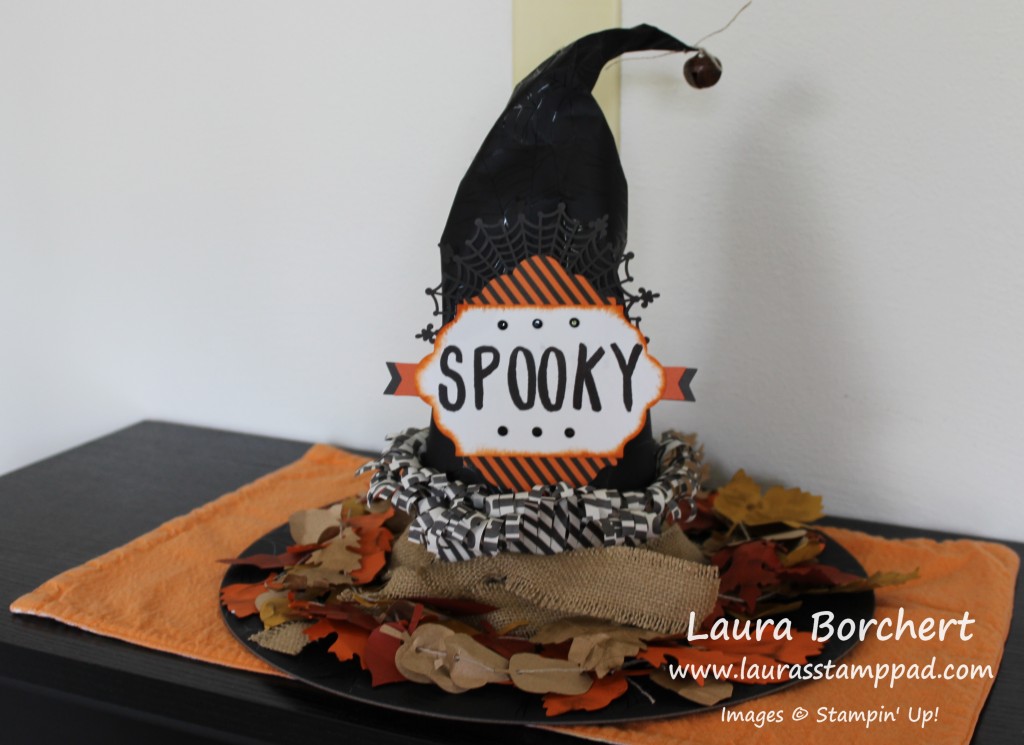
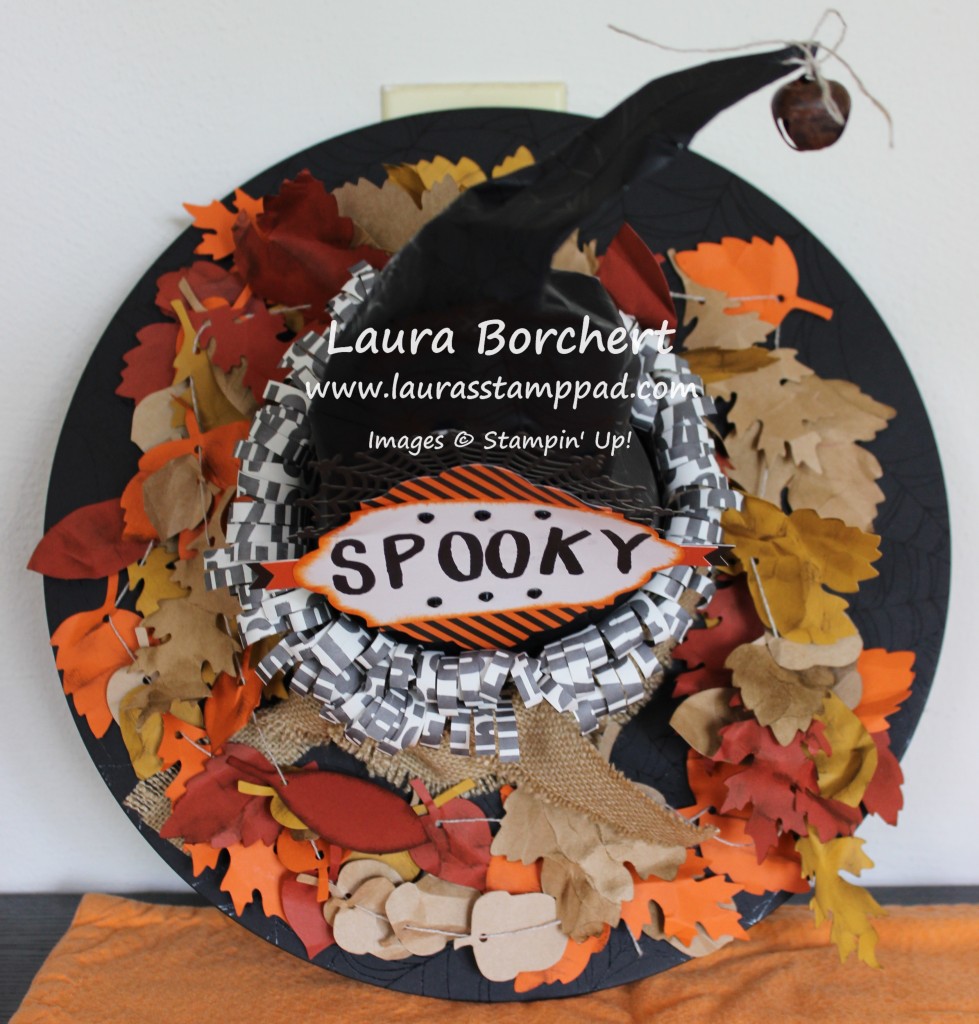
I really love how this Witching Decor Project Kit turned out!!! I’m not a huge Halloween fan but this will be fun to have out as a decoration!!! Love it!!! Don’t worry I took TONS of pictures/angles of this thing to show off all of the details!!!

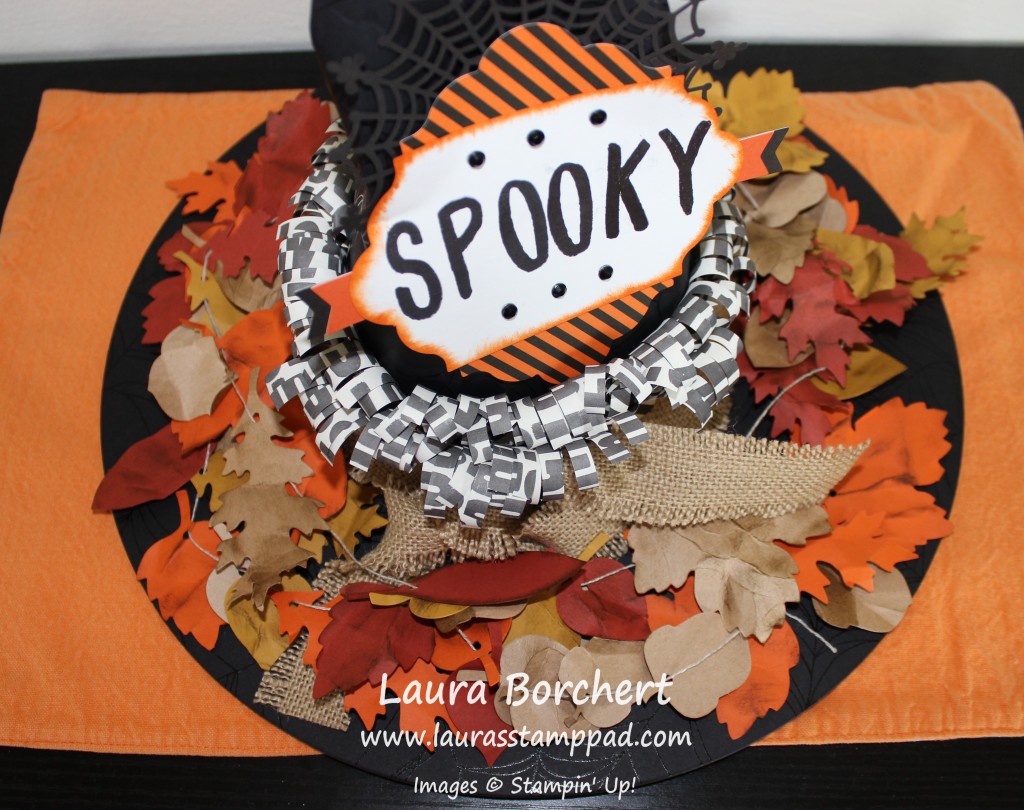
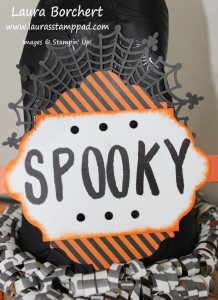
I started with the tag which this kit comes with tons of them so you can make mistakes (who does that?) or use them on other projects. Woot Woot! Again, since I’m not a huge Halloween fan, I decided not to get the coordinating stamp set – Witches Night! Instead I used the Layered Letters Alphabet Set and stamped SPOOKY in Basic Black and then brushed the edges with a Pumpkin Pie Sponge Dauber! I added the little black rhinestones from the kit to the top and bottom. The little banners on the sides were layered and then adhered on the ends of the tag. I adhered all of this to the orange and black striped label and added the Spider Doily to the back. I set this aside and started on the hat.

Witch Hat Kit, www.LaurasStampPad.com

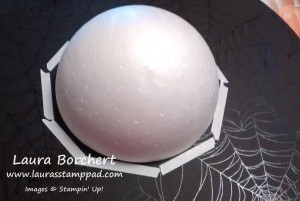
The bottom circle comes already black with a spider web clear embossed on it. Alone, it was really cool looking. The point of the hat is also the same pattern. I glued the foam dome to the hat with Multi-Purpose Glue and let it sit to dry. Before adding the top I placed stripes of Tear & Tape Adhesive around the bottom of the dome to adhere all of the tabs!!! Then I added the point of the hat. I had my husband help me because 2 hands just wasn’t enough to hold on to it, pull off the adhesive strip and keep it still!!! After you have the cone shape then you can peel off the Tear & Tape and adhere it down!!!

Foam Dome, www.LaurasStampPad.com

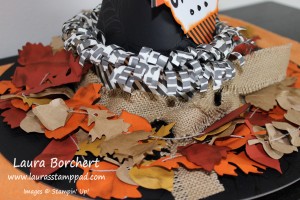
Now for the 2 things that took the longest….not the hardest but the longest – punching all the leaves out and fraying the burlap ribbon! Oh my I swear it took my a day and a half….okay really just like an hour. I squashed each of the leaves in my hands to get them some wrinkle and texture and then I used my Sponge Dauber and Soft Suede Ink to add some color.

Fall Leaves, www.LaurasStampPad.com

Now time to assemble. First I added the black and white fringe. I adhered the strips together with Fast Fuse and wrapped them around the cone of the hat (not on the bottom, up about 1/2″ to 1″) Then I wrapped the burlap around and tied it into a double knot. I did place a few Stampin’ Dimensionals in a few places to hold the ribbon either down farther or up higher so that it wasn’t just tight around the base. I wanted to to look loose but still hold in place! I adhered the greeting tag with Stampin’ Dimensionals as well but before attaching it, I scrunched and bent my hat so it wasn’t sticking straight up! I really liked the more ruffled up look of the scrunched hat rather than a straight pointy one.

Spooky Halloween Tag, www.LaurasStampPad.com

For the leaves, I took a large needle and looped the twine through and then went through all of the leaves. It was much easier and quicker this way. I had them all threaded up in like a minute!!! I did tie the first and last leave to the twine so that they wouldn’t slide off. Then I added a few Stampin’ Dimensionals around the base of the hat and used those as staking points for my leaves. So like 5 of the leaves are stuck on there (first one, last, one and 3 towards the beginning of the loop) but the are just laying all over.

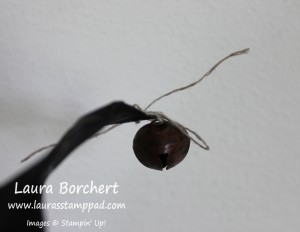
Bell, www.LaurasStampPad.comNow for the final touch – my favorite part!!! I used my Handheld 1/8″ Circle Punch to punch a little hole in the tip of the hat. Then I used the Twine and tied the little bell on!!! I think this is just precious. When I was carrying it downstairs to photo it, it jingled and I giggled! LOVE IT!!!

Witch's Hat, www.LaurasStampPad.com

So I had bought this kit thinking it would be cute on the front door BUT I think I have decided that it is too cute to put out there and I don’t think it would work. 1. All…or most….of the leaves would need to be tacked down because otherwise they are going to bunch up or hang off. 2. On it’s side like this, it’s not as cute. 3. I think I like it as a centerpiece instead!!! 🙂

If you would like to see the Unboxing and Reveal of this Kit, check that out below or by clicking here!!! If you liked it, be sure to give it a thumbs up! Click here to order your Witching Home Decor Kit so you can get festive this Halloween!

Happy Hauntin’

~Laura


Season to Season Wreath!!!

Posted on

4 Season Wreath, www.LaurasStampPad.com

This wreath is fabulous! I love the look and I love that I have my wreath all set from now until 2016!!!! Not having to worry about my wreath decoration during some of the busiest months of the year….sound amazing to me!!! The Season to Season Wreath Kit comes with all of the supplies to make this wreath including the foam circle!!! The kit comes with TONS of the leaves to fill the wreath too! I am usually the one that goes too close in the beginning and then runs out so I was very careful and what happened….I had tons left over. I used lots of the extras to fill in open holes but still had tons left over so that was awesome!!! Now here are some up close looks at each one!!!

Hello Fall Wreath, www.LaurasStampPad.com

I took a photo of each wreath on the inside and outside door as well as a close-up! This wreath I will hang up this month for Fall….maybe in a few weeks, I’m holding tight to Summer! 🙂 The kit includes the burlap ribbon and all the goodies for the banner. You will want to purchase the Cheer All Year Stamp Set to stamp on all of the die cut included in the kit. The little pom pom looking things are adorable too!!!

Halloween Wreath, www.LaurasStampPad.com

This wreath will go up in October for Halloween! I love the black and white striped ribbon!!! The bats, spider, and Boo are super cute too….well minus the spider. I really don’t like spiders even stamped ones!

Thanksgiving Wreath, www.LaurasStampPad.com

This wreath will go up in November for Fall/Thanksgiving! I love the leaves, especially the wooden element leaves in the kit. I used the burlap ribbon again for this one!

Christmas Wreath, www.LaurasStampPad.com

This one is my favorite! That Cherry Cobbler satin striped ribbon is AMAZING!!!! It is just beautiful! I did a two loop bow for this one. I really like the red sequins on the trees as well! Love it!!!

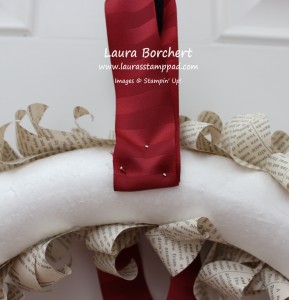
Ribbon Attachment, www.LaurasStampPad.com

Here is how I attached my ribbons and banners – with straight pins!!! It is really simple to do and to change out! It holds really well as long as you angle the pins in different directions!! You could also leave a spot open on the wreath with no leaves and have the ribbon loop around the foam. This would work if you ran out of leaves and still had foam showing.

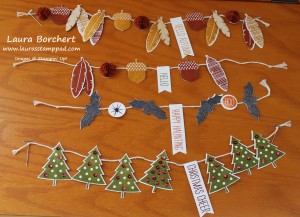
Holiday Banners, www.LaurasStampPad.com

Here are all of the banners. The kit comes with the twine and four T pins to use to attach to your wreath. I tied a knot in the twine and then pushed the pin through the knot. Some of the banners I pinned in across and some diagonal. It was really easy to do!!! This entire kit was pretty easy and didn’t really take that long. The longest part was the leaves on the wreath…..but I seriously think it is because I am not good with a hot glue gun! 🙂 Picking it up and setting it down and up and down is so not cool and time consuming. Tips anyone?

If you would like to see the Unboxing and Reveal of this Season to Season Wreath Kit, you can check that out below or by clicking here!!! If you are local and want to create this kit, I’m having a class on September 29th!!! Come over for stamping, chatting and gluing! Go home with a beautiful wreath!!!

Happy Stampin’

~Laura

Sweet Stack Project Kit!!!

Posted on

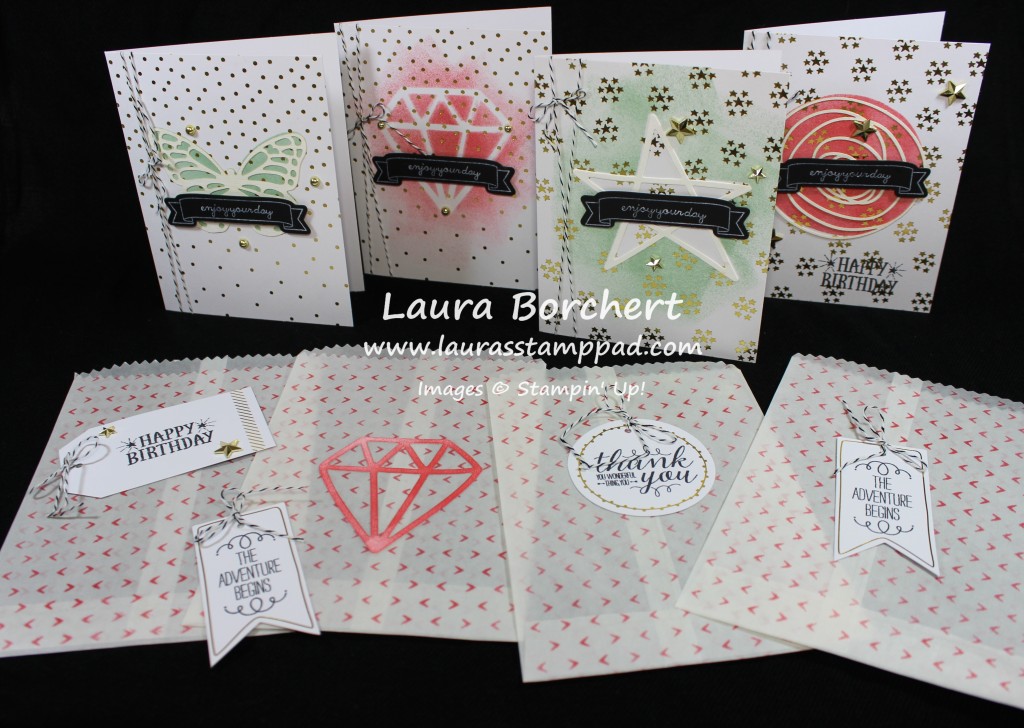
The Sweet Stack Project Kit is adorable! Who wouldn’t love to walk into a party and see this amazing cake sitting there and then find out you get to take a slice of cake home with you?!?!?! How fabulous? Thank goodness there is a kit for this because I don’t think I could have created something this amazing on my own!!! This kit is great for parties and events to put treats, gifts, favors, and so much more in. You could always decorate it specifically to your party theme as well!!!

Sweet Stack Kit, www.LaurasStampPad.com

See how pretty this is!!!! It wasn’t until I looked at these photos that I realized how off center my “cake” is on that pedestal. 🙂 This kit is super fun but I will admit there was a lot of repetitive stamping which seemed to last forever……especially those dots on the side of all 10 big slices!!! Otherwise this kit was fairly easy to put together!!!

The cake stand is really easy to assemble. I haven’t glued mine yet to the pedestal but you will for sure want to do that when you use this kit because I have knocked mine over a few times just having it in my craft room. (Although my husband said he wasn’t surprised so maybe I’m just clumsy!) The scallop border already has adhesive on the back so that was really simple to apply. You can have yours hanging off a bit like mine or all the way up. If it is hanging off a bit, be sure to store the box upside down as to not bend those scallops!

Cake Stand, www.LaurasStampPad.com

The cake slices are easy to assemble once the stamping is done. I found the stamping to take the longest. The instructions showed you where to stamp your top image for the top of the slice of cake and I didn’t like that. If you go by the instructions, your seam for assembling the cake is at the top and I wanted mine to be at the bottom (more hidden) in case I didn’t get it perfectly lined up. So I used the triangle in the middle as my top of the slice. Be sure to stamp your “cake layer” hearts from the Sweet Stack Stamp Set right side up on either side of the cake. For the greeting on the top, you can leave it blank or pick from a few different greetings from the Sweet Stack Stamp Set. I did mine all the same and like the photo on the instructions. I do like the way the candle sits right in the middle of it!! Also, for the “icing flap” I only used adhesive on the top so that I could still get into my box without ripping into it. You could always add a little more adhesive once you have stuffed the boxes and it is go time!!

Paper Cake Slice, www.LaurasStampPad.com

Paper Cake Slice, www.LaurasStampPad.com

For the candles, I was really impressed with this. I really wondered how you get the candle to stand up so well and Stampin’ Up really nailed it!!! It is super simple but I did a little modification. I took a 3/4″ Circle Punch and some scrap paper and stuck the candle to that circle for some added strength. This helped secure the bottoms and hold them up super easy!!

Glitter Candles, www.LaurasStampPad.com

Candle, www.LaurasStampPad.com

The banner came with tons of little banner so you could easily do a few different ones. I thought about doing Celebrate but I was short one “E” so I went with Congrats. I figured that would work for any occasion! I adhered my banners with a Stampin’ Dimensional and looped the twine through the top (not stuck on the Dimensional). This allows me to move my banners along the twine and even remove them and add more later if I wish! Love it!

You can see the Unboxing and Reveal of this kit in this video here! Then by request, I did another video showing the assembly of the kit here!!! Be sure to give it a thumbs up if you liked it and don’t forget to subscribe!!!!

If you would like to check out some of the other New Kits from the Catalog, I have enjoyed lots of them – Tin of Cards and Watercolor Wishes!!!

Happy Stampin’

~Laura

Watercolor Wishes Card Kit!!!

Posted on

Okay everyone, you know I like to be honest with you on Stampin’ Up’s kits…..some are hard but still rewarding and some are not my style and some are amazing!!! PS: I still have the flower bouquet in my kitchen and I love it but memories of putting it together still haunt me. Oh my that was a long process! With the new Stampin’ Up Catalog came LOTS of kits and I couldn’t wait to try them all out!!! You can check out the Tin of Cards here which was lots of fun and the tin is adorable! Then there is the Sweet Stack Kit which I have assembled and will be posting about that next week but until then you can check out this video! Then there is the Watercolor Wishes Project Kit…….I LOVE this one for a couple of reasons. 1. It includes everything you need in the kit – stamps, embellishments, and ink!!!! 2. The Stamp Set is amazing. You know I’m a sucker for a scroll-y font!!! Then I made all 20 of the cards in 65 minutes and really fell in love!!! Here they are for you to check out and fall in love! Watercolor Wishes Card Kit, www.LaurasStampPad.com

I used the provided instructions a little bit but then added my own flare on a few of them. For example, I didn’t embellish that Hello card in the middle at all. Also, I LOVE ombre so I had to do that a few times as well! I think I mixed up almost all of the die-cut stickers as well because I didn’t like one of the color combinations and so that threw them all off.

Watercolor Cards, www.LaurasStampPad.com

Okay so looking back at that center card, I’m even more in love. It is just STUNNING in it’s simplicity and with a little bling from the sequins! Another card that I changed up was the one on the far left. I left off the heart wooden accents because I thought it looked like a great Man Card.

Wooden Accents, Butterflies and hearts, www.LaurasStampPad.com

Here is the final set of all 20 cards…..by the way did you notice that it is 20 different cards and not X number of X style. Yeah, twenty different styles. LOVE IT!!! I did time myself just to see how long it took to do this kit and at the hour mark I still had 2 more to go so it ended up taking 65 minutes. That isn’t bad at all. The other awesome thing is look at all of these leftovers!!!!

Card Kit Leftovers, www.LaurasStampPad.com

Stampin’ Up always provided so much product in each of the kits. I still have Stampin’ Dimensionals, flowers, stickers, tons of Washi Tape, wooden accents and sequins left. Also, don’t forget I still have a fabulous stamp set and 2 ink pads. LOVE IT! To see all of the goodies in this kit, you can check out my Unboxing and Reveal Video here!!!! (Be sure to subscribe to my YouTube Channel because I’m almost at 1,000 and I will be doing a fabulous give-away when that happens)

Have you tried any of the kits? Which one is your favorite and why??? Let me know in the comments below!

Happy Stampin’

~Laura

Technique Tuesday – Tin of Cards!!!

Posted on

Happy Tuesday!!! That means I have a technique to share with you…..the “technique” this week is quick and simple and a wonderful gift item for anyone!!!! The NEW Stampin’ Up! Catalog has so many wonderful kits in it and I love each one of them. So far though, my favorite is the Tin of Cards Project Kit!!! I think the Mint Macaron and White striped tin is just adorable!! The kit makes 16 cards with envelopes and dividers for the tin to keep the tin organized! This is the perfect gift item for anyone! We all need cards to use throughout the year so this is perfect for any occasion (I started listing them but it went on and on)!!!

Tin of Cards, www.LaurasStampPad.com

Look at all of this! It is stunning and would make a wonderful gift!!!! Now lets get into the specifics!!!

Mint Tin for Cards or Recipes, www.LaurasStampPad.com

Are you swooning over this adorable tin like me??? I love it!!! The kit comes with 9 tabbed cards for you to create. There are lots of the Mint Macaron Designer Papers for you to pick from (and 1 extra) to adhere to the front. Then the Tin of Cards Stamp Set has these adorable 3 sided rectangle image that fits perfectly on each tab and then of course all of the card types – Birthday, Thanks, Sympathy, Wedding, Just Because, Baby, Hello, Congrats, Misc. You could always use this for a recipe card box and add other tags to those tabs!

Triangle Cards, www.LaurasStampPad.com

Here is the first set of cards! There are 4 each of 4 designs and coordinating envelopes. This set has these amazing die-cut card bases with that heart across the front. You just adhere the designer series paper in, stamp your greeting on the banner, and add some epoxy hearts! It’s that simple! You can always mix it up and turn your paper over like I did in one of them (that wasn’t a mistake). You can place your greeting and hearts any where you wish and you can use any greeting you need!!!

Gold Strip, Epoxy Hearts, www.LaurasStampPad.com

I love these the most I think!!! That gold foil POPS so much….even my photos were all shiny! I love it! I stamped the Happy on the gold foil and on the white card. The kit came with the white circles already with greetings on there (in lots of different languages) or you could always stamp a greeting from the Tin of Cards Stamp Set in the middle! I love the look of the Baker’s Twine behind a greeting but I think I need to practice some more…..mine all came out looking a little weird I thought. To finish these cards off, there are clear epoxy stars randomly placed on the card!!!

Wooden Accent Thought Bubble, www.LaurasStampPad.com

These cards were super quick and simple. The base was already printed with the Bermuda Bay strip. Adhere the Crushed Curry Designer Paper and stamp the border from the Tin of Cards Stamp Set along the top. It was easy to stamp the border because it is a Photopolymer stamp set and you can overlap the center since it is covered by the greeting. I was really impressed with the stamped image on the wooden accents. It came out really clear and bold. I was thinking it would look all grainy and light. Woot Woot for that! Then finish it off with the die cut gold glimmer hearts. I wanted the one to be more manly so I just put 2 hearts on another one!!!

Layered Butterfly Window Sheet, www.LaurasStampPad.com

These cards are amazing but they took a little bit longer. All of the butterflies came die cut out already. The vanilla solid butterfly is stamped with a greeting to match the main greeting. Then I used Mini Glue Dots in the center of the butterfly to adhere the yellow one onto the vanilla one. I used them for the coral medium butterfly as well. For the little butterfly I used the curly border stamp to create a center. I also stamped that border on the top and bottom of the card base. The original card base comes with that rectangle popped out and you adhere the polka dot window sheet over that cut out. Behind the big butterfly is some gold thread that is wrapped in loops and peaking out. You really can’t see it in these photos. Now add your butterflies and greeting and you are all set.

Tin of Cards leftover, www.LaurasStamPPad.com

Also, look at all of these leftover pieces – 8 white circles, tons of gold foil strips, gold thread, 4 banners, white hearts, and a mint maracon piece of designer paper!!!

To see all of these up close and in action, be sure to check out my Video Tutorial here!!! You can also check out the unboxing and reveal of this kit here! Be sure to give the video a thumbs up if you liked it and let me know if there is something you would like to see in action and I’ll do my best to make it happen!

Start thinking of those upcoming holidays and gifts that you need so you can order these kits now!!! Click here to get yours today!

Happy Stampin’

~Laura

Hooray It’s Your Day!! (Part 2)

Posted on

Sunshine Template, Hooray It's Your Day, www.LaurasStampPad.com

Welcome back!!! Today is Part 2 of the Hooray It’s Your Day Card Kit from the Occasions Mini Catalog! If you missed Part 1 yesterday, you can check that out here!!

I LOVE this card….which is why I paired it with the Melon Mambo envelope! <3 It was super fun to make and you can make tons of them because the template in the kit is reuse-able! Again, I used my Sponge Daubers for this one rather than the included spritzer. I like to have more control over my color  and get a strong line image. I love the bright colors and bold look of this sun! You could always do it in other colors as well. Many of my stampers at the class I held on this kit did Melon Mambo. They sure know the way to my heart! 🙂 TIP: If you drop your sponge dauber down at the center circle of this template and rub out on each ray you will get a fabulous ombre look. It will be really dark around the center and lighten up as you go out! It looks amazing!!! I stamped my greeting from Age Awareness and add all the little goodies which were provided in the kit. I would love to do this card with a greeting stamped in the middle of the sun and maybe some Dazzling Details! That would be awesome too!!

Scallop Template, Hooray It's Your Day, www.LaurasStampPad.com

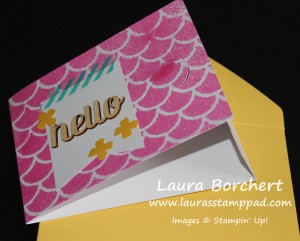
Now for the final card! This card comes scored and cut with that little tab! How cute is that? I used the scallop template for this one and used my Spritzer with Melon Mambo Re-inker in it (Alcohol 70 Proof or less and as few or many drops of re-inker you wish). I love the look of this card as it makes me think of a mermaid but you can see how the lines are very distinct and the colors vary across the card. It looks cool but the OCD in my goes a little crazy. When there is a spot that doesn’t have ink or enough ink, I spritz and spritz and then over do it. Ehhh What are you going to do? Remember less is more! 🙂 I added the wooden greeting and the tag. The little flowers came in the kit but are white so I pounced a few times on them with my Daffodil Delight Sponge Dauber and make them yellow! 🙂 Love it! Here is another photo showing that tab look of this card!

Scallop Template, Hooray It's Your Day, www.LaurasStampPad.com

I was really impressed with all of the goodies that were included in this kit and how amazing the cards are! I really loved making them and seeing what my other stampers came up with in the class!

Hooray It's Your Day Kit

Here is another snapshot of all of the supplies! And here is 1 set of all of the cards. The kit makes 5 each of these!

Hooray It's Your Day Card Kit, www.LaurasStampPad.com

Be sure to get your kit before it is gone on June 2nd! Click here to get yours! I hope you enjoyed these and if you make these cards and add your own flare I would love to see what you come up with! Please share in the comments below!

Happy Stampin’

~Laura