On the 6th Day of Stamps-Mas!!!

Posted on

On the 6th Day of Stamps-Mas, my true love gave to me…..Embellishments!!! What are your favorite ways to embellish your projects – Bling? Enamel Shapes? Sequins? Ribbon? Washi Tape?

6thDayofStampsmas, www.LaurasStamppad.com

I have fallen in love with Enamel Shapes!!! They come in lots of different colors – Brights, Subtles, Regals, Metallics, and 2016-2018 In Colors.   I love that they aren’t super bulky. I love that they come off the clear sheet packaging without popping off of the adhesive backing (at least I haven’t had a problem yet). I love that they come in all the colors!!! I will say it can be difficult to do a big project and need just 1 color. Then you have to purchase an entire color family just for that one color. So my tip for that is to always use the Enamel Shapes in multiple colors. If your card is Rich Razzleberry with Island Indigo and Crushed Curry, then use one of each color or use one color on the first card, another color on the second, and so on. That way you are spreading out the usage. Another tip is to share with another stamper friend and if that person needs red and you need blue, then you swap colors!!! 🙂

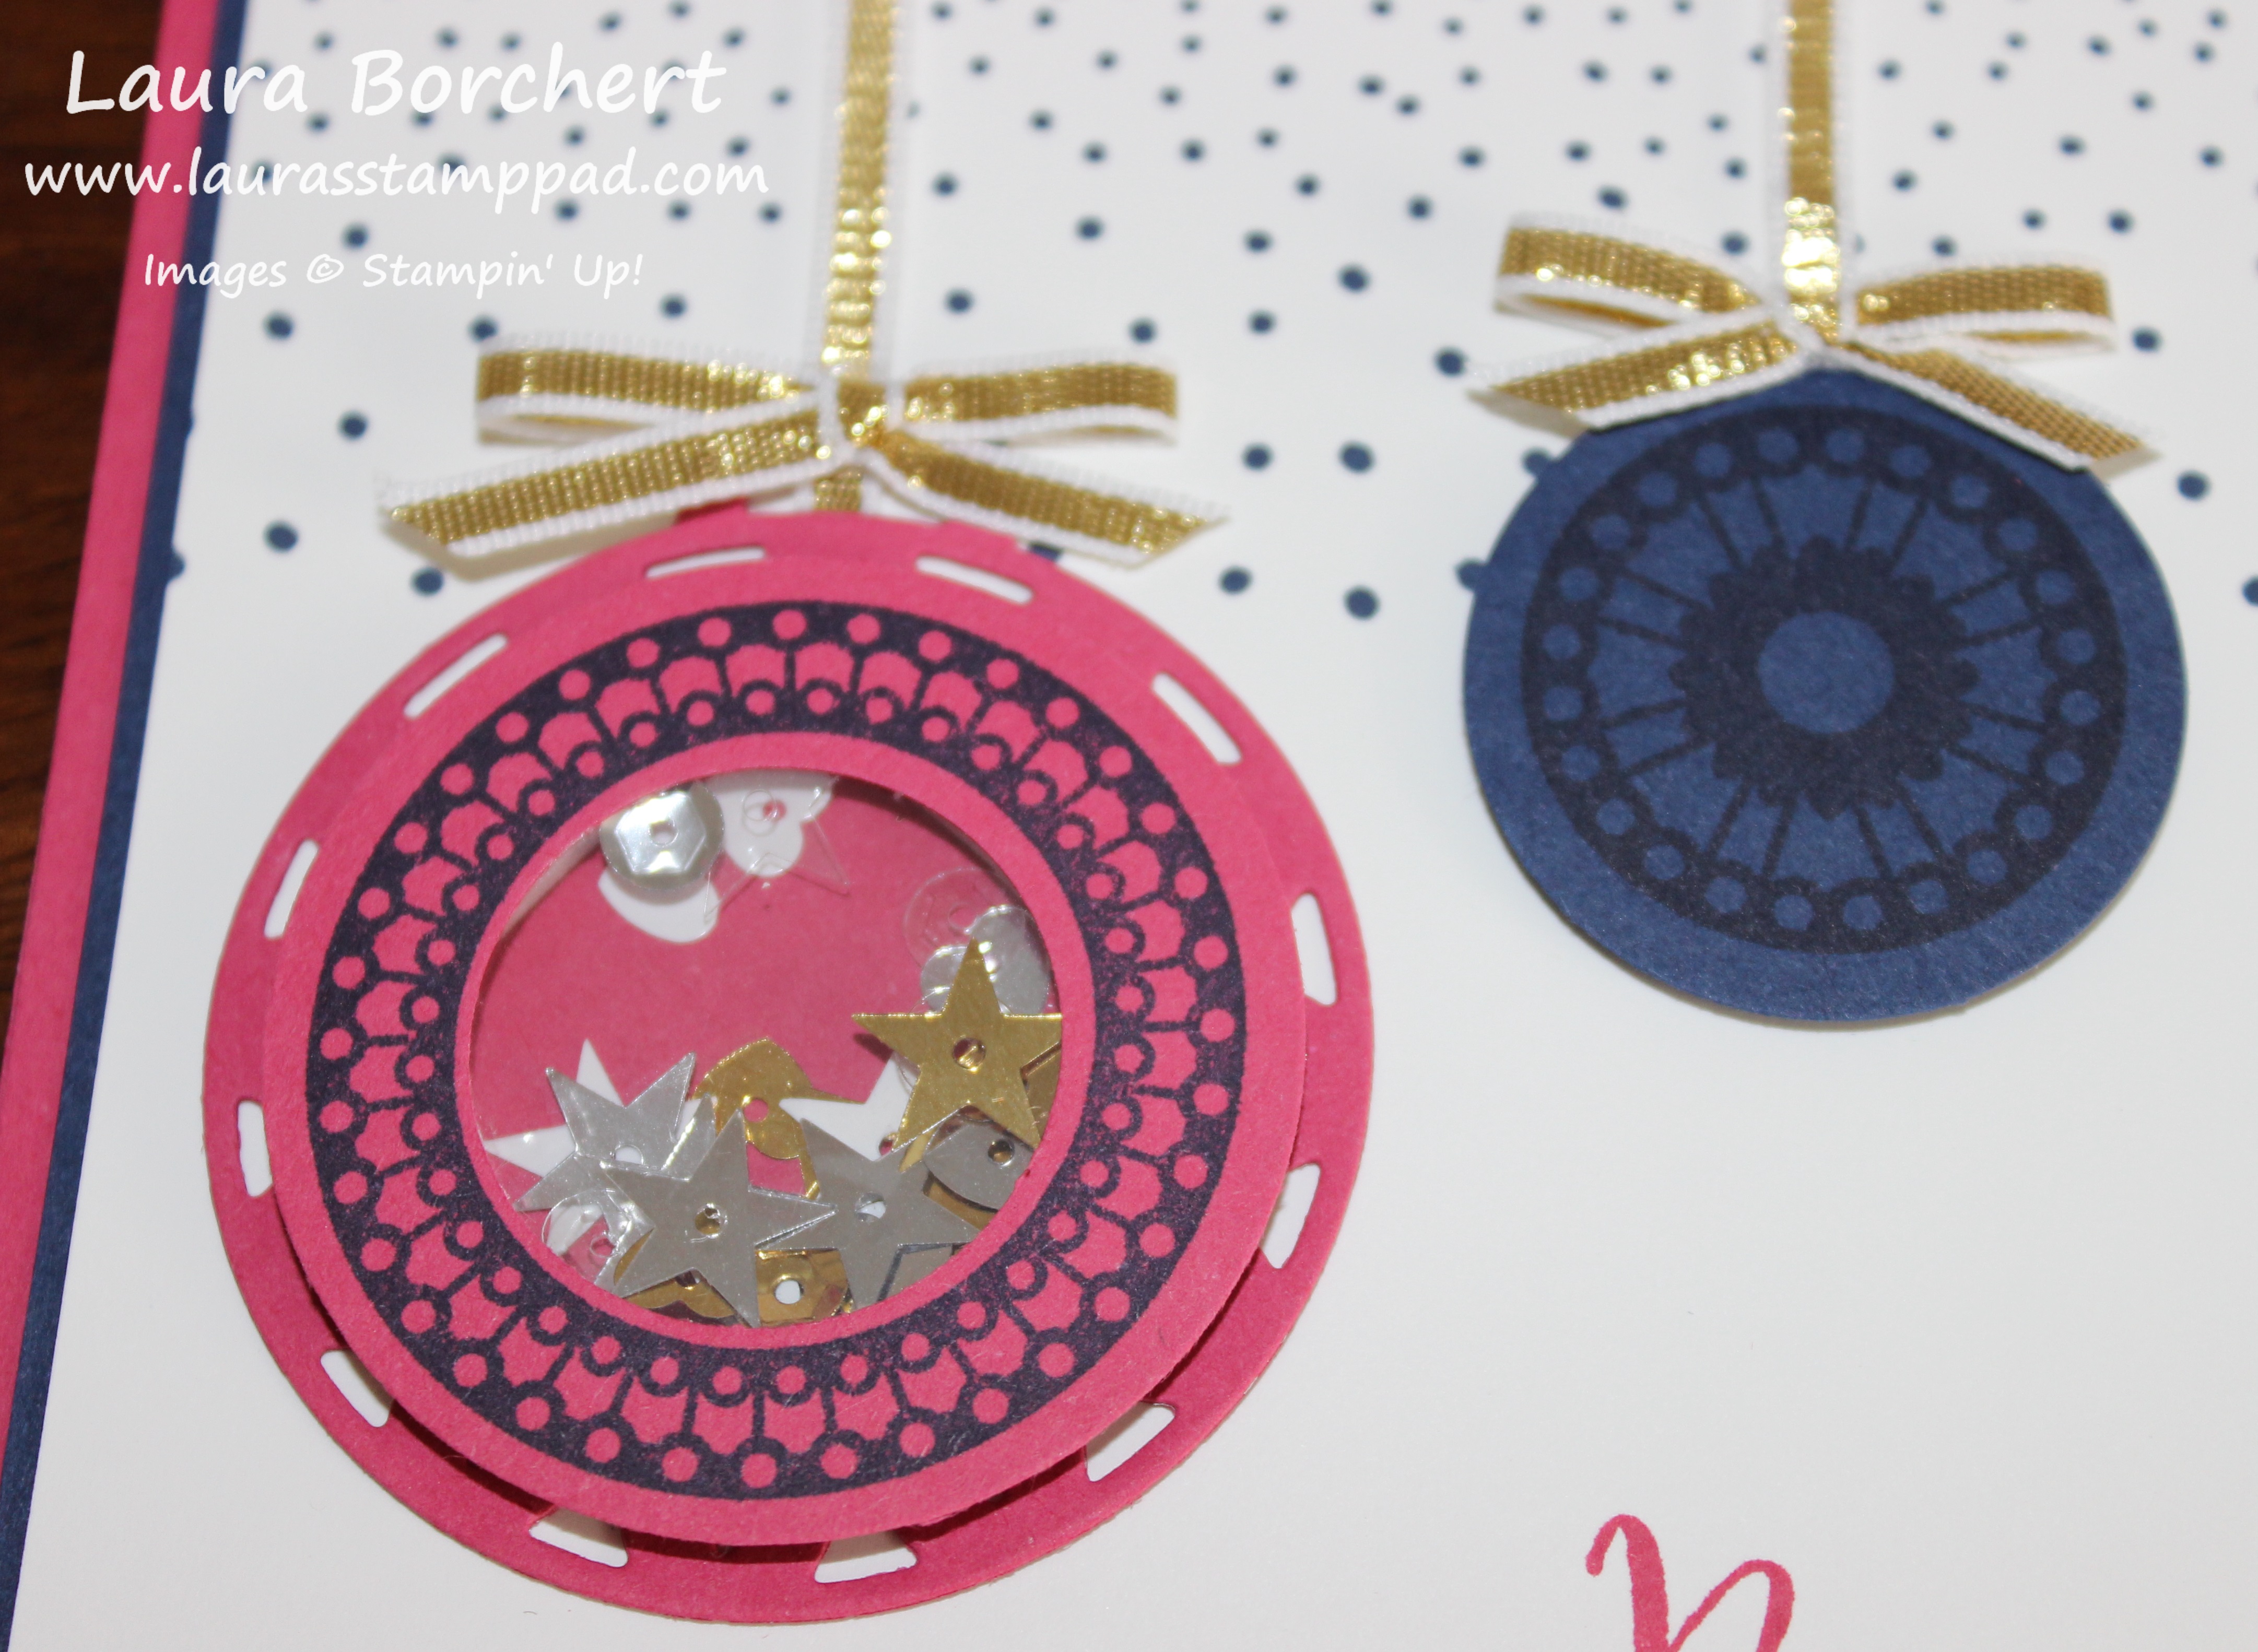
Sequins are fabulous because of the bling they offer but they are something I always kind of forget about. They come lose in a container in Brights and Metallics. You can also get Sequin Trim in Bermuda Bay, Blushing Bride, Silver, and Gold. I love using the trim in with ribbon on gift packaging like this fabulous one below! big-shot-giveaway-gift

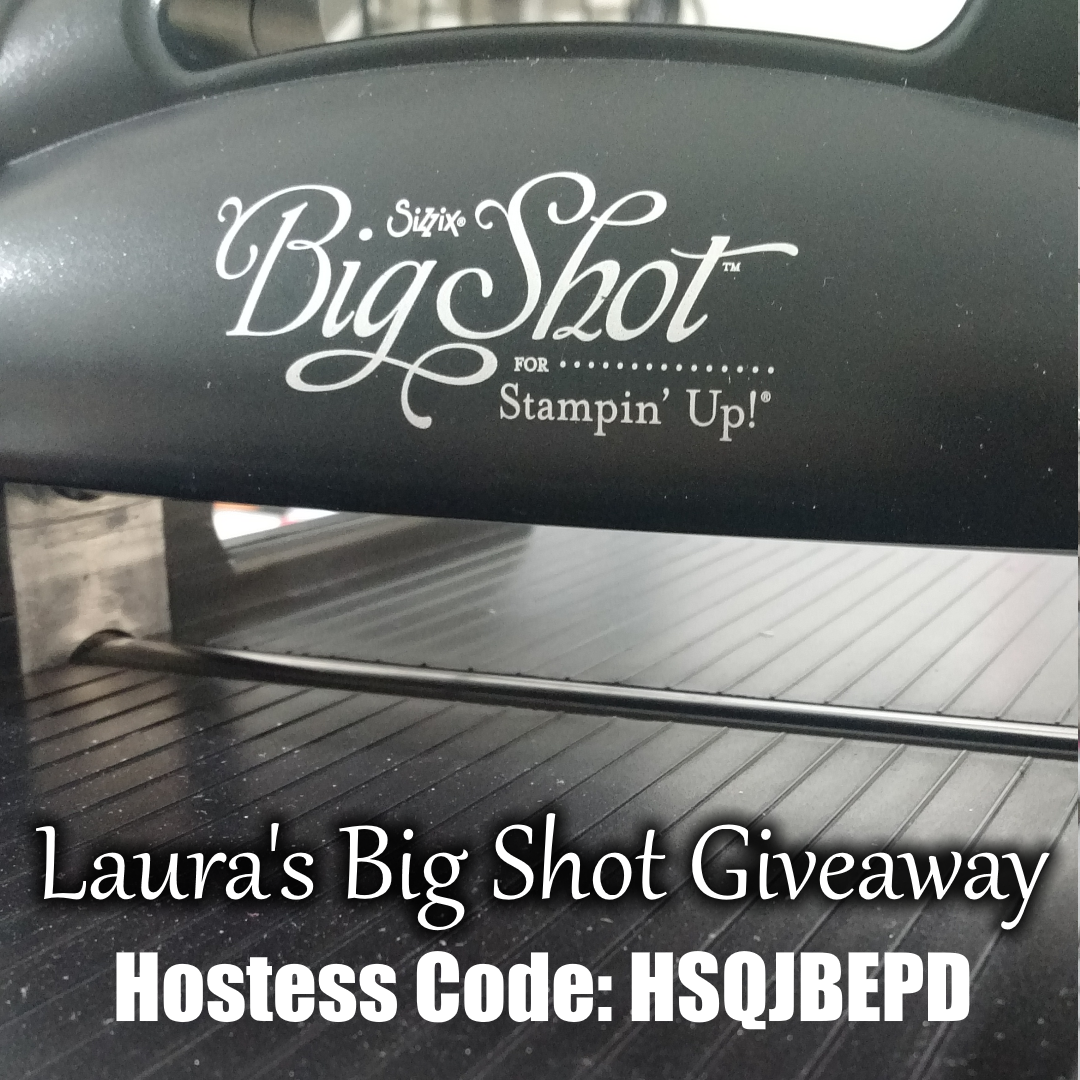
This is the Big Shot that I wrapped up for the Giveaway!!! It looked so fabulous!!! You can also cut the trim and pull off the sequins to use individual. I find the Fine Tip Glue Pen is perfect for adhering them onto a project!

Washi Tape is super fun to use in so many different ways. You can rip it or cut it. You can wrap it to the back side of your cardstock when creating a background. You can use it like tape to hold something in place on a card or memory keeping. You can use it to make a border or background or anything. I love how Stampin’ Up has coordinating Washi Tape with a lot of the Designer Series Paper. It makes it so much fun to use together. Washi Tape comes in lots of different patterns and widths. You can check them all out here. One tip I do have to say about using Washi Tape is try to handle is as little as possible. It may not seem super sticky or problematic but I have found that when I touch the backside of it a lot, the oils/dust/whatever from my hands make the sticky not as strong and then sometimes it will curl and not stick. To see some quick and simple background techniques, check out this post and this post!

You can check out all of the Bling Embellishments in Day 5 of Stamps-Mas and stay tuned for Ribbon!! I hope you didn’t miss Day 1Day 2, Day 3, and Day 4 of Stamps-Mas!!! Be sure to subscribe so you don’t miss out on the rest of the days! You can do that on the right hand side-bar online or at the bottom of the page if you are on a phone!

Happy Stampin’

~Laura


On the 5th Day of Stamps-Mas!!!

Posted on

On the 5th Day of Stamps-Mas, my true love gave to me…..BLING, BLING, BLING, BLING, BLING!!!! Did you all sing that with me?? I know I sure did!!! In honor of the 5 Golden Rings, I thought I would do BLING – Rhinestones, Pearls, Glimmer Paper, Foil Paper and Dazzling Details!!!

5thday of Stampsmas, www.LaurasStampPad.com

Pearls & Rhinestones are the perfect little pop of bling to add to any project. I love adding a few randomly for some texture and bling. Add one to the center of flowers for a pop of color or on either side of a greeting!

Foil Paper comes in Gold, Silver, and Copper! This paper is super shiny and fun to work with. I find that it goes through the Big Shot in Framelits and Thinlits fairly easy (sometimes better than Glimmer Paper since it is chunkier). It is also better for layering than Glimmer Paper. It works perfect for man cards too which a little shine for tools and other looks!

Glimmer Paper is just so fabulous and bling-y! It comes in Red, Gold, Silver, Blushing Bride, and Dazzling Diamonds (like white). I love using this for lots of bling on my card but not having to work with powder glitter that gets all over. This glitter may have a piece or 2 rub off on your hand but it will not be all over. You can use it with Framelits & Thinlits in the Big Shot but be sure to crank it through a few times to get all the way through the paper. One of the downfalls to this paper is I find it difficult to adhere things to the top of it. So using it as a background is not ideal but I tend to use it as an accent or front and center piece anyway!!! Who wants to hid it? It’s fabulous!!!

Dazzling Details is my other favorite form of glitter because it isn’t powder glitter that gets all over. If you haven’t picked up on it yet, I’m not a fan of powder glitter after I dropped an entire tub of it all over myself. 🙂 This glitter is in a squeeze bottle with a fine tip. You can add it along the edge of an image or dotted all around. You don’t need a ton of it or it will take forever to dry but it adds the perfect amount of bling! It comes in Silver and Gold.

What is your favorite form of Bling? Do you like powder glitter? Let me know in the comments below!

Have you been following all the Days of Stamps-Mas? If not you can check out the past days here, here, here, and here. Be sure to subscribe so you don’t miss the rest! You can do so at the bottom of this page (on your phone) or on the right hand sidebar (on your computer).

Happy Stampin’

~Laura


Shaker Card Ornaments!!!

Posted on

shaker-ornament, www.LaurasStampPad.com

Shaker cards are so much fun so why not combine shaker cards with holiday ornaments and create lots of FUN! The color combination, the fun greeting, and the shaker card magic make this card so wonderful!!!

I started with a Rose Red card base. Then I took a piece of Night of Navy (4″ x 5-1/4″) and Whisper White (3-7/8″ x 5-1/8″) for the next layers. I stamped the greeting from the Merriest Wishes Stamp Set in Rose Red Ink on the bottom right corner. I used the dotted image from the same set and stamped it in Night of Navy Ink twice along the top to look like snow falling….or just a cool background! For the ornaments, I used various images from the same stamp set. I stamped the large circle in Night of Navy Ink onto Night of Navy cardstock and die cut with the circle frame from the coordinating Merry Tags Framelit Set (Bundle & Save 10%). I stamped the large circle image (the one without a center) in Night of Navy Ink onto Rose Red cardstock. You can either punch these out or use your Layering Circles Framelits to do the center and the outside circle. Be sure to keep that inside circle though!!! Die cut out the large ornament from the Merry Tags Framelits and place the stamped circle over top of it. Place the punched out center back in the middle of the ring you created. Now remove the ring but hold the middle circle in place. You should be left with the middle circle in the middle of the large ornament. This is so you can find the spot on your ornament for the shaker pieces so you don’t have to flip it over later when the sequins are inside. Now you will want to trace the punched out circle with a pencil. I lightly trace out farther rather than close to the circle so I am wide enough and the adhesive doesn’t show in the window. Now that you have your traced circle you can remove it and place some Foam Adhesive Strip around your pencil mark. If you traced right next to the circle, make sure your adhesive strip is out farther than that circle. Next I filled the open hole with all the sequins from the Metallic Sequin Assortment.  You can use punched pieces, sequins, or silica gel colored to match your project. It is all up to you. You can see other samples using those items here and here as well as Video Tutorials! Now that you have your goodies in there, I placed a circle of Window Sheet over the top to seal in the sequins. You can use the same punch or Framelit you use for the larger circle. Then I added the ring that I stamped and punched out over the top as decoration!

Shaker Sequins, www.LaurasStampPad.com

For the ribbons attached to the ornaments, I used Gold Ribbon and adhered the end behind the ornament and then wrapped it over the top of the cardstock. I tied little bows and added those on top with a Mini Glue Dot. Now you can add this layer to the Night of Navy and the card base!!! Fun little holiday card with non-traditional colors!!!

Today I did an Up Close & Personal look at the Layering Circles and Layering Ovals Framelits, you can check that out below or click here! I have been loving these for greetings and so much more. The scallops are just perfect for adding a little pop of fabulousness! Be sure to give it a thumbs up if you liked it and don’t forget to subscribe if you are new! Let me know in the comments below if there is a product you would like to see Up Close & Personal and I will do my best to make it happen!

Happy Stampin’

~Laura

yearendcloseout_shareables_eng_2

Don’t forget to shop the Year End Clearance Sale!!! Click here to check out the fabulous products!!!


Golden Stockings!!!

Posted on

gold-purple-stockings, www.LaurasStampPad.comFor some reason when I first saw the Hang Your Stocking Bundle (Save 10%), I saw rich, elegant stockings that had to be done in gold and purple! I’m not really sure where that came from but this was the result!!! While it isn’t my favorite card this holiday season, I really like how it turned out!

I started with an Elegant Eggplant card base. Then I took a piece of Perfect Plum measuring 4-1/4″ x 5″ and rounded the bottom 2 corners with the Corner Punch. I liked the soft look of the rounded corners and I picked this length because it was the same as the Noel Thinlit. For all of the pieces, I used the Christmas Stockings Thinlit Set. I die cut the Noel, stocking top, heel, and toe, and the swirly overlay in Gold Foil Paper. Then I did 2 solid stockings and the stocking top in Elegant Eggplant. I adhered all of the pieces to build the stocking with the Fine Tip Glue Pen. I added a little loop of Gold Thread from the Baker’s Twine Trio Pack to the corner of the stockings and secured it on the back under a Stampin’ Dimensional. I added more on the heel and toe to help secure the stockings to the card. Now to add all of this to the card front, I slide the loop of gold thread over the Noel die-cut and added that to the card front with the Fine Tip Glue Pen. Then I pulled the backs of the dimensionals off and placed the stockings down.

purple-stocking-inside, www.LaurasStampPad.com

Since the Elegant Eggplant is such a dark color, I added a Whisper White piece (4″ x 5-1/4″) to the inside. I rounded the corners with Corner Punch and stamped the greeting from the Hang Your Stocking Stamp Set on the inside. That is the only stamping I did on this card! Love it!!!

You can check out more samples using the Hang Your Stocking Bundle by clicking here and here!

Happy Stampin’

~Laura

Cut For Christmas, www.LaurasStampPad.com

Need help getting your Christmas Cards complete this year! Let me do all of the cutting for you! I have 5 cards in my Cut For Christmas Offer to pick from to help you get started!


Gold Ornaments!!!

Posted on

golden-ornament, www.LaurasStampPad.com

Happy Thursday!!! We are almost to the weekend and I’m sharing a fabulous card with you today that I thought wasn’t going to finished. Once I did finish it, it turned into this amazing card that I thought “WOW, I love that and think I will use it in a class!” Do you ever have one of those moments while crafting that something doesn’t turn out like you wanted or you get started but then take it a different direction and toss what you were doing aside? That is what happened here. I die cut the gold ornament and had some other designer paper ready but didn’t like the look. I tossed it aside but at the end of the day, I thought just finish this card and use it personally…..and then this happened! I LOVE IT!!!

I started with a Whisper White card base measuring 4-1/4″ x 11″. Then I took a piece of Cherry Cobbler (4″ x 5-1/4″) and layered some of the Presents and Pinecones Designer Series Paper (3-3/4″ x 5″) on top. This wasn’t my favorite paper at first glance but I have been using it a lot this season. You can see more samples using it here and here! I die cut the ornament out with the Merry Tags Framelits in Gold Foil Paper. You should totally go for it and get the Merriest Wishes Stamp Set so you can Bundle & Save 10%. I have loved using this stamp set and you can always use one of the greeting on the inside of this card! After die cutting out the ornament, I placed an Emerald Envy Circle on the back that I punched out with the 1-3/4″ Circle Punch. Then I slide a piece of the Emerald Envy Silky Taffeta Ribbon through the ornament top and placed a Stampin’ Dimensional on the back to hold the end of the ribbon and to adhere to the card front. Add a few more dimensionals and then place the ornament on the card with the other end of the ribbon going over the top of the Cherry Cobbler and secured to the back. Once the ribbon is secured, you can add this to your card base. To finish it off, I tied a bow with some more of the Emerald Envy Silky Taffeta Ribbon and secured it to the top of the ornament with some Mini Glue Dots! Now you are all done! You can add a greeting of your choice to the inside if you wish! I just love the colors and that gold shine and silky ribbon!

If you would like to see this all in action, check out my Video Tutorial below or click here. Be sure to give it a thumbs up if you liked it and don’t forget to subscribe if you are new! I post every Tuesday and Thursday!!

Are you done with your Christmas or Holiday card yet? Have you started on them? Let me know in the comments below! I have my envelopes stamped with my return address and a postage stamp on them. I have a few more classes that I need the samples for and then I will start writing them out, making more, and stuffing them in the envelopes. I like to have them done by the end of November and ready to mail out in early December!

Happy Stampin’

~Laura

TODAY IS THE LAST DAY to enter the Big Shot Giveaway! I will be drawing the winner of the Big Shot tomorrow at 1:00 p.m. Central Time on a Facebook Live Video. Click here to join my Facebook Page!

Big Shot Code:HSQJBEPD, www.LaurasStampPad.com


Technique Tuesday – Hand Sanitizers!!!

Posted on

Happy Tuesday!!! That means I have a fabulous technique to share with you and this one is perfect for this time of year – gift giving!!! These little hand sanitizers are perfect for stocking stuffers, Secret Santa, and hostess gifts…..but they are perfect for all year long as well!

Hand Sanitizer, www.LaurasStampPad.com

Aren’t they fabulous??? I got the idea from Meg Loven who shared this at one of our Team Meetings!! They are perfect for sitting on your desk, coffee table, or even in your purse!!! Let’s get started!

SUPPLIES NEEDED: Cardstock, Designer Series Paper, Favorite Greeting, Punches or Framelits, Embellishments

Starting with a piece of cardstock measuring 1-7/8″ x 11″, you will score at 2″, 3″, 6-1/4″, 7-1/4″, 9-1/2″, & 10-1/2″. You can get lots of these out of one sheet of 8-1/2″ x 11″ which is awesome. TIP: If you are using all of the 8-1/2″ x 11″ sheet of cardstock, be sure to score the entire sheet and then cut it into strips, this will save time and less scoring. 🙂 Fold on all of the score lines. On the end with the 1/2″ tab, you will need to punch out a hole for the top of the hand sanitizer to fit though. I used the 3/4″ Circle Punch and slide in it, centered it, and made sure I was just over that first score line and into the 2nd “box”. Now that you have your hole in there, add some Fast Fuse Adhesive to that 1/2″ flap, place your hand sanitizer in there and adhere it to the back panel. I like to use Fast Fuse or Tear & Tape for this because it has a nice strong hold. If you would like, add some Washi Tape around the neck of the bottle to coordinate with your decoration and designer paper! Now you can decorate with Designer Paper of your Choice. You will need 3 pieces measuring 1-5/8″ x 3″ (back panel), 1-5/8″ x 2″ (bottom front), and 1-5/8″ x 1-3/4″ (top flap). You can always add these pieces before putting the hand sanitizer in but just be sure you have them right side up if the pattern requires that. I used Pop of Pink Designer Paper, Presents & Pinecones Designer Paper, Affectionately Yours Designer Paper, and Candy Cane Lane Designer Paper in all of the samples pictured.

reindeer sanitizer, www.LaurasStampPad.com

For the decoration, you can use your favorite greeting or image. For the one above and the gingerbread man, I used the Cookie Cutter Christmas Stamp Set and coordinating Cookie Cutter Builder Punch (Bundle & Save 10%). The Be Joyful is from the Merriest Wishes Stamp Set. I really just had so much fun playing with different greetings, designer paper, and ribbons! For the decoration, I added it to the bottom half of the hand sanititzer and added it with Stampin’ Dimensional on the lower portion only. This is so the top flap can slide under the greeting/reindeer/image and hold closed. You could also use a little piece of velcro too!

fill-me-with-happiness, www.LaurasStampPad.com

This one uses the Papillon Potpourri Stamp Set and Bitty Butterfly Punch! Let me know which one your favorite is in the comments below. I’m thinking my favorite is the butterfly and reindeer ones!!

If you would like to see this all in action, check out the Video Tutorial below or click here! Be sure to give it a thumbs up if you liked it and don’t forget to subscribe if you are new! I post videos every Tuesday and Thursday!

Happy Stampin’

~Laura

Only 2 more days left to get a chance at winning a Big Shot!!! Check out all the details here!!!

Big Shot Code:HSQJBEPD, www.LaurasStampPad.com


Forever Evergreen Project Kit!!!

Posted on

Forever Evergreen Supplies, www.LaurasStampPad.com

When I first looked at the Holiday Mini Catalog and saw the Forever Evergreen Project Kit, I was like I need those!!!! The trees look perfect for decoration on an end table or buffet for the holidays!!! I’m not exactly sure when I’m going to display mine but we shall see. There are so many goodies in the kit and all of the trees are die-cut and scored so that is super handy! You can see the full reveal of the kit and the goodies here!

leftover-garden-green, www.LaurasStampPad.com

I’m not going to lie, I think it took me almost an hour to pop out all of the die cut pieces….which some of the images should probably be stamped before popped out so it is easier to line them up. It wasn’t all that hard but I think it would have been easier! 🙂 Also, there is so much leftover cardstock around the trees. I just had to save it for future projects because look at all of that. Here is one card that I used a lot of it on!

Evergreen Trees, www.LaurasStampPad.com

Here are all three of the trees looking fabulous!!! My husband did the kit with me. He did all of the trees which was fairly simple since they are already scored. You will fold them in half and add adhesive, place the next one on top folded in half. You will keep stacking them up until they are all in place and then add adhesive and bring the top around to the bottom to create the full circle. I added a Mini Glue Dot to the top and bottom to secure them so that maybe at the end of the season I can pop it open and store them flat. We shall see if that works!

garland-tree, www.LaurasStampPad.com

This was the easiest tree because it is just ribbon and garland wrapped around it. This is the biggest tree and to be honest I think I would put the ornaments on the biggest tree because there are tons of those and you would be able to use more on the big tree. I wasn’t changing it after I had it all complete though. I also mistakenly added a small star to the big tree so I had to put the big star on one of the smaller trees!

Star Tree Topper, www.LaurasStampPad.com

I used a Hot Glue Gun for the start to secure the pieces together as well as to secure it to the top stick in the center of the tree.

pinecone-tree, www.laurasStampPad.com

This tree is probably my favorite. I hot glued all of the pieces together to each other and then to the tree. I placed the red berries and the laced pine cone piece down onto the Silicone Mat and then I added hot glue to the back of the stamped pine cone and pressed it over the 2. I added a little more hot glue to add the bow and let it all cool. Once it was cooled, I added some hot glue to the back and placed it on the tree. Stamping the garland was super easy and I glued each of them together by overlapping a half circle. I attached it to the back of the tree on top with a little adhesive and then wrapped it around and attached it to the bottom with a little adhesive. Love it!

ornament-tree, www.LaurasStampPad.com

This is probably my least favorite tree. The hardest part of this entire kit was assembling those little red ball ornaments. I think I broke 3 of them. You peel off the two backs and bring them around to stick to each other but before be sure to place a loop of linen thread in the top. Sounds easy…..but remember these are little delicate balls of tissue type paper so you can squeeze them and when you press them together, don’t smash it. Oh my goodness, it stressed me out! This tree did turn out super cute. I did 9 of each of the ornaments on this tree and it wasn’t even half of all of them given in the kit. There are TONS!!!! If I am able to store them flat and enjoy this kit again next year, I can create all new ornaments! Look at all of the leftovers!

leftover-pieces-ornaments, www.LaurasStampPad.com

This baggie has all of the leftover pieces from the kit. There is tons of ribbon, ornaments, hooks and so much more! I love that Stampin’ Up always give you plenty of supplies!!! If you would like to order your Forever Evergreen Kit, click here! Don’t forget to get the coordinating Forever Evergreen Stamp Set! Let me know what you think of it if you get it or let me know what you think of mine in the comments below!!!

Happy Stampin’

~Laura


Designer Tin of Cards!!!

Posted on

designer-tin-of-cards, www.LaurasStampPad.com

Check out these amazing cards in the Designer Tin of Cards Kit!!! I kind of like how this card kit has a big array of colors using the different patterns from the Designer Series Paper Packs! There are some regals, brights, and subtles! I LOVED the Tin of Cards from last year. You can check that out here. I knew I needed this kit as well. After all the little tin is super cute and I feel like I need to collect them all! Last year it was mint and white and this year it is navy and white!!!

navy-white-tin, www.LaurasStampPad.com

Isn’t it amazing??? I love it! There are dividers in the kit so you can stamp the titles from the Designer Tin of Cards Stamp Set on them and create the perfect tin of cards to keep yourself or give as a gift!!!

card-storage, www.LaurasStampPad.com

There is a category for all of the cards you need throughout the year!!!! Now onto the cards in the Designer Tin of Cards Kit!

thanks-to-you, www.LaurasStampPad.com

This set of cards uses the pattern/theme from the Moroccan Designer Series Paper (part of the Buy 3, Get 1 Free Special!). I stamped the greetings from the Designer Tin of Cards Set. I adhered the sequins on with the Fine Tip Glue Pen!

sending-love, www.LaurasStampPad.com

I really really like these cards. There is something about that simple navy and white look with a little touch of gold! So beautiful!!! This set of cards uses the style from the Floral Boutique Designer Series Paper (part of the Buy 3, Get 1 Free Special).

celebrate-your-day, www.LaurasStampPad.com

I love these cards because of the bright colors. I am realizing I really need some of the Festive Birthday Designer Series Paper (part of the Buy 3, Get 1 Free Special), which is what this style is from.

congrats-so-happy-for-you, www.LaurasStampPad.com

These cards use the Affectionately Yours Specialty Designer Paper theme and they are perfect for graduation, wedding, engagement, and so much more!

Which one is your favorite??? Let me know in the comments below! I really enjoyed making these cards and love the samples. The hardest part was trying the bows onto the paper clips but the rest was super easy and fun!!!

If you would like to see the unboxing and reveal of this kit, check that out here or click below! Don’t forget to give it a thumbs up if you liked it! Be sure to subscribe if you are new as I post every Tuesday and Thursday!!!

Happy Stampin’

~Laura

Seasonal Offer, www.LaurasStampPad.com

Check out this fabulous offer for the Holiday Season!!!


Technique Tuesday – Purple & Gold!!!

Posted on

Happy Tuesday!!! That means I have a fabulous technique to share with you today – heat embossing! Many of you may know all about heat embossing but I thought I would talk about the tools, steps of heat embossing and tips along the way as a refresher and for those who have never done it before!!!
Purple & Gold, www.LaurasStampPad.com

Purple and Gold are so rich and fabulous. I love that deep color…..and you know I am a “Brights” girl!!! I played with some masking techniques on this one and I have some tips for you.

I started with a piece of Whisper White measuring 4″ x 5-1/4″ and I masked off the square. This can be any size or shape you would like. TIP: Use printer paper and not a Post-It Note because the sticky from the Post-It stays on the cardstock enough to hold embossing powder. So just cut strips of paper and lay them in a square or cut a square out of a piece of paper. Be sure to secure your cardstock to your surface as well as securing the mask to the surface. You don’t want the cardstock to move underneath your mask and you don’t want your mask to move. For this card, I actually colored in the square with a Sponge Dauber and Elegant Eggplant Ink but you could always use a Sponge Brayer! You can add as much color as you want for the perfect shade. Keep going if you want a darker look. Be sure to allow the ink to dry before embossing since you are adding so much ink in one spot. After a minute or so of drying (or use the Heat Tool to dry it), now it is time to emboss. Start by running the Embossing Buddy over the cardstock to get rid of an static on your cardstock. Tap off an excess powder and then stamp your image in VersaMark Ink. I stamped the flourish from the Flourishing Phrases Stamp Set. After stamping the image, you will pour the embossing powder of your choice over the image. I used Gold Embossing Powder. Tap off the excess powder and heat the image with your Heat Tool. TIP: Don’t wave the heat tool over your image because that is just dispersing the heat and then it will take longer. Start on one side or corner and once it starts to melt, just move your way around the image slowly until it is all melted. The first time you use the tool each time will take a bit longer than if you embossed 5 at one time because it takes a bit to warm up. So if you are making multiples, the first one might take a minute to melt but the rest will take 45 seconds.

Gold Flourish, www.LaurasStampPad.com

Now that you have your image embossed it is time to finish it off. I stamped the greeting from the Number of Years Stamp Set and added some Gold Metallic Thread for texture and a little more gold!

If you would like to see Heat Embossing in action, check out the Video Tutorial below or click here. Be sure to give it a thumbs up if you liked it and don’t forget to subscribe if you are new!

Do you like heat embossing on your projects? Let me know in the comments below! It is one of those techniques that looks amazing but sometimes you don’t want to haul out the tools or you forget because they are all in the drawer. I like embossing a lot on holiday cards because it looks so fabulous!

Happy Stampin’

~Laura


Fireflies in Summertime!!!

Posted on

Fireflies in a Jar, www.LaurasStampPad.com

I found this sample on Pinterest and fell in love so hard, I had to buy the Star Confetti Punch just for this card! I wish I could give credit to the amazing person who created it but there wasn’t a watermark or link. So whoever it was, just know I LOVE it and thank you so very much for the idea!!!

I started with a Crushed Curry card base. Then I cut two pieces of Gold Foil Paper measuring 4″ x 1-1/2″ and two pieces of Night of Navy cardstock measuring the same. I punched out the navy piece with the Star Confetti Punch and then glued it onto the Gold Foil with the Fine Tip Glue Pen. Next, I took a piece of Whisper White cardstock (4″ x 5-1/4″) and stamped the green stem from the Jar of Love Stamp Set in Pear Pizzazz along the bottom 1-1/2″ up. I placed the navy piece to the side of the white as a guide for how high I needed to stamp. I stamped the jar and the lid from the Jar of Love Stamp Set in Night of Navy Ink. I stamped the fireflies/lightening bugs in Basic Black Archival Ink all over the card. I colored in the bug booty with a Crushed Curry Marker and then I took a Sponge Dauber in Crushed Curry and added the glow! Now that you are done stamping, you can adhere the stars to the top and bottom and then adhere this piece to the card base! How simple and fabulous?!?!?!

Lightening Bugs, www.LaurasStampPad.com

Lightening bugs remind me of summer. As kids, we always use to catch them and put them into a jar every evening. We played outside all summer long until it was dark out and then we had to go in to take a bath and go to bed. I love summer time so much and wish it wasn’t coming to an end!

Happy Stampin’

~Laura

Don’t forget about the Paper Pumpkin BOGO Sale for new subscribers!!! Click here to get started and be sure to enter the Promo Code: BOGO

PP_BOGO_Facebook_US, www.LaurasStampPad.com