Happy 13th Anniversary to Me!!!

Posted on

I just can’t believe it is my 13th Anniversary with Stampin’ Up! today! How crazy is that?!?!?! Thirteen years seems like a long time but yet this has been an amazing and fun journey! I have enjoyed every moment of it!!! In celebration (and tradition), I am doing my 13 Favorite Stampin’ Up! items right now today!

13th Anniversary, www.LaurasStampPad.com

My 13 Favorite Stampin’ Up! Items!!!

~Enamel Shapes – I love the shape of these and the little POP of color they add to a project!

~Perfect White Accents – I honestly just found out about these things and I’m in love! They are flat and smooth and perfect for a card!

~Floral Boutique Designer Series Paper – Simple Navy and White look is just stunning for every occasion! Check out this One Sheet Wonder I did!

~Beautiful You Stamp Set – The ladies are beautiful but the greeting are even more amazing! Check out some samples here, here, and here!

~Lift Me Up Stamp Set – I just love these greetings. Sending Smiles Across the Miles is my favorite. You can check out samples here, here, and here!

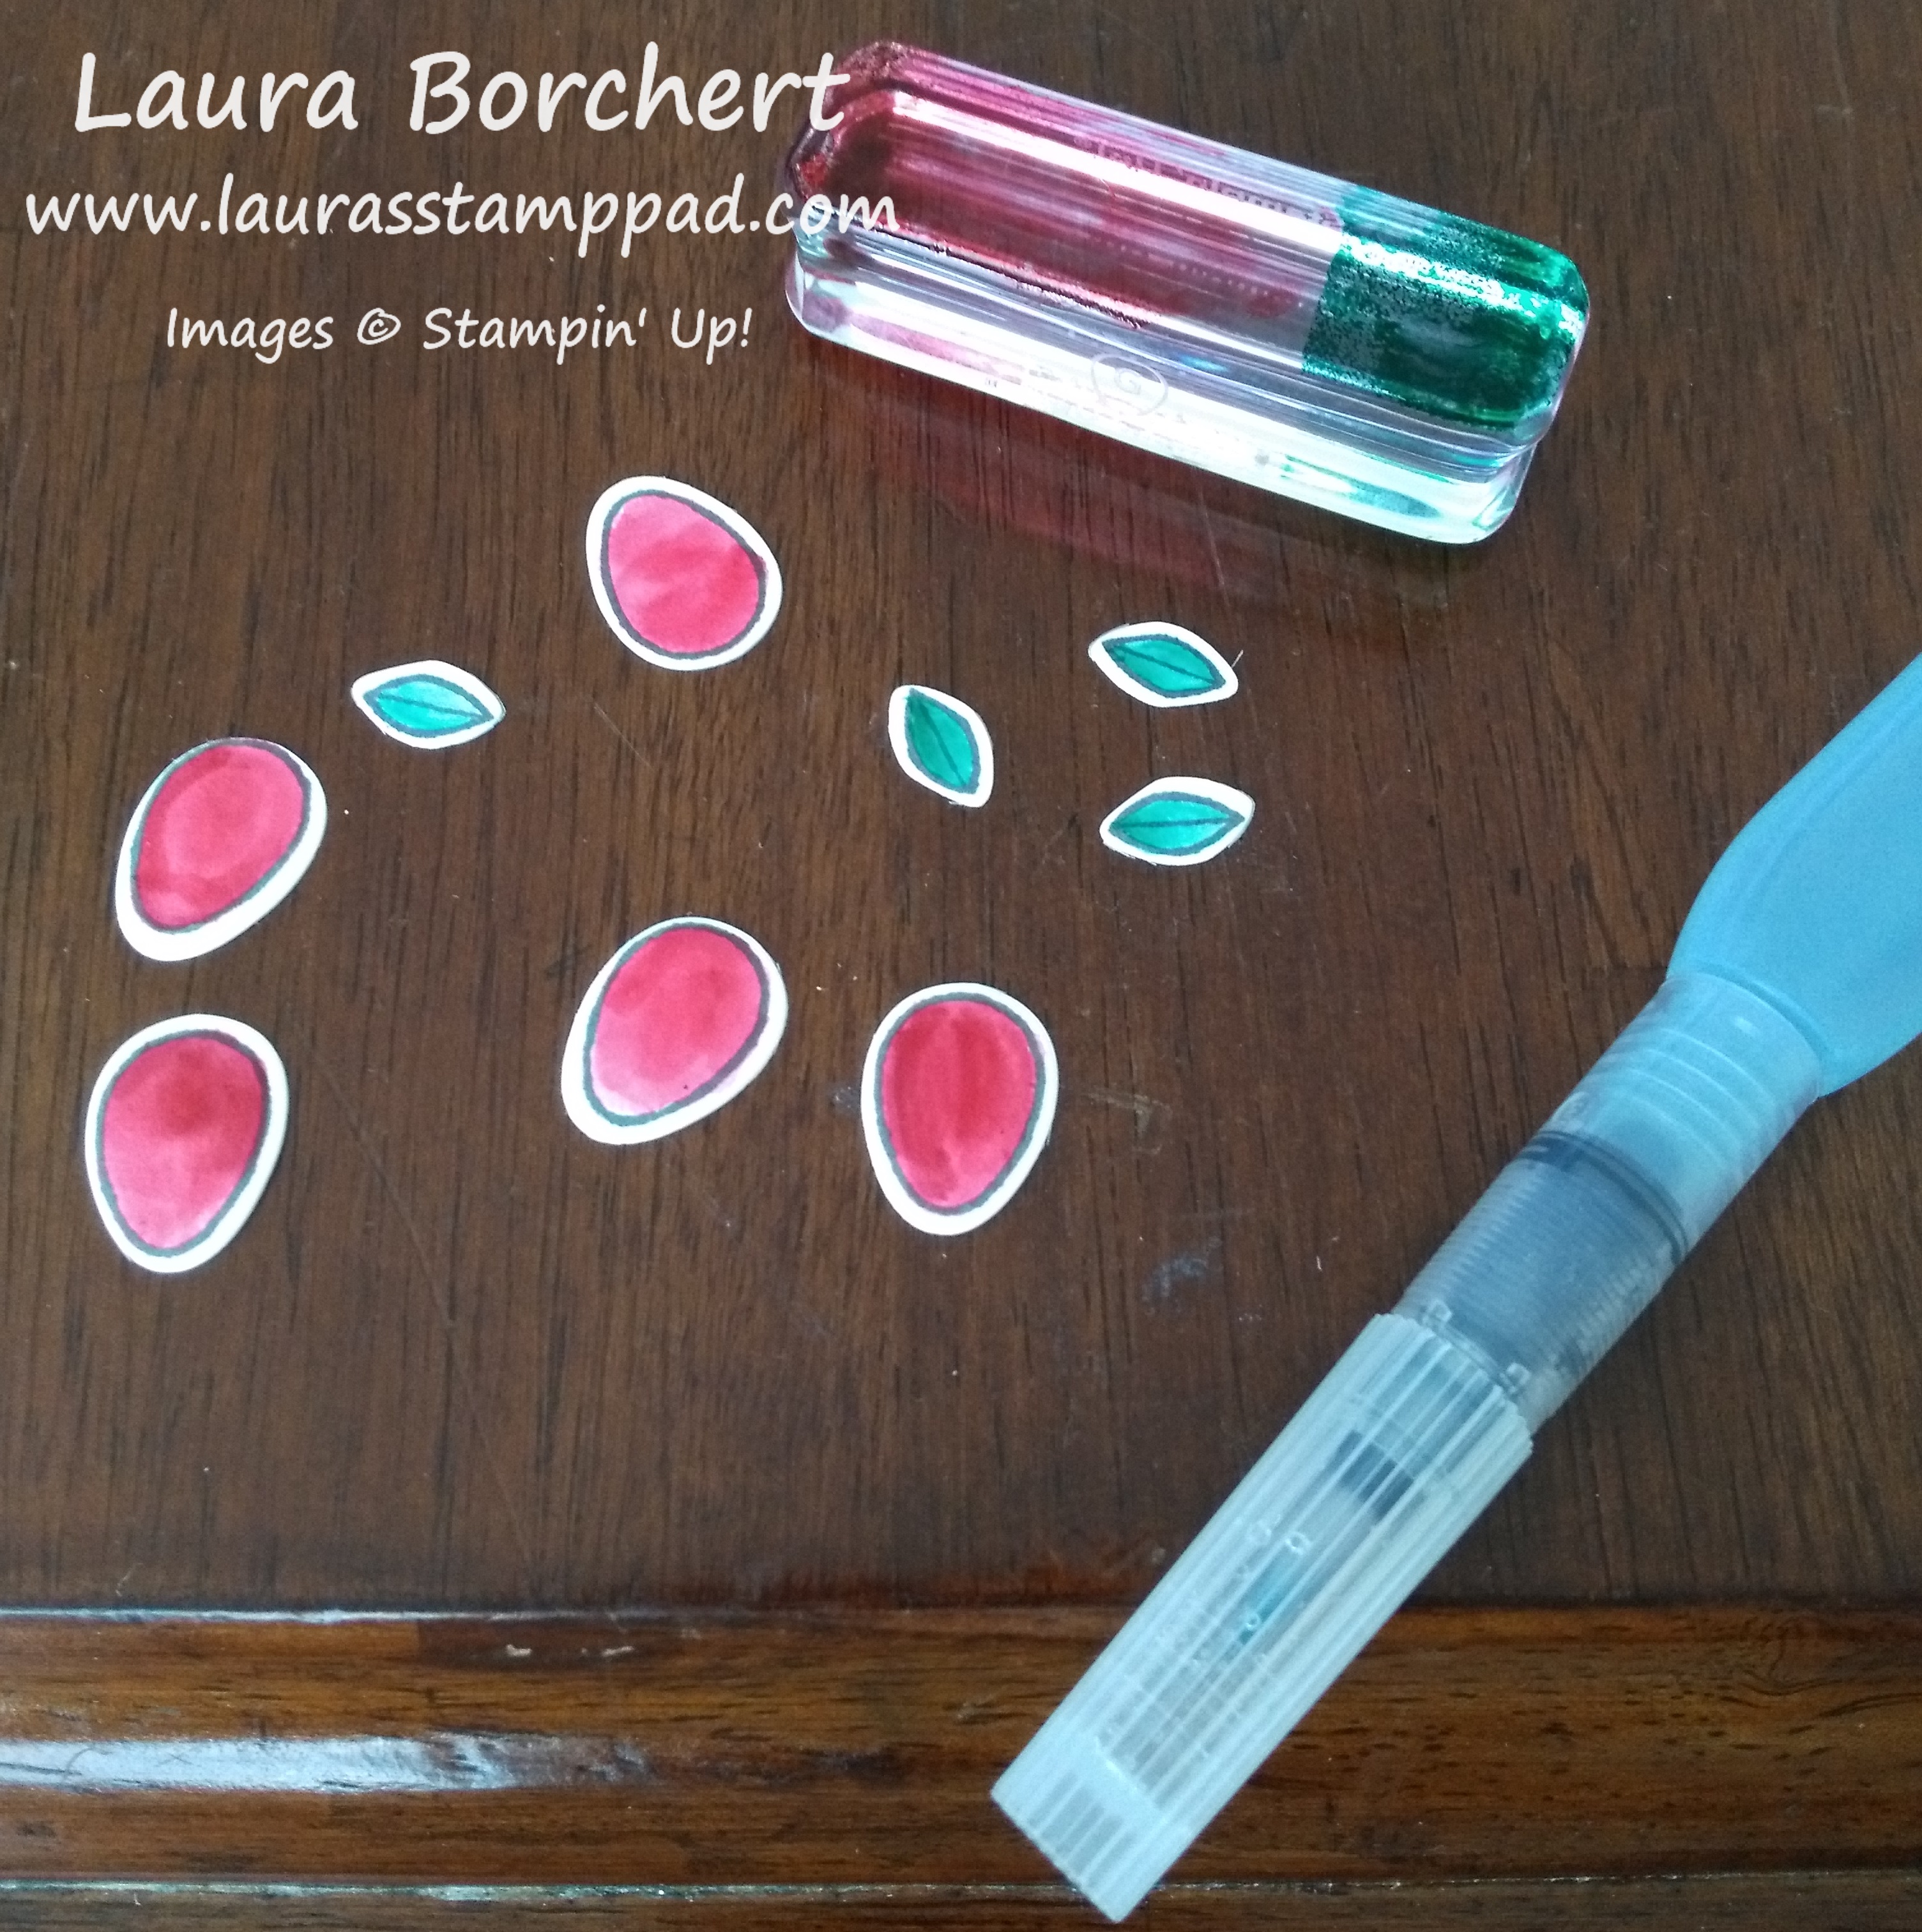
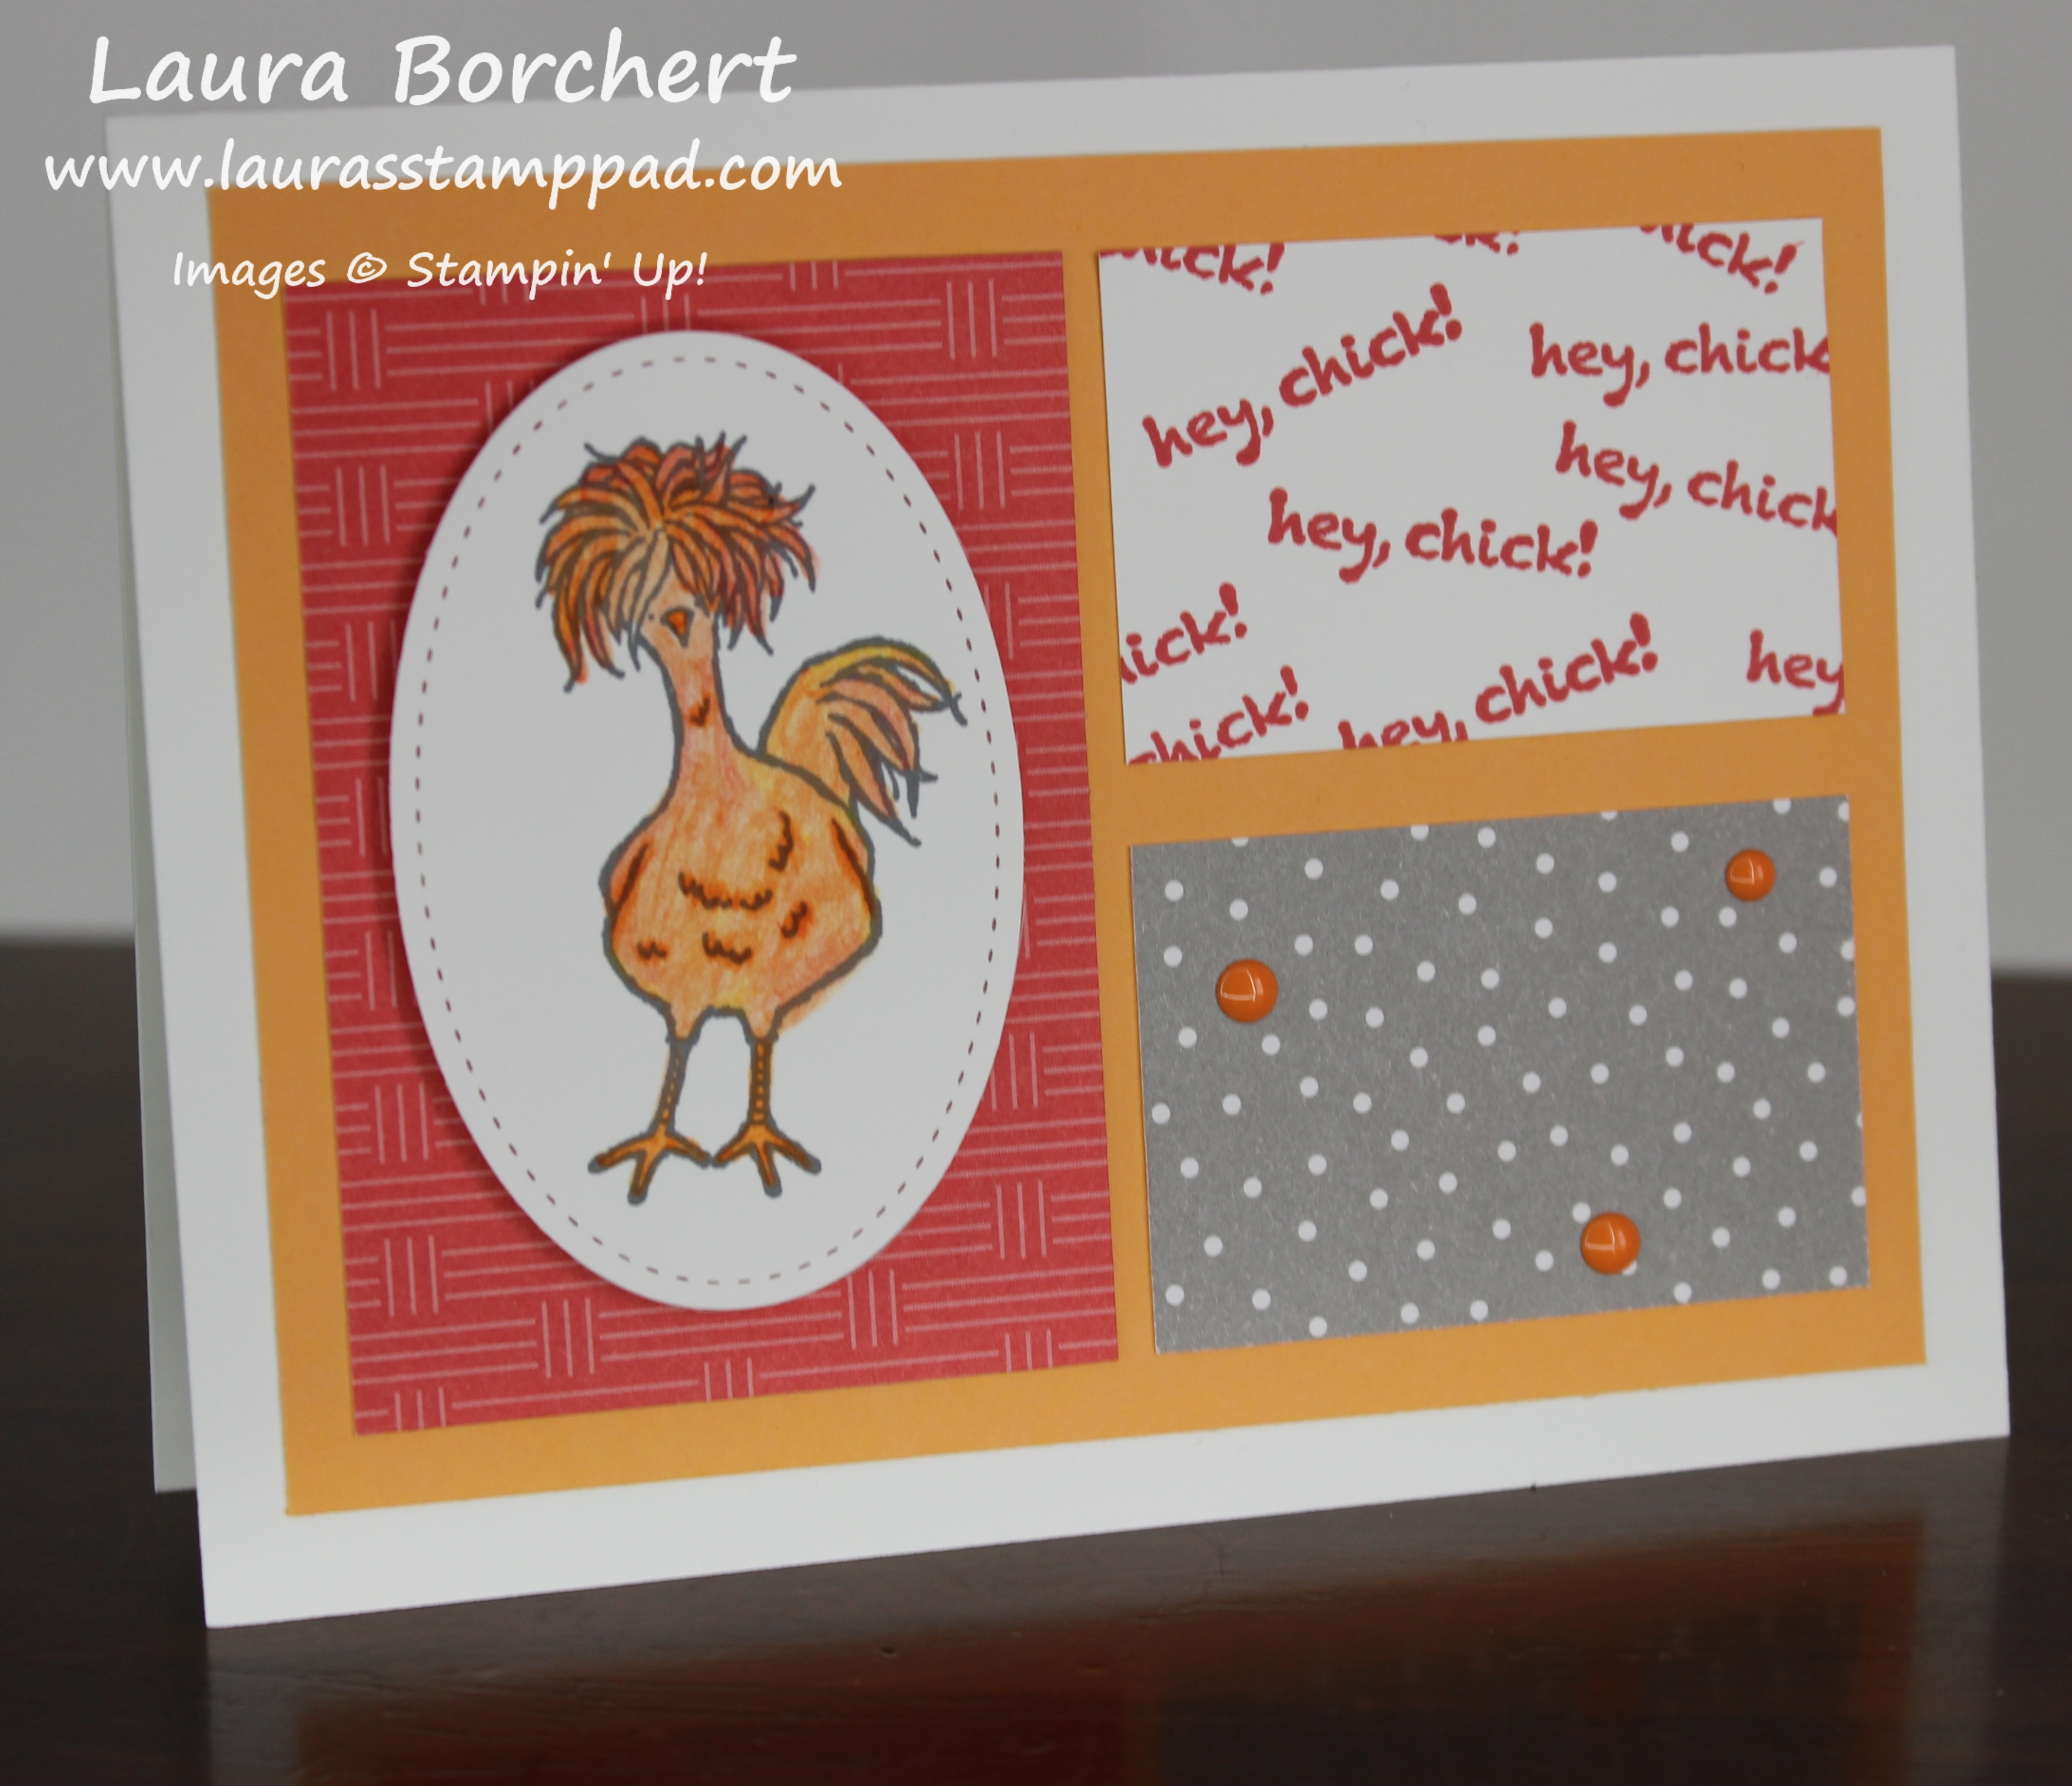
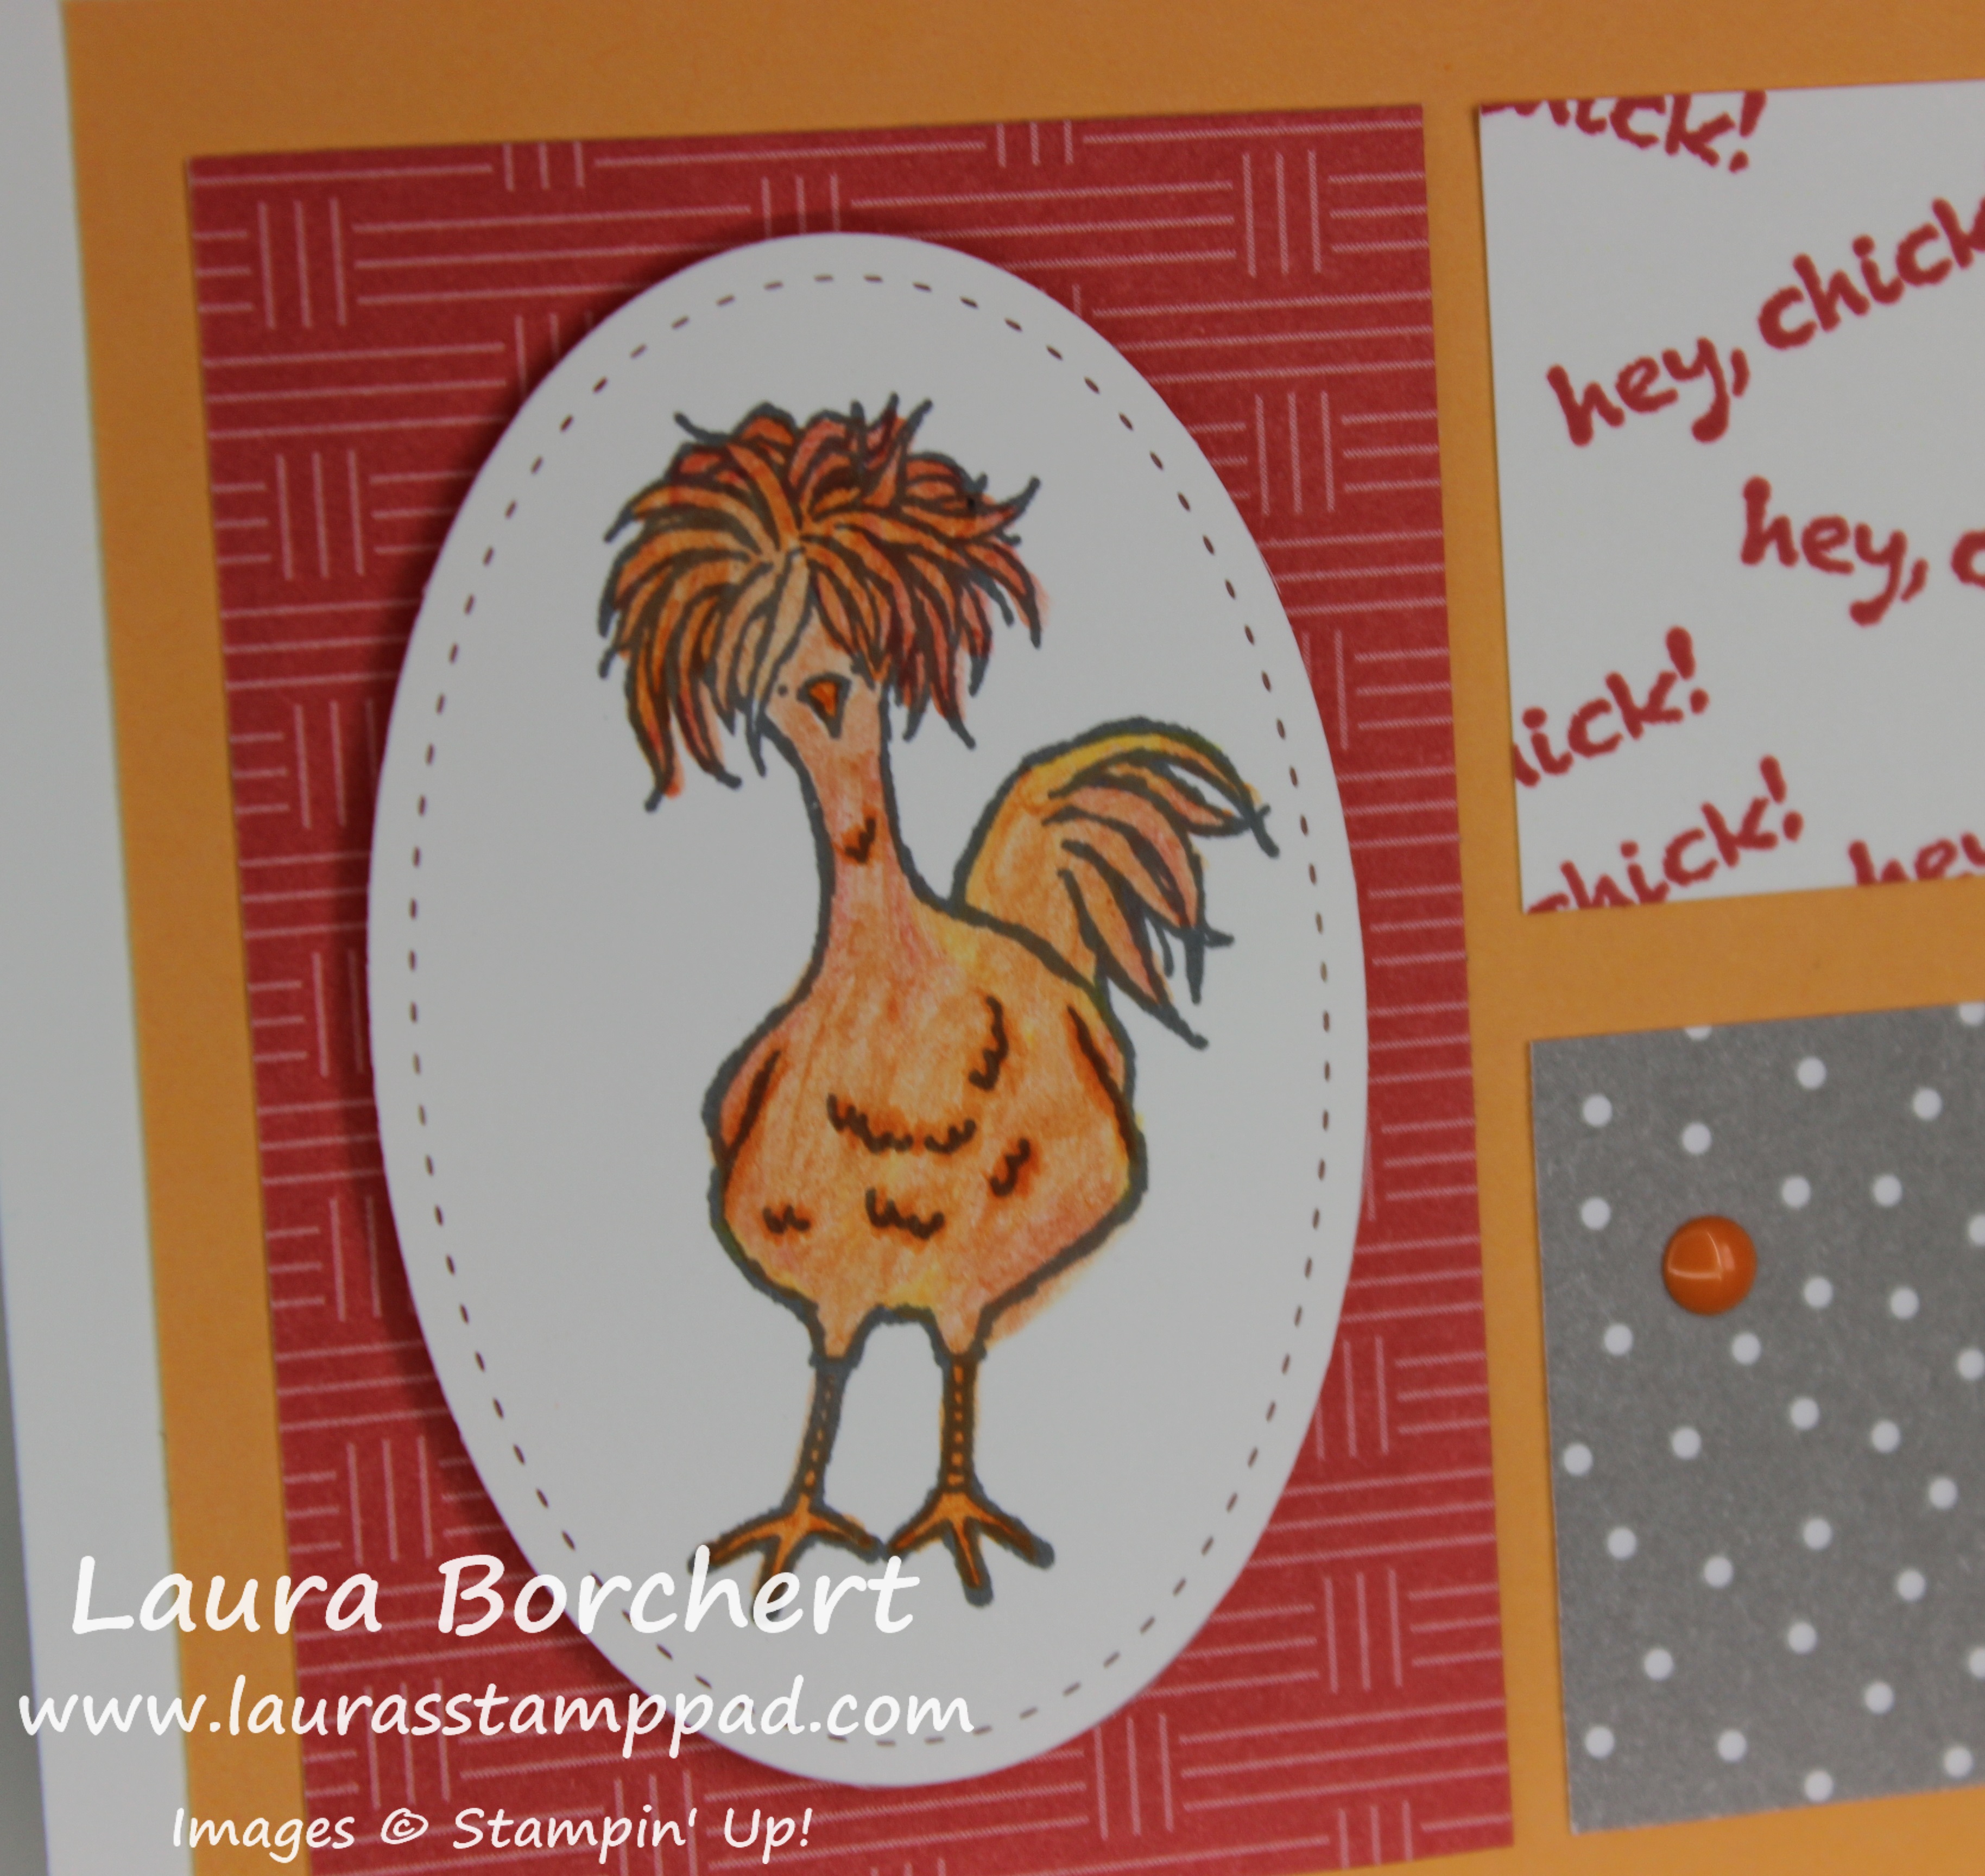
~Watercolor Pencils – My new favorite coloring tool! These things are amazing. Check out some samples here, here, and here!

~Blender Pens – Since I have been playing with the Watercolor Pencils so much, these work perfectly to blend the colors for the perfect look like in this sample and this one!

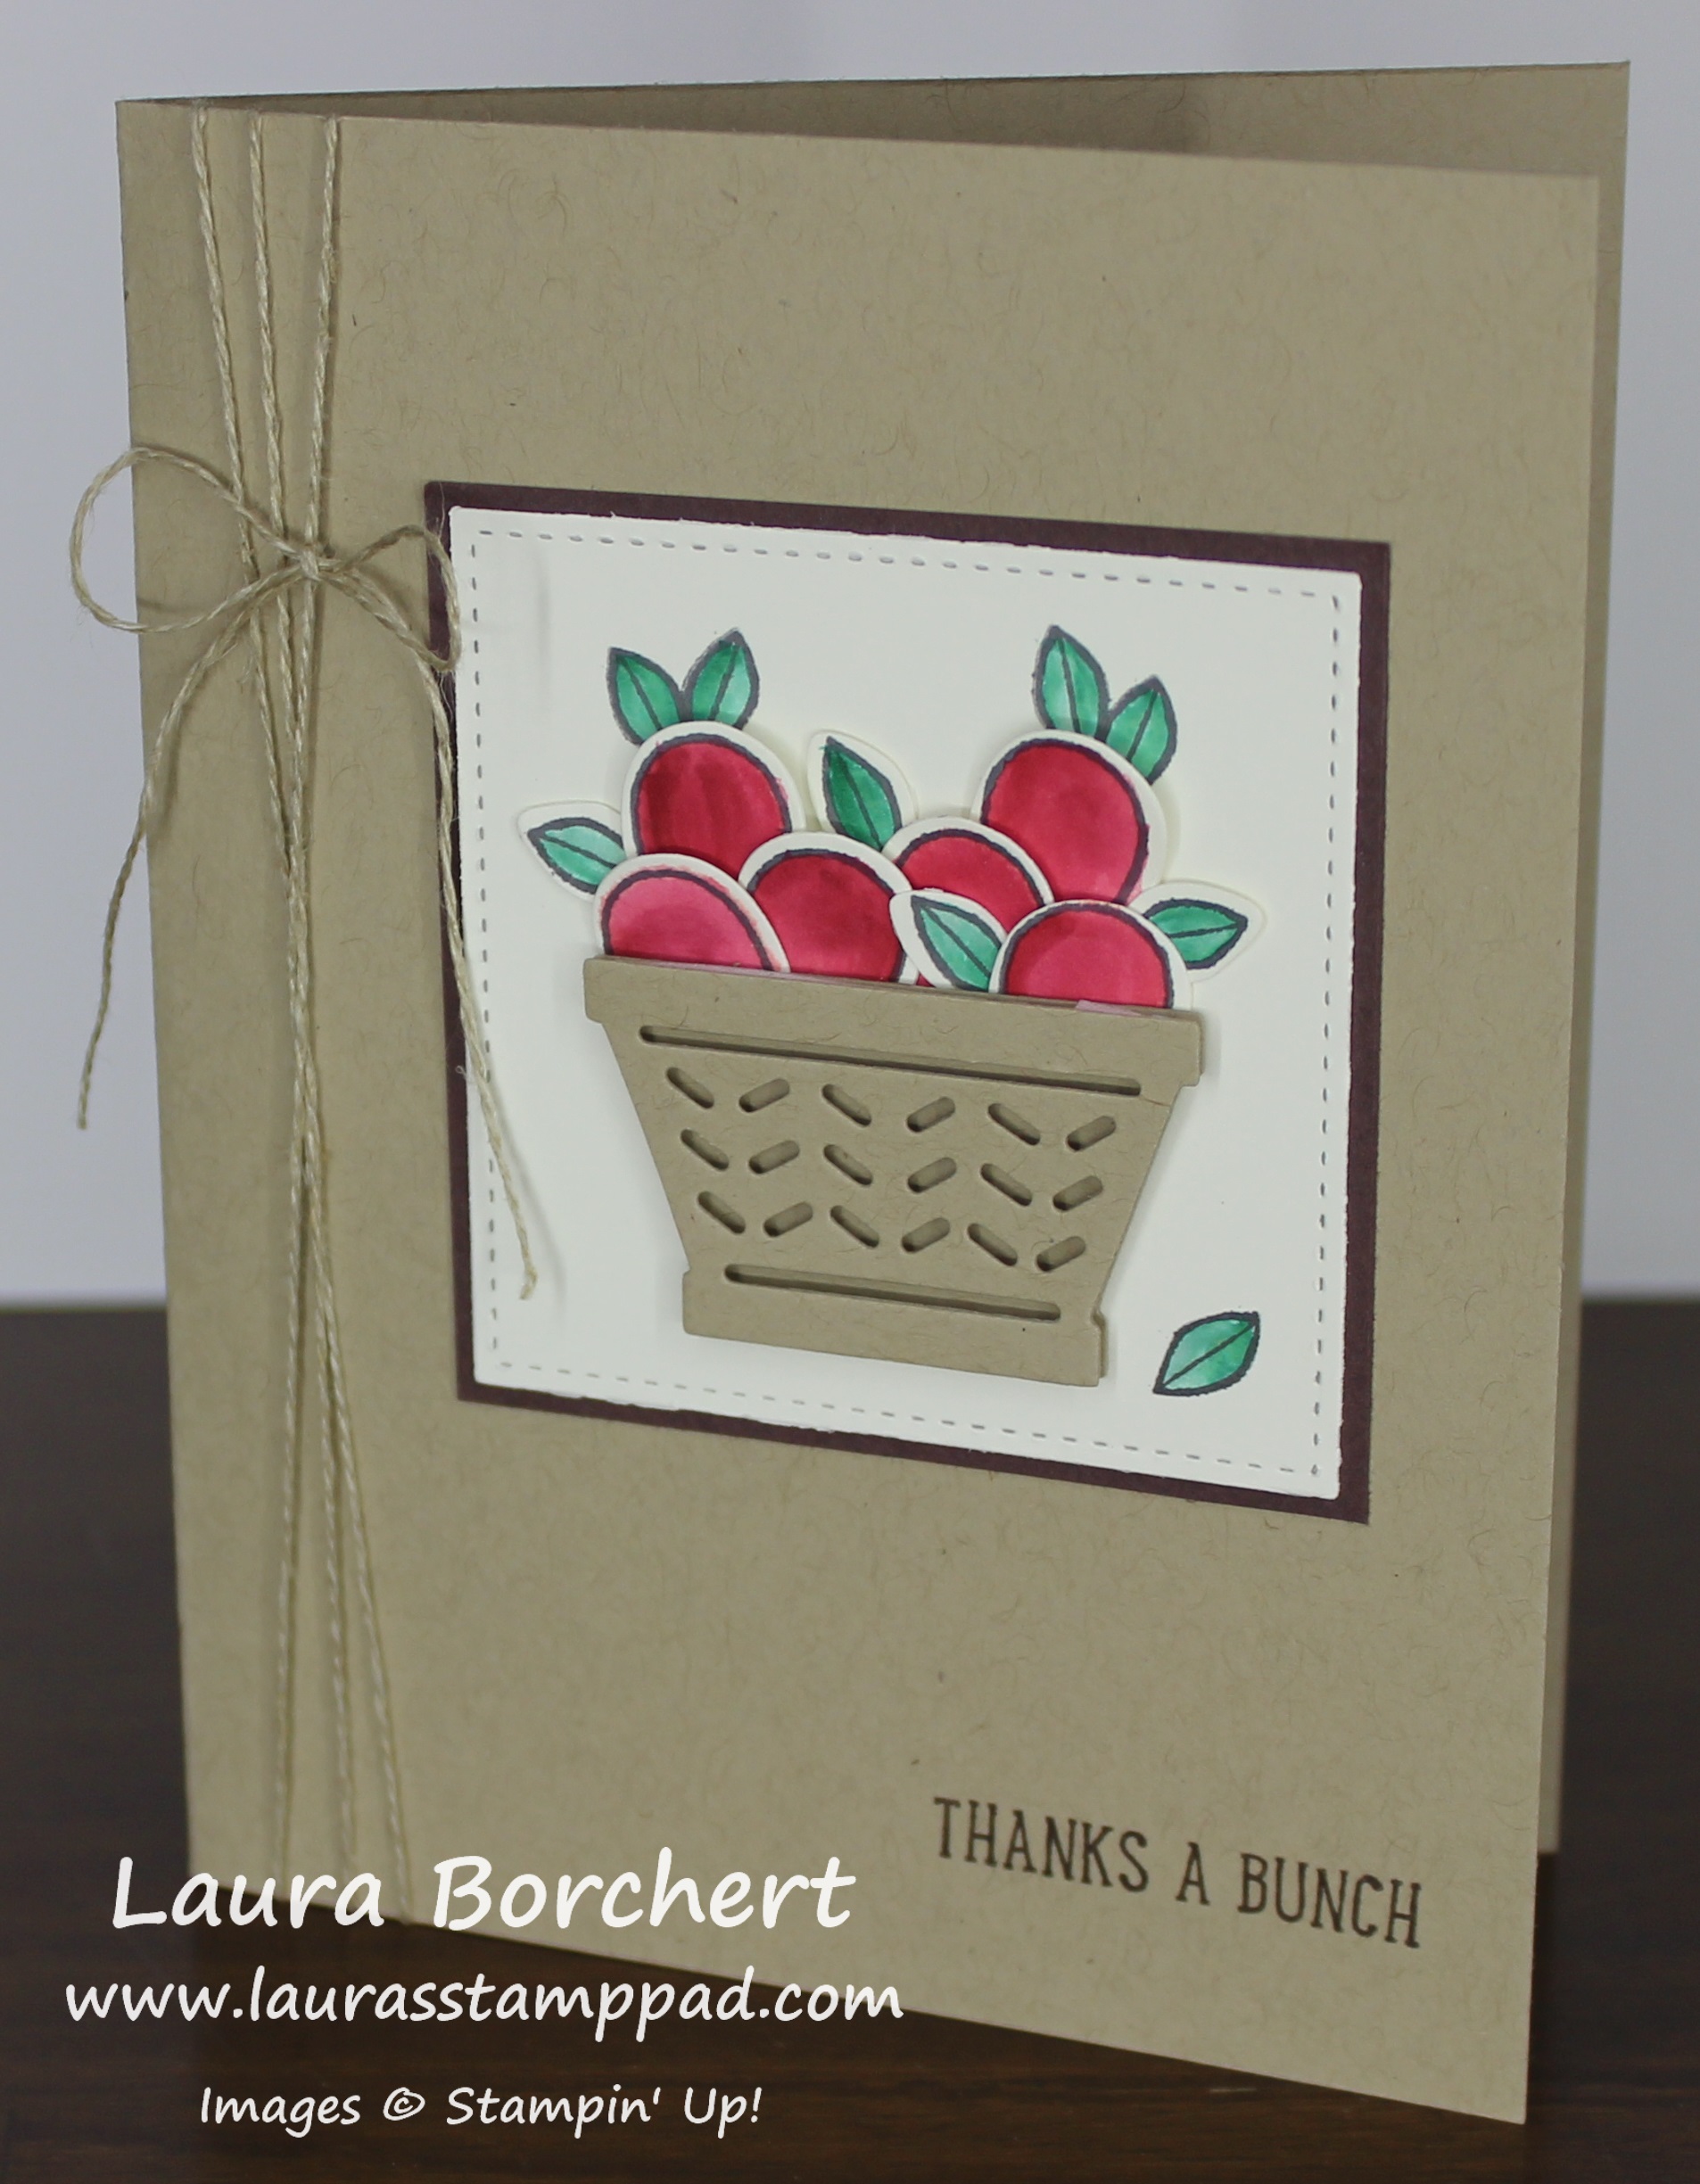
~So Detailed Framelits – The details and beauty of these are just AMAZING! Check out my favorite card right now here!

~Brights Collection – I had a stamper tell me she owned the color collection I recommended….I knew exactly which one that was!

~Stitched Shapes Framelits – These are the perfect shape (circles, ovals, squares) with amazing detail!

~Grid Paper – This stuff is amazing to use when stamping for when you stamp off the paper, stamp off for a shade lighter, or just practice stamping!

~Mint Macaron Sheer Linen Ribbon – I love this color and the texture of the ribbon is perfect on so many projects!

~Flirty Flamingo Ruched Ribbon – I love pink and this ribbon has a fabulous texture and it’s easy to use. There isn’t a big knot when you use it on a card!

Are any of these your favorites?? Let me know in the comments below!

If you would like to see this all in action, check out my Video Tutorial below or click here! Don’t forget to give it a thumbs up if you liked it and be sure to subscribe if you are new. I post a new video every Tuesday and Thursday (or when my Anniversary falls on a Wednesday)!!!!

Happy Stampin’

~Laura


All My Love for These Lace Doilies!!!

Posted on

These Lace Doilies are so amazing and I’m super sad to see them retiring. They are perfect because they are white on one side and vanilla on the other side!!! LOVE IT!!!

Lace Doilies, www.LaurasStampPad.com

I started with a So Saffron card base. Then I took a piece of Very Vanilla (4″ x 5-1/4″) and adhered some Falling In Love Designer Series Paper (2″ x 5-1/4″) to the left side. I really feel like the flowers have a hint of yellow in them and this card really made it pop! For the greeting, I used one of the Lace Doilies (retiring in May) in the center. I adhered it with a little bit of Snail Adhesive in middle. Then I die cut a scallop circle using the Layering Circles Framelits and stamped the greeting from the So In Love Stamp Set.

Just for You, www.LaurasStampPad.com

I added the scallop greeting to the card front with Stampin’ Dimensionals. To finish off the card, I added a few So Saffron Enamel Shapes for some random pops of color! A simple and elegant card for any occasion. The perfect one to always have on hand!

Don’t forget that the Stampin’ Up! Retired List is out and items are selling out fast! You can check out the complete list here:

2017 Retiring List – Excel

2017 Retiring List – PDF

Some of these items are sold out already so you can just start shopping here! Let me know in the comments what items you are sad to see go! These Lace Doilies are high on my list! Another item that I am sad to see go is the Decorative Label Punch.

Not only do you get to enjoy getting some great products before they are gone (and at a discount for some), you will also be able to earn Laura’s Loyal Stampers Stickers!!! Just one way for me to show my appreciation to you!!! 🙂

Happy Stampin’

~Laura


Fill Your Basket of Colorful Flowers!!!

Posted on

Easter is almost here and some may be filling their baskets with eggs while others fill a basket of colorful flowers!!! I love these colors and Spring look!!! Spring is my favorite Season and Easter is my favorite holiday!!!
Basket of Colorful Flowers, www.LaurasStampPad.com

I started with a Daffodil Delight card base! Then I took a piece of the Sending Love Designer Series Paper (5-1/4″ x 4″) and placed it on the card front diagonal. The look is super fun but sometimes I wonder if it just looked like I messed up and make it crooked. 🙂 I’ll take it!

Next, I took a piece of Whisper White (5″ x 3-3/4″) and adhered 2 pieces of grass die cut from the Basket Builder Framelits. When I placed the grass down, I just left the gap in the middle where I planned on putting the basket so you can’t actually see it! As for adhesive, I just ran some Snail along the bottom of the grass and stuck it down! I stamped the greeting in the upper left corner from the Basket Bunch Stamp Set. I used Basic Gray Ink and stamped twice before going back to the ink pad for that shadow look. Next, I added this to the card front diagonal and worked on the focal point!

For the focal point, I stamped the basket, flowers, and leaves (from the Basket Bunch Stamp Set) in Basic Gray Ink onto Whisper White scraps. I like to use gray for that softer look! I die cut out all of the pieces with the coordinating Basket Builder Framelits (Bundle & Save 10%). Die-cutting out the pieces before coloring is best so that if you cut them incorrectly, you haven’t wasted coloring time! For the coloring, I used the Watercolor Pencils and Blender Pens!

For the basket, I placed the handle on the back and secured  the ends with a Stampin’ Dimensional on either side and one at the bottom. Don’t place a dimensional in the middle because you will want to stick your greenery down in the basket! I wrapped some Crushed Curry Baker’s Twine around the basket and and tied it into a bow and placed it on the card front! Now it’s time to assemble the flowers and greenery using Mini Glue Dots and Stampin’ Dimensionals. You can fill the basket as much as you want!

This card could be created for any occasion or season just by changing the greeting and colors! What is your favorite flower? Let me know in the comment below! Mine is a Peony but I do love all bright flowers! They make me smile!

Happy Stampin’

~Laura


The Stunning Glimmer Floral Lace!!!

Posted on

This card is just stunning with that glimmer floral lace detail using the So In Love Bundle!!! I think this card is perfect for weddings, anniversaries, birthdays and so much more. It is just amazing!!!

Glimmer Floral Lace, www.LaurasStampPad.com

I started with a Very Vanilla card base! Next, I layered a piece of the Falling In Love Designer Series Paper (4″ x 5-1/4″) onto a piece of Blushing Bride cardstock (4-1/8″ x 5-3/8″). I placed this on the card front! For the amazing glimmer floral lace detail, I used the Blushing Bride Glimmer Paper and the So Detailed Thinlits. It is best to place the thinlit on the backside of  the glimmer paper to run through the Big Shot. When I did this I found that I could use the Big Shot Die Brush to pop all of the pieces out. If I run it through face up and use the brush, it scruffs up the glimmer and sometimes makes it come off! This  is the perfect solution.

Die Cut Pretties, www.LaurasStampPad.com

I just love how all of the pieces popped out and look so amazing! Now it is time to adhere it to the card front. I put it on the left hand side and used the Multi-Purpose Glue to adhere it. Just use a sponge and some of the glue to pounce all over the details for that perfect amount of glue without any messes! I love it!!! Next, I added some Very Vanilla Satin Ribbon around the card and into a knot.

Floral Lace, www.LaurasStampPad.com

For the greeting, I used the Layering Ovals Framelits and the So In Love Stamp Set! I added the greeting to the card with Stampin’ Dimensionals. Oh how I am just in love with this card and this bundle! Don’t forget that you can purchase the So In Love Stamp Set and So Detailed Thinlits as a Bundle and you will save 10%. Stay tuned as I have a lot more samples coming soon!

If you would like to see this all in action, check out my Video Tutorial below or click here! Don’t forget to give it a thumbs up if you liked it and be sure to subscribe if you are new. I post a new video every Tuesday and Thursday!

Today is the last day to get entered into the Ink Pad Giveaway! I will be drawing a name for a Color Family of Ink Pads (10 total) tomorrow!!! Click here for all the details!!!

Ink Pad Collection Giveaway, www.LaurasStampPad.com

Happy Stampin’

~Laura


Technique Tuesday: The Baby Wipe Technique with Butterflies!!!

Posted on

Happy Tuesday!!! That means I have a fabulous technique to share with you – the Baby Wipe Technique!!! I have done this many times before but each time it looks so amazing! Just playing with different stamp sets makes it so much fun! I just love it!!!

Baby Wipe Technique, www.LaurasStampPad.com

Butterflies are just so uplifting and beautiful! While I would love to make them in reds, yellows, and oranges, I thought I would branch out and use different colors! Now let’s get started on this super cool, easy technique – the Baby Wipe Technique!

I took a wet baby wipe and folded it a few times. Be sure the size is still bigger than the image you are going to stamp on it. Then I took a few ink refills and randomly dripped dots of ink on the baby wipe creating a big inky blob. The colors I used were Pacific Point, Cucumber Crush, and Soft Sky. This is now what I used as my ink pad for my butterflies!

Using the Watercolor Wings Stamp Set, I stamped the image into my “baby wipe ink pad” and then onto Whisper White scraps. Sometimes it takes a few stamps to get the colors to mingle together and then you get fabulous ones! You don’t have to worry about cleaning the stamp before going back to the “ink pad” because it’s not like you are going to ruin it. In fact, it will only make it more fun!! After stamping the butterflies, I die cut them with the coordinating Butterflies Thinlits! I did not stamp the center part of the butterfly until I die cut it out. I have found that I usually stamp too high or low and it get cut off so doing it afterwards is best!

Butterflies Baby Wipe, www.LaurasStampPad.com

Now to assemble the card, I started with a Pacific Point card base. Then I took a piece of Soft Sky (4″ x 5-1/4″) and stamped the three dots from the Watercolor Wings Stamp Set all over the background using my “baby wipe ink pad.” I adhered that to the card front and placed my butterflies on the card (no adhesive yet) and stamped the antennas. Then I added Stampin’ Dimensionals to the butterflies and placed them right next to their stamped antennas! For the greeting, I took a piece of scrap Whisper White 3/4″ wide and stamped the greeting from the Watercolor Wings Stamp Set in Basic Black Ink. I added those three little dots as well for an extra pop. Next, I cut the banner tips on the end and cut it as long as it needed to be for the greeting and dots. This can vary card to card. I layered it onto Pacific Point 1″ wide and long enough to layer. The greeting is on the lower left hand side of the card!

If you would like to see this all in action, check out my Video Tutorial below or click here! Don’t forget to give it a thumbs up if you liked it and be sure to subscribe if you are new. I post a new video every Tuesday and Thursday!

Only 2 more days to get entered into the Ink Pad Giveaway! I will be drawing a name for a Color Family of Ink Pads (10 total) on Friday!!! Click here for all the details!!!

Ink Pad Collection Giveaway, www.LaurasStampPad.com

Happy Stampin’

~Laura


Loving this Bushel Basket of Apples!!!

Posted on

Happy Tuesday!!! Today I have a fabulous technique to share with you today! It’s a bit out of the box but super cool! This bushel basket of apples was created with the Basket Bunch Bundle from the Occasions Mini Catalog

Bushel Basket of Apples, www.LaurasStampPad.com

I got the idea for this card from the amazing, Shelli Gardner who showed it at the Stampin’ Up Event last November!! It sold me on this set….the outside the box ways to use the Basket Bunch Stamp Set. This looks like an Easter Stamp Set but I got so many other styles of cards out of  it! These apples, a baby card  with the bunny and many others can be created! Now let’s get started on this one!

I started with a scrap piece of Very Vanilla and stamped lots of leaves and the smaller solid outline Easter egg. All of these come from the Basket Bunch Stamp Set and stamped in Basic Gray Ink! I like the softer look of gray over black. Next, I die cut out each of them using the coordinated Basket Builder Framelits (Bundle & Save 10%). A little tip for die cutting lots of little pieces, use a  post-it note to hold the die to the cardstock! After I had all of the pieces die cut, I colored them with Real Red and Emerald Envy Ink and an Aqua Painter!

Watercolor Apples, www.LaurasStampPad.com

It’s time to assemble!!! I die cut the basket bottom (solid & detailed) in Crumb Cake. I stuck the two basket pieces together with some cut pieces Stampin’ Dimensionals. This gives the basket a bit of a 3D look! Next, I adhered the basket to a piece of Very Vanilla that I die cut with the Stitched Shapes Framelits! I love the rustic look of the stitches! TIP: Be sure to only add adhesive to the basket on the bottom half so that you can tuck in the “apples”! I placed some of the apples on with pieces of Stampin’ Dimensionals. So that I didn’t have to die cut so many of the leaves, I actually stamped a few of the leaves directly onto the vanilla and colored them in! Just be sure to tuck the “apples” in deep enough that they look like apples and not eggs!

After the bushel basket is all complete, I added this  to a layer of Chocolate Chip cardstock and then to the center of a Crumb Cake card base! The greeting from the Basket Bunch Stamp Set is stamped in the lower right corner in Chocolate Chip Ink. To finish off the card, I wrapped some Linen Thread around the card and tied it into a bow! I love it!

If you would like to see this all in action, check out the Video Tutorial below or click here! Be sure to give it a thumbs up if you liked it and don’t forget to subscribe if you are new!!!

Happy Stampin’

~Laura


My Succulent Garden Home Decor Piece!!!

Posted on

Succulents are so in right now as home decor, greeting cards, and so much more! So when I thought of how to decorate my Cake Dome for Spring, I instantly thought of a little Succulent Garden Home Decor piece!!! I love how it turned out!!!

Succulent Garden Home Decor, www.LaurasStampPad.com

My cake dome just makes me so happy as it is! Now it’s even more fabulous with these flowers as it sits on the counter in my kitchen! I just love it!!!! Let’s get started on how I created it because it was rather easy!

For the Succulent Garden Home Decor piece, I die cut the 6 layers of flowers from the Succulent Framelits! The colors I used were Garden Green, Pool Party, Calypso Coral, Elegant Eggplant and Old Olive. The large flowers are all 6 layers and I brushed the edges of the flowers with my Sponge Dauber! To get the petals to curl, I just ran it over my Bone Folder like curling ribbon. Here are the color combinations I used:

~Pool Party Cardstock with Elegant Eggplant brushed on the edges

~Garden Green & Old Olive Cardstock with Elegant Eggplant brushed on the edges

~Old Olive Cardstock with Whisper White brushed on the edges

Big Succulents, www.LaurasStampPad.com

I made the large flowers and  realized I needed filler or moss! I reached out on Facebook and everyone suggested moss from the dollar store. So off I went to the store and got some moss and some green covered “rocks”. Perfect. I kept the rock sponge that I had from the beach and placed it in the middle with moss under it. Then I placed all of the “green rocks” all around. Next I tucked in the big succulents and die cut a few of the smaller 3 flowers in Elegant Eggplant and Calypso Coral. I added a Pearl to the center and attached them to the display with a Mini Glue Dot!

Succulent Garden, www.LaurasStampPad.com

If  you would like to see this all in action and up close, check out my Video Tutorial below or click here! Be sure to give it a thumbs up if you like it and don’t forget to subscribe if you are new! I post a new video every Tuesday and Thursday!

Purchase the Oh So Succulent Bundle and some Pearls (or other item for $1.50), save 10% with the bundle and you get to pick a Sale-A-Bration item!!! Tomorrow is the last day of Sale-A-Bration so stock up now. Use the Hostess Code: FCCVREYF and your name will be entered into a drawing for an entire Color Family of Ink Pads!!! Click here to start shopping!

Happy Stampin’

~Laura


Hey Chick Sale-A-Bration Stamp Set!!!

Posted on

The Hey Chick Sale-A-Bration Stamp Set has been super popular….probably because of  this crazy fabulous one!!! He is my favorite of all of them! I love the greetings as well! They are just so fun and different!!!
Hey Chick, www.LaurasStampPad.com

Let’s get started on this fun card!!! I started with a Whisper White card base and added a piece of Peek-A-Boo Peach measuring 3-3/4″ x 5″! Then I took a piece of Whisper White (2-1/4″ x  1-1/2″) and stamped the greeting Hey Chick all over in Watermelon Wonder. I cut out 2 pieces of the Carried Away Designer Series Paper (Sale-A-Bration item) measuring 2-1/4″ x 1-1/2″ (for below the greeting) and 2-1/4″ x 3-1/4″ for under the chick! It is easiest to line up all the pieces on the card and then pick one up, add adhesive, and place it back down. This way you know your spacing is all good!!

For the chick, I die cut one of the ovals from the Stitched Shapes Framelits. I stamped the chick from the Hey Chick Sale-A-Bration Stamp Set in Basic Gray Archival Ink. I always like to use gray over black for that softer look! Then using the Daffodil Delight, Pumpkin Pie, and Real Red Watercolor Pencils, I colored that crazy chicken! I used the Blender Pens to blend the colors together! I attached this to the card with Stampin’ Dimensionals for a little pop! To finish it off, I added a few Pumpkin Pie Enamel Shapes.

Crazy Chicken, www.LaurasStampPad.com

I love the coloring blocking and the use of Designer Series Paper on this card! I need to keep this style in mind for future cards too! 🙂 Do you like to reuse a certain card style with lots of different card types and stamp sets?? Let me know in the comments below!

Don’t forget that Sale-A-Bration ends on Friday, March 31st!!! Click here to see the 3 different brochures of items you can pick from! There are the originals (minus the card tin), the extras that came out in February (minus the Glimmer Paper), and the items they released last week that are in the Occasions Mini Catalog (minus the embossing folders). Items are going fast and while supplies last so don’t wait to place you order. Click here to start shopping! You will earn a free item for every $50 you spend!

Happy Stampin’

~Laura


Delicate Detail Butterflies are Perfect For Spring!!!

Posted on

Spring is here and these Delicate Detailed Butterflies are perfect for all your cards right now! I love the colors and different styles of lace!!! Let’s get started on how I created this!

Delicate Detail Butterfly, www.LaurasStampPad.com

I started with a Pear Pizzazz card base. Then I took a scrap piece of Very Vanilla (big enough for my butterfly framelit) and stamped each of the lace details from the Delicate Details Sale-A-Bration Stamp Set! You can space them super close together or farther apart. It is all up to you! I did a few more after this sample and found I liked it much better when they were close together. The colors I used are Wisteria Wonder, So Saffron, Pear Pizzazz, Pool Party, and Blushing Bride. These are all in Subtles Collection! Once I had my lace background all complete, I die cut out the butterfly with the Bold Butterfly Framelits! Using the other detailed butterfly in the set, I die cut a Pool Party butterfly!

Next, I took a piece of So Saffron cardstock (4″ x 5-1/4″) and stamped the greeting from Suite Sentiments Stamp Set from the Occasions Mini Catalog in Pear Pizzazz Ink. I wrapped some Gold Natural Trim around the cardstock and adhered it to the card base with Stampin’ Dimensionals. Finally, I added the two butterfly to the card front. For the large butterfly, I used Stampin Dimensionals and for the smaller one I used the Fine Tip Glue Pen. For just a little bit more bling, I added some Gold Dazzling Details down the center of the blue butterfly! Be sure to set this aside to allow the glitter to dry!

This card would make a great Easter Card as well! Don’t forget there is only ONE WEEK left of Sale-A-Bration and Stampin’ Up added new catalog items this week that you can redeem as your Sale-A-Bration item with every $50 order!!! So you can pick from any of these items (minus the card tin which is sold out) or these items that came out in February (minus the Glimmer Paper) or any of these catalog items!!! There are so many fabulous goodies to pick from!! Click here to start shopping and earning Laura’s Loyal Stampers Stickers!

Have a wonderful weekend and I’ll see you back here on Monday!

Happy Stampin’

~Laura


Check Out This Star Blast!!!

Posted on

The Birthday Blast Stamp Set and coordinating Star Blast Edgelits are so much fun!! You can bundle and save 10% when you purchase them together! If you missed yesterday’s samples, check it out here! Now for today’s sample….

Star Blast, www.LaurasStampPad.com

I am loving this color combination – Night of Navy and Rich Razzleberry!!! Let’s get started!

I started with a Night of Navy card base. Then I took a piece of Whisper White (4″ x 5-1/4″) and stamped the star swirl image from the Birthday Blast Stamp Set! I used Night of Navy Ink. Stamp it towards the top and centered as best you can! Next, I took a piece of Rich Razzleberry cardstock (4″ x 4-1/2″) and die cut it with the Star Blast Edgelits. You will place the die at the top and center it side to side. The die doesn’t actually cut on the bottom side so it keeps that long piece at the bottom of the star blast. I like that about this die, it’s very versatile. You can save all of the little stars that die cut out so you can use them on the inside of the card or another project! I adhered the Rich Razzleberry star blast onto the card with some Fine Tip Glue Pen.

For the greeting, I layered a piece of Night of Navy (4″ x 2-1/4″). Then I took a piece of Whisper White (4″ x 2″) and stamped the greeting from the Birthday Blast Stamp Set in Night of Navy Ink. I tied some Silver Ribbon around the piece and above the greeting! I added this piece to the card front with Stampin’ Dimensionals. To finish off the card, I added 2 Silver Enamel Shapes to the stars at the top!

Star Border, www.LaurasStampPad.com

But wait….that’s not all! Since I had extra Rich Razzleberry stars leftover, I thought I would use them. I added a piece of Whisper White (4″ x 5-1/4″) to the inside of the card and added the little stars. I love it! Of course, check out my Video Tutorial posted yesterday showing off this sample and the one I posted yesterday!

Do you like to decorate the inside of your cards? Do you stamp greetings on the inside or just leave it open to write in? Let me know in the comments below!

Hope you have an amazing weekend! I will be stamping with lots of fabulous stampers both Saturday and Sunday! I can’t wait! See you back here on Monday!!!

Happy Stampin’

~Laura