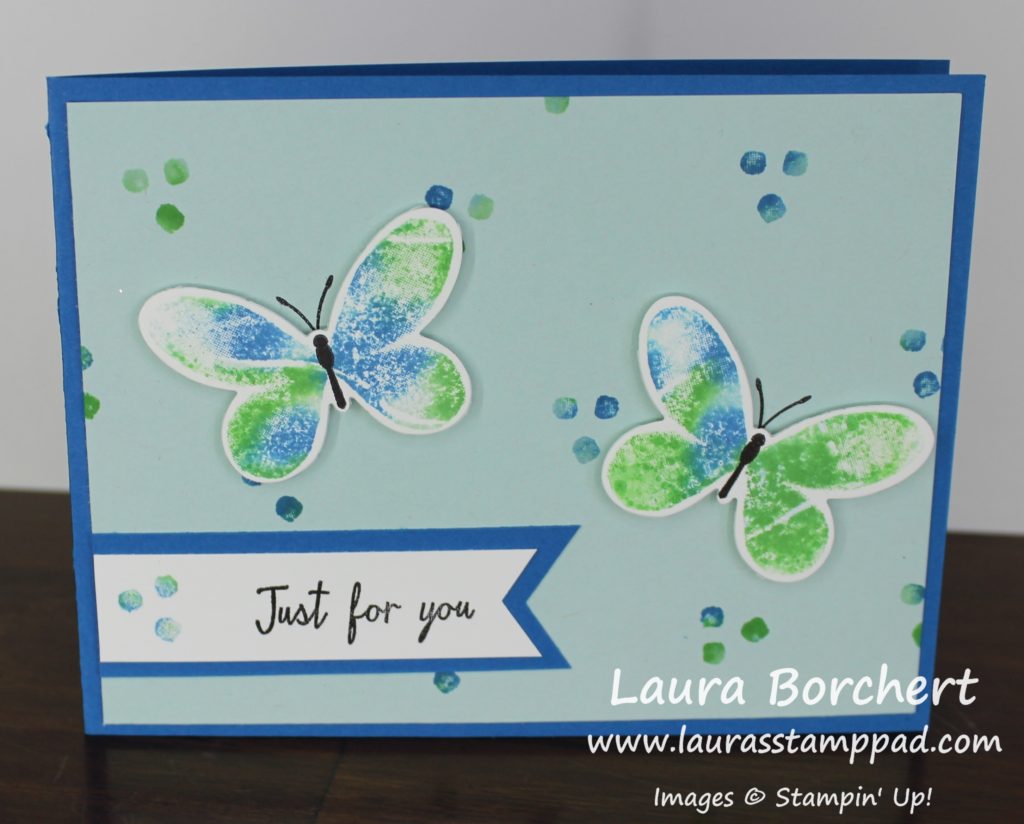
Happy Tuesday!!! That means I have a fabulous technique to share with you – the Baby Wipe Technique!!! I have done this many times before but each time it looks so amazing! Just playing with different stamp sets makes it so much fun! I just love it!!!
Butterflies are just so uplifting and beautiful! While I would love to make them in reds, yellows, and oranges, I thought I would branch out and use different colors! Now let’s get started on this super cool, easy technique – the Baby Wipe Technique!
I took a wet baby wipe and folded it a few times. Be sure the size is still bigger than the image you are going to stamp on it. Then I took a few ink refills and randomly dripped dots of ink on the baby wipe creating a big inky blob. The colors I used were Pacific Point, Cucumber Crush, and Soft Sky. This is now what I used as my ink pad for my butterflies!
Using the Watercolor Wings Stamp Set, I stamped the image into my “baby wipe ink pad” and then onto Whisper White scraps. Sometimes it takes a few stamps to get the colors to mingle together and then you get fabulous ones! You don’t have to worry about cleaning the stamp before going back to the “ink pad” because it’s not like you are going to ruin it. In fact, it will only make it more fun!! After stamping the butterflies, I die cut them with the coordinating Butterflies Thinlits! I did not stamp the center part of the butterfly until I die cut it out. I have found that I usually stamp too high or low and it get cut off so doing it afterwards is best!
Now to assemble the card, I started with a Pacific Point card base. Then I took a piece of Soft Sky (4″ x 5-1/4″) and stamped the three dots from the Watercolor Wings Stamp Set all over the background using my “baby wipe ink pad.” I adhered that to the card front and placed my butterflies on the card (no adhesive yet) and stamped the antennas. Then I added Stampin’ Dimensionals to the butterflies and placed them right next to their stamped antennas! For the greeting, I took a piece of scrap Whisper White 3/4″ wide and stamped the greeting from the Watercolor Wings Stamp Set in Basic Black Ink. I added those three little dots as well for an extra pop. Next, I cut the banner tips on the end and cut it as long as it needed to be for the greeting and dots. This can vary card to card. I layered it onto Pacific Point 1″ wide and long enough to layer. The greeting is on the lower left hand side of the card!
If you would like to see this all in action, check out my Video Tutorial below or click here! Don’t forget to give it a thumbs up if you liked it and be sure to subscribe if you are new. I post a new video every Tuesday and Thursday!
Only 2 more days to get entered into the Ink Pad Giveaway! I will be drawing a name for a Color Family of Ink Pads (10 total) on Friday!!! Click here for all the details!!!
Happy Stampin’
~Laura


I learned something new today. I think I will try this today. I have an idea right now. Thank you for the inspiration! ☺
YEAH! I hope you have fun and if you have any questions, just reach out! Enjoy! ~Laura