Fields of Lavender!!!

Posted on

Soft Spring breeze! Warm sun kissing your face! Birds chipping sweetly! Are you feeling amazing and relaxed?? I know I am and that’s why this fields of lavender card makes me so happy!!!

Fields of Lavender, www.LaurasStampPad.com

While this card is super simple, it’s just so amazing! The stamp set is called Beautiful Moments and there are 3 images with people in them as well as a few decorative images and greetings! It’s perfect! I’m in love!

I started with a Whisper White card base and stamped the greeting in Basic Gray in the lower right corner! Next, I added a strip of Highlight Heather that I ran through the Curls & Swirls Embossing Folder. Then for the focal point, I die cut out a Stitched Rectangle! This added a little more texture to the card!

Beautiful Moments Stamp Set, www.LaurasStampPad.com

I stamped this image in Basic Gray because I like that softer look! Then using Stampin’ Blends, I colored everything in!!! You could always use different colors. Heck, I don’t even know if that is lavender but that’s what I’m going with! Is it lavender? Let me know in the comments below!

Stampin' Blends Markers, www.LaurasStampPad.com

For the inside of the card, I added a little sprig of lavender!!! I feel like I could make lots of these with various greetings because it’s just so pretty! If you would like to recreate this fields of lavender card, check out the supply list below!

Happy Stampin

~Laura

Product List

Copper & Navy!!!

Posted on

Oh my goodness, Copper and Navy looks so amazing together and I love it!!! Check out this fun card I created with the Heartfelt Bundle. No red and pink and no Valentine’s Day! The Heartfelt Stamp Set isn’t just for Valentine’s Day! Try it out!

Copper & Navy, www.LaurasStampPad.com

This card is perfect for a birthday, anniversary, wedding, or just because. The texture and layers are amazing too!

I started with a Night of Navy card base. Next, I took a piece of Very Vanilla measuring 4″ x 5-1/4″ and stamped the greeting in the right corner. This greeting is from the Peaceful Moments Stamp Set in the 2020 Mini Catalog! This set has a greeting for everything which I LOVE!!! Then, I took a piece of Copper Foil Paper and ran it through the Mosaic 3D Embossing Folder. This gives that perfect touch of texture. This I added to the left side of the card.

For the hearts, I used the Heartfelt Stamp Set and coordinating Heart Punches. I stamped the big one onto Very Vanilla scrap cardstock and punched it out. Then I set it on the card about where I wanted it, moved it over slightly and stamped the smaller heart from the set. I also stamped off once with the smaller heart for a fun shadow effect. Then I used Stampin’ Dimensionals to add the big heart overlapping!

Heartfelt Stamp Set, www.LaurasStampPad.com

For the inside of the card, I added a piece of Very Vanilla (4″ x 5-1/4″) and stamped some hearts in the corners with Night of Navy Ink. This is the perfect decoration to pull it all together. You can always stamp a few hearts on the envelope as well!

Check out the supplies below to recreate this fun Copper and Navy card! Also, you can check out more samples using the Heartfelt Bundle by clicking here and here!

Happy Stampin’

~Laura

Product List

3D Embossing Folder Plate!!!

Posted on

Happy Tuesday!!! I’m keeping it simple today and sharing with you the 3D Embossing Folder Plate! Many of you have been asking me why your Embossing Folders aren’t going through and this is the trick!!

3D Embossing Folder Plate, www.LaurasStampPad.com

This fun blue plate has been a product that Stampin’ Up released to help us with embossing. Unfortunately since it was a product release after the Annual Catalog came out, it hasn’t been in an actual catalog. So while it is available, it’s been under the radar kind of!

The blue plate is a bit thicker than the clear plates for die cutting and embossing. When using Stampin’ Up’s 3D Embossing Folders, 1 clear plate is not thick enough and 2 is way too thick! So rather than using cardboard shims and getting super frustrated, we have the fun blue plate!!!

Check out all of this in action with the 3D Embossing Folder Plate in the video below or click here! Be sure to give the video a thumbs up if you liked it and don’t forget to subscribe if you are new. If you would like a notification when I post a new video, be sure to click the bell right next to the subscribe!!!

Happy Stampin’

~Laura

Product List

Golden Goddess!!!

Posted on

Happy Monday, everyone! I hope you had a wonderful weekend! I sure did! My Mom came yesterday and we stamped her Christmas Cards!!! It was so much fun and a good time to catch up! Today, I’m sharing another samples using the Christmastime is Here Suite. Check out this Golden Goddess!!!

Golden Goddess, www.LaurasStampPad.com

This card is just so elegant and beautiful! It would be perfect for a wedding card too!!! All white and gold and so amazing!

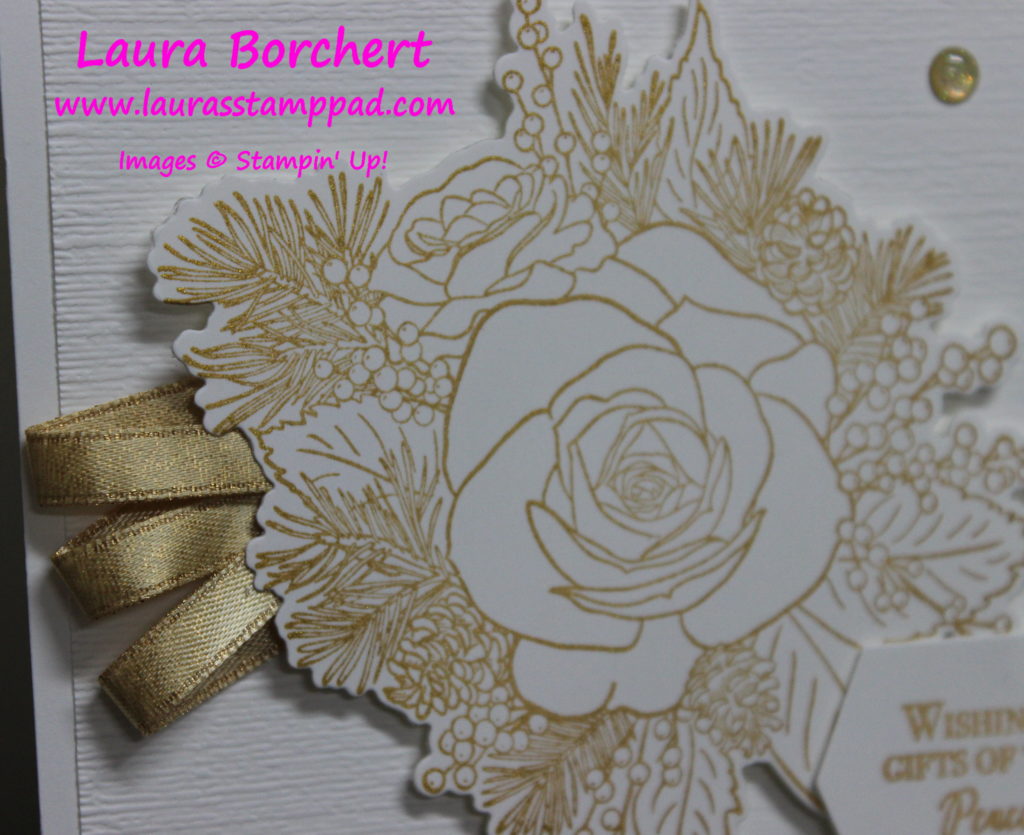
I started with a Whisper White card base. Next, I embossed another piece of Whisper White with the Subtle Embossing Folder and added it to the front. Then with yet another piece of Whisper White, I stamped the Christmas Rose in Gold Delicata Ink. Be sure to set it aside a bit to dry completely. I have found sometimes it smears if it isn’t fully dry. Once it is dry, I used the coordinating Roses Dies to die cut the rose and the greeting label. The greeting was also stamped in Gold Delicata!

Golden Rose, www.LaurasStampPad.com

To assemble, I flipped the rose over and added three little loops of the Gold Shimmer Ribbon. This stuff is just stunning! Using the Stampin’ Dimensionals to secure the ribbon and then all over the rest of the rose, I then added it to the card front! The greeting was also added with Stampin’ Dimensionals. You know me and my love for those things. To finish it off, I added a few Gold Glittered Enamel Dots! LOVE!!!!

Don’t forget that these items are while supplies last so click the supplies below to get your today and recreate this beautiful golden goddess card!

Happy Stampin’

~Laura

Product List
Christmastime Is Here Suite Bundle (English)
$112.50
Christmastime Is Here Specialty Designer Series Paper
$14.50
Gold 1/4" (6.4 Mm) Shimmer Ribbon
$7.00
Christmas Rose Bundle (English)
$61.00
Golden Glitz Delicata Metallic Ink Pad
$11.00
Subtle Dynamic Textured Impressions Embossing Folder
$10.00

Apple of My Eye!!!

Posted on

Happy Wednesday!!! This card is perfect for teachers, get well, and so much more. After all, you could send it to anyone as the apple of my eye!!!

Apple of My Eye, www.LaurasStampPad.com

This super cute card had fun fold to it as well. The green center piece with the apple opens up and then a little red flap opens down! There are little greetings with each flap too! Thank you to Deb Snyder for the inspiration for this fabulous card!

I started with a piece of Real Red measuring 4-1/4″ x 8-1/2″ and I scored it at 5-1/2″. This creates the little flap on the bottom that folds up. Next, I took a piece of Mint Macaron measuring 9″ x 3-1/4″ and folded it in half at 4-1/2″. The front flap of this piece was then embossed with the Pinewood Planks Embossing Folder. Then I added this to the inside of the red card base. I find that Tear & Tape is best because it has a nice strong hold for a flap that is going to be pulled on a lot.

A+ Teacher, www.LaurasStampPad.com

Next, I create the fun half apple and greeting using the Harvest Hellos Stamp Set and coordinating Apple Builder Punch! For the greeting, I used the Timeless Label Punch! The apple was colored with Real Red Stampin’ Blends and Soft Suede Stampin’ Blends. Be sure that this piece is positioned underneath the Mint Macaron flap.

For the front of the card, I created the apple by adding some of the Toile Tidings Designer Series Paper to a strip of Real Red cardstock. Then I stamped the apple over the top of this and punched it out. That is how you get the perfect half and half apple. The stem was done in Soft Suede and the leaf in Mint Macaron. Then to seal the overlap of paper on the apple, I added a mini strip of Mint Macaron Ribbon. The mini bow was then created with the Fork Bow Technique! This was all added to the front of the card with Stampin’ Dimensionals! So fun and fabulous!!!

If you would like to make this amazing card, check out the supplies listed below! Don’t forget that the Free Stamp Set of the Month is your choice between Day of Thanks and Perfectly Plaid! If you would like to see more samples using the Harvest Hellos Bundle, click here.

Happy Stampin’

~Laura

Product List

Flying Away!!!

Posted on

I’m writing this blog after dropping Claire off at a Stay & Play for the first time. I’m so excited for her to play with other kids and new toys and have fun. There is also the excitement that I have dedicated time to work without interruptions. Then there is that little pull on my heart that misses her already and is wondering what is she doing and does she miss me. It’s like she’s already flying away from me. 🙁 But just like this card says, Let Your Dreams Soar!!!

Flying Away, www.LaurasStampPad.com

This card is perfect for this time of the year. Send it to someone who is heading off to college. Someone heading to a new job would love a card like this too! There are so many wonderful uses for this card that is sure to put a smile on their face and some warmth in their heart!

I started with a Pretty Peacock card base. Next, I took a piece of 4″ x 4″ Terracotta Tile and embossed it with the Subtle Embossing Folder. This gives just the perfect amount of texture! This piece was added on the left hand side of the card front. Then, I took a piece of the Follow Your Art Designer Series Paper and stamped hot air balloons all over in Pretty Peacock. All of these images are from the Above the Clouds Stamp Set. Then I added this layer to the card front.

Subtle Embossing Folder, www.LaurasStampPad.com

Now for the flying away balloon focal point and the greeting! I die cut a Stitched Circle in Very Vanilla! Then on a piece of scrap Very Vanilla, I stamped the Hot Air Balloon and greeting in Basic Gray Ink. Using Stampin’ Blends, I colored the balloon! I went with Pretty Peacock, Crushed Curry, and Calypso Coral. For the basket, I actually stamped in Basic Gray onto Smokey Slate cardstock. I added these to the circle with regular Snail Adhesive but then I popped up the full circle on the card front with Stampin’ Dimensionals! Off to the right, I added a little banner strip with the other greeting stamped in Terracotta Tile Ink. I finished off the card with a few Faceted Dots in Pretty Peacock!

If you would like to recreate this Flying Away card, check out the supplies listed below. You can also check out other samples using this set here and here!

Happy Stampin’

~Laura

Product List

5 Layer Bow!!!

Posted on

I know many of you may hate tying bows but they make a card look so fabulous! Practice makes perfect too so keep trying! People always ask how I do it and get it to come out so well. Practice, Practice, Practice! Every time I help someone make a bow….that’s more practice! This 5 layer bow really POPS off the card and I just used 5 strands of Linen Thread!

Thank You Birdie Card, www.LaurasStampPad.com

See how this card just POPS with that fun bow….and those gorgeous birdies! Check out this video tutorial to see how simple punching out designer paper is!

I started with a Calypso Coral card base. Next, I took a piece of Whisper White and ran it through the Woodland Embossing Folder for that fun tree background. Before adding this layer to the card front, I added a piece of the Petal Pink Organdy Striped Ribbon across it, securing the ends on the back side. Then using the Layering Circles Framelits and a Circle Punch, I punched out some of the Bird Ballad Designer Series Paper. These images are super fabulous and fit perfectly in a little circle. You can punch out tons of images for one sheet of 12″ x 12″ to create lots of different cards. It’s super fun! I layered those together and added it to the card front with Stampin’ Dimensionals!

5 Layer Bow, www.LaurasStampPad.com

The greeting was stamped from the Free As A Bird Stamp Set onto the coordinating Stitched Nested Framelits! I added this to the card with Stampin’ Dimensionals too! The dimensionals help secure an image on a rough surface like an embossed one or one with ribbon! It also gives a nice smooth look to the card because the dimensional pops in and out of the grooves!

Now for that fabulous 5 layer bow, I took 5 strands of Linen Thread all stacked together and tied them into a bow. For a free standing bow like this one, I create 2 loops (bunny ears) and then tie a knot with those 2 loops just as if they were a single strand. Push and pull to get the perfect size loops and tails for your bow that you wish. Then I secured it to the card front with a Mini Glue Dot!!!

Flowers on the corner, www.LaurasStampPad.com

Of course I had to decorate the inside of the card too! I added a few flowers from the Free As A Bird Stamp Set in Calypso Coral Ink! I just love decorating the inside of the cards now! How about you??? Let me know in the comments below!!

If you want to create this card, check out the supplies listed below! Don’t forget Bonus Bucks this month for every $50 you spend!!

Happy Stampin’

~Laura

Product List
Bird Ballad Designer Series Paper
$11.50
Woodland Embossing Folder
$8.50
Petal Pink 5/8" (1.6 Cm) Organdy Striped Ribbon
$8.00
Linen Thread
$5.00
Layering Circles Dies
$35.00
Free As A Bird Bundle
$51.25
Calypso Coral Classic Stampin' Pad
$7.50

Laura’s Quick Tip: Punch It!!!

Posted on

Did you know that the gray, nude, and white images in the Stampin’ Up! Catalog actually mean something??? The stamp images that have a nude looking outline behind them mean that there is a coordinating Punch that matches that image. If it is gray or white behind the image, there is a coordinating die cut. Super fabulous, right! Did you know that there are tons of images that can be punched or die cut even though they don’t have that little labeling?? That what today’s Laura’s Quick Tip is all about. There are so many images that you can punch!!!

Laura's Quick Tip, www.LaurasStampPad.com

Check out this super cute card that used lots of punches for various images! There are so many fun ways to use your punches for different images for a super cool look!

I started with a So Saffron card base. Next, I took a piece of Pool Party measuring 4″ x 5-1/4″ and ran it through the Mosaic Embossing Folder. Then I added it to the card front. For the decorations, I stamped the little flower in So Saffron and the mosaic flower in Terracotta Tile. Using the 1/2″ Circle Punch and 3/4″ Circle Punch, I punched them out and added them to the card. Some of them I used Stampin’ Dimensionals and others I glued on flat. This gives more texture and dimension to the card!

Layered Punches, www.LaurasStampPad.com

For the greeting, I stamped it in Pool Party. All of these images are from the Memorable Mosaic Stamp Set. Using the Timeless Label Punch, I punched it out of Whisper White. Then I layered a piece of Terracotta Tile that was punched out with the Everyday Label Punch. Those layer so well together! Using the Silver Metallic Thread to make some loops, I added those to the back of the greeting and added it to the card front. I finished it off with a Flower Faceted Gem!

Mosaic Card Insert, www.LaurasStampPad.com

For the inside of the card, I stamped a few of the same images on the corners to really pull it all together! It’s perfect! I hope you enjoyed this Laura’s Quick Tip and have fun with your punches! Remember you can punch it with any image!

If you would like to see this all in action and how it looks in the catalog, check out the video below or click here! Be sure to give the video a thumbs up if you liked it and don’t forget to subscribe if you are new. If you would like a notification when I post a new video, be sure to click the bell right next to the subscribe!!!

Happy Stampin’

~Laura

Product List
Memorable Mosaic Bundle
$36.00
Everyday Label Punch
$18.00
1/2" (1.3 Cm) Circle Punch
$6.00
Mosaic 3D Embossing Folder
$10.00
Flower Faceted Gems
$8.00
Silver Metallic Thread
$3.50

Country Floral!!!

Posted on

This Country Floral Embossing Folder was one of the Sale-A-Bration items and that ended last week. If you earned it, try out this amazing card!!! If you didn’t earn it, don’t worry as it is coming back! Woot Woot!

Country Floral, www.LaurasStampPad.com

I went very basic as I feel like the embossing folder is just so stunning. Adding a little gold bling and some navy makes it POP! You could use silver and any other color as well. What colors would you use? Let me know in the comments below!

I started with a Very Vanilla card base. Next, I took another piece measuring 4-1/8″ x 5-3/8″ and embossed it with the Country Floral Embossing Folder. I went a tiny border from the embossed piece and the card base so it looked like it filled out the card front more. I don’t like actually embossing the card front of the card base because then it makes the inside all bumpy and the card base less secure in my opinion. After adding this piece to the card base, I tied some Gold Metallic Edge Ribbon around the card.

Welcome Baby, www.LaurasStampPad.com

For the greeting, I used Circle Punches and the Well Said Stamp Set from the Occasions Mini Catalog. I love this stamp set because it has lots of greetings for any occasion and it has a greeting for the inside of the card as well! Perfect! I stamped the greeting in Night of Navy Ink. To finish off the card, I added a few pearls for bling and texture!

This quick and simple card can be created with any style of embossing folder! It is great to have a few on hand and add a greeting as you need a card!

Happy Stampin’

~Laura

Product List

You are Amazing!!!

Posted on

It’s Monday and while that is a bit of a bummer that the weekend is over. It means a new start to a week and let’s make it a good one! After all it is the last week of February and one step closer to Spring! So put on a smile this Monday and know that you are amazing!!! Thank you to Jean Noellsch‎ for the inspiration for this card.

You Are Amazing, www.LaurasStampPad.com

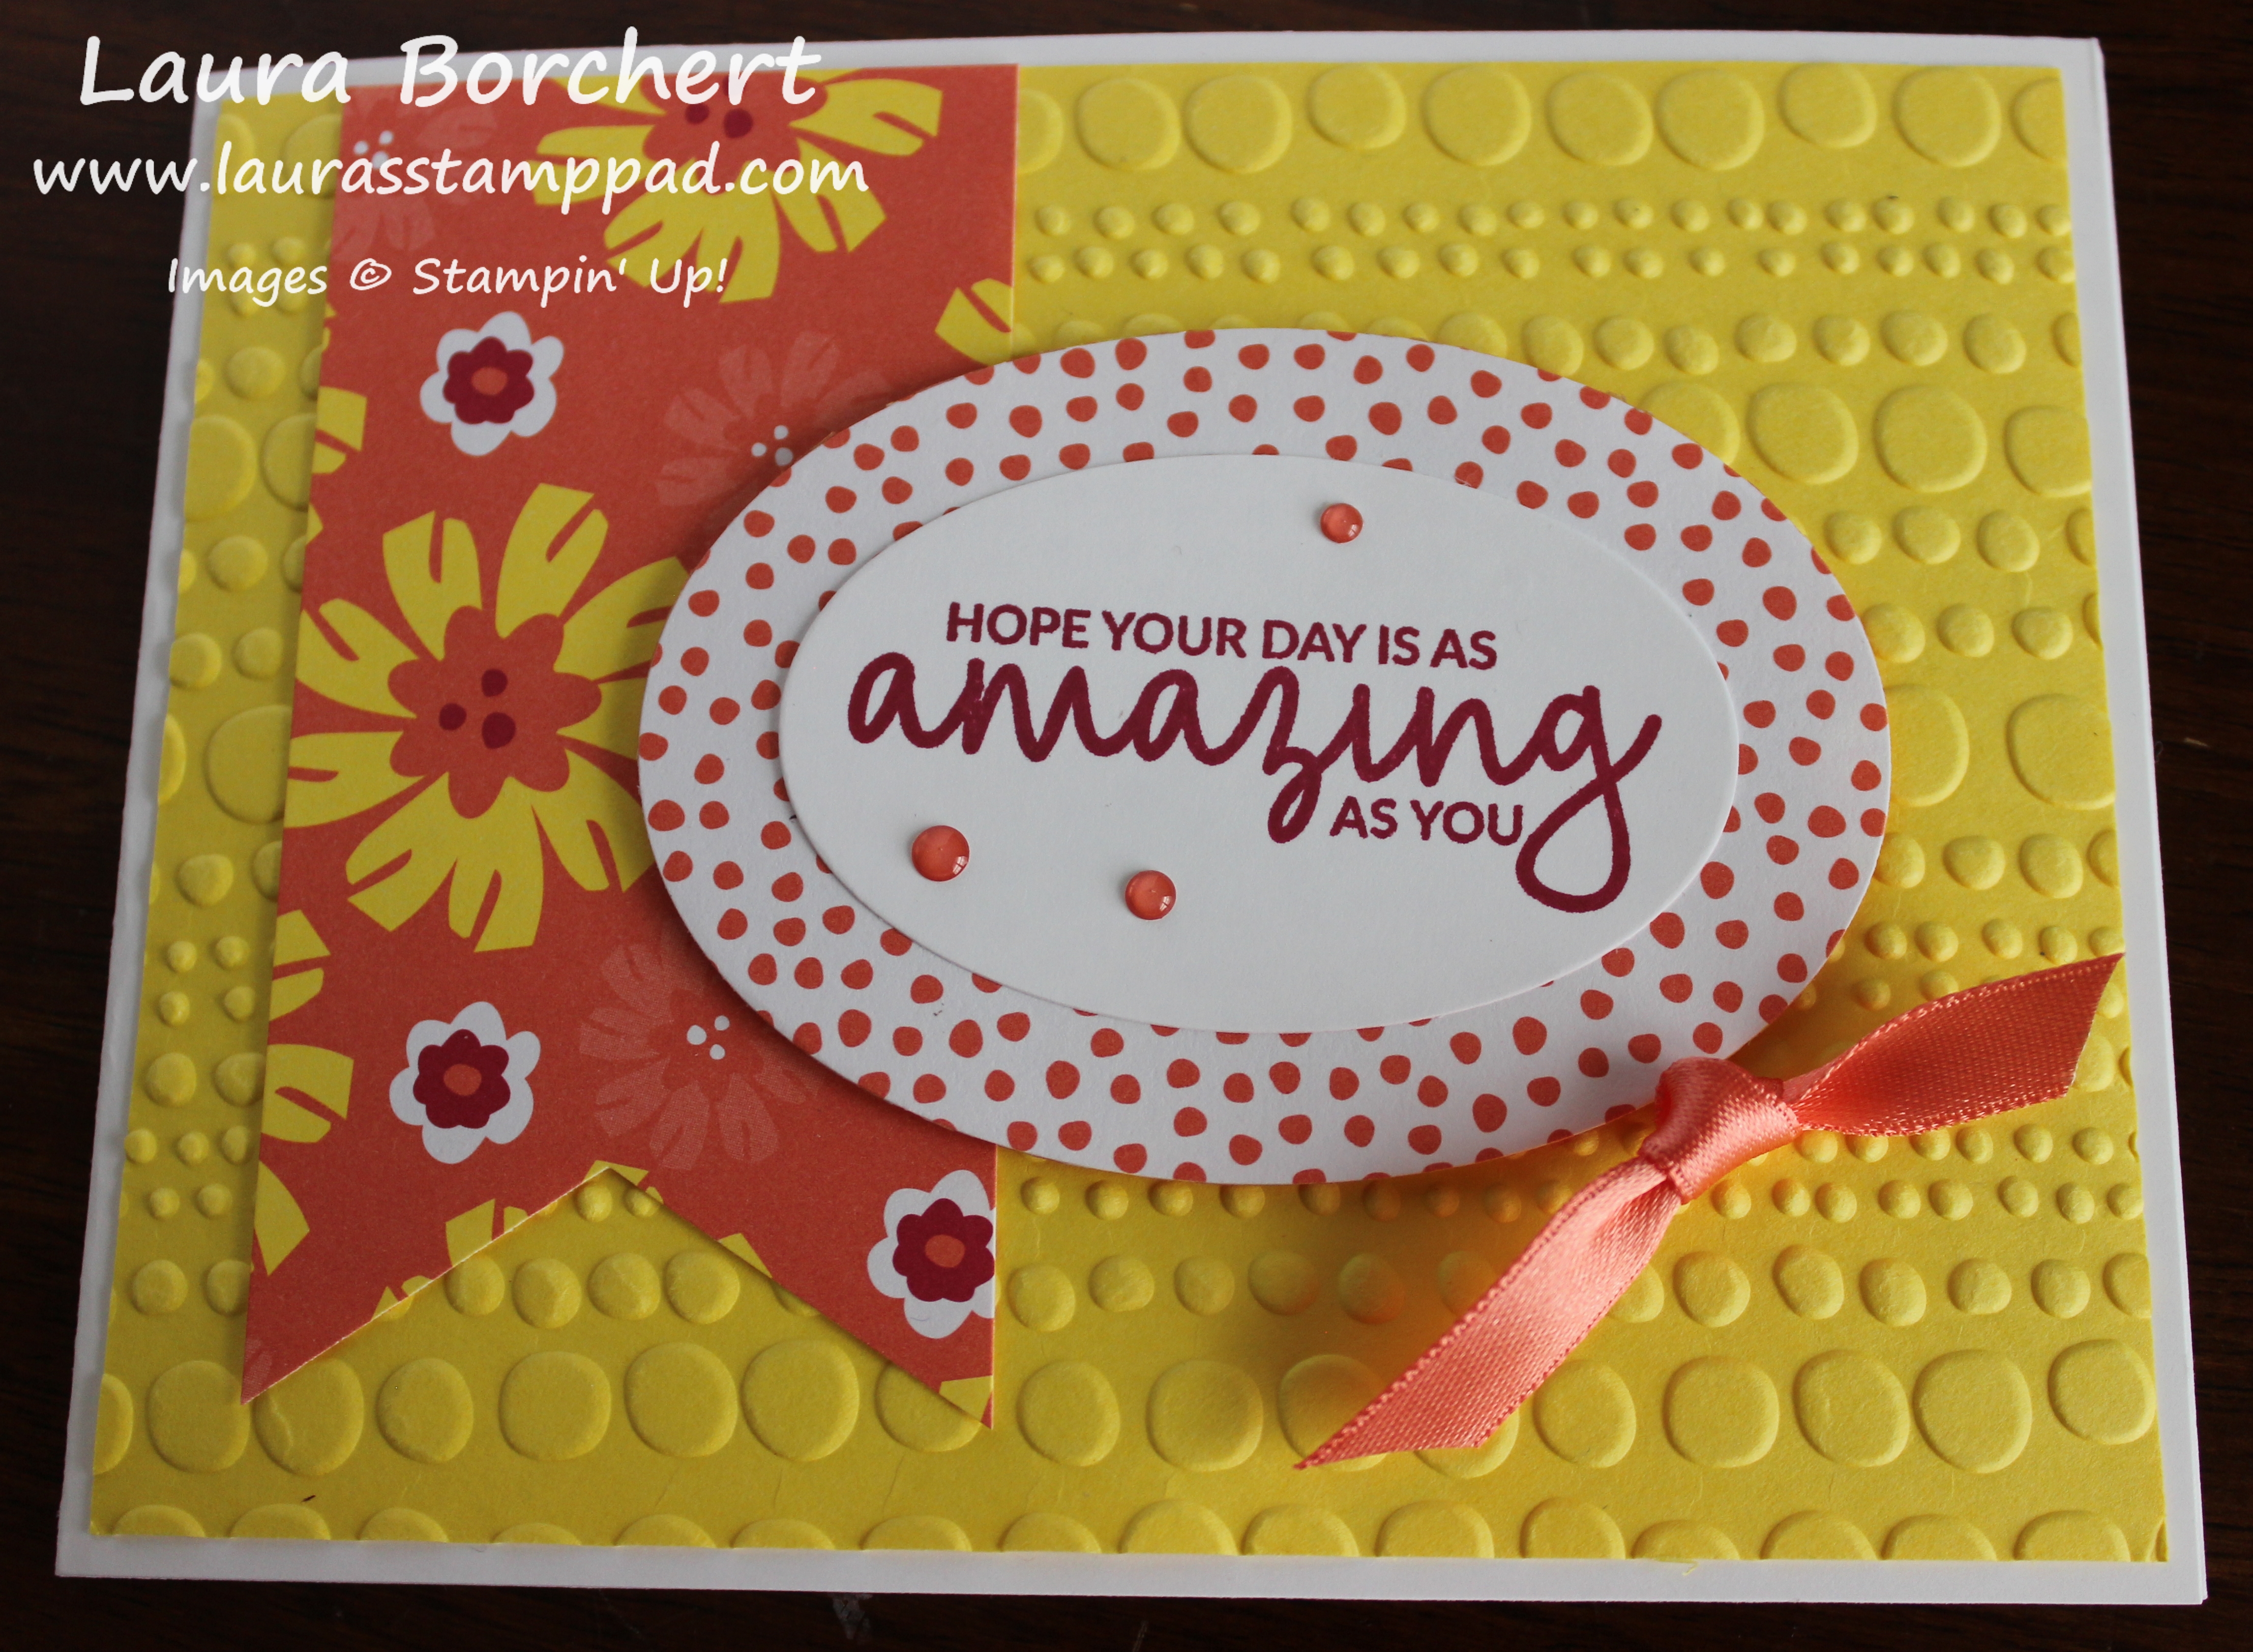
Surely this beautiful bright card is going to make you smile!!! I just love flowers and bright colors. I’m also loving the Dot To Dot Embossing Folder right now too. It’s just so classic and goes with everything!

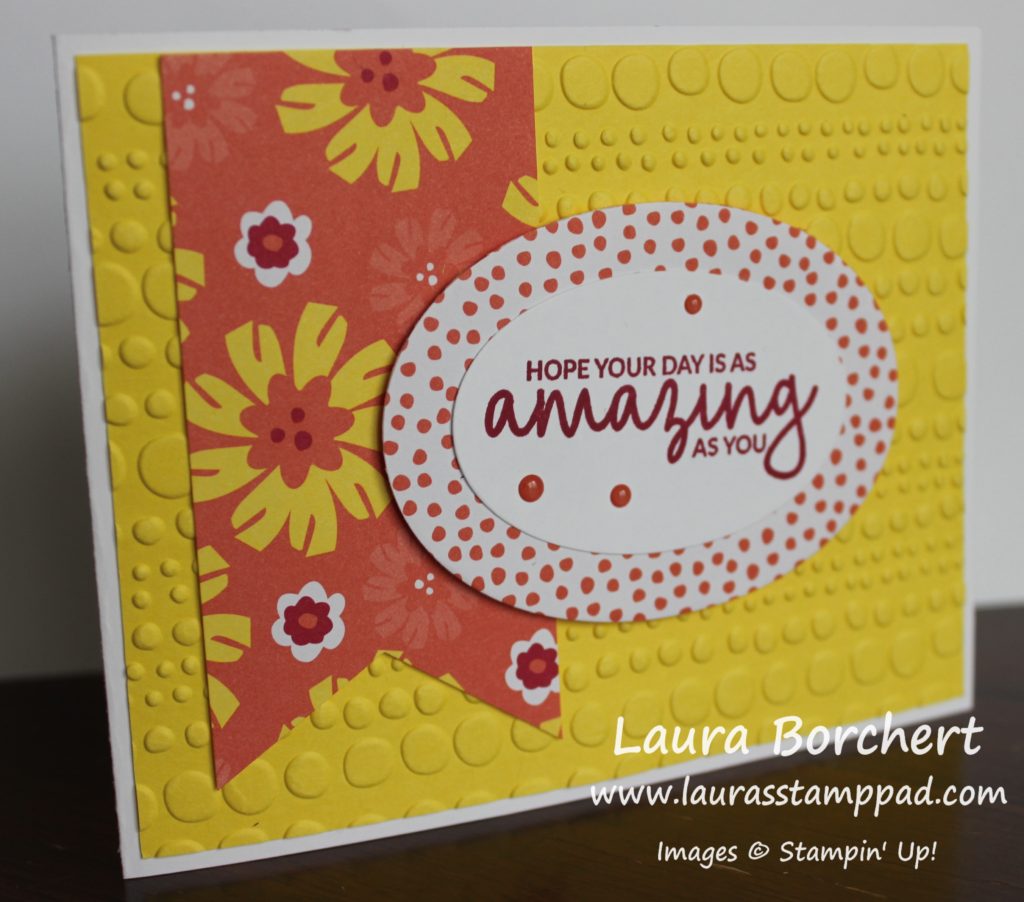
I started with a Whisper White card base. Next, I layered on a piece of Pineapple Punch (4″ x 5-1/4″) that was run through the Big Shot in the Dot to Dot Embossing Folder! Using a strip of the Happiness Blooms Designer Series Paper and the Banner Triple Punch, I created the floral banner for the left hand side. Then using that same patterned piece, I die cut an oval with the Layering Ovals Framelits to back the greeting! The greeting was stamped from the Incredible Like You Stamp Set. To finish it off I added a few Happiness Blooms Enamel Dots. The greeting was added to the card front with Stampin’ Dimensionals for texture as well as the fact that they hold better on an embossed surface.

Knot or Not, www.LaurasStampPad.com

I couldn’t decide whether it needed this little knot of ribbon or not. What do you think – knot or not?? Let me know in the comments below!

If you would like to recreate this card, check out the supply list below! Don’t forget that orders of $50 earn a FREE Sale-A-Bration item!!!!

Happy Stampin’

~Laura

Product List