Highlighting With Color!!!

Posted on

Do you like to color? Could you spend hours a day just snuggling on the couch and coloring? I’m with you on the snuggling but I don’t think I could color for hours. I enjoy it in little bits but those adult coloring books give me heart palpitations. The image is just so overwhelming and I don’t know what to color first. If it does that to you as well or you just don’t have a lot of long hours to give to color, check this out – Highlighting With Color!!!!

highlighting with color, www.LaurasStampPad.com

See how those butterflies pop but I didn’t color everything on the Botanical Butterfly Designer Series  Paper!!! Just a little bit of color goes a long way and it was quick to do!

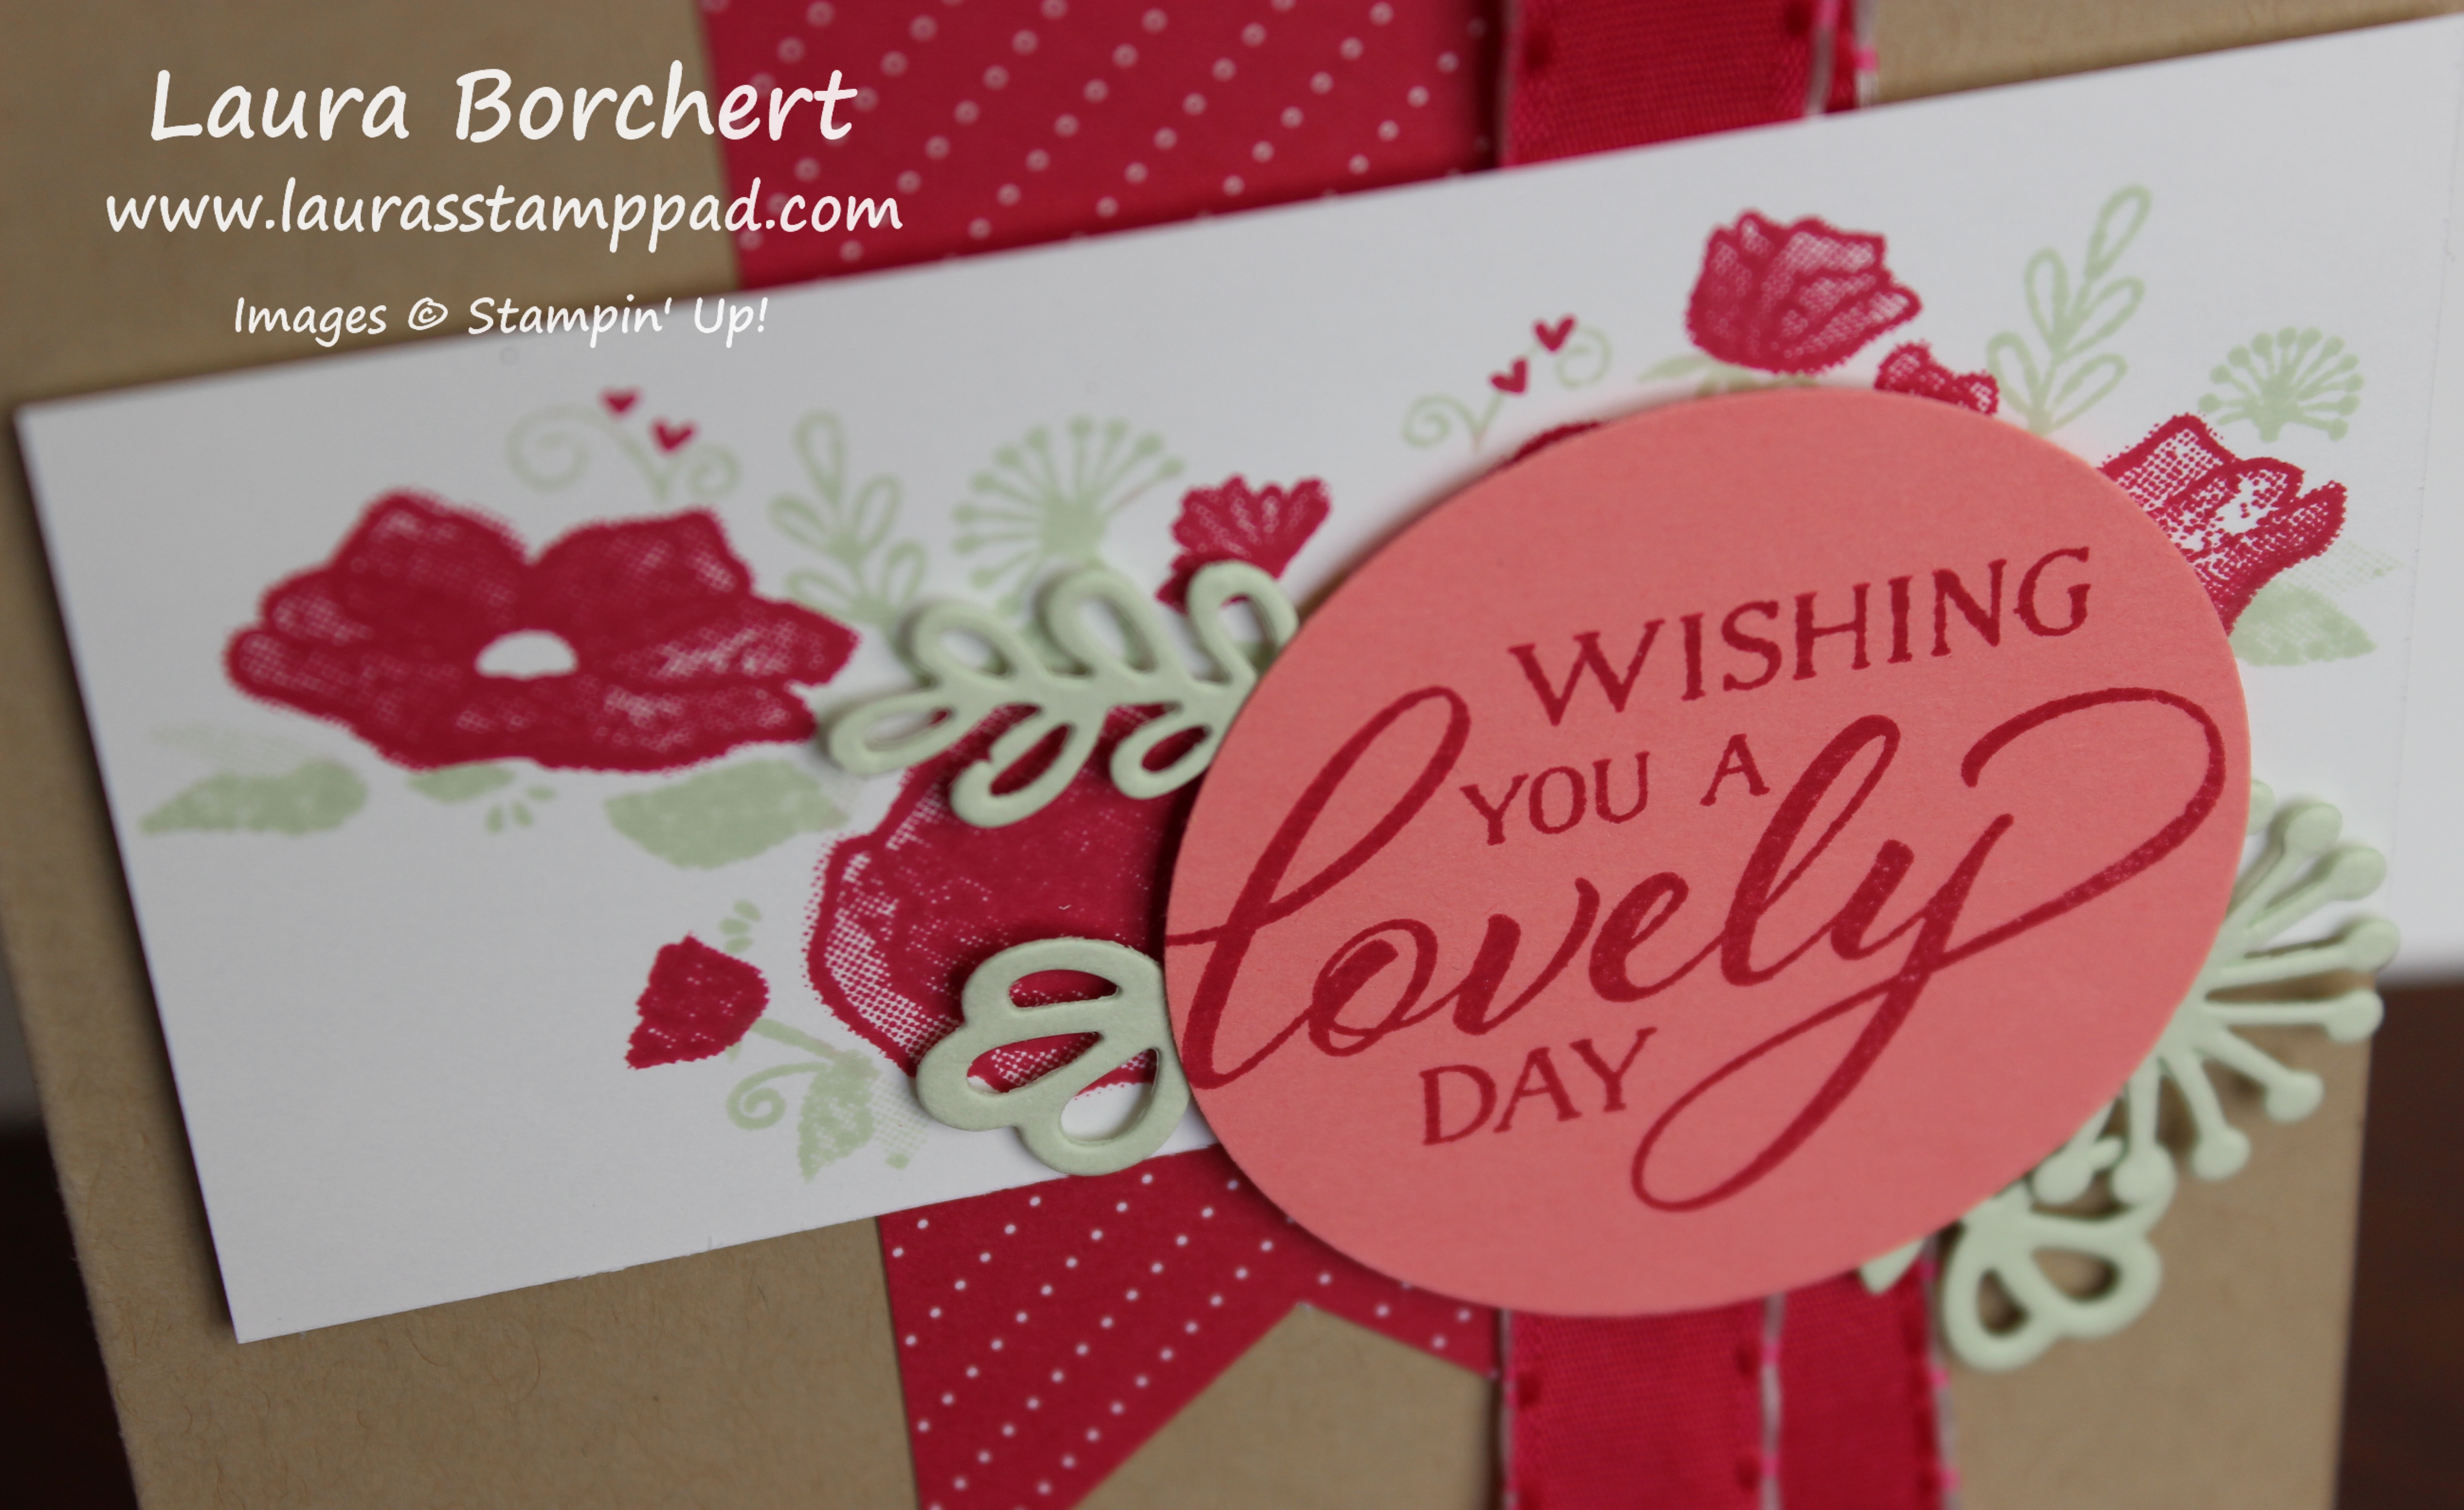
I started with a Bermuda Bay card base. Next, I layered on a piece of Basic Black measuring 3-1/2″x 4-1/2″. Then I took a piece of the Botanical Butterfly Designer Series Paper (3″ x 4″). Using the Bermuda Bay Watercolor Pencil, I quickly colored back and forth all the way around the big butterflies. Just a simple scratch scratch scratch all the way around! You could always use different colors or all the same color! Once I finished coloring, I layered this piece onto the card front.

Hello Beautiful, www.LaurasStampPad.com

For the greeting, I used the Layering Circle Framelits to die cut a smooth white circle and a scalloped black circle. The greeting was stamped in Bermuda Bay Ink from the Butterfly Gala Stamp Set. You can still purchase this stamp set even though the coordinating punch is on backorder! I’ll keep you posted when the punch is available again! For a little bit of texture and shine, I wrapped some Silver Metallic Thread around my fingers to create loops for the back of the greeting. Using Stampin’ Dimensionals, I secured the thread and adhered the greeting to the card front. Depending on where your butterflies are the piece of designer paper that you cut, you can move the greeting around to different spots. I love it!

You can earn the Botanical Butterfly Designer Series Paper for FREE with Sale-A-Bration!!! Bring on all things butterflies! I am loving it all this season! I’m also loving monochromatic cards lately. Not sure why, but I have noticed all of my cards have been single colors. Are you a fan or do you prefer a card with all kinds of colors? Let me know in the comments below!

Happy Stampin’

~Laura

Product List


I Am A Beautiful Butterfly!!!

Posted on

Do you know what movie that is from??? I Am A Beautiful Butterfly…..if you guessed A Bug’s Life you are correct! I love that movie and the crazy little bugs. Butterflies are all I seem to want to play with right now! The Butterfly Gala Stamp Set, Duet Butterfly Punch, Botanical Butterfly Designer Paper…..I want it all!!!

Today, I am honored to be a part of the Blogging Friends Blog Hop!!! I created this amazing butterfly card and the other Blogging Friends used it as inspiration for their project. Be sure to check out all of their links below to get more fabulous ideas on how to use these products!

I Am A Beautiful Butterfly, www.LaurasStampPad.com

Isn’t this card so fabulous with that POP of purple and those gorgeous butterflies??? I am love love loving it! Also, I always love playing with some back and white! The super cool thing about this card is that the butterflies were already colored for me so that was super easy!!

I started with a Basic Black card base. Next, I took a piece of Highland Heather (4″ x 5-1/4″) and ran it through the Big Shot in the Swirls & Curls Embossing Folder. This makes such a fabulous background and gives the card a lot of texture. I added this piece to the card front! Then I took a strip of the Botanical Butterfly Designer Series Paper which is a Sale-A-Bration item and punched some banner tips using the Banner Triple Punch! The strip measures 1″ x 3-1/2″. This was added to the card front on the right side edge. For the greeting, I stamped it in Memento Black Ink from the Butterfly Gala Stamp Set. Then I punched it out with the Pretty Label Punch! This was then layered onto a Daffodil Delight 1-3/4 Circle. The greeting was added to the card front with Stampin’ Dimensionals for even more texture!

Now for those amazing butterflies that I didn’t have to color. Those were actually punched out with the Butterfly Duet Punch from the Botanical Butterfly Designer Paper! How cool is that??? No fussy cutting or coloring! The piece of paper has LOTS of butterflies with different color combinations to pick from. I went with these two so that I could keep with the purple theme. Another tip: the butterfly hiding behind the greeting isn’t even a full butterfly. I really loved the coloring on that one but it was at the edge of the paper so it wasn’t a complete butterfly. No need to fret, I just make it look like the butterfly was flying up from behind the greeting! It looks fabulous and you would never know! After all, we can’t waste designer paper! Am I right?

Click the blue box below to see a complete list of the other Blogging Friends in this Blog Hop and see their amazing creations!

Check out the supply list below so you can recreate this amazing card and earn the Botanical Butterfly Designer Paper for FREE through Sale-A-Bration!!!

Happy Stampin’

~Laura

Product List


Laura’s Quick Tips: Have a Missing Framelit??

Posted on

Today I’m sharing another one of Laura’s Quick Tips! Are you always super organized?? Yeah me neither even though I am a rather organizational freak. It happens though. I get to playing so much in the stamp room. I’m pulling out everything to try and when the mess gets about 2 feet deep, it’s time to clean up and start again! There are 10 inks pads on the desk, cardstock in 15 colors, 4 stamp sets opened up, and framelits all over. Unless it is the Layering Ovals/Circles/Squares, it can be tricky figuring out which ones go with with set.

Have a Missing Framelit, www.LaurasStampPad.com

Not anymore after you hear about this cool tip! If you look real close to the top side of the framelit, there will be a number. That number is actually the item number for the set of Framelits. You will see in the catalog, there is a number usually starting with 14 and then the name and price of the item. If you find a random framelit on your desk….or gasp the floor. lol Take that number and enter into the Stampin’ Up website and it will tell you which set it is. Try it out with this number and let me know in the comments below which set it is. The number is 146828 and click here to find out what set it is! (There might be a prize drawn for all of the answers.) 🙂

DISCLAIMER: This will not work for sets that have retired. So here are a few tips for your retired items. Keep your old catalogs for the awesome ideas as well as looking up framelit numbers. You can browse the back and find the number in the section with all of the framelits. Another option is to download the catalog to your computer/device and save it. When you need to find a set, simply hit Control F or (FIND) and type in the number there. Then it will pop up really quick!

I hope this if super useful and you can rest assure you aren’t alone in trying to figure out the missing piece! If you would like to see this all in action, check out the video below or click here! Be sure to give the video a thumbs up if you liked it and don’t forget to subscribe if you are new. If you would like a notification when I post a new video, be sure to click the bell right next to the subscribe!!!

Happy Stampin’

~Laura


Laura’s Quick Tips: Did My Stamp Just Move??

Posted on

Happy Tuesday, everyone! I have a little bit of a Technique Tuesday and a little Laura’s Quick Tips today! If this has happened to me, surely it has happened to you. I have my Stamparatus all lined up and ready to go. After stamping a few, I line up the next one and just as a go to stamp it down, I realize it is not lined up correctly. Did My Stamp Just Move???

Did My Stamp Just Move, www.LaurasStampPad.com

Nope!!! The stamp didn’t move but the grid/scrap paper did or the foam mat did. My mind has been boggled so much on this and wondering how it moved and I could have thought I lined it up correctly. Then after looking at it more, I realize the paper or foam moved and it’s like Ahhh Hah!!! So when you think the stamp moved……check your paper and foam mat! 🙂

This fabulous card was created using the Stamparatus for that 2 step stamped image of flowers! The Stamparatus makes that image a breeze. One plate holds the folders for a fun color of your choice and the other plate holds the greenery piece! Boom Boom and you have a fabulous stamped image…..just make sure your grid and foam mat are in place!

I started with a Crumb Cake card base and then added a 2″ strip of the All My Love Designer Series Paper. I punched the bottom of it with the Banner Triple Punch to get those banner tips! Next, I added a piece of the All My Love Ribbon by just putting a little bit of Snail Adhesive down the banner and pressing the loop into it. It won’t feel secure at this time but when you place the stamped floral image over the top with Stampin’ Dimensionals, that will secure it better. For the floral piece I used Soft Sea Foam and Lovely Lipstick Inks.

Wishing You a Lovely Day, www.LaurasStampPad.com

For the greeting, I stamped it from the Forever Lovely Stamp Set in Lovely Lipstick. Can I say Lovely any more in one sentence?!?!? Then I punched it out with the 1-3/4″ Circle Punch! For a little texture, I die cut some of the greenery pieces from the coordinating Lovely Flowers Framelits. One of the framelits is actually a 2 for 1 piece. There are 2 of that greenery piece in the 1 framelit. I die cut the 3 framelits in Soft Sea Foam and got the 4 pieces to use around the greeting! The greeting piece was added to the card front with Stampin’ Dimensionals as well! Just lovely! (I had to do it.)

If you would like to see this all in action, check out the video below or click here! Be sure to give the video a thumbs up if you liked it and don’t forget to subscribe if you are new. If you would like a notification when I post a new video, be sure to click the bell right next to the subscribe!!!

Happy Stampin’

~Laura

Product List


So Glad We Are Friends!!!

Posted on

Happy Wednesday!!! Do you follow someone on social media and you feel like you really know them? When talking to someone, you say oh yeah my friend recommends this or my friend did this but really you have never met that person. This happens to me all the time. I have lots of friends like that. If I am your friend that way, give me a shout out in the comments and know I would LOVE to be your friend online and maybe even some day in person! This card says it all….So Glad We Are Friends!!!

Grapefruit Grove Foil Paper, www.LaurasStampPad.com

How fabulous is this card?? The Lovely Lipstick and Grapefruit Grove color combination is amazing and oh that shiny foil! YUM!!!

I started with a Grapefruit Grove card base measuring 11″ x 4-1/4″. It opens like a book. Next, I took a piece of Lovely Lipstick and ran it through the Big Shot in the NEW Dot To Dot Embossing Folder. I layered this onto the card front! Then using the Stitched Rectangles Framelits, I die cut some of the Sale-A-Bration Grapefruit Grove Foil Paper and Whisper White cardstock.

So Glad We Are Friends, www.LaurasStampPad.com

The greeting is from the Incredible Like You Stamp Set from the Occasions Mini Catalog. I stamped  it in Lovely Lipstick Ink towards the right side. Then I layered the white rectangle onto the foil piece. Then using the Lovely Lipstick Ribbon from the All My Love Ribbon Pack, I looped a knot and placed it on the rectangles. Then I simply secured the ends on the back with some Stampin’ Dimensionals. Finish off adding more dimensionals so it’s even and I added this to the card front!


Stitched Rectangles, www.LaurasStampPad.com

I finished off the card by adding a few Enamel Shapes from the Happiness Blooms Enamel Dots. It’s just perfect! I had to share all of these photos so you could really see how fabulous that foil paper is and the ways it shines! Earn this foil paper for FREE through Sale-A-Bration with a $50 order! Click the supplies for this card listed below to start earning!!!

Happy Stampin’

~Laura

Product List


Designer Series Paper Scraps Used Up!!!

Posted on

Come on I know we all have plenty of scraps laying around. Today I’m sharing how to get those Designer Series Paper scraps used up!!!

Designer Series Paper Scraps Used Up, www.LaurasStampPad.com

This card uses scraps of designer paper measuring 4″ x 1-1/4″. I mixed and matched the pieces together. Some of the patterns I used both the front and the back and others I just used one of the sides for each card. All of these are layered on a piece of Early Espresso cardstock measuring 4-1/8″ x 5-3/8″. My tip for getting the spacing correct is to start on the outside and work your way in. All of this was layered onto a Whisper White card base.

For the decoration, I added a piece of the Real Red Satin Ribbon with the loop at the top and the ends hanging down. Simply add a smidge (an inch) of adhesive to the card and press the ribbon into it. Then place your greeting over the top to help secure it. The greeting uses the Laying Circles Framelits in Old Olive and Whisper White. The greeting was stamped in Early Espresso from the Stylish Christmas Stamp Set from the Annual Catalog! Of course the greeting is popped up with Stampin’ Dimensionals for a little bit of texture and a smooth finish over that ribbon!

What designer paper pack do you have lots of scraps from? What style of card or occasion are you going to make this with pattern?? Let me know in the comments below!

Happy Stampin’

~Laura

Product List


Festive Farmhouse Fun!!!

Posted on

Happy Monday!!! I hope you all had a wonderful Thanksgiving and weekend! We got to spend lots of time with both sides of the family. It was amazing and Claire enjoyed all the attention. Wish me luck today as I am her only entertainment. 🙂 Now that Thanksgiving is over, it’s time to prepare for the next holiday!!! I created this cute and simple Festive Farmhouse fun card for just the occasion!

Festive Farmhouse Fun, www.LaurasStampPad.com

I’m all about quick and simple cards this year because I just don’t seem to have much time lately now with little Miss Claire in our lives! 🙂 This card also uses every bit of the 12″ x 12″ sheet of Designer Paper because it is a 4″ x 3″ piece! Bonus!

I started with a Cherry Cobbler card base. Next, I took a piece of the Festive Farmhouse Designer Series Paper (4″ x 3″) and layered it onto a piece of Crumb Cake (4-1/4″ x 3-1/4″). Then I added this piece to the card front. I took a piece of the Striped Burlap Trim and cut the ends to a point, making the points opposite for each end. Just add a little bit of Snail Adhesive to the designer paper and press the ribbon into it. It won’t be held super strong at this point but that’s okay. Adding the greeting over the top will hold it much better.

For the greeting, I used the Timeless Tidings Stamp Set. The kit is amazing but the coordinating stamp set is SUPER versatile. Check out these samples using it here and here! The greeting was stamped in Cherry Cobbler Ink and punched out with the 2″ Circle Punch. Then I layered it onto a Cherry Cobbler Scallop Circle. The scallop was die cut with the Layering Circle Framelits. The framelits create smooth and scalloped circles but I used my punch for the smooth one to go faster! If you only have the framelits, it would work perfectly! I added the greeting to the card front with Stampin’ Dimensionals for a little texture and to go smooth over the ribbon!

Do you like quick and simple cards for Christmas or more intricate, detailed ones? Let me know in the comments below! I’m off to work on my cards today! I have a lot to create since my family is huge and all of my customers get one! 🙂

Happy Stampin’

~Laura

Product List


Detailed Deer Card #2!!!

Posted on

Yesterday I shared a fun card using the Dashing Deer Stamp Set and coordinating framelits. Today it’s Part 2 and I’m sharing this detailed deer card!!! Click here to check out yesterday’s card if you missed it!

Detailed Deer Card, www.LaurasStampPad.com

As you can see, this card is very similar in style to the one I shared yesterday! It also uses the same greeting banner, stamped floral image, same colors, and the die cut deer!!! This makes creating multiples for Christmas super easy!!!

I started with a Whisper White card base and stamped the floral image on the top and bottom in Merry Merlot Ink. All the images for this card are from the Dashing Deer Stamp Set from the Holiday Mini Catalog. Next, I added a little strip of Gold Glimmer Paper just above and just below the stamped image. Then I took a piece of Whisper White (4″ x 4″) and embossed it with the Swirls and Curls Embossing Folder. TIP: I know this is sort of after the fact but I wanted to point out that you might want to hold the glimmer paper up to the embossed cardstock to make sure they line up correctly. While I cut the glimmer paper and white paper at 4″, after embossing it the white paper pulled in a smidge. This made the glimmer paper hang out a little on the ends and I had to trim it off.

Swirls & Curls Embossing Folder, www.LaurasStampPad.com

Now for the focal point, I added Stampin’ Dimensionals (and some Mini ones) to the die cut Gold Foil Deer. I used the coordinating Detailed Deer Framelits (Bundle & Save 10%). Next, I added the greeting which was stamped in Merry Merlot Ink and punched with the Banner Triple Punch. It also was added with Stampin’ Dimensionals. Be sure not to put a dimensional on the spot that it sits on the deer because then it would be popped over the deer. So I just added some to the top side of the greeting and let the bottom rest on his back.

I love that I was able to cut a lot of the same dimensional and colors for 2 cards and get 2 different looks. It’s also super fabulous to not have to waste Gold Foil Paper because this deer isn’t really the easiest for minimal waste. This way I’m using the deer and the negative image for 2 cards. It’s perfect!!!!

If you would like to create these 2 cards, click on the supplies below to get started. Also, you can check out the video tutorial here!

Happy Stampin’

~Laura

Product List


Technique Tuesday – Dashing Deer Duplicates!!!

Posted on

Happy Tuesday!!! You all know what that means! I have a fabulous Technique to share with you today! I’m sharing this fun idea of creating Dashing Deer Duplicates!!! Today I’ll be sharing one card today and then the coordinating one tomorrow!!! Get a sneak peak of it in the video below!

Dashing Deer Duplicates, www.LaurasStampPad.com

For this card, I used Gold Foil, Whisper White, and Merry Merlot paper. The only ink used was Merry Merlot Ink and the only stamp set was the Dashing Deer Stamp Set. I also, used the Detailed Deer Framelits (Bundle & Save 10%). With these products I created this card and then used a similar layout and the die cut deer to create another card. Come back tomorrow for that one!

I started with a Whisper White card base which is great for writing on the inside of the card too! Next, I layered on a piece of Merry Merlot cardstock after stamping the floral image on the top and bottom. The image was stamped in Merry Merlot for that subtle look. Then I took a 4″ x 4″ piece of Gold Foil Paper and die cut the deer out with the Detailed Deer Framelits. I also die cut out a few flowers in Merry Merlot cardstock. BONUS: Stampin’ Up put a few of the flower framelits in the set so that you can die cut multiples at the same time. So I got all 3 of these flowers with just 1 crank through the Big Shot!

Detailed Deer Framelits, www.LaurasStampPad.com

Using the Fine Tip Glue Pen, I added the flowers around the deer! For the greeting, I stamped it in Merry Merlot from the Dashing Deer Stamp Set. To make the banner tips, I just used the Banner Triple Punch! Since I hadn’t used any Stampin’ Dimensionals just yet, I thought I needed to for the greeting! 🙂 You all know how much I love those things!

Come back again tomorrow to see how I used the die cut deer to create another card with the same stamps, ink, and paper!!!

If you would like to see this all in action, check out the video below or click here! Be sure to give the video a thumbs up if you liked it and don’t forget to subscribe if you are new. If you would like a notification when I post a new video, be sure to click the bell right next to the subscribe!!!

Happy Stampin’

~Laura

Product List


Do You Make Thanksgiving Cards???

Posted on

Do You Make Thanksgiving Cards?? I know that holiday isn’t one of the big ones but it’s actually my 2nd favorite after Easter!!! Being thankful, more low key, and rather simple are just a few reasons why it is my favorite! I don’t typically make cards for it though, rather fall cards that work for Thanksgiving too. What is your favorite holiday?? Let me know in the comments below!

Thanksgiving Cards, www.LaurasStampPad.com

This card is great all year around since we should really be counting our blessings each and every day! With these colors, I think this card makes a great Fall/Winter card though!

I started with a Soft Suede card base. Next, I took a strip of the Frosted Floral Designer Series Paper (2″ x 5-1/2″) and placed it on the lower half of the card front. The greeting was stamped from the Painted Harvest Stamp Set in Soft Suede Ink. I added it to the card front with Stampin’ Dimensionals for a little bit of texture!

For the floral piece, I used the First Frost Stamp Set and coordinating Frosted Bouquet Framelits. Don’t forget to Bundle & Save 10% on these amazing products. First, I layered a Mossy Meadow leaf down and then placed the Silver Foil flower on top. I used Mini Glue Dots to adhere these to the card front. The top layer was stamped in Gray Granite and then die cut using the coordinating die.

While typically I am not a fan of neutrals, I really like the soft neutral look of this card. Maybe it’s because there is still a pop of color and shine in the designer paper and silver foil! I love it! If you would like to make this card, check out the supplies listed below! To see more samples using these 2 stamp sets, click here, here, and here!

Happy Stampin’

~Laura

Product List