Happy Tuesday!! That means I have a fabulous technique to share with you!!! Today, I’m showing you these fabulous Treat Tubes from the Holiday Mini Catalog!!!

Here are 2 tubes that I decorated for Halloween and Christmas. Well actually that little red bow could be any occasion….like Valentine’s Day, Birthday, Baby, etc. That is what is so fun about these! They are cute, simple, and fun!
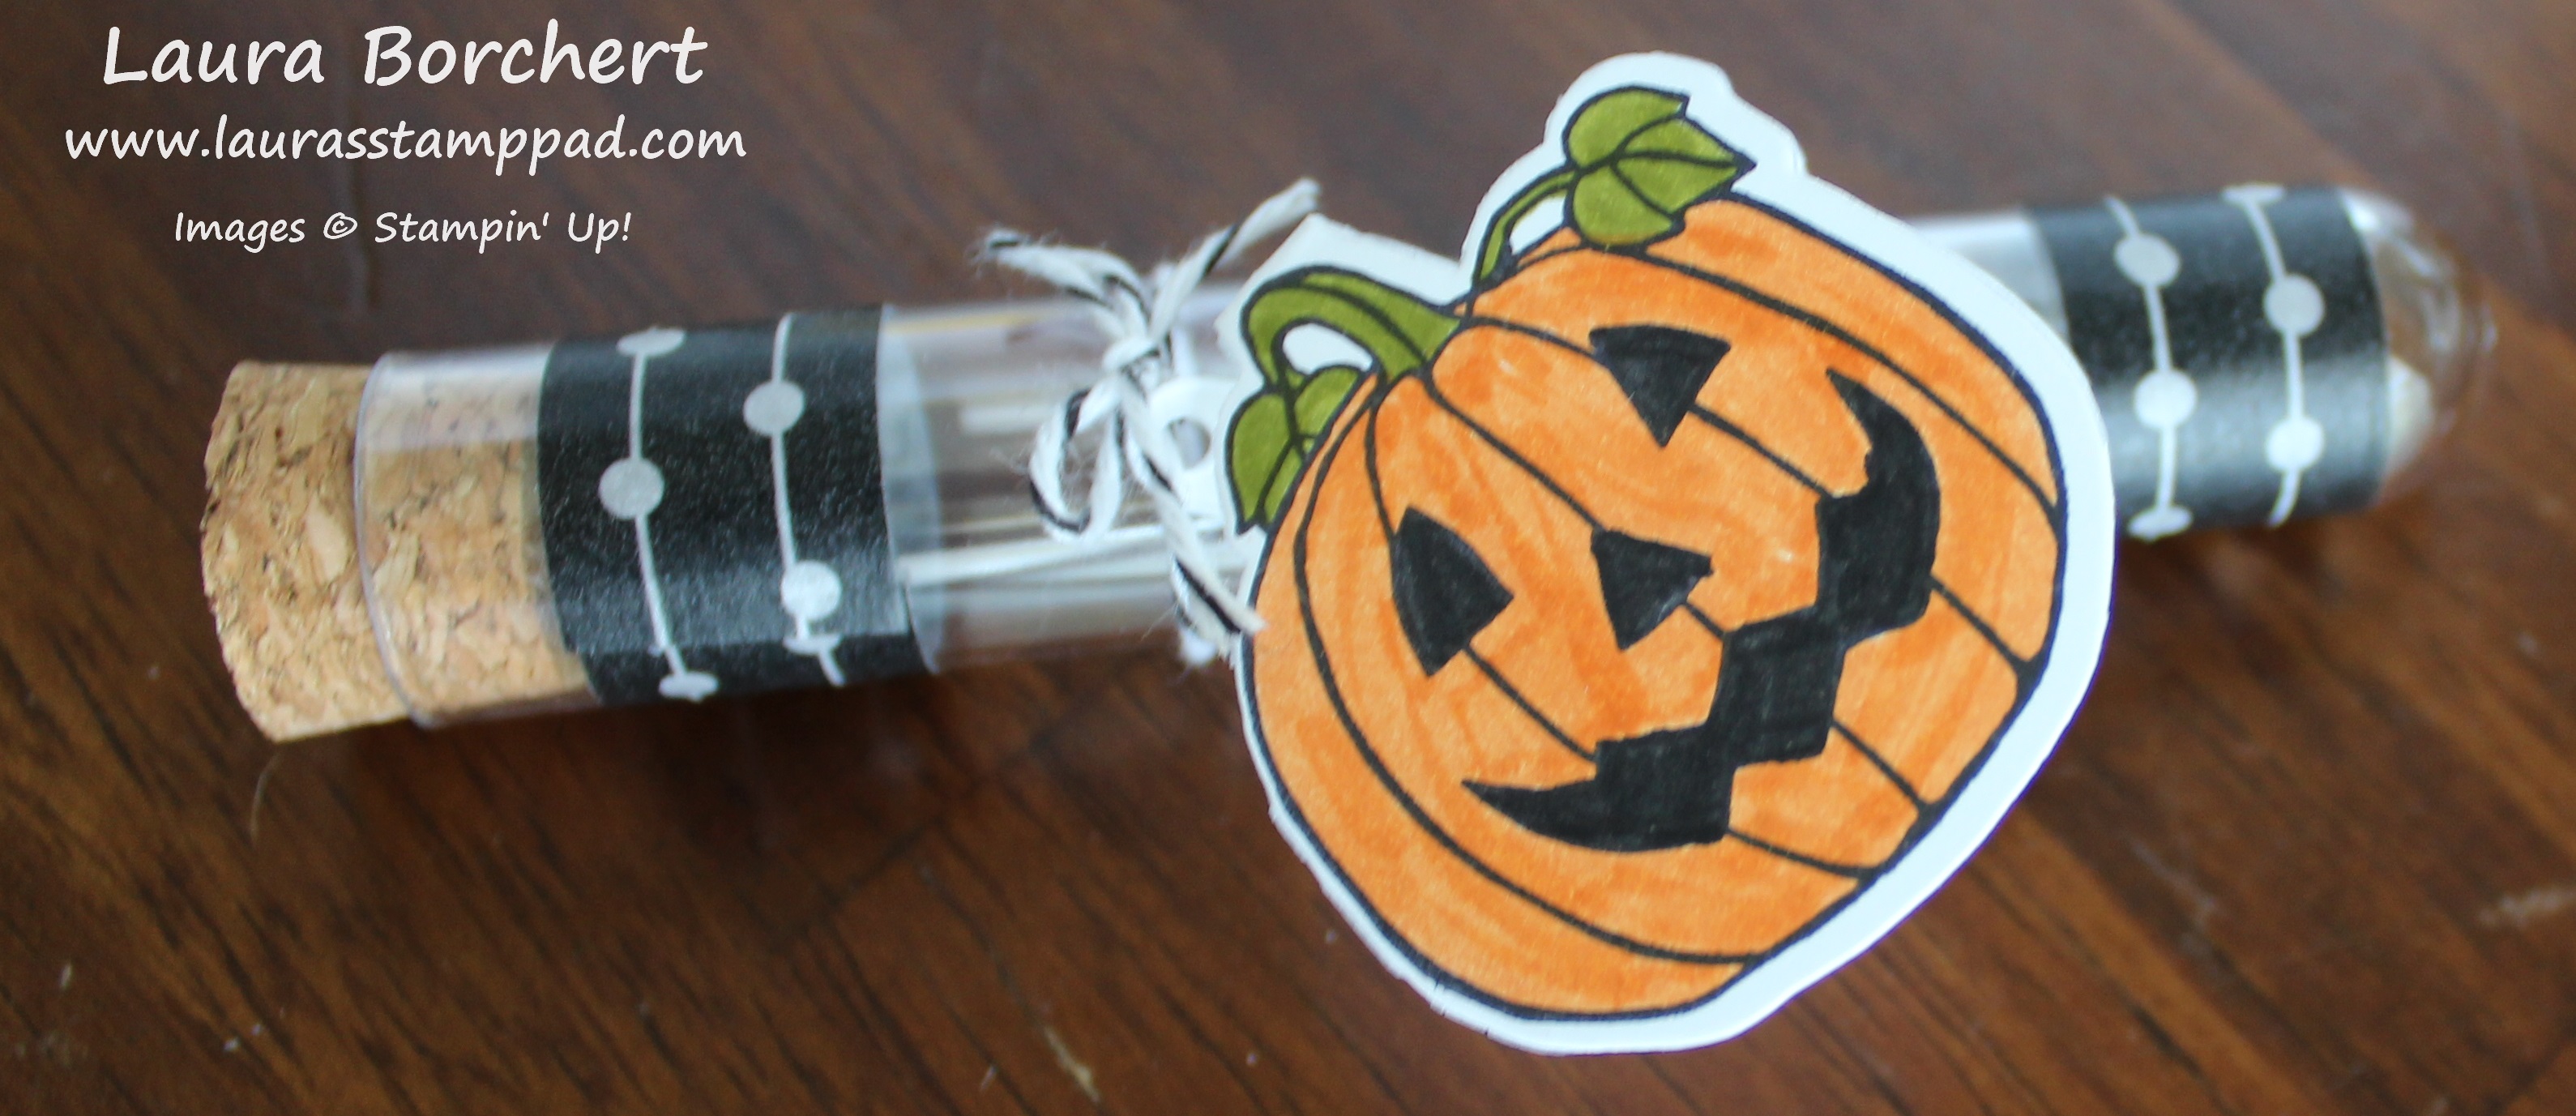
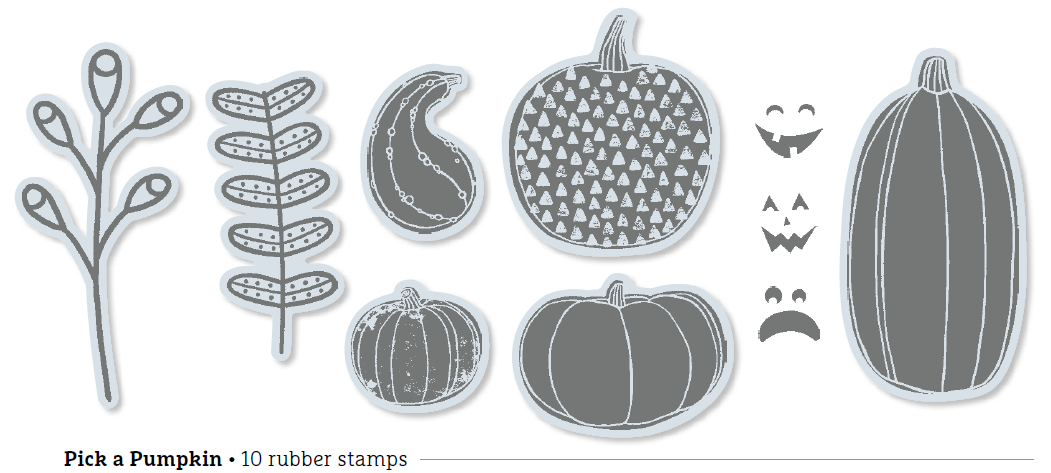
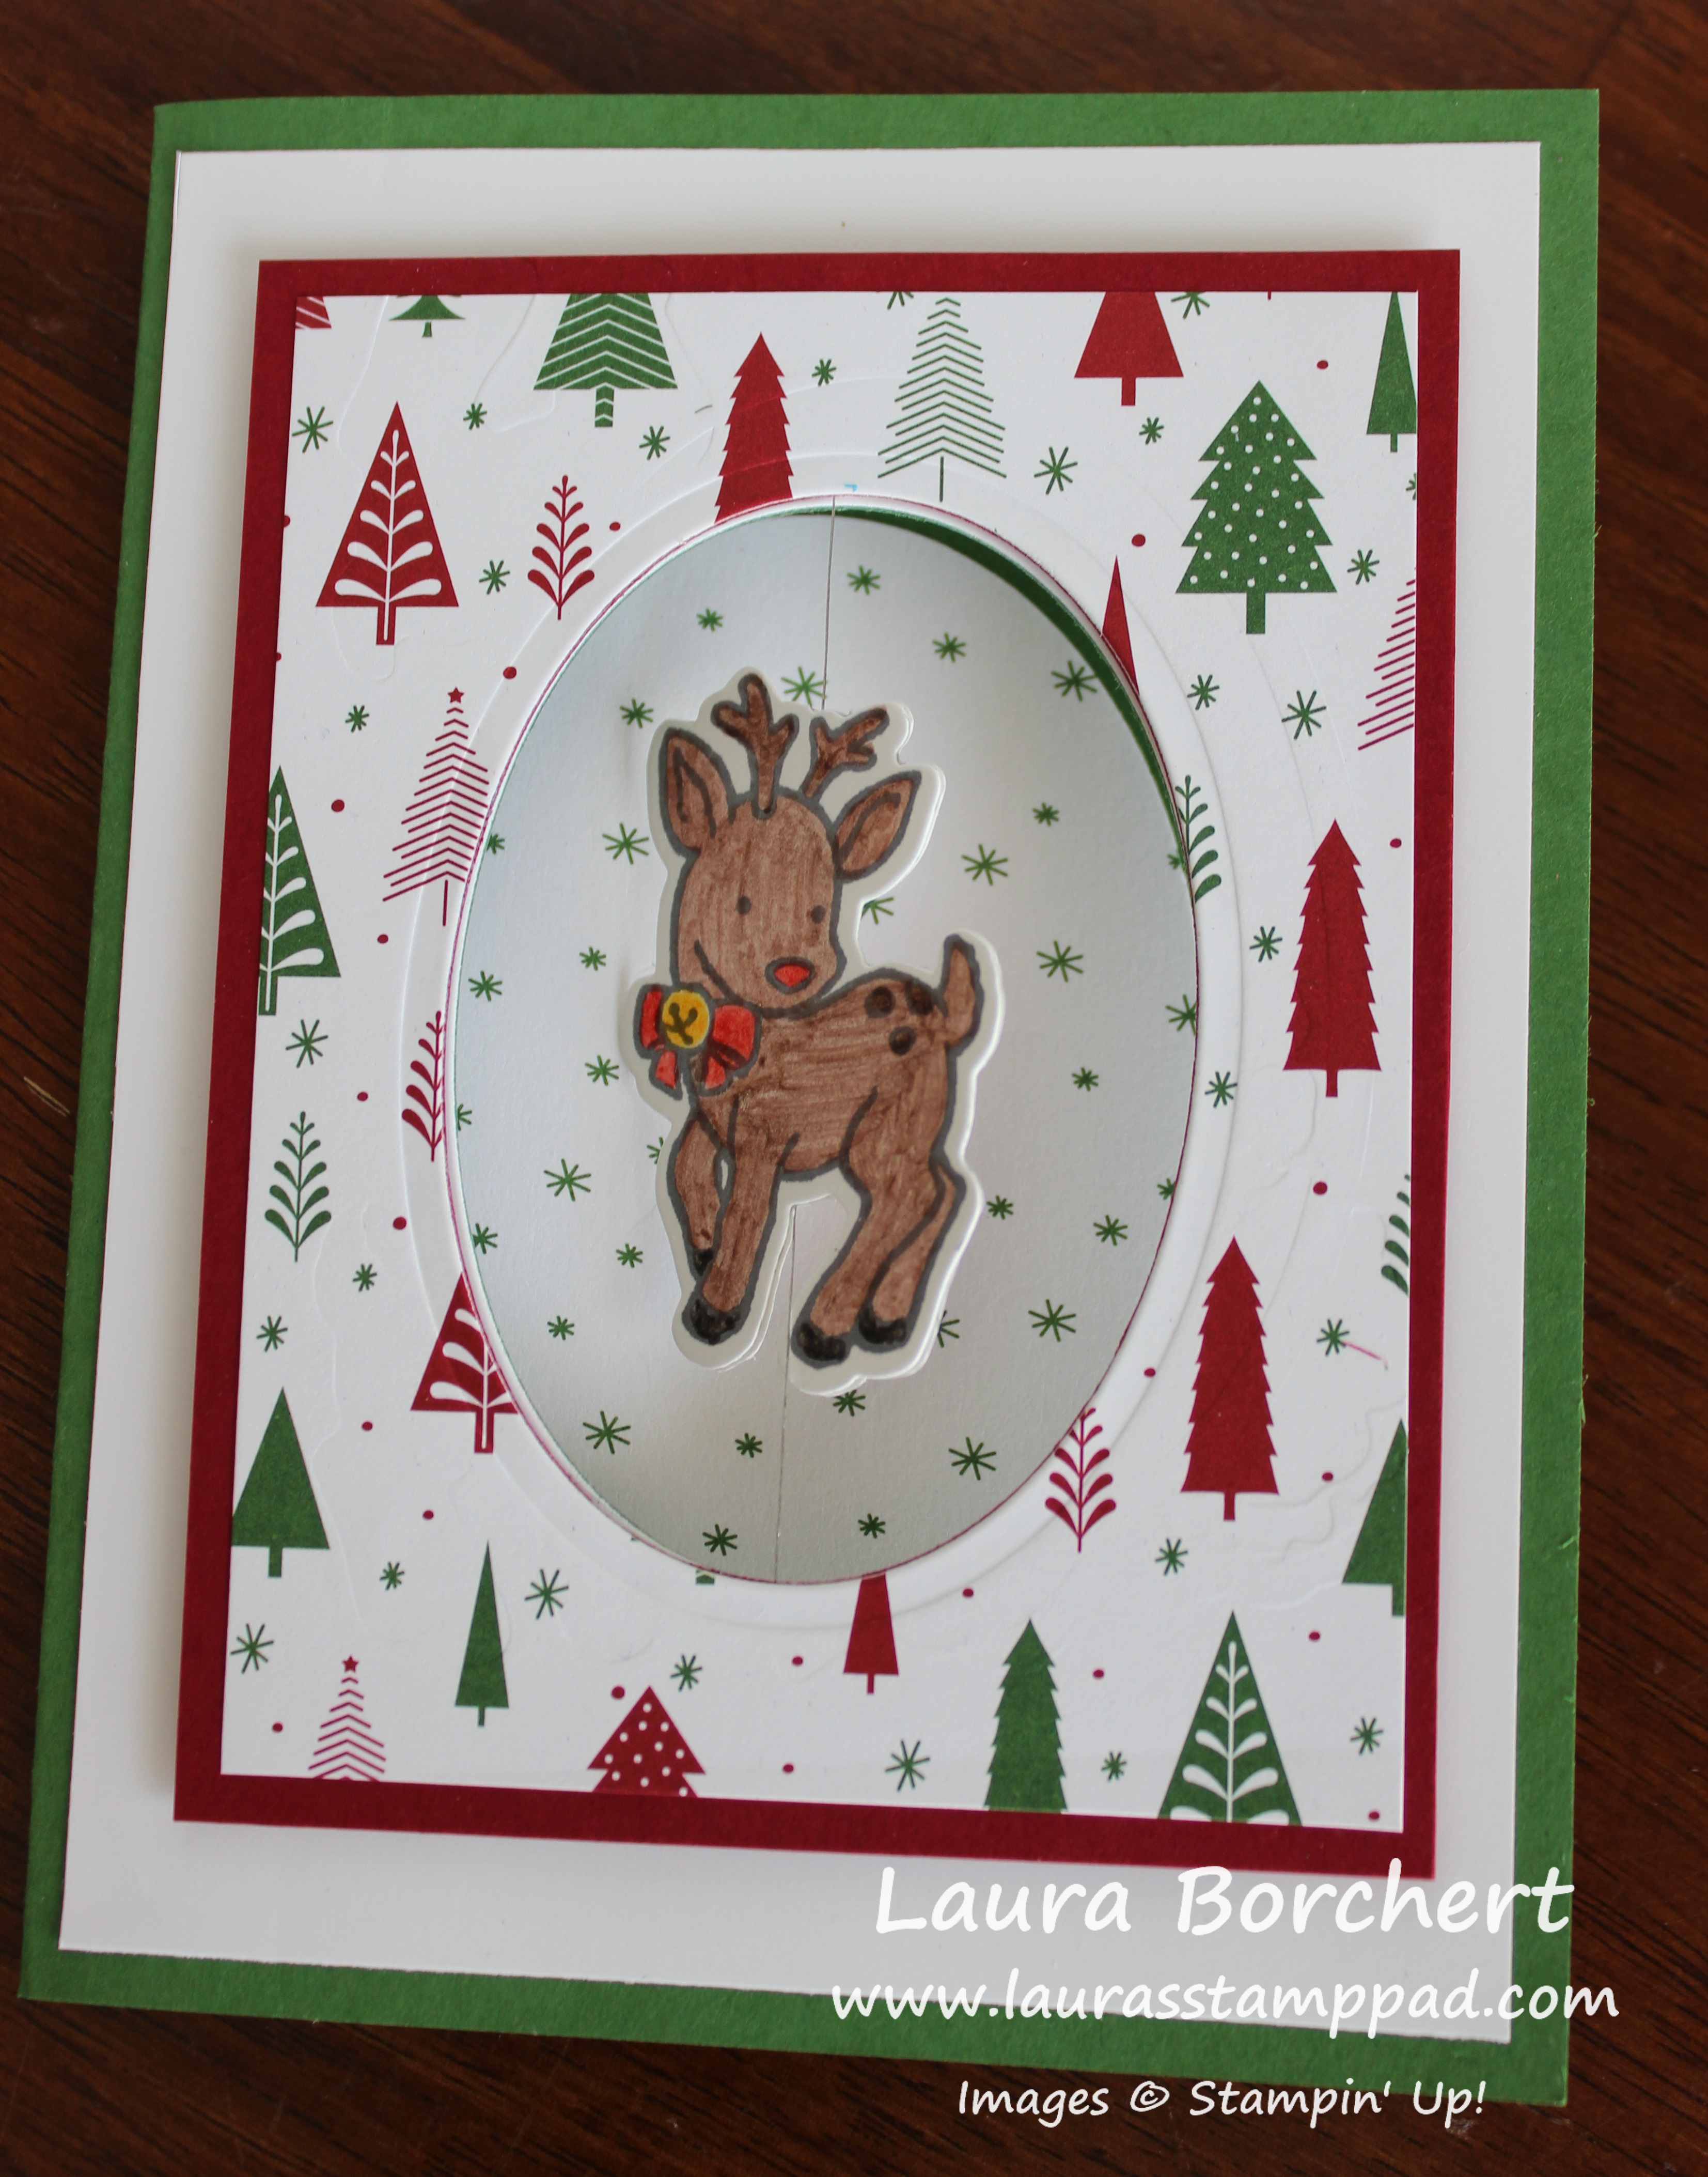
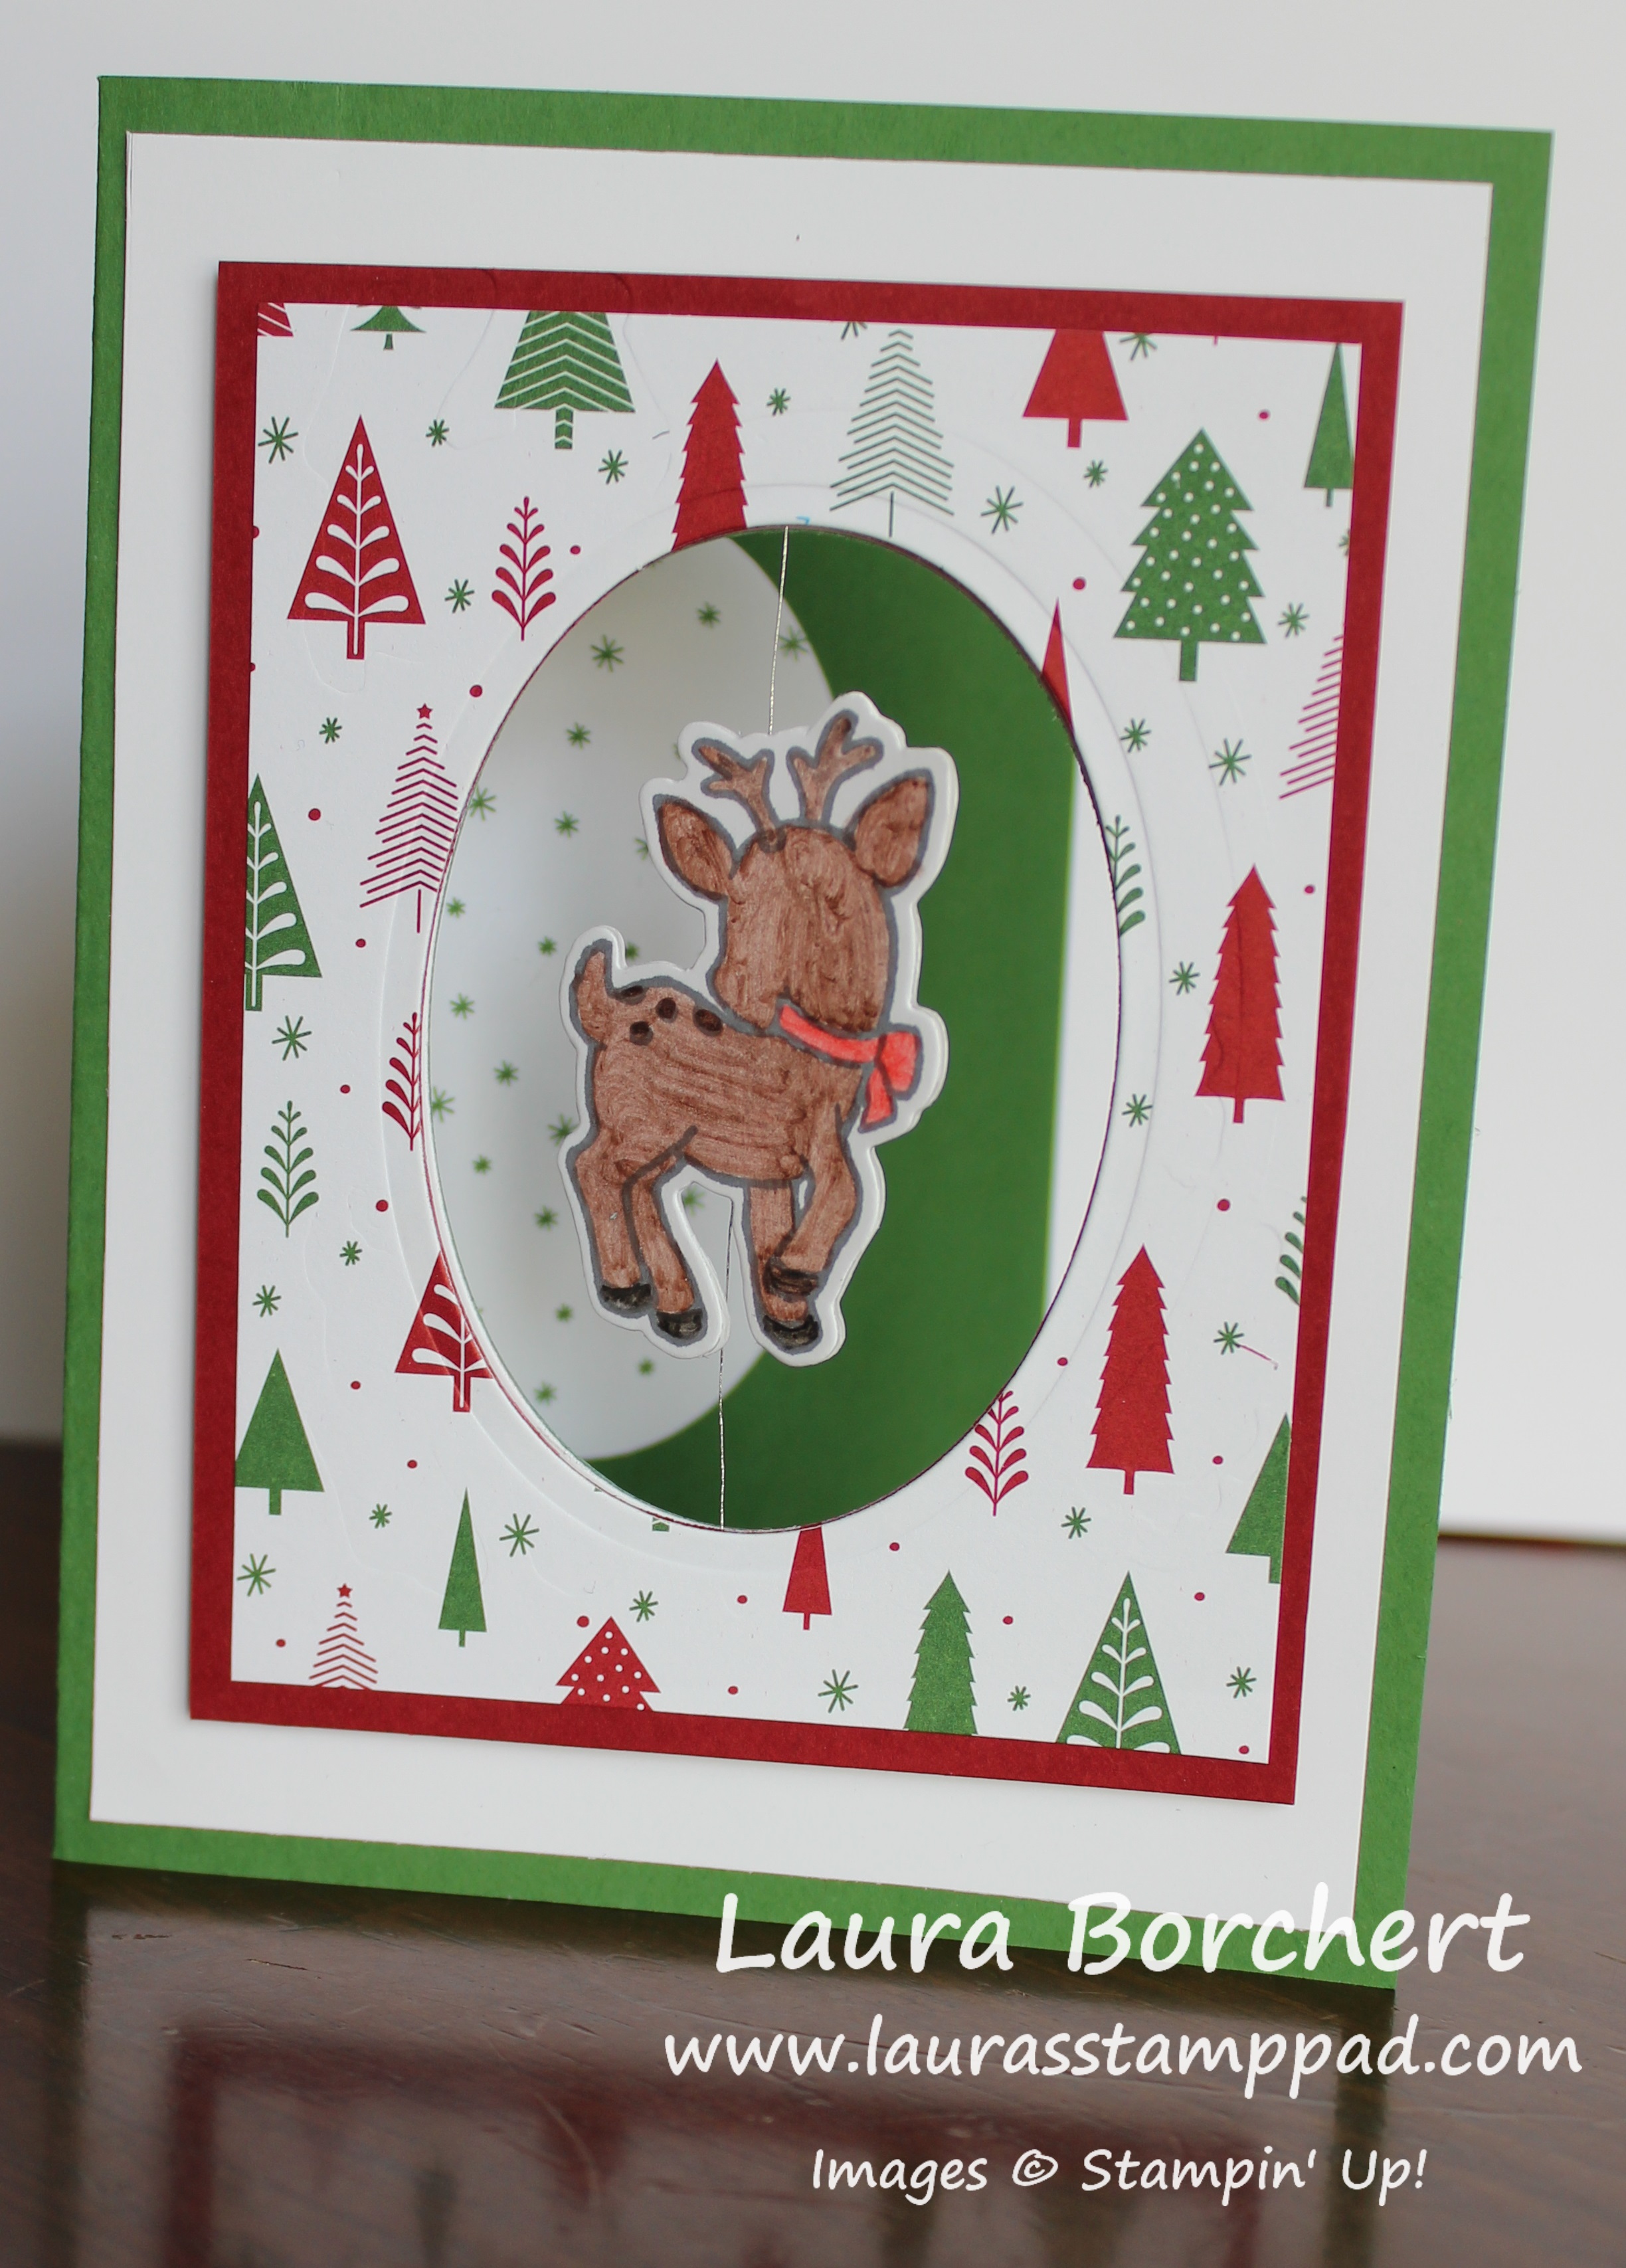
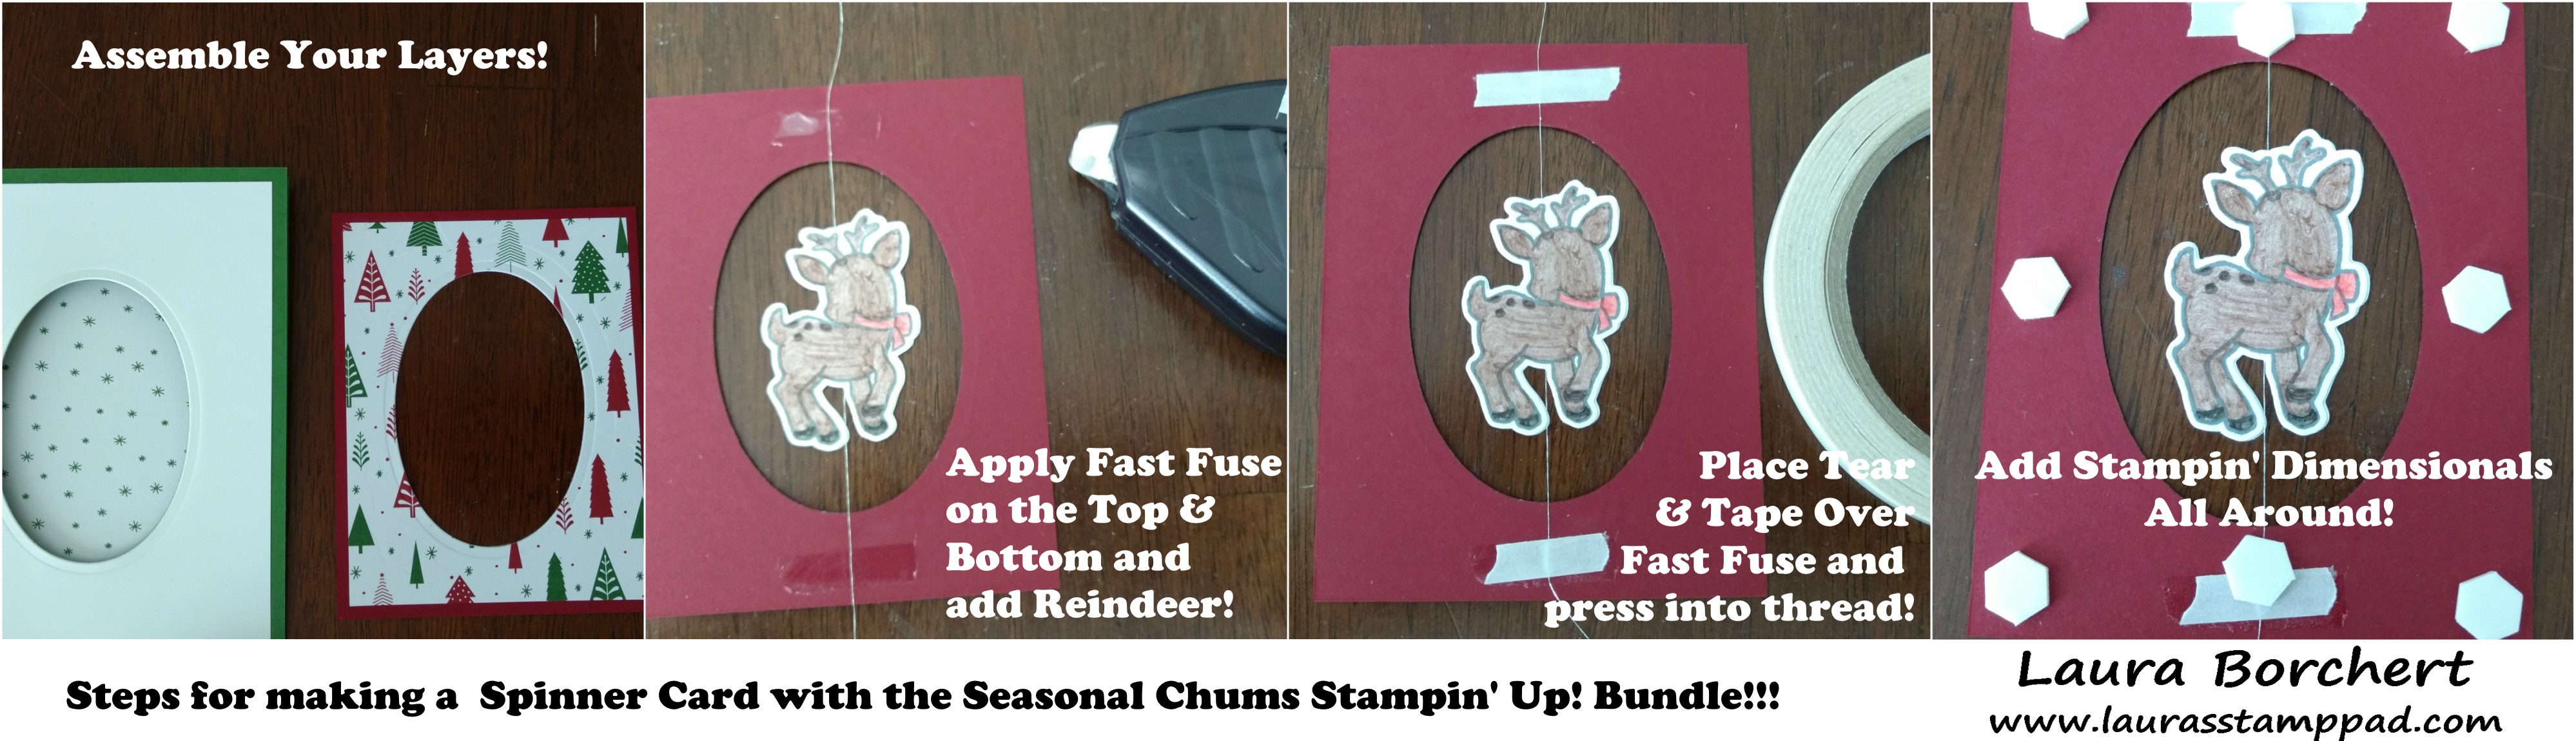
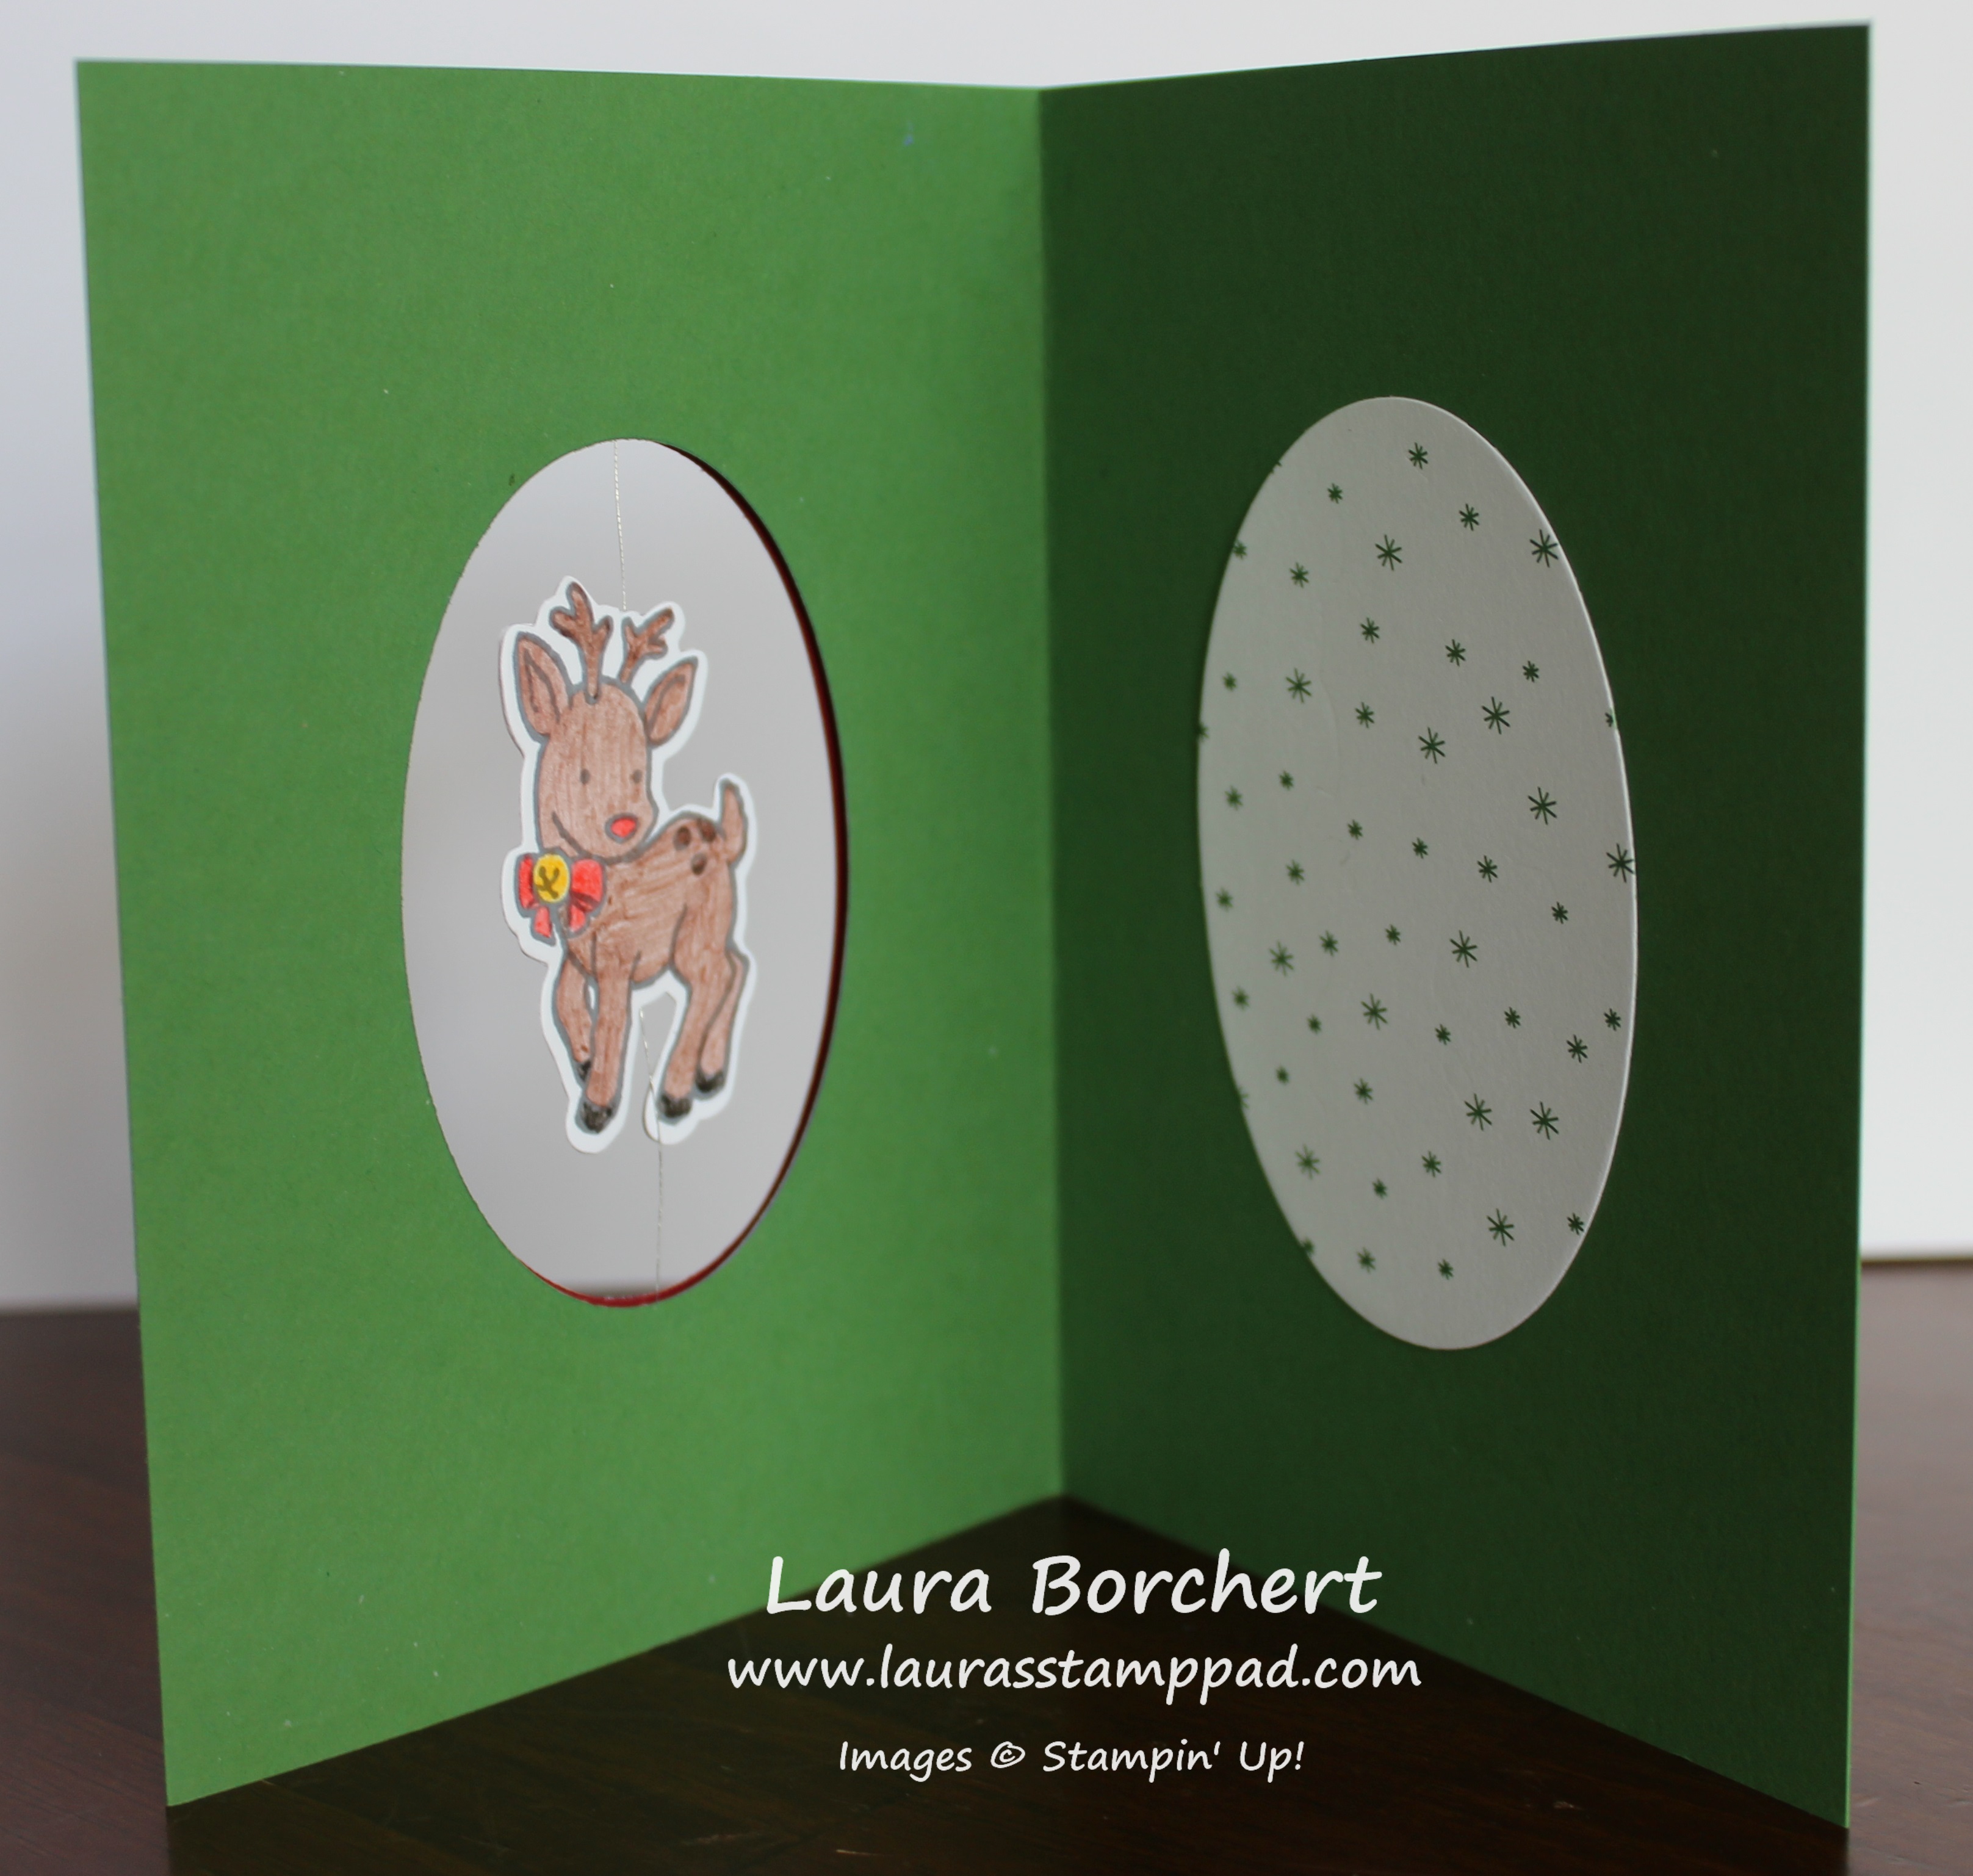
For the little Pumpkin one, I used some of the Pick A Pattern Designer Washi Tape to wrap around the top and bottom. For the tag, I used the Seasonal Chums Stamp Set and coordinating Seasonal Tags Framelits (Bundle and Save 10%). I simply stamped it in Basic Black Archival Ink so it wouldn’t bleed when I colored it with the markers. I wanted that bold, bright color so I went with markers. Pumpkin Pie, Old Olive, and Basic Black were the colors I used!
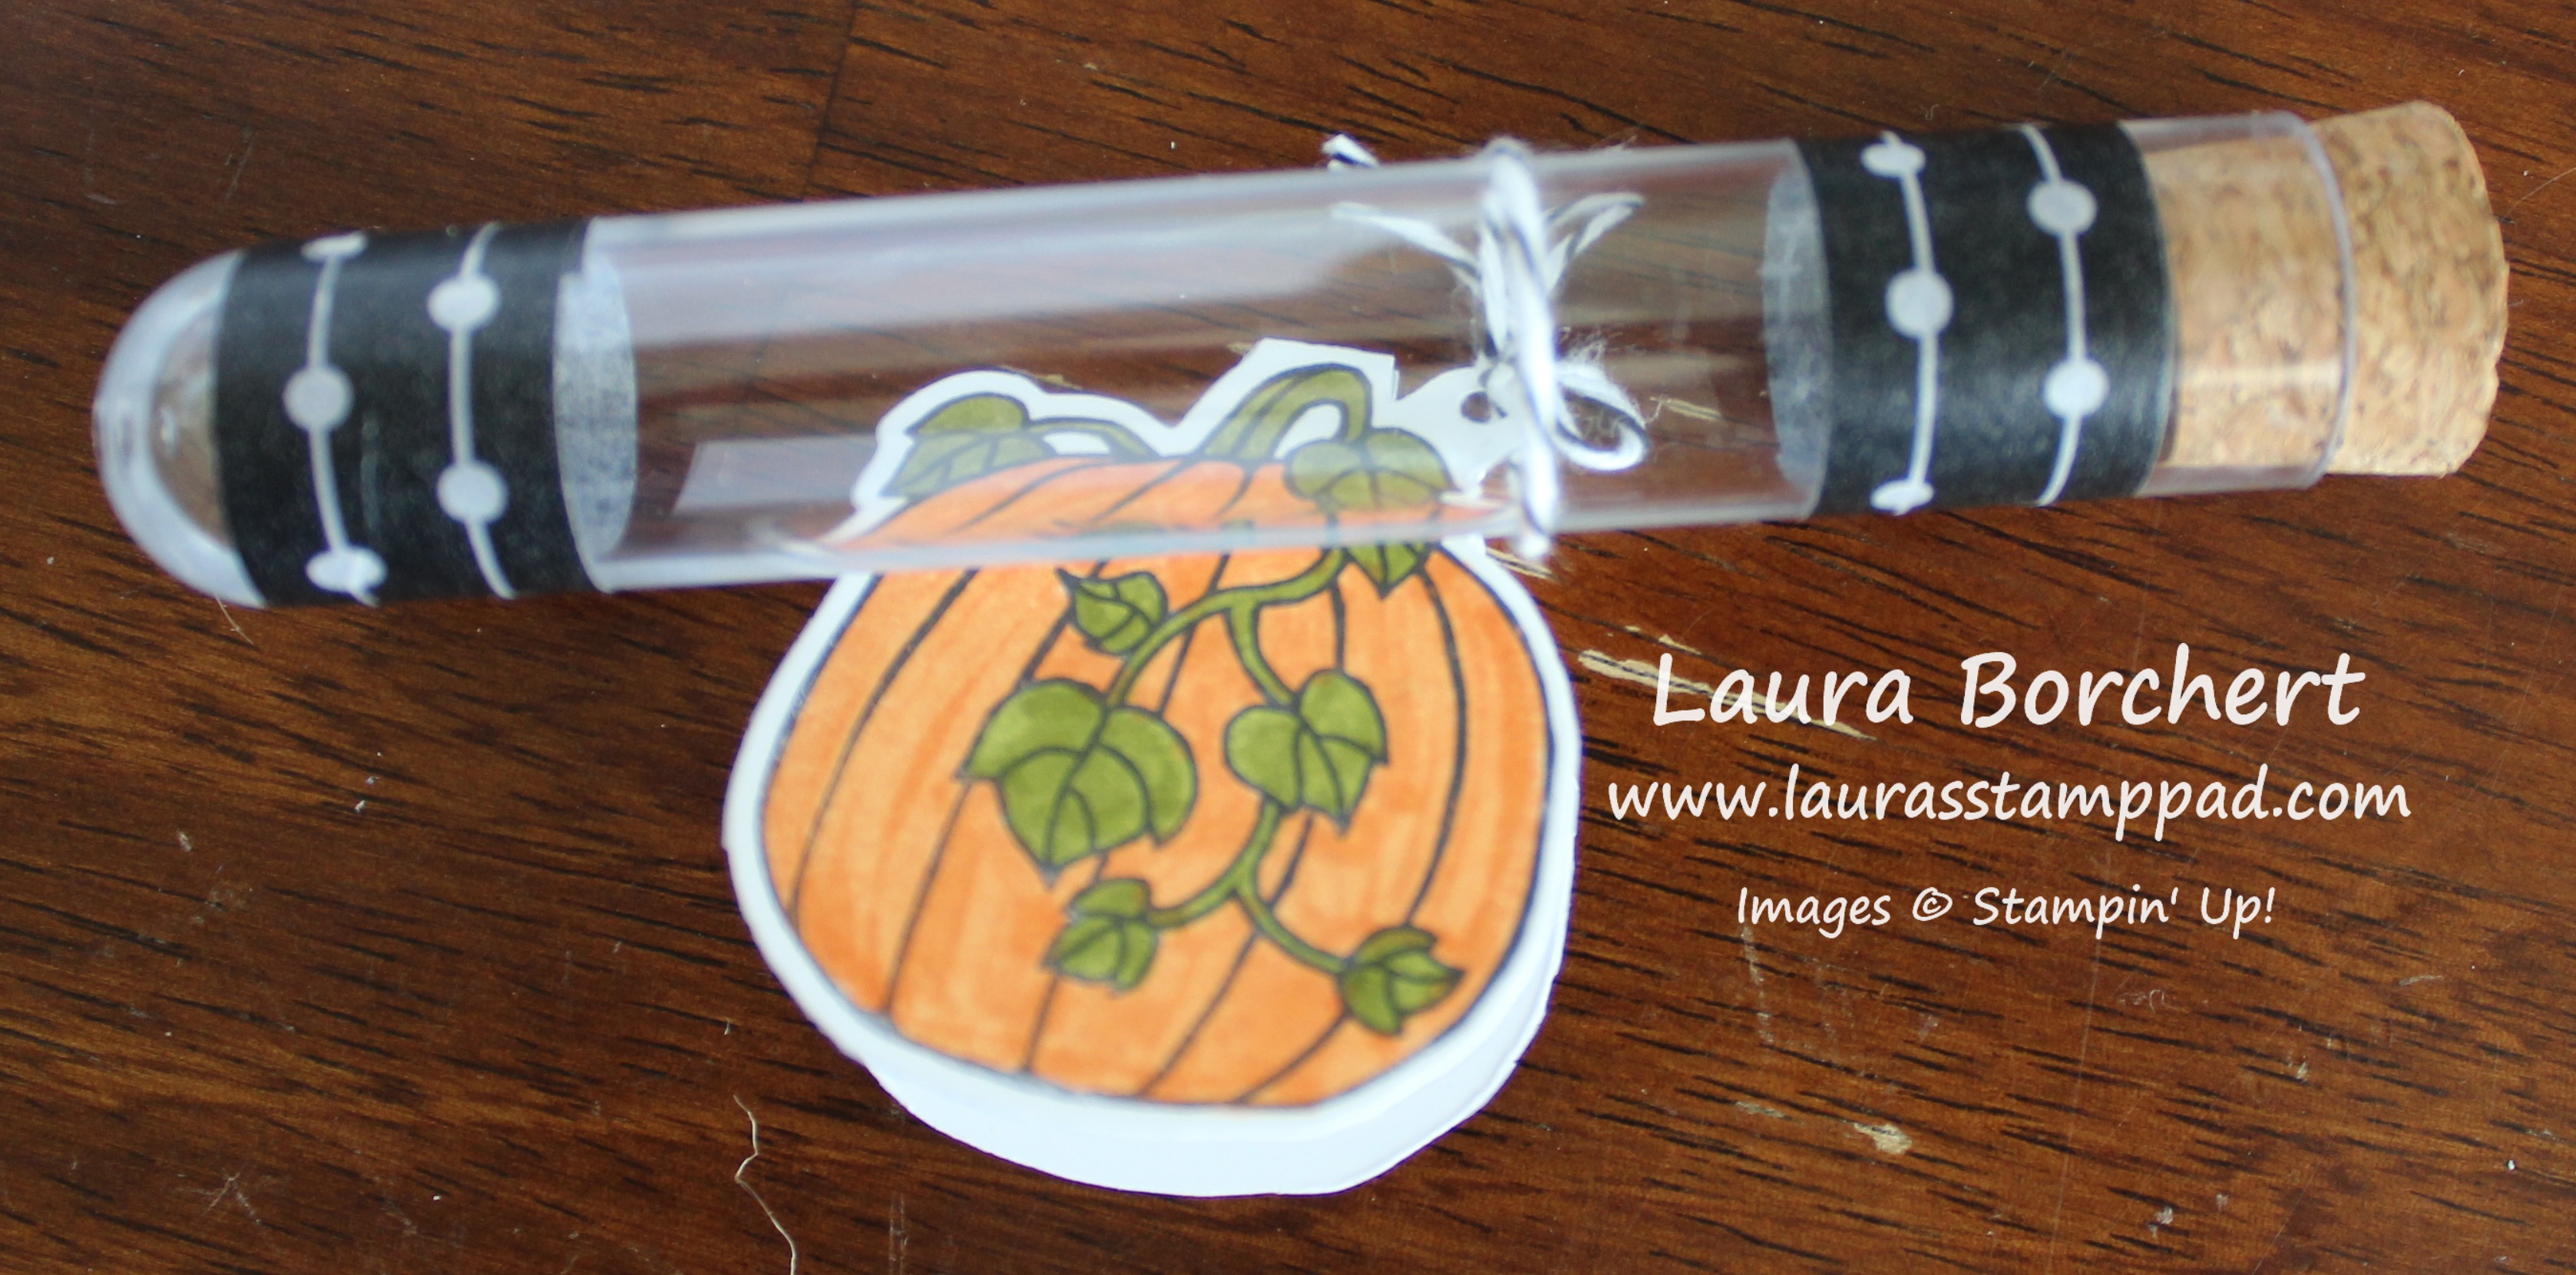
I love this set because it makes perfect little tags with the hole in it to tie it on and it’s a front and back tag. Isn’t that adorable??? I used Black and White Baker’s Twine to tie it on!

I went super simple with this one and placed a Mini Bow on top! Adorable!!! You could always add a tag if you wished!
A few tips for the inside goodies: Candy, Tic Tacs, M&Ms, Hot Cocoa, Coffee Beans, Single Serving Drink Packets (coffee, tea, lemonade, etc.), Bath Salts, Candles/Balloons/Confetti, Spice Mix, Glitter, Oats & Glitter for Reindeer Food, Marshmallows inside tied to a Hot Cocoa Packet. Let me know in the comments if you have any other great ideas!!!
If you would like to see these in action and lots of other Gift Packaging ideas, check out the Video Tutorial below. I will be posting more items from the video on here tomorrow so stay tuned! Be sure to give the video a thumbs up if you liked it and don’t forget to subscribe if you are new. If you would like a notification when I post a new video, be sure to click the bell right next to the subscribe!!!
Happy Stampin’
~Laura
Product List