Happy Thanksgiving to each and every one of you! You all are so amazing and I appreciate you very much!!!
Thanksgiving is my favorite holiday. I love that it is simple, low key and the main focus is food and family! That’s what I am all about. I don’t need presents and all the decorations. Just simple time spent together counting our blessings. I love having that extra reminder to think about the many blessings in our lives. Here are a few of mine!
~My family and friends and the love we have for each other
~A place to live, food to eat, clothes to wear
~A job doing what I love and loving what I do
~My health and the ability to take an adventure here and there
Of course I could go on and on because I truly feel blessed through and through! There are days where we struggle with frustrations of things around us or going on with us. Those are the days that I like to remind myself that while that thing might not be going well but that there are so many other blessings. Count your blessings today and every day!!!
I hope you all have an amazing day today! We are spending today with my family and then my husband’s family comes to town for the weekend! Let the festivities and family time begin!!!
Sometimes I like to go with all the layers and details and sometimes it’s all stamping like in this Bethlehem card!!!
This card is super simple because it only uses one stamp set and four ink pads. All stamping and just the one layer!!!
I started with a Dapper Denim card base. Next, I cut a piece of Very Vanilla (4″ x 5-1/4″) for the front and for the inside. I did this card many times and used vanilla and white. The vanilla gives a more rustic soft tone and the white gives a brighter clean look. Since the base is rather dark/deep, I used a piece for the inside to write my message on.
Of course, don’t put the piece on the front until after you stamp! Using the Night in Bethlehem Stamp Set, I started with the village first in Crumb Cake Ink. I inked it up and stamped it three times without going back to the ink pad. This is how I got that variation of colors. Next, I stamped the star in Crushed Curry. Mary and Joseph were stamped in Dapper Denim Ink and the greeting in Chocolate Chip Ink. After all of the stamping, I adhered it to the card front and finished it off with some Rhinestones!
Every once in a while, I enjoy a simple card! Sometimes basic is just as fabulous! What about you? Do you like all the layers and foo foo or sometimes a simple stamped card? Let me know in the comments below!
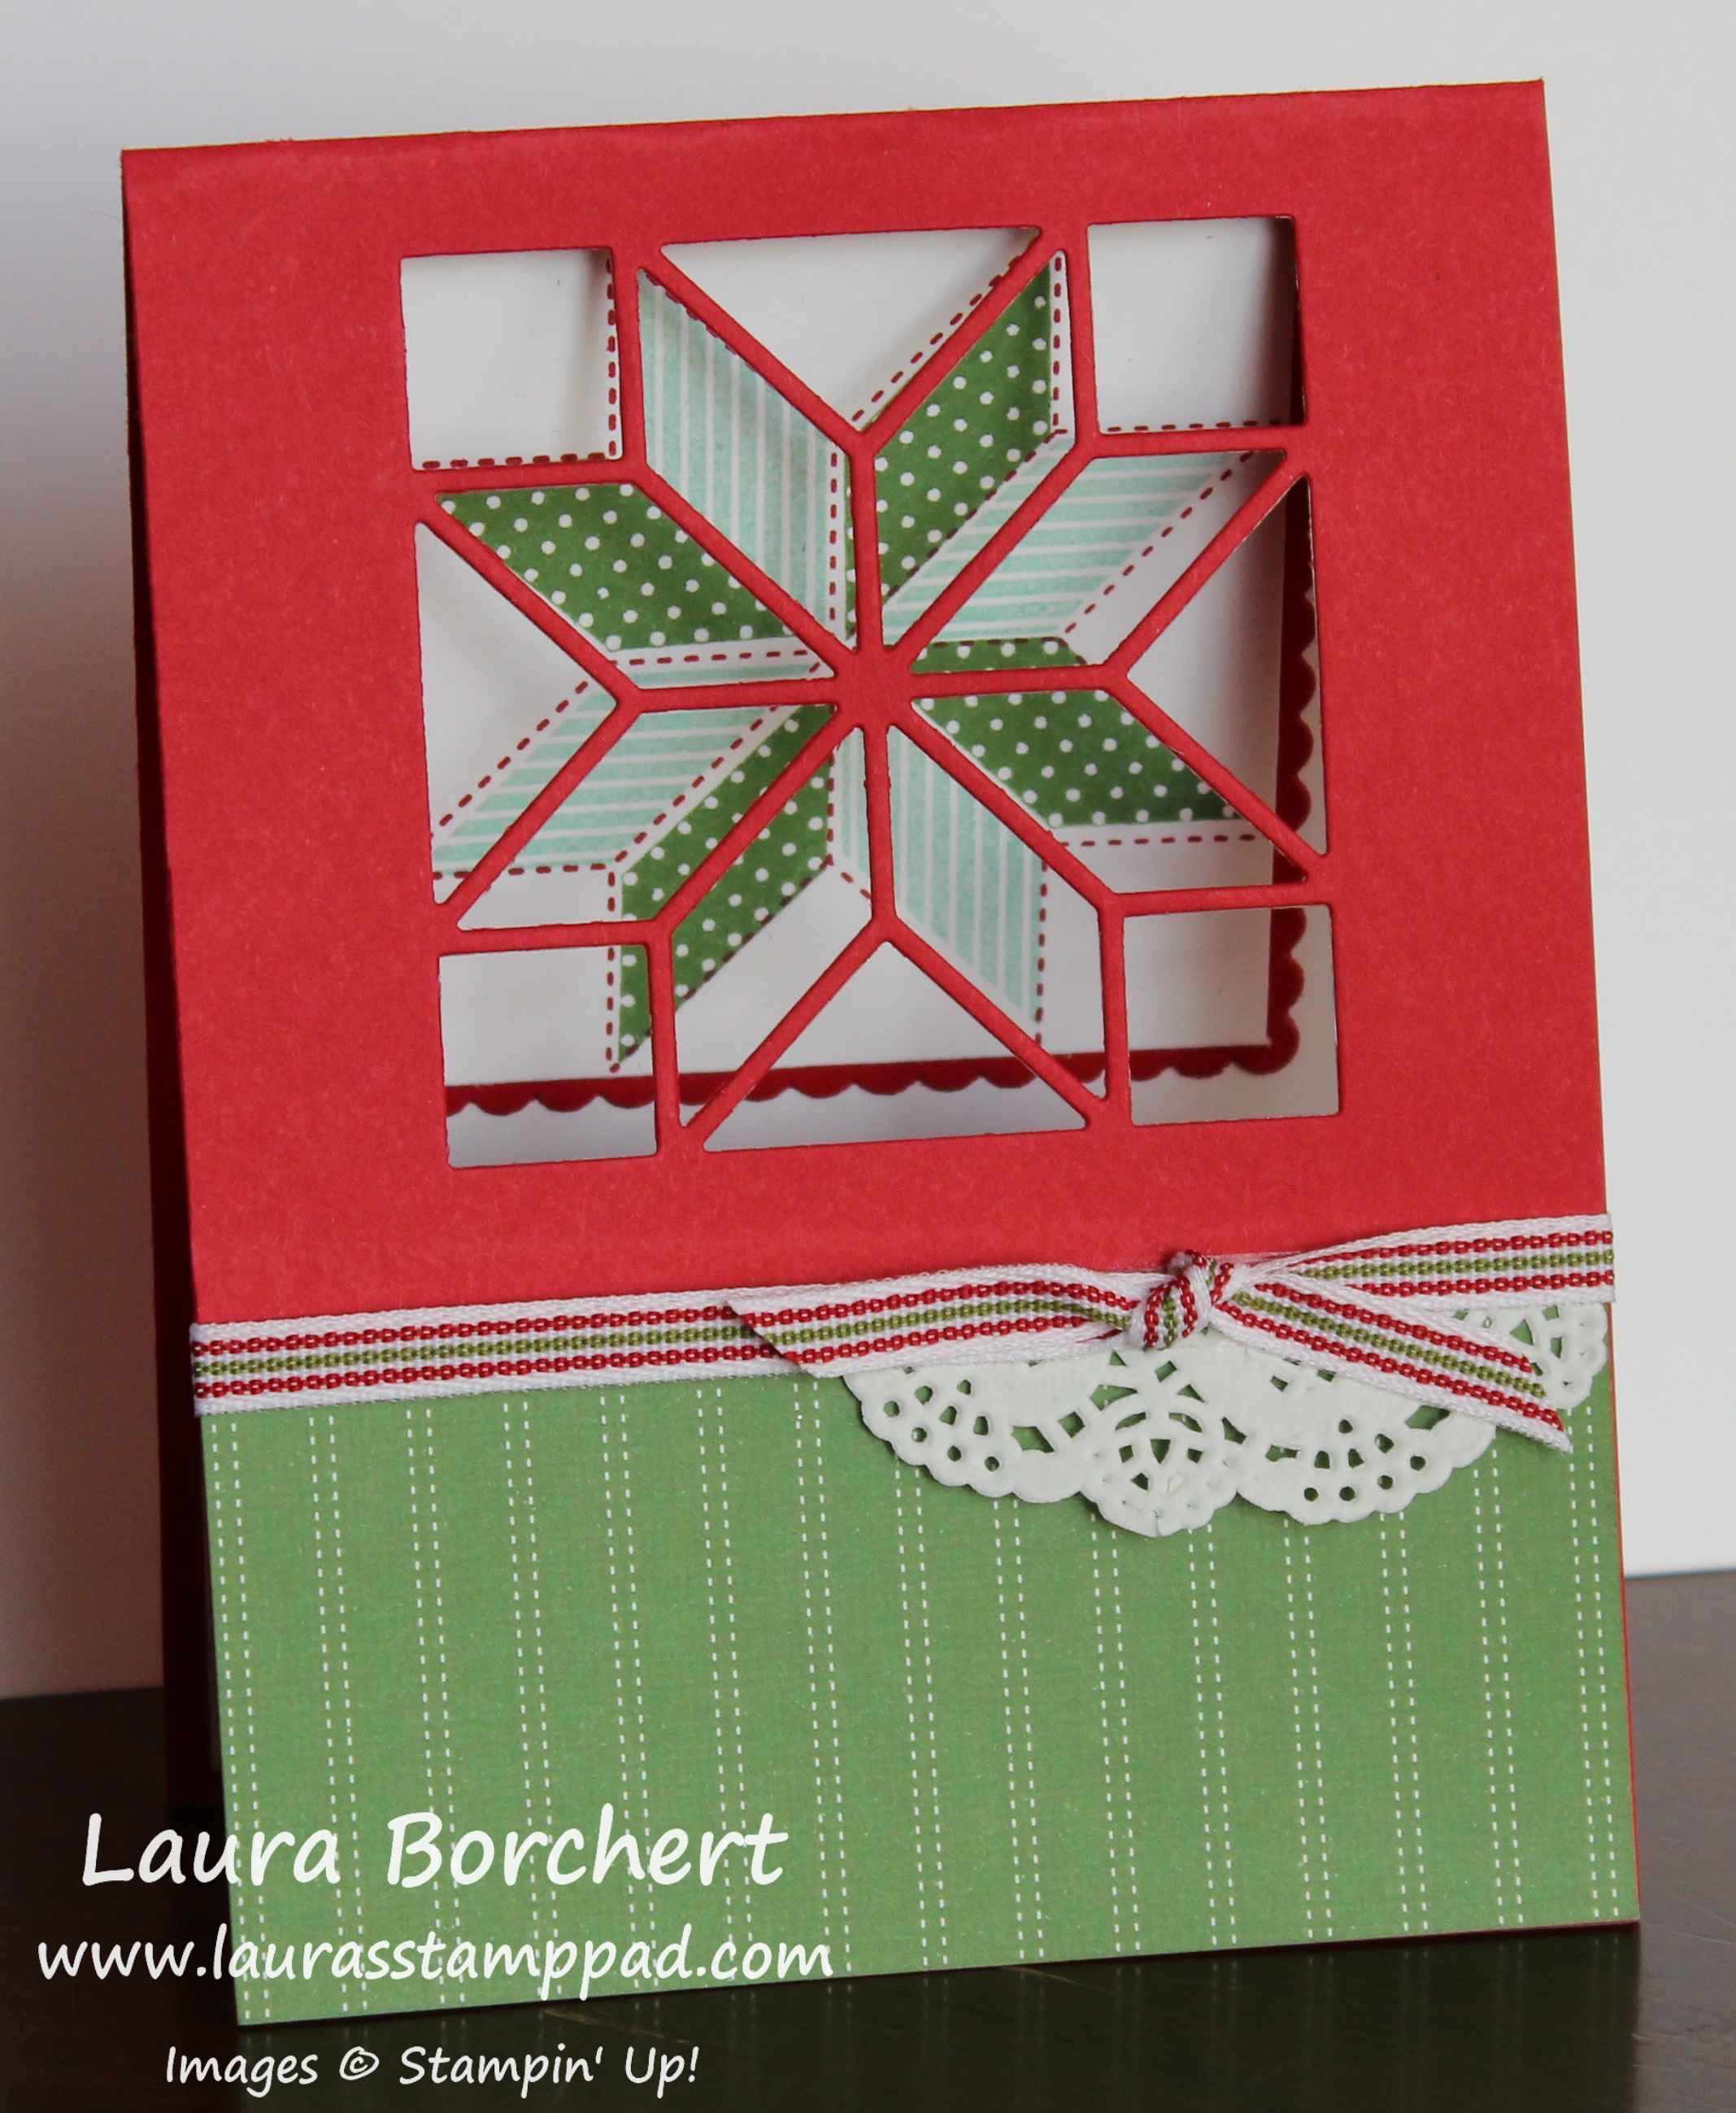
Happy Tuesday!!! That means I have a fabulous technique to share with you today! This Peek Through Quilt Card is super cute and perfect for Christmas. Change up the colors and it would be great for many other occasions too!
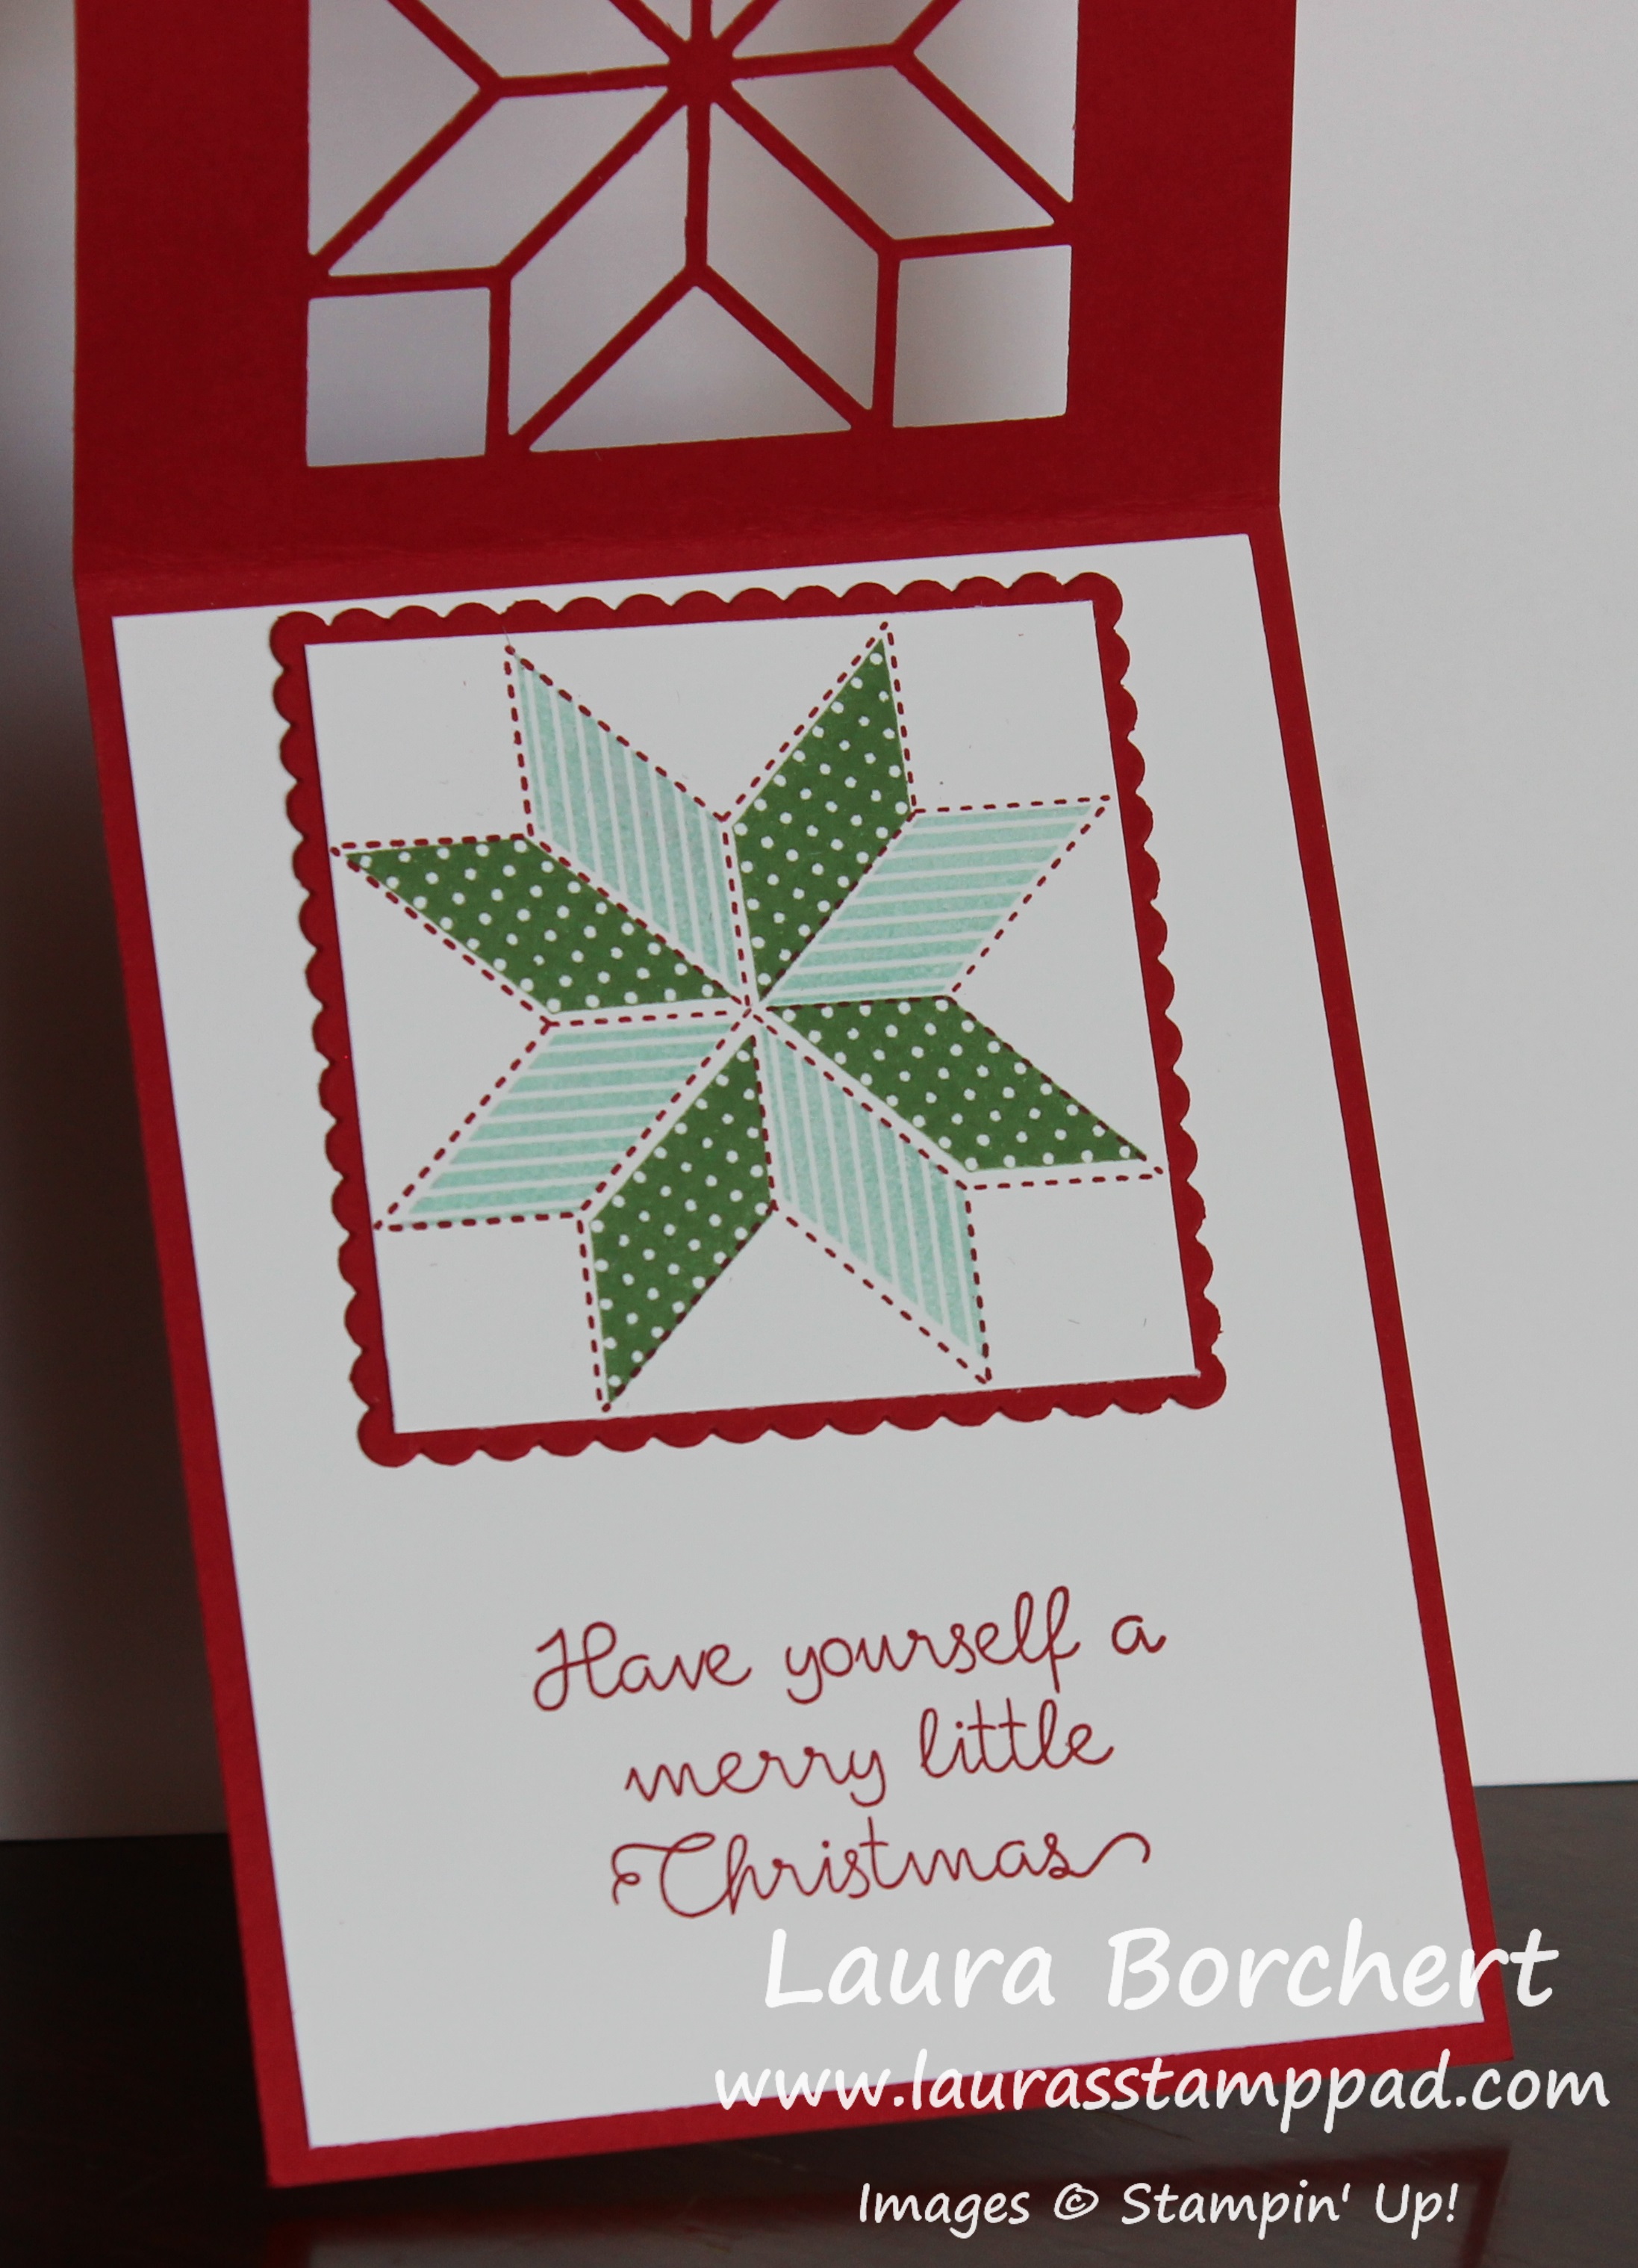
From the front, it just looks super cute but then when you open it, the real WOW factor is shown off!!!
I started with a Real Red card base measuring 11″ x 4-1/4″. After folding it in half for the card base, open it back up and place it in the Big Shot with the square quilt framelit on top. This is from the Quilt Builder Framelits. I eyeballed it for placement from the top and then used Post It Notes to hold the frame in place with markings on either side to center it. Check out the video below. I did this a few times and sometimes I just eyeballed the entire placement. It still works! Just go for it!
For the decorations on the front, I used a piece of the Quilted Christmas Designer Series Paper on the bottom. Next, I placed just a small piece of the Delicate White Doily on the right hand side. I was able to get 3-4 of these pieces from each doily depending on how I cut it. Simply add just a hint of adhesive at the top of the designer paper and press the doily into it. Then I tied some of the Quilted Christmas Ribbon around the card front and into a knot.
Now for the inside where all the magic is! I placed a piece of Whisper White in the center and stamped the greeting from the Christmas Quilt Stamp Set (Bundle & Save 10%) in Real Red Ink. Make sure the greeting is low enough that your greeting doesn’t get covered by the quilt square. For the quilt square, I used the Layering Squares Framelits. That scallop edge just adds even more to this warm and cozy sweet card. First, I stamped the dotted image in Real Red Ink. Then, I stamped the inserts in Pool Party and Garden Green Ink. After stamping, I added this piece to the scallop red square.
Now for the placement to the inside of the card and yet still making sure it peeks through correctly. I added adhesive to the back of the scallop and held it in front of the die cut window. Holding it there, all lined up, I shut the card and slowly pulled my fingers out. You will notice that the sample above is a hint tilted but I’m okay with that because it still lines up perfectly when closed.
If you would like to see this all in action, check out the Video Tutorial below or click here! Be sure to give the video a thumbs up if you liked it and don’t forget to subscribe if you are new. If you would like a notification when I post a new video, be sure to click the bell right next to the subscribe!!!
Today, there are 24-hour doorbusters but the sale lasts all week long. There will be 20% off select stamp sets! Woot Woot! Great time to stock up on some favorites or use as gifts for that crafty friend!!! My stamp set favorites that are on sale include Heartfelt Sympathy and Number of Years. The Number of Years Stamp Set has that fabulous anniversary greeting that I like to use, even if I don’t use the numbers. Also, it has flowers in the set which you all know I love. You can check out some of my samples here and here!
All orders in increments of $40 will earn Laura’s Loyal Stampers Stickers and orders of $75 or more will also earn the November Free Stamp Set of the Month from me. This month it is Basket of Wishes!!!
Stay tuned as there will be another fabulous 24-hour sale on November 27th to close out the Online Extravaganza with a bang.
Happy Friday!!! Today I’m sharing a cute gift packaging with the Tiny Treat Boxes!!! You can add some chocolates or other candy in there and so much more! Cute little gift for a hostess or at each spot at a party!
Isn’t it adorable??? It’s super simple to create as well. Mix up the designer paper for any occasion too!
I started by popping up the Clear Tiny Treat Boxes. Next, I took a piece of the Be Merry Designer Series Paper (1-3/4″ x 10″) and wrapped it around the box. I started with the end in the middle of the bottom of the box. This makes the overlap on the bottom to seal it together. After wrapping it around, I slide it off and used my Bone Folder to create a strong crease on each edge. I prefer doing this over scoring it because I find it fits around the box better. When I score, sometimes it’s a little too big or a little too small. Be sure not to adhere the paper to the box or you won’t be able to open the box. If you adhere it around like a belly band, it just slides right off!
For the decoration, I used the 1-1/2″ Circle Punch to punch out Whisper White and stamp the To/From. I layered this one onto a Silver Foil Circle punched out with the 1-3/4″ Circle Punch! Using the Handheld Punch, I added a hole and tied on the box with some Silver Tinsel Ribbon. I finished it off with a little Season of Glitz Mini Gift Bow! These bows come in green, red, and white so there are lots of options to mix and match with other papers!
Don’t forget that the Basket of Wishes Stamp Set is the November Free Stamp Set from me for orders of $75 or more this month! Of course, all orders over $40, earn Laura’s Loyal Stampers Stickers!
Yesterday, Stampin’ Up opened up the reservations for the New Stamparatus and they were sold out in less than 20 minutes! I knew this item was HOT but I didn’t know it was going to go that fast. The next reservation date is December 5th!!! If you would like one, stay tuned and be ready on December 5th!
I hope you all have a fabulous weekend. See you back here on Monday! Happy Monday!
I’m not usually a big fan of chunky embellishments but the Stitched Felt Embellishments are soft and super cute!!
Aren’t these the cutest?!?! I kind of like having the options of mixing and matching with the colors too! I used Real Red and Garden Green!!!
The card bases are Real Red and Garden Green. Then using the Quilted Christmas Designer Series Paper, I cut it into 3″ x 4″ pieces. This way I was able to get 2 pieces out of each square with a nice rectangle left over to use for another project. I added this piece to the upper 1/3 of the card.
Next, I took a piece of Whisper White (1-1/2″ x 4″) and stamped the greeting from the Quilted Christmas Stamp Set. I used Real Red Ink for the green card and Garden Green Ink for the red card. Be sure to stamp on the right hand side so there is room for the felt on the left. Before adding this to the card front, I added a little strip (1/2″ x 4″) of the same color as the card base (green in the one above). I did this for a few reasons….to add a little more color and to use up scraps! 🙂
For the final detail, I added a Stitched Felt Embellishment to the left hand side. I found that the Multi-purpose Adhesive worked best. Hold for about 30 seconds and then set it aside. Since the glue is liquid it does take a bit longer to dry.
If you would like to see this all in action, check out the Video Tutorial below or click here! Be sure to give the video a thumbs up if you liked it and don’t forget to subscribe if you are new. If you would like a notification when I post a new video, be sure to click the bell right next to the subscribe!!!
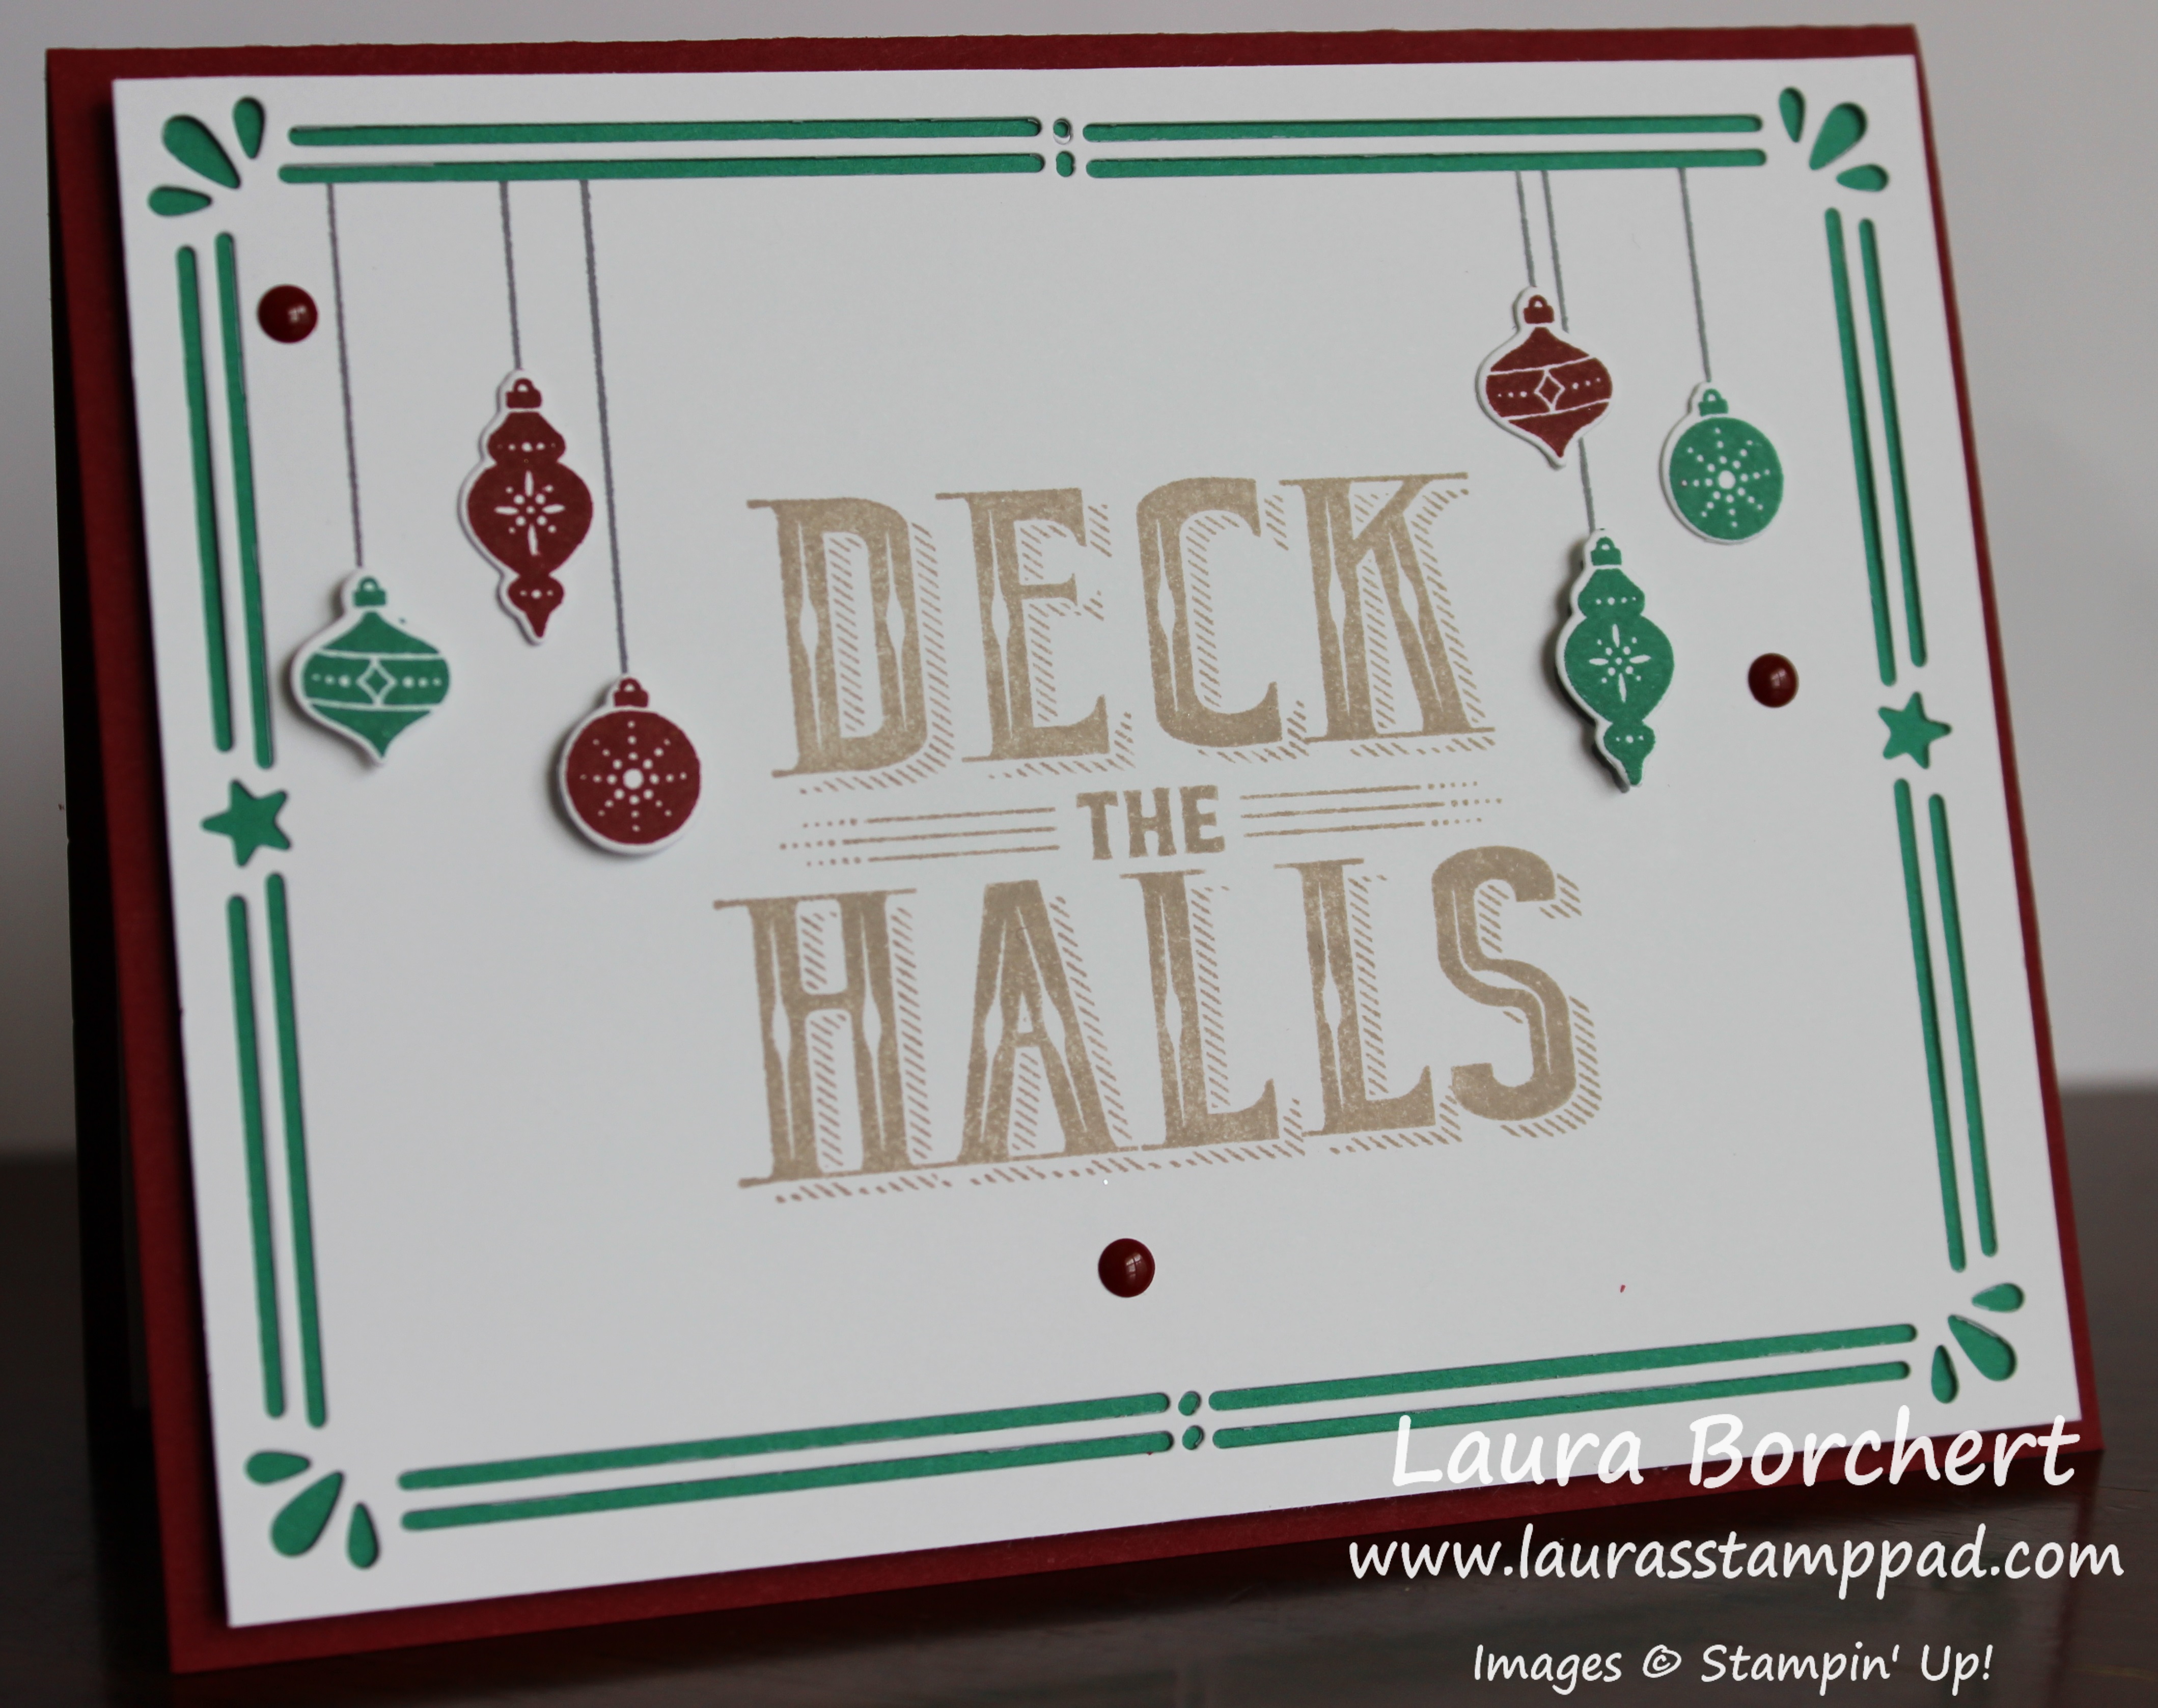
Are you excited about Christmas? Have you started to Deck the Halls?? We usually decorate the first week of Christmas! I like celebrating each holiday as it’s own so next up is Thanksgiving!
I started with a Cherry Cobble card base. Next, I took a piece of Whisper White (4″ x 5-1/4″) and die cut the border piece on the left and then the right using the Card Front Builder Framelits. This was probably the hardest part of the entire card. Then using the coordinating Carols of Christmas Stamp Set (Bundle & Save 10%), I stamped the greeting in Crumb Cake Ink. I really struggled with my colors for this card, wondering if I wanted to stick with just a few and is that one dark enough. Feel free to change it up if you recreate this card! 🙂
Next up, I stamped the ornaments on either side of the greeting in Basic Gray Ink. I placed a piece of scrap paper over the top border so that the strings stopped in the middle and didn’t cross over each line. Then I cleaned off the stamps and stamped the ornaments in Emerald Envy Ink and Cherry Cobbler Ink onto scrap white paper. Using the Card Front Builder Framelits, I die cut the ornaments out. Two of the ornaments are adhered flat and the other 4 ornaments were added with Mini Stampin’ Dimensionals. I love these little things! Now that the front is complete, I added this piece to a piece of Emerald Envy cardstock. Then I added this to the card front with Stampin’ Dimensionals. To finish off the front, I added a few Enamel Shapes!
For the inside, I added a piece of Whisper White and stamped some ornaments in Emerald Envy to coordinate!!! Do you like to add a layer to the inside of the card and decorate it?? Let me know in the comments below! I don’t usually do it but like to every once in a while!
Don’t forget that all orders of $75 or more placed in the month of November will earn the Basket of Wishes Stamp Set from me!!! Click here to start shopping!
Happy Tuesday everyone! I hope you are having an amazing week! Today is Technique Tuesday which is super exciting! I’m sharing with you this quilted tree which is perfect for Christmas time and this winter season. Quilts just scream warm and cozy! My Grandmother and Mom have made so many so they also make me think of family and love! 🙂
I started with a Real Red card base. Next, I took a piece of Whisper White measuring 4″ x 5-1/4″ to use for the front. Using the Quilt Builder Framelits, I die cut a bunch of triangles from the Quilted Christmas Designer Series Paper Stack. The cool thing is that the paper is double sides so you have tons of options. Another bonus is that I was able to cut 2-3 layers of paper with every crank through the Big Shot. Woot Woot!!!
Starting with the middle on the top, I placed my first triangle (red). Next, I placed the green one directly under it. I did slide my triangles a bit under each other just for a nice clean covered look. I didn’t want them to pull apart when I ran it through the Big Shot with the embossing folder. After I placed the green one directly under, I added the red triangles to either side. For the third row, I added the red triangles directly under the red triangles and then filled in with the green ones! For the stump on the bottom, I placed a small rectangle of Early Espresso cardstock.
Using the Quilt Top Embossing Folder, I ran this entire piece through the Big Shot. I did it both ways – with the impression pressed out and pressed in. You can pick which one you prefer. I found that when I pressed the embossed image in, the triangles came up a bit on the tips where there wasn’t any adhesive. Of course, I didn’t cover the entire triangle with adhesive so the tips popped up. With the impression popped out like the sample above, it was nice and smooth! After adding this to the front of the card, I added some Whisper White Baker’s Twine to the inside of the card. The little silver star to the top from the Metallic Enamel Shapes added a little bling!
I added a piece of Whisper White to the inside and stamped the greeting from the coordinating Christmas Quilt Stamp Set (Bundle & Save 10%). It was stamped in Real Red!
If you would like to see this all in action, check out the Video Tutorial below or click here! Be sure to give the video a thumbs up if you liked it and don’t forget to subscribe if you are new. If you would like a notification when I post a new video, be sure to click the bell right next to the subscribe!!!
When I first saw the Champagne Foil Paper I fell in love and then I embossed Champagne Foil Paper and my heart exploded!!! So simple but yet very stunning!
I love the colors of this card. That Fresh Fig is just stunning with the new Champagne Foil. (PS: I went to the University of Illinois in Champaign/Urbana and every time I type for this foil, I want to spell it Champaign. Gets me every time!!! So please forgive me if I happen to spell it that way at some point!)
I started with a piece of Very Vanilla (4-1/4″ x 11″) for a card base. Next, I cut a piece of Fresh Fig (4″ x 5-1/4″) and added it to the front. Then, I took 2 pieces of Champagne Foil measuring 1-1/2″ x 3-3/4″. Using the Big Shot, I ran them through in the Oh My Stars Embossing Folder. I added one to the top and one to the bottom of the card front. By placing these one first, I found that my spacing was better. Working towards the middle rather than top to bottom (or vice versa) helped with my spacing more.
For the greeting in the middle, I cut a piece of Very Vanilla measuring 1-3/4″ x 3-3/4″. Using the Snowflake Sentiments Stamp Set, I stamped the greeting in Fresh Fig Ink. Then using the little scroll, I stamped one up and one down to border the greeting!
This card is super simple and easy to duplicate this season. You can actually emboss 3 of those pieces of foil in the folder each crank through. So that means 2 cranks through the Big Shot for 3 cards! I’m all about getting the most out of each crank. Time is not on our side during this time of year so making the most of it is best. Am I right?? 🙂
Happy Friday!!! We all have gotten through our first week of falling back for Daylight Savings. The worst part for me is how early it gets dark. How many more days till Spring Forward?!?! Today, I have some Friday Fun for all you!
As I was grocery shopping this week, I realized there are a few items in my Stamp Room that make seem a little odd. Here are a few of mine: Baby Wipes, Rubbing Alcohol, and Post It Notes (or Post It Note Tape).
I use all of these items almost daily in my stamp room. The Baby Wipes I use for excess ink on a clear block and cleaning up messes. 🙂 There are also a few techniques that use them too like this one and this one! The Rubbing Alcohol is used for cleaning scissors and clear blocks. It gets the sticky and ink off so easily! Cleaning with 70+ proof makes it super easy but using less than 70 proof is fun for using on projects like spritzing. Check out a sample here! Now for the Post It Note Tape, I use that to hold my framelits in place so they don’t move as I crank it through the Big Shot. What are some items you have in your craft room that you pick up at the grocery/big box store?? I would love to hear from you in the comments below!
Don’t forget that the November Free Stamp Set for orders of $75.00 or more is Basket of Wishes!!! Any order of $75 or more placed within the month of November will receive this stamp set from me. It won’t come with your order but arrive separately. Click here to start shopping!
Make sure Santa brings you exactly what you want!!! Fill out MY CHRISTMAS WISH LIST and pass it around to friends and family!! There is also a bonus in there for you as well. Earn $5 for every order of goodies placed by a family or friend of yours. Woot Woot!!! If your wish list is SUPER long or time is a big factor, I also offer Gift Certificates for you to spend with me on anything you wish. Just let your friends and family know they can contact me!!!
I’m off to Paris (Illinois) to stamp with a fabulous group this evening. Then, I have my Holiday Card Class at the local Library here on Saturday. It’s a weekend full of stamping and fun! I am sooo excited. Thankful for all of you who make my life so fun and fabulous!!! I hope you all have a fabulous weekend! See you back here on Monday!