I absolutely love the Gold Foil overlay on these butterflies. It is stunning, adds a little bling, and really makes the butterflies POP!!! You could create this card in various colors and use either the Gold Foil or Silver Foil!!!
I started with a Marina Mist card base and stamped on a piece of Whisper White measuring 4″ x 5-1/4″. The dots from the Watercolor Wings Stamp Set were stamped in Night of Navy. I stamped them a few times before returning to the ink pad so I could have a variation of colors! The greeting Just Because is from the A Dozen Thoughts Stamp Set! For the butterflies, I stamped them on a scrap piece of Whisper White with the following colors – 1. Soft Sky, 2. Marina Mist, & 3. Night of Navy! The butterflies are amazing just like that but I added the foil overlay to really make them pop. I used the coordinating Bold Butterflies (Bundle & Save 15%) and the Butterflies Framelits for cutting out the butterflies and the overlays!!! Of course the butterflies were added to the card with Stampin’ Dimensionals and I adhered the overlay with a Mini Glue Dot down the center of the butterfly! Simple and fabulous!!
Here are some other butterfly color combinations that I have been using!!! You can also check out a Video Tutorial on the Watercolor Wings Stamp Set by clicking here! Let me know your favorite color combination in the comments below!!
Happy Tuesday and Happy September!!! I can’t believe it! But that means that I have a fabulous technique to share with you – 2-Step Stamping AND the Holiday Mini Catalog is out!!! WOOT WOOT! It’s a fabulous day!!! Check out this beauty!!!
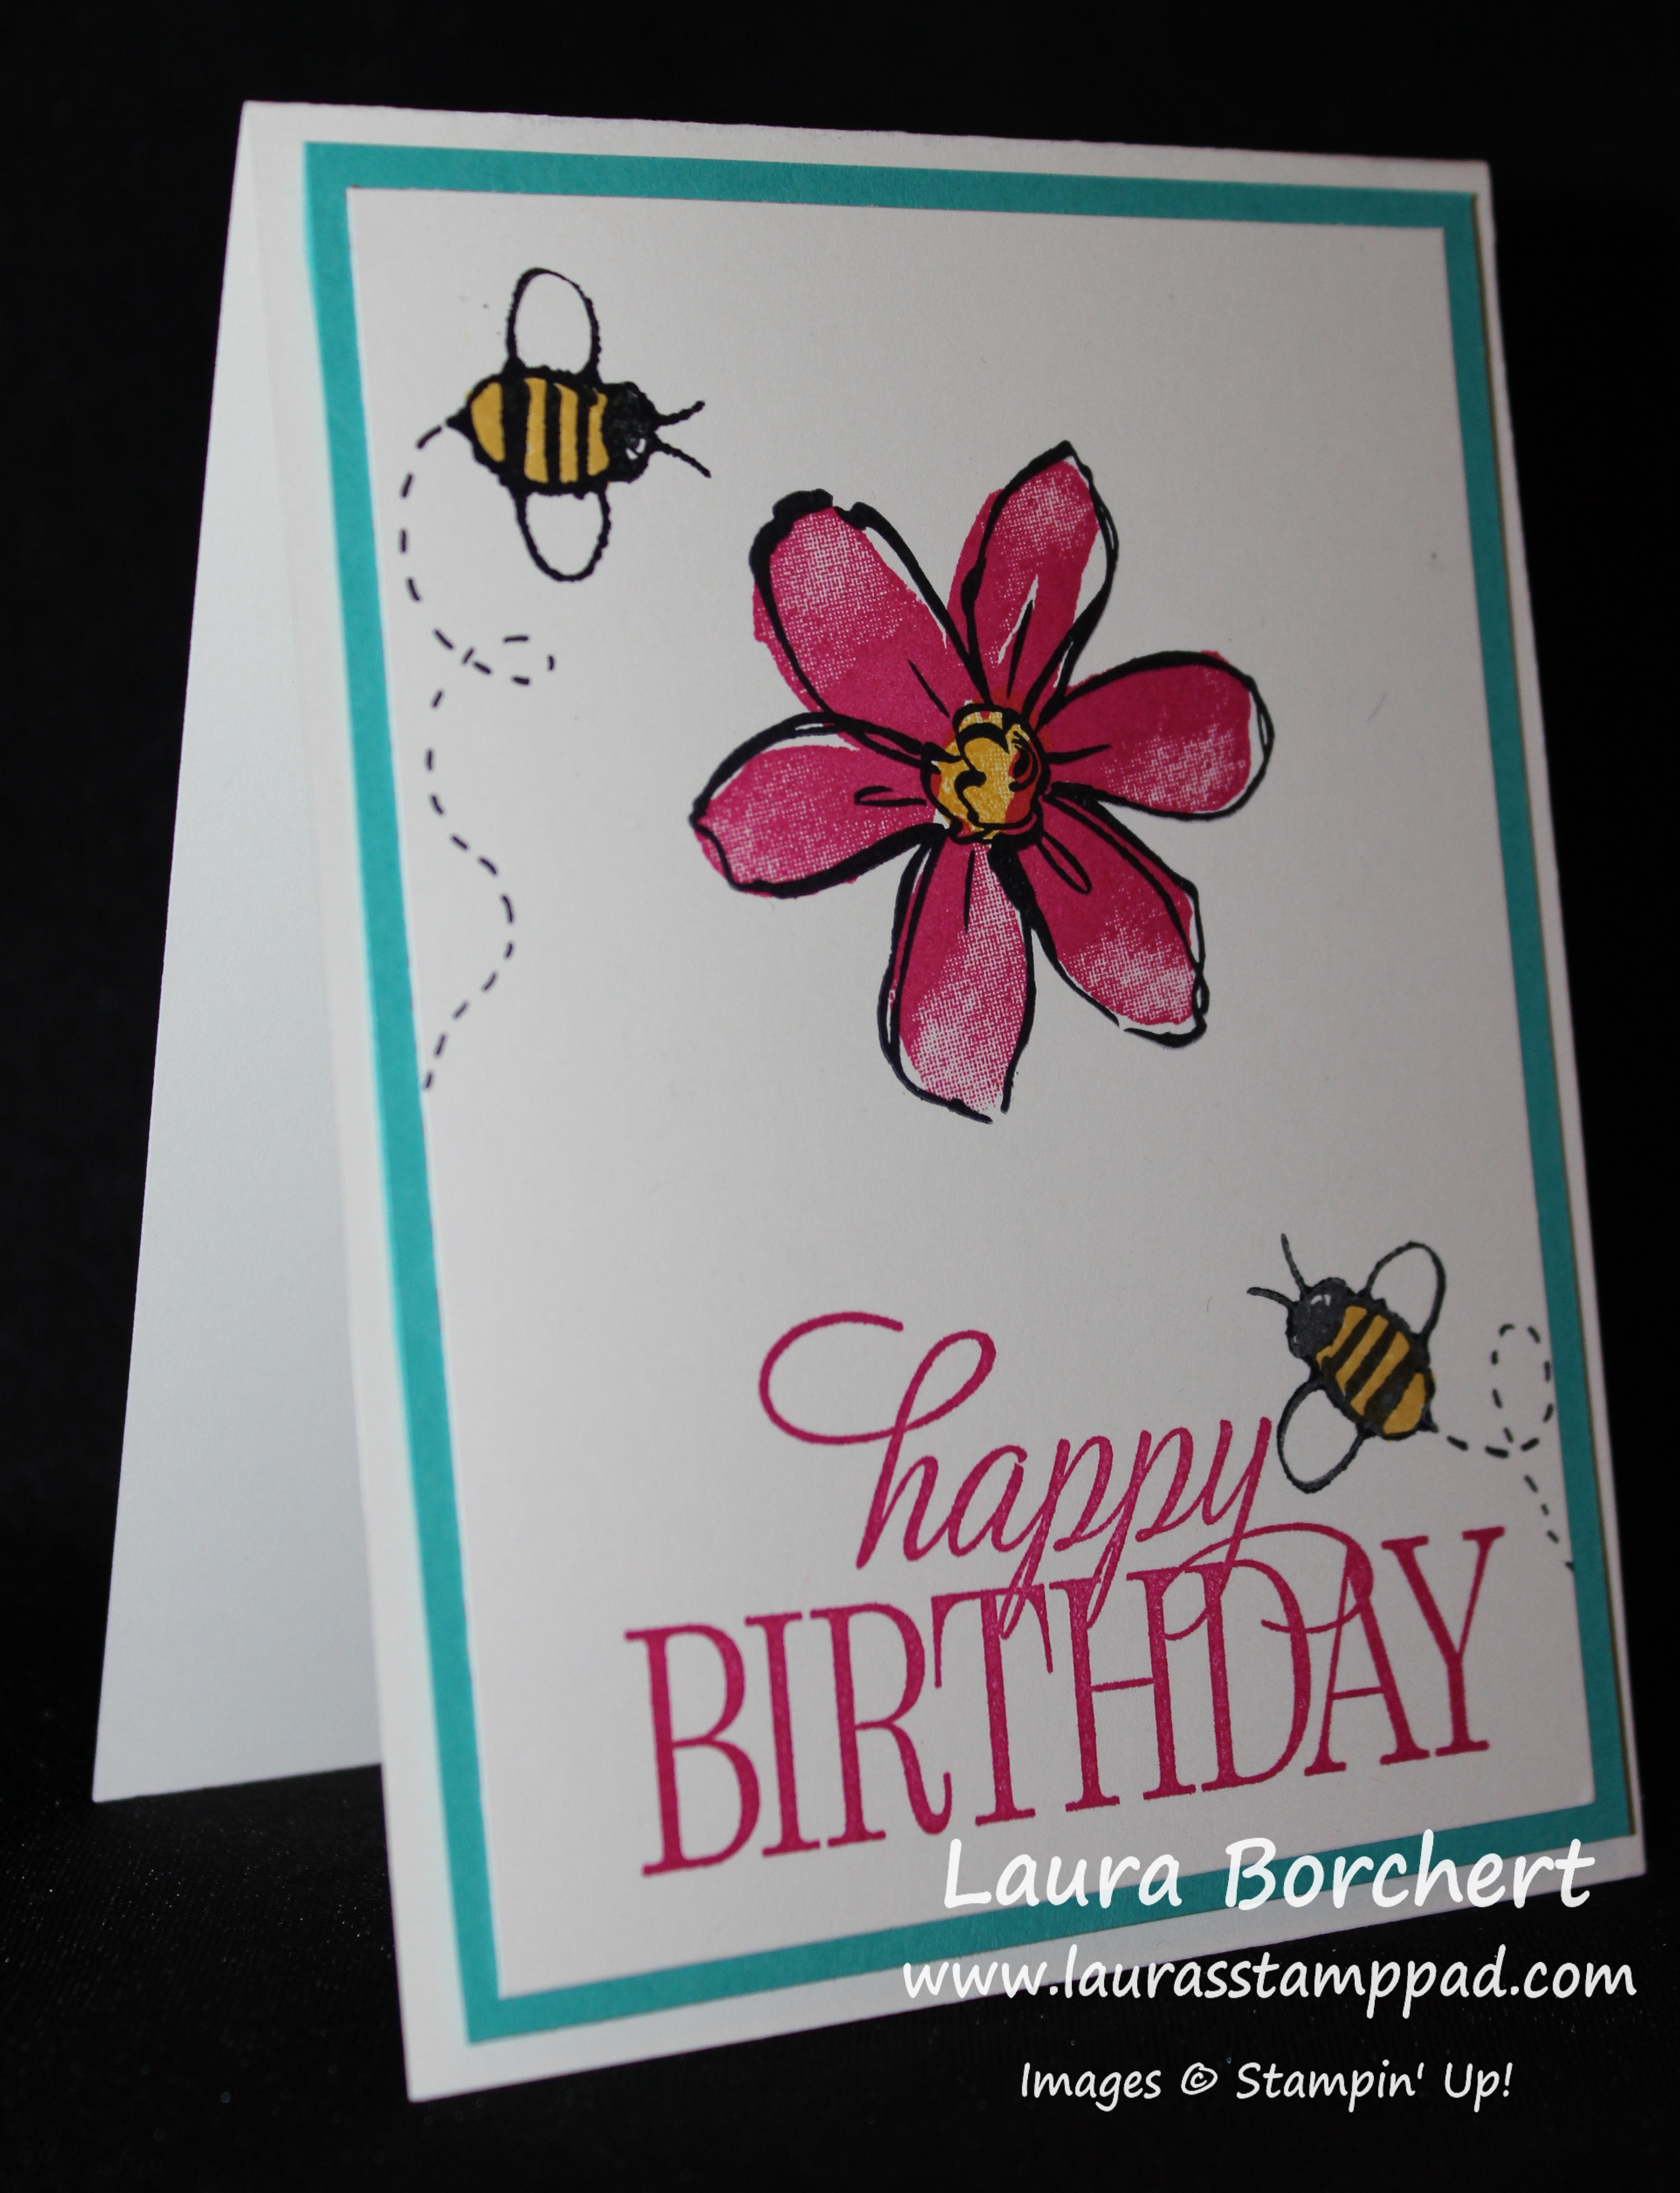
So you all know I love flowers but that Bumble Bee steals the show on this card! Aren’t they precious??? I think so for sure!!! Now let’s get started on this Multi-Step Stamping card!!!!
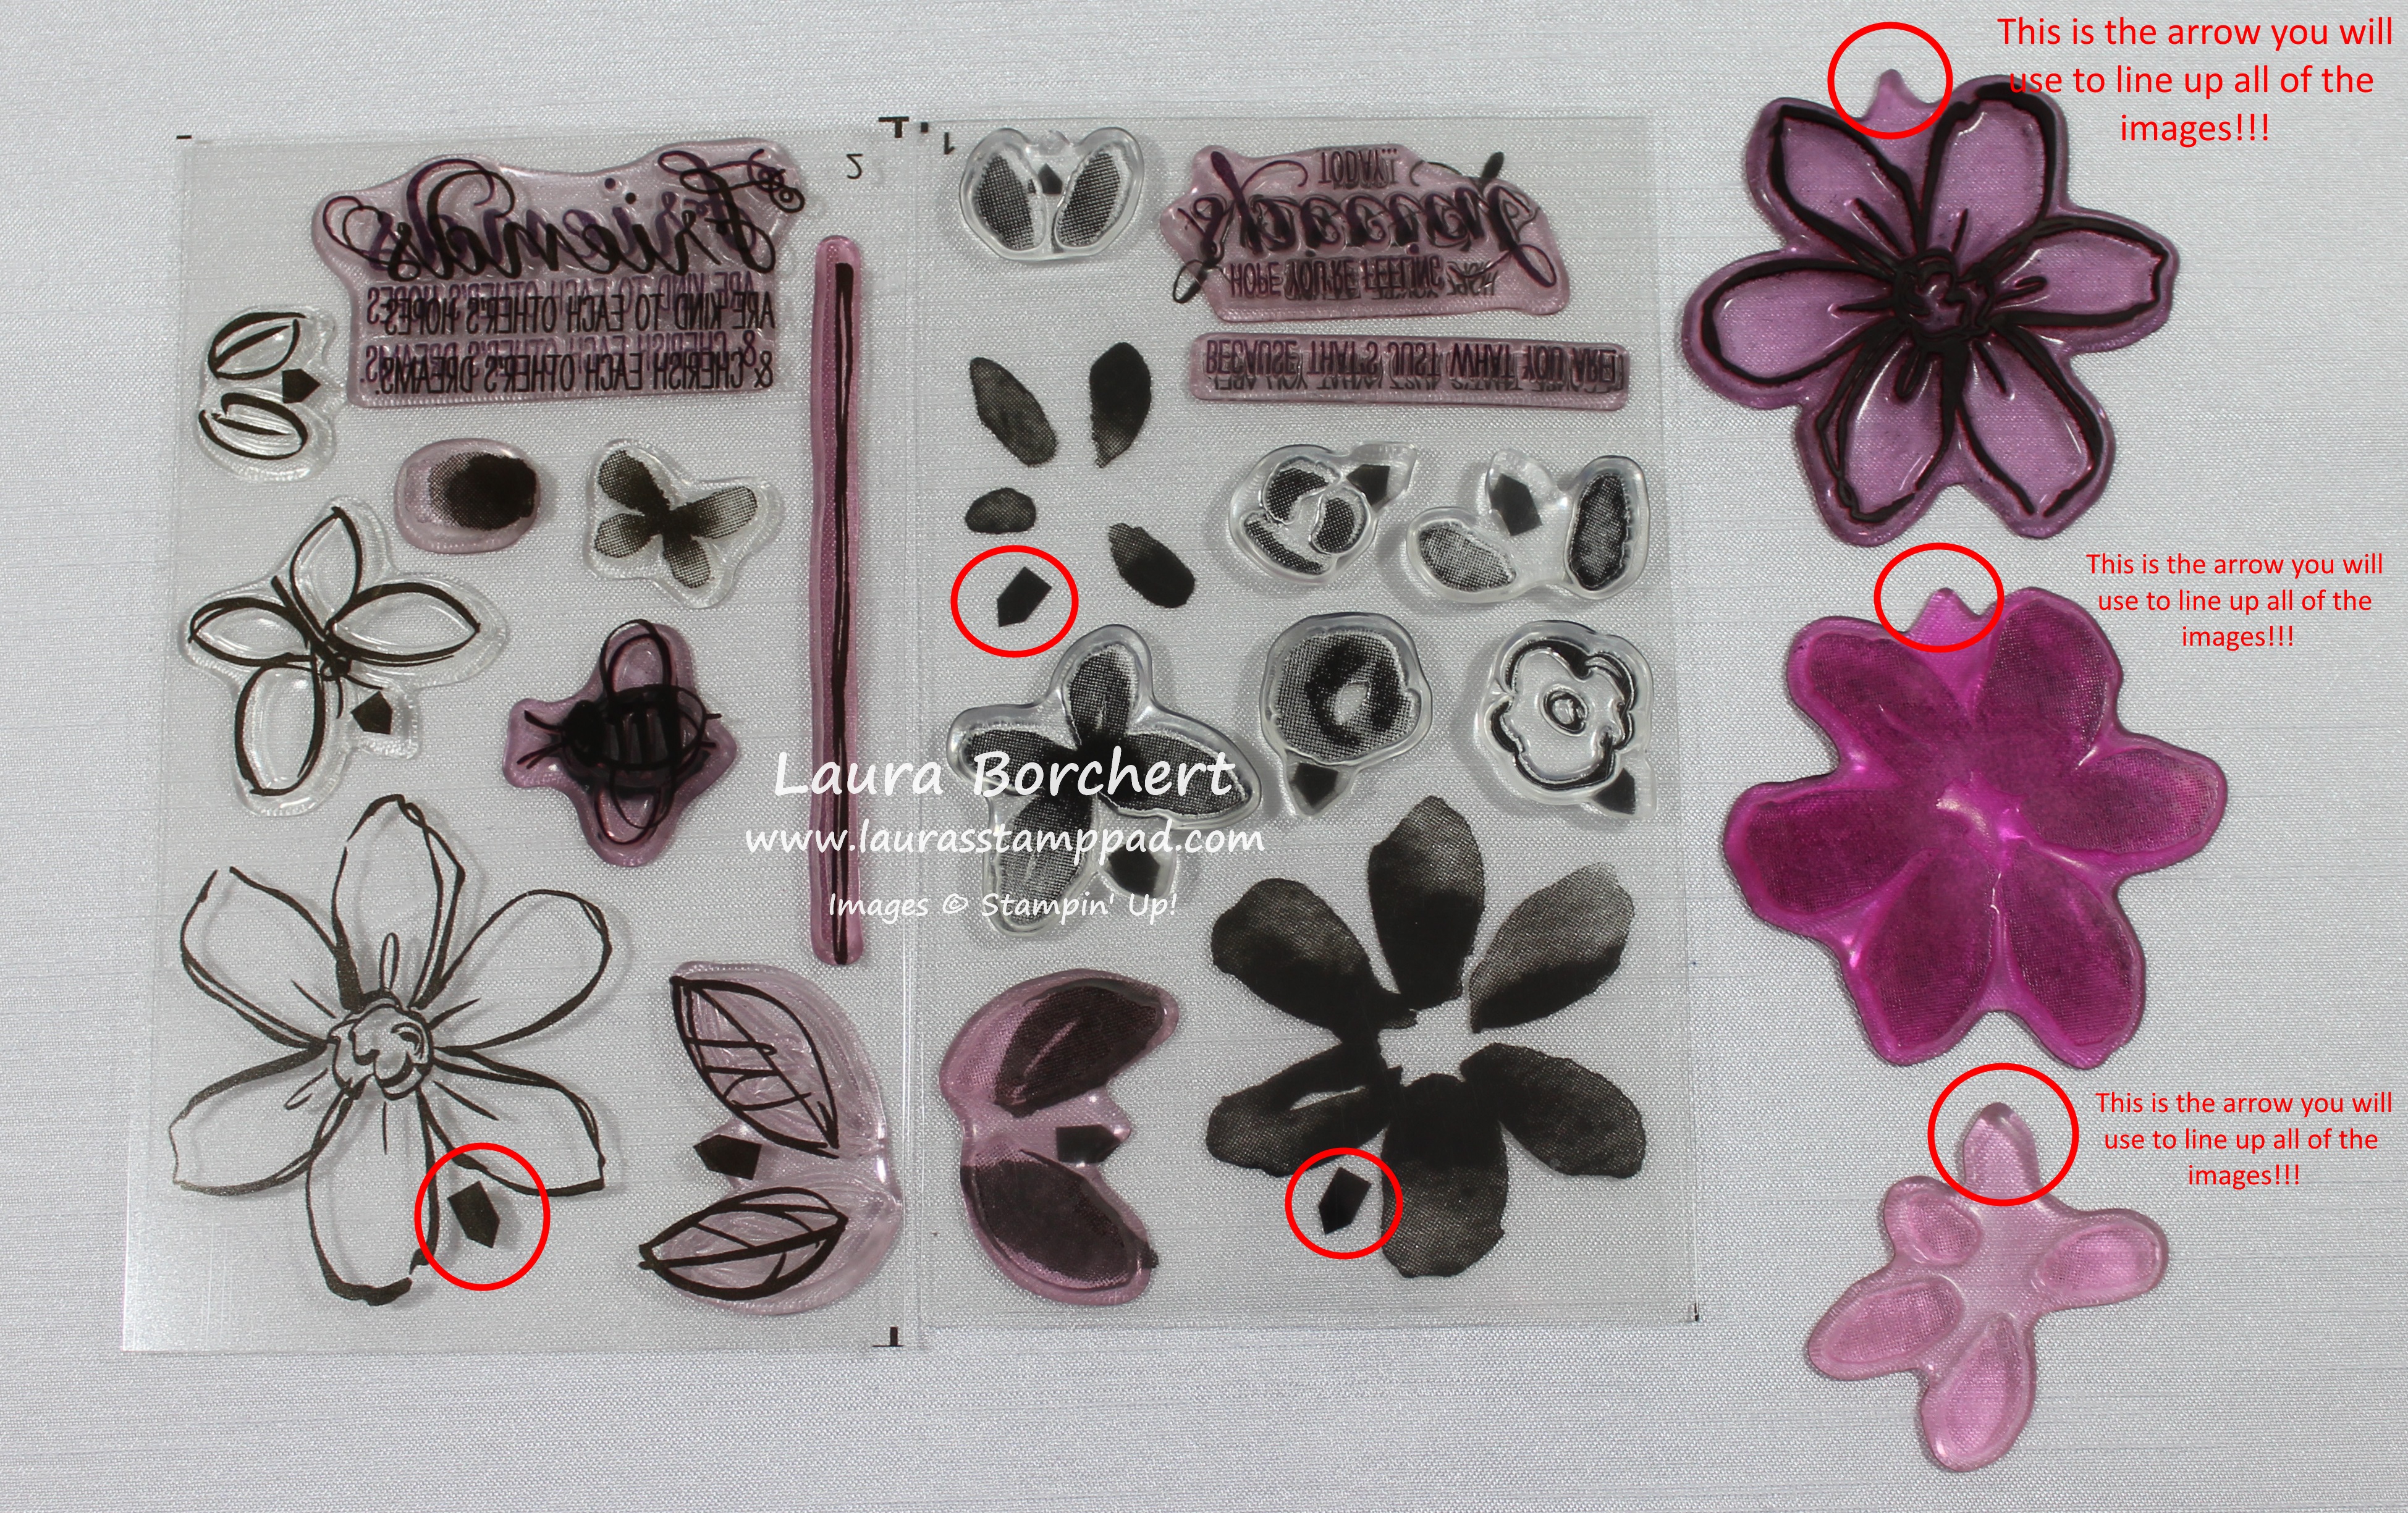
Not a lot of items on the list this week! When you have a fabulous stamp set like this Garden in Bloom Set, you don’t need a lot of extra because the set has it all. The 2-Step Stamping (sometimes 3) technique really gives an image depth, texture, and a variation of colors. I love that!!! The Whisper White piece of cardstock that I stamped on measures 3-3/4″ x 5″. I started with the flower in the center. First, I stamped the outline of the flower in Memento Black Ink. There is a little arrow (or nubbin as I like to call it) on the stamp that you will want to take note of. This arrow is on every image for your flower. If you line those arrows up each time, your image will be placed correctly. I usually try to point the arrow UP or at another image on my paper to make it easy to remember.
Then I took the 6 petal image and inked it up in Melon Mambo. Remembering that my arrow was up last time, I will place the arrow up on this image to have perfect placement of these petals. How fabulous?!?! There is also a little oval (finger print) image in the stamp set that you can use for the center. I think it is actually for the bumble bee but it can be used for the flower as well. You could also color it in with a marker if you wish. I stamped the center of the flower in Crushed Curry!!! I stamped the little bumble bees in Memento Black Ink and then the centers with Crushed Curry. For the buzz lines, I used a Basic Black Marker!!! Those really made him come to life! I seriously squealed once I added those on. 🙂 The greeting is from the Happy Birthday Everyone Hostess Stamp Set!!! Love that font!
I will be posting more samples using this stamp set because I had so much fun with it!!! Stay tuned! If you want a sneak peak of those cards as well as a Video Tutorial on this Garden in Bloom Stamp Set, check out the video below or click here!!
The Holiday Mini Catalog is here and it is AMAZING!!!! You can check it out here – Holiday Mini Catalog! I am so excited to start planning Holiday Card Classes because lets face it those are some of my most popular classes….after Flower Classes! 🙂 Oh how I love my stampers and their love for flowers like me!!! Gold is soooo in again this year and I am loving it!!!
Okay, I’m stopping there because I could go on and on!!! As always the list keeps growing as I see samples or play more. I will be posting lots of samples in the coming weeks! It is super exciting!!!
If you would like a copy of this catalog, I can mail one to you. Leave me a comment below and I will reach out to you for your address!! If you would like to order from the catalog, click here!!! Don’t forget the Weekly Deals that came out today as well!!
This card is perfect for any occasion. You could make multiples of this one in no time at all and add a greeting as you need them! It also uses up scraps which I love!!! I started with a Soft Sky card base. Then I took a piece of Very Vanilla measuring 4″ x 5-1/2″ and placed the 2nd to smallest Deco Labels Framelit in the center and ran it through the Big Shot. You can use this cut out piece for another project and take the frame and place it into the Elegant Dots Embossing Folder and run it through the Big Shot again! Now this is your frame for your card!!! I used Stampin’ Dimensionals to adhere it to my card front BUT FIRST I laid it on the card front to stamp my greeting and then added the dimensionals and adhered it on. I did it in this order so that 1. I could line up my greeting in the center but not have it raised up hitting my greeting and 2. If I messed up the stamping, I could get another card base and try again without having do re-create the frame again as well. I used the greeting from the Thoughts & Prayers Stamp Set with Chocolate Chip ink. To finish off the card, I punched out Calypso Coral, Wisteria Wonder, and Daffodil Delight with the Petite Petals Punch and flower from the Itty Bitty Accents Punch! I added little Candy Dots to the center of the flowers coordinating with each color!! I really like how the Candy Dots add that little pop! Love it!!!
Today is my Birthday and I love Birthdays! They are a day to celebrate life and what better way to celebrate than with all things PINK, cupcakes, a cute outfit, and time spent with family!!!! That’s just a few of the things that make me smile even more on my birthday!!! As you know from yesterday, I like celebrating all month long so here are a few ways I have been celebrating!! You will see a common theme I bet!!!
Family Vacation to the Lake! Nothing on the schedule for an entire week. The only decision to be made was Pool or Lake!!!
Weddings and Brides and Love!!!!! I attended a wedding and a Bridal Fair this month! I absolutely love weddings and they make me cry. There is just something about that special day that has so much meaning, love, and family all together!!! Working with Brides to make that day even more special is lots of fun too!! I wish I could get married every weekend but Brad says no; so working with Brides on their wedding fits the need! 🙂
We live near (like 10 minutes away) a Horse Track and have never been in the 4 years we have lived here. I put it on my list of things to do this year and it finally happened during Birthday Month!!! I like to call it Pick Your Pony and it was lots of fun! We won some and lost more but in the end we broke even!!!
And sharing again from yesterday – stamping with friends and cupcakes!!!
These are all of the cards I have received already and yes they are on display on my kitchen table and will be for at least a week! Well, until Stamp Class I guess because then I’ll have to take them down!
I can’t wait to see what the weekend holds. Brad has been working on my card a few evenings this week…..good thing it doesn’t take me a few evenings to complete just 1 card. I know it will be super special. You can check out some of his cards from other occasions here and here! I will be sure to post it!!! Spending time with my hubby tomorrow and then headed to my parents on Sunday for a day with the family!!! I couldn’t be more blessed on my Birthday!!! Thank you to all of you who have wished me a Happy Birthday! It really means a lot to me!!!
I did a special Video on my YouTube Channel today about the reasons I love being a Stampin’ Up Demonstrator. Click here to check that out!! You can also see my Holiday Mini Catalog Haul Video which was posted on Thursday!!!! Eeeee Only a few more days till you can order from it!!!
ONE MORE SPECIAL, all online orders placed today, Saturday or tomorrow Sunday, will receive Double Laura’s Loyal Stampers Points AND a special gift from me! Click here to order! OR You can join Paper Pumpkin with the Promo Code: HALFOFF and you will earn as well! Send me an email after you have signed up so I can send you your gift!
Have a wonderful weekend!!!! See you back here on Monday!
Happy Friday and Happy Birthday Eve to ME!!!!! Of course, I have been celebrating all month long. I think everyone should celebrate their Birthday Month…..trust me it’s more fun that way!!! The week of my Birthday, I like to have a special stamp class. We did all flower cards because those are my favorites, we enjoyed cupcakes and everyone got Stampin’ Dimensionals!!! I couldn’t figure out the timer on my camera so the photos were a bit crazy. Also, it is rather hard to take a selfie when you have short arms and you camera is really big! 🙂 I love the photos anyway!!! The bottom left photo is of my stamper girl, Vel who also is celebrating her birthday tomorrow!!!! BIRTHDAY BUDDIES!!!! My heart is full!!!
Of course, it isn’t a Friday without the Weekly Deals!!! These items are right up my alley as well. Gold Glimmer Paper for a little bling or Silver Glitter Powder for those who live on the edge. I don’t do powder anymore after spilling an entire container all over myself. Glimmer Paper and Dazzling Details for this girl now!!! The Pansy Punch (FLOWER) is super fabulous as well!!
Tomorrow I will have a Special Saturday Post for my Birthday as well as a Video on my YouTube Channel! Stay tuned!!! I’m off to do some more celebrating!!!
I told you I have had lots of fun with the Watercolor Wings Stamp Set and here is another amazing creation!!! Click here to see more! I love how the Fluttering Embossing Folder gives a great background texture to the card! I embossed a piece of Daffodil Delight measuring 4″ x 5-1/4″ and tied a piece of Pumpkin Pie Cotton Ribbon around the lower half. I adhered this to a Whisper White card base! For the butterflies, I used a scrap piece of Whisper White and used the Watercolor Wings Stamp Set. I used Pumpkin Pie for the first stamp, Tangerine Tango for the second, and Real Red for the third one. Then I used the coordinating Framelits to cut these out. You can Bundle & Save 15% when you purchase the Watercolor Wings Stamp Set and Bold Butterfly Framelits! You will also want to get the Butterflies Framelits! Together both sets of Framelits will cut out both the big and little butterflies as well as do the overlay which I will be showing some fabulous samples with that next week! 🙂 Stay tuned!!!
Here are some butterfly color combinations that I have created and click here to see a Video Tutorial on the Watercolor Wings Stamp Set!!!
This card scream little boy!!! It would be a perfect kid’s birthday card!!! I have been having fun with the No Bones About It Stamp Set because there are so many combinations!!! Here is another fun one!!
I started this one with a Whisper White Card base and added a piece of Basic Black measuring 4″ x 5-1/4″. Then I took little pieces of Whisper White measuring 1-1/4″ x 1-3/4″ and stamped a dinosaur and his coordinating bones onto it. I used Lost Lagoon, Hello Honey, and Cucumber Crush. I layered this piece onto the coordinating cardstock (1-1/2″ x 2″ ) and added the little star! I punched the star out with the Itty Bitty Accents Punch Pack! I love how the star adds a little pop and it fills in that white at the top! Then I added 2 Stampin’ Dimensionals to the back down the center! Set these aside and we are going to work on the banners. The banners are 3/4″ x 3-3/4″. Add the little banner tips to one end and stamp the feet from the dinosaur in the coordinating color! At my stamp class, my stampers made sure to put the feet in the same direction as the dinosaur….that never really occurred to me! 🙂 The things we all catch!!! Now for spacing, I added the dinosaur rectangles to the banner strips by putting them all close together to make sure the spacing was correct along the banner strips. Now for the spacing on the card, place them all down how you would like them and then pick up each one individually for adhesive! I found this to be the best way. When I tried adhering the banner strips first, I ended up with horrible spacing. I hope this helps with your card!!!
I know that the multiple stamping and cleaning to switch colors might make this card a little bit more time consuming but it is a fun card. It uses up lots of scraps of various colors of cardstock AND making multiples at one time would work really well! What colors would you use for the dinosaurs?? Let me know in the comments below!
Happy Tuesday!!! That means I have a fabulous technique to share with you today!!! This one is super exciting because it is all about FLOWERS!!! I just love stamping flowers and creating beautiful cards with them!!! This is no exception!!!!
How amazing is this card with the depth and texture and colors of the flowers??? I love it!!! So let’s get started on how it was created!
I started with a Whisper White card base measuring 4-1/4″ x 11″ and embossed the card front with the Elegant Dots Embossing Folder. Then I took scrap Whisper White pieces and stamped the flowers. The large center flower was done in Blackberry Bliss and the medium flower was stamped in Tempting Turquoise with the other flower on top stamped in Island Indigo. For the smaller flower, I stamped it in Crushed Curry and the smallest one (layered on top of the yellow flower) was stamped in Tangerine Tango. For the leaves, I stamped the solid image in Cucumber Crush and stamped off, then I took the center piece and stamped it also in Cucumber Crush (no stamping off). I then used the coordinating Flower Fair Framelits to cut out each of the flowers and leaves!!! No fussy cutting necessary here. I have a couple tips for finding the correct way to line up the flowers without spinning them around and around to see how it lines up. Check out the video below for those tips!! 🙂 I adhered the flowers with Stampin’ Dimensionals to a piece of Tip Top Taupe. I also stamped the greeting and little mini flower from the Flower Patch Stamp Set in Tip Top Taupe. I love it!!! You could use so many color combinations for a card like this and each one would be stunning I’m sure!! I finished off the flowers with a few Pearls!!! Love it!!!
Here is the Video Tutorial showing the tips and tricks on stamping and using the Framelits!!! I will be posting the other samples from the video soon! Be sure to subscribe to my blog in the upper right corner so you don’t miss out!!
I love this card for some many reasons – the shades of Purple, that adorable Fork Bow, the little background images and the Dazzling Details!!! I love it ALL!!!!
I started with a card base of Whisper White! Then I took a piece of Whisper White measuring 3-7/8″ x 5-1/8″ and stamped different images from the Perpetual Birthday Calendar Stamp Set. I did the stars in Rich Razzleberry, the dots in Wisteria Wonder, and the starburst image in Elegant Eggplant! I just stamped them all randomly around making sure to fall off the paper so it looks completely covered! I adhered this stamped piece onto a piece of Wisteria Wonder measuring 4″ x 5-1/4″. For the ribbon, I took a piece of Rich Razzleberry Cotton Ribbon measuring 4-1/4″ and adhered the ends to the back of the Wisteria Wonder. Then I took another piece of the ribbon and created the Fork Bow. Click here for a video tutorial on how to create one! I adhered the mini bow with a Mini Glue Dot. Now you can adhere this to your card base! For the greeting, I stamped HI from the Layered Letters Alphabet Stamp Set in Elegant Eggplant onto a piece of Whisper White scrap paper. I punched it out with the Decorative Label Punch. I then punched out a second one in Elegant Eggplant and cut it in half to layer it on. You can see a tutorial on that here! Of course I adhered this to the card front with Stampin’ Dimensionals. To finish the card off, I added a little bit of Dazzling Details to the center of the starburst images!! Everything is better with a little bling! What color combination would you use for this card? Let me know in the comments below!!