Warm and cozy is how I would describe this card!!! These little stockings are just so cute and I love the soft, warm colors. I used the Hang Your Stockings Bundle (Save 10%) for this one and it was super simple!
I started with a Wild Wasabi card base. Then I took a piece of Very Vanilla measuring 4″ x 5-1/4″ and ran it through the Big Shot in the Festive Embossing Folder. You could use any folder you wish but I thought this one was cute. I added this piece to the card front. For the greeting, I took a piece of Very Vanilla (5″ x 3/4″) and stamped the greeting from the Cookie Cutter Christmas Stamp Set in Chocolate Chip Ink. I needed a long and skinny greeting and that one just went with the cozy theme of this card! I layered this piece onto Chocolate Chip cardstock (5″ x 1″) and added it to the card front with Stampin’ Dimensionals. I like to use dimensionals when adhering things to embossed images because they sink into the grooves and give a smooth look to your card….and I just love them!!! For the stockings, I used the Hang Your Stocking Stamp Set and stamped one in Marina Mist, one in Wild Wasabi, and one in stamped off once Cherry Cobbler. I wanted a more subtle red look so I just stamped off once and then onto my Very Vanilla and got the perfect look. I used the coordinating Christmas Stocking Thinlits (Bundle & Save 10%) to cut out the stockings. I added each of the stockings to the card with Stampin’ Dimensionals as well. To finish it off, I added a little Enamel Shape to the corner to look like a little peg holding them up. You can use the hearts, stars, or dots for your cards……or mix and match to use them up!
If you would like to see this in action, check out the Video Tutorial below or click here. Be sure to subscribe if you are new and don’t forget to hit the like button!!!
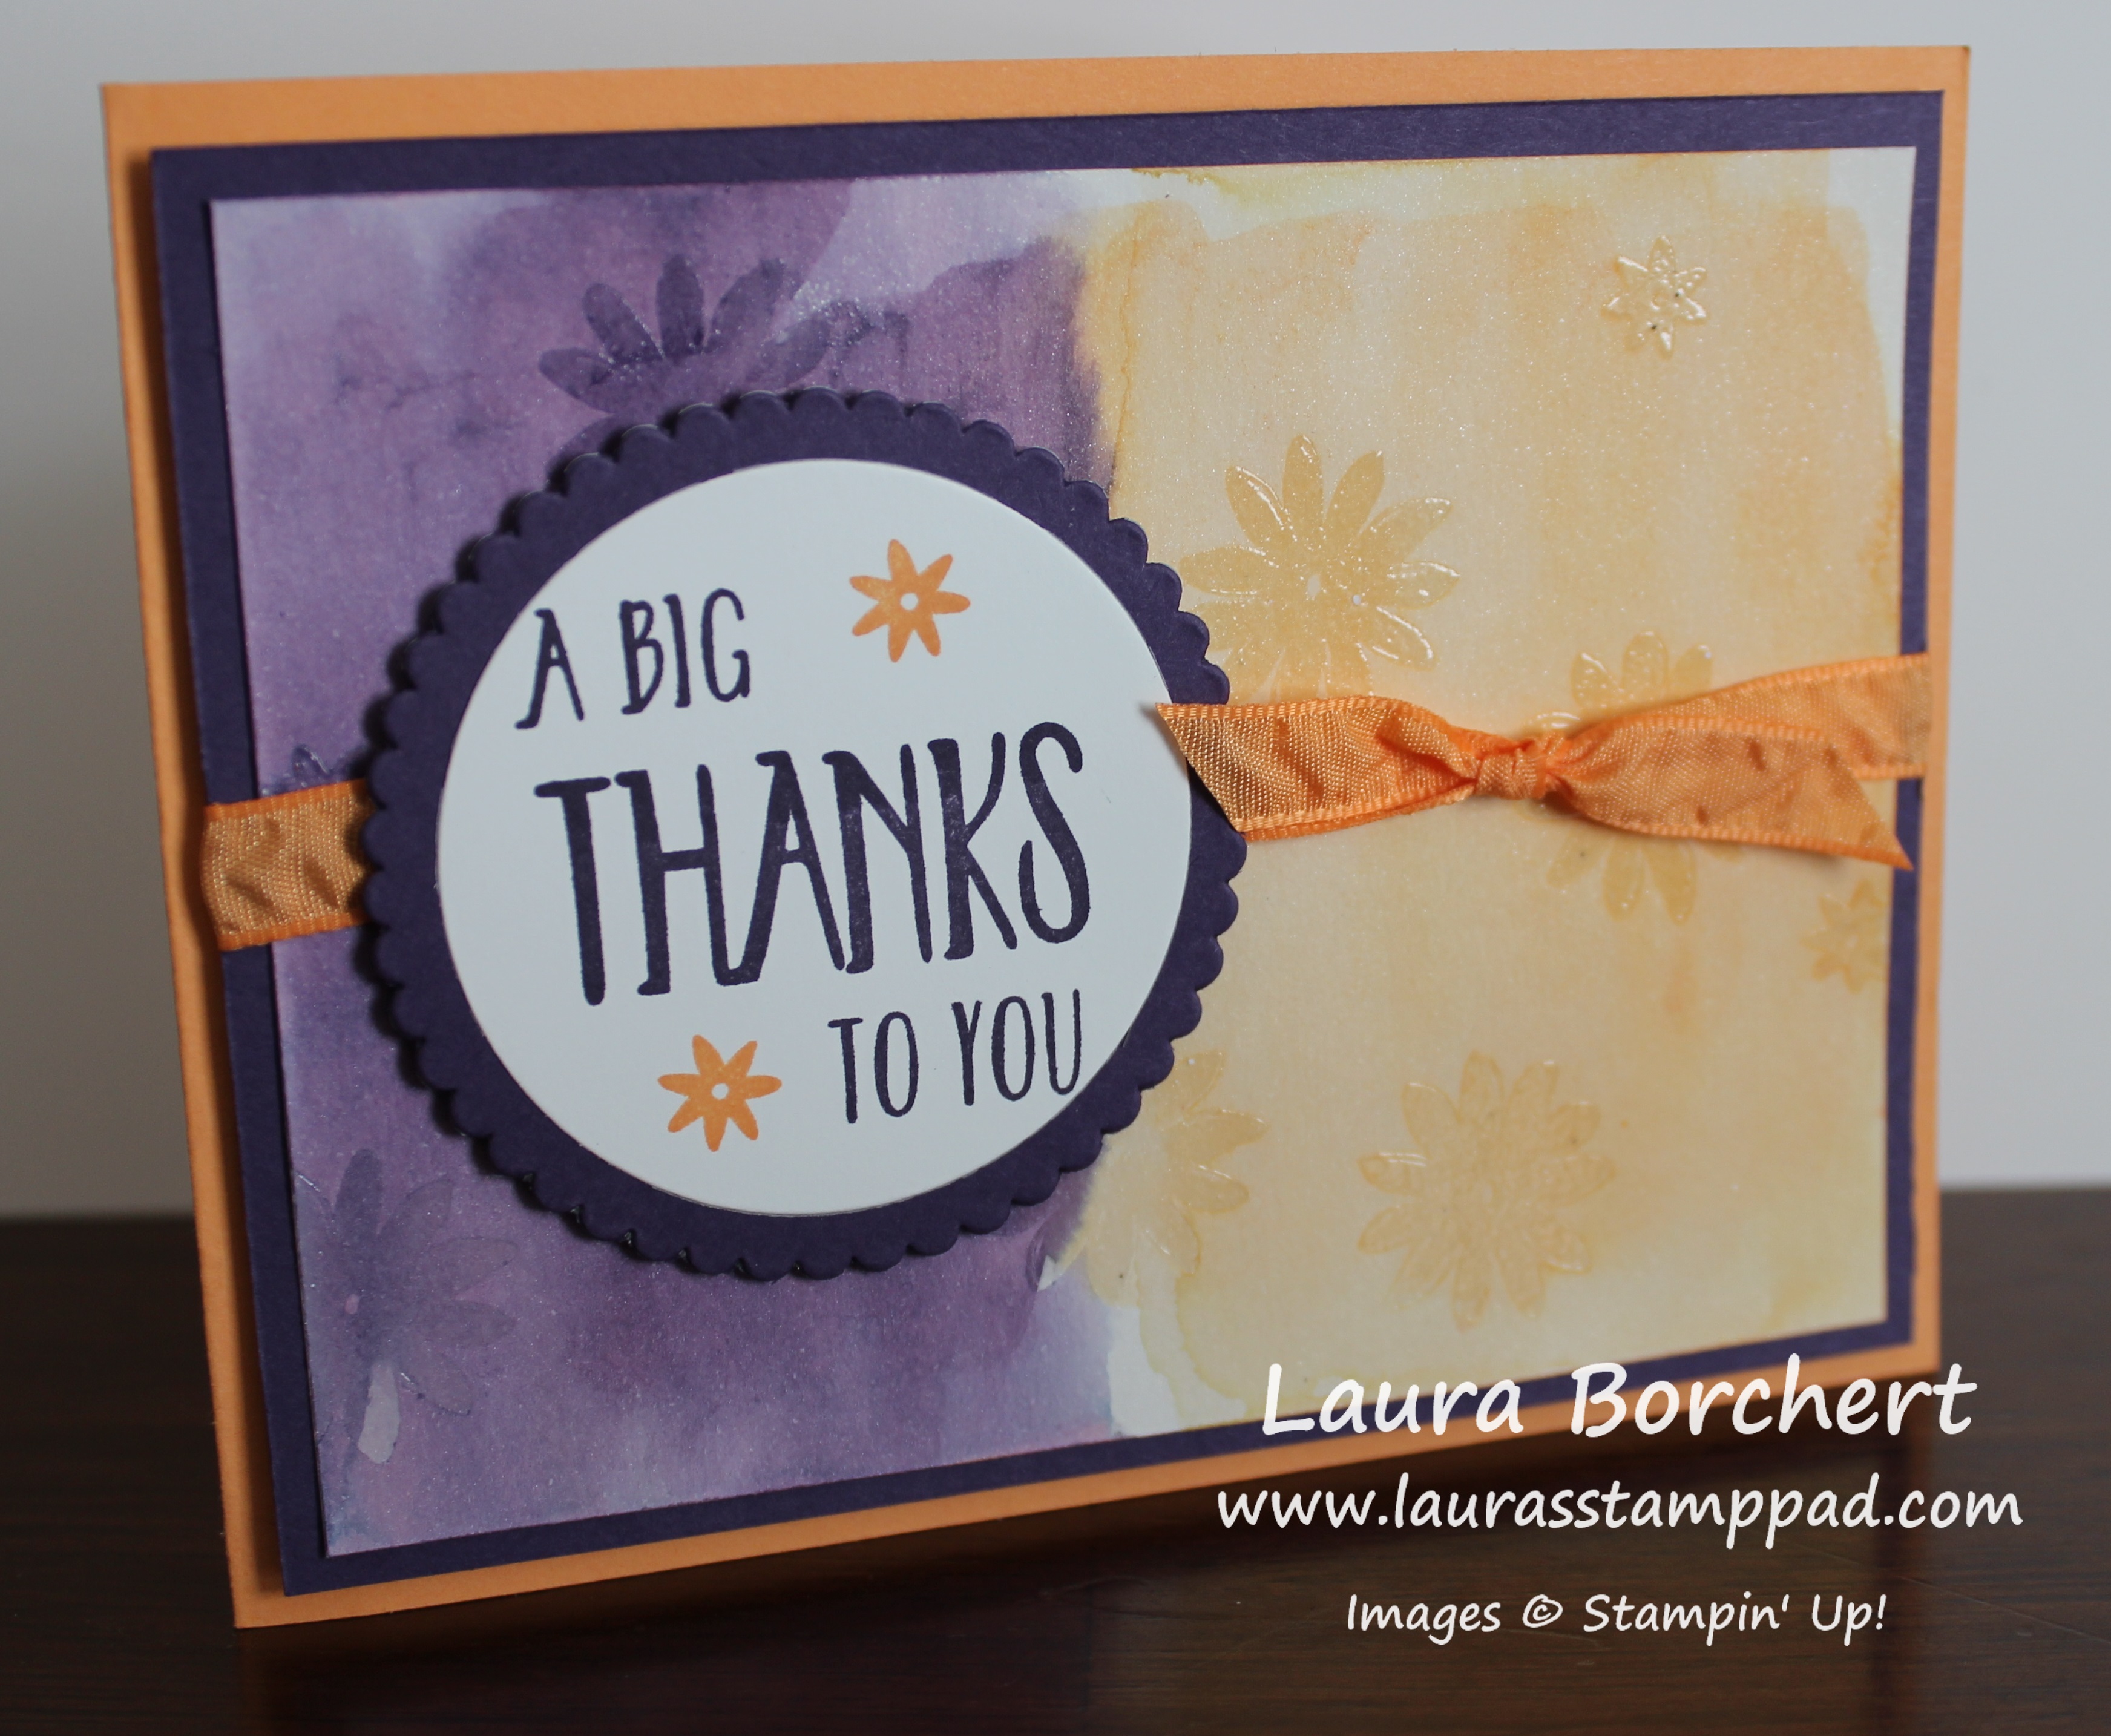
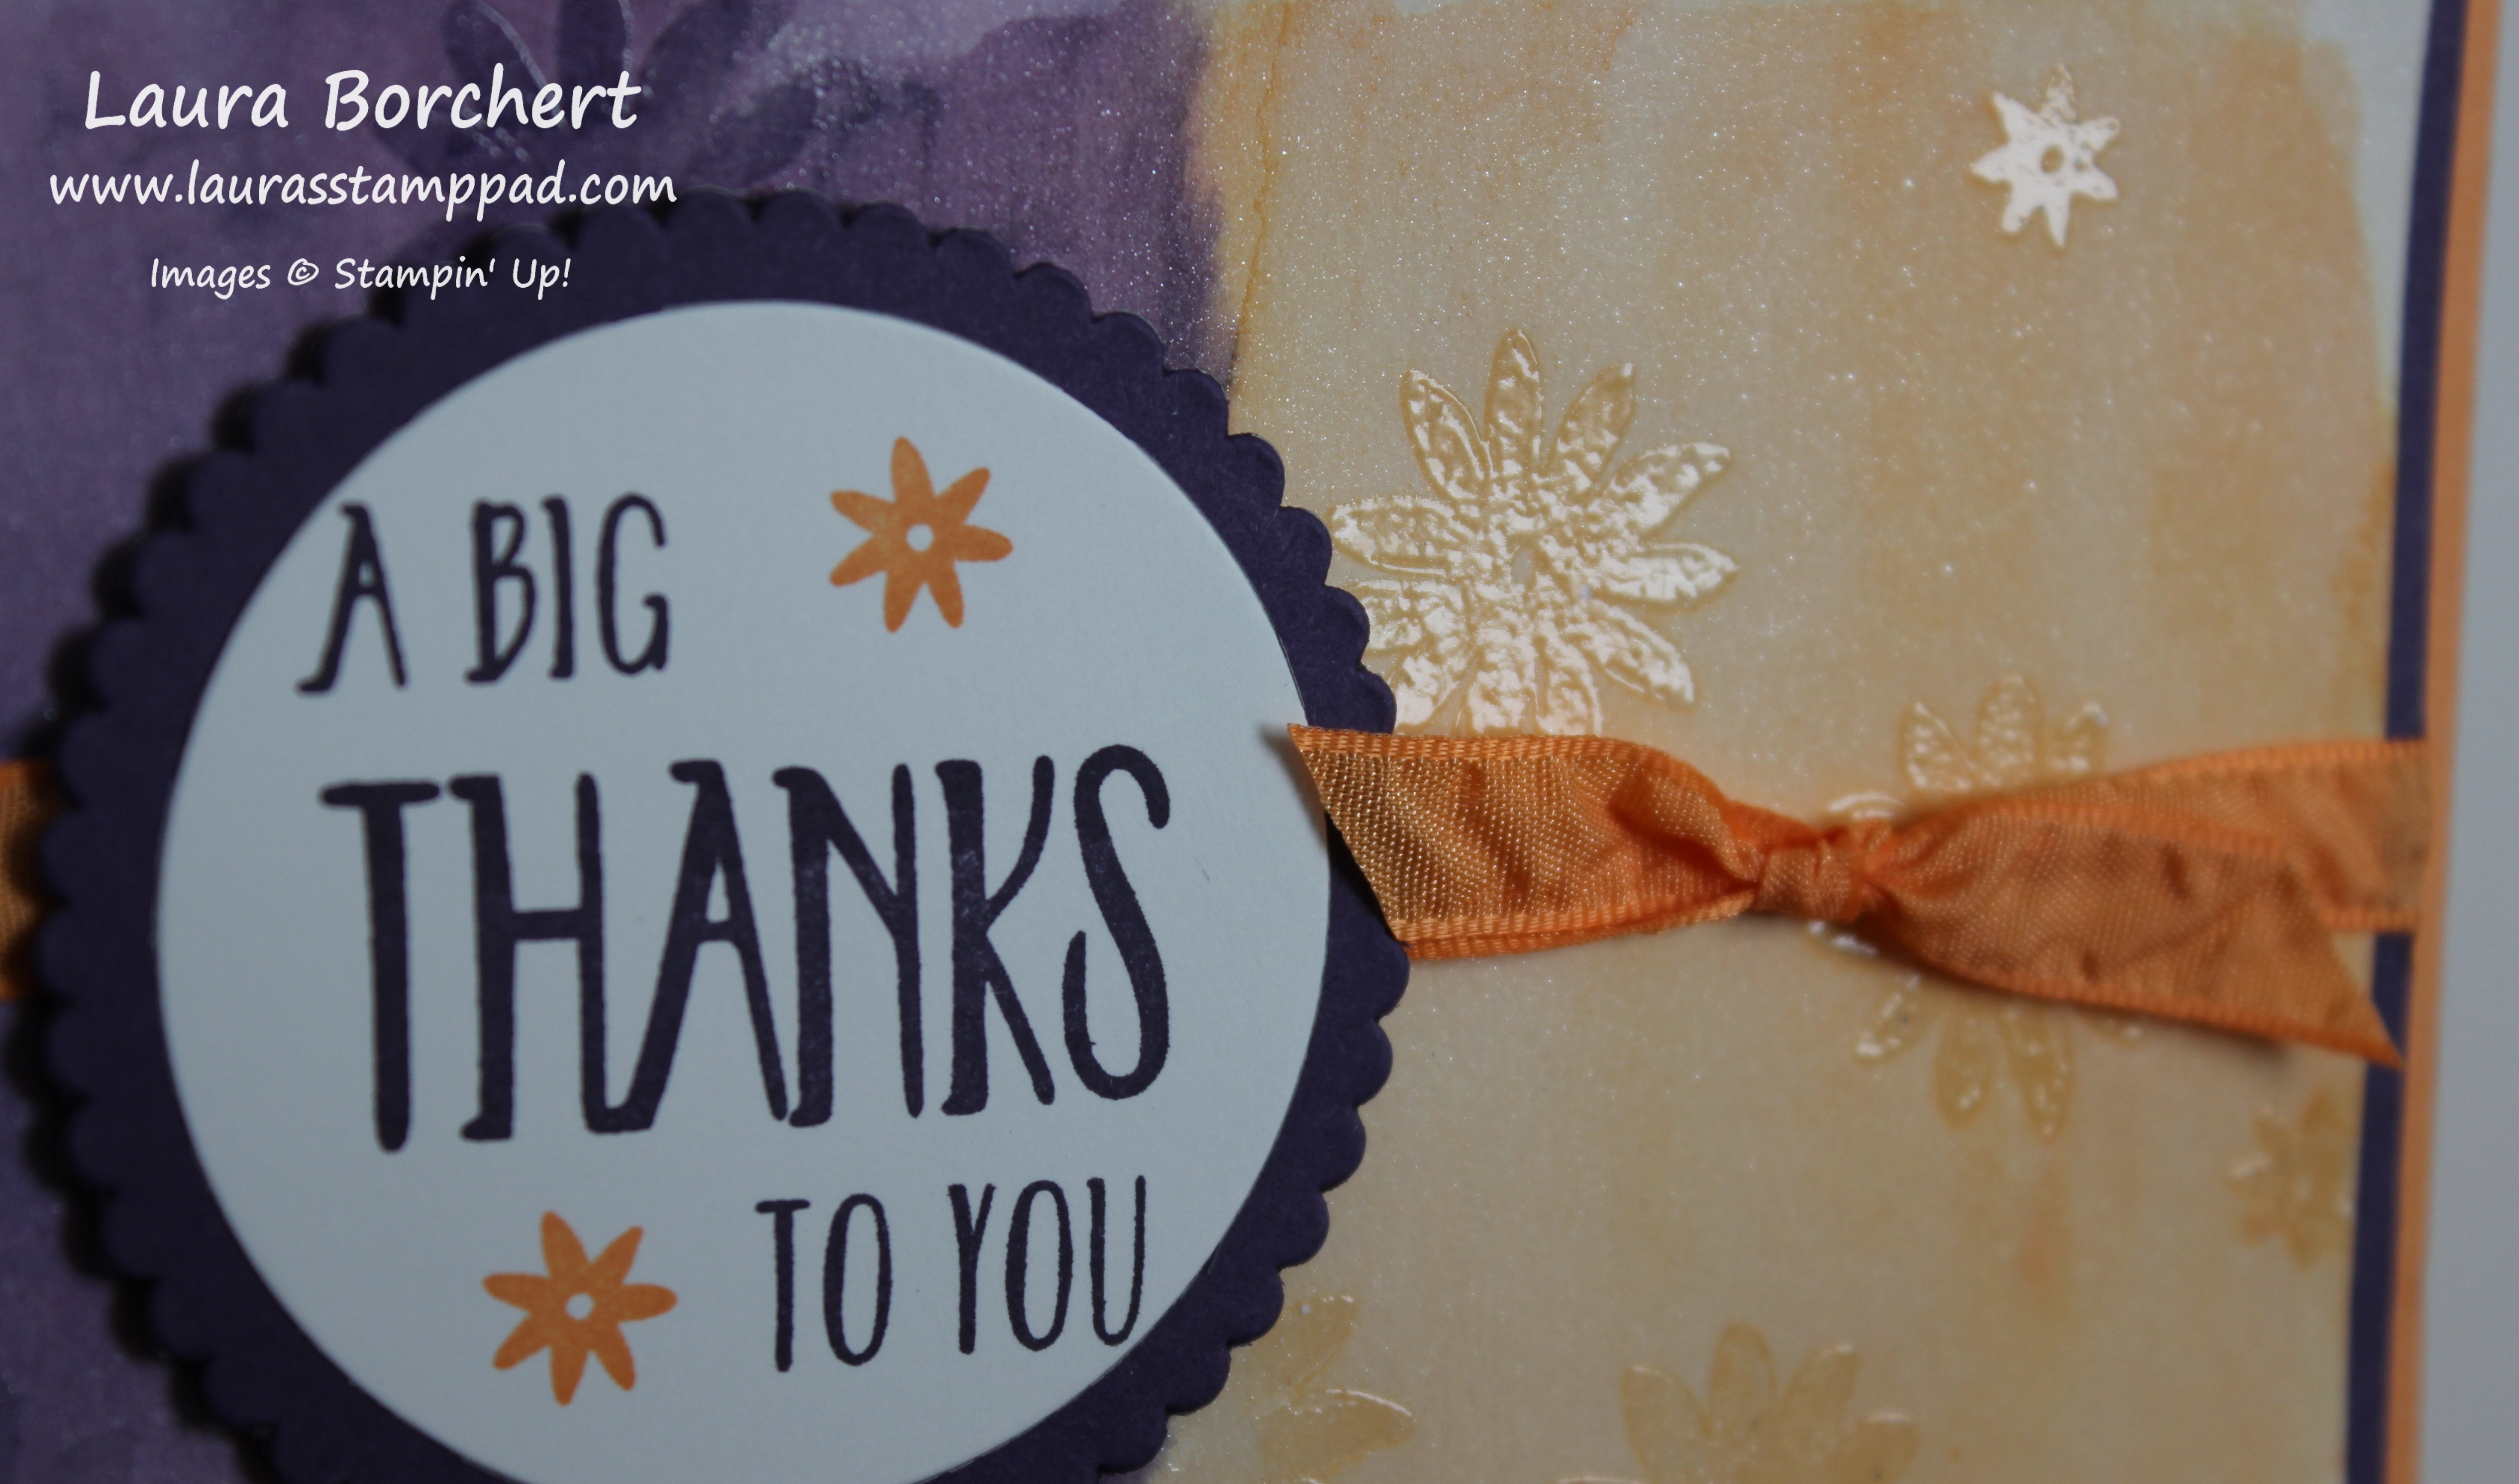
So yesterday I showed you how to do Reverse Watercoloring with snowflakes and all winter/holiday themed! You can check that out here. Today, I’m bringing bright and cheery flowers to you with the Reverse Watercolor Technique!!!
I started with a Peek-A-Boo Peach card base. Then I took a piece of Shimmery White Cardstock (3-3/4″ x 5″) and went over the entire piece with the Aqua Painter to wet it down a little. This will help the color bleed and sort of prime the paper. You don’t need to soak it but just a little brush of water over the top. Now pick up some Peek-A-Boo Peach Ink and watercolor wash over half of the paper. Clean off the brush and do the other half in Elegant Eggplant. You can go to the edge or leave a border. That is all up to you! Now allow this to dry by setting it aside or using the Heat Tool!
Side Notes while it dries……I use Shimmery White cardstock because of the fabulous shimmery look but also because it is a little bit thicker than Whisper White but not as thick and textured as Watercolor Paper. Watercolor Paper has too much texture so it won’t get a nice stamped image for clear embossing. Also, when you are using the Aqua Painter, you can either press your ink pad into the lid and use that as your color palette or you can press a clear block into the pad and use that. I prefer using the clear block because it isn’t as messy and I can easily clean it up. You could also drop re-inker onto the clear block and do it that way as well!
Once it is dry, you will stamp all over in a solid image stamp set with VersaMark Ink. I used a large and small flower from the Perfectly Wrapped Stamp Set. Apply Clear Embossing Powder over the top and set it with the Heat Tool. You can see a tutorial on Heat Embossing here. Now that your embossed image are set, they will hold the color underneath. Using your Aqua Painter, you will gently brush over the entire cardstock like you did in the beginning but this time with no color on your brush. You are just adding water which is taking some of the watercolor wash off that you applied earlier. The color is still being held under the images so they are popping more now. That is the Reverse Watercolor Technique!!!
Once your watercolor is dry, I added this piece to some Elegant Eggplant measuring 4″ x 5-1/4″! I used Fast Fuse for a strong hold since the cardstock is warped a little. Then I wrapped some of the Peeka-A-Boo Peach Ruched Ribbon around it and tied it in a knot. For the greeting, I used the Perfectly Wrapped Stamp Set and stamped onto Whisper White. I added a few flowers to the greeting as well to really pull it all together! Using the Layering Circle Framelits, I die cut the greeting as well as a scallop in Elegant Eggplant. I added the greeting to the card front with Stampin’ Dimensionals.
See you can use this fabulous technique for holidays, all occasion, and so much more! I hope you have really enjoyed this technique as much as I have. You can see the complete Video Tutorial on this technique here!
Happy Tuesday everyone!!! I hope you have survived the fabulous turkey feast and shopping craziness! Now it is back to the craft room to prepare for the next holiday!!! This technique is super fabulous for Christmas Cards and cards all year long!!!
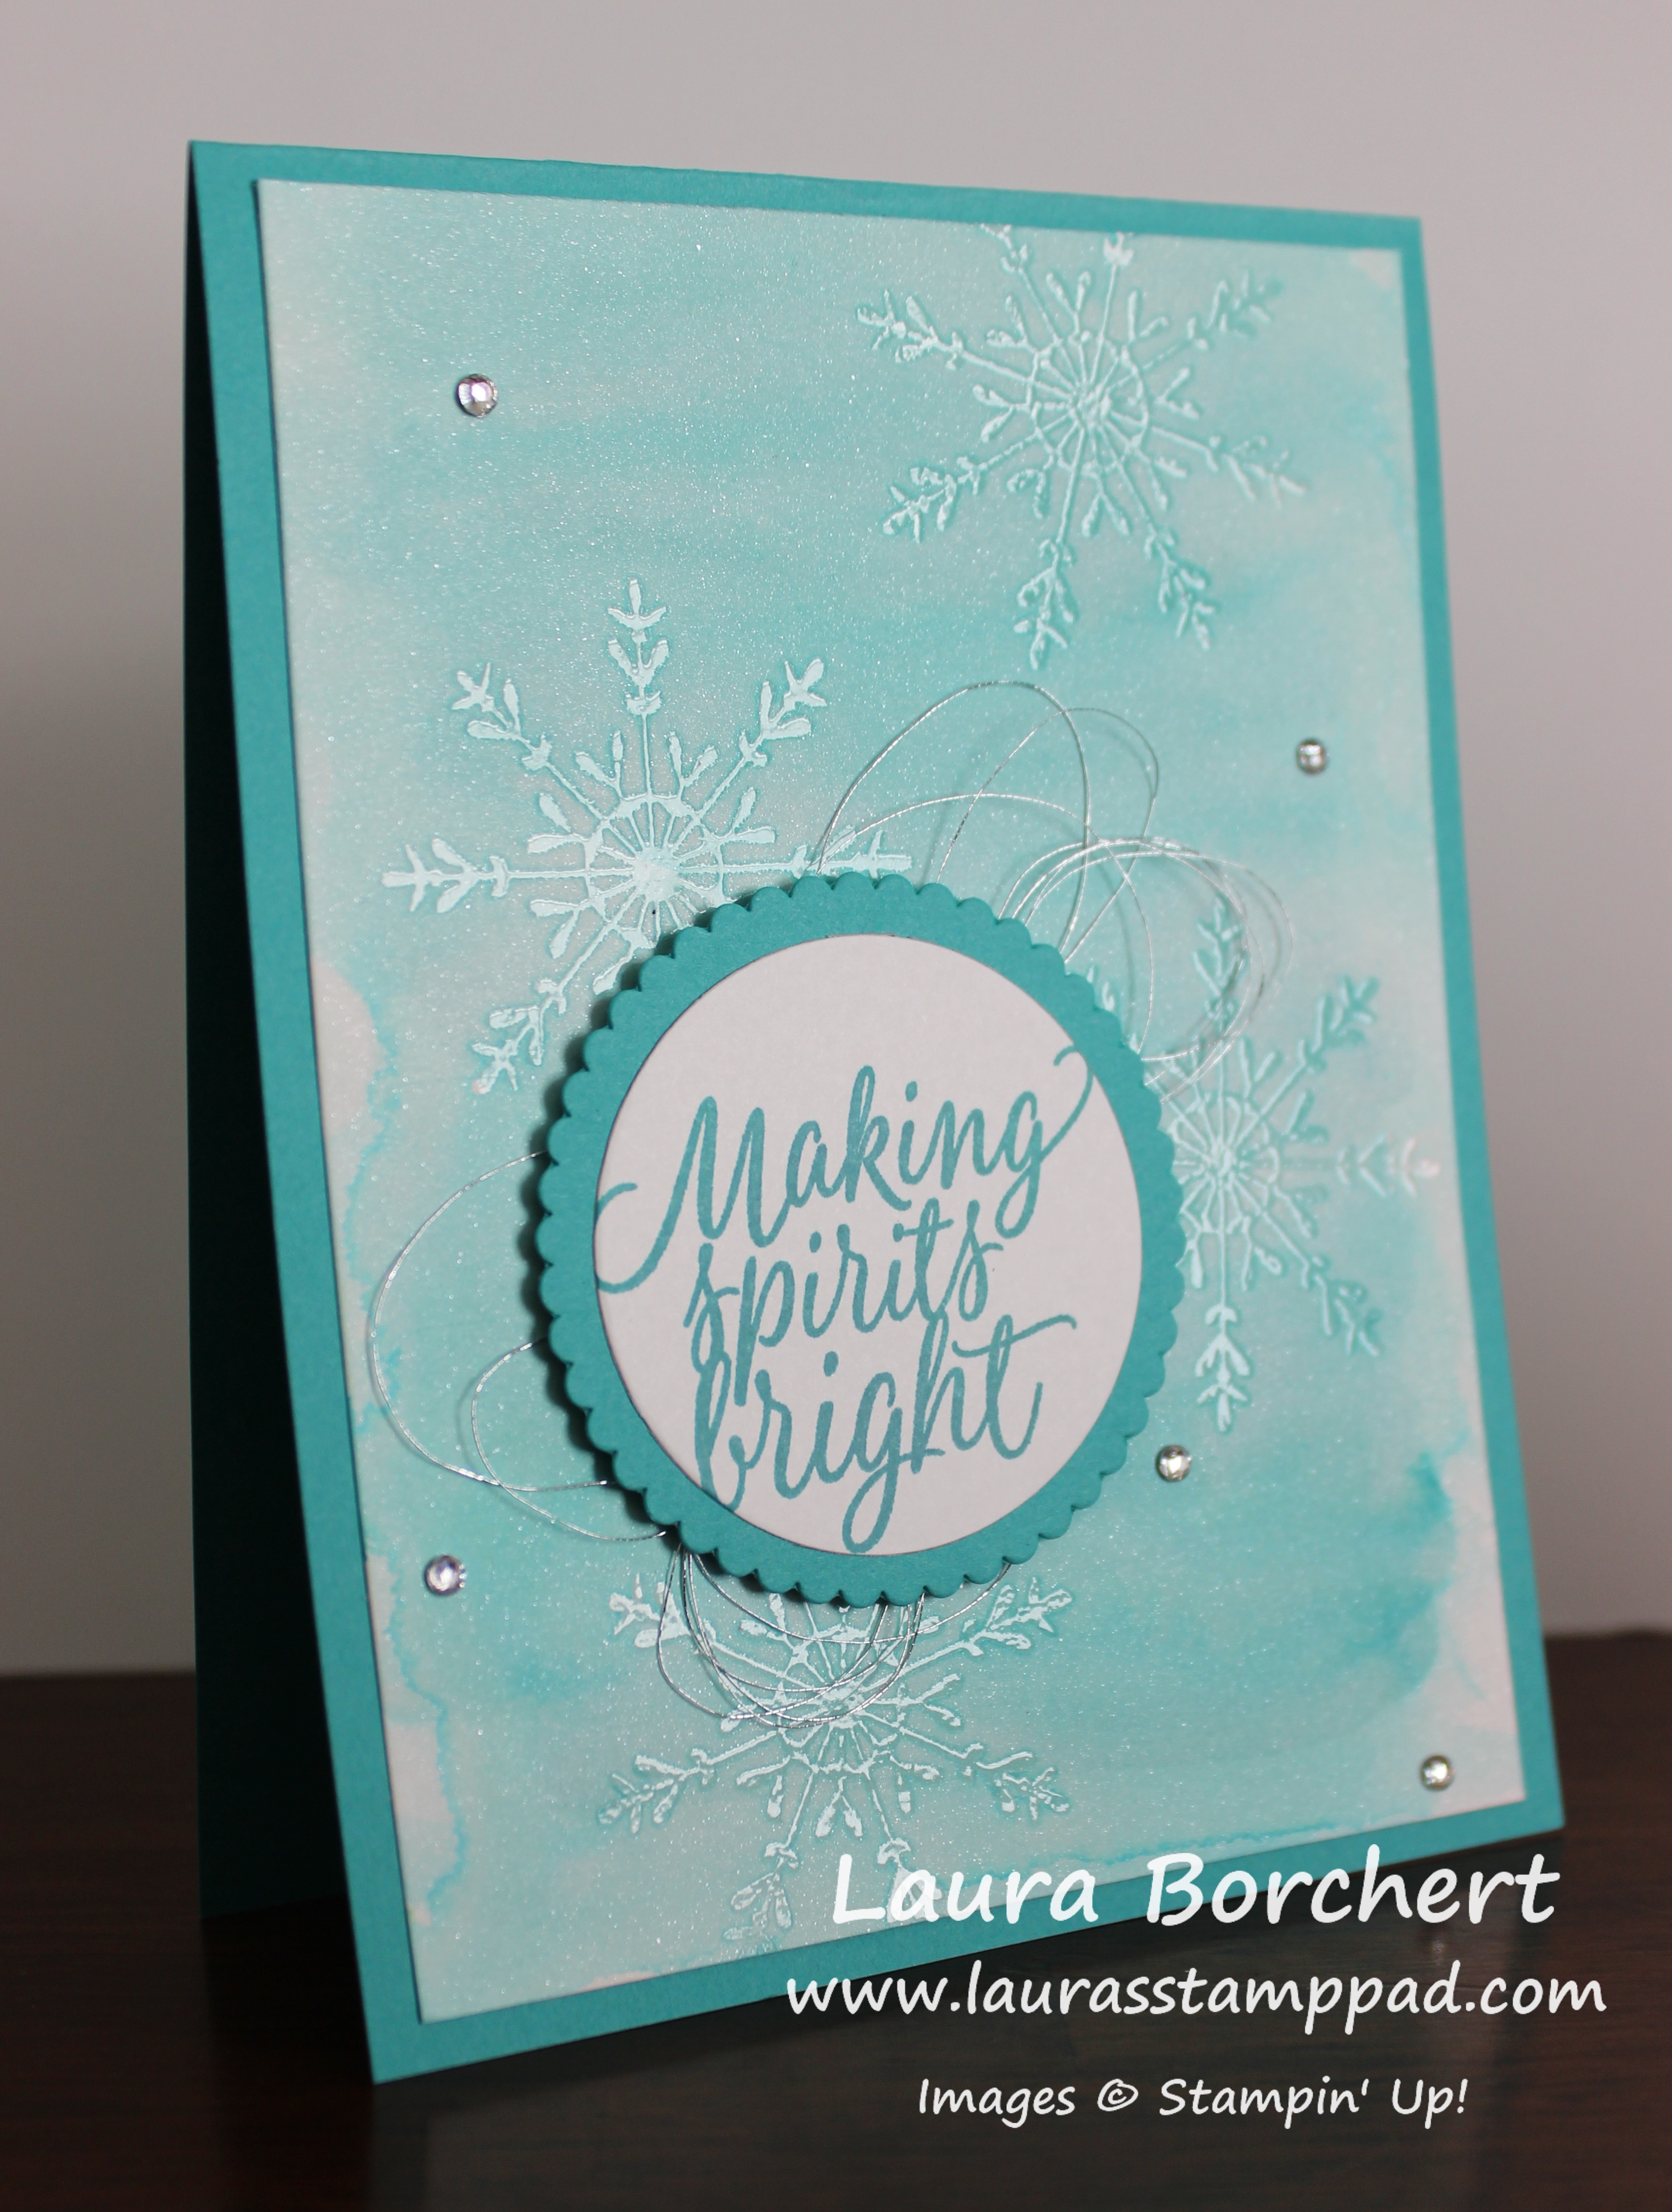
I just love the shades of blue this card has and, without the snowflakes, I can dream of blue water and white sand on the beach! I said I can dream…..I know that doesn’t exist in Illinois especially this time of the year!!! Let’s get started on this amazing technique!
I started with a Bermuda Bay card base. Then I took a piece of Shimmery White Cardstock (4″ x 5-1/4″) and went over the entire piece with the Aqua Painter to wet it down a little. This will help the color bleed and sort of prime the paper. You don’t need to soak it but just a little brush of water over the top. Now pick up some Bermuda Bay Ink and watercolor wash over the paper. You can go to the edge or leave a border. That is all up to you! Now allow this to dry by setting it aside or using the Heat Tool!
Side Notes while it dries……I use Shimmery White cardstock because of the fabulous shimmery look but also because it is a little bit thicker than Whisper White but not as thick and textured as Watercolor Paper. Watercolor Paper has too much texture so it won’t get a nice stamped image for clear embossing. Also, when you are using the Aqua Painter, you can either press your ink pad into the lid and use that as your color palette or you can press a clear block into the pad and use that. I prefer using the clear block because it isn’t as messy and I can easily clean it up. You could also drop re-inker onto the clear block and do it that way as well!
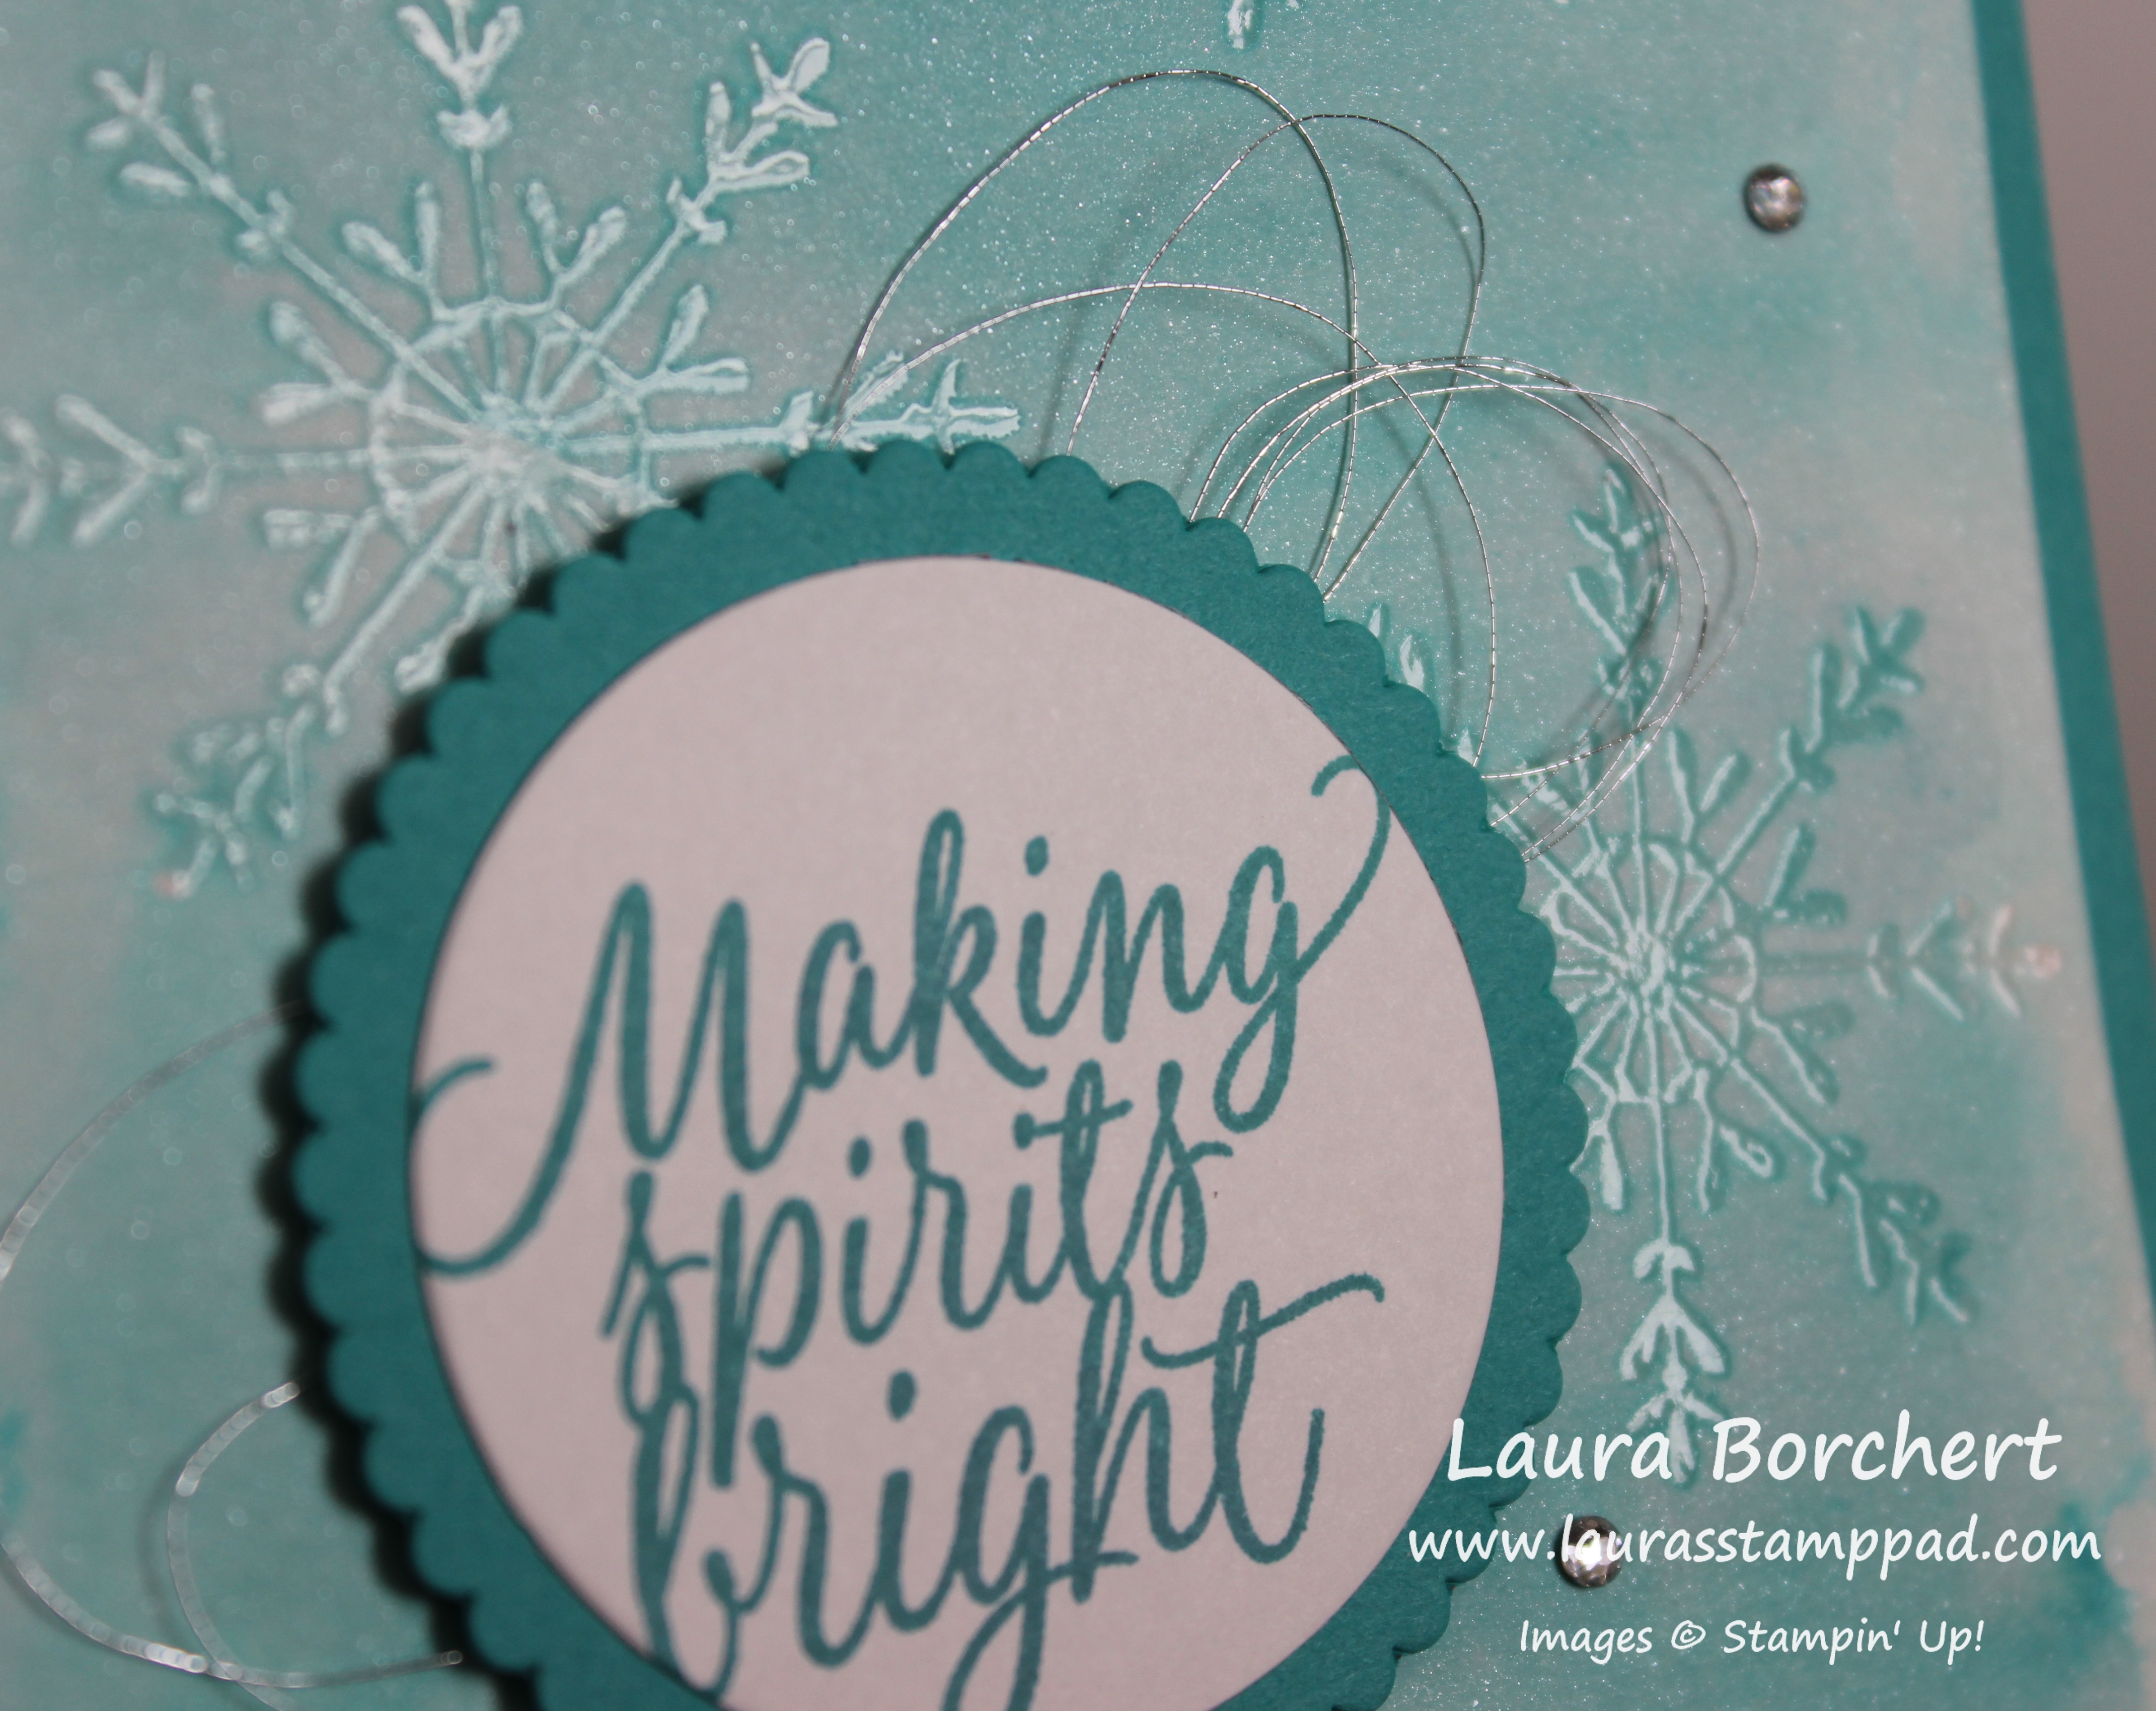
Once it is dry, you will stamp all over in a solid image stamp set with VersaMark Ink. I used the snowflake from the Tin of Tags Stamp Set. Apply Clear Embossing Powder over the top and set it with the Heat Tool. You can see a tutorial on Heat Embossing here. Now that your embossed image are set, they will hold the color underneath. Using your Aqua Painter, you will gently brush over the entire cardstock like you did in the beginning but this time with no color on your brush. You are just adding water which is lightening the watercolor wash that you applied earlier. The color is still being held under the images so they are popping more now. That is the Reverse Watercolor Technique!!!
Once your watercolor is dry, you can add it to your card base. I used Fast Fuse for a strong hold since the cardstock is warped a little. For the greeting, I used the Tin of Tags Stamp Set and stamped onto Whisper White. Using the Layering Circle Framelits, I die cut the greeting as well as a scallop in Bermuda Bay. I adhered these together and added loops of Metallic Silver Thread to the back and then placed it on the card front. For the Metallic loops, just wrap it around your finger as many times as you wish (8-12 times). Then twist the loops in the middle to create a figure 8 and place it on the back of the greeting. Using Stampin’ Dimensionals to secure it to the back of the greeting and then add it to the card front! I still thought it needed a little bit more bling so I added some Rhinestones all over! Love it!!!
Be sure to check back tomorrow as I will be sharing another sample using this technique! Tomorrow’s sample is a card for any time of the year!
If you would like to see this in action, check out the Video Tutorial below or click here. Don’t forget to give it a thumbs up if you liked it and be sure to subscribe if you are new!!
This greeting is so perfect and I love using it. I have reached for it so much! It is from the Merriest Wishes Stampin’ Up! Stamp Set! It is perfect to use all year around too!!! Change up the colors and washi tape and you have the perfect card for any season!
I started with an Emerald Envy card base. Then I layered on Cherry Cobbler (4″ x 5-1/4″) and Whisper White (3-3/4″ x 5″). Using the Presents & Pinecones Designer Washi Tape, I added 3 strips in the middle. I just laid them down and ripped the ends for that torn look and it’s easier! 🙂 There are 5 different patterns/rolls in the set so you can have fun mixing and matching them when making multiples! For the greeting, I used the Layering Ovals Framelits in Whisper White and Mint Macaron. I am loving the Layering Ovals and Layering Circles. There is something about that small scallop that I just love and it really makes a greeting pop! I used the greeting from the Merriest Wishes Stamp Set and stamped it in Cherry Cobbler Ink. I added the greeting to the card front with Stampin’ Dimensionals for a little texture! Simple and fabulous!
If you wanted to make this card even more simple, you could leave off the Cherry Cobbler layer or create the card base with Whisper White! You can do as much or as little as you wish! Love it!!!
Don’t forget today is the last day of the Online Extravaganza and there are fabulous Door Busters as well! Get these great sales before they are gone! Click here to shop the Online Extravaganza and click here to shop the 25% Stamp Sale.
TODAY is the last day for Stampin’s Up’s Online Extravaganza!!! You can check out out all of the details on these specials here!
Couple Things To Know:
~All offers are WHILE SUPPLIES LAST so be sure to order early!
~Not a Paper Pumpkin subscriber yet? No problem! ONLY during this sale, anyone can purchase Past Paper Pumpkin kits and kit refills.
~No minimum purchase necessary for Online Extravaganza!
There are more goodies on sale all week look at 10%, 20%, 30%, and even 40% off!!! Check out all of these goodies!
HOW TO ORDER!!
~Click here to start shopping! You will see along the left side that there is a category for Online Extravaganza so you can see all of the products there!!! Shop 24/7, online through my store beginning on Monday, November 21 and through November 28th!
~Clearance Rack and regular priced items can be added to the same order!
~Orders will ship right away – shipping confirmation and tracking numbers will be emailed directly to you. ~Stampin’ Rewards get you a FREE shopping spree along with your order! Rewards begin at $150 in product. ~Use the Hostess Code6YAGWW43 through 11/30 and you will get a Free Gift from ME!
I started with a Crumb Cake card base! Then I took a piece of Real Red cardstock measuring 4-1/8″ x 5-3/8″ and placed a piece of the Candy Cane Lane Designer Series Paper (4″ x 4″) on the lower portion. I stamped the greeting from the Cookie Cutter Christmas Stamp Set in Real Red Ink onto Whisper White cardstock (1-1/2″ x 4″). I attached the greeting to the top portion of the Real Red. Then I used some of the Candy Cane Lane Designer Washi Tape to place over the overlap of the greeting and designer paper. I just wrapped the ends around to the back side. Now you can add this piece to your card front. For the little gingerbread man, I stamped him in Chocolate Chip Ink onto Whisper White cardstock. Then I punched him out with the coordinating Cookie Cutter Builder Punch (Bundle & Save 10%). I also stamped the bow in Real Red and punched it out with the same punch. I added the bow to the gingerbread man with a Mini Glue Dot and I added the gingerbread man to the card with Stampin’ Dimensionals. I finished off the card with a little heart to share a little more love in the card. I used the Real Red Enamel Shapes for the little heart! Love it!!!
Don’t forget about the Online Extravaganza going on this week! 24 Hour Door Busters on Monday to end out this amazing sale! Click here to start shopping and use the Hostess Code: 6YAGWW43 and you will get a FREE Gift from me!
HAPPY THANKSGIVING!!!! I love this holiday because it is fairly low key! It’s a great reminder of all of the amazing things we have in our lives and to take a moment to be thankful for them! I am so incredibly thankful for the many blessings in my life including all of you and my stamping business. I get to do what I love every day and it is amazing!!! I hope you all have a wonderful day today and every day!!! Thank you for being you!
Don’t forget that you can shop fabulous Stampin’ Up deals from the comfort of your home. Check out the Online Extravaganza here!
I also wanted to share these adorable little things! Remember the September Paper Pumpkin Kit which came with these little test tubes?? I said I was saving those for a special project…..well this wasn’t the one in mind but I love it! I saw these on Pinterest and just had to make some myself. I filled the test tubes with some oats and some Metallic Sequins. Then I created the tags with the Cookie Cutter Christmas Stamp Set and coordinating Cookie Cutter Builder Punch (Bundle & Save 10%). I stamped the reindeer in Early Espresso Ink and added a Red GlimmerCircle to his nose! I used some of the Candy Cane Lane Baker’s Twine to tie it to the test tube! I just think they are adorable!!! Now I still have a few left for yet another project! 😉 What have you done with your test tubes? Let me know in the comments below!!!
If you would like to see this in action, check out my Video Tutorial below or click here. Don’t forget to give this video a thumbs up if you liked it and be sure to subscribe if you are new! I post every Tuesday and Thursday!
Have an amazing day!!! I’m going to be working with my Mom on her Christmas Cards today and then enjoying a fabulous Thanksgiving Dinner!!!
I love how embossing folders can make a quick and fabulous card! The texture and image just have such a WOW factor and I love that! Besides cranking the Big Shot twice, this card is so simple. Just do all of the Big Shot work while watching your favorite show or a Christmas movie and you will be done in no time at all! Let me know in the comments what your favorite Christmas Movie is! I think mine is either Elf or National Lampoon Christmas Vacation!
For this card I started with a Cherry Cobbler card base. Then I took a piece of Whisper White cardstock (4″ x 5-1/4″) and ran it through the Big Shot with the Pine Bough Embossing Folder (on sale this week!). I stamped the greeting from the Merriest Wishes Stamp Set in the bottom right corner in Cherry Cobbler Ink. You can use any of your favorite greetings! Then I die cut the ornament from the Merry Tags Framelit Set (Bundle & Save 10% with the Merriest Wishes Stamp Set). There are a few other ornaments that you could use on your card as well to mix it up or to die cut more with each crank through the Big Shot. The Big Shot Die Brush is your best friend on popping the cardstock out of the framelit! I love that little tool! I tied some Cherry Cobbler Baker’s Twine around the top of the ornament and added it to the card front with Stampin’ Dimensionals. You know how I love those little things!!! Now you are all done! How simple was that?!?!?
Don’t forget to check out the Online Extravaganza going on this week! Lots of fabulous product on sale up to 40%!!!
Happy Tuesday!!! Are you ready for this amazing masterpiece??? I have to say this is probably THE MOST amazing, detailed, stunning card I have ever made in my 12+ years of stamping. Check it out!!!
There are just no words for this card. I honestly don’t think I am going to send it out. I’m going to save it and display it every year ever so proudly. I just love it so much!!! Now let’s get started on how to make it with the Santa’s Sleigh Bundle (Save 10%)!!!
I started with a Night of Navy card base measuring 11″ x 4-1/4″ and a strip of Whisper White measuring 11″ x 1″. Both of these are scored at 2-3/4″ and 5-1/2″ which creates the Z folds! For the panels, I cut Soft Sky cardstock into the following measurements – 4″ x 5-1/4″ and two pieces of 4″ x 2-1/2″. Then I cut Whisper White to layer on top measuring 3-3/4″ x 5″ and two pieces of 3-3/4″ x 2-1/4″. Go ahead and layer the white onto the Soft Sky and then onto the card base. You can stamp the greeting in the upper right corner. I used the one from the Santa’s Sleigh Stamp Set!
Now you can add the Whisper White strip to the bottom of the card. I lined it up with the bottom of the white on the panels. Be sure that you are only adding adhesive to the small flap and half of the long flap. I like to fold it all up and then add the adhesive to the spots showing (see video below). Place it on the card and then you can work on all of the decorations. I added the trees first. I stamped 2 blue trees using the Santa’s Sleigh Stamp Set and die cut them out with the Santa’s Sleigh Framelits (Bundle & Save 10%). I also cut out a tree in Silver Foil Paper! I added two trees to the large panel and one to the middle small panel. Next up are the reindeer. I stamped all of them in Chocolate Chip Ink onto Crumb Cake cardstock. You will need 6 reindeer. I die cut them out. I also die cut the sleigh in Night of Navy, the sleigh overlay in Silver Glimmer Paper, 12 stars in Silver Glimmer Paper (one for each reindeer and a few others to decorate, and a few bows for the presents in Silver Glimmer Paper!
Now to assemble the second Z with the Whisper White strip! All you need to do is take a strip of white scored cardstock and add it to your card opposite folds as the base. Fold it like a Z and the long panel will go across the front (sticking to the left side) and the short panel will adhere to the back right hand side. I used Fast Fuse Adhesive for a strong hold and placed it on the bottom lined up with the bottom of the white panel. I added 2 reindeer to each of the little panels of the white Z fold overlapping them just a little. Be sure that when you add adhesive to the reindeer that you are only adding it on the legs so that adhesive isn’t showing and then glues your card together.
Before placing the last reindeer on, I added the sleigh to the card. I placed the Silver Glimmer overlap onto the navy sleigh with Fine Tip Glue Pen and then added it to the far left of the card. I did trim off a little bit of the sleigh on the bottom rung. Once the sleigh is in place, you can add that final reindeer. Now is also when you will add all of your presents. I stamped the 3 different styles of presents from the Santa’s Sleigh Stamp Set onto Night of Navy and Soft Sky cardstock and cut them out. They are super easy to cut since they are rectangles! Place as many presents as you wish in the sleigh. Then I added the ribbons and all of the Silver Glimmer stars to the card with the Fine Tip Glue Pen. For the reins, I added some of the glue from the Fine Tip Glue Pen to the first reindeer, placed the Whisper White Baker’s Twine down and then added a star. Press and hold for a few seconds and then move to the next one. You could also use a Mini Glue Dot for this part if you wish. Be sure to leave some slack between each reindeer so it doesn’t pull tight when you open the card and so it swags just a bit. I glued the end of the reins under the front of the sleigh at the end. Now you are all set! The most amazing card ever! Yes it is a bit time consuming but it is just so stunning!!! I can’t wait to display mine…..I don’t think I can part with it and send it out.
If you would like to see that all in action, check out my Video Tutorial below or click here! Don’t forget to give it a thumbs up if you liked it and be sure to subscribe if you are new!!!
Happy Stampin’
~Laura
Don’t forget about the Online Extravaganza going on all week long!!! Great chance to get fabulous product on super sale!! Click here to check it out!
Happy Monday everyone!!! I just wanted to give a big Thank You to all of those that participated in the Big Shot Giveaway that I had. I drew the name of the winner on Friday and it was…….drum roll………Gloria C. I’m so excited for her and wish I could have given you all a Big Shot! I had a lot of fun with this so stay tuned as I’m thinking I will do more fun giveaways like these. I’m thinking maybe an entire color family of ink pads (10 pads) next time…what do you think? Let me know in the comments below what you would like!!!
Well Fall/Winter has officially set in here in Illinois. We had one day last week where it was almost 80 degrees and I was in love!!! It felt like Spring again…..and then I got bit by a mosquito and decided FINE bring on Fall! Then 5 hours later, it was!!! Brrr. It’s cold out, the leaves are blowing and I’m ready for Thanksgiving! Can’t believe that’s next week! I’m so excited! I LOVE Thanksgiving!!! Today I’m going to skip Thanksgiving and help you get ready for the next holiday as this card is one in my Cut For Christmas offer! I do all of the cutting, provide instructions, and a color photo and all you have to do is stamp and assemble!!! Quick and easy!
I started with a Crumb Cake card base. Then I adhered four strips of Candy Cane Lane Designer Series Paper measuring 1″ x 2-3/4″ onto a piece of Real Red cardstock (4-1/2″ x 3-1/4″). The fun thing about this is that the Designer Series Paper is 2-sided so you have endless options on your strips. You can work with 2 prints or 4 prints in any combination! You also don’t have to worry about using up only certain styles in your Designer Series Paper Pack. Love it!!! Then I wrapped some Candy Cane Lane Baker’s Twine around the Real Red rectangle. You can do this in the middle and tie a bow or in an “X” pattern like mine. I actually put the knot on the back side because I didn’t want it to show. Then I added this piece to the card front with Stampin’ Dimensionals. I used those because I love them so much and so the cardstock lays flat and isn’t bumpy over the Baker’s Twine. For the greeting, I stamped the snowflake from the Tin of Tags Stamp Set in Crumb Cake Ink. I stamped off once before stamping on the Whisper White for a lighter look so that the greeting still pops! Then I stamped the greeting from the Tin of Tags in Real Red Ink over the top of the snowflake. I die cut out the scallop circle with the Layering Circles Framelits. I love these things because they layer so well and add the perfect took to any project!!! I die cut out a smooth circle in Early Espresso and layered the two together. I added the greeting to the card front using Stampin’ Dimensionals. Again, I used Stampin’ Dimensionals because I love them so much and so that it looks smooth over the Baker’s Twine.
I love this card for the amazing greeting and cheerful look! I got the idea for this card from fellow stamper, Ann Veneziano that I did a card swap with!!! I love sharing ideas with other stampers!! It’s so much fun!
Don’t forget about the Online Extravaganza that started today!!! Fabulous Door Busters today and next Monday! Also, the Tin of Tags Stamp Set I used on this card is on sale this month too! I love that set for greetings!!