It’s Wednesday and we are half way through the week! Here is a little something to brighten your day and help you get through the week! Just know you are a ray of sunshine! Just breath out and smile!!!
Here is another fabulous blue and yellow card and I just love it. Is this my new color combination that I will be using all the time now??? Check out this card for another fabulous blue and yellow combo!
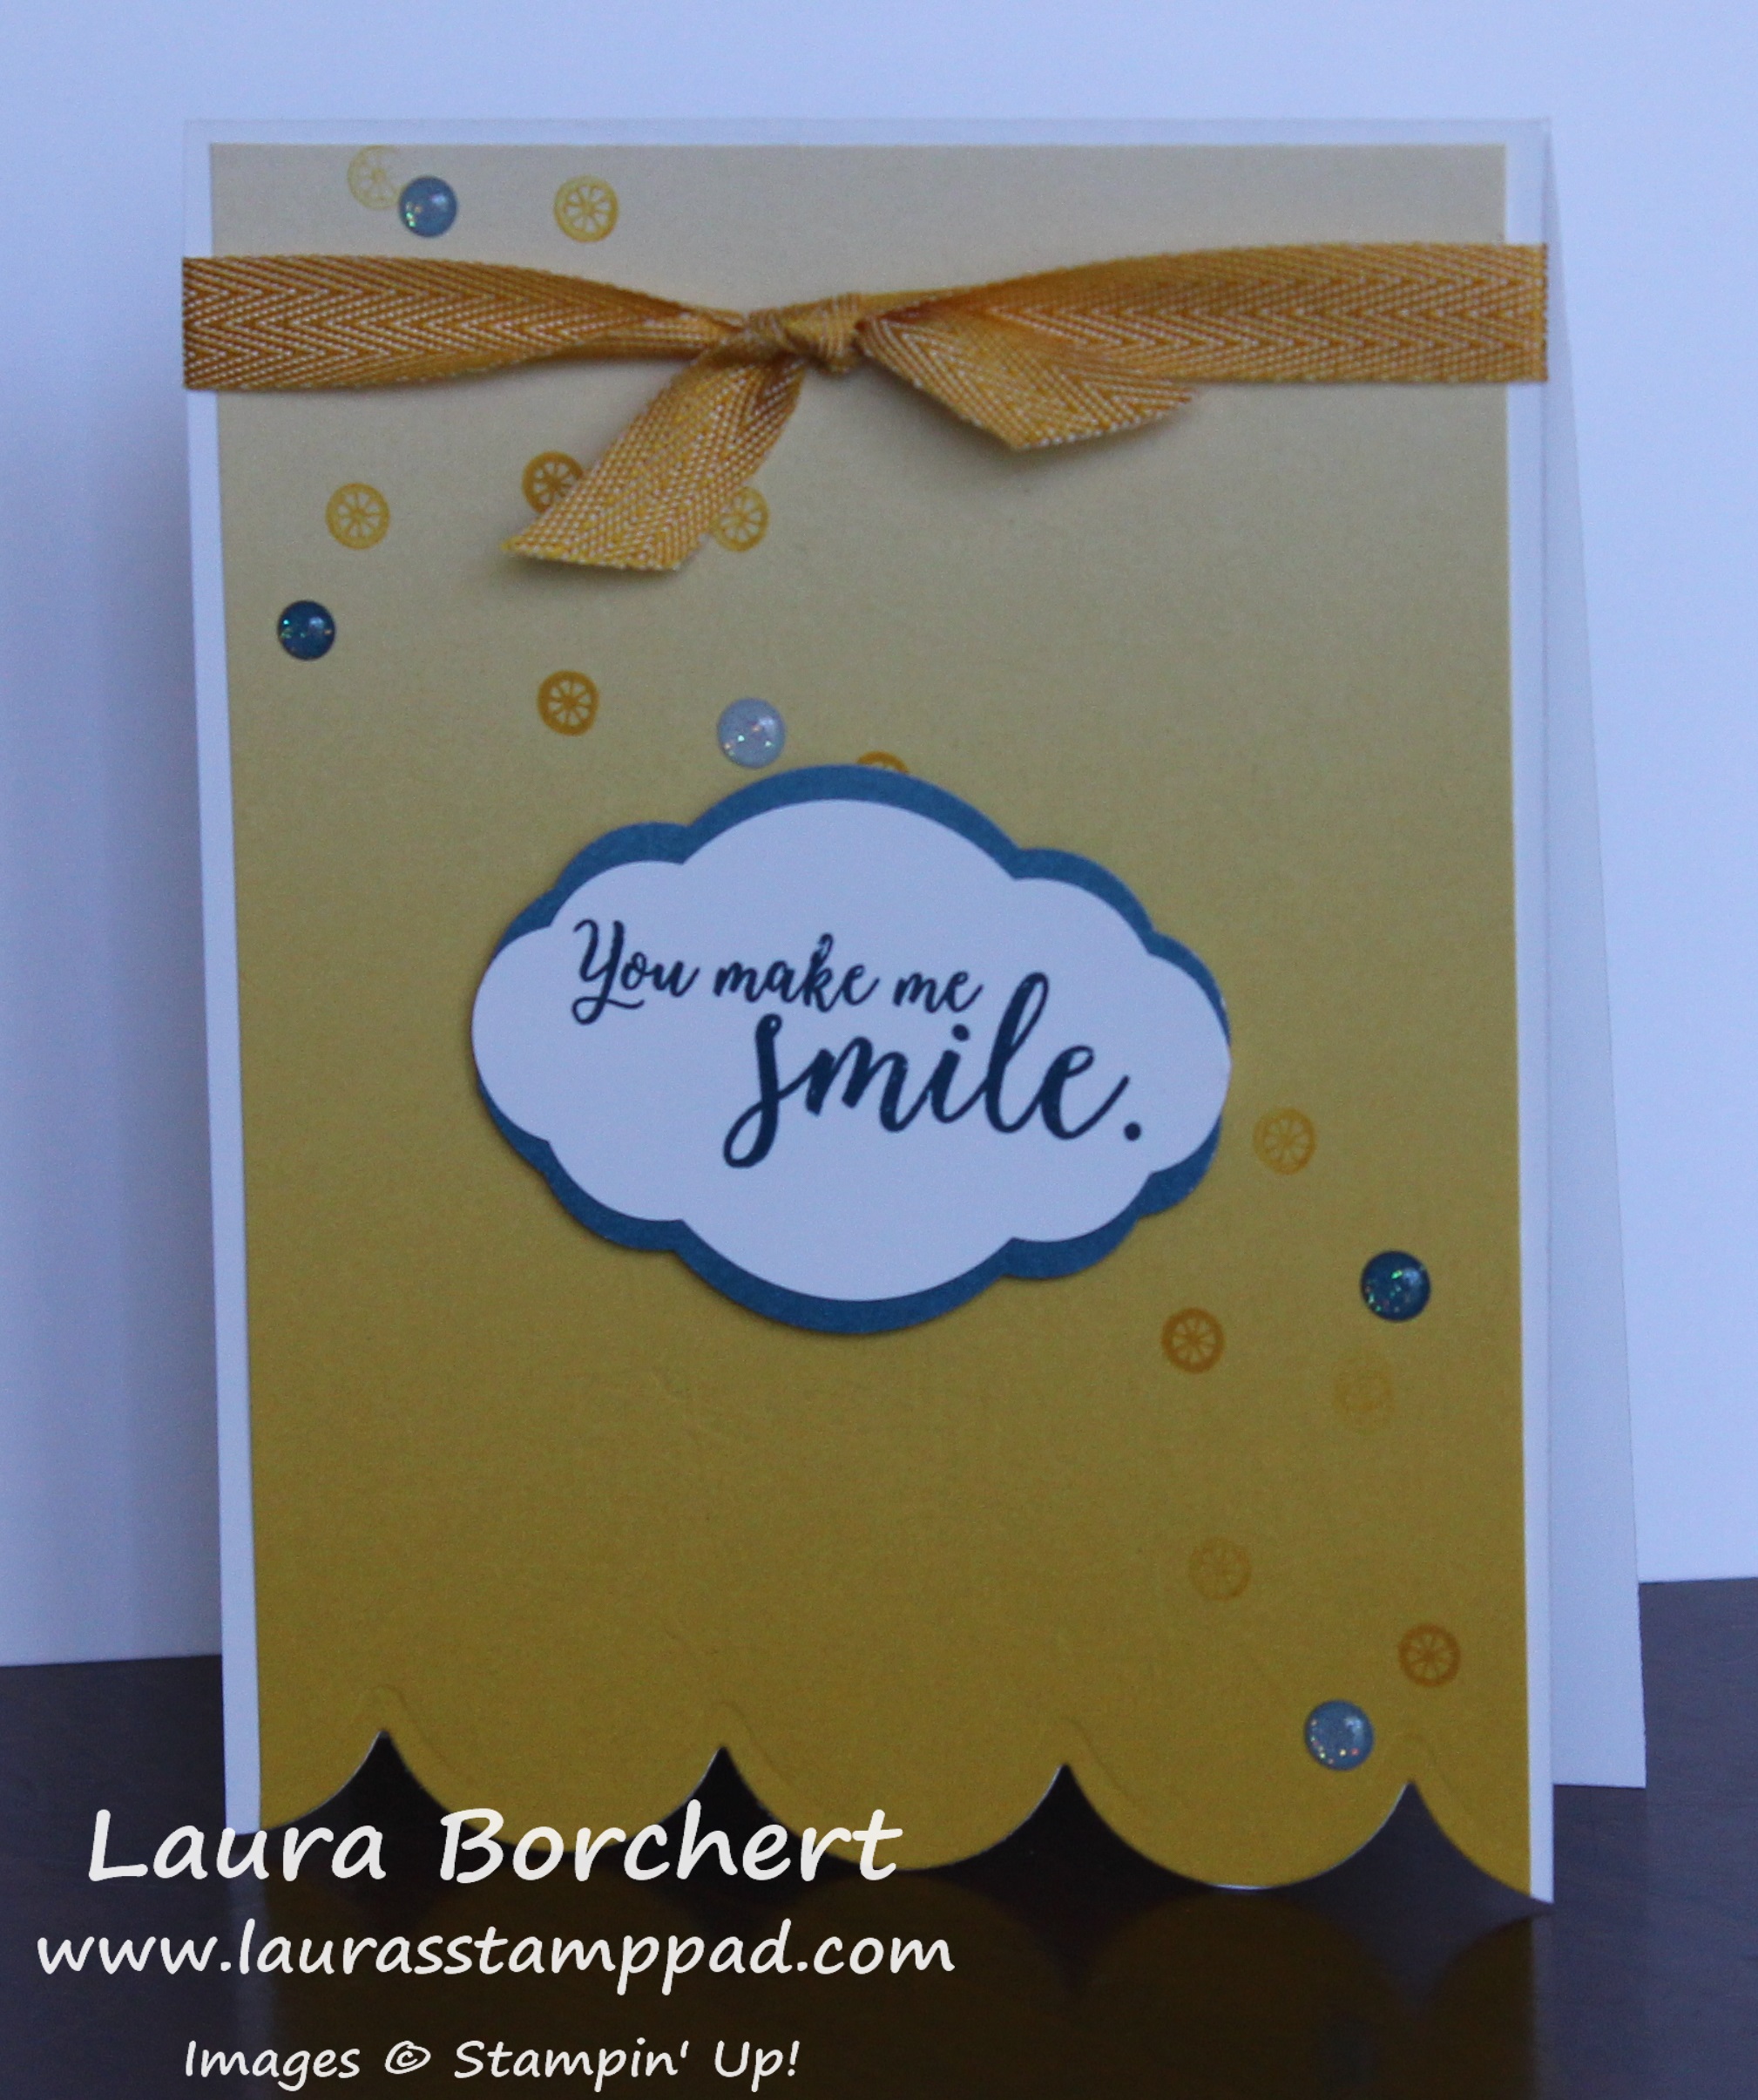
For this card, I started with a Whisper White card base and layered on a piece of Color Theory Designer Series Paper (4″ x 5-1/4″). I just love this ombre pattern. Next, I placed the card base opened up onto my Precision Base Plate with the scallop die along the bottom and ran it through. This die is from the Seasonal Layers Framelits. Be careful that the die is centered so it doesn’t hit the edge of the Big Shot and move or bend. I like to use a Post-It Note to hold dies in place while die cutting!
Now it is time to decorate. I stamped the little circle from the Colorful Seasons Stamp Set diagonally from the lower right to the upper left corner in Crushed Curry. I stamped 3 times with each time I inked it up. This variation in color goes along with the ombre paper. Next, I tied some of the Crushed Curry Mini Chevron Ribbon around the top of the card and into a knot.
For the greeting, I used the Colorful Seasons Stamp Set (Bundle & Save 10%) and stamped it in Dapper Denim Ink. Then I punched it out with the Pretty Label Punch. I punched out a second one in Dapper Denim and cut it in half. I added one half to the top portion of the greeting and the other half to the bottom. Using Stampin’ Dimensionals, I added it to the card front. Finally, I finished off the card with some Glitter Enamel Dots in the various shades. These things are just beautiful!!! I love them!!
What is your favorite color combination right now? Let me know in the comments below! I would love to try some new ones out!
The layers and details of this card just give such a WOW factor. I know this isn’t a card I would make every day for every occasion. It’s always fun to go above and beyond for that one special card sometimes. Let’s get started!
I started with a Tranquil Tide card base and layered on a piece of the Eastern Palace Designer Series Paper (4″ x 5-1/4″). Next, I took a piece of Very Vanilla (3-1/4″ x 4-1/4″) and die cut out the circle in the upper left corner. I used the small circle and the next layer up circle from the Eastern Medallion Framelits. There are lots of different cut out creations you can make. Then I stamped the circle from the Eastern Beauty Stamp Set (Bundle & Save 10%) in Fresh Fig Ink. Now it’s time to put on the Gold Vinyl Sticker. The sticker will fall off on the left side and maybe the top depending on where the die cuts were placed. It’s important to do these layers in this order because otherwise this happens…..
Notice how the stamped circle is messy and missing a portion on the left hand side, that’s because I stamped after the sticker. The circle fits like just perfectly or doesn’t fit just perfectly so stamping afterwards is not a good deal. Some of the stamped image went onto the sticker and then just smeared off. By stamping first, it is underneath the sticker and peaks through perfectly no matter what! I stamped the greeting from the Eastern Beauty Stamp Set after adding the sticker so I knew it would be placed at the edge of the image!
Now it is time to assemble! I layered the stamped vanilla piece onto a piece of Tranquil Tide (3-1/2″ x 4-1/2″) flush with the upper left corner with Stampin’ Dimensionals. The dimensionals give that nice little peekaboo for the die cut potion. Next, I layered this onto the card base, again placing it flush with the upper left corner. To finish off the card, I tied some Vanilla Baker’s Twine around the card and added 2 of the Mini Tassels.
Since I didn’t want to waste that little piece of Gold Vinyl Sticker that I trimmed off. I placed it on the inside of the card for a little decoration piece! I love it!
If you would like to see this all in action, check out the Video Tutorial below or click here! Be sure to give it a thumbs up if you liked it and be sure to subscribe if you are new! I post a new video every Tuesday and Thursday! Also, check out more samples using the Eastern Palace Bundlehere, here, and here!
I just love flowers and I think this Hello Friend Daisy Card fits the bill perfectly!!! This is the Part 2 to last weeks Two In One Daisy Card! You can check that out here!
Isn’t this just heaven for all my flower lovers out there??? I love it and those soft colors of Wisteria Wonder and Calypso Coral are amazing!!!
I started with a Calypso Coral card base and layered on a piece of Wisteria Wonder (4″ x 5-1/4″). Next, I took a piece of the Delightful Daisy Designer Series Paper (3-3/4″ x 5″) and layered it on top. This paper is where I got my color combination inspiration. Now for the greeting, I die cut a square using the Stitched Shapes Framelits and the Big Shot. These are some of my favorite framelits because that added texture of the stitch gives your project so much more WOW! I love them!
I stamped the greeting from the Wood Words Stamp Set because I needed a small but bold greeting. This one was perfect. I stamped the flowers from the Daisy Delight Stamp Set. These are 2-step stamping flowers so I was able to add different colors. I used Old Olive Ink for the greenery and Wisteria Wonder Ink for the flowers. I added in some Tranquil Tide greenery on another card I created and liked that look as well.
Now it’s time to build onto the card front. I added the stamped square to the card with Stampin’ Dimensionals. Then for the large daisy flower, I used the one stamped and punched from the other card I made. I stamped and punched one more daisy out to layer them together. I used Calypso Coral Ink and the Daisy Punch. Next, I add the Daisy to my card front with Stampin’ Dimensionals too, making sure it is right next to but not on top of the greeting piece.
Now you have 2 amazing cards and using up all of the pieces. Don’t forget you can check out the Video Tutorial on both of these cards here! May no scrap, punched image, or piece of ribbon go to waste!!! 🙂
While I’m not sure how many men I have that follow me, I would like to wish a Happy Father’s Day To Each and Every One of You!
Happy Father’s Day…
…to all of those who children of their own!
…to all of those who have step-children!
…those of you with fur babies!
…to all of those who are wishing and hoping for a baby!
…to all of those who have lost a child!
…And most of all to those who act fatherly to those around them!
Each and every one of you falls into one or more of these categories! Just like Mother’s Day, I feel like everyone should celebrate Father’s Day! Whether you are spending the day with family, your children, or your fur-babies, I wish you the best day ever! Today is your day to celebrate and enjoy!
Thank you for being kind, caring, and fatherly to those around you and those you encounter! It’s not easy being a Father but it is very rewarding! May you have all the rewards today and every day!
HAPPY FATHER’S DAY TO EACH AND EVERY ONE OF YOU!!
I hope you all have a wonderful weekend celebrating and I’ll see you back here on Monday!!! I have so great techniques, a ribbon share, and a lot more!! Don’t forget to sign up for my mailing list and get a Card Making Cheat Sheet! You can do so in the upper right corner of my website when on a computer or scroll to the bottom of the page if looking on a mobile device!
Today I’m going to show you how to create a two in one daisy card. I used the NEW Daisy Delight Stamp Set and coordinating Daisy Punch! I love being able to use punched out pieces for a second card right away otherwise I forget I have it and it never gets used!
This card is a quick and simple Note Card that uses Designer Series Paper and a simple punch! Let’s get started on this one!
I started with a Whisper White Note Card & Envelope for this card. These things are a bit smaller than a regular sized card but quick and simple as they come together. The card base is already scored so that’s a bonus too! They come 20 to a pack. Next, I layered on a piece of Delightful Daisy Designer Series Paper measuring 3-1/4″ x 4-3/4″. Now for the top piece, I took a piece of Whisper White (3″ x 4-1/2″) and stamped the daisy and greeting from the Daisy Delight Stamp Set in Calypso Coral Ink. TIP: Be sure the petal of the daisy is straight up a down, it will go into the punch super easy this way.
I kept the punched out daisy for card #2! Finally I added the punched and stamped piece to my card front with Stampin’ Dimensionals so it would have that 3D look! I finished off the card with a Gold Faceted Gem in the middle of the daisy! All done with the first card!
You will have to stay tuned till Monday to see card #2 that uses that punched out daisy! But if you just can’t wait, check out my Video Tutorial below or click here! Don’t forget to give it a thumbs up if you liked it and be sure to subscribe if you are new! I post a new video every Tuesday and Thursday!
Let me know in the comments below if you like to make cards like this that use one part for one card and the leftovers for another card! Do you save all of your leftovers and scraps or toss them?
I feel like saying I made a masculine card using the Eastern Beauty Stamp Set is like an oxymoron. This card is super fabulous and that set is so much fun and versatile! Check out other samples using this set here, here, and here!
Man cards are fun to make using Tranquil Tide and Dapper Denim Ink! I am loving this look!
I started with a Crumb Cake card base measuring 11″ x 4-1/4″. Next I took a piece of Very Vanilla (4″ x 5-1/4″) and added a strip of Eastern Palace Designer Series Paper (2″ x 4″). This is a great measurement because it uses up an entire sheet of 12″ x 12″ Paper. You can make 18 of these cards with 1 sheet! Now for adding the Linen Thread, I wrapped it around three times and tied it into a knot. If you would like to do a bow, you can or you can place the knot under the greeting so it looks more seamless. I stamped a few of the diamond images from the Eastern Beauty Stamp Set in Tranquil Tide Ink. Then I added this piece of the card base!
For the greeting, I stamped the circle in in Dapper Denim Ink and the greeting in Tranquil Tide Ink onto Very Vanilla cardstock. All of these are from the Eastern Beauty Stamp Set! Using the Layering Circles Framelits, I die cut out the greeting and die cut a scallop circle in Tranquil Tide. Next, I layered the two together and added them to the card from with Stampin’ Dimensionals. This adds some texture and since it’s over the top of the thread it lays flatter. All done!
I really struggle with Man cards because I love flowers and pink and bling. I get super excited when I come up with an awesome man card style! This card will be easy to make multiples of quickly!!!
Happy Tuesday!!! Today’s amazing technique is all about creating an open shutter card. The greeting just pop out behind the camera shutter look as you open it up! Check it out below and be sure to watch the Video Tutorial to see in all in action!!
Okay so you thought I would show the amazing WOW factor in this first picture, huh? Did you scroll down and check it out??? That’s okay I would have too! let’s get started on this beauty! I got the idea for this card from Frenchie Martin who is amazing! Thank you for this great card idea!
I started with a Whisper White card base measuring 5-1/2″ x 8-1/2″ and scored it at 2-1/8″ x 6-3/8″ for the gate fold! For the front panels, I cut 2 piece of Night of Navy measuring 5-1/4″ x 1-7/8″. Then I layered on some of the Delightful Daisy Designer Series Paper measuring 5″ x 1-5/8″. The belly band that wraps around the card is Night of Navy measuring 1″ x 11″. I didn’t actually score it but instead just wrapped it around the card and pressed on the edges. Then I unwrapped it and used a Bone Folder on the creases. This works best I think because otherwise it seems mine is too tight or too loose. Next, I used Tear And Tape to secure the belly band because it’s a nice strong adhesive. I cut the end into banner tips for a little fun texture! Next, I took a piece of Whisper White (3/4″ x 4″) and stamped the greeting from the Daisy Delight Stamp Set. I added the banner tips on the right and secured it to the belly band, cutting off any extra on the left hand side.
Now it’s time for the amazing inside of the card – the Open Shutter part! I cut 2 pieces of Daffodil Delight cardstock measuring 4″ x 3-1/2″ and scoring 1/2″ in along the 4″ side. This creates the little tab to adhere the shutter pieces. On the opposite side of the score line, measuring half way up (half of 3-1/2″ is 1-3/4″) put a dot with a pen. Then measuring 2″ in, place another dot. This is so you know how far in to cut your banner tips. I cut from the corner to that 2″ in dot. After doing one of them, I just placed it over the other one as a template. The less measuring the better, right? 🙂 Now the shutter pieces are ready!
Isn’t it beautiful?!?!?! Now that we created the shutter pieces, it’s time to do that middle piece. I took a piece of Whisper White (3″ x 5-1/2″) and layered on some Delightful Daisy Designer Series Paper (2-3/4″ x 5-1/4″) before die cutting a 2-1/2″ circle out of it. I used the Layering Circles Framelits but you could use a punch too! Then I added Stampin’ Dimensionals along the very top and very bottom of the piece and placed it in the center of the card. The dimensionals lift up this piece so the shutter can slide underneath! Now for adding the shutter pieces, I put Tear And Tape all along the 1/2″ tab, slide the left on under the daisy piece. With it lined up flush with the score line/fold in the card and centered up and down, I closed the left panel of the card. This will then grab onto that adhesive and secure the left shutter. For the right side, I did the same thing but there are a few tips.
Be sure that your banner tips are both under the left side banner tips. They can’t be one up/one down or it won’t close correctly. Another tip is to be sure that the banner tips aren’t peaking out on the left side because it is uneven. They should be hiding perfectly below the left side.
Now that the shutter is complete, I opened up the card completely and stamped the greeting! I used the coordinating greeting from the Daisy Delight Stamp Set in the center! It is best to stamp this after creating the shutter so that you are sure it will fit and peak out in the right spot.
If you would like to see this all in action, check out the Video Tutorial below or click here! Don’t forget to give it a thumbs up if you liked it and be sure to subscribe if you are new. You won’t want to miss Thursday’s video!
It feels like summer here in Illinois and yellow and blue screams summer to me! Look at these beautiful colors and that relaxing chair!!!
Last week, I showed this card with Berry Burst and Old Olive but I think I like it even more in these colors! I wanted to show you how you can mix up the designer paper, ribbon, and colors to fit your preferences and supplies! I think the Linen Thread gives it more of a nautical look! SUMMER!!!! See I told you it screams summer! 🙂
I started with a Whisper White card base. Next I cut some Whisper White for both the greeting (3″ x 2″) and the chair (2″ x 2-1/4″)! For the chair from the Colorful Seasons Stamp Set, I used Chocolate Chip Ink for the base and Crushed Curry for the fabric. It was fairly easy to line up the chair since you can see through the stamp and there are notches that help! 🙂 For the greeting, I stamped it in Dapper Denim Ink!
Now it is time to layer and assemble the card! I layered the chair onto Crushed Curry (2-1/4″ x 2-1/2″) and the greeting onto Dapper Denim (3-1/4″ x 2-1/4″). Next I took a piece of Crushed Curry Color Theory Designer Series Paper (4″ x 5-1/4″) and wrapped some Linen Thread around it and into a knot under the chair. I didn’t really want a bow so I just did a simple knot and hid it under the chair layer! Then I layered this onto the card base and then added the greeting with Snail and the chair with Stampin’ Dimensionals!
Here is another sample using more of the Color Theory Designer Series Paper. See how this card can use any style of Designer Paper and it still looks fabulous! What Stamp Set and/or Designer Series Paper would you use for this style of card? Let me know in the comments below!
Last Saturday, I headed to Paris for a Girls Morning Out and yesterday I had my Girls Morning & Night Out at my place launching the New Catalog!!! All of these events were so much fun! I just love gathering together to stamp, gush over the new product, and catch up with everyone! My heart is full for sure!! 🙂
Here are some photos of the displays, goodie baskets, cupcakes and set-up at the Girls Morning/Night out that I had yesterday! I love to spoil my customers because they are all so fabulous! I sure hope they love cupcakes because that’s what I always make for these events! 🙂
Here are some photos from the event in Paris! I’m super excited I remembered to take some photos! The little ones are my nieces who love to stamp and I see them stamping for many years to come! We had a fabulous time stamping together! I love catching up with these ladies since I only see them a few months out of the year. I always do my Paris Events as a Mystery Hostess so the items can be shipped over there. The Hostess this time got over $80 in Hostess Benefits! Woot Woot!
Here are some photos from the event at my place in the evening. Totally forgot to take photos at the morning event! I was so excited when I remembered at the evening one but after these 3, I set my phone down and didn’t take any more. I had such an amazing time at all of these events. Catching up with these amazing ladies, stamping, and sharing our love of Stampin’ Up! product just makes me so very happy! I love it!
You can check out all these new product online here. If you would like a catalog, send me your address here and I’ll get one out to you! I hope you all have an amazing weekend and I’ll be back here on Monday!
Stampin’ Up! has a NEW All Inclusive Card Kit called Soft Saying and it’s fabulous!!! The thing I love the most is that it’s perfect for the beginner because it includes everything. It’s perfect for the seasoned stamper because it’s so beautiful and fun!
Look at all of these beautiful cards! The color scheme isn’t one that I would pick on my own but I do love it. Of course there are flowers in there so I’m happy! There are 20 total cards in this kit with envelopes. The stamp set is perfect for all occasions and it’s always great to have another clear block and Basic Gray Ink!
Here are the 2 sets of mini cards in the kit for a total of 4 cards! These cards are 3″ squares. The card bases came printed with that watercolor wash. I added the Washi Tape and stamped the greetings and some leaves/flowers! Next, I added the die cut leaves with a little bit of Fine Tip Glue Pen. Many times though, I just placed a Stampin’ Dimensional over the ends to secure it and placed the greeting on top.
These are the note card size and there are 8 total in this size! I love the colors of the flowers and gold but also the simple more masculine cards as well! Again, you can see that I used the Washi Tape to secure the die cuts and used very little Fine Tip Glue Pen. It made putting these cards together very quickly!!! My favorites here are the gold rose in the upper left corner and the gray strips in the lower left corner!
These are the large cards and there are 8 total! Of course, my favorite is the floral die cut and pin in the upper left corner. I loved that the floral die cut had a large enough border that I could put the adhesive there. It was super simple! The greetings are amazing and my favorite is “I’m happy you’re in my life.” I will say there was Lemon Lime Twist Baker’s Twine in the kit and I just didn’t care to use it. I did add it here and there following the instructions in the kit but there are a few I didn’t use it. It’s all about adding in your own flare and I know I’ll use that twine in other projects!
Next up I wanted to show off all the leftover pieces that can be used on future projects! I have leftover labels (or extras if you make a mistake), twine, and washi tape. Then there are the non-consumables – stamps, ink, and clear block that can be used many many times over! I love it! There is also a Refill Kit that you can purchase to make even more cards! The refill kit comes with all of the supplies in the full kit minus the stamps, ink, clear block, and striped box.
If you would like to see the complete unboxing and reveal of this kit, check out my Video Tutorial below or click here! Don’t forget to give it a thumbs up if you liked it and be sure to subscribe if you are new!