This & That Journal Books

Posted on

This & That Journal 2

Stampin’ Up introduced the This & That Journal Album and while I thought it was super cute I didn’t think I would really use it much since I have my Big (12×12) album! I’ll do a post later this week on my Big Album using My Digital Studio! But I went ahead and bought the This & That Journal and now I LOVE IT! I made myself do a page or 2 and I was hooked. It is so much fun and super easy. Since it is smaller, you have less to “create” on the page so it’s quick and the pages are already printed Designer Series Paper so you don’t need to do a lot of layering! I have also started using this album for all of my tickets, brochures, and other items I on our trips and adventures. The page above from when my husband and I went to the Zoo for a “day date.” I threw a few of my favorite pictures on there and and did some journaling. I normally don’t like to share a lot of my scrapbooking because, I think like many others, we don’t like our own handwriting or we think our pictures that we love others will think are crazy. But I still scrapbook because these are memories I want to keep forever so you should do it too even if you don’t like your pictures or handwriting! Here are a few more pages in my album!!!

This & That Journal, www.LaurasStampPad.com

Here is a page from when I had my hair chopped off earlier this year so I could donate it! It was the most amazing feeling ever to think I was helping someone! I saved the receipt from the post office when I mailed it off and a magazine cut-out with the how-to on donating!

This & That Journal, www.LaurasStampPad.com

I love my family so much and having precious photos of them makes me so happy! My niece and I took that fabulous photo at Silver Dollar City this summer! The photo on the right is of my Dad and all of his grandkids (my nieces and nephews) at his 60th Birthday Party! Precious!

This & That Journal, www.LaurasStampPad.com

And of course I have a page with my AMAZING Stampin’ Up! girls! This was at a demonstrator event this past Spring! Love these girls so much!

I hope this gave you some inspiration and fabulous ideas! Start your This & That album today! You can use it for a vacation album, all year, album, or whatever you would like to remember for years to come! Get yours today!

Happy Stampin…..and Scrappin!

~Laura


Stampin’ Up Clearance Rack Items!

Posted on

Rain or Shine, www.LaurasStampPad.com

Stampin’ Up has aded new items to their Clearance Rack and those items won’t last long so be sure to check it out and order today! Did you know that you can shop 24/7 online through my website? Click Here to start shopping! You will see everything in the Big Catalog, Holiday Mini and even the Clearance Rack in the categories listed on the left hand side! Now any time you see a special or need more Snail adhesive while stamping late into the evening (isn’t that when everyone finds their creative side…no just me?) you can jump online and place an order for whatever you need! The card above was created with the Rain or Shine Stamp Set that retired a few months ago but NOW you can get is on sale for just $9.59 (plus shipping and tax). Hurry before it’s gone!

And when you try out the online shopping and get some fabulous items at a super discounted price on the Clearance or stamps and cardstock for your Holiday cards. If you place an order today through the end of the day on Sunday, use this Hostess Code: ZQBEPFU9 when checking out and you will be entered into a drawing for the Hostess Benefits AND you will receive 5 hand-stamped cards from me!!!!

Happy Stampin’

~Laura


NEW – Envelope Punch Board!

Posted on

Wouldn’t you love to get the mail and see a fabulous patterned envelope with your name on it in the mailbox? Would you like to add a little flare to your envelopes when sending out a special card to someone? Well then this is so totally for you!!!!

Envelope Punch Board, www.LaurasStampPad.com

So I totally love getting mail….sometimes even junk mail, at least there is something in my mail box waiting for me to pull it out (even if I just throw in in the trash.) It is still super exciting to me! And I get even more excited when there is an envelope….not a business size envelope, but a pretty one with a return address that I recognize! Eeeee! It’s so exciting. But image a pretty PINK envelope or flowered envelope (or other designs but you know those are my favorite)! That would be so fabulous! And with this Envelope Punch Board you can create these envelopes in whatever color, pattern, and size you desire (Stampin’ Up gives dimensions right one the board for 66 different envelope sizes)! Super simple to use and lots of fun! Check out this video from Stampin’ Up to see more about this new product! 

Happy Stampin’

~Laura


It’s a Polka Dot Parade!!

Posted on

Polka Dot Parade, www.LaurasStampPad.com

Check out all of these fabulous cards! Super cute and super simple since they use a lot of the same basic items. I hate when my card box gets low on cards and then every time you need one you have to sit down and create it. And lets be honest, when that happens you mind goes completely blank on all creative thoughts. I did this class the other night and we all had a great time! Many people loved the flower bouquet and the champagne glasses so they used those images in place of the ones they didn’t like. I was able to get about 10 sets of these 8 cards shown above out of one pack of Polka Dot Parade Designer Series Paper! How fabulous is that? I used the Embellished Events and Tag It stamp sets. It is super simple to get out some circle punches, 2 stamp sets, your markers, and the cardstock, rather than dig though lots of ink pads and stamp sets. These cards are also perfect for every occasion – Thank You, Sympathy, Get Well, Birthday, Christmas, Baby, Wedding, Valentine’s Day, and more! Try it out and see what you come up with when using one pack of Designer Series Paper and one or two stamp sets!!!!

Happy Stampin’

~Laura


Technique Tuesday – Inking with Your Sponge Daubers!

Posted on

It is Tuesday and so I’m sharing a fabulous technique with you!!! This week it is Inking with Your Sponge Daubers!!!!

Tie Dye Technique, www.LaurasStampPad.comOkay if you don’t have these fabulous sponge daubers in your craft collection, CLICK HERE! You totally need them! I probably use mine…..daily! I love love love these things. I brush the edges of my cardstock to give that softened look. I create this fabulous technique. I used them for Reverse Masking in last week’s post! You can use them with your Build A Banner Templates! And I can go on and on! Trust me these are amazing and you get 12 in a pack!!!! Okay onto this fabulous technique!

All you need are your sponge daubers, a few ink pads, and a stamp! You can either ink up your image with the lightest color and then add the other ink colors with the sponge daubers or you can add all of the ink colors with your sponge daubers. In the Happy Birthday sample above, I used the Happy Birthday greeting from the Delightful Dozen Stamp Set. I used Gumball Green, Raspberry Ripple, Bermuda Bay and Summer Starfruit! Always start with your lightest color and just pounce in the ink and pounce or rub in random places on your stamp! Move to the next color and keep going until you have applied all colors and the stamp is covered. Sometimes you might want to rub your dauber on paper before going back into the ink just in case you might have picked up another dark color. This helps keep your daubers clean too!!! Huff on your stamp (Ha Ha like the stamp is hot) and then press onto your cardstock!!! Here is another sample:

Dauber Coloring Technique, www.LaurasStampPad.comFor this fabulous colored leaf, I inked the Magnificent Maple in Crushed Curry and then used my dauber to ink the Pumpkin Pie around going just about a dauber width in and then I took my Chocolate Chip dauber and did just the edges. Doesn’t that leaf just look so amazing and it has that perfect fall look! I have to admit when I first did it I was afraid it wasn’t going to come out and then BOOM onto the paper, lift the stamp and AMAZING! You can try this out with flowers, other greetings and so much more!!! Don’t forget to go order your daubers today!

Have fun and Happy Stampin’

~Laura


Wedding Wonderland!

Posted on

I have been working on so many fabulous Wedding Invitations and Anniversary Invitations lately that I just have to share some more with you!!! Check out my past posts here and here! These could always be changed to be a Birthday Card, Anniversary Card, or Wedding Card too!!!

50th Anniversary

This fabulous card with LOTS of bling (and I hear Gold is so “in” right now) was created as a 50th Wedding Anniversary Invitation. So perfect with the gold….simple and elegant! I love it (and I’m more of a silver girl but bling is bling and I love bling)!!!

Branch Wedding Invitation, www.LaurasStampPad.comThese invitations above are very similar but I changed up the colors a little bit. I love the Elegant Eggplant and Black one best! What do you think? The branches (Thoughts & Prayers Stamp Set) are heat embossed so they are textured and had a little bit of a glossy look!

Branch Invitation, www.LaurasStampPad.comThe insides are my favorite! The little pocket at the bottom is great for your RSVP, Instructions, Accommodations, etc. I then stamped the same branches on the inside along the wording of the invitation and added a few punched flowers!!

I hope you enjoyed these fabulous Wedding Samples! If you would like me to create invitations for your next party or help you with some ideas for you to create the invitations, just email me! I would love to help out!!!!

Happy Stampin’

~Laura


September Stamps In A Snap!

Posted on

September Stamps In A SnapSeptember Stamps In A Snap Club is here!!!! This kit comes right to your door! This month you will get the Beautifully Baroque Stamp Set, Crushed Curry Ink Pad and Coastal Cabana Ink Pad as well as the pre-cut cardstock, embellishments, and color instructions!! Click here and sign up at the bottom of the page to get your kit for just $45.00 including all shipping!

Next month will feature this same stamp set but the kit will include more embellishments and ways to take you cards from great to WOW! If you have any of the items listed in the kit, you can substitute them for something of equal value or you can pay the difference if it’s more!

Happy Stampin’

~Laura


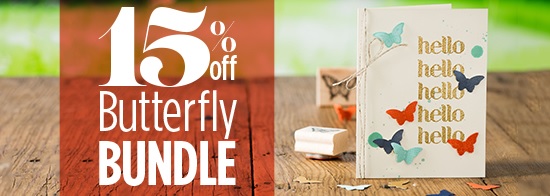
15% off on the Butterfly Bundle

Posted on

Butterfly Bundle

Oh Butterflies…..I love them so much! And now they are even better because they are on sale!!! Purchase the Papillion Potpourri Stamp Set and Bitty Butterfly Punch Bundle and you will receive 15% off!!!! This stamp set also coordinates with the Elegant Butterfly Punch too! Here are a few samples I have created with this fabulous stamp set!!! And here is another post with Butterflies!

Poppy Butterfly Card www.laurasstamppad.com


Butterfly Card


I hope you enjoy the butterflies as much as me!!!!

Happy Stampin’

~Laura


Undefined – Stampin’ Up! Carving Kit

Posted on

Undefined Carving Kit www.LaurasStampPad.comStampin’ Up! introduced the all NEW Undefined Carving Kit in July at their annual convention. I thought it was really cool to be able to make your own stamps but it didn’t really appeal to me (I’m not an artist AT ALL). Then I started seeing all of these AMAZING creations that people were making and as I was showing them to my husband he asks me if I have the kit because he wants to make something. So I gave in and bought a kit and it is sooooooo cool! I let him carve the first image because again this kit scares me and he is much more artistic than me. My first image I wanted was a puzzle piece! He drew the puzzle piece on paper and then rubbed it onto the rubber and started carving! He did let me play with the 2 tools and the rubber a little so I could get the feel and see what it is all about. That’s about all I wanted to do though. I would not be good at actually carving something for real I don’t think. But as with anything practice makes perfect!!!! Here is my…our first stamp!!!! Isn’t it super cute?Undefined Puzzle Stamp

The next one one my wish list is grass. While browsing all the fabulous images on Stampin’ Up!’s Pinterest Board (click here) I found grass! It was like 6 or 7 sprigs of grass curved in different directions. Since I LOVE my flower stamps, I thought this would be perfect!!!! More to come!!! Order your kit by clicking here and share your creation!!! I would love to see what you come up with!IMG_3401(And a little picture of my husband and his creations, he’s so crafty!)

Happy Stampin’

~Laura


Technique Tuesday – Reverse Masking!

Posted on

It is Tuesday and so I’m sharing a fabulous technique with you!!! This week it is Reverse Masking!

Reverse Masking Technique www.LaurasStampPad.com

Reverse masking is a technique that I recently tried out and fell in love!!! It gives such an amazing look! In the card above I feel like it makes a perfect scene for this Poppy. It give me a feeling of evening sunset. I have done many more of these cards using the Sympathy greeting in the Simply Sketched Stamp Set – so elegant and uplifting!!!

Butterfly Reverse Masking www.LaurasStampPad.com

This second card was created using the same technique! I created the template with the Oval Framelits! I cut out an oval for the template and then I used that oval and the next size up to create the Black frame! Also, the fabulous Butterflies came from the Papillon Potpourri Stamp Set! Check out the special on that Stamp Set this month here! You could really create a fabulous window look with this technique too! I want to try it out with a rainbow of colors next! To create your template, use the cardboard backing used in your Designer Series Paper Packaging, cut out your image (oval, rectangle, Circle, etc) and then you are good to go!!!

Frames for Reverse Masking www.LaurasStampPad.com

I hope you enjoy this technique and try it out soon!

Happy Stampin’

~Laura