Thankful Simply Created Cards!

Posted on

Thankful Simply Created Kit, www.laurasstamppad.com

Thankful Tablescape Simply Created KitStampin’ Up! has this fabulous kit in the Holiday Mini Catalog that is super cute for any Thanksgiving Tablescape! But if your family is anything like mine there is so much food and chaos going on that there is no room for cute decorations! So why not think outside the box??? Check out these fabulous cards that I created with all of the supplies inside the kit (minus the card bases which are crumb cake cardstock). I was able to create over 30 cards and 10 treat bags! Come back again tomorrow to see how I created treat bags with the napkin pouches!

The card that I did above was created using half of the menu card (the yellow striped piece) and a small piece of the Designer Series Paper from the strips (the orange piece). The package comes with these amazing chalkboard pieces which I thought were totally just black cardstock. Whoa, was I wrong! It is this crazy slick, textured, plastic-like piece and it so looks and feels amazing! I used the fabulous Chalk Marker for the greeting! This is the greatest white marker I have ever used! It writes very clear and amazing! The little notches on the chalkboard piece make it easy to wrap the twine around and the kit comes with die-cut leaves!

Thankful Simply Created Kit, www.laurasstamppad.com

This card uses the the hounds-tooth printed paper (in the package to be used as food tent cards) as your background piece. You need to cut off about a 1/2″ piece which I then added to the inside for a little POP of color/decoration on the inside! The Chocolate Chip patterned piece comes from the roll of paper in the kit! That roll seems never endings! I added a little twine and another one of the die-cut leaves! The kit also comes with a roll of this birch paper which is super cool because it is textured and not actual cardstock (sort of plastic feeling too). I stamped the Magnificent Maple leaf on there in Crushed Curry and Tangerine Tango and then used my Label Framelits to cut it out! Love it! Post in the comments if you have any other outside the box ideas that you have for this fabulous kit! And be sure to come back again tomorrow for the Technique Tuesday – Treat Bag!

Happy Stampin’

~Laura


Fabulous Cards for Fall!

Posted on

Fabulous Fall Cards, www.LaurasStampPad.com

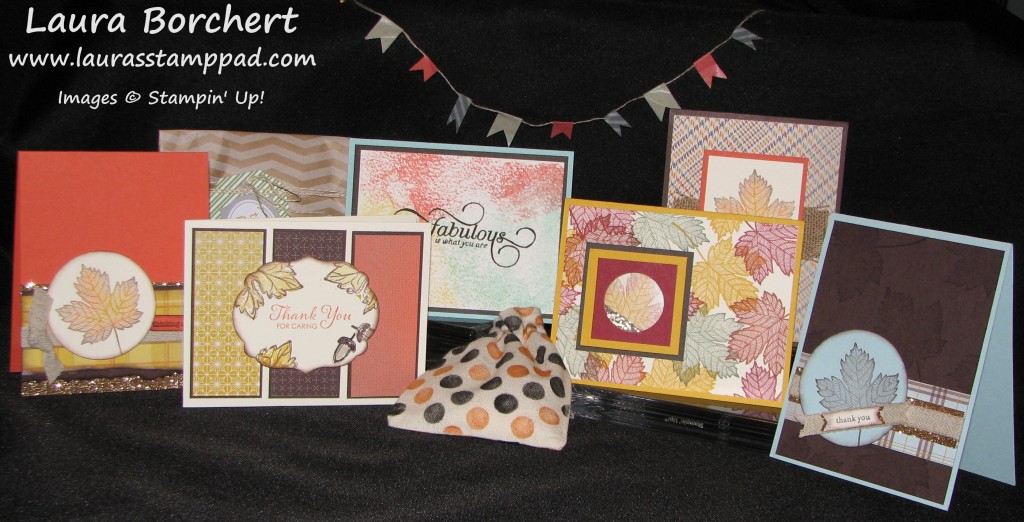
While I am still not a huge fan of Fall….after all that means winter is coming and that is so not cool! Also, I am not a fan of the color brown BUT I did have fun with these Fall Cards! It’s stamping and crafting so of course it is fun! Just close the blinds and ignore the weather changing, Laura! I really loved the Magnificent Maple Stamp which is a single stamp, but look at all of the amazing looks I got with just one stamp!!!! Check out this post for the how-to on the orange leaf card on the far left! Check out this post for the Shaker Card technique which is shown towards the right with the leaves in different colors! The treat bags were lots of fun to create as well! And the cutest ever, in my opinion, is the little Washi Tape Banner hanging in the back! Awww! Well I hope you are enjoying your Fall!!! Time to start thinking of Thanksgiving and Christmas now that Halloween is over!!!! Check back often to get lots of inspiration and ideas!!!

Also, don’t forget to check out the last set of Weekly Specials!!!

Happy November!!!

~Laura


Magnificent Maple!!

Posted on

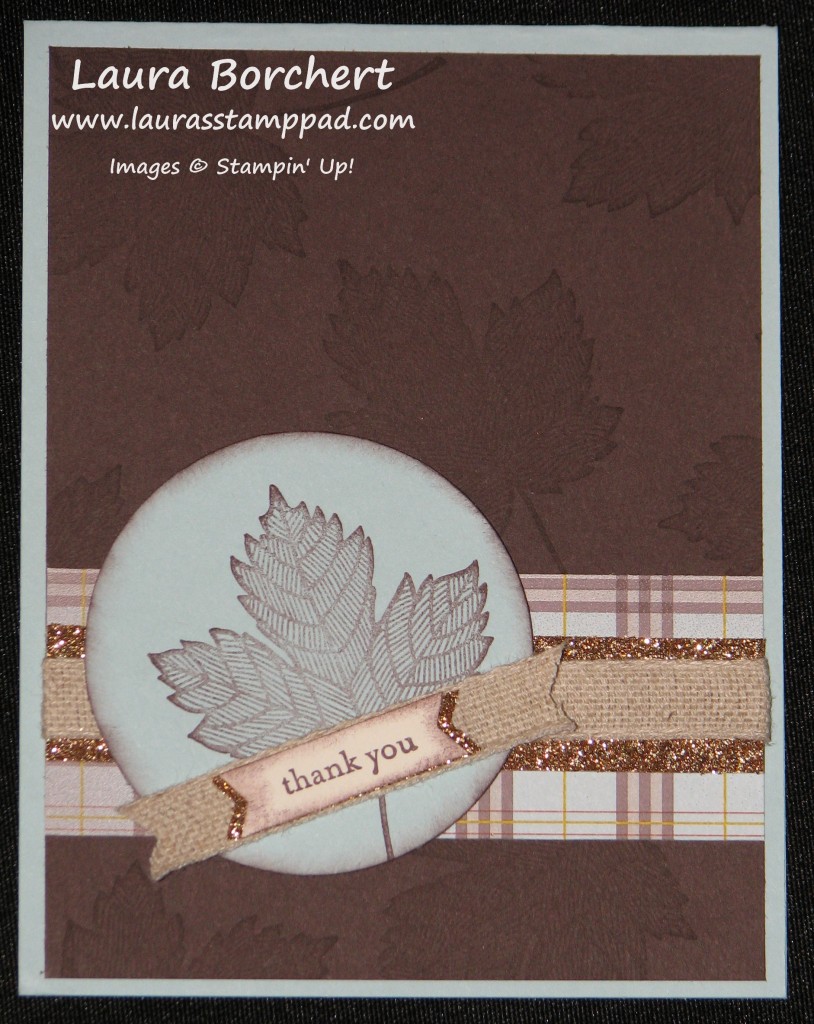
Gold Glimmer Magnificent Maple Stamp, www.LaurasStampPad.comThis one little single stamp is so amazing – Magnificent Maple! Look how amazing this card is with the maple leaf randomly stamped on the background and then highlighted on the Soft Sky circle! I love how the blue plaid piece of Sweater Weather Designer Series Paper, Champagne Glimmer Paper, and Natural Trim Ribbon make this card pop and look so rustic. And I love the use of blue on this fall card rather than the usual browns, oranges, and yellows!!

Champagne Glimmer Magnificent Maple, www.LaurasStampPad.comHere is another similar card using the Champagne Glimmer Paper, Sweater Weather Designer Series Paper and Natural Trim. But this time I colored the Maple Leaf with my daubers. Check out the technique here! I hope you enjoyed these cards and it got you into the Fall mood! Post in the comments of any projects you are have created with this stamp set!

Happy Stampin’

~Laura


Technique Tuesday – Inking with Your Sponge Daubers!

Posted on

It is Tuesday and so I’m sharing a fabulous technique with you!!! This week it is Inking with Your Sponge Daubers!!!!

Tie Dye Technique, www.LaurasStampPad.comOkay if you don’t have these fabulous sponge daubers in your craft collection, CLICK HERE! You totally need them! I probably use mine…..daily! I love love love these things. I brush the edges of my cardstock to give that softened look. I create this fabulous technique. I used them for Reverse Masking in last week’s post! You can use them with your Build A Banner Templates! And I can go on and on! Trust me these are amazing and you get 12 in a pack!!!! Okay onto this fabulous technique!

All you need are your sponge daubers, a few ink pads, and a stamp! You can either ink up your image with the lightest color and then add the other ink colors with the sponge daubers or you can add all of the ink colors with your sponge daubers. In the Happy Birthday sample above, I used the Happy Birthday greeting from the Delightful Dozen Stamp Set. I used Gumball Green, Raspberry Ripple, Bermuda Bay and Summer Starfruit! Always start with your lightest color and just pounce in the ink and pounce or rub in random places on your stamp! Move to the next color and keep going until you have applied all colors and the stamp is covered. Sometimes you might want to rub your dauber on paper before going back into the ink just in case you might have picked up another dark color. This helps keep your daubers clean too!!! Huff on your stamp (Ha Ha like the stamp is hot) and then press onto your cardstock!!! Here is another sample:

Dauber Coloring Technique, www.LaurasStampPad.comFor this fabulous colored leaf, I inked the Magnificent Maple in Crushed Curry and then used my dauber to ink the Pumpkin Pie around going just about a dauber width in and then I took my Chocolate Chip dauber and did just the edges. Doesn’t that leaf just look so amazing and it has that perfect fall look! I have to admit when I first did it I was afraid it wasn’t going to come out and then BOOM onto the paper, lift the stamp and AMAZING! You can try this out with flowers, other greetings and so much more!!! Don’t forget to go order your daubers today!

Have fun and Happy Stampin’

~Laura