Happy Thanksgiving!!!!

Posted on

Happy Thanksgiving everyone!!! This is one of my favorite holidays because it is low key and there is just so much to be thankful for today and everyday throughout the year!!!! I am so very thankful to each and every one of you who visit my blog, comment, share, and pin! Thank you all very much! You are all fabulous!!!

Today I thought I would share a quick and simple little project!

Gift Tags Cookies, www.LaurasStampPad.com

I get told by many people that my Chocolate Chip Cookies are pretty good so I usually whip up a batch for any and all special occasions – family visits, friends visits, when visiting my new niece and nephew in the hospital, and many other times! It is always more fun to give the cookies in an adorable package too! Here I used some of the Gusseted Cellophane Bags to put 13 (Baker’s Dozen) cookies into. I tied them up with some Whisper White Satin Ribbon and then added a tag. These tags are quick and simple and can probably use some of the scraps you have laying around! You need a piece that is 2″ wide and the length can be whatever you wish. I go with about 2-1/2″ but sometimes a little shorter or longer if I have a scrap piece that measures just so. I used my Scallop Tag Topper Punch for the adorable top. Then I used a piece of scrap Whisper White measuring 1-3/4″ x 1-3/4″ and decorated it. For the one up front, I used the Work of Art Stamp Set and Bitty Butterfly Punch. For the two in the back, I used the Embellished Events Stamp Set! Quick and Simple Gift Packaging! Check out this tag here to use this Holiday Season!

I hope you have an amazing day today celebrating Thanksgiving! I know I will as I will be spending lots of time with Family!

Happy Thanksgiving!

~Laura


Spreading Holiday Joy Series!!!!

Posted on

Here is the fourth card in my Spreading Holiday Joy Series because I love sending and receiving cards in the mail!! They brighten my day and I hope they brighten the day of those I send them to! You can see the others here and here!

Tag It, www.LaurasStampPad.com

Supplies Needed: Whisper White Cards (2 cards per sheet), scrap pieces of Whisper White, scraps of Real Red and Polka Dot Parade Designer Series Paper (there is also Red Polka Dots in the pack so you could use all Designer Series Paper), and Embellished Events Stamp Set

Cut out squares of the Designer Series Paper (or Real Red Cardstock). Mine are 1.5 inch squares but you could do 1 inch squares too! Then I inked the Santa Hat with my Real Red Maker and stamped it down! Be sure to stamp before punching because then you can line it up in the center when punching! Be sure to clean the stamp real well before inking the Ho Ho Ho with your Old Olive Marker and stamping that down! I used Stampin’ Dimensionals to adhere the Hat, Ho Ho Ho, and Merry Christmas Greeting! What can I say, I love Dimensionals! Also, I have to say the Embellished Events Stamp Set is a must have in your collection!!! Check out other samples here and here!

Happy Stampin’!

~Laura


It’s a Polka Dot Parade!!

Posted on

Polka Dot Parade, www.LaurasStampPad.com

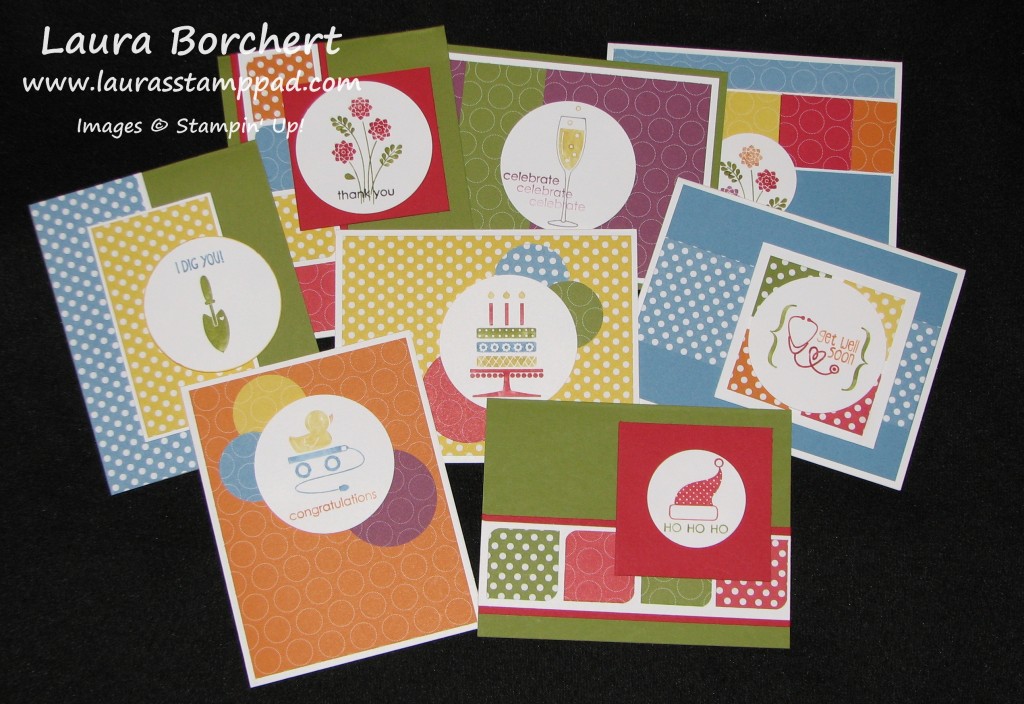
Check out all of these fabulous cards! Super cute and super simple since they use a lot of the same basic items. I hate when my card box gets low on cards and then every time you need one you have to sit down and create it. And lets be honest, when that happens you mind goes completely blank on all creative thoughts. I did this class the other night and we all had a great time! Many people loved the flower bouquet and the champagne glasses so they used those images in place of the ones they didn’t like. I was able to get about 10 sets of these 8 cards shown above out of one pack of Polka Dot Parade Designer Series Paper! How fabulous is that? I used the Embellished Events and Tag It stamp sets. It is super simple to get out some circle punches, 2 stamp sets, your markers, and the cardstock, rather than dig though lots of ink pads and stamp sets. These cards are also perfect for every occasion – Thank You, Sympathy, Get Well, Birthday, Christmas, Baby, Wedding, Valentine’s Day, and more! Try it out and see what you come up with when using one pack of Designer Series Paper and one or two stamp sets!!!!

Happy Stampin’

~Laura


Something for all Occasions!

Posted on

Wedding CardI love stamp sets that have images and greetings because you can create a card when you pull out that one stamp set! Embellished Events is one of my favorite sets right now! I love the simple greetings and the fabulous images!!! The wedding bells in the Congratulations card here on the left is perfect for a Wedding, Anniversary, and even Christmas! Of course the photo doesn’t do the amazing card any justice. The circle with the bells and greeting is actually on the inside of the card with the circle cut out of the front of the card creating a peek-a-boo!!! Isn’t that cute? Oh and you see that fabulous bow on the banners! You can create that with your oval punch! Yep, that’s right! Just 4 punched ovals and you have that fabulous bow! Curl 2 of the ovals and adhere with a Stampin’ Dimensional Thank You Flowersand then cut little V’s out of the other 2 ovals to create the tails! I put an Antique Brad in the center but you could use any type of Brad or Ribbon or even a cardstock loop! Precious!

Of course, flowers can be used for ANY occasion, at least that’s my moto because I LOVE flower stamps! These flowers are perfect for a Thank You, Birthday, or Just Because Card! I love how these flowers are super cute and bold and easy for coloring with your markers. When you color your stamps with you markers, you can have multiple colors like the Thank You card here on the right! If you feel like it took you a long time to color the stamp and it may have dried, don’t worry just huff on it! Don’t blow on it but instead huff (like when you eat something hot and you go ha ha). I hope that makes sense! There are many other images in this stamp set too! Check out this post for more samples! I hope you try out some of these card styles and even this stamp set!!!

Happy Stampin’

~Laura