December – Best of 25 Stamp Set!

Posted on

Best of 25 - December, www.LaurasStampPad.com

Sale-A-Bration is so exciting every year! I love the stamp sets they pick each year! I think my favorite part about this one is that the images are mostly flowers! I can’t resist flower stamps!!!! These are the BEST! To check out last month’s Best of 25, click here!

  • All of the Best of 25 Stamp Sets are just $14.95 and they will be available until March 31, 2014.
  • Best of 25 Stamp Sets only come in clear-mount.
  • As a special incentive to collect the Best of stamps, we’re including a collector’s card and 25-year proof of purchase sticker with every Best of set. Collect six stickers, and send it in to redeem a FREE set of your choice valued up to $14.95! Free sets must be redeemed no later than April 30, 2014.

Happy Stampin’!

~Laura


Spreading Holiday Joy Series!!!!

Posted on

Here is the third card in my Spreading Holiday Joy Series! You can see the others here and here!

Special Season, www.LaurasStampPad.com

I love the elegance that the Silver Ink and Ribbon adds to this card! And with the single color, it is super simple!

Supplies Needed: Smokey Slate Cardstock (2 cards per sheet), Whisper White Cardstock (4 cards per sheet), Silver Ink, Silver Ribbon, and Special Season Stamp Set

You will stamp the tree and the greeting onto the Whisper White cardstock (5-1/4″ x 4″ rectangles) in Silver Ink! You can get 4 from each piece of 8-1/2″ x 11″ sheet of cardstock. Then you will tie the Silver Ribbon around the Whisper White Cardstock and adhere to your card base! You could always modify this card style by adding some color to the tree, using Real Red and Gumball Green, or add some Dazzling Details! There are many other ways to change it up too! Feel free to add your modified idea in the comments below!

Happy Stampin’

~Laura


Spreading Holiday Joy Series!!!!

Posted on

Here is the second card in my Spreading Holiday Joy Series! You can see the first one here!

Festive Flurry, www.LaurasStampPad.com

This card uses some of my favorite colors and my favorite set this season – Festive Flurry!

Supplies Needed: Pool Party Cardstock (2 cards per sheet), Winter Frost Designer Series Paper Stack, Whisper White Cardstock, Island Indigo Cardstock, 2-3/8″ Scallop Punch, 1-3/4″ Circle Punch, Rhinestones, Island Indigo Ink, Festive Flurry Stamp Set, and Sweet Essentials Stamp Set

My strips of the Winter Frost Designer Series Paper are all less than an inch so you can get A LOT from the Paper Stack!!! A little TIP on how to get a perfect banner each time…..on the end of the piece, make a cut in at the center, then from the corners, cut diagonal to that center cut! This will make your banner tips the same length! (I hope that made sense.) Another TIP…..the piece of white cardstock that I used for the greeting is the leftover piece from this card! On that other card, you create 5-1/4″ x 4″ rectangles and you can get 4 from each piece of 8-1/2″ x 11″ sheet of cardstock. You are left with this little strip and I used it for my greeting on this card! Gotta love using those scraps!!! You will stamp the smallest snowflake from the Festive Flurry Stamp Set onto a piece of scrap white cardstock and then punch it out with your 1-3/4″ Circle Punch, layer that onto the punched Island Indigo scallop! Add your rhinestone to the center and adhere to your card! Once your supplies are cut, this card should take about 1-1/2 minutes to 2 minutes! Be sure to check back to see the rest of the cards in the Spreading Holiday Joy Series! Also, if you would like me to send you a card, email me your address!

Happy Stampin’

~Laura


Technique Tuesday – More Color Bursting Fun!

Posted on

Happy Tuesday!!! So awhile back, I did a Technique Tuesday about the Starburst Technique or Color Burst! Check it out here! Well I have TWO more ways that you can Color Burst! You know once you find a Technique, you keep playing and crazy things happen! Check it out!

Starburst Stamping Technique, www.LaurasStampPad.com

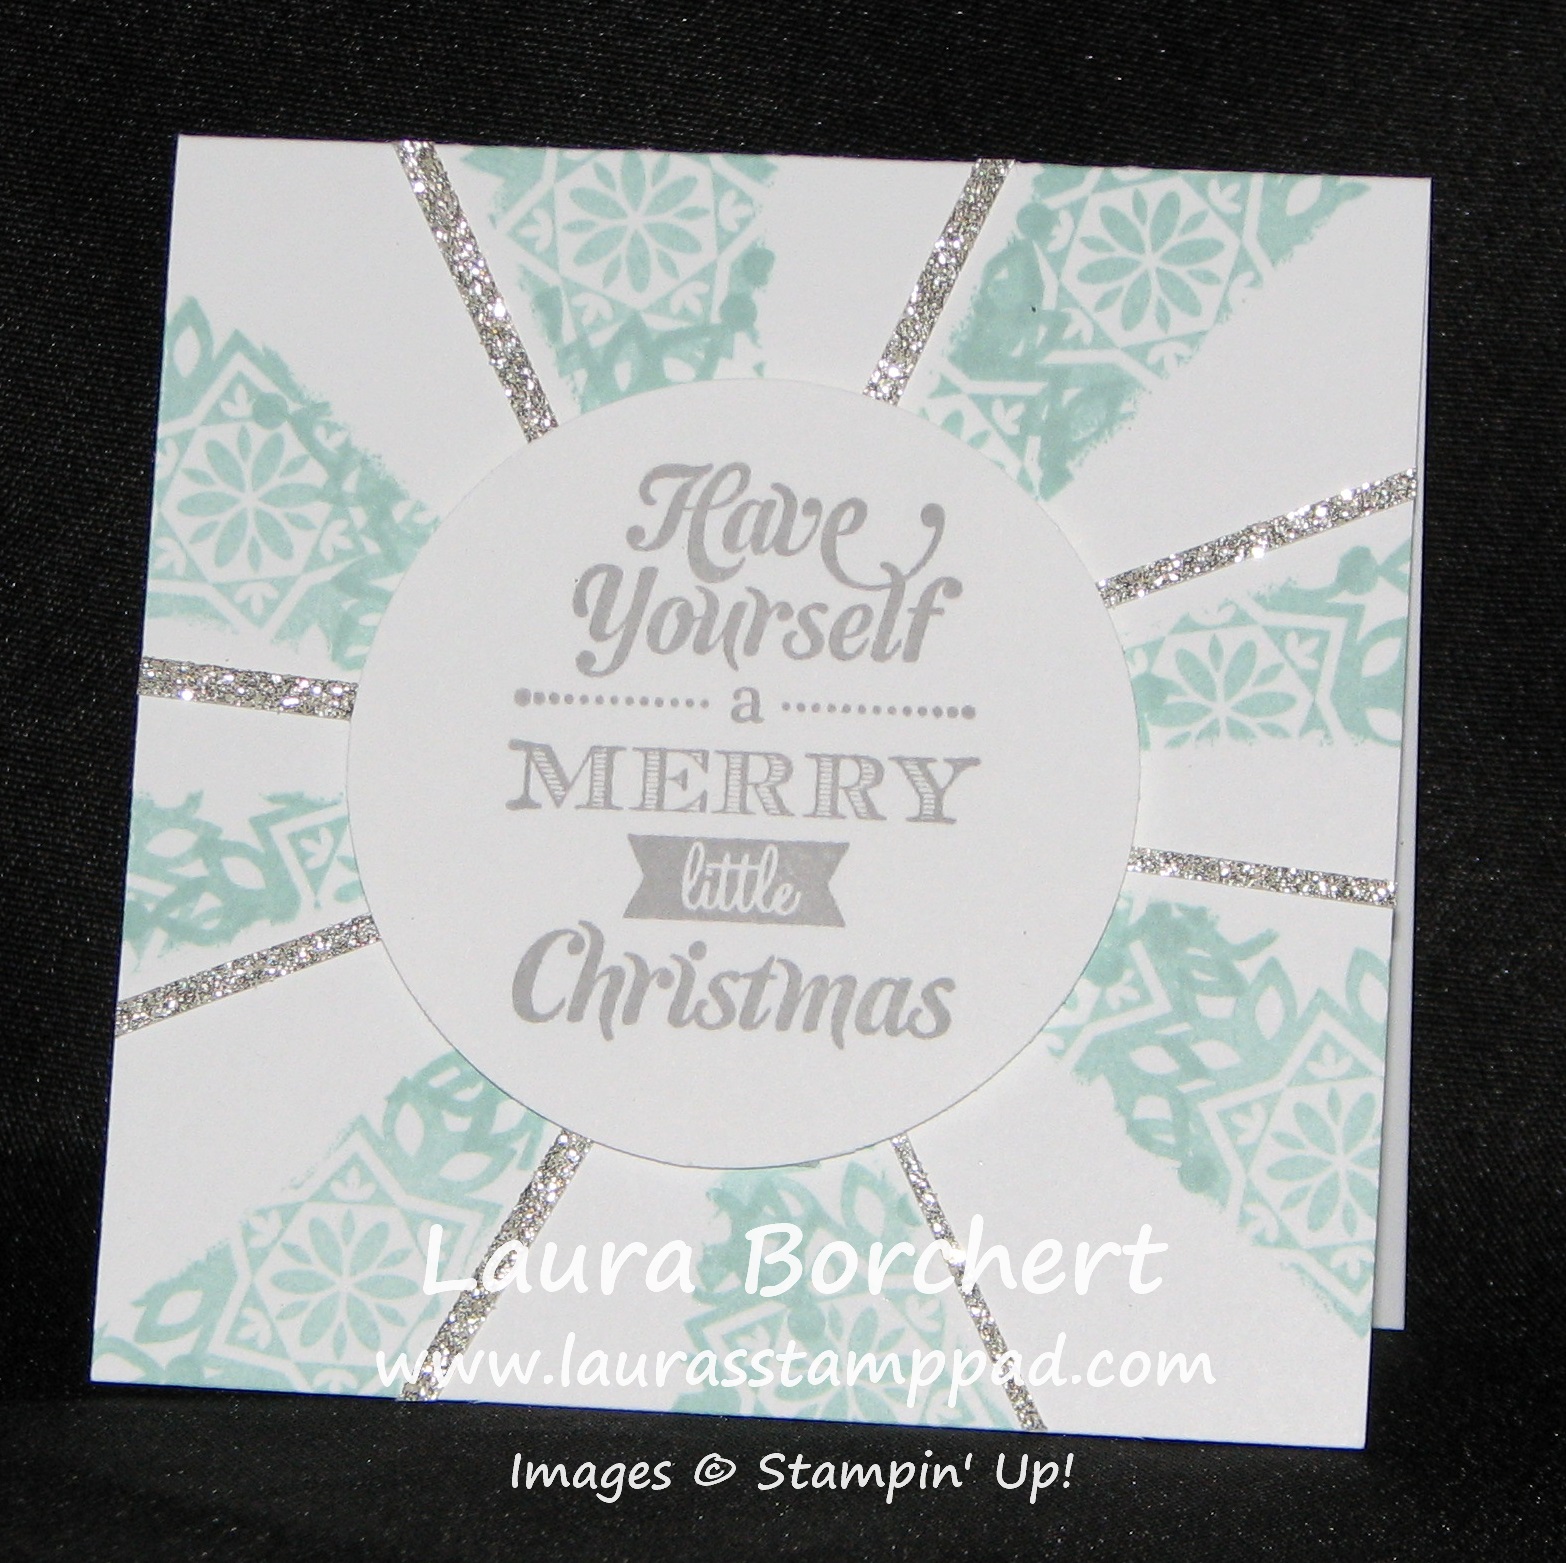
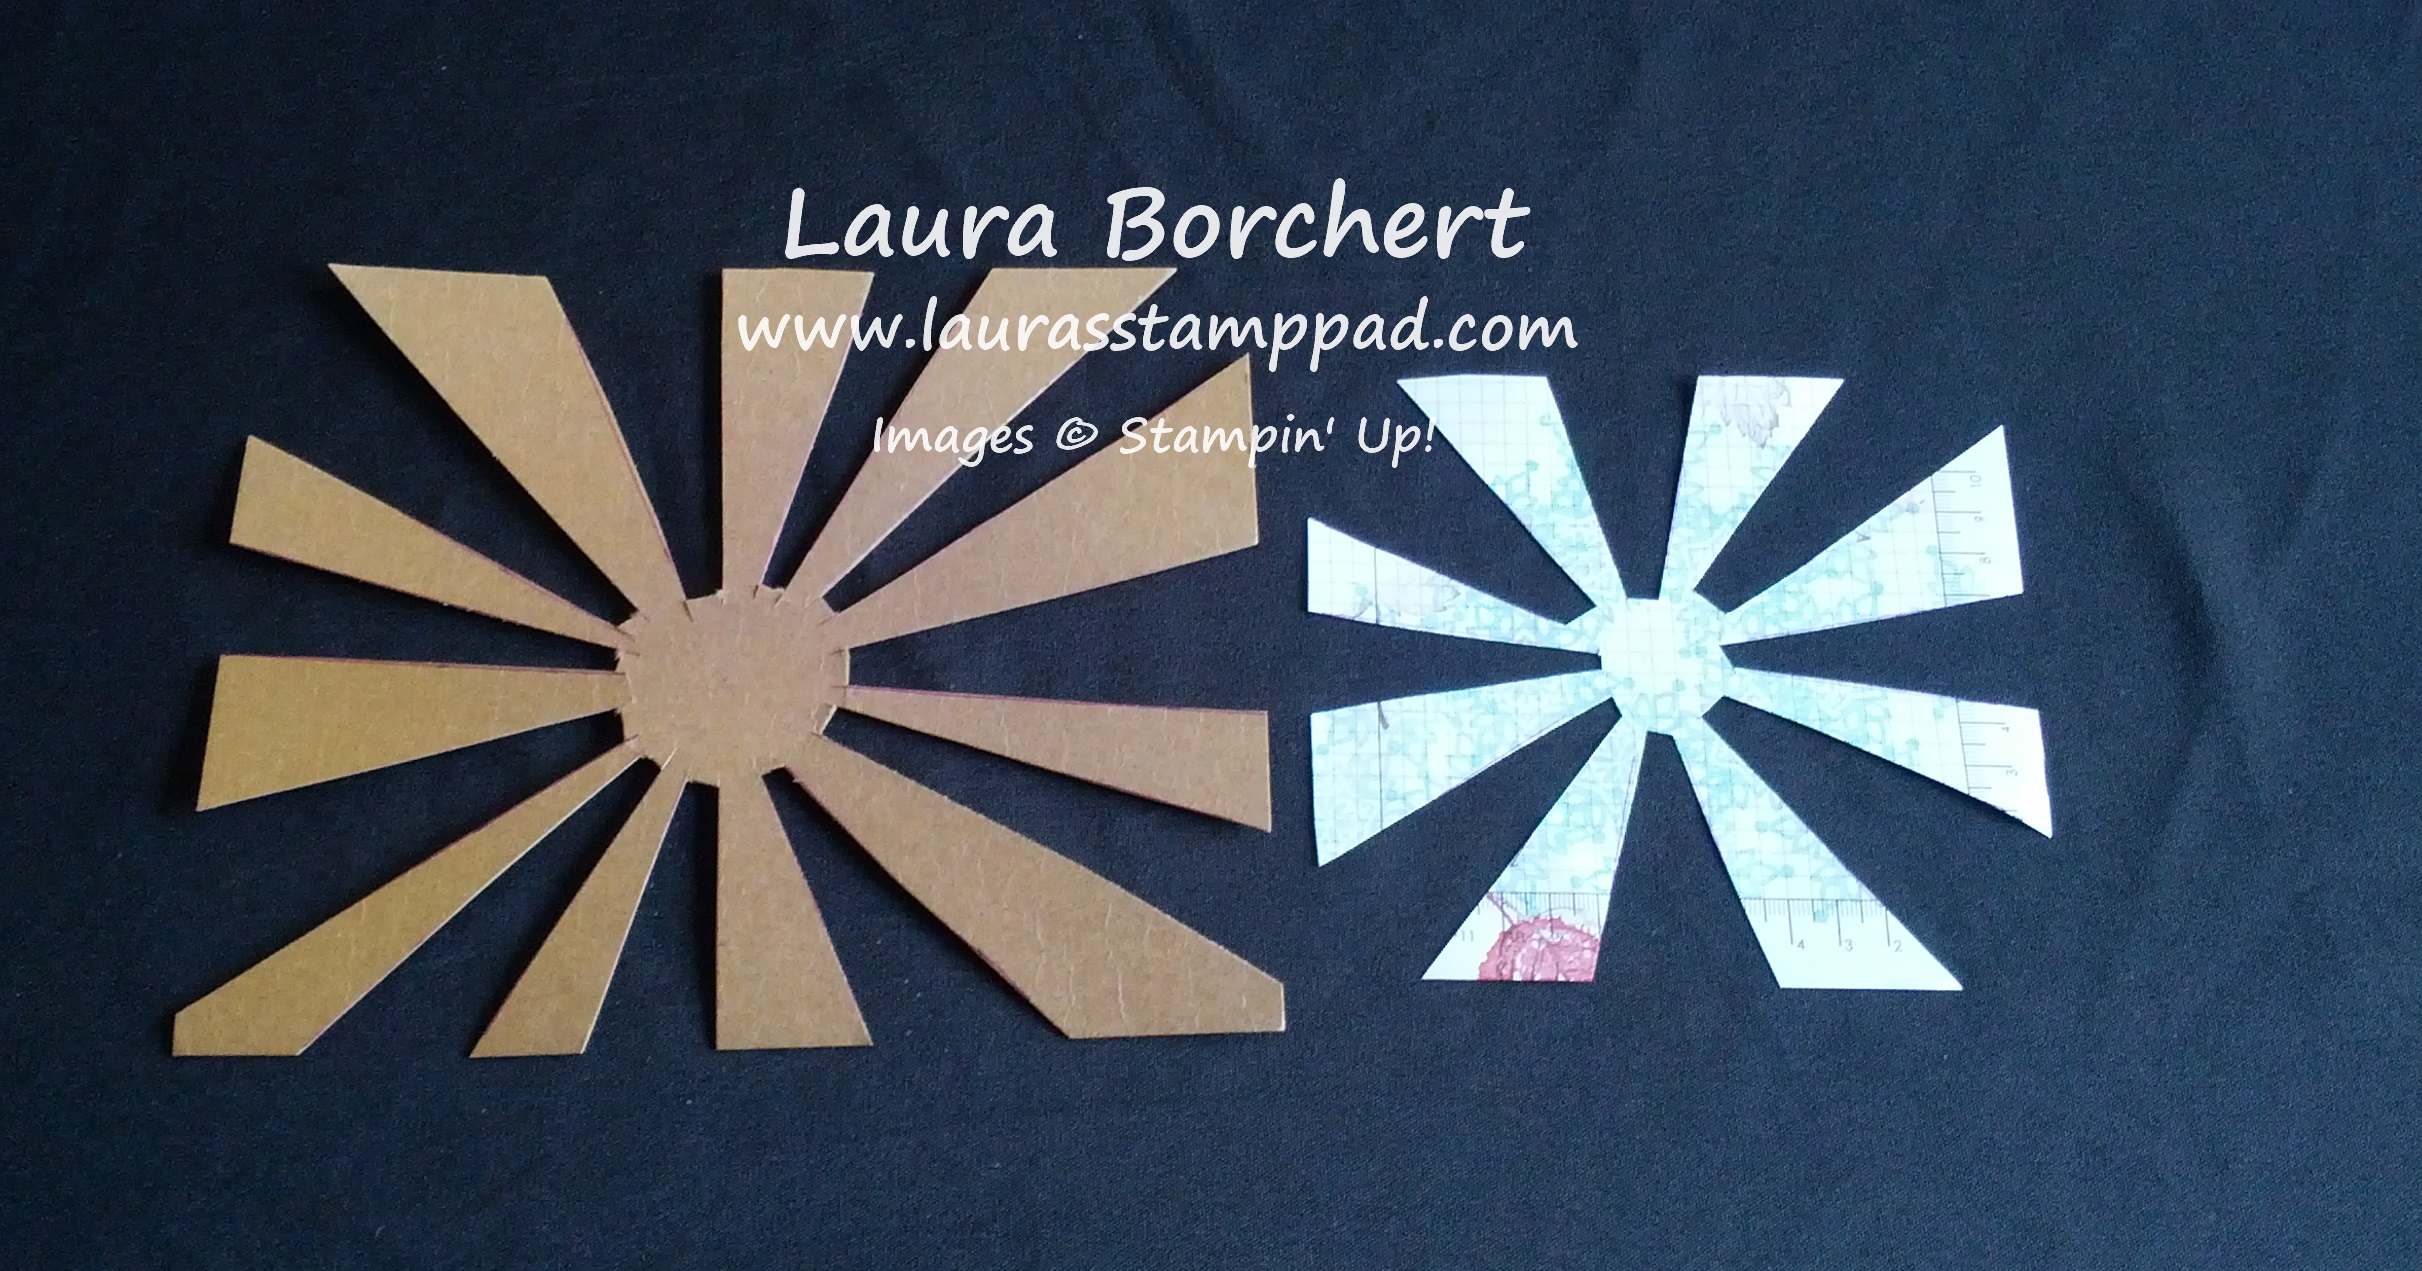
While I super loved my Pink and Fabulous card, this one is probably my second favorite! I love the colors and the glimmer paper and the Technique! All you need to do is create a template. I used the cardboard piece that comes in a package of Designer Series Paper, punched out any size of Circle scrap paper and place it in the center. Then with a ruler draw lines from that center circle to the edge. Once you have all of your lines drawn, you will cut out every other section, like this:

Color Burst Templates, www.LaurasStampPad.com

You don’t have to worry that the center is not a perfect circle because that is where you will put your greeting or decoration on your card. Also, if you go in too far then it will be super flimsy and won’t hold up for lots of cards/projects! For the card above, I laid this template onto my card front and stamped the Festive Flurry snowflakes in Pool Party all over. Then I added thin pieces of Glimmer Paper. For the greeting, I used the Merry Little Christmas Stamp Set and Smoky Slate ink!

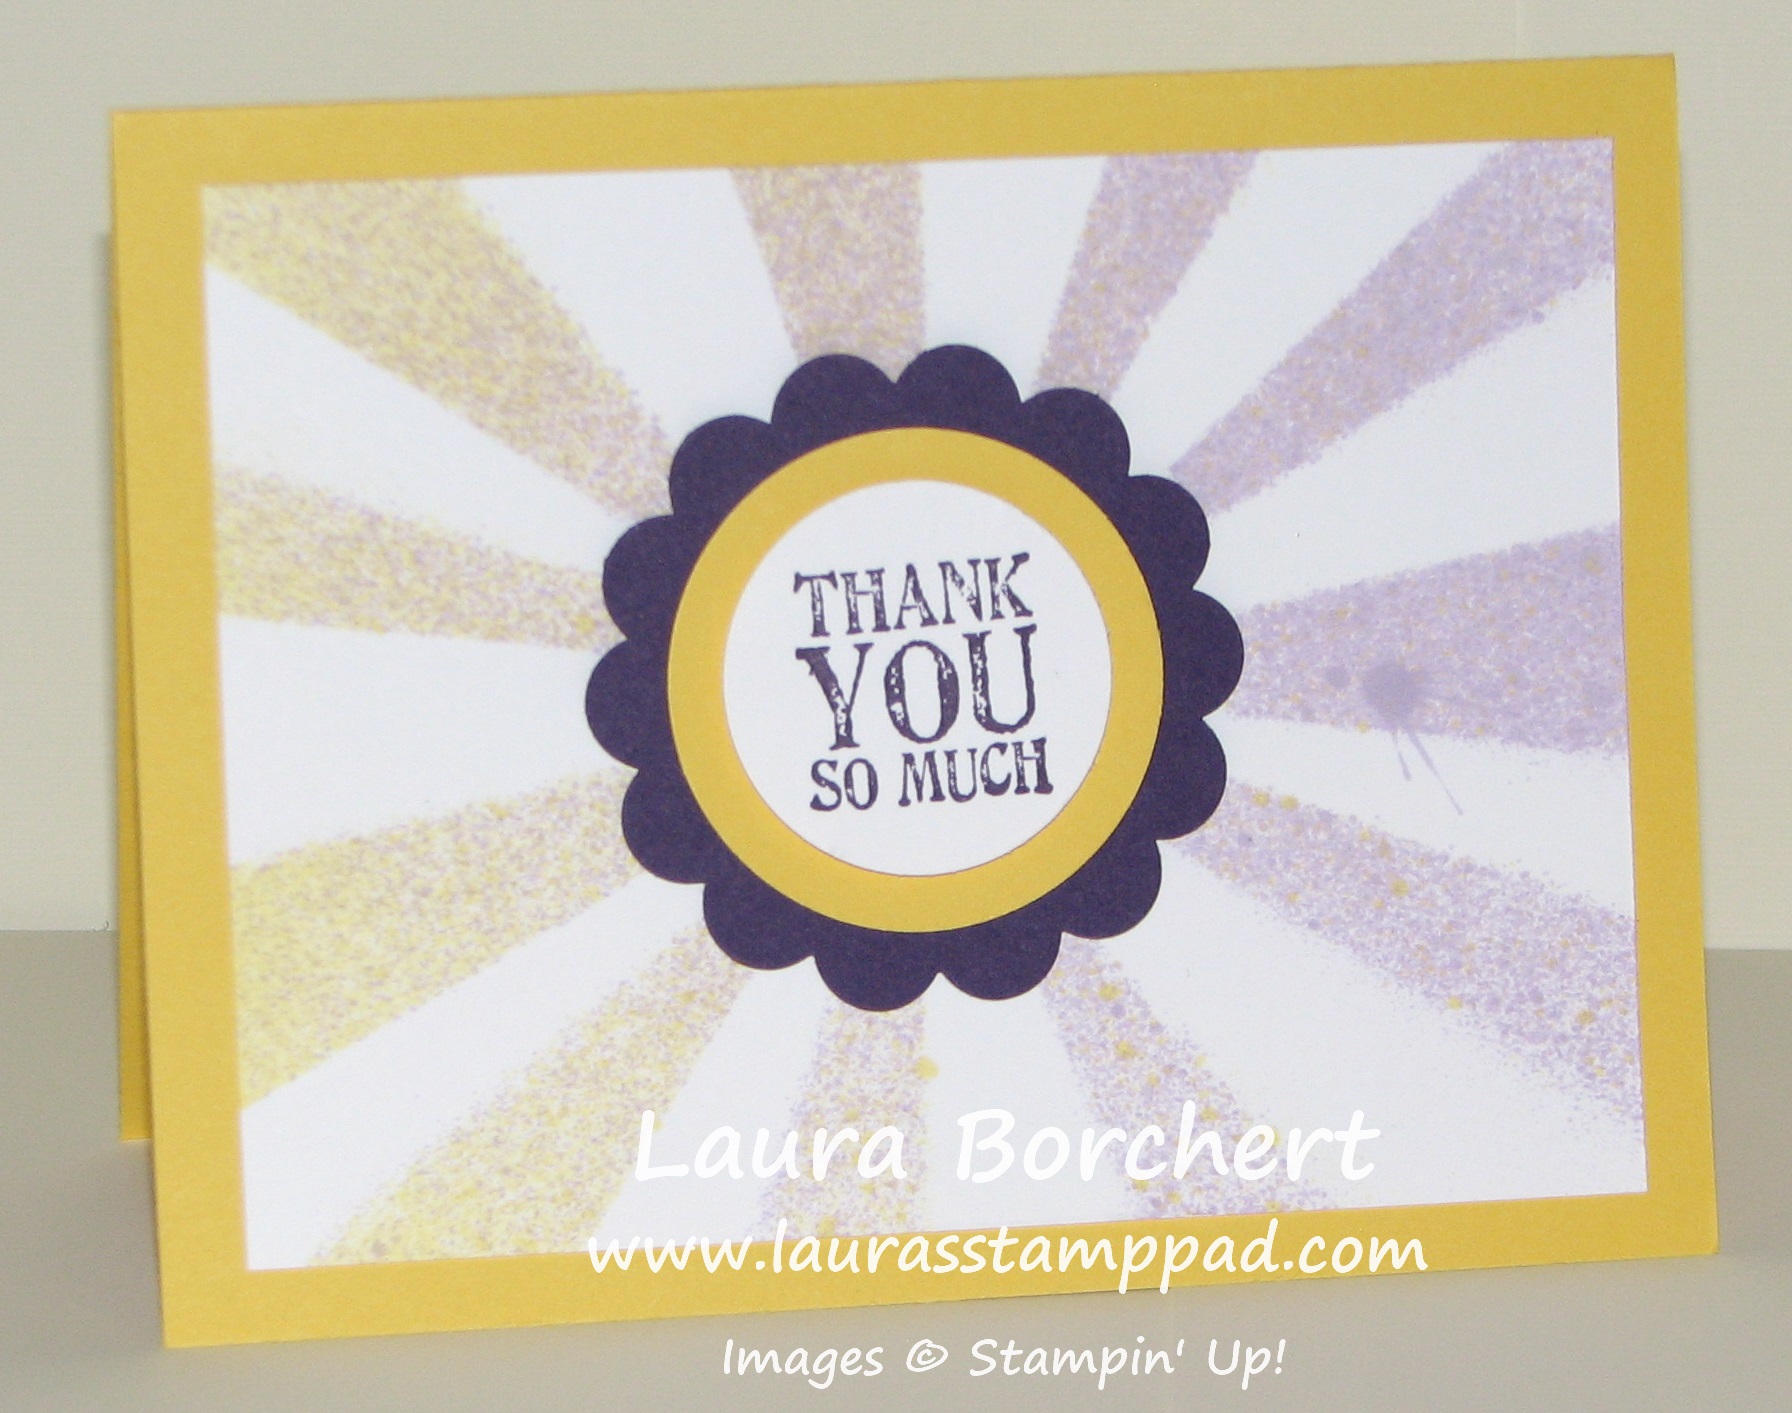
Now you can use this same template and do a completely different look by spritzing your card front like this one here!

Starburst Spritzing Technique, www.LaurasStampPad.com

Just lay your template down and spritz away with one color or many colors! I hope you have enjoyed this technique! Try it out and leave me a comment with your creation or which one you liked the most!

Happy Color Burstin’

~Laura


HAPPY BIRTHDAY BRAD!!!!

Posted on

Tomorrow is my husband, Brad’s Birthday! I thought I would share some fabulous things about him like I shared about myself on my Birthday just so you know a little bit more about me (and him)! I would share on his actual Birthday tomorrow but didn’t want you all to miss out on Technique Tuesday! 🙂
Brad and Laura, www.LaurasStampPad.com~Brad’s favorite color is Blue! 95% of his shirts are blue!

~Brad is my computer geek! He works in IT and fixes all of my computer meltdowns as well! It is great to live with someone who is sooooo tech savvy!

~Brad is also a gamer! Most of the time he plays late at night after I have gone to bed or when I have stamp events! All of his gamer friends ask me how my stamping is going because they know that is what I do when he is playing!

~Brad is a night owl and can survive on little sleep – total opposite of me!

~Brad knows more about stamping then most Stamper Girl’s husbands, I think! It is great because then I can ask him for advice like what does this project need or how can change this up!Domo Card, www.LaurasStampPad.com

~Brad loves spicy foods! He thinks that sweating through a meal means it is a good one!

~Brad loves to watch cartoons as much as my nieces and nephews!

~This card was created by Brad for my Birthday! He used all of my stamp stuff – markers, punches, stamps, ink and adhesive! He even cleaned the stamp afterwards! I taught him well!

Happy Birthday to the best Husband ever! Leave a comment below and I will be sure to pass it along to Brad!

~Laura


Spreading Holiday Joy Series!!!!

Posted on

I love love love getting mail especially when it in a rectangle envelope and the address is hand-written because that means its not just another bill or piece of junk mail! I love sending cards to other as well because I want them to be excited, feel loved, and it just may brighten their day!!! I know many of you send out Christmas card during this time of year so I thought I would share some of the cards that I have created for various classes or for my cards that I will be sending out! Over the next few weeks, you will be seeing lots of cards that can easily be recreated for your own cards or you can use the theme with another stamp set all year long!!! Also, if you would like me to send you a card, email me your address and I will be sure to get one in the mail to brighten your day!!! 🙂

Calm Christmas, www.LaurasStampPad.com


This card was the favorite at the Holiday Card Class I had at the Library and it is sooooo simple!

Supplies Needed: Night of Navy Cardstock (2 cards per sheet), Whisper White Cardstock (4 cards per sheet), Night of Navy Ink, Sponge Daubers, and Calm Christmas Stamp Set

You will stamp the dove and the greeting onto the Whisper White cardstock! (5-1/4″ x 4″ rectangles)! You can get 4 from each piece of 8-1/2″ x 11″ sheet of cardstock. You are left with this little strip and I used that in another card that I created so be on the lookout! Gotta love using those scraps!!! Brush the edges with your Sponge Dauber and adhere it to your Night of Navy card base! DONE! Once you cut your cardstock, it should only take about 1 minute to stamp and assemble!! I hope you enjoyed this! Be sure to subscribe to my blog by entering your email address on my blog at the top right so you don’t miss any more posts and the rest of the cards in this series!

Happy Stampin’

~Laura


Happy Thanksgiving!!!

Posted on

Thankful Banner, www.LaurasStampPad.comJust wanted to post a little greeting on my most favorite Holiday of the year! HAPPY THANKSGIVING! I am so thankful for so many things this year! I am thankful for my Family and Friends and Stampin’ Up who has allowed me share my love and creativity with so many of you! I am thankful to have meet you, crafted with you, shared stories with you, shared laughs and tears! You all are like family to me! Thank you for being you!!!!

Happy Thanksgiving!

~Laura


Weekly Specials!!!

Posted on

Weekly Deals 11.26.13, www.LaurasStampPad.comHere are the amazing items that are on sale this week!!! That Cherry Cobbler Chevron Ribbon would look amazing on your presents!! The Beautifully Baroque Embossing Folder is one that I just recently got….why I waited so long, I do not know! It is amazing! And be sure to get the markers – remember you can use them directly on your stamp to color the image. That is how you can get red flowers and green stems and other fabulous multi-colored images!

Also, don’t forget about the Holiday Sale!!! That is still going on through December 2nd! AND……drum roll please…..Stampin’ Up is having amazing Door Busters on December 2nd to celebrate Cyber Monday! Be sure to check it out on Monday! We don’t know what items they will be! As always, you can shop 24/7 online by clicking HERE!

Happy Shopping!!!
~Laura


Technique Tuesday – Nice & Simple Notepads!

Posted on

It is Tuesday and so I’m sharing a fabulous technique with you!!! This week it is these adorable Notepads!

Notepads, www.LaurasStampPad.com

 I LOVE these super simple notepads! They make perfect gifts! I actually gave them to all of my Bridesmaids for part of their gift! Stampin’ Up sells our clear stamp cases 4 in a pack so it is super easy!!!!

Supplies You Will Need:  Clear Cases, Designer Series Paper, Jr. Legal Paper Pads (or Post-It Packs), Ribbon, and Sticky Strip

Take your Designer Series Paper and cut it down to 10-1/2 x 7″ and slide it into the clear front cover! (This is great for those pieces you have been holding onto forever for that perfect project or large scraps!) Add Sticky Strip to the back of your pad of paper and adhere that to the inside cover. (NOTE: If you are using Jr. Legal Pads, you will have to cut off a little over an inch to make it fit! I have found Post-It packs and various others that fit without cutting!) Then you can decorate the spine of your case with ribbon! Done!

The best thing about these is you can always add more paper once you run out so no need to throw it all away once it is gone! It is perfect to toss in your purse because the edges won’t get ruffled! Or you can put one by the phone and you will always be able to find it because of the clear plastic case and fabulous decorations! Make a few of these to have on hand for that last minute gift you might need this Holiday Season!

Happy Stampin’

~Laura


Magical Mason Jars!

Posted on

Mason Jars, www.LaurasStampPad.com


Mason Jars seem to be HOT HOT HOT right now with the whole vintage, antique craze! I have taken the Mason Jar and added my own spin on it!! Last year a friend of mine asked me to help her create some Teacher Gifts for her children’s teachers! I was super excited and together we came up with these decorated Mason Jars! They make the perfect Teacher Gift because you can fill them with just about anything – candy, a gift card, little samples of lotion or anti-bacterial gel, layered cookie mix, and so much more! For Halloween, my friend layered candy corn and M&M’s! Super cute and different and the best part is the teacher can then use the jar for pencils, constant candy jar, and so many other things! You can decorate these jars using ribbon, tags, punches, cardstock or Designer Series Paper, and a stamp or two! The Pop And Place Tags Kit is perfect for decorating these! Hope this helps with some of your gift packaging or gift ideas this season!

Happy Stampin’

~Laura