Happy Tuesday!!! You all know that means I have a fabulous technique for you! I’m showing you creating snowy evergreen trees with Embossing Paste! It’s super fabulous!
This card is so amazing! I just love it!!! The texture and snow on those trees looks so real! Eeee! 🙂
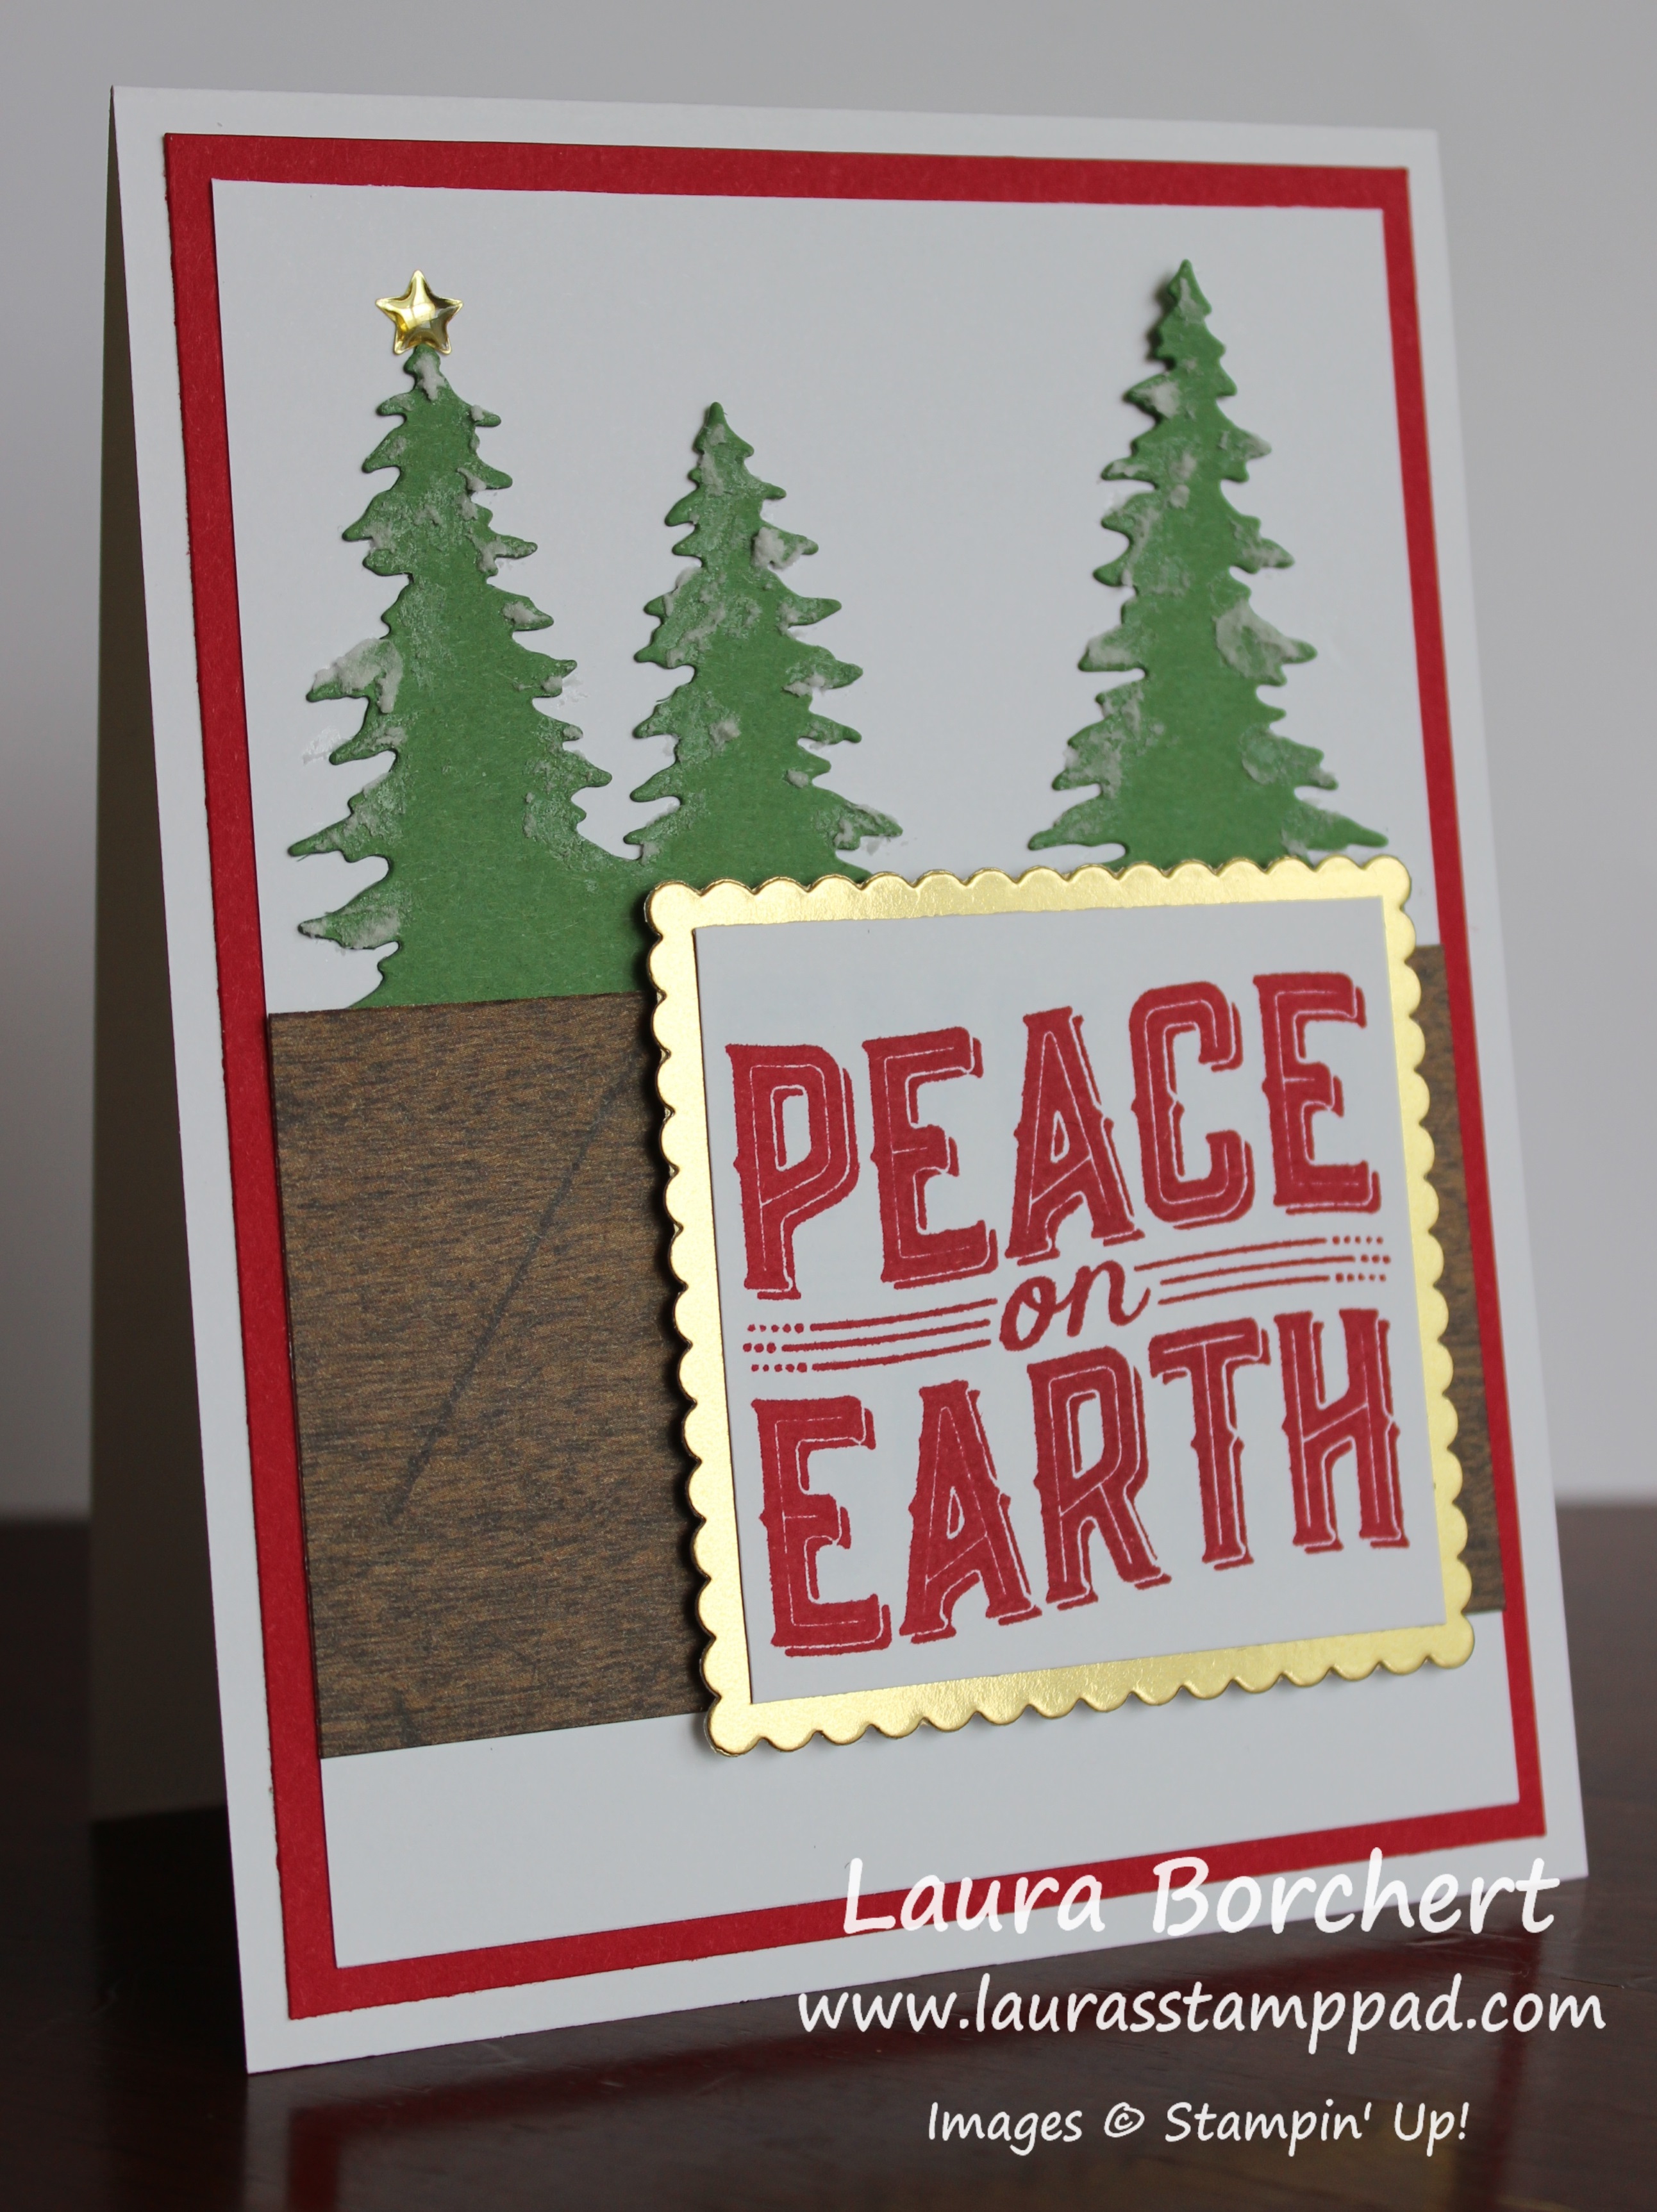
I started with a Whisper White card base. Next, I layered on Real Red (4″x 5-1/4″) and Whisper White (3-3/4″ x 5″). Using the Card Front Builder Thinlits, I die cut the double and the single tree in Garden Green. I added these to the top half of the card and then placed the Wood Textures Designer Series Paper piece over the tree bottoms.
Now for adding snow to the trees. I used 2 of the Palette Knives; one to scoop out some and one to apply it on. Since it dries so quickly, I didn’t want to leave the tub of Embossing Paste open while working. Using the second Palette Knife, I pulled a bit of the paste off and just lightly touched the edges of the tree. Just a few light dabs all over the trees is all you need! It gives that light snowy look. Be sure to tap a little in the middle of the tree so it’s all around and not just on the sides.
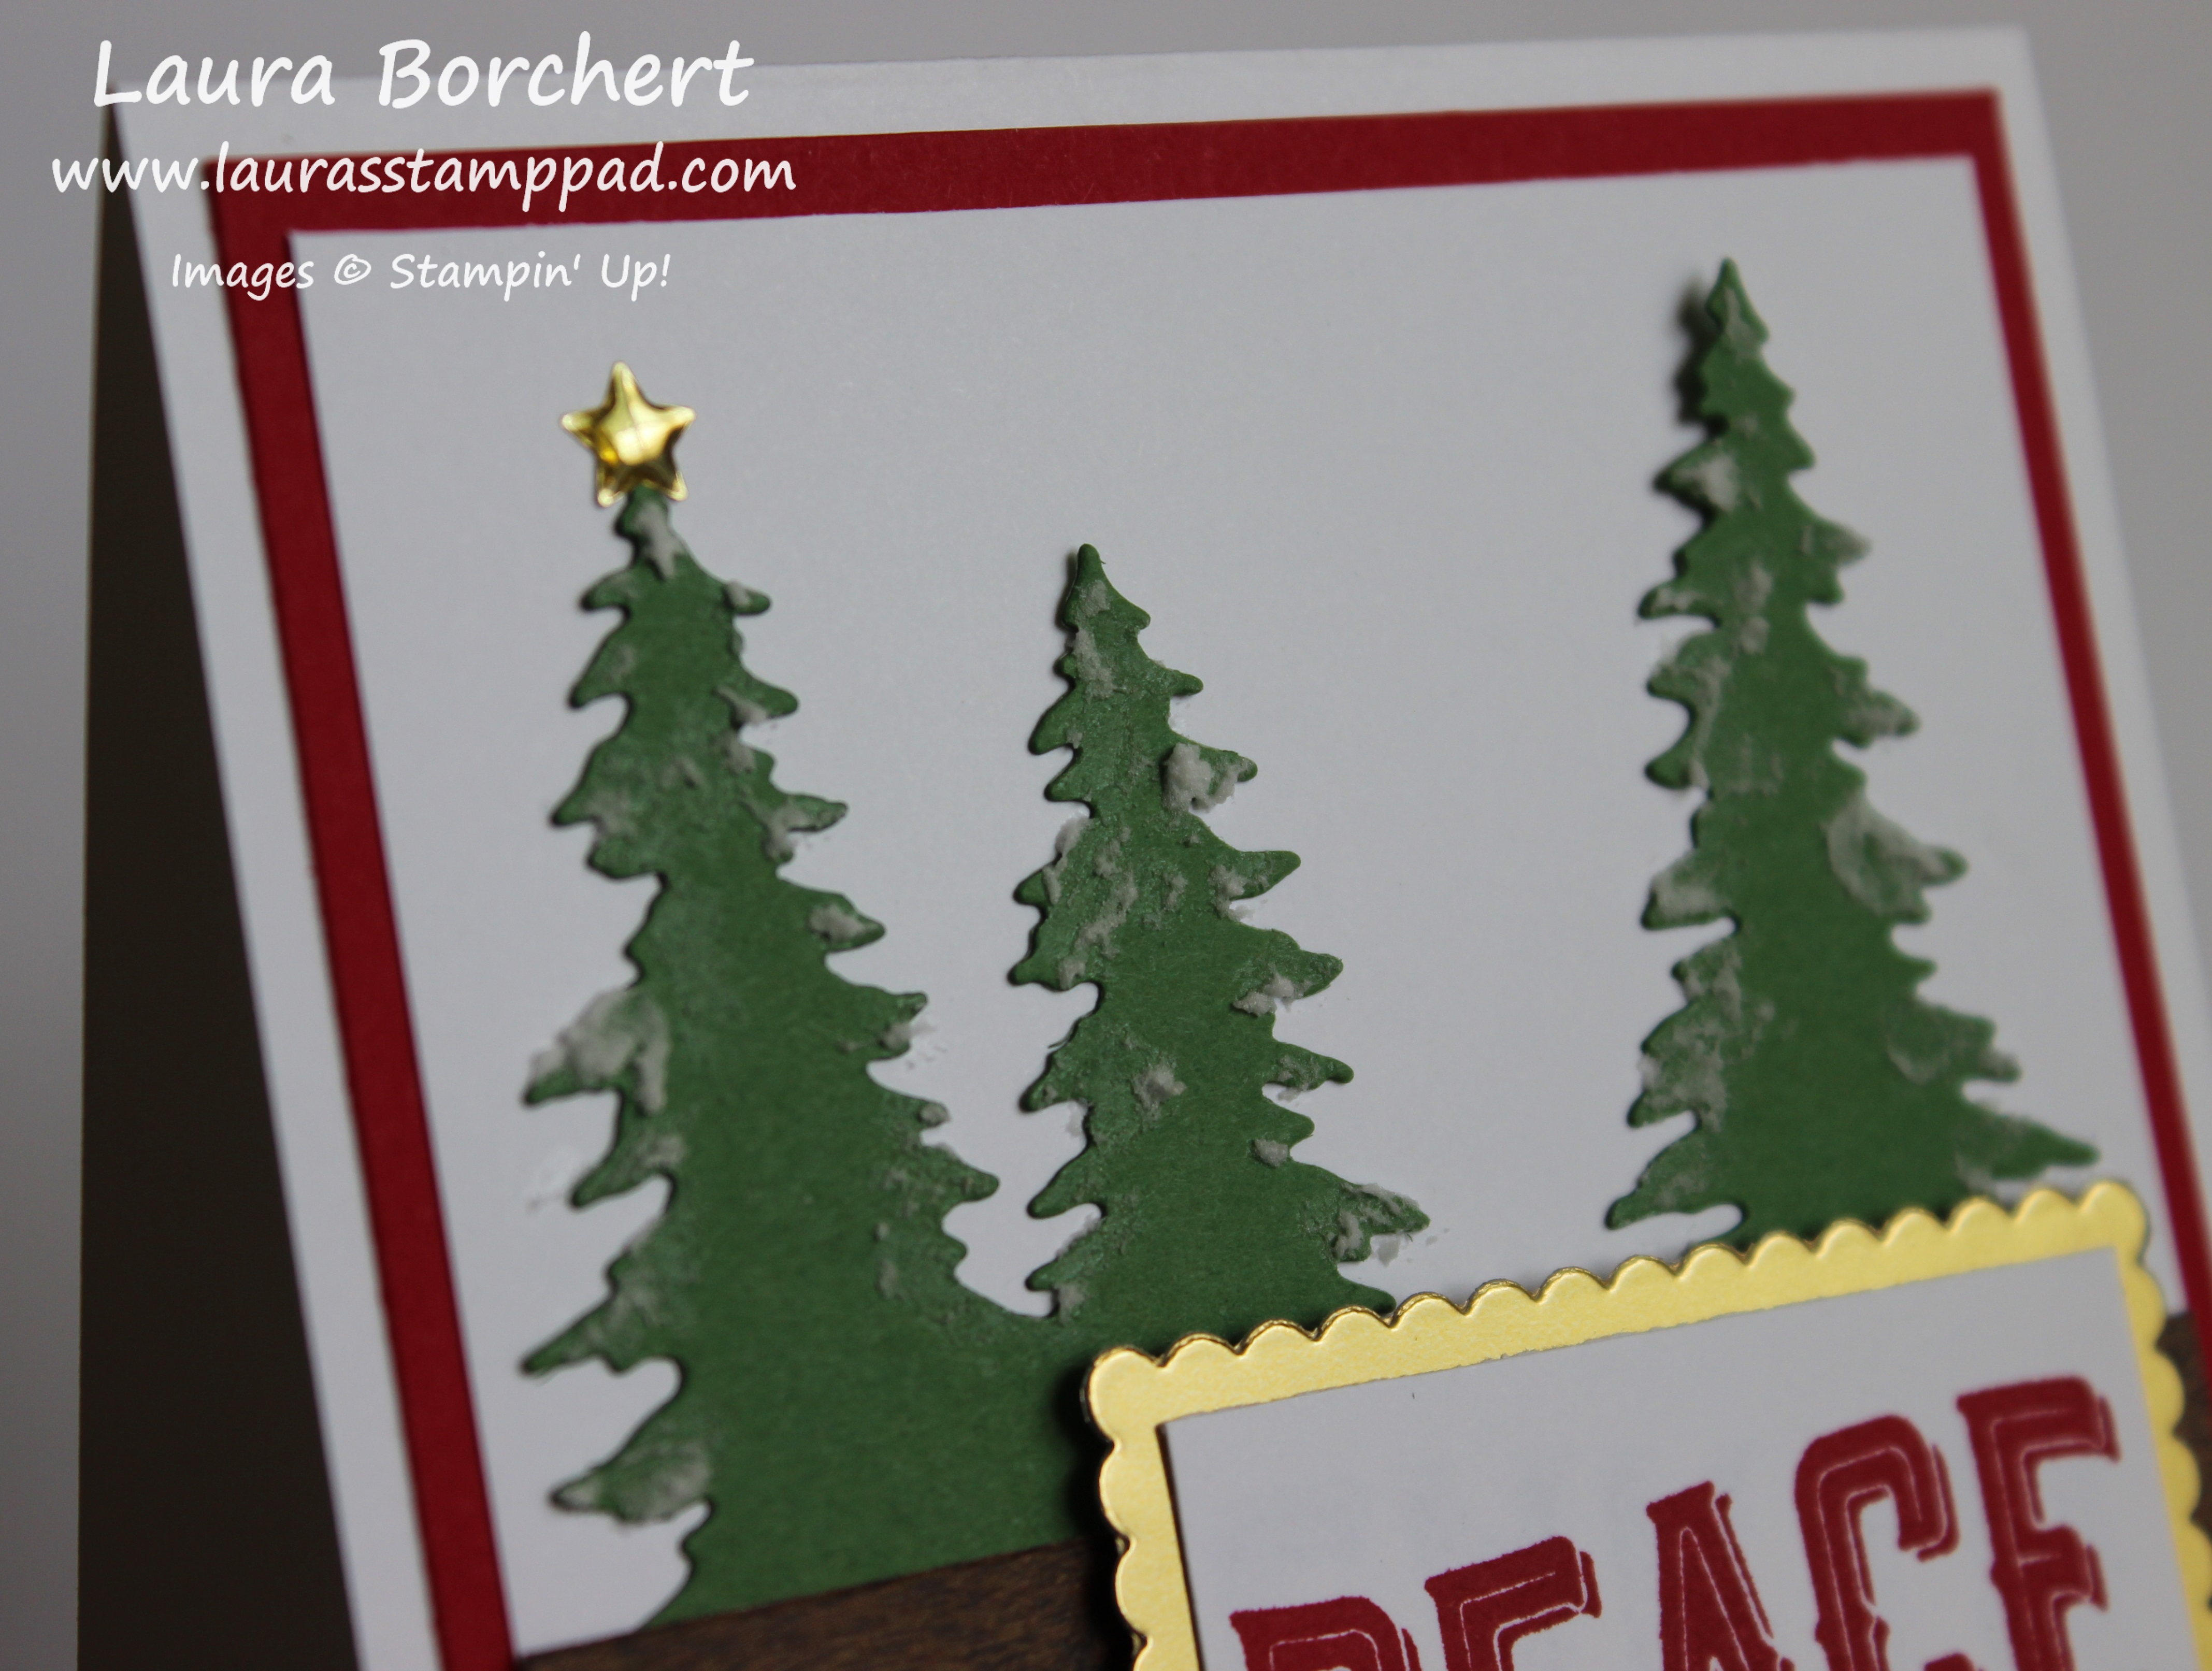
For the greeting, I stamped it from the Carols of Christmas Stamp Set in Real Red Ink onto Whisper White. I die cut the greeting with the Layering Squares Framelits as well as the Gold Foil layer. I added the greeting to the card with Stampin’ Dimensionals. To finish off the card, I added a Gold Metallic Enamel Star to the top of the one tree!
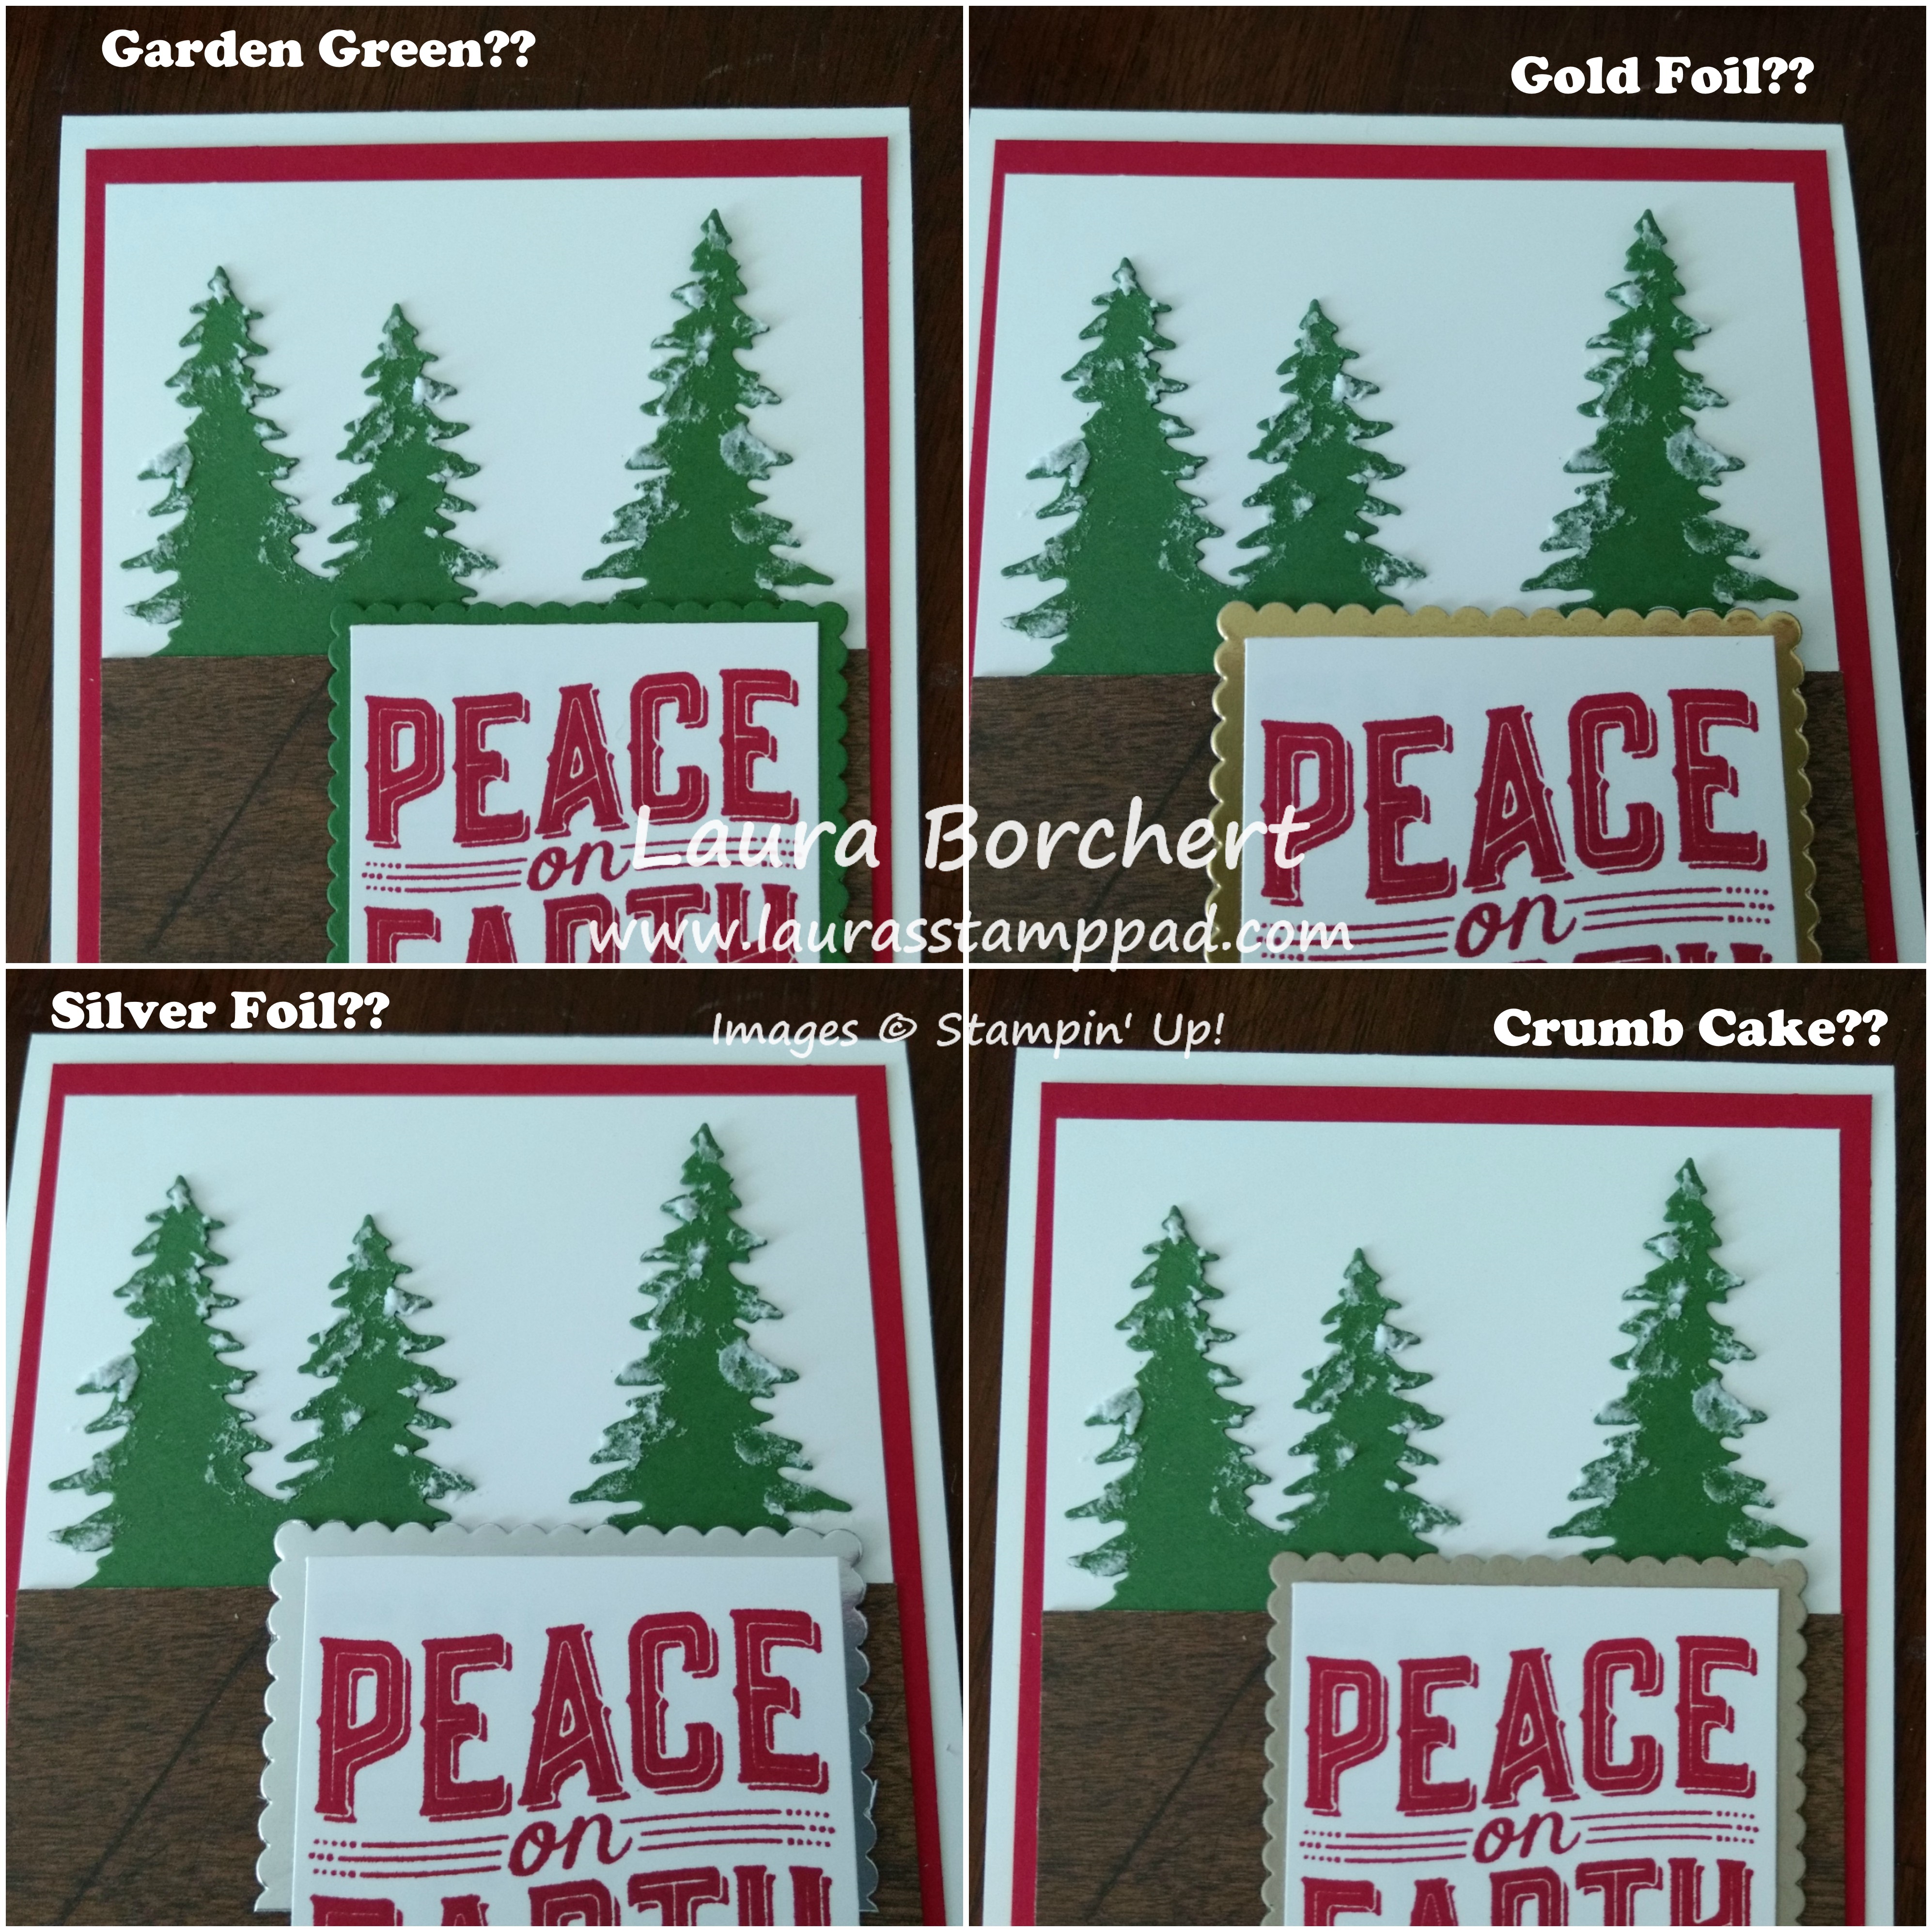
I spent a long time trying to figure out how to layer the greeting. Here are some of the ideas I was playing with – Garden Green, Silver Foil, Gold Foil, or Crumb Cake! Which one would you pick? Let me know in the comments below!
If you would like to see this all in action, check out the Video Tutorial below or click here! Be sure to give the video a thumbs up if you liked it and don’t forget to subscribe if you are new. If you would like a notification when I post a new video, be sure to click the bell right next to the subscribe!!! If you would like to see more samples using the Carols of Christmas Bundle (Save 10%), click here and stay tuned!
Happy Stampin’
~Laura